1. 组件库文档问题
以前常用的组件库文档storybook,包括现在也有用dumi、vitepress做组件库文档等。storybook缺点不美观、webpack的热更新太慢,虽然新版本支持了vite提高了速度但还不算稳定。好在各种文档、mdx、测试等组件第三方工具很多集成进去能很方便我们开发。dumi、vitepress虽然颜值高,但是在针对ui组件库层面还有待加强,更偏向于做静态网站。这里讲下我认为文档工具最重要的几个方面,如果以后要自己实现一个文档框架或工具需要考虑的。
如何根据文件层级的依赖关系渲染ui
dumi、storybook等文档都会通过node监听文件是否有改动,一旦有改动那么我们去递归检查所有内部文件的依赖关系然后定义一个对象来描述,这里会涉及exclude、include等配置,无非一些读取配置的操作,在md文档中更可以解析内部的特定格式的字符串来实现配置, 然后通过js来操作网站左侧的sidebar的层级关系,同时配置路由跳转。
如何在写代码的时候自动生成文档
storybook可以通过写注释代码来解析获取配置。其实就是读取文件的字符串通过一些开源库解析成ast树然后判断位置然后用node的fs来写入md文件,然后将md转为html被网站识别展示。那么我们可以用babel写一个插件在运行时解析对应代码生成实时的文档数据。例如以下:
function sayHi (name: string, age: number, a: boolean) {console.log(`hi, ${name}`);return `hi, ${name}`;
}
转换为 ->
##sayHi
say 你好
name: 名字
>sayHi(name: string, age: number, a: boolean)
#### Parameters:
-name(string)
-age(number)
-a(boolean)
下面的代码简单看下就行,visitor类似在每个节点套了个壳去访问而不影响原来的节点。里面定义了解析的各个节点,然后通过path的api或者各种terver的包批量修改。你只要知道下面做了两件事情,一个是生成类似vue的描述虚拟节点的集合,通过这个生成md的模板文件。
const autoDocsPlugin = declare((api, options, dirname) => {api.assertVersion(7);return {pre (file) {file.set('docs', []);},visitor: {FunctionDeclaration (path, state) {const docs = state.file.get('docs')docs.push({type: 'function',name: path.get('id').toString(),params: path.get('params').map(paramsPath => {return {name: paramsPath.toString(),type: resolveType(paramsPath.getTypeAnnotation()) //get type}}),return: resolveType(path.get('returnType').getTypeAnnotation()),doc: path.node.leadingComments && parseComment(path.node.leadingComments[0].value)})state.file.set('docs', docs)},ClassDeclaration (path, state) {const docs = state.file.get('docs');const classInfo = {type: 'class',name: path.get('id').toString(),constructorInfo: {},methodsInfo: [],propertiesInfo: []};if (path.node.leadingComments) {classInfo.doc = parseComment(path.node.leadingComments[0].value);}path.traverse({ClassProperty (path) {classInfo.propertiesInfo.push({name: path.get('key').toString(),type: resolveType(path.getTypeAnnotation()),doc: [path.node.leadingComments, path.node.trailingComments].filter(Boolean).map(comment => {return parseComment(comment.value);}).filter(Boolean)})},ClassMethod (path) {if (path.node.kind === 'constructor') {classInfo.constructorInfo = {params: path.get('params').map(paramPath => {return {name: paramPath.toString(),type: resolveType(paramPath.getTypeAnnotation()),doc: parseComment(path.node.leadingComments[0].value)}})}} else {classInfo.methodsInfo.push({name: path.get('key').toString(),doc: parseComment(path.node.leadingComments[0].value),params: path.get('params').map(paramPath => {return {name: paramPath.toString(),type: resolveType(paramPath.getTypeAnnotation())}}),return: resolveType(path.getTypeAnnotation())})}}});docs.push(classInfo);state.file.set('docs', docs);}},post (file) {const docs = file.get('docs');const res = generate(docs, options.format);fse.ensureDirSync(options.outputDir);fse.writeFileSync(path.join(options.outputDir, 'docs' + res.ext), res.content);}}
})
2. react开发的组件要注意什么
export const verticalMenu: ComponentStory<typeof Menu> = () => (<><PageHeader title="垂直"></PageHeader><Menu mode="vertical" onSelect={(index) => console.log(index)}><MenuItem>标签1</MenuItem><MenuItem>标签2</MenuItem><MenuItem>标签3</MenuItem><SubMenu title="标签4"><MenuItem>标签1</MenuItem><MenuItem>标签2</MenuItem><MenuItem>标签3</MenuItem></SubMenu></Menu></>
);
在antd中我们经常能看到各种各样的嵌套, 比如这里的SubMenu组件的title属性,很显然Menu父组件要遍历children,找到对应的tag,然后将props传入控制对应的子组件。或者你也可以用Provider和Consumer。这样的好处更多的标签可以帮助我们理解,对props做分层控制。下面举个例子, 这里要注意下Children和cloneElement这两个核心api的使用。
const renderChildren = () => {return React.Children.map(children, (child, index) => {const childElement = child as React.FunctionComponentElement<IMenuItemProps>;const { displayName } = childElement.type;if (displayName === 'MenuItem' || displayName === 'SubMenu') {return React.cloneElement(childElement, {index: index.toString(),});} else {console.error('Warning: Menu has a child which is not a MenuItem component');}});};
在一些常见你也可以用类的写法,在antd中通过hoc高阶组件来实现比如Layout组件。
function generator({ suffixCls, tagName, displayName }: GeneratorProps) {return (BasicComponent: any) => {const Adapter = React.forwardRef<HTMLElement, BasicProps>((props, ref) => {return <BasicComponent ref={ref} prefixCls={suffixCls} tagName={tagName} {...props} />;});if (process.env.NODE_ENV !== 'production') {Adapter.displayName = displayName;}return Adapter;};
}
const Header = generator({suffixCls: "speed-header",tagName: "header",displayName: "Header",
})(Basic);

const Footer = generator({suffixCls: "speed-footer",tagName: "footer",displayName: "Footer",
})(Basic);
在一些弹窗组件你可以看到一个回调就可以执行组件的调用,显示隐藏、控制时间、结束的回调等。在vue也一样通过install函数传入Vue实例,然后挂载对应的sfc文件,$mount挂载对应dom。生成的组件实例赋值给Vue的原型对象,我们可以调用对应的方法来控制全局组件。
function createNotification() {const div = document.createElement('div')document.body.appendChild(div)const notification = ReactDOM.render(<Toast />, div)return {addNotice(notice) {return notification.addNotice(notice)},destroy() {ReactDOM.unmountComponentAtNode(div)document.body.removeChild(div)}}
}
在一些Table表单组件、日历等组件是需要很大的自定义余地的,不能仅仅靠children解析来实现,那么你要考虑props传入对应的JSX的节点,例如下面:
const customTableTpl: ComponentStory<typeof Table> = args => {const [dataSource, setDataSource] = React.useState(defaultDataSource);const [paginationParams, setPaginationParams] = React.useState(defaultpaginationParams);const [isModalVisible, setIsModalVisible] = React.useState(false);/** input 单元格 */const hanldeBlur = e => {let val = e.target.value;if (val.trim()) {let cloneData = [...dataSource];cloneData.forEach((item, index) => {if (item.key === source.key) {cloneData[index].name = val;}});setDataSource(cloneData);}};/** 编辑操作 单元格 */const showModal = () => {setIsModalVisible(true);};const handleConfirm = () => {setIsModalVisible(false);};const handleCancel = () => {setIsModalVisible(false);};const handleDelete = key => {let result = dataSource.filter(item => item.key !== key);setDataSource(result);setPaginationParams({...paginationParams,total: paginationParams.total - 1,});};const columns = [{title: 'ID',dataIndex: 'key',key: 'key',},{title: '姓名',dataIndex: 'name',key: 'name',render: source => {if (!source) return;return <Input placeholder={source.name} onBlur={hanldeBlur} style={{ width: '200px' }} blurClear></Input>;},},{title: '年龄',dataIndex: 'age',key: 'age',render: source => {if (!source) return;return <Button>{source.age}</Button>;},},{title: '住址',dataIndex: 'address',key: 'address',},{title: '操作',dataIndex: 'edit',key: 'edit',render: source => {return (<><Modal visible={isModalVisible} onConfirm={handleConfirm} onCancel={handleCancel}><h2>我是{source.name}</h2></Modal><Space><Button btnType='primary' onClick={showModal}>编辑</Button><Button btnType='danger' onClick={() => handleDelete(source.key)}>删除</Button></Space></>);},},];return (<><PageHeader title='自定义表格' /><Table dataSource={dataSource} columns={columns} paginationParams={paginationParams}></Table></>);
};
在antd使用过程中你可能会遇到<From.FromItem /> 其实也就是导出的模块对象Form内部定义个属性,Form.Item = FormItem;
3. 组件库的主题怎么做、样式用什么方案
antd5以前,原来用了less的方案在网站的加载前置请求link,动态获取css的配置,那么对于设计师修改方案的主题可能是一种折磨,你不能定位到组件级别的ui。less在某种层面导致对样式的可控性有很大的局限。less和scss一样可以通过js控制对应的样式变量,那么这个变量在scss或者less中可以被控制
@mixin theme-aware($key, $color) {
	@each $theme-name, $theme-color in $themes {
		.theme-#{"" + $theme-name} & {
			#{$key}: map-get(map-get($themes, $theme-name), $color);
		}
	}
}

/**
 * 这里定义了map,对应多个主题面板,通过mixin函数获取对应的map的值,在对应的标签内使用@include 使用覆盖函数
 */
$themes: (
	light: (
		global-background: #fff,
		global-color: #37474f,
	),
	dark: (
		global-background: #37474f,
		global-color: #fff,
	),
	blue: (
		global-background: #10618a,
		global-color: #fff,
	),
);
body {@include theme-aware("background", "global-background");@include theme-aware("color", "global-color");
}

button {
	.theme-light & {
		background: #f30000;
	}
	.theme-dark & {
		background: #ee0fd0;
	}
}
//这里通过js控制const changeTheme = (theme: string) => {document.documentElement.className = "";document.documentElement.classList.add(`theme-${theme}`);};
这种方案局限在只能控制全局的,无法细粒度的修改,就算修改也是很麻烦的一件事,同时维护也挺累的,不断的@include。
社区有很多方案,比如cssmodule、原子化的css、运行时的cssinjs、编译时的cssinjs。都各有利弊。那么我们先来看看最近antd5做了什么吧,用了自研的运行时的cssinjs方案,好处是可控性更强了,在组件级别的更新相比emotion等方案有更好的性能,token的控制hash可以让组件的样式被缓存。我这里写一写原来的老版本antd的大致的样式思路,在antd的会尽量很少用style挂载样式,尽量通过classNames这个库做的名更新。同时为了隔离,通过全局的变量方法在各个组件内获取类名的前缀来隔离,下面做个简单的演示。
//....const { getPrefixCls } = useContext(ConfigContext);let prefixCls = getPrefixCls("notification", customizePrefixCls);const cls = classNames(prefixCls, className, {[`${prefixCls}-tc`]: position === 'tc',[`${prefixCls}-tl`]: position === 'tl',[`${prefixCls}-tr`]: position === 'tr',[`${prefixCls}-bc`]: position === 'bc',[`${prefixCls}-bl`]: position === 'bl',[`${prefixCls}-br`]: position === 'br',});return (< >{notices.map((notice, index) => {return (<div className={cls} style={getStyles()} key={index}<div className={`${prefixCls}-card`}>{iconJSX ? iconJSX : <Icon icon={solid('check')} size='2x' color='#18ce55'></Icon>}<div className={`${prefixCls}-warp`}><h4>{notice.title}</h4><p className={`${prefixCls}-content`}>{notice.content}</p></div></div></div>)})}</>);
如果自己实现,那么个人推荐用cssinjs的社区方案,更好的兼容、变量的共享、隔离化、代码提示、主题定制更灵活可控。缺点就是hash序列化隔离的时候性能微微的损耗,打包的体积大些。
4. 组件库用什么打包
组件库的代码调试的时候,其实可以考虑vite做项目的构建,更快的单模块请求更新开发体验还是很棒的。由于vite需要esm模块,用其他模块会有问题,如果你的项目及其依赖都是esm那么可以考虑vite打包, vite也是可以使用rollup生态的。rollup更适合小库的打包,静态分析很不错,treeshaking给力。打包上手及其简单。gulp相对适合中大项目,出色的串行和并行的工作流,更规范和可控。webpack也可以但是有点笨重了,就是没有gulp轻量和相对简单。
//...
function compileScripts (babelEnv, destDir) {const { scripts } = paths;process.env.BABEL_ENV = babelEnv;return gulp.src(scripts).pipe(babel({"presets": [["@babel/preset-react",{ "runtime": "automatic", "importSource": "@emotion/react" }]],"plugins": ["@emotion/babel-plugin"]})) // 使用gulp-babel处理.pipe(gulp.dest(destDir));
}
/**
 * 编译cjs
 */
function compileCJS () {const { dest } = paths;return compileScripts('cjs', dest.lib);
}

/**
 * 编译esm
 */
function compileESM () {const { dest } = paths;return compileScripts('esm', dest.esm);
}

//...
const buildScripts = gulp.series(compileCJS, compileESM);

const buildSDK = gulp.series(compressionSdkCJS, compressionSdkESM);

const buildStyle = gulp.parallel(buildBasicStylesMin, buildBasicStylesMax, buildSpeedStylesMax, buildSpeedStylesMin, buildComponentStyle);

// 整体并行执行任务
const build = gulp.parallel(buildTypes, buildScripts, buildSDK, buildStyle);
5. typescript在组件库中如何用
这里简单展示下大致的tsx文件的组件的ts类型定义。还有一些其他要注意的比如类型断言as,在ref获取dom节点的去操作的时候ts可能会提示你可能undefined,这个时候你可以很放心的告诉他是一定存在的。
export interface ResultProps {/** 样式命名隔离 */prefixCls?: string;/** 组件子节点 */children?: ReactNode;/** 容器内联样式 */style?: React.CSSProperties;/** 组件类名 */className?: string;/** 操作区 */extra?: React.ReactNode;/** 自定义icon */icon?: React.ReactNode;/** 改变的回调 */onChange: (e: ChangeEvent<HTMLInputElement>) => void;/** 失去焦点的回调 */onBlur: (e: ChangeEvent<HTMLInputElement>) => void;/** 状态 */status?: StatusType;/** 主标题 */title?: React.ReactNode;/** 副标题 */subTitle?: React.ReactNode;
}
const Result: FC<ResultProps> = props => {const {children,className,prefixCls: customizePrefixCls,style,title,subTitle,icon,extra,status = 'success',} = props;//...return (<div className={cls} style={style}></div>);
};
6. 单元测试怎么做
我们会在每个文件夹都定义一个__tests__文件夹,那么你要注意这个文件夹不能被gulp打包进入。 默认我们使用的是@testing-library/react、'@testing-library/jest-dom, 操作跟jest很相似,一个是react的轻量的测试库、一个是jest的dom的一些api集成。当然还有其他库可以使用,下面我简单用了例子
要特别注意组件库可能并不适合TDD开发,测试驱动开发。我们可以在写完组件后,针对关键功能做测试用例,更关注结果,里面繁杂的处理过程一定要忽视。
我们一般都常用的就是快照测试、样式的判断、dom的判断、一些异步延迟的场景判断。
import { render, screen, fireEvent } from '@testing-library/react';
import '@testing-library/jest-dom';
import { Calendar } from '../../index';

describe('test Calendar component', () => {it('should render base Calendar', () => {const { asFragment } = render(<Calendar></Calendar>);expect(asFragment()).toMatchSnapshot();});it('callback is successfully after click event', () => {const handleSelect = jest.fn();const handlePanelChange = jest.fn();render(<Calendar onSelect={handleSelect} onPanelChange={handlePanelChange}></Calendar>);fireEvent.click(screen.getByText('15'));fireEvent.click(screen.getByText('>'));fireEvent.click(screen.getByText('<'));expect(handlePanelChange).toHaveBeenCalledTimes(2);expect(handleSelect).toHaveBeenCalledTimes(2);});it('should find classnames', () => {const { container } = render(<Calendar></Calendar>);expect(container.querySelector('.speed-calendar')).toBeTruthy();expect(container.querySelector('.speed-calendar-picker')).toBeTruthy();expect(container.querySelector('.speed-calendar-arrow')).toBeTruthy();expect(container.querySelector('.speed-calendar-detail')).toBeTruthy();expect(container.querySelector('.speed-calendar-week')).toBeTruthy();expect(container.querySelector('.speed-calendar-day')).toBeTruthy();});it('custom data in the Calendar component', () => {const Demo = () => {let date = new Date();const customData = [{day: 1,month: date.getMonth() + 1,year: date.getFullYear(),getNode: () => {return (<div style={{ display: 'flex' }}><div>吃饭</div><divstyle={{background: 'red',width: '5px',height: '5px',borderRadius: '50%',position: 'relative',left: '5px',}}></div></div>);},},{day: 2,month: date.getMonth() + 1,year: date.getFullYear(),getNode: () => {return <div>睡觉</div>;},},];return <Calendar customData={customData}></Calendar>;};const { asFragment } = render(<Demo></Demo>);expect(asFragment()).toMatchSnapshot();expect(screen.getByText('吃饭')).toBeInTheDocument();expect(screen.getByText('睡觉')).toBeInTheDocument();});
});
7. 组件库如何本地调试
这里要注意你的package的配置
//package.json {"types": "dist/types/index.js","main": "dist/lib/components/index.js","module": "dist/esm/components/index.js","files": ["dist"],}
1. npm run link
最快速的一般通过 npm run link 可以找到全局的npm文件夹内找到,这个时候npm i xxx -g就可以了。
2. Verdaccio
通过搭建私有仓库npm,需要在自己的服务器上部署Verdaccio, npm生成新的镜像源,然后输入用户名和密码连接成功后,nrm use <自己的镜像地址名称>
3. package配置
在你要引入的项目的package.json中配置加个link配置个相对路径,个人认为这个是最简单的
devDependencies: {"yourPackage": "link:../../dist"//注意这里的link哈!
}
8. 开发中如何提高效率,减少重复代码
如果你真的写过组件库那么你会感到组件库是一个很繁琐,倒不是说没有技术含量。每次当你创建文件夹,复制粘贴其他组件的重复代码其实是一个很痛苦的问题。所以一定需要这么一个模板,我输入一行命令行直接给我生成组件文件夹、组件tsx、基础样式、文档说明、基础测试用例。我敢说真能减少30%的工作量了。腾出的时间去做些别的有技术含量的东西他不香么?
ejs模板解析
当然我目前实现上还是有问题,我用的ejs模板做解析,ejs模板只是处理字符串而已做个变量的替换只要更换文件后缀名就可以了,注意这里要去掉prettier或者vscode的代码格式约束,通过noode的argv来获取的组件参数名来控制创建的文件夹,那么有了这个组件名,我们可以将字符串解析并替换。其他的无非node的读写到对应文件而已。注意ejs好像对css的语法无法做解析。读者可以考虑用vue cli内部使用的库来实现模板解析。这里暂时用ejs演示具体用法.
/**
 * @description 命令行直接生成组件开发模板
 *
 * 在命令行输入 node src/generator.ts Test注意要大写
 */

const fs = require('fs')
const path = require('path')
let ejs = require('ejs')
let prettier = require('prettier')

const componentName = process.argv[2] || 'TestComponent'
const lowerName = componentName.toLowerCase()

const templatePath = path.join(__dirname, 'components', 'Template') //模板路径
const toPath = path.join(__dirname, 'components', componentName) //生成路径
const stylePath = path.join(__dirname, 'styles', 'componentStyle') //生成路径

console.log(`当前正在生成${process.argv[2]}组件模板.....`);

function copyDir (srcDir, desDir) {fs.readdir(srcDir, { withFileTypes: true }, (err, files) => {if (fs.existsSync(desDir)) {console.log("无法覆盖原文件, 请删除已有文件夹");return} else {fs.mkdirSync(desDir);}for (const file of files) {//判断是否为文件夹if (file.isDirectory()) {const dirS = path.resolve(srcDir, file.name);const dirD = path.resolve(desDir, file.name);//判断是否存在dirD文件夹if (!fs.existsSync(dirD)) {fs.mkdir(dirD, (err) => {if (err) console.log(err);});}copyDir(dirS, dirD);} else {function handleOutputFilename (name) {if (name === 'template.stories.ejs') {return `${lowerName}.stories.tsx`}if (name === 'Template.ejs') {return `${componentName}.tsx`}if (name === 'index.ejs') {return `index.ts`}if (name === 'style.ejs') {return `${lowerName}.scss`}}const srcFile = path.resolve(srcDir, file.name);let desFile//输出的路径let desName = handleOutputFilename(file.name) //输出的文件名//如果是样式路径if (desName.includes('scss')) {desFile = path.resolve(stylePath, desName);} else {//如果是文件路径desFile = path.resolve(desDir, desName);}fs.copyFileSync(srcFile, desFile);//传入ejs渲染const template = fs.readFileSync(desFile, {encoding: 'utf-8'})const code = ejs.render(template, { name: componentName, lowname: lowerName })let newCode = prettier.format(code, {parser: "babel-ts"}); //格式化fs.writeFileSync(desFile, newCode)}}})
}

copyDir(templatePath, toPath)
9. 如何实现按需加载的组件库
我们知道在以前按需加载通过babel-import-plugin引入,原理也很简单就是babel解析ast做个模块导入的转换。我去尝试使用感觉有问题,可能跟我组件库的文件目录不是很契合。哈哈,所以自己搞了一个类似的babel插件。
有人可能会说现在esm的tree-shaking不是已经可以了么,但其实在副作用的函数调用,传参是个对象那么你打包后你可以看下还是会被引入。更不用说其他特殊的副作用。当然rollup内部的一些算法能解决这些问题。所以esm你可以不考虑这个问题,那么其他模块比如common、cmd、amd我们还是考虑下吧。同时你要打包出来的文件要拆分好,css、js不同模块文件。下面我做个此插件的简单原理实现:
最后
整理了75个JS高频面试题,并给出了答案和解析,基本上可以保证你能应付面试官关于JS的提问。
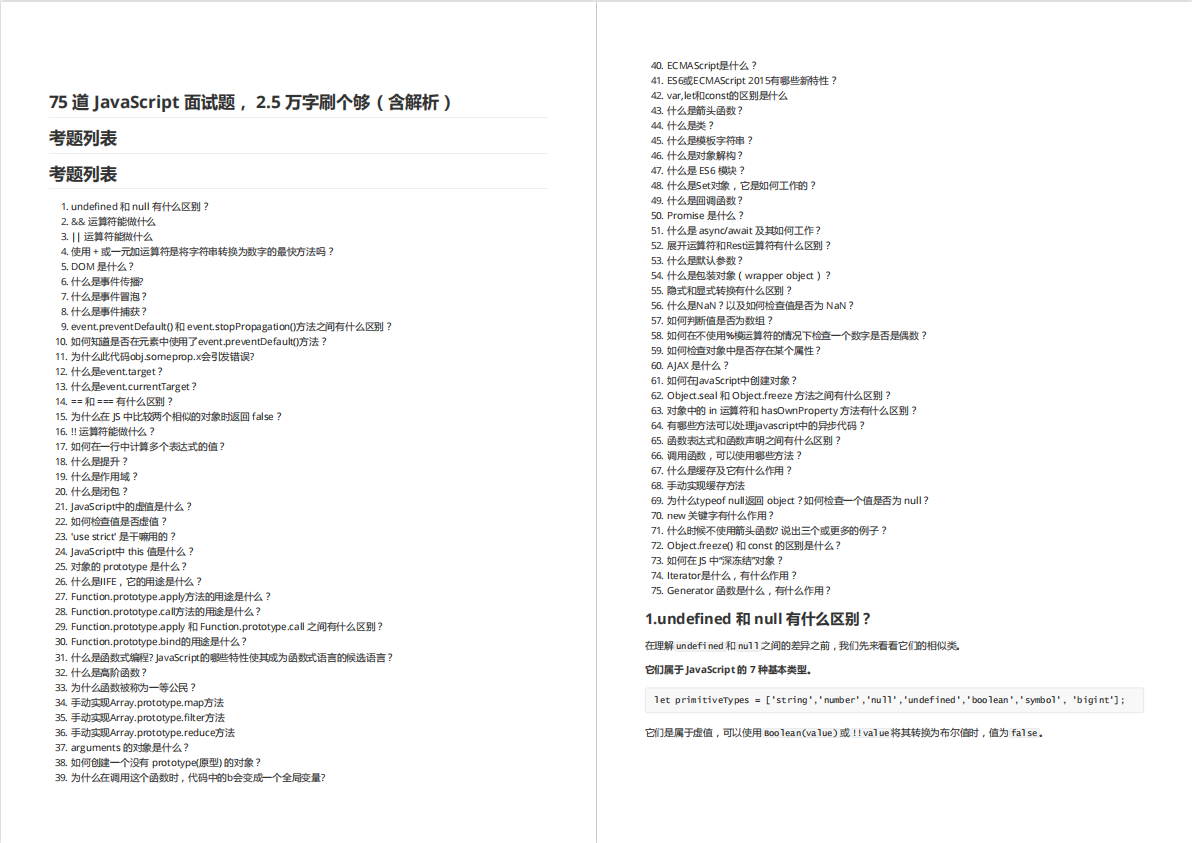

有需要的小伙伴,可以点击下方卡片领取,无偿分享