一、概述
1.1 redhat7.9 定制镜像上传到云平台。 这个制作镜像得方式适用于多种iso 镜像。
将iso 镜像通过vmware 创建出一台虚机,对虚机做一些基础配置。在虚机上安装kvm 虚拟化得工具, 将iso 镜像在导入虚机种通过kvm创建一下虚机, 虚机创建出来后会进入安装得界面无法自己引导安装, 所以我们通过图形化界面virt-manager 或者console 方法进入引导得界面,将虚机生产出来,此时得虚机是允许在qcow2 里,然后我对这个镜像做定制得配置或者按照。
二、开始制作镜像
2.1 通过vmware 创建新的虚机
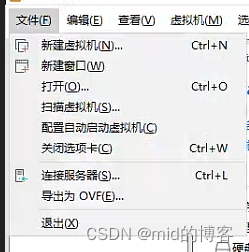
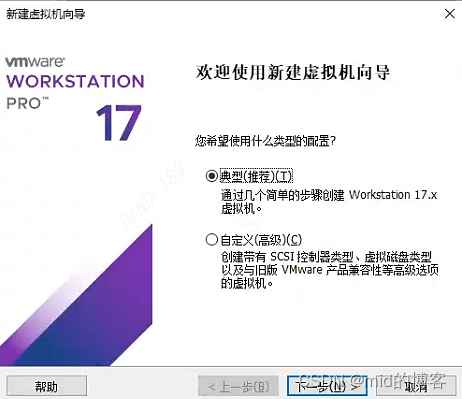
2.2 创建自定义虚拟机
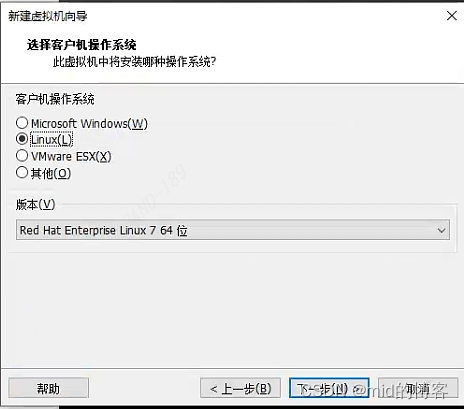
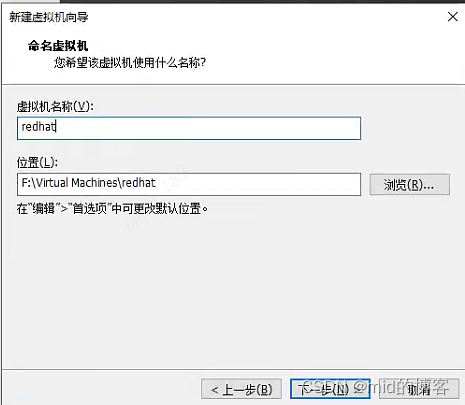
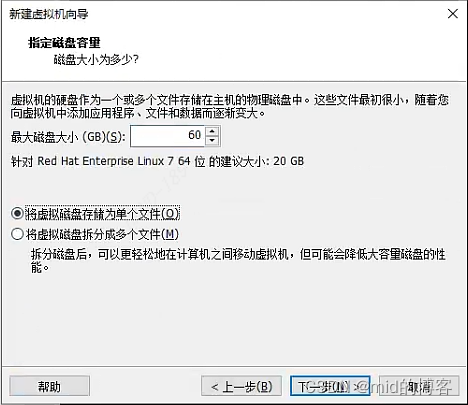
2.3 指定系统磁盘容量,大小根据自己实际分配
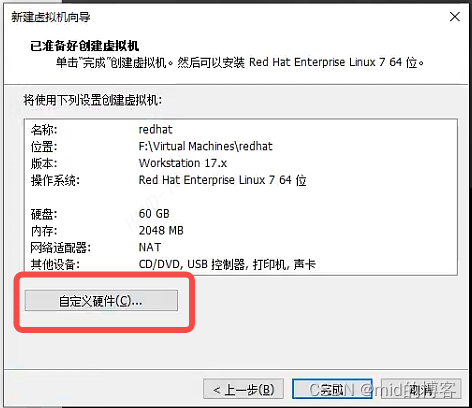
2.4 自定义硬件,移除其他不必要的硬件,根据自己实际移除。
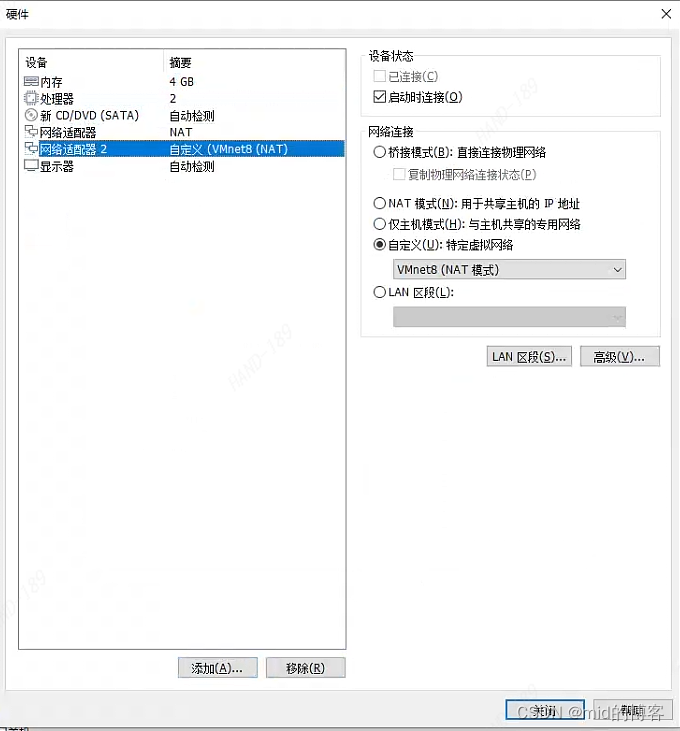
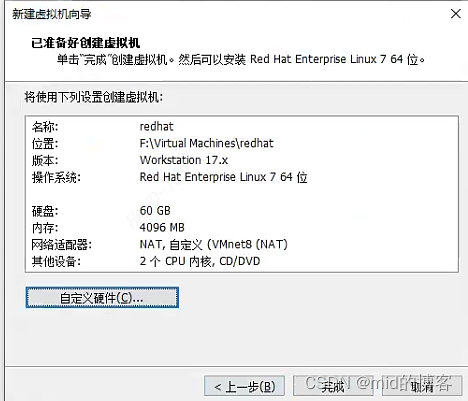
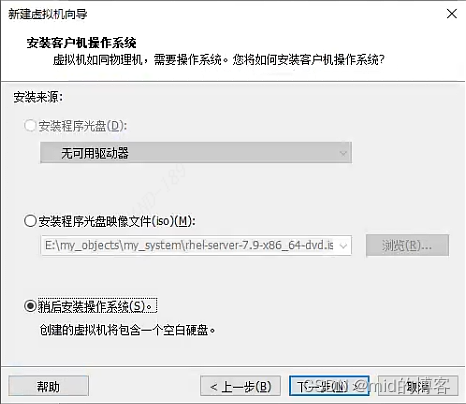
2.5 指定启动光盘
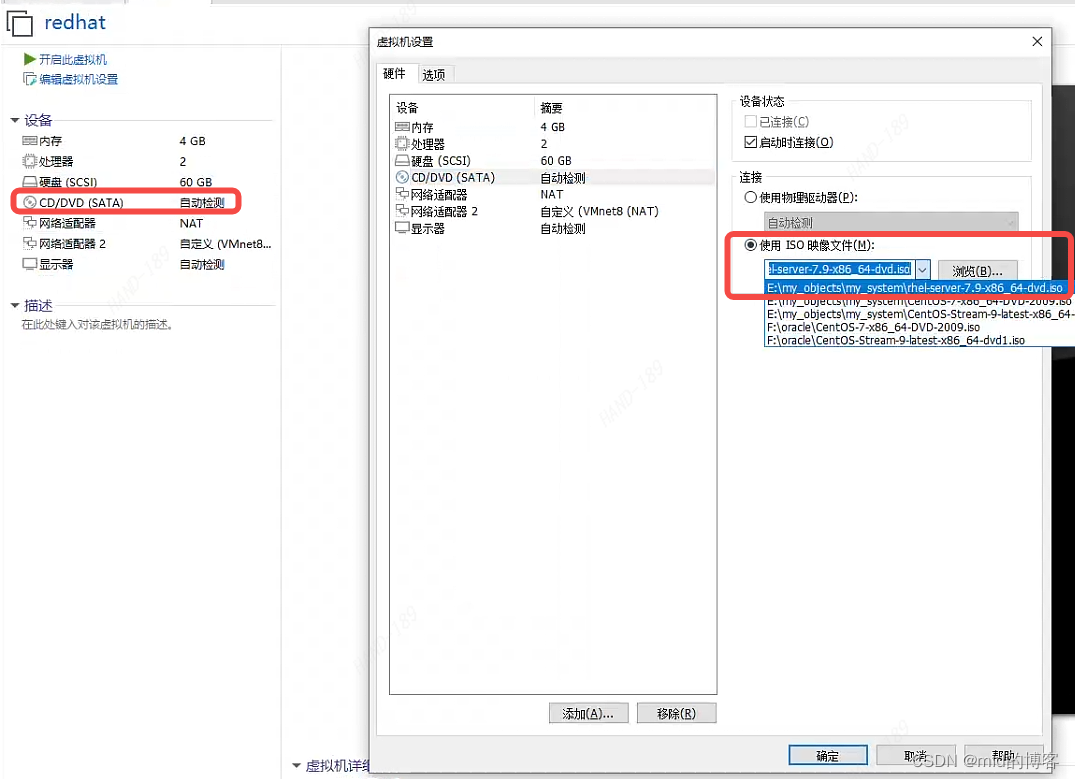
2.6 启动虚拟机
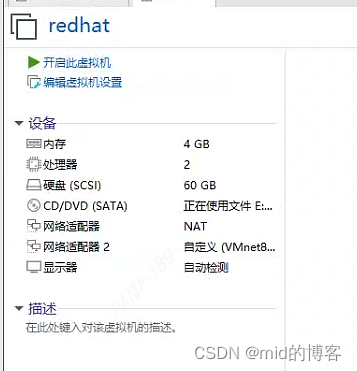
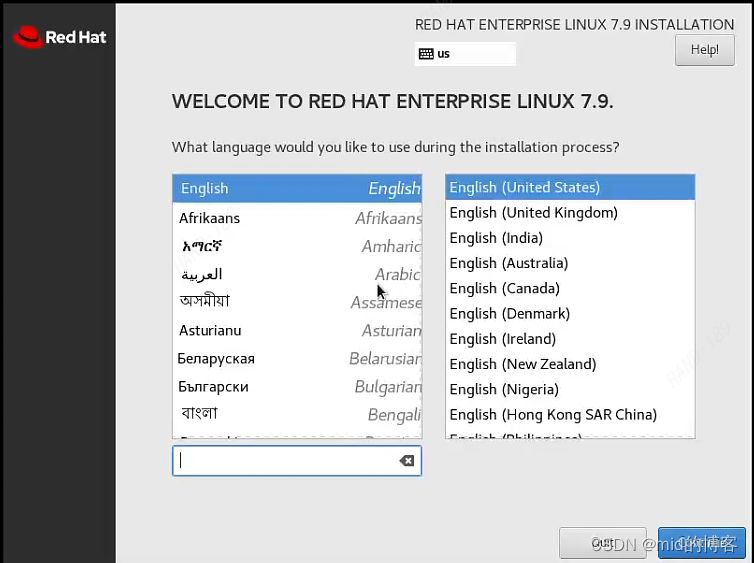
2.7 根据自身选择语言
本次测试选择英文
2.8 根据需求选择安装信息
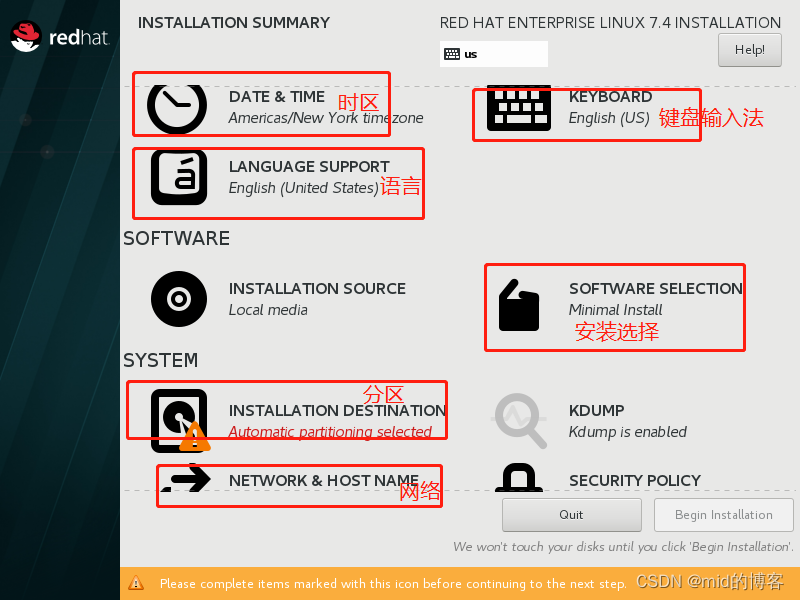
本次安装是最小安装模式
2.9 进入分区
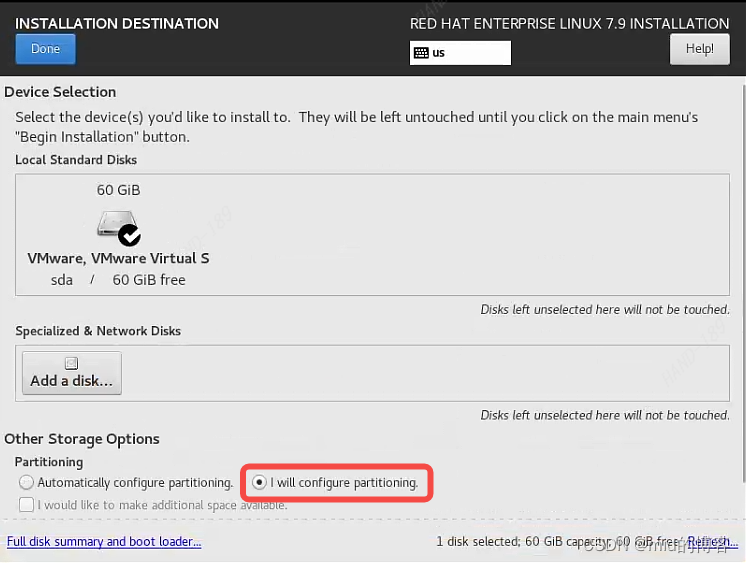
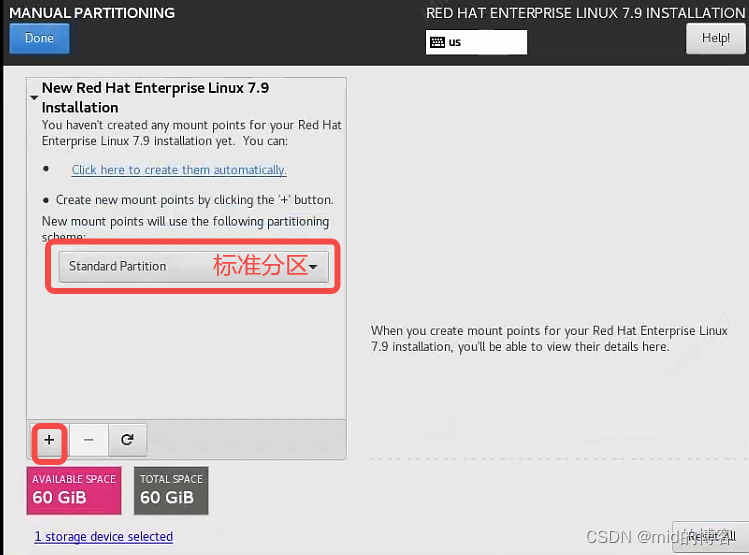
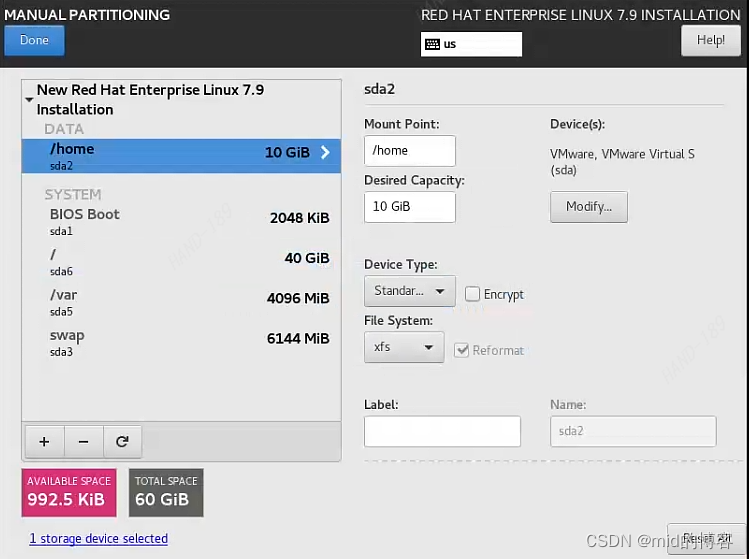
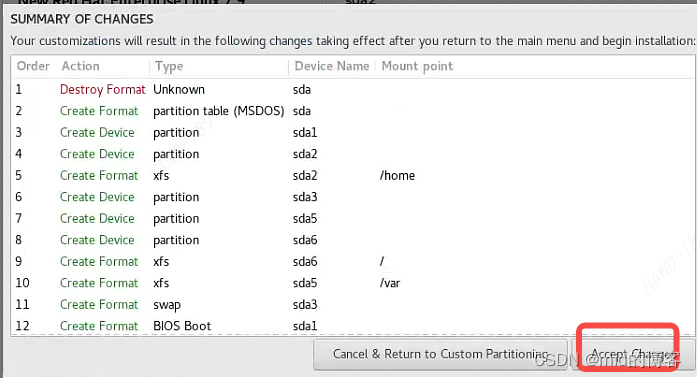
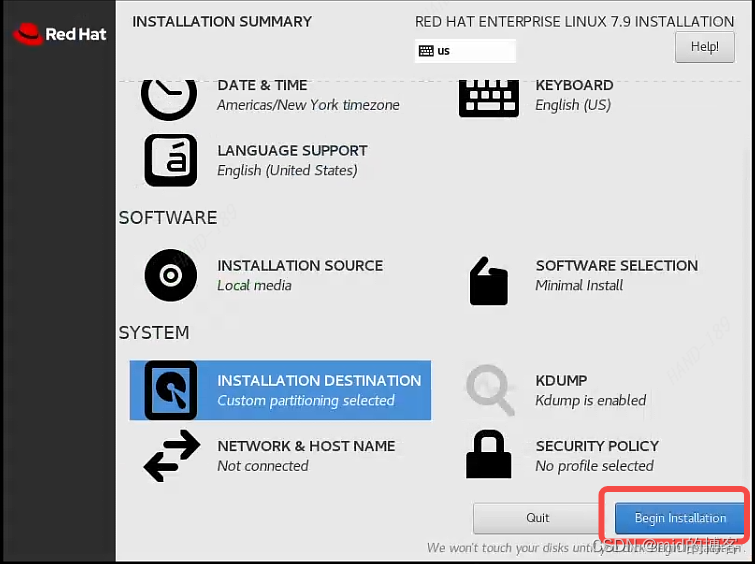
2.10 设置密码
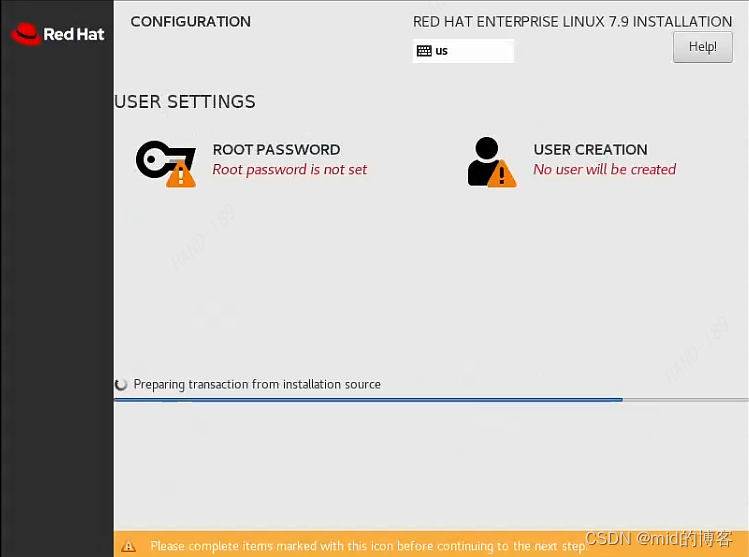
2.11 创建完成后重启虚机,登录虚机
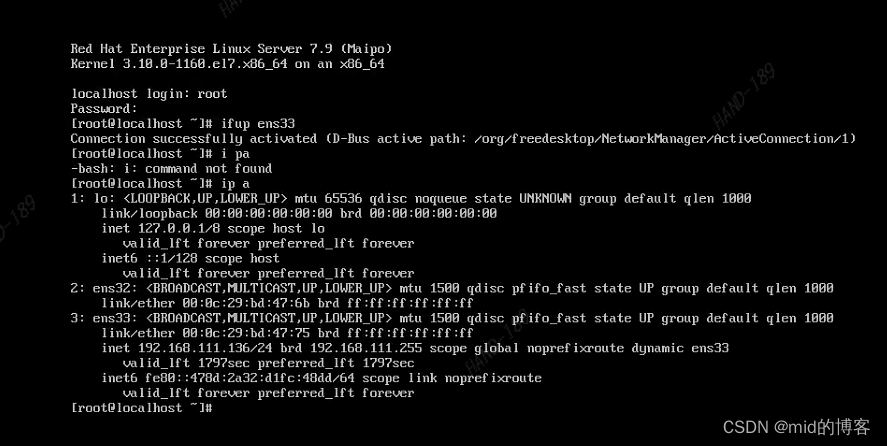
**到此镜像就准备差不多了,如果需要下载安装报自己做一个网络源安装所需要得软件包 **
三、定制配置信息
3.1 指定网卡名为eth0(根据需求来做,需要就做,不需要跳过就好)
修改网卡配置文件
[root@localhost ~]# cd /etc/sysconfig/network-scripts/
[root@localhost network-scripts]# cp ifcfg-ens32 /home/ifcfg-ens32
[root@localhost network-scripts]# cp ifcfg-ens33 /home/ifcfg-ens33

[root@localhost network-scripts]# mv ifcfg-ens32 ifcfg-eth0
[root@localhost network-scripts]# sed -i 's/ens32/eth0/g' ifcfg-eth0
[root@localhost network-scripts]# cat ifcfg-eth0
TYPE=Ethernet
PROXY_METHOD=none
BROWSER_ONLY=no
BOOTPROTO=dhcp
DEFROUTE=yes
IPV4_FAILURE_FATAL=no
IPV6INIT=yes
IPV6_AUTOCONF=yes
IPV6_DEFROUTE=yes
IPV6_FAILURE_FATAL=no
IPV6_ADDR_GEN_MODE=stable-privacy
NAME=eth0
UUID=8221b333-543f-4818-b4a1-b3ac55933901
DEVICE=eth0
ONBOOT=yes

[root@localhost network-scripts]# mv ifcfg-ens33 ifcfg-eth1
[root@localhost network-scripts]# sed -i 's/ens33/eth1/g' ifcfg-eth1
[root@localhost network-scripts]# cat ifcfg-eth1
TYPE=Ethernet
PROXY_METHOD=none
BROWSER_ONLY=no
BOOTPROTO=dhcp
DEFROUTE=yes
IPV4_FAILURE_FATAL=no
IPV6INIT=yes
IPV6_AUTOCONF=yes
IPV6_DEFROUTE=yes
IPV6_FAILURE_FATAL=no
IPV6_ADDR_GEN_MODE=stable-privacy
NAME=eth1
UUID=59748da2-300f-41c4-9711-1052e2525cd8
DEVICE=eth1
ONBOOT=yes
3.2 修改/etc/sysconfig/grub,给GRUB_CMDLINE_LINUX参数中增加net.ifnames=0 biosdevname=0
[root@localhost ~]# cat /etc/sysconfig/grub
GRUB_TIMEOUT=5
GRUB_DISTRIBUTOR="$(sed 's, release .*$,,g' /etc/system-release)"
GRUB_DEFAULT=saved
GRUB_DISABLE_SUBMENU=true
GRUB_TERMINAL_OUTPUT="console"
GRUB_CMDLINE_LINUX="crashkernel=auto rhgb quiet net.ifnames=0 biosdevname=0"
GRUB_DISABLE_RECOVERY="true"
3.3 添加udev网卡规则
[root@localhost ~]# ip a
1: lo: <LOOPBACK,UP,LOWER_UP> mtu 65536 qdisc noqueue state UNKNOWN group default qlen 1000
    link/loopback 00:00:00:00:00:00 brd 00:00:00:00:00:00
    inet 127.0.0.1/8 scope host lo
       valid_lft forever preferred_lft forever
    inet6 ::1/128 scope host
       valid_lft forever preferred_lft forever
2: ens32: <BROADCAST,MULTICAST,UP,LOWER_UP> mtu 1500 qdisc pfifo_fast state UP group default qlen 1000
    link/ether 00:0c:29:bd:47:6b brd ff:ff:ff:ff:ff:ff
3: ens33: <BROADCAST,MULTICAST,UP,LOWER_UP> mtu 1500 qdisc pfifo_fast state UP group default qlen 1000
    link/ether 00:0c:29:bd:47:75 brd ff:ff:ff:ff:ff:ff
    inet 192.168.111.136/24 brd 192.168.111.255 scope global noprefixroute dynamic ens33
       valid_lft 1651sec preferred_lft 1651sec
    inet6 fe80::478d:2a32:d1fc:48dd/64 scope link noprefixroute
       valid_lft forever preferred_lft forever

[root@localhost ~]# vim /etc/udev/rules.d/70-persistent-ipoib.rules

ACTION=="add", SUBSYSTEM=="net", DRIVERS=="?*", ATTR{type}=="32", ATTR{address}=="自己本地得mac地址", NAME="eth0"

ACTION=="add", SUBSYSTEM=="net", DRIVERS=="?*", ATTR{type}=="33", ATTR{address}=="自己本地得mac地址", NAME="eth1"
3.4 生成系统引导文件
[root@localhost ~]# grub2-mkconfig -o /boot/grub2/grub.cfg
Generating grub configuration file ...
Found linux image: /boot/vmlinuz-3.10.0-693.el7.x86_64
Found initrd image: /boot/initramfs-3.10.0-693.el7.x86_64.img
Found linux image: /boot/vmlinuz-0-rescue-5ac3927ec296497d93cca4c4ef73aedc
Found initrd image: /boot/initramfs-0-rescue-5ac3927ec296497d93cca4c4ef73aedc.img
done
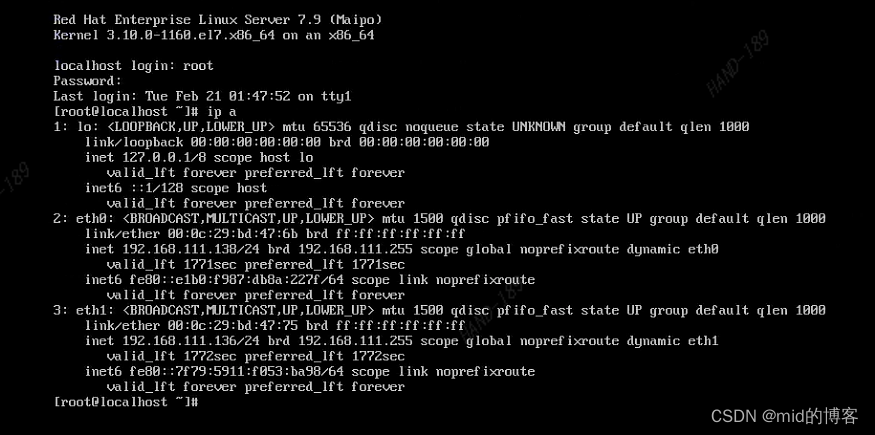
重启虚机,可以观察到网卡已经被更正为eth0、eth1
3.5 创建网络yum源
[root@localhost ~]# cat /etc/yum.repos.d/redhat-aliyun.repo
[aliyun]
name=aliyun
baseurl= https://mirrors.aliyun.com/centos/7/os/x86_64/
enabled=1
gpgcheck=0

[root@localhost yum.repos.d]# yum repolist
Loaded plugins: product-id, search-disabled-repos, subscription-manager

This system is not registered with an entitlement server. You can use subscription-manager to register.

aliyun                                                                                                                                                                                                                | 3.6 kB  00:00:00
(1/2): aliyun/group_gz                                                                                                                                                                                                | 153 kB  00:00:01
(2/2): aliyun/primary_db                                                                                                                                                                                              | 6.1 MB  00:00:42
repo id                                                                                                             repo name                                                                                                          status
aliyun                                                                                                              aliyun                                                                                                             10,072
repolist: 10,072
3.5 软件包安装,禁用selinux
禁用selinux
[root@localhost yum.repos.d]# cat /etc/selinux/config | grep SELINUX
# SELINUX= can take one of these three values:
SELINUX=disabled
# SELINUXTYPE= can take one of three values:
SELINUXTYPE=targeted
卸载防火墙与NetworkManager
[root@localhost yum.repos.d]# yum remove -y NetworkManager-* firewalld-* python-firewall
Loaded plugins: product-id, search-disabled-repos, subscription-manager

This system is not registered with an entitlement server. You can use subscription-manager to register.

Resolving Dependencies
--> Running transaction check
---> Package NetworkManager.x86_64 1:1.18.8-1.el7 will be erased
---> Package NetworkManager-config-server.noarch 1:1.18.8-1.el7 will be erased
---> Package NetworkManager-libnm.x86_64 1:1.18.8-1.el7 will be erased
---> Package NetworkManager-team.x86_64 1:1.18.8-1.el7 will be erased
---> Package NetworkManager-tui.x86_64 1:1.18.8-1.el7 will be erased
---> Package firewalld.noarch 0:0.6.3-11.el7 will be erased
---> Package firewalld-filesystem.noarch 0:0.6.3-11.el7 will be erased
---> Package python-firewall.noarch 0:0.6.3-11.el7 will be erased
--> Finished Dependency Resolution

Dependencies Resolved

=============================================================================================================================================================================================================================================
 Package                                                               Arch                                            Version                                                  Repository                                              Size
=============================================================================================================================================================================================================================================
Removing:
 NetworkManager                                                        x86_64                                          1:1.18.8-1.el7                                           @anaconda/7.9                                          5.1 M
 NetworkManager-config-server                                          noarch                                          1:1.18.8-1.el7                                           @anaconda/7.9                                          463
 NetworkManager-libnm                                                  x86_64                                          1:1.18.8-1.el7                                           @anaconda/7.9                                          8.5 M
 NetworkManager-team                                                   x86_64                                          1:1.18.8-1.el7                                           @anaconda/7.9                                           40 k
 NetworkManager-tui                                                    x86_64                                          1:1.18.8-1.el7                                           @anaconda/7.9                                          648 k
 firewalld                                                             noarch                                          0.6.3-11.el7                                             @anaconda/7.9                                          1.9 M
 firewalld-filesystem                                                  noarch                                          0.6.3-11.el7                                             @anaconda/7.9                                          239
 python-firewall                                                       noarch                                          0.6.3-11.el7                                             @anaconda/7.9                                          1.9 M

Transaction Summary
=============================================================================================================================================================================================================================================
Remove  8 Packages

Installed size: 18 M
Downloading packages:
Running transaction check
Running transaction test
Transaction test succeeded
Running transaction
  Erasing    : firewalld-0.6.3-11.el7.noarch                                                                                                                                                                                             1/8
  Erasing    : 1:NetworkManager-tui-1.18.8-1.el7.x86_64                                                                                                                                                                                  2/8
  Erasing    : firewalld-filesystem-0.6.3-11.el7.noarch                                                                                                                                                                                  3/8
  Erasing    : python-firewall-0.6.3-11.el7.noarch                                                                                                                                                                                       4/8
  Erasing    : 1:NetworkManager-config-server-1.18.8-1.el7.noarch                                                                                                                                                                        5/8
  Erasing    : 1:NetworkManager-team-1.18.8-1.el7.x86_64                                                                                                                                                                                 6/8
  Erasing    : 1:NetworkManager-1.18.8-1.el7.x86_64                                                                                                                                                                                      7/8
  Erasing    : 1:NetworkManager-libnm-1.18.8-1.el7.x86_64                                                                                                                                                                                8/8
  Verifying  : python-firewall-0.6.3-11.el7.noarch                                                                                                                                                                                       1/8
  Verifying  : firewalld-filesystem-0.6.3-11.el7.noarch                                                                                                                                                                                  2/8
  Verifying  : 1:NetworkManager-tui-1.18.8-1.el7.x86_64                                                                                                                                                                                  3/8
  Verifying  : firewalld-0.6.3-11.el7.noarch                                                                                                                                                                                             4/8
  Verifying  : 1:NetworkManager-1.18.8-1.el7.x86_64                                                                                                                                                                                      5/8
  Verifying  : 1:NetworkManager-libnm-1.18.8-1.el7.x86_64                                                                                                                                                                                6/8
  Verifying  : 1:NetworkManager-config-server-1.18.8-1.el7.noarch                                                                                                                                                                        7/8
  Verifying  : 1:NetworkManager-team-1.18.8-1.el7.x86_64                                                                                                                                                                                 8/8

Removed:
  NetworkManager.x86_64 1:1.18.8-1.el7     NetworkManager-config-server.noarch 1:1.18.8-1.el7     NetworkManager-libnm.x86_64 1:1.18.8-1.el7     NetworkManager-team.x86_64 1:1.18.8-1.el7     NetworkManager-tui.x86_64 1:1.18.8-1.el7
  firewalld.noarch 0:0.6.3-11.el7          firewalld-filesystem.noarch 0:0.6.3-11.el7             python-firewall.noarch 0:0.6.3-11.el7

Complete!
[root@localhost yum.repos.d]#
安装系统常用命令
[root@localhost yum.repos.d]# yum install -y net-tools vim-enhanced bridge-utils psmisc java
四、打包镜像
4.1 安装生产镜像软件包
[root@localhost ~]# yum install qemu-img -y
4.2 将系统盘生成为qcow2镜像
[root@localhost yum.repos.d]# qemu-img convert -f raw -O qcow2 /dev/sda /home/redhat7.9.qcow2
[root@localhost yum.repos.d]# ll /home/
total 2098628
-rw-r--r--. 1 root root 1982857216 Feb 21 02:22 redhat7.9.qcow2
[root@localhost yum.repos.d]# qemu-img info /home/redhat7.9.qcow2
image: /home/redhat7.9.qcow2
file format: qcow2
virtual size: 60G (64424509440 bytes)
disk size: 2.0G
cluster_size: 65536
Format specific information:
    compat: 1.1
    lazy refcounts: false
将/home/redhat7.9.qcow2 拉取下来上传云平台即可,若是需要安装其他得软件自行安装,安装完在将系统盘生成为qcow2镜像即可。


