目录
- 一、医院管理模块需求分析
- 1、医院列表
- 2、医院详情
- 二、医院列表功能(接口)
- 1、添加service分页接口与实现
- 2、添加controller方法
- 3、service_cmn模块提供接口
- 3.1 添加service接口与实现
- 3.2 添加controller
- 4、封装Feign服务调用
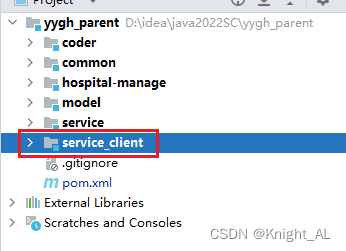
- 4.1 搭建service_client父模块
- 4.2 在service_client模块引入依赖
- 4.3 搭建service_cmn_client模块
- 4.4 添加Feign接口类
- 5、医院接口远程调用数据字典
- 5.1 在service-hosp添加依赖
- 5.2 service_hosp模块启动类添加注解
- 5.3 调整service方法
- 6、添加数据字典显示接口
- 6.1 根据dictcode查询下层节点
- 三、医院列表功能(前端)
- 四、更新医院上线状态功能(接口)
- 1、添加service方法和实现
- 2、添加controller
- 五、更新医院上线状态功能(前端)
- 1、封装api请求
- 2、修改/views/hosp/list.vue组件
- 六、医院详情(接口)
- 1、添加service方法和实现
- 2、添加controller方法
- 七、医院详情(前端)
- 1、添加隐藏路由
- 2、创建医院详情页面
一、医院管理模块需求分析
目前我们把医院、科室和排班都上传到了平台,那么管理平台就应该把他们管理起来,在我们的管理平台能够直观的查看这些信息
1、医院列表

2、医院详情
二、医院列表功能(接口)
1、添加service分页接口与实现
(1)在HospitalService定义医院列表方法
Page<Hospital> getHospitalPage(Integer pageNum, Integer pageSize, HospitalQueryVo hospitalQueryVo);
(2)在HospitalServiceImpl添加医院列表实现的方法
 @Override
    public Page<Hospital> getHospitalPage(Integer pageNum, Integer pageSize, HospitalQueryVo hospitalQueryVo) {

        Hospital hospital = new Hospital();
//        if (!StringUtils.isEmpty(hospitalQueryVo.getHosname())){
//            hospital.setHosname(hospitalQueryVo.getHosname());
//        }
//        if (!StringUtils.isEmpty(hospitalQueryVo.getHoscode())){
//            hospital.setHoscode(hospitalQueryVo.getHoscode());
//        }
//        if (!StringUtils.isEmpty(hospitalQueryVo.getCityCode())){
//            hospital.setCityCode(hospitalQueryVo.getCityCode());
//        }
        BeanUtils.copyProperties(hospitalQueryVo, hospital);
        //0为第一页
        Pageable pageable = PageRequest.of(pageNum-1, pageSize);
        //创建匹配器,即如何使用查询条件
        ExampleMatcher matcher = ExampleMatcher.matching() //构建对象
//                .withStringMatcher(ExampleMatcher.StringMatcher.CONTAINING) //改变默认字符串匹配方式:模糊查询
                .withMatcher("hosname",ExampleMatcher.GenericPropertyMatchers.contains())
                .withIgnoreCase(true); //改变默认大小写忽略方式:忽略大小写
        Example<Hospital> hospitalExample = Example.of(hospital, matcher);
        Page<Hospital> pages = hospitalRepository.findAll(hospitalExample, pageable);
        return pages;
    }
2、添加controller方法
在HospitalController添加医院列表方法
@RestController
@RequestMapping("/admin/hospital")
public class HospitalController {

    @Autowired
    private HospitalService hospitalService;

    @GetMapping("/{pageNum}/{pageSize}")
    public R getHospitalPage(@PathVariable Integer pageNum, @PathVariable Integer pageSize, HospitalQueryVo hospitalQueryVo){
        Page<Hospital> hospitalPage = hospitalService.getHospitalPage(pageNum,pageSize,hospitalQueryVo);
        return R.ok().data("total",hospitalPage.getTotalPages()).data("list",hospitalPage.getTotalElements());
    }
}
3、service_cmn模块提供接口
3.1 添加service接口与实现
在DictService添加查询数据字典方法
    String getNameByValue(Long value);

    String getNameByDictCodeAndValue(String dictCode, Long value);
在DictServiceImpl实现查询数据字典方法
    @Override
    public String getNameByValue(Long value) {
        QueryWrapper<Dict> wrapper = new QueryWrapper<>();
        wrapper.eq("value",value);
        Dict dict = baseMapper.selectOne(wrapper);
        if (dict != null){
            return dict.getName();
        }
        return null;
    }

    @Override
    public String getNameByDictCodeAndValue(String dictCode, Long value) {
        QueryWrapper<Dict> wrapper = new QueryWrapper<>();
        wrapper.eq("dict_code",dictCode);
        Dict dict = baseMapper.selectOne(wrapper);
        QueryWrapper<Dict> wrapper1 = new QueryWrapper<>();
        wrapper1.eq("parent_id",dict.getId());
        wrapper1.eq("value",value);
        Dict dict2 = baseMapper.selectOne(wrapper1);
        return dict2.getName();
    }
3.2 添加controller
在DictController添加方法
提供两个api接口,如省市区不需要上级编码,医院等级需要上级编码
    //根据医院所属的省市区编号获取省市区文字
    //远程调用@PathVariable指定value属性值
    @GetMapping("/{value}")
    public String getNameByValue(@PathVariable("value") Long value){
        return dictService.getNameByValue(value);
    }

    //根据医院的等级编号获取医院等级信息
    @GetMapping("/{dictCode}/{value}")
    public String getNameByDictCodeAndValue(@PathVariable("dictCode") String dictCode,
                                            @PathVariable("value") Long value){
        return dictService.getNameByDictCodeAndValue(dictCode,value);
    }
4、封装Feign服务调用
openfeign4步骤
1.导入openfeign依赖
2.自定义一个feign客户端接口,@FeignClient(value="调用方在注册中心上的应用名称“),方法和被调用方的controller层方法完全一致
3.在启动类上加@EnableFeignClient(basePackages=“com.donglin.yygh”)注解
4.在远程调用的地方直接注入自定义feign接口的代理对象,即可远程调用
思考如果多个模块调用同一个微服务?
service
   service_cmn
   service_hosp:4步依赖service-cmn-client
       3.在启动类上加@EnableFeignClient(basePackages="com.donglin.yygh")注解
       4.在远程调用的地方直接注入自定义feign接口的代理对象,即可远程调用
service-client:
   service-cmn-client
       1.导入openfeign依赖
       2.自定义一个feign客户端接口,@FeignClient(value="调用方在注册中心上的应用名称“),方法和被调用方的controller层方法完全一致
4.1 搭建service_client父模块
4.2 在service_client模块引入依赖
    <dependencies>
        <dependency>
            <groupId>com.donglin</groupId>
            <artifactId>model</artifactId>
            <version>0.0.1-SNAPSHOT</version>
            <scope>provided </scope>
        </dependency>

        <dependency>
            <groupId>org.springframework.boot</groupId>
            <artifactId>spring-boot-starter-web</artifactId>
            <scope>provided </scope>
        </dependency>

        <!-- 服务调用feign -->
        <dependency>
            <groupId>org.springframework.cloud</groupId>
            <artifactId>spring-cloud-starter-openfeign</artifactId>
            <scope>provided </scope>
        </dependency>
    </dependencies>
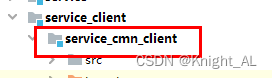
4.3 搭建service_cmn_client模块
4.4 添加Feign接口类
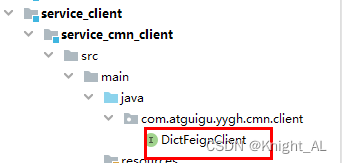
@FeignClient(value = "service-cmn")  //被调用方  在application.properties去查看服务名称   spring.application.name=service-cmn
public interface DictFeignClient {

    //根据医院所属的省市区编号获取省市区文字
    //远程调用@PathVariable指定value属性值
    @GetMapping("/admin/cmn/{value}")
    public String getNameByValue(@PathVariable("value") Long value);

    //根据医院的等级编号获取医院等级信息
    @GetMapping("/admin/cmn/{dictCode}/{value}")
    public String getNameByDictCodeAndValue(@PathVariable("dictCode") String dictCode,
                                            @PathVariable("value") Long value);

}
5、医院接口远程调用数据字典
5.1 在service-hosp添加依赖
        <dependency>
            <groupId>com.donglin</groupId>
            <artifactId>service_cmn_client</artifactId>
            <version>0.0.1-SNAPSHOT</version>
        </dependency>
5.2 service_hosp模块启动类添加注解
@SpringBootApplication
@ComponentScan(basePackages = {"com.donglin"})
@EnableDiscoveryClient
@EnableFeignClients(basePackages = "com.donglin.yygh")
public class ServiceHospApplication {
    public static void main(String[] args) {
        SpringApplication.run(ServiceHospApplication.class,args);
    }
}
5.3 调整service方法
修改HospitalServiceImpl类实现分页
    @Autowired
    private DictFeignClient dictFeignClient;

    @Override
    public Page<Hospital> getHospitalPage(Integer pageNum, Integer pageSize, HospitalQueryVo hospitalQueryVo) {

        Hospital hospital = new Hospital();
        BeanUtils.copyProperties(hospitalQueryVo, hospital);
        //0为第一页
        Pageable pageable = PageRequest.of(pageNum-1, pageSize);
        //创建匹配器,即如何使用查询条件
        ExampleMatcher matcher = ExampleMatcher.matching() //构建对象
//                .withStringMatcher(ExampleMatcher.StringMatcher.CONTAINING) //改变默认字符串匹配方式:模糊查询
                .withMatcher("hosname",ExampleMatcher.GenericPropertyMatchers.contains())
                .withIgnoreCase(true); //改变默认大小写忽略方式:忽略大小写
        Example<Hospital> hospitalExample = Example.of(hospital, matcher);
        Page<Hospital> pages = hospitalRepository.findAll(hospitalExample, pageable);
        pages.getContent().stream().forEach(item->{
            this.packageHospital(item);
        });
        return pages;
    }

    private void packageHospital(Hospital item) {
        String hostype = item.getHostype();
        String provinceCode = item.getProvinceCode();
        String cityCode = item.getCityCode();
        String districtCode = item.getDistrictCode();
        String provinceAddress = dictFeignClient.getNameByValue(Long.parseLong(provinceCode));
        String cityAddress = dictFeignClient.getNameByValue(Long.parseLong(cityCode));
        String districtAddress = dictFeignClient.getNameByValue(Long.parseLong(districtCode));

        String level = dictFeignClient.getNameByDictCodeAndValue(DictEnum.HOSTYPE.getDictCode(), Long.parseLong(hostype));
        item.getParam().put("hostypeString",level);
        item.getParam().put("fullAddress",provinceAddress+cityAddress+districtAddress+ item.getAddress());
    }
5.4 启动service_cmn和service_hosp服务,访问service_hosp的swagger-ui界面测试
6、添加数据字典显示接口
用于页面条件查询,多级联动
直接用之前的
6.1 根据dictcode查询下层节点
(1)添加controller
    @ApiOperation(value = "根据数据id查询子数据列表")
    @GetMapping("/childList/{pid}")
    @Cacheable(value = "dict", key = "'selectIndexList'+#pid")
    public R getchildListById(@PathVariable Long pid){
        List<Dict> list = dictService.getchildListById(pid);
        return R.ok().data("items",list);
    }
(2)编写service
定义方法
List<Dict> getchildListById(Long pid);
实现方法
    @Override
    public List<Dict> getchildListById(Long pid) {
        QueryWrapper<Dict> wrapper = new QueryWrapper<>();
        wrapper.eq("parent_id",pid);
        List<Dict> dictList = baseMapper.selectList(wrapper);
        //向list集合每个dict对象中设置hasChildren
        for (Dict dict : dictList) {
            Long dictId = dict.getId();
            boolean isChild = this.isChildren(dictId);
            dict.setHasChildren(isChild);
        }
        return dictList;
    }
三、医院列表功能(前端)
(1)在router/index.js添加
  {
    path: '/yygh/hosp',
    component: Layout,
    redirect: '/yygh/hosp/list',
    name: '医院管理',
    alwaysShow: true,
    meta: { title: '医院管理', icon: 'el-icon-s-help' },
    children: [
      {
        path: 'list',
        name: '医院列表',
        component: () => import('@/views/yygh/hosp/list'),
        meta: { title: '医院列表', icon: 'table' }
      }
    ]
  },
(2)封装api请求
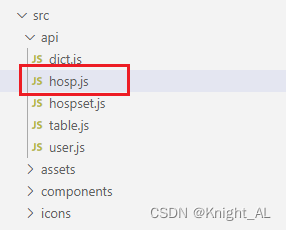
在api/yygh目录下创建hosp.js文件
import request from '@/utils/request'

export default {
  //医院列表
  getPageList(pageNum,pageSize,searchObj) {
    return request ({
      url: `/admin/hospital/${pageNum}/${pageSize}`,
      method: 'get',
      params: searchObj
    })
  },
  //查询dictCode查询下级数据字典
  getChildList(pid) {
    return request({
        url: `/admin/cmn/childList/${pid}`,
        method: 'get'
      })
    },

}
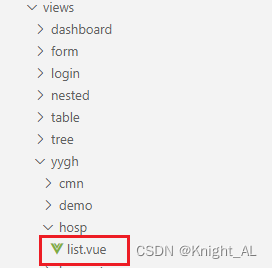
创建hosp/list.vue页面
(3)编写页面内容
在hosp/list.vue添加内容
<template>
    <div class="app-container">
        <el-form :inline="true" class="demo-form-inline">
            <el-form-item>
                <el-select
                    v-model="searchObj.provinceCode"
                    placeholder="请选择省"
                        @change="provinceChanged">
                    <el-option
                        v-for="item in provinceList"
                            :key="item.id"
                            :label="item.name"
                            :value="item.id"/>
                </el-select>
            </el-form-item>

            <el-form-item>
                <el-select
                v-model="searchObj.cityCode"
                placeholder="请选择市">
                    <el-option
                    v-for="item in cityList"
                    :key="item.id"
                    :label="item.name"
                    :value="item.id"/>
                </el-select>
            </el-form-item>

            <el-form-item>
                <el-input v-model="searchObj.hosname" placeholder="医院名称"/>
            </el-form-item>

            <el-button type="primary" icon="el-icon-search" @click="fetchData()">查询</el-button>
            <el-button type="default" @click="resetData()">清空</el-button>
        </el-form>

        <!-- banner列表 -->
        <el-table v-loading="listLoading" :data="list"
                border
            fit
            highlight-current-row>

            <el-table-column
            label="序号"
            width="60"
            align="center">
                <template slot-scope="scope">
                        {{ (page - 1) * limit + scope.$index + 1 }}
                </template>
            </el-table-column>

            <el-table-column label="医院logo">
                <template slot-scope="scope">
                <img :src="'data:image/jpeg;base64,'+scope.row.logoData" width="80">
                </template>
            </el-table-column>

            <el-table-column prop="hosname" label="医院名称"/>
            <el-table-column prop="param.hostypeString" label="等级" width="90"/>
            <el-table-column prop="param.fullAddress" label="详情地址"/>
            <el-table-column label="状态" width="80">
                <template slot-scope="scope">
                        {{ scope.row.status === 0 ? '未上线' : '已上线' }}
                </template>
            </el-table-column>
            <el-table-column prop="createTime" label="创建时间"/>

            <el-table-column label="操作" width="230" align="center">
                <template slot-scope="scope">
                    <router-link :to="'/hospSet/hospital/show/'+scope.row.id">
                        <el-button type="primary" size="mini">查看</el-button>
                    </router-link>
                    <router-link :to="'/hospSet/hospital/schedule/'+scope.row.hoscode">
                        <el-button type="primary" size="mini">排班</el-button>
                    </router-link>

                    <el-button v-if="scope.row.status == 1"  type="primary" size="mini" @click="updateStatus(scope.row.id, 0)">下线</el-button>
                    <el-button v-if="scope.row.status == 0"  type="danger" size="mini" @click="updateStatus(scope.row.id, 1)">上线</el-button>
                </template>

            </el-table-column>
        </el-table>

        <!-- 分页组件 -->
        <el-pagination
            :current-page="page"
            :total="total"
            :page-size="limit"
            :page-sizes="[5, 10, 20, 30, 40, 50, 100]"
            style="padding: 30px 0; text-align: center;"
            layout="sizes, prev, pager, next, jumper, ->, total, slot"
            @current-change="fetchData"
            @size-change="changeSize"
        />
    </div>
    </template>
<script>
    import hospApi from '@/api/hosp.js'
    export default {
        data() {
            return {
                listLoading: true, // 数据是否正在加载
                list: null, // 医院列表数据集合
                total: 0, // 数据库中的总记录数
                page: 1, // 默认页码
                limit: 10, // 每页记录数
                searchObj: {
                    provinceCode:'',
                    cityCode:''
                }, // 查询表单对象
                provinceList: [], //所有省集合
                cityList: []   //所有市集合
            }
        },
        created() {
            //调用医院列表
            this.fetchData()
            //调用查询所有省的方法
            hospApi.getChildList(86).then(response => {
                this.provinceList = response.data.items
            })

        },
        methods: {
            //医院列表
            fetchData(page=1) {
                this.page = page
                hospApi.getPageList(this.page,this.limit,this.searchObj)
                    .then(response => {
                        //每页数据集合
                        this.list = response.data.list
                        //总记录数
                        this.total = response.data.total
                        //加载图表不显示
                        this.listLoading = false
                    })
            },
            //查询所有省
            findAllProvince() {
                hospApi.getChildList(86).then(response => {
                    this.provinceList = response.data.items
            })
            },
            //点击某个省,显示里面市(联动)
            provinceChanged() {
                //初始化值
                this.cityList = []
                this.searchObj.cityCode = ''
                //调用方法,根据省id,查询下面子节点
                hospApi.getChildList(this.searchObj.provinceCode)
                    .then(response => {
                        //console.log(response.data.dictList)
                        this.cityList = response.data.items
                    })
            },
            //分页,页码变化
            changeSize() {
                this.limit = size
                this.fetchData(1)
            },
             //医院列表
            fetchData(page=1) {
                this.page = page
                hospApi.getPageList(this.page,this.limit,this.searchObj)
                    .then(response => {
                        //每页数据集合
                        this.list = response.data.list
                        //总记录数
                        this.total = response.data.total
                        //加载图表不显示
                        this.listLoading = false
                    })
            },
            //查询所有省
            findAllProvince() {
                hospApi.getChildList(86).then(response => {
                    this.provinceList = response.data.items
            })
            },
            //点击某个省,显示里面市(联动)
            provinceChanged() {
                //初始化值
                this.cityList = []
                this.searchObj.cityCode = ''
                //调用方法,根据省id,查询下面子节点
                hospApi.getChildList(this.searchObj.provinceCode)
                    .then(response => {
                        //console.log(response.data.dictList)
                        this.cityList = response.data.items
                    })
            },
            //分页,页码变化
            changeSize() {
                this.limit = size
                this.fetchData(1)
            },
            resetData(){
                this.searchObj={},
                this.fetchData()
            }
        }
    }
    </script>
四、更新医院上线状态功能(接口)
1、添加service方法和实现
(1)在HospService定义方法
void updateStatus(String id, Integer status);
(2)在HospServiceImpl实现方法
    @Override
    public void updateStatus(String id, Integer status) {
        if (status == 0 || status == 1){
            Hospital hospital = hospitalRepository.findById(id).get();
            hospital.setStatus(status);
            hospital.setUpdateTime(new Date());
            hospitalRepository.save(hospital);
        }
    }
2、添加controller
在HospController添加方法
    @ApiOperation(value = "更新上线状态")
    @PutMapping("/{id}/{status}")
    public R updateStatus(@PathVariable String id,@PathVariable Integer status){
        hospitalService.updateStatus(id,status);
        return R.ok();
    }
五、更新医院上线状态功能(前端)
1、封装api请求
在api/yygh/hosp.js添加
    //更新上线状态
    updateStatus(id,status){
        return request({
            url: `/admin/hospital/${id}/${status}`,
            method: 'put'
        })
    },
2、修改/views/hosp/list.vue组件
<el-table-column label="操作" width="230" align="center">
    <template slot-scope="scope">
        <router-link :to="'/hospSet/hospital/show/'+scope.row.id">
            <el-button type="primary" size="mini">查看</el-button>
        </router-link>
        <router-link :to="'/hospSet/hospital/schedule/'+scope.row.hoscode">
            <el-button type="primary" size="mini">排班</el-button>
        </router-link>

        <el-button v-if="scope.row.status == 1"  type="primary" size="mini" @click="updateStatus(scope.row.id, 0)">下线</el-button>
        <el-button v-if="scope.row.status == 0"  type="danger" size="mini" @click="updateStatus(scope.row.id, 1)">上线</el-button>
    </template>
</el-table-column>
添加调用方法
            updateStatus(id,status){
                this.$confirm('您是否要修改医院状态, 是否继续?', '提示', {
                    confirmButtonText: '确定',
                    cancelButtonText: '取消',
                    type: 'warning'
                    }).then(() => {
                        hospApi.updateStatus(id,status).then(res=>{
                          this.fetchData(this.page)
                        })
                    }).catch(() => {
                    this.$message({
                        type: 'info',
                        message: '已取消修改'
                    });
                    });
            },
六、医院详情(接口)
1、添加service方法和实现
(1)在HospService定义方法
/**
     * 医院详情
     * @param id
     * @return
     */
    Hospital detail(String id);
(2)在HospServiceImpl定义方法
    @Override
    public Hospital detail(String id) {
        Hospital hospital = hospitalRepository.findById(id).get();
        this.packageHospital(hospital);
        return hospital;
    }
2、添加controller方法
    @ApiOperation(value = "获取医院详情")
    @GetMapping("/detail/{id}")
    public R detail(@PathVariable String id){
        Hospital hospital = hospitalService.detail(id);
        return R.ok().data("hospital",hospital);
    }
七、医院详情(前端)
1、添加隐藏路由
在router/index.js添加
    {
        path: 'detail/:id',
        name: '查看详情',
        component: () => import('@/views/yygh/hosp/detail'),
        meta: { title: '查看详情', noCache: true },
        hidden: true
      }
2、创建医院详情页面
(1)添加查看按钮
list.vue
 <router-link :to="'/yygh/hosp/detail/'+scope.row.id">
     <el-button type="primary" size="mini">查看</el-button>
 </router-link>
(2)封装api请求
    //查看医院详情
    getHospById(id){
        return request({
            url: `/admin/hospital/detail/${id}`,
            method: 'put'
        })
    },
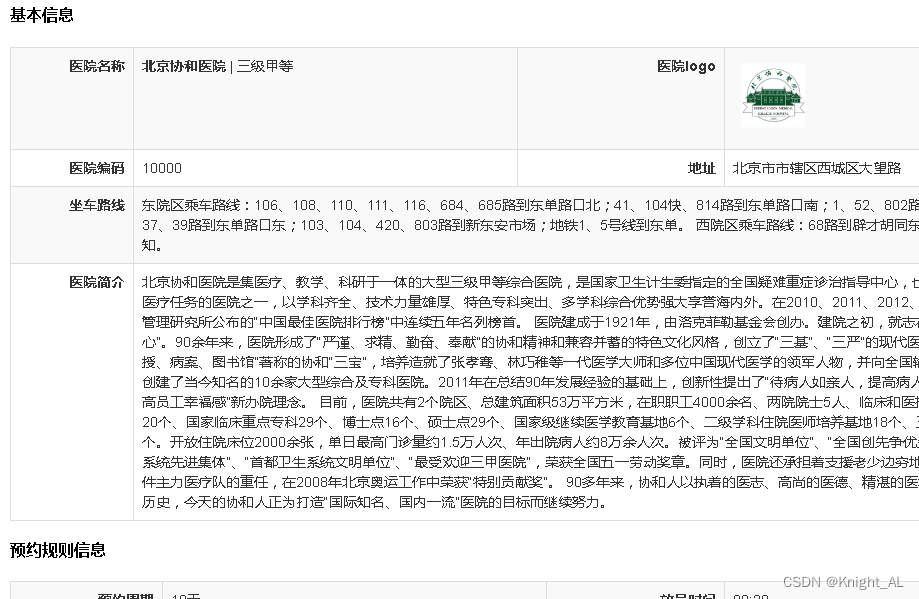
(3)修改显示页面组件
<template>
<div class="app-container">
    <h4>基本信息</h4>
    <table class="table table-striped table-condenseda table-bordered" width="100%">
        <tbody>
            <tr>
                <th width="15%">医院名称</th>
                <td width="35%"><b style="font-size: 14px">{{ hospital.hosname }}</b> | {{ hospital.param.hostypeString }}</td>
                <th width="15%">医院logo</th>
                <td width="35%">
                    <img :src="'data:image/jpeg;base64,'+hospital.logoData" width="80">
                </td>
            </tr>
            <tr>
                <th>医院编码</th>
                <td>{{ hospital.hoscode }}</td>
                <th>地址</th>
                <td>{{ hospital.param.fullAddress }}</td>
            </tr>
            <tr>
                <th>坐车路线</th>
                <td colspan="3">{{ hospital.route }}</td>
            </tr>
            <tr>
                <th>医院简介</th>
                <td colspan="3">{{ hospital.intro }}</td>
            </tr>
        </tbody>
        </table>

        <h4>预约规则信息</h4>
        <table class="table table-striped table-condenseda table-bordered" width="100%">
        <tbody>
            <tr>
                <th width="15%">预约周期</th>
                <td width="35%">{{ bookingRule.cycle }}天</td>
                <th width="15%">放号时间</th>
                <td width="35%">{{ bookingRule.releaseTime }}</td>
            </tr>
            <tr>
                <th>停挂时间</th>
                <td>{{ bookingRule.stopTime }}</td>
                <th>退号时间</th>
                <td>{{ bookingRule.quitDay == -1 ? '就诊前一工作日' : '就诊当日' }}{{ bookingRule.quitTime }} 前取消</td>
            </tr>
            <tr>
                <th>预约规则</th>
                <td colspan="3">
                <ol>
                <li v-for="item in bookingRule.rule" :key="item">{{ item }}</li>
                </ol>
                </td>
            </tr>
        <br>
            <el-row>
            <el-button @click="back">返回</el-button>
            </el-row>
        </tbody>
    </table>
</div>
</template>

<script>
import hospApi from '@/api/yygh/hosp'
export default {
    data() {
        return {
            hospital: null,  //医院信息
            bookingRule: null //预约信息
        }
    },
    created() {
        //获取路由id
        const id = this.$route.params.id
        //调用方法,根据id查询医院详情
        this.fetachHospDetail(id)
    },
    methods:{
        //根据id查询医院详情
        fetachHospDetail(id) {
            hospApi.getHospById(id)
                .then(response => {
                    this.hospital = response.data.hospital.hospital
                    this.bookingRule = response.data.hospital.bookingRule
                })
        },
        //返回医院列表
        back() {
            this.$router.push({ path: '/hospSet/hosp/list' })
        }
    }
}
</script>
(4)引入样式
第一、将show.css文件复制到src/styles目录

第二、在src/main.js文件添加引用
import '@/styles/show.css'