序
没错,又是需求导致我 需要研究下 mybatis-plus了。。。。
本来我想直接网上百度出来一篇,看看得了,就不自己从头研究了
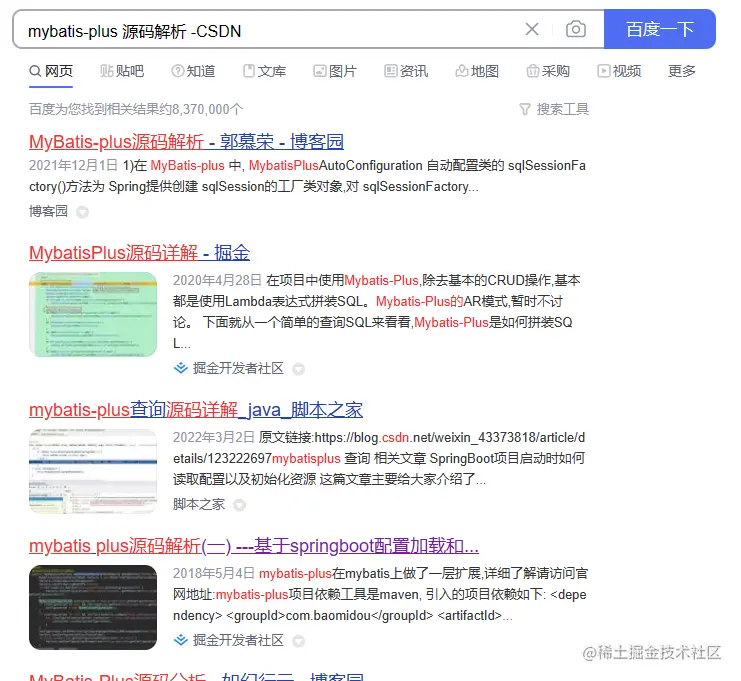
我都看了一遍,但是很可惜 ,没一个能用的。。。。
有一个掘金的写的,我看了下他总共写了5篇,借用下 里面的一个评论

百度不到,就自己搞一个吧
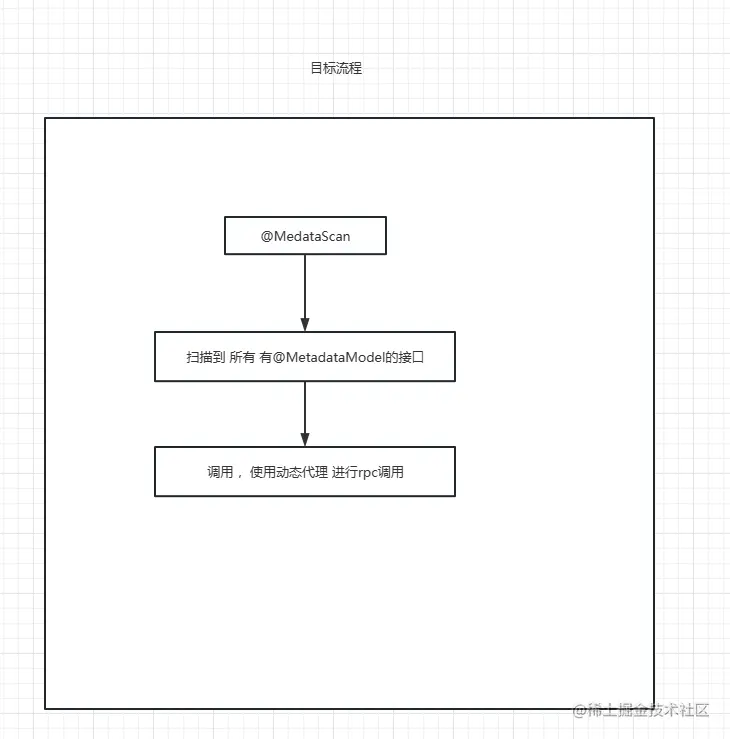
我的期望
开始
目前mybatis-plus 最新的代码 在 v3.5.3.1
因为我们自己组件库 用的是 3.4.0 所以这次 也用的 3.4.0
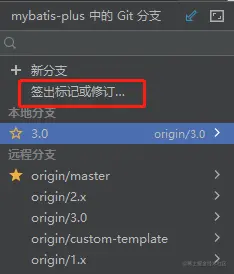
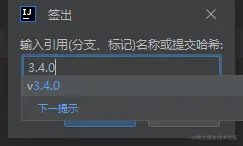
之前有人私聊问,idea 找不到 tag分支
mybatis-plus 基础使用
一、环境准备: 1.1、导入依赖 将springboot 整合mybatis的依赖替换为整合mybatis-plus的起步依赖;
    <dependency>
        <groupId>com.baomidou</groupId>
        <artifactId>mybatis-plus-boot-starter</artifactId>
        <version>3.4.0</version>
    </dependency>
IDEA按照一个插件Maven Helper可以查看是否有依赖冲突。
1.2、修改配置文件 端口、数据库、mybatis-plus日志输出、驼峰映射、xml位置等
server:
  port: 8889
spring:
  datasource:
    url: jdbc:mysql://localhost:3308/boot_mybatis?serverTimezone=UTC&useUnicode=true&characterEncoding=utf-8&AllowPublicKeyRetrieval=True
    username: root
    password: root

mybatis-plus:
  mapper-locations: mapper/*.xml
  configuration:
    log-impl: org.apache.ibatis.logging.stdout.StdOutImpl
    map-underscore-to-camel-case: true
  type-aliases-package: com.example.demo.entity
1.3、IUser实体类 绑定表名、主键名
@Data
@TableName("t_user")
public class IUser {
    /**
     * 指定主键名、主键生产策略
     */
    @TableId(value = "u_id", type = IdType.AUTO)
    private Integer uId;
    /**
     *指定列名,若一致可以不用指定
     */
    @TableField("user_name")
    private String userName;

    private String email;
    private String passWord;
    private Date birth;
    private int gender;
}
1.4、UserMapper 只要继承BaseMapper<~>即可、其他方法和xml可以删掉。
@Mapper
public interface IUserMapper extends BaseMapper<IUser> {}
IUserMapper继承BaseMapper<~>后就可以不用编写XML来实现了
mybatis-plus debug
首先 mybatis-plus 是基于 mybatis的,这个没毛病
我们首先从 META-INF 中 spring.factories 看初始化了什么
# Auto Configure
org.springframework.boot.env.EnvironmentPostProcessor=\
  com.baomidou.mybatisplus.autoconfigure.SafetyEncryptProcessor
org.springframework.boot.autoconfigure.EnableAutoConfiguration=\
  com.baomidou.mybatisplus.autoconfigure.MybatisPlusLanguageDriverAutoConfiguration,\
  com.baomidou.mybatisplus.autoconfigure.MybatisPlusAutoConfiguration
SpringBoot常用接口–EnvironmentPostProcessor
一般用于读取环境变量达到多个微服务共同配置的修改与维护。当我们有多套环境(开发、测试、生产等等)时,每套环境都有专属的配置文件存放于配置中心(以nacos为例),可能存放于不同的配置中心(每个环境有专属的配置中心,服务地址不同),也可能存放于同一nacos的不同命名空间,也或者同一命名空间的不同分组等等。同一套代码在不同环境运行需要不同的配置文件,这时,我们就可以在项目启动时,实现EnvironmentPostProcessor接口,在postProcessEnvironment方法中读取环境变量或者启动命令参数,从而获取本环境下nacos的服务地址,或命名空间名称、分组名称等等,然后就可以根据获取的配置参数或环境变量来读取不同的配置文件,从而实现不同环境使用不同的配置文件,不用修改代码或者本地配置文件。
SafetyEncryptProcessor 是安全加密处理器
这不是我们这次的重点 忽略,抓住重点
MybatisPlusLanguageDriverAutoConfiguration
这个里面 看起来也就是 初始化
mybatis-freemarker 1.2.x
mybatis-velocity
Thymeleaf
...看起来 也不是重点啊,无奈
小知识点: 如果想 必须引用了 xxx 才能触发某个类
使用
@ConditionalOnClass(LanguageDriver.class)
MybatisPlusAutoConfiguration
看名字 靠点谱了。。。
 If {@link org.mybatis.spring.annotation.MapperScan} is used, or a
* configuration file is specified as a property, those will be considered,
* otherwise this auto-configuration will attempt to register mappers based on
* the interface definitions in or under the root auto-configuration package.
嗯嗯 注释说的是
如果{@link org.mybatis.spring.annotation。使用MapperScan},或者将配置文件指定为属性,这些都将被考虑,否则这个自动配置将尝试根据根自动配置包中或下面的接口定义注册映射器。
@ConditionalOnSingleCandidate表示当指定Bean在容器中只有一个,或者虽然有多个但是指定首选Bean。
@AutoConfigureAfter 在加载配置的类之后再加载当前类
public class MybatisPlusAutoConfiguration implements InitializingBean {

}

public interface InitializingBean {

   void afterPropertiesSet() throws Exception;

}
因为实现了 InitializingBean 接口,我们当然要看 afterPropertiesSet 方法
@Override
public void afterPropertiesSet() {
    if (!CollectionUtils.isEmpty(mybatisPlusPropertiesCustomizers)) {
        mybatisPlusPropertiesCustomizers.forEach(i -> i.customize(properties));
    }
    checkConfigFileExists();
}
debug下看看

行吧,到这 ,基本可以看出 mybatis-plus-boot-starter 的这几个类 都是 针对 springboot的一些配置,和它本身的 扫描 / 动态代理都没有关系,我们应该往依赖的jar 看看

使用的是 gradle
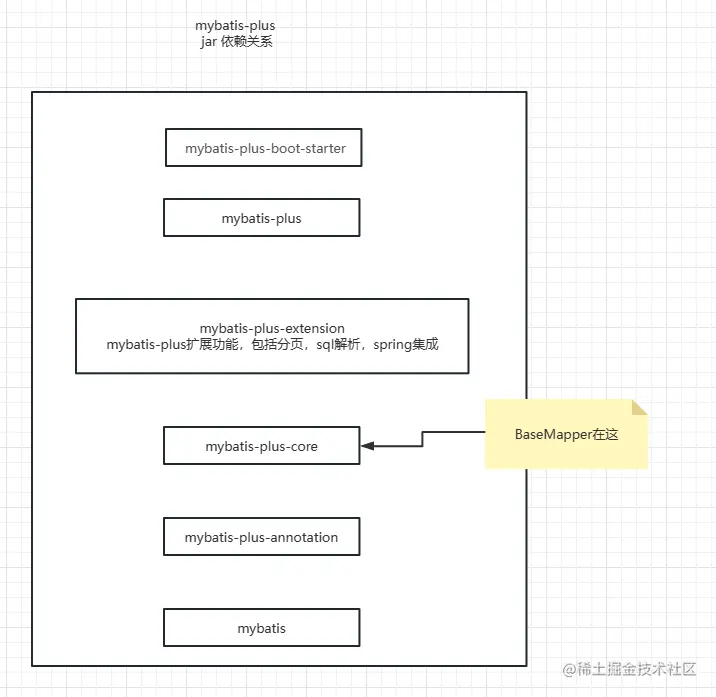
那 BaseMapper的动态代理 应该也在 mybatis-plus-core中啊,去看看
spring-devtools.properties 干什么的
如果有一个多模块项目,只有部分导入到你的IDE中,你可能需要自定义一下。首先创建一个文件:META-INF/spring-devtools.properties。该文件中,可以有以前缀 restart.exclude. 和 restart.include. 开头的属性。前者会被放入base类加载器,后者则被放入restart类加载器。
转折点
这按照套路走,也找不到啊,行吧,我们都知道 肯定用到了 动态代理,我就find newProxyInstance 方法不就行了
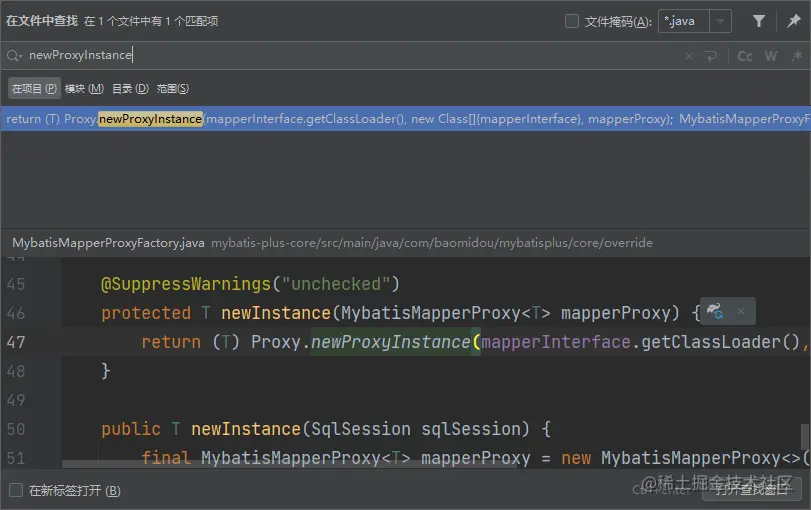
public class MybatisMapperProxyFactory<T> {

    @Getter
    private final Class<T> mapperInterface;
    @Getter
    private final Map<Method, MybatisMapperProxy.MapperMethodInvoker> methodCache = new ConcurrentHashMap<>();

    public MybatisMapperProxyFactory(Class<T> mapperInterface) {
        this.mapperInterface = mapperInterface;
    }

    @SuppressWarnings("unchecked")
    protected T newInstance(MybatisMapperProxy<T> mapperProxy) {
        return (T) Proxy.newProxyInstance(mapperInterface.getClassLoader(), new Class[]{mapperInterface}, mapperProxy);
    }

    public T newInstance(SqlSession sqlSession) {
        //接口代理类 真正执行的逻辑在这
        final MybatisMapperProxy<T> mapperProxy = new MybatisMapperProxy<>(sqlSession, mapperInterface, methodCache);
        return newInstance(mapperProxy);
    }
}
public class MybatisMapperProxy<T> implements InvocationHandler, Serializable {

@Override
public Object invoke(Object proxy, Method method, Object[] args) throws Throwable {
    try {
        if (Object.class.equals(method.getDeclaringClass())) {
            //可能method 不是 BaseMapper的 就走原来的逻辑
            return method.invoke(this, args);
        } else {
            //是 baseMapper的方法 就要统一处理
            return cachedInvoker(method).invoke(proxy, method, args, sqlSession);
        }
    } catch (Throwable t) {
        throw ExceptionUtil.unwrapThrowable(t);
    }
}

}
//真正执行 业务逻辑
public Object execute(SqlSession sqlSession, Object[] args) {
    Object result;
    switch (command.getType()) {
        case INSERT: {
           xxx
            break;
        }
        case UPDATE: {
            xxx
            break;
        }
        case DELETE: {
           xxx
            break;
        }
        case SELECT:
            xxx
            break;
        case FLUSH:
            result = sqlSession.flushStatements();
            break;
        default:
            throw new BindingException("Unknown execution method for: " + command.getName());
    }
    if (result == null && method.getReturnType().isPrimitive() && !method.returnsVoid()) {
        throw new BindingException("Mapper method '" + command.getName()
            + " attempted to return null from a method with a primitive return type (" + method.getReturnType() + ").");
    }
    return result;
}
其实这个直接copy 过去就能实现接口的 动态代理
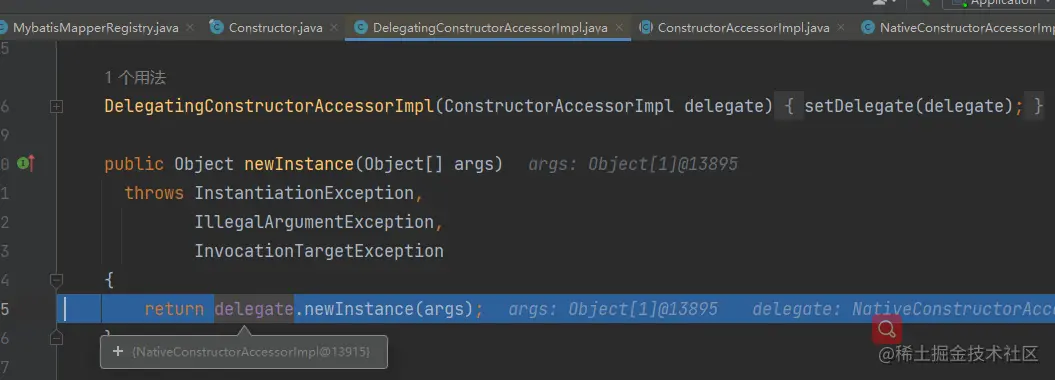
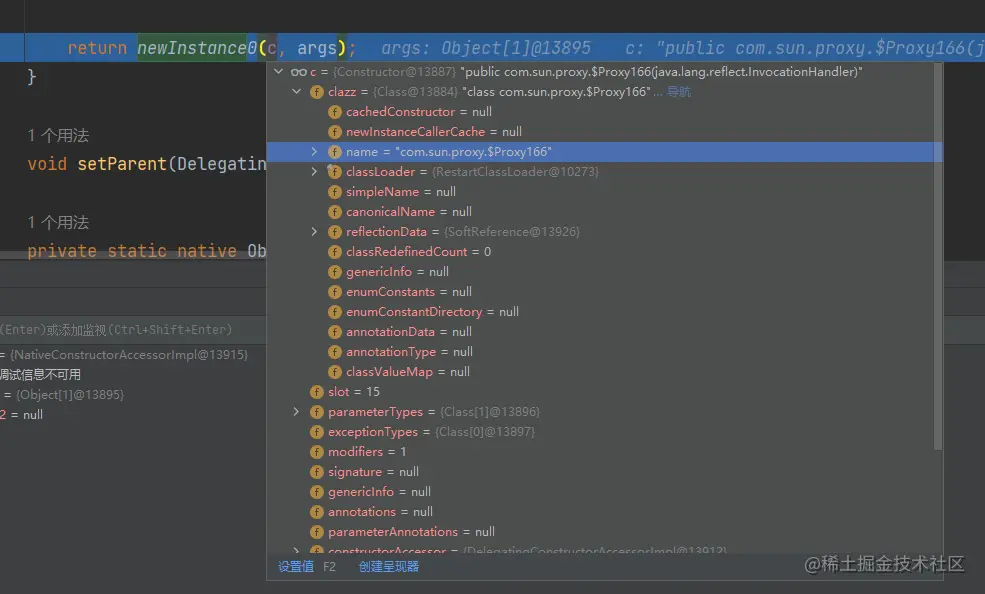
MybatisMapperProxy invoke 我想看怎么做的动态代理,但是断点进不去
想进invoke 方法 需要有人调用 接口方法 ,才能触发,低级错误
小总结
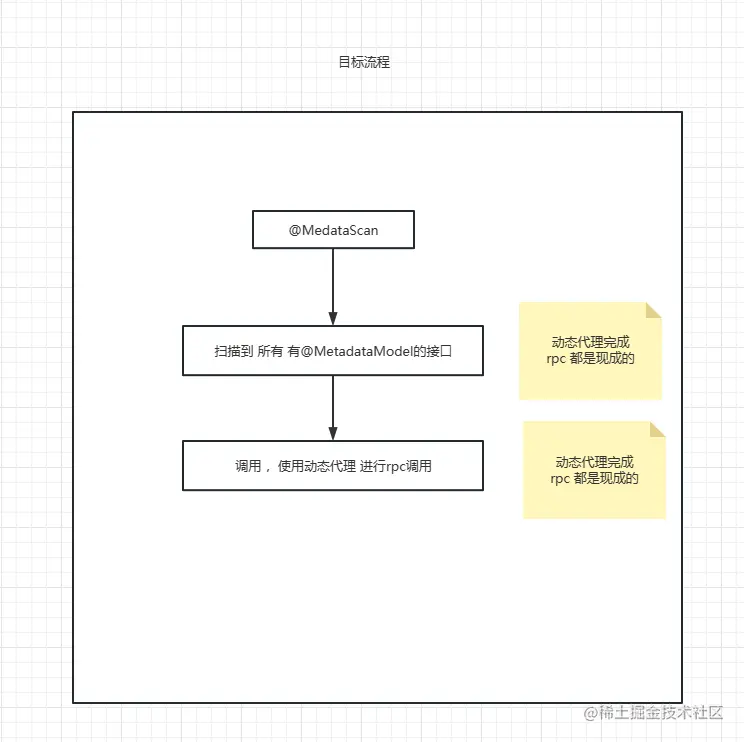
现在 后面2步都可以了,就剩第一步 @MetadataScan 扫描指定的包路径了,这个属于mybatis 的范围了
@MetadataScan 扫描指定的包路径
在 mybatis-spring 中
@Override
public void registerBeanDefinitions(AnnotationMetadata importingClassMetadata, BeanDefinitionRegistry registry) {
  AnnotationAttributes mapperScanAttrs = AnnotationAttributes
      .fromMap(importingClassMetadata.getAnnotationAttributes(MapperScan.class.getName()));
  if (mapperScanAttrs != null) {
    registerBeanDefinitions(importingClassMetadata, mapperScanAttrs, registry,
        generateBaseBeanName(importingClassMetadata, 0));
  }
}
要想 进行我们的扫描,需要一些自定义的操作
效果
这是改动前
小插曲
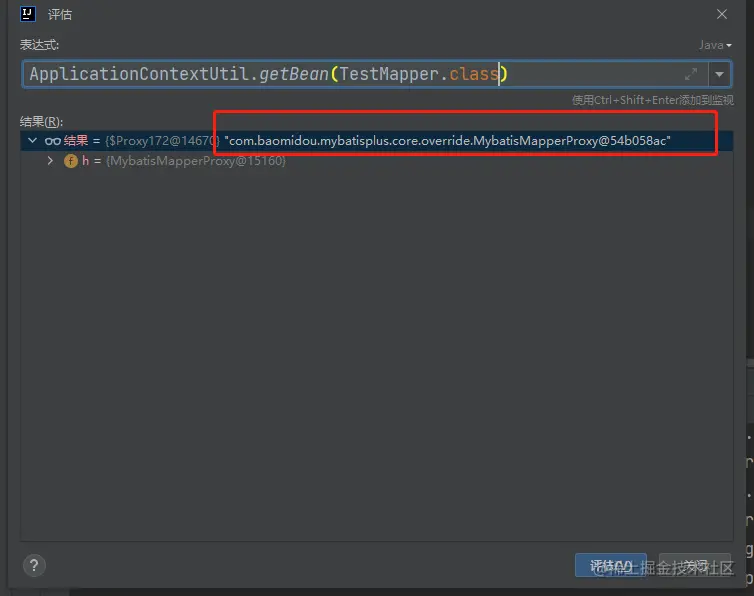
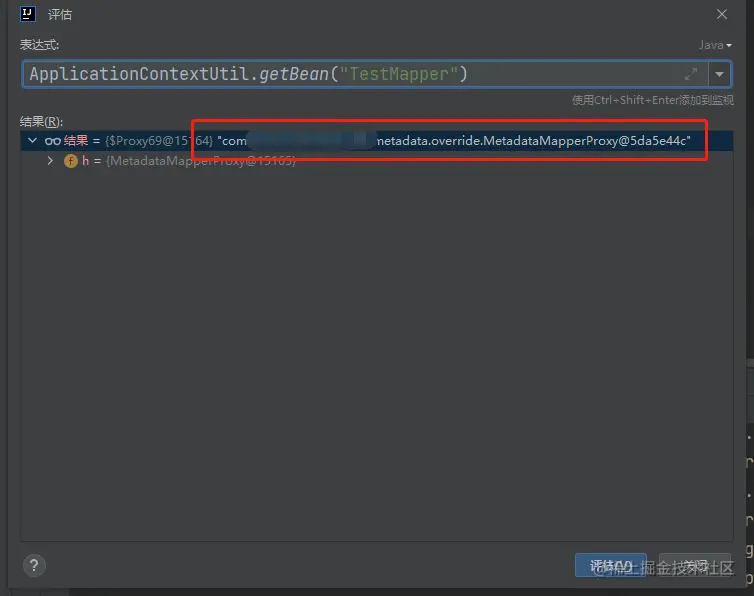
两种获取方式 ,返回值还不对。。。哎 可能是 key 我设置的不对
我现在是
BeanDefinitionBuilder builder = BeanDefinitionBuilder.genericBeanDefinition(beanClazz);

GenericBeanDefinition definition = (GenericBeanDefinition) builder.getRawBeanDefinition();

definition.getConstructorArgumentValues().addGenericArgumentValue(beanClazz);

definition.setBeanClass(ServiceFactory.class);

definition.setAutowireMode(GenericBeanDefinition.AUTOWIRE_BY_TYPE);
//beanClazz.getSimpleName() = TestMapper
registry.registerBeanDefinition(beanClazz.getSimpleName(), definition);
这个就 涉及@Resource 是怎么获取值的
需要跟进到 其中的代码,看看其区别
TestMapper a1 = ApplicationContextUtil.getBean(TestMapper.class);
Object a2 = ApplicationContextUtil.getBean("TestMapper");
ApplicationContextUtil.getBean(TestMapper.class); 关键代码如下

这代表 我们赋值的时候 应该 也用这种全路径
小问题
Object 接就好使

我用下面这种就不存在

这是因为我的代理返回的对象 接口class 错误

