1、前言
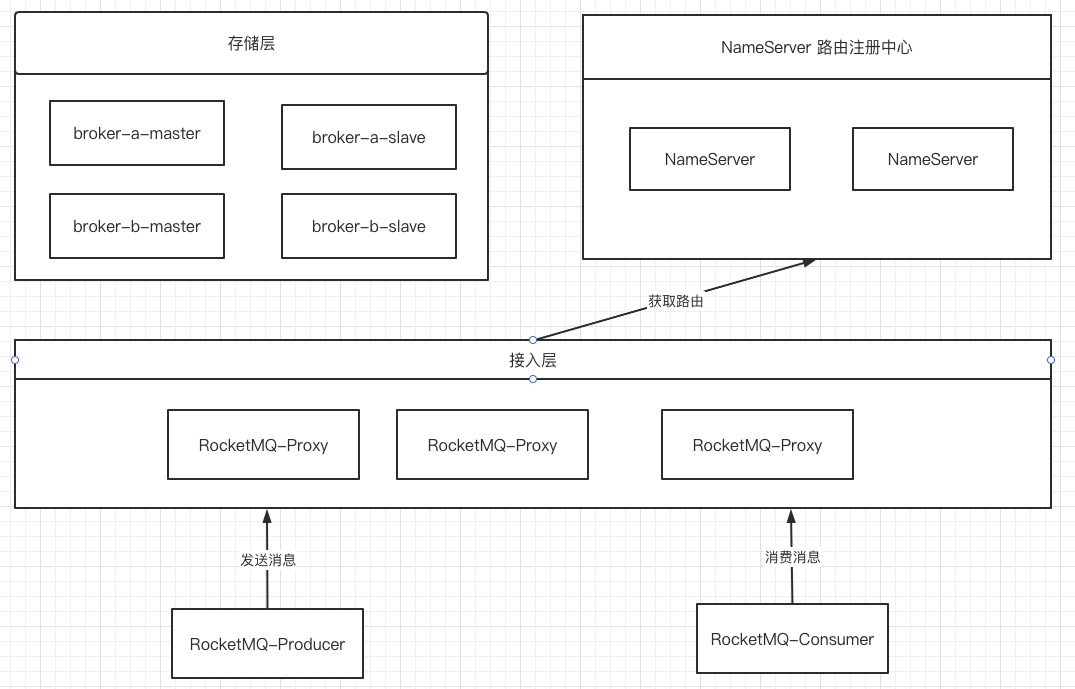
为了更好的拥抱云原生,RocketMQ5.x架构进行了大的重构,提出了存储与计算分离的设计架构,架构设计图如下所示:
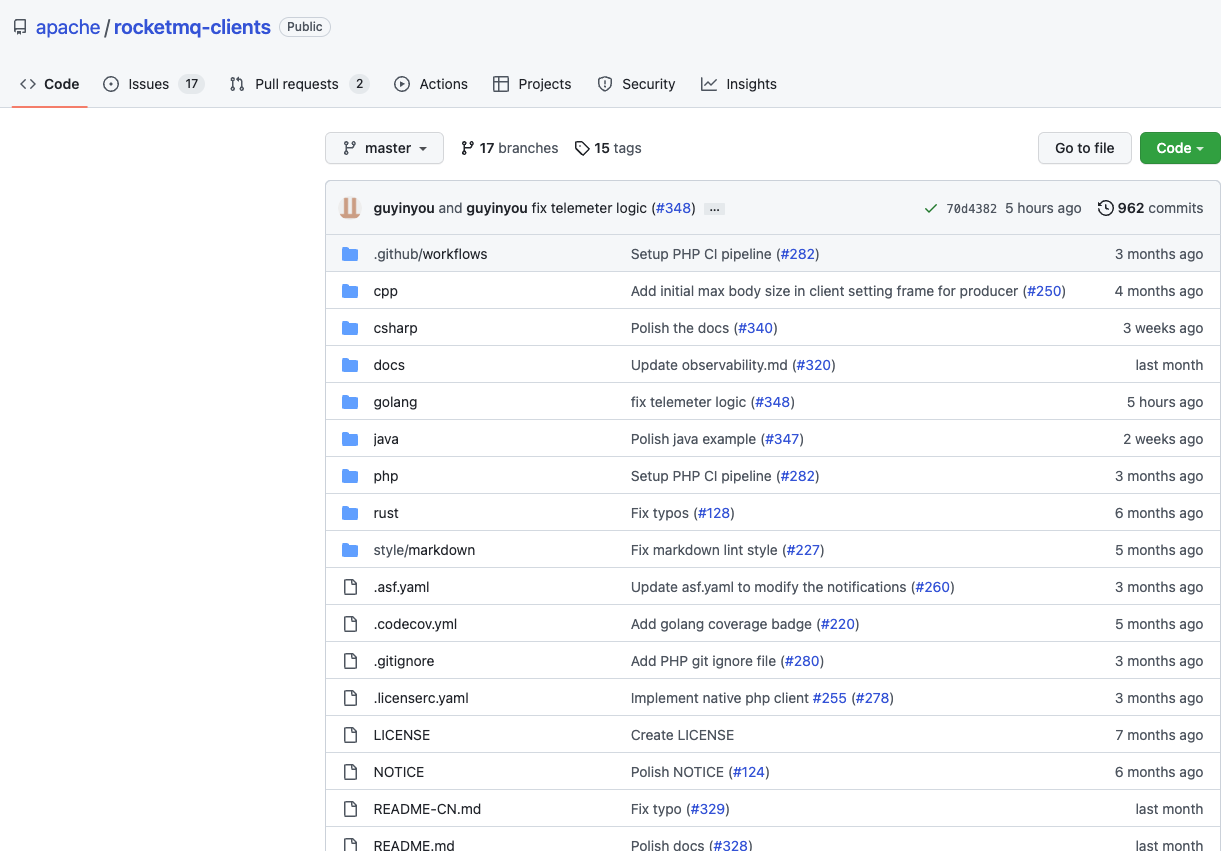
RocketMQ5.x提供了一套非常建议的消息发送、消费API,并统一放在Apache顶级开源项目rocketmq-clients下,链接:https://github.com/apache/rocketmq-clients,提供了cpp、go、java、php、rust的实现,多语言生态初现,如下图所示:
2、源码级调试 RocketMQ 5.x
当RocketMQ为了顺应云原生大潮,提出存储与计算分离后,想必我相信很多粉丝朋友和我一样,都希望尽快一睹RocketMQ5.x的”芳颜“,如果还没有在IDE中调试通过的小伙伴,那就跟着我的步骤来,带你一起体验RocketMQ 5.x。
Step1:从github(https://github.com/apache/rocketmq)下载源码,并导入到IDEA中,如下图所示:
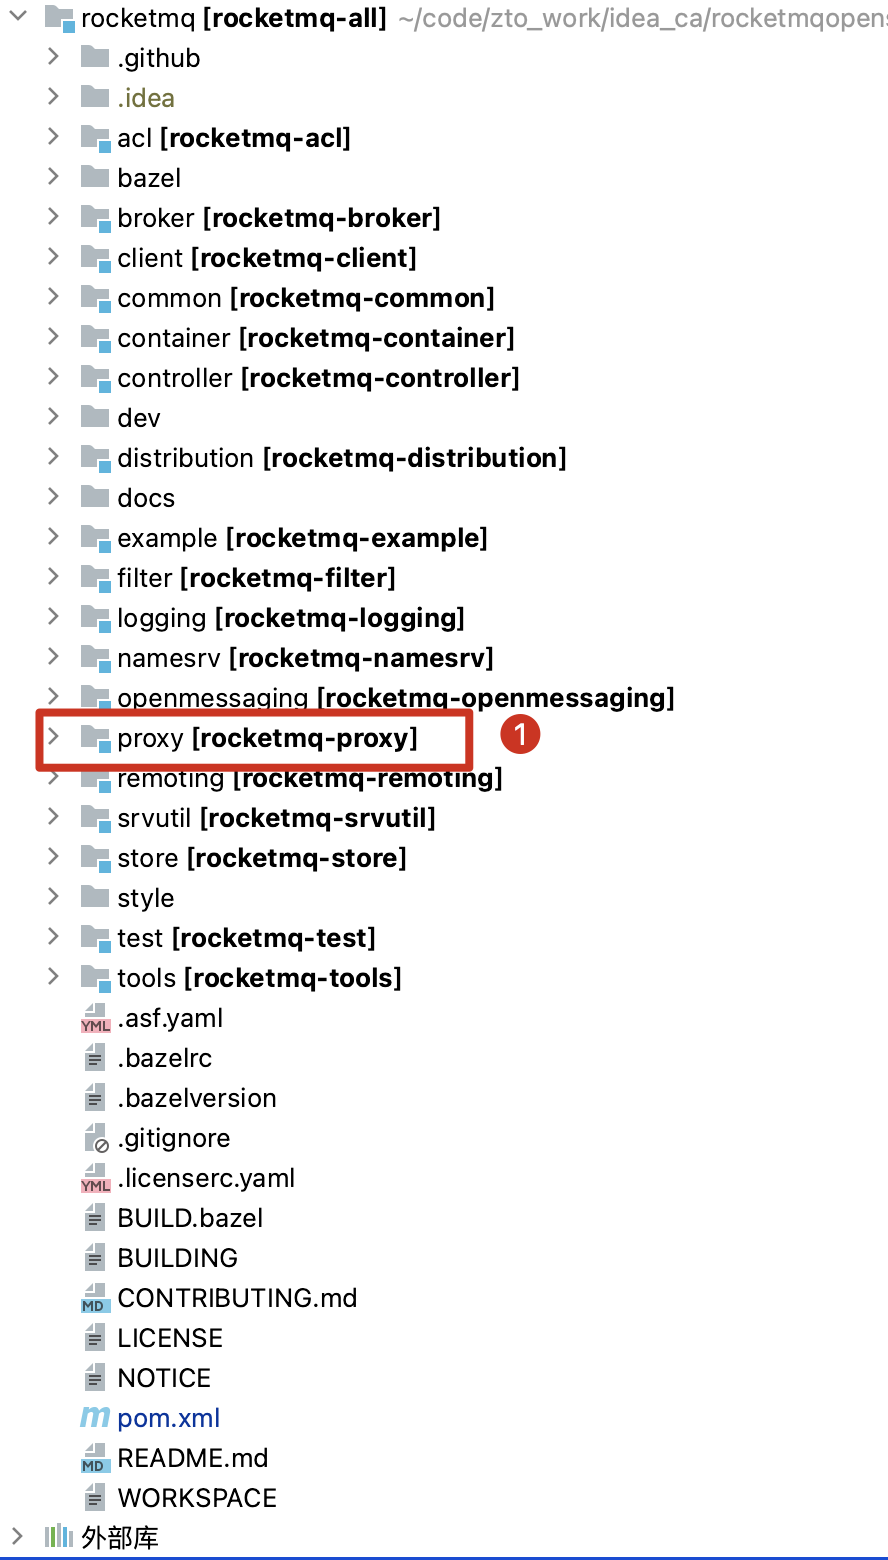
相比RocketMQ4.x,5.x主要是增加了一个代理模块(rocketmq-proxy),将路由、计算等功能从Broker中剥离出来。
Step2:创建一个RocketMQ主目录,并在主目录中创建conf文件夹,并把源码中distribution模块中conf下的文件拷贝到当前目录,如下图所示:
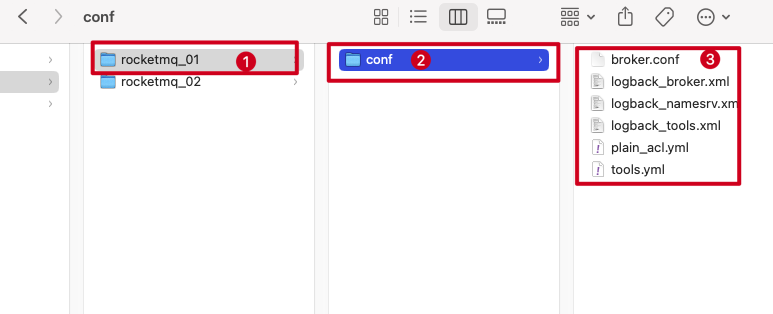
Step3:从namesrv模块中找到类NamesrvStartup类,配置后运行,如下图所示:
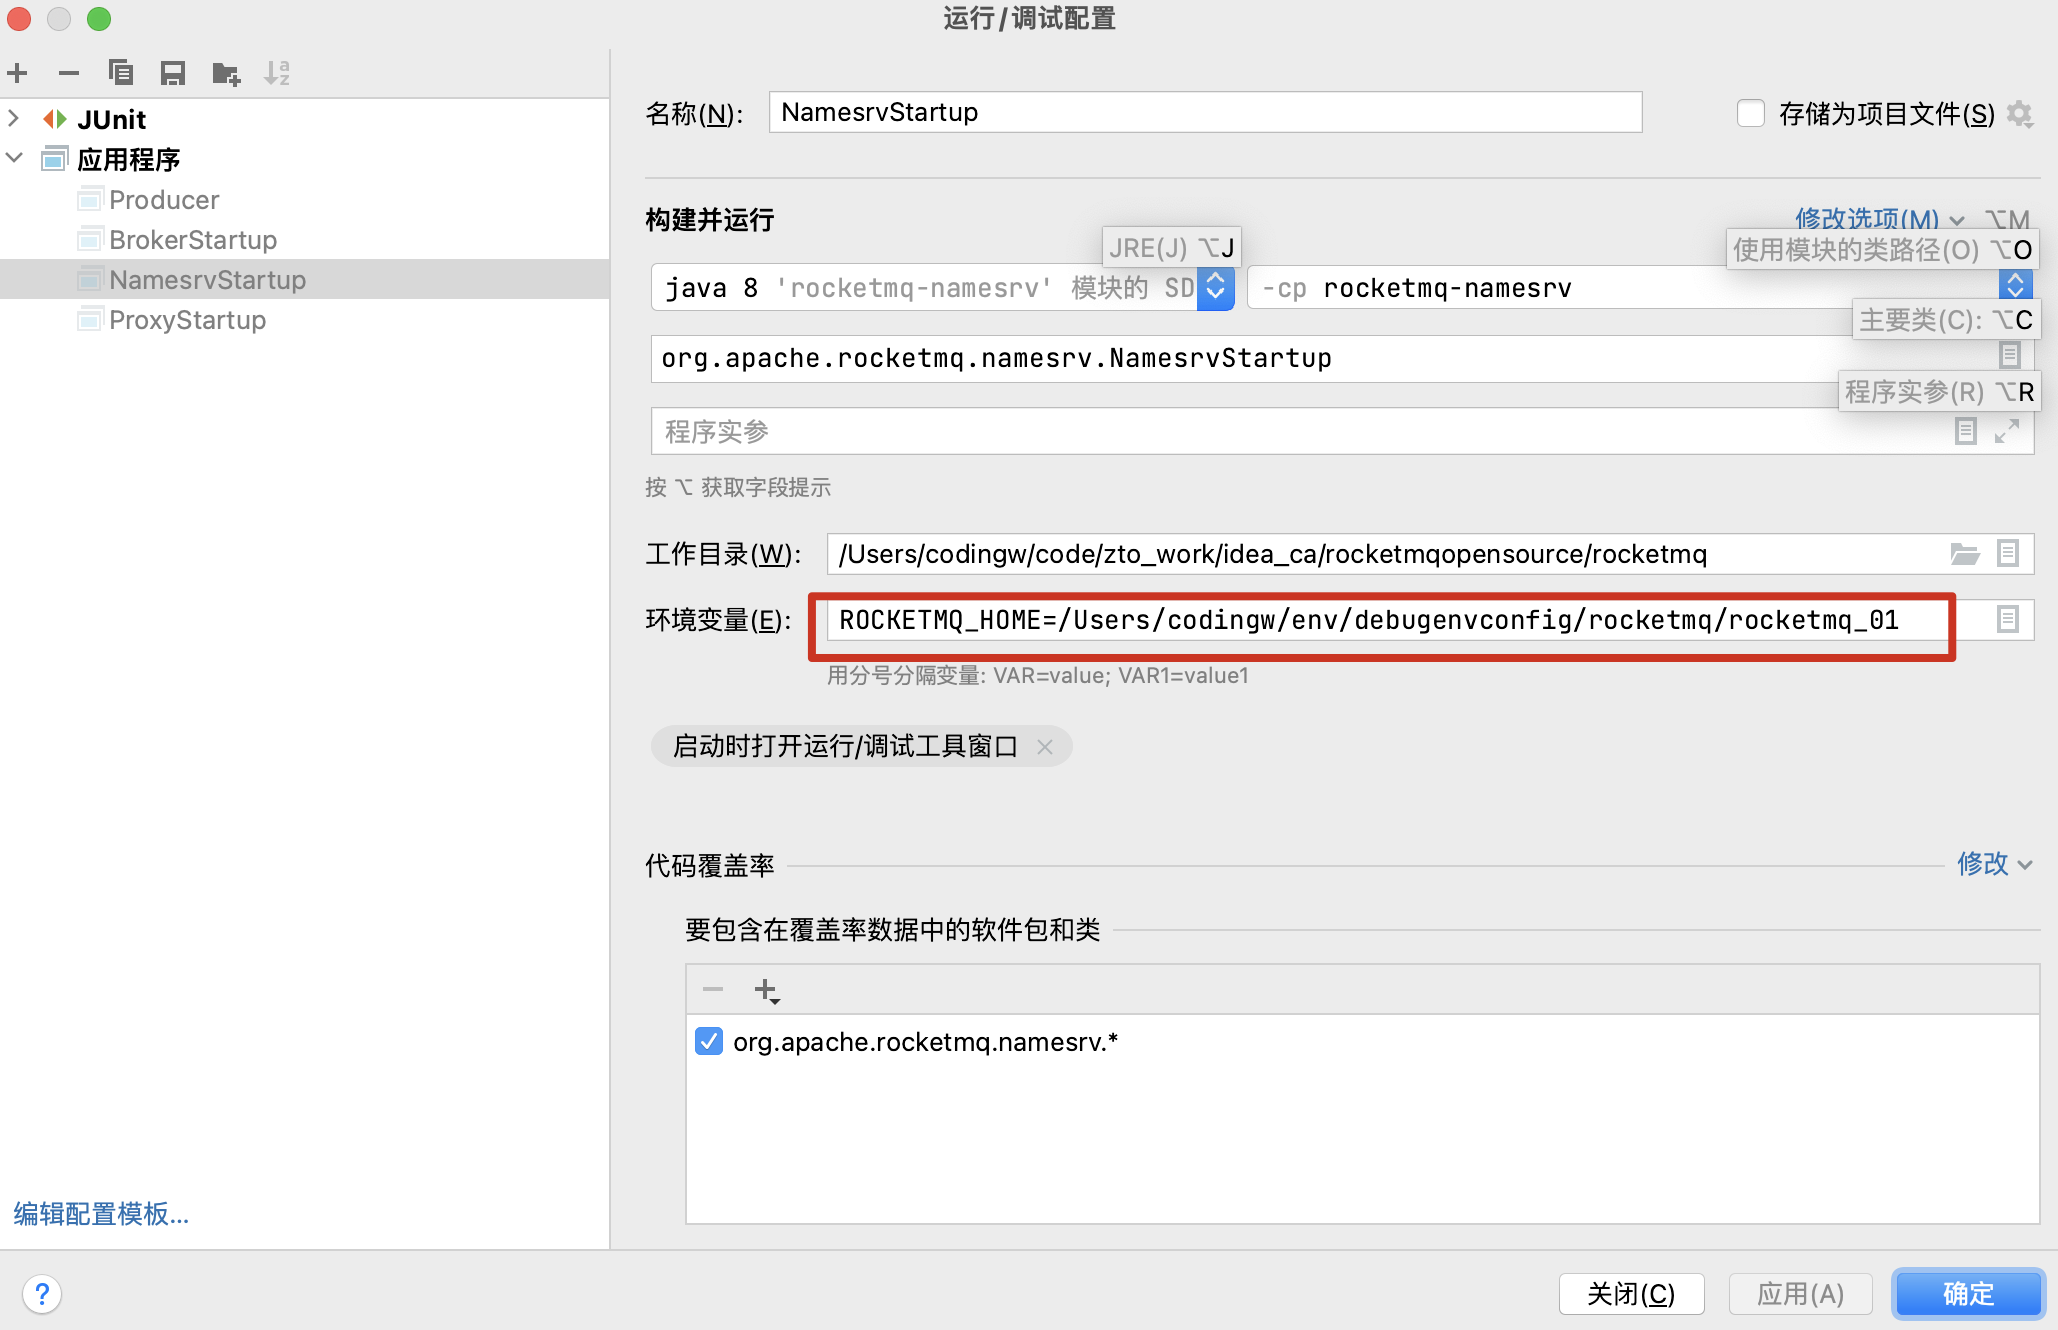
这里的关键点在于需要配置环境变量ROCKETMQ_HOME,其路径设置为【Step2】中创建的目录,然后启动该类,输出如下所示表示NameServer启动成功。
The Name Server boot success. serializeType=JSON
Step4:从broker模块中找到类BrokerStartup,配置后运行,效果如下图所示:
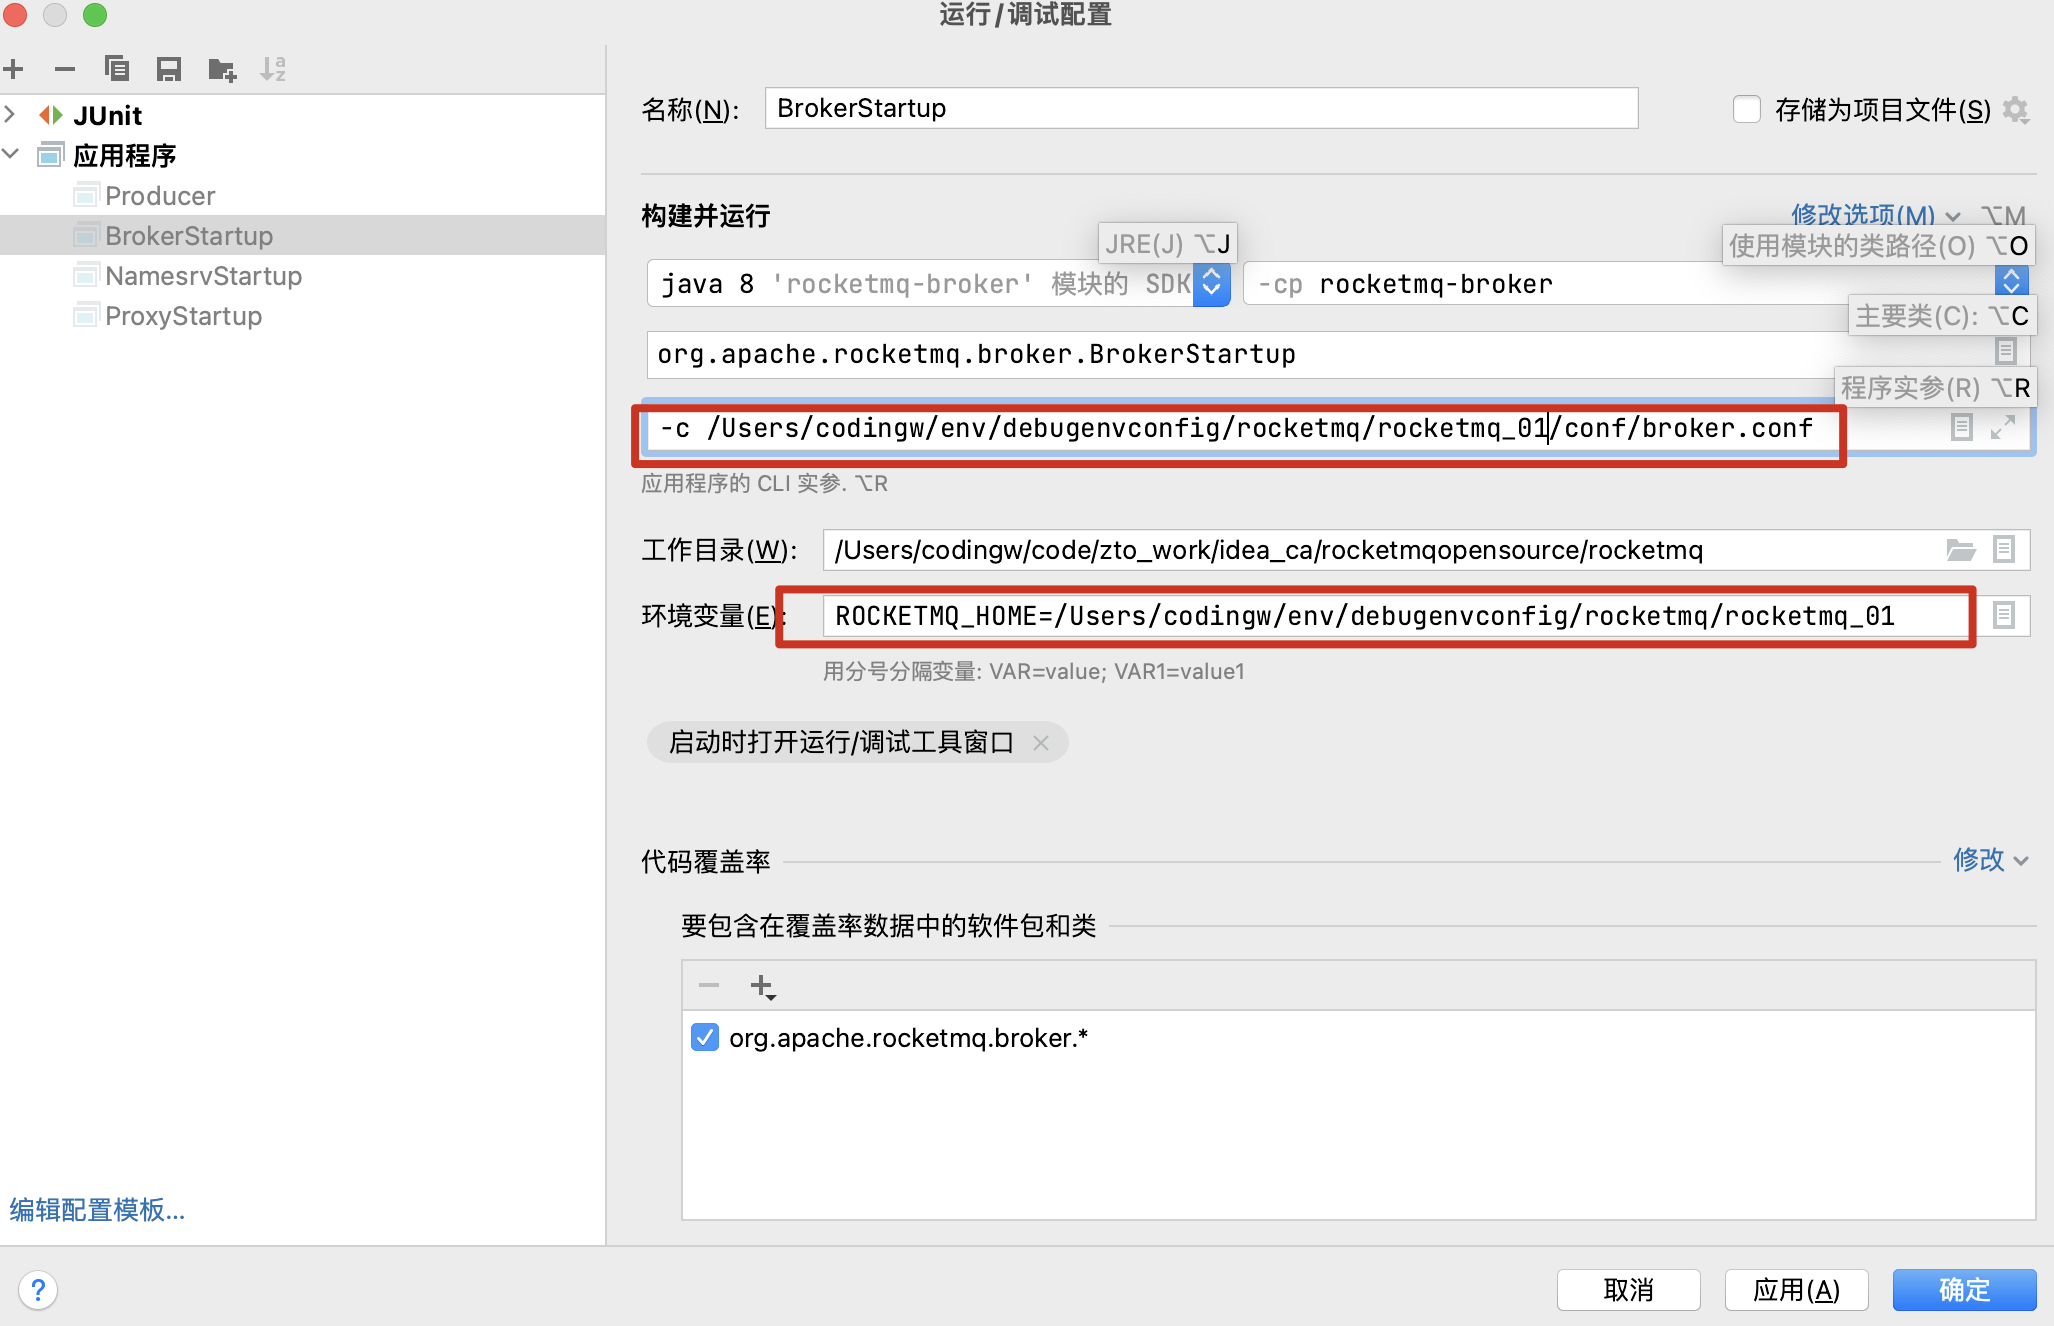
这里有两个要点:
- 通过 -c 参数指定broker配置文件的位置
- 设置ROCKETMQ_HOME环境变量,其路径就是上文中conf目录所在的父目录
Step5:启动proxy模块,如下图所示:
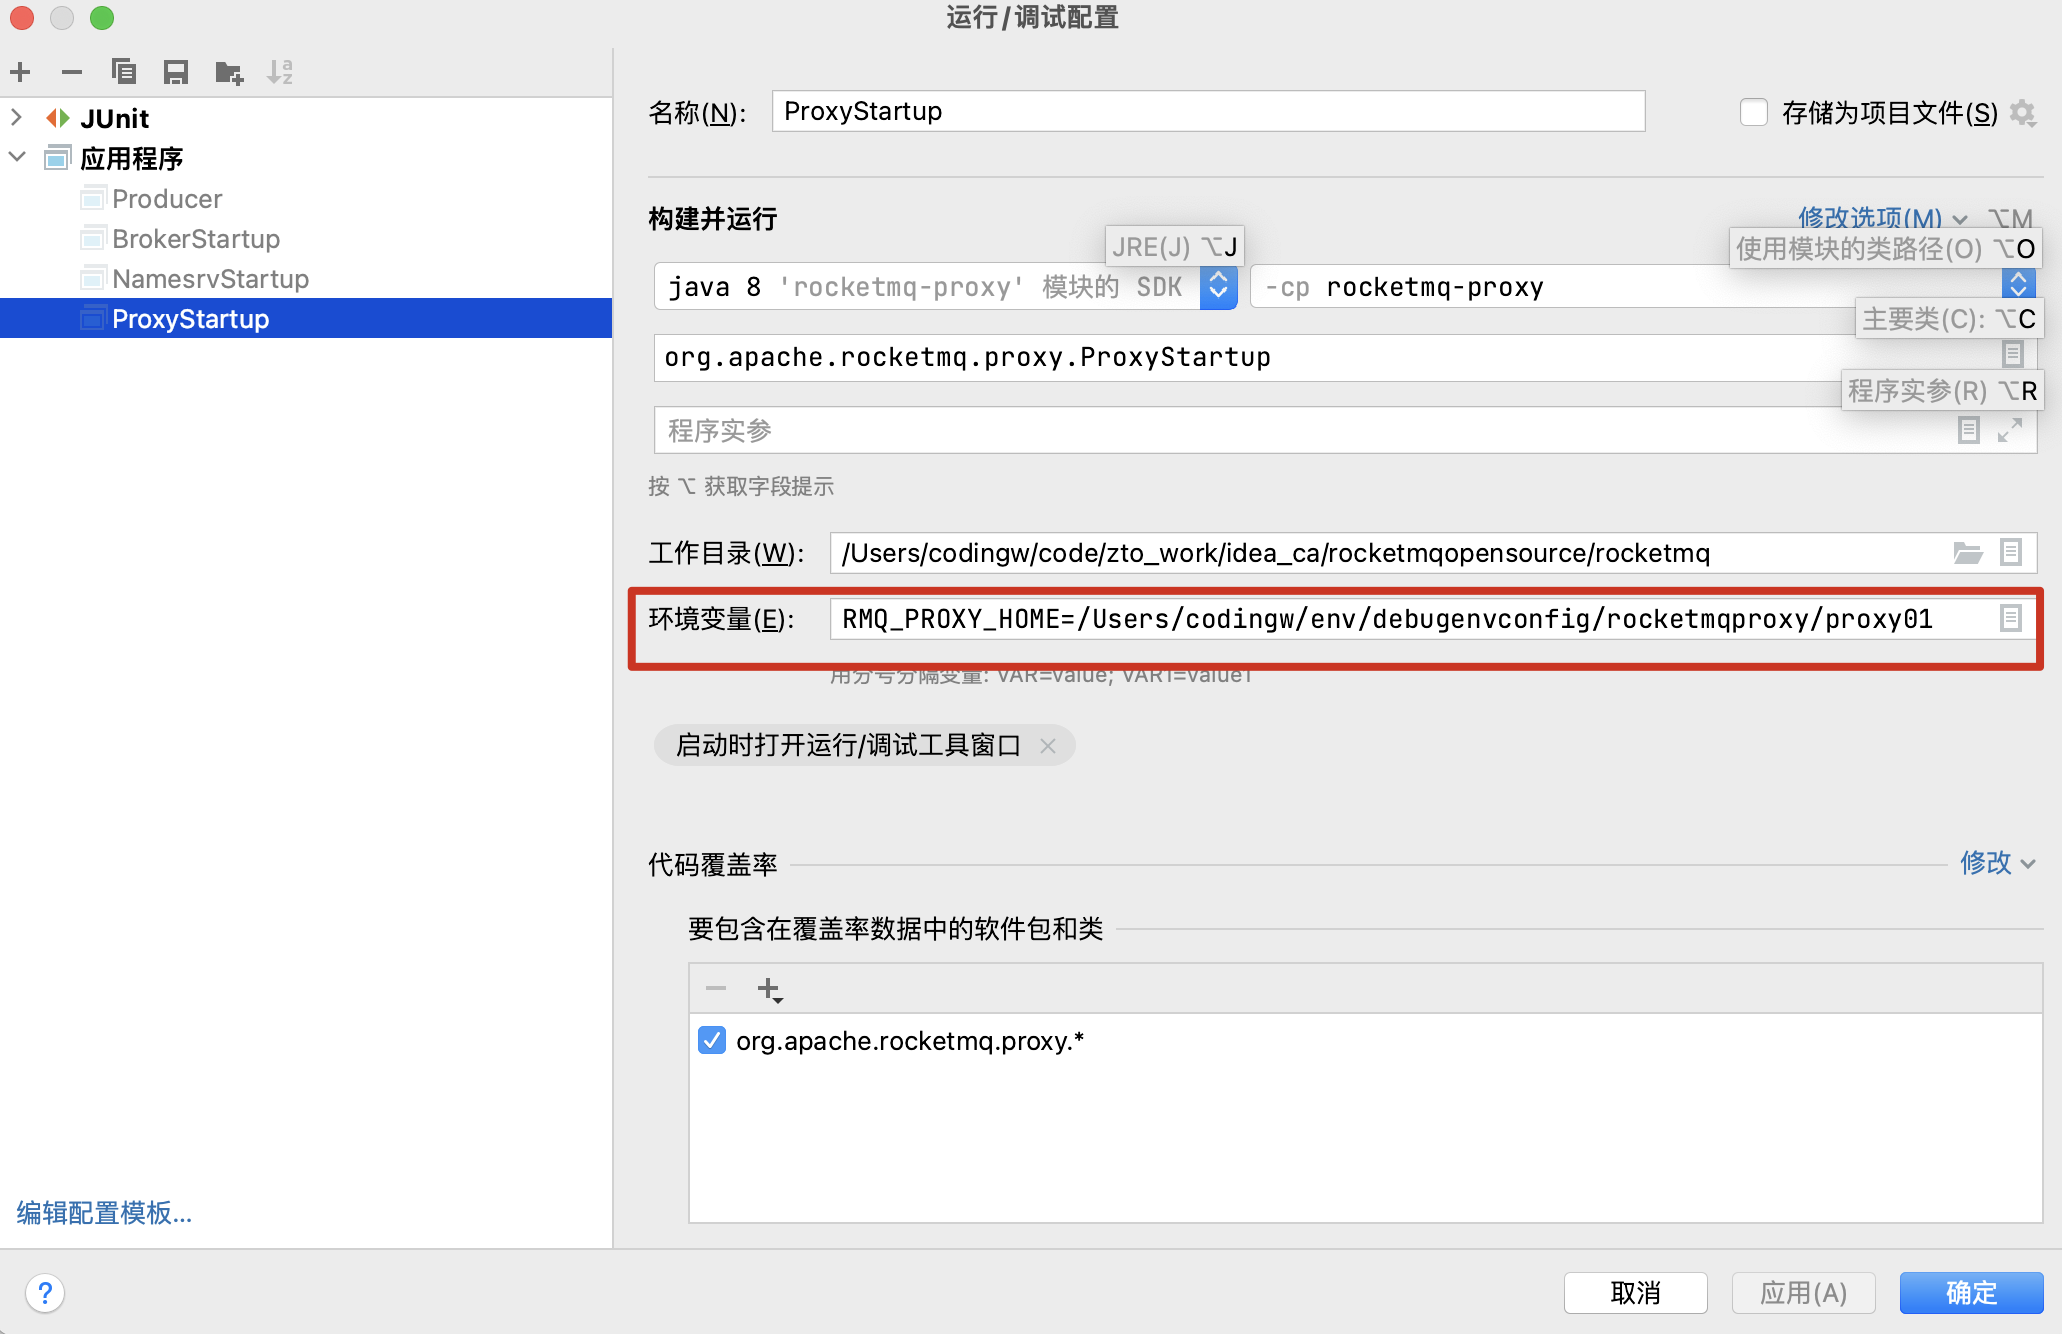
设置好环境变量RMQ_PROXY_HOME环境变量,直接启动,会抛出如下错误:

原因是RocketMQ Proxy在启动时会RMQ_PROXY_HOME加载日志文件,我们从源码模块中distribution中logback_proxy.xml拷贝到proxy主目录的conf文件夹下。
再次尝试启动,抛出如下错误:

需要再从源码模块中distribution中rmq-proxy.json拷贝到proxy主目录的conf文件夹下,启动成功如下所示:

那问题来了,rmq-proxy.json文件中的内容是多少呢?
{
  "rocketMQClusterName": "DefaultCluster"
}
那这个文件中又可以陪着哪些参数呢?这个目前无法从官方网站中获取,大家可以去查看org.apache.rocketmq.proxy.config.ProxyConfig,里面所有的属性都可以在这个文件中配置。
Nameserver、broker、Proxy都已经启动成功了,那我们如何发送消息呢?
由于RocketMQ 5.x引入了Proxy,原先的RocketMQ Client API 不能直接使用,RocketMQ官方提供了一套极简API,API的完整定义在Apache顶级开源项目rocketmq-apis(https://github.com/apache/rocketmq-apis),具体的定义如下图所示:

具体的实现在https://github.com/apache/rocketmq-clients,实现了cpp、golang、java、php、rust的实现。
接下来,我们使用一下java版本的客户端尝试发送一条消息,代码如下所示:
<dependency>
      <groupId>org.apache.rocketmq</groupId>
      <artifactId>rocketmq-client-apis</artifactId>
      <version>5.0.0</version>
    </dependency>

    <dependency>
      <groupId>org.apache.rocketmq</groupId>
      <artifactId>rocketmq-client-java</artifactId>
      <version>5.0.0</version>
    </dependency>

import org.apache.rocketmq.client.apis.ClientConfiguration;
import org.apache.rocketmq.client.apis.ClientServiceProvider;
import org.apache.rocketmq.client.apis.SessionCredentialsProvider;
import org.apache.rocketmq.client.apis.StaticSessionCredentialsProvider;
import org.apache.rocketmq.client.apis.message.Message;
import org.apache.rocketmq.client.apis.producer.Producer;
import org.apache.rocketmq.client.apis.producer.SendReceipt;

import java.nio.charset.StandardCharsets;
import java.time.Duration;
import java.util.concurrent.CompletableFuture;

public class RocketMQProxyTest {

    public static void main(String[] args) throws Exception {


        final ClientServiceProvider provider = ClientServiceProvider.loadService();

        // Credential provider is optional for client configuration.
        String accessKey = "yourAccessKey";
        String secretKey = "yourSecretKey";
        SessionCredentialsProvider sessionCredentialsProvider =
                new StaticSessionCredentialsProvider(accessKey, secretKey);

        String endpoints = "127.0.0.1:8081";
        ClientConfiguration clientConfiguration = ClientConfiguration.newBuilder()
                .setEndpoints(endpoints)
                .setCredentialProvider(sessionCredentialsProvider)
                .setRequestTimeout(Duration.ofSeconds(30))
                .build();
        String topic = "TopicTest";
        final Producer producer = provider.newProducerBuilder()
                .setClientConfiguration(clientConfiguration)
                // Set the topic name(s), which is optional. It makes producer could prefetch the topic route before
                // message publishing.
                .setTopics(topic)
                // May throw {@link ClientException} if the producer is not initialized.
                .build();
        // Define your message body.
        byte[] body = "This is a normal message for Apache RocketMQ".getBytes(StandardCharsets.UTF_8);
        String tag = "yourMessageTagA";


        final Message message = provider.newMessageBuilder()
                // Set topic for the current message.
                .setTopic(topic)
                // Message secondary classifier of message besides topic.
                .setTag(tag)
                // Key(s) of the message, another way to mark message besides message id.
                .setKeys("yourMessageKey-0e094a5f9d85")
                .setBody(body)
                .build();
        final CompletableFuture<SendReceipt> future = producer.sendAsync(message);
        future.whenComplete((sendReceipt, throwable) -> {
            if (null == throwable) {
                System.out.println("Send message successfully, messageId=" + sendReceipt.getMessageId());
            } else {
                System.out.println("Failed to send message");
            }
        });
        // Block to avoid exist of background threads.
        Thread.sleep(Long.MAX_VALUE);
        // Close the producer when you don't need it anymore.
        producer.close();
    }
}
运行结果:
Send message successfully, messageId=01C6A0F34F62CB328C03EFF3EF00000000
运行成功,在这里给大家留一个作业,那消息消费如何写呢?
原文首发:https://www.codingw.net/Article?id=783
一键三连(关注、点赞、留言)是对我最大的鼓励。
各位技术朋友们,我是《RocketMQ技术内幕》一书作者,CSDN2020博客之星TOP2,热衷于中间件领域的技术分享,维护「中间件兴趣圈」公众号,旨在成体系剖析Java主流中间件,构建完备的分布式架构体系,欢迎大家大家关注我,回复「专栏」可获取15个专栏;回复「PDF」可获取海量学习资料,回复「加群」可以拉你入技术交流群,零距离与BAT大厂的大神交流。


