由于项目的需要提取图像之中的一个接近于竖直的物体,一般的方法是进行图像分割,分割方式使用什么OTSU方式以及hsv方法等等。但是项目中使用的相机是黑白相机,会受到一定的限制。因此想到的是使用线条提取方式。线条提取方式之中最好的方法是使用canny算法,但是这里不能够将接近竖直特征进行提取,因此,此处使用了Prewitt算子进行提取,但是只用这个算法,轮廓提取不出来,就结合了一下canny算子。下面是我的思路,感觉实现过程比较麻烦,但是居然实现了[苦笑]!!!!
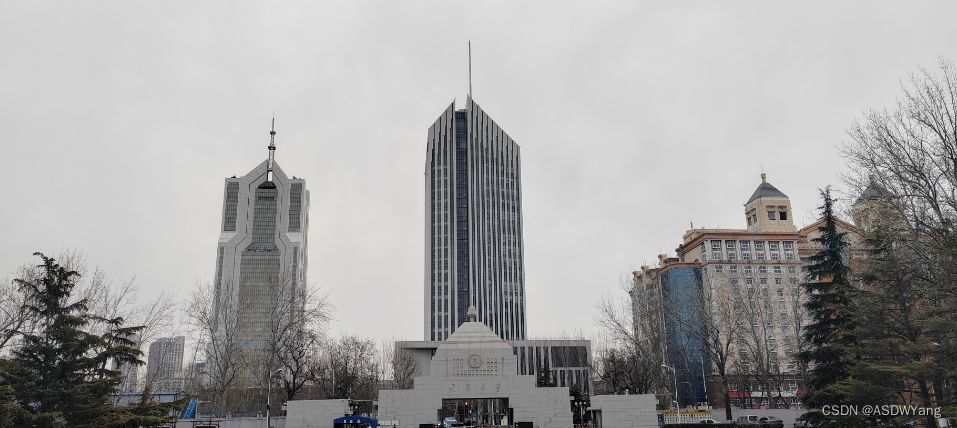
本次测试的案例是使用校门口的一个图片,图中存在很多的干扰,如下图所示
#include <opencv2/opencv.hpp>
#include <opencv2/highgui/highgui.hpp>
#include <iostream>
#include <opencv2/core.hpp>
#include <opencv2/highgui.hpp>
#include <opencv2/imgproc.hpp>
using namespace cv;
using namespace std;


void getPrewitt_oper(cv::Mat& getPrewitt_horizontal, cv::Mat& getPrewitt_vertical, cv::Mat& getPrewitt_Diagonal1, cv::Mat& getPrewitt_Diagonal2) {
	//水平方向
	getPrewitt_horizontal = (cv::Mat_<float>(3, 3) << -1, -1, -1, 0, 0, 0, 1, 1, 1);
	//垂直方向
	getPrewitt_vertical = (cv::Mat_<float>(3, 3) << -1, 0, 1, -1, 0, 1, -1, 0, 1);
	//对角135°
	getPrewitt_Diagonal1 = (cv::Mat_<float>(3, 3) << 0, 1, 1, -1, 0, 1, -1, -1, 0);
	//对角45°
	getPrewitt_Diagonal2 = (cv::Mat_<float>(3, 3) << -1, -1, 0, -1, 0, 1, 0, 1, 1);

	//逆时针反转180°得到卷积核
	cv::flip(getPrewitt_horizontal, getPrewitt_horizontal, -1);
	cv::flip(getPrewitt_vertical, getPrewitt_vertical, -1);
	cv::flip(getPrewitt_Diagonal1, getPrewitt_Diagonal1, -1);
	cv::flip(getPrewitt_Diagonal2, getPrewitt_Diagonal2, -1);
}

void edge_Prewitt(cv::Mat& src, cv::Mat& dst1, cv::Mat& dst2, cv::Mat& dst3, cv::Mat& dst4, cv::Mat& dst, int ddepth, double delta = 0, int borderType = cv::BORDER_DEFAULT) {
	//获取Prewitt算子
	cv::Mat getPrewitt_horizontal;
	cv::Mat getPrewitt_vertical;
	cv::Mat getPrewitt_Diagonal1;
	cv::Mat getPrewitt_Diagonal2;
	getPrewitt_oper(getPrewitt_horizontal, getPrewitt_vertical, getPrewitt_Diagonal1, getPrewitt_Diagonal2);

	//卷积得到水平方向边缘
	cv::filter2D(src, dst1, ddepth, getPrewitt_horizontal, cv::Point(-1, -1), delta, borderType);

	//卷积得到4垂直方向边缘
	cv::filter2D(src, dst2, ddepth, getPrewitt_vertical, cv::Point(-1, -1), delta, borderType);

	//卷积得到45°方向边缘
	cv::filter2D(src, dst3, ddepth, getPrewitt_Diagonal1, cv::Point(-1, -1), delta, borderType);

	//卷积得到135°方向边缘
	cv::filter2D(src, dst4, ddepth, getPrewitt_Diagonal2, cv::Point(-1, -1), delta, borderType);

	//边缘强度(近似)
	cv::convertScaleAbs(dst1, dst1); //求绝对值并转为无符号8位图
	cv::convertScaleAbs(dst2, dst2);

	cv::convertScaleAbs(dst3, dst3); //求绝对值并转为无符号8位图
	cv::convertScaleAbs(dst4, dst4);
	dst = dst1 + dst2;

}

//数组从大到小排序
void reserve(int x[], int n) {
	int i, j, temp;
	for (i = 0; i < n - 1; i++) {     //一共n个元素,则需要比较n-1次
		for (j = 0; j < n - 1 - i; j++) {     //每一个元素需要比较的次数
			if (x[i] < x[i + j + 1]) {
				temp = x[i];
				x[i] = x[i + j + 1];
				x[i + j + 1] = temp;
			}
		}
	}
}


int main()
{
	cv::Mat src = cv::imread("楼.jpg");
	if (src.empty()) {
		return -1;
	}
	cout << "??" << endl;
	if (src.channels() > 1) cv::cvtColor(src, src, CV_RGB2GRAY);
	cv::Mat dst, dst1, dst2, dst3, dst4, dst5;

	Mat src1 = cv::imread("楼.jpg");
	Mat src2 = cv::imread("楼.jpg");

	//medianBlur(src, src, 5);  //均值滤波
	GaussianBlur(src, src, Size(5, 5), 0); //高斯滤波
	cout << "??" << endl;

	//注意:要采用CV_32F,因为有些地方卷积后为负数,若用8位无符号,则会导致这些地方为0
	edge_Prewitt(src, dst1, dst2, dst3, dst4, dst, CV_32F);

	cv::namedWindow("垂直边缘", CV_WINDOW_NORMAL);
	imshow("垂直边缘", dst2);
	cout << "??" << endl;


	//获取结构
	cv::Mat element1 = cv::getStructuringElement(cv::MORPH_RECT, cv::Size(3, 3));

	Mat out1;
	//进行形态学开运算操作
	morphologyEx(dst2, out1, MORPH_OPEN, element1);//形态学开运算
	cv::namedWindow("xingtai", CV_WINDOW_NORMAL);
	imshow("xingtai", out1);


	//第二次进行形态学操作
	edge_Prewitt(dst2, dst1, out1, dst3, dst4, dst, CV_32F);
	cv::namedWindow("垂直边缘1", CV_WINDOW_NORMAL);
	imshow("垂直边缘1", out1);
	cout << "??" << endl;

	morphologyEx(out1, out1, MORPH_OPEN, element1);//形态学开运算
	cv::namedWindow("xingtai1", CV_WINDOW_NORMAL);
	imshow("xingtai1", out1);


	//获取结构
	cv::Mat element2 = cv::getStructuringElement(cv::MORPH_ELLIPSE, cv::Size(10, 10));

	Mat out2;
	//进行形态学闭运算操作
	morphologyEx(out1, out2, MORPH_CLOSE, element2);//形态学开运算
	cv::namedWindow("xingtai2", CV_WINDOW_NORMAL);
	imshow("xingtai2", out2);
	imwrite("xingtai2.jpg", out2);

	/*
	//膨胀运算,将细小缝隙填补上,非必要
	Mat kernel = getStructuringElement(0, Size(3, 3));
	dilate(out2, dst2, kernel);
	cv::namedWindow("膨胀", CV_WINDOW_NORMAL);
	imshow("膨胀", dst2);
	*/

	cv::threshold(out2, dst2, 5, 255, cv::THRESH_BINARY);
	cv::namedWindow("二值化", CV_WINDOW_NORMAL);
	imshow("二值化", dst2);

	cv::threshold(dst2, dst2, 5, 255, cv::THRESH_BINARY_INV);
	cv::namedWindow("反二值化", CV_WINDOW_NORMAL);
	imshow("反二值化", dst2);


	//进行形态学闭运算操作
	morphologyEx(dst2, out2, MORPH_CLOSE, element2);//形态学开运算
	cv::namedWindow("xingtai3", CV_WINDOW_NORMAL);
	imshow("xingtai3", out2);
	imwrite("xingtai3.jpg", out2);

	/*
	cv::threshold(dst2, dst2, 5, 255, cv::THRESH_BINARY);
	cv::namedWindow("反二值化", CV_WINDOW_NORMAL);
	imshow("反二值化", dst2);
	imwrite("反二值化.jpg", dst2);
	*/

	/*
	//膨胀运算,将细小缝隙填补上,非必要
    Mat kernel = getStructuringElement(0, Size(5, 5));
	dilate(out2, out2, kernel);
	cv::namedWindow("膨胀1", CV_WINDOW_NORMAL);
	imshow("膨胀1", out2);*/

	Canny(out2, dst2, 5, 10);
	cv::namedWindow("Canny", CV_WINDOW_NORMAL);
	imshow("Canny", dst2);
	imwrite("Canny.jpg", dst2);


	vector<Vec4i> lines;
	HoughLinesP(dst2, lines, 1, CV_PI / 180, 50, 200, 30);
	int Length[100] = {0};//存放直线长度
	for (size_t i = 0; i < lines.size(); i++)
	{
		Vec4i I = lines[i];
		double x1 = I[0];
		double y1 = I[1];
		double x2 = I[2];
		double y2 = I[3];

		//筛选满足条件的点
		if (abs(x1 - x2) + abs(y1 - y2) > 50)
		{
			Length[i] = sqrt( (x1 - x2)*(x1 - x2) + (y1 - y2) * (y1 - y2));
			//将满足条件的点画出
			line(src1, Point2d(x1, y1), Point2d(x2, y2), Scalar(0, 255, 255), 2);

			cout << " " << "(" << x1 << "," << y1 << ")" << " " << "(" << x2 << "," << y2 << ")" << endl;
			//line(canny, Point2d(x1, y1), Point2d(x2, y2), Scalar(0, 255, 255), 2);
		}
	}

	Mat imgShow;
	imgShow = src1;
	resize(imgShow, imgShow, Size(imgShow.cols / 4, imgShow.rows / 4));
	imshow("imgShow", imgShow);
	imwrite("shuchu.png", src1);


	reserve(Length, 100);
	for (int i = 0; i < 100; i++) {
		cout << "长度"<<Length[i] << endl;   //输出排序后的数组元素
	}

	for (size_t i = 0; i < lines.size(); i++)
	{
		Vec4i I = lines[i];
		double x1 = I[0];
		double y1 = I[1];
		double x2 = I[2];
		double y2 = I[3];
		cout << "sdjk" << endl;
		cout << int(sqrt((x1 - x2)*(x1 - x2) + (y1 - y2) * (y1 - y2))) << endl;
		//筛选满足条件的点
		if ((int(sqrt((x1 - x2)*(x1 - x2) + (y1 - y2) * (y1 - y2))) == Length[0] ) || (int(sqrt((x1 - x2)*(x1 - x2) + (y1 - y2) * (y1 - y2))) == Length[1]))
		{

			//将满足条件的点画出
			line(src2, Point2d(x1, y1), Point2d(x2, y2), Scalar(0, 255, 255), 2);

			cout << "djfkljsa " << "(" << x1 << "," << y1 << ")" << " " << "(" << x2 << "," << y2 << ")" << endl;
			//line(canny, Point2d(x1, y1), Point2d(x2, y2), Scalar(0, 255, 255), 2);
		}
	}

	imgShow = src2;
	resize(imgShow, imgShow, Size(imgShow.cols / 4, imgShow.rows / 4));
	imshow("imgShow2", imgShow);
	imwrite("shuchu2.png", src2);


	waitKey(0);
	return 0;
}
调试过程:本次在进行调试过程之中进行了两次垂直检测迭代,进一步去排除水平线的干扰.使用形态学操作去除图片之中的空洞等等.
第一次进行垂直检测,注意这个地方只能够用特定的算子进行垂直检测,别的算子没有这个效果.
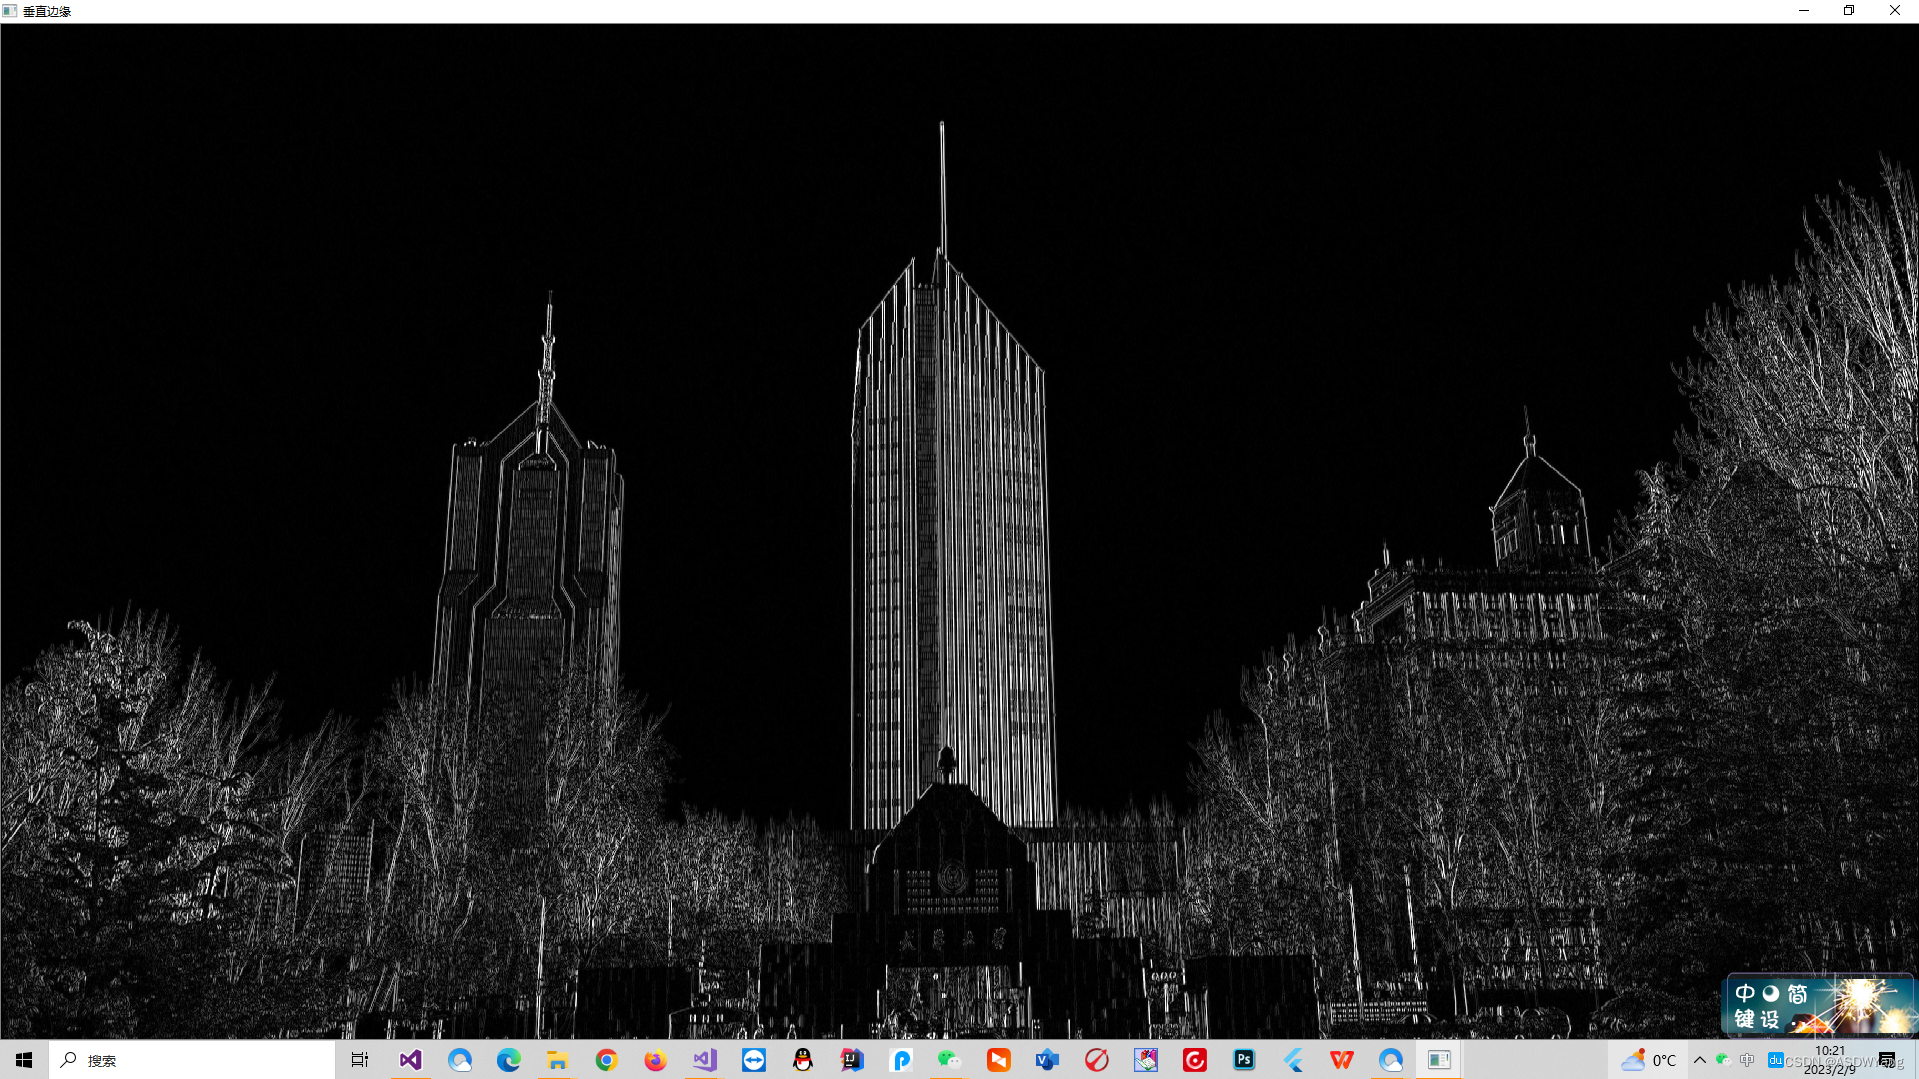
为了减少图片之中白色空洞的干扰,使用开操作.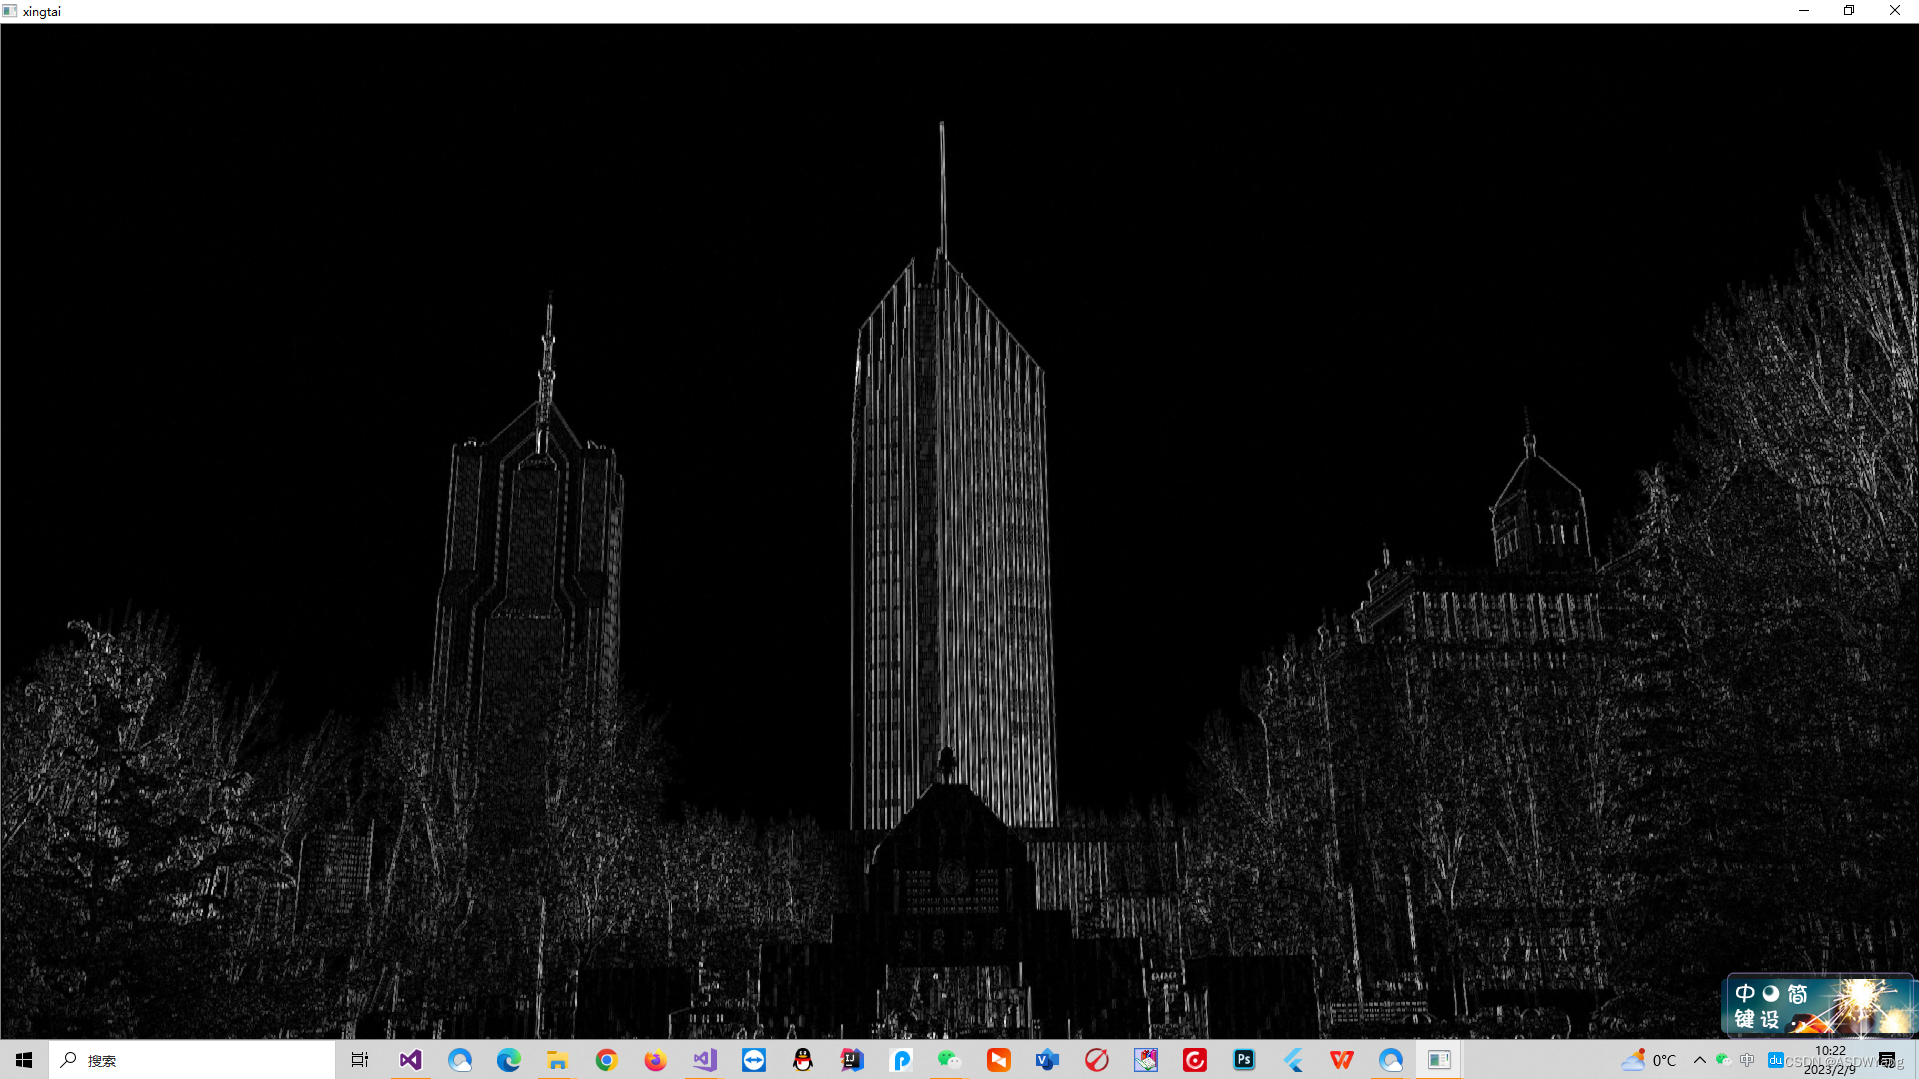
重复上述操作,进一步排除水平线的干扰.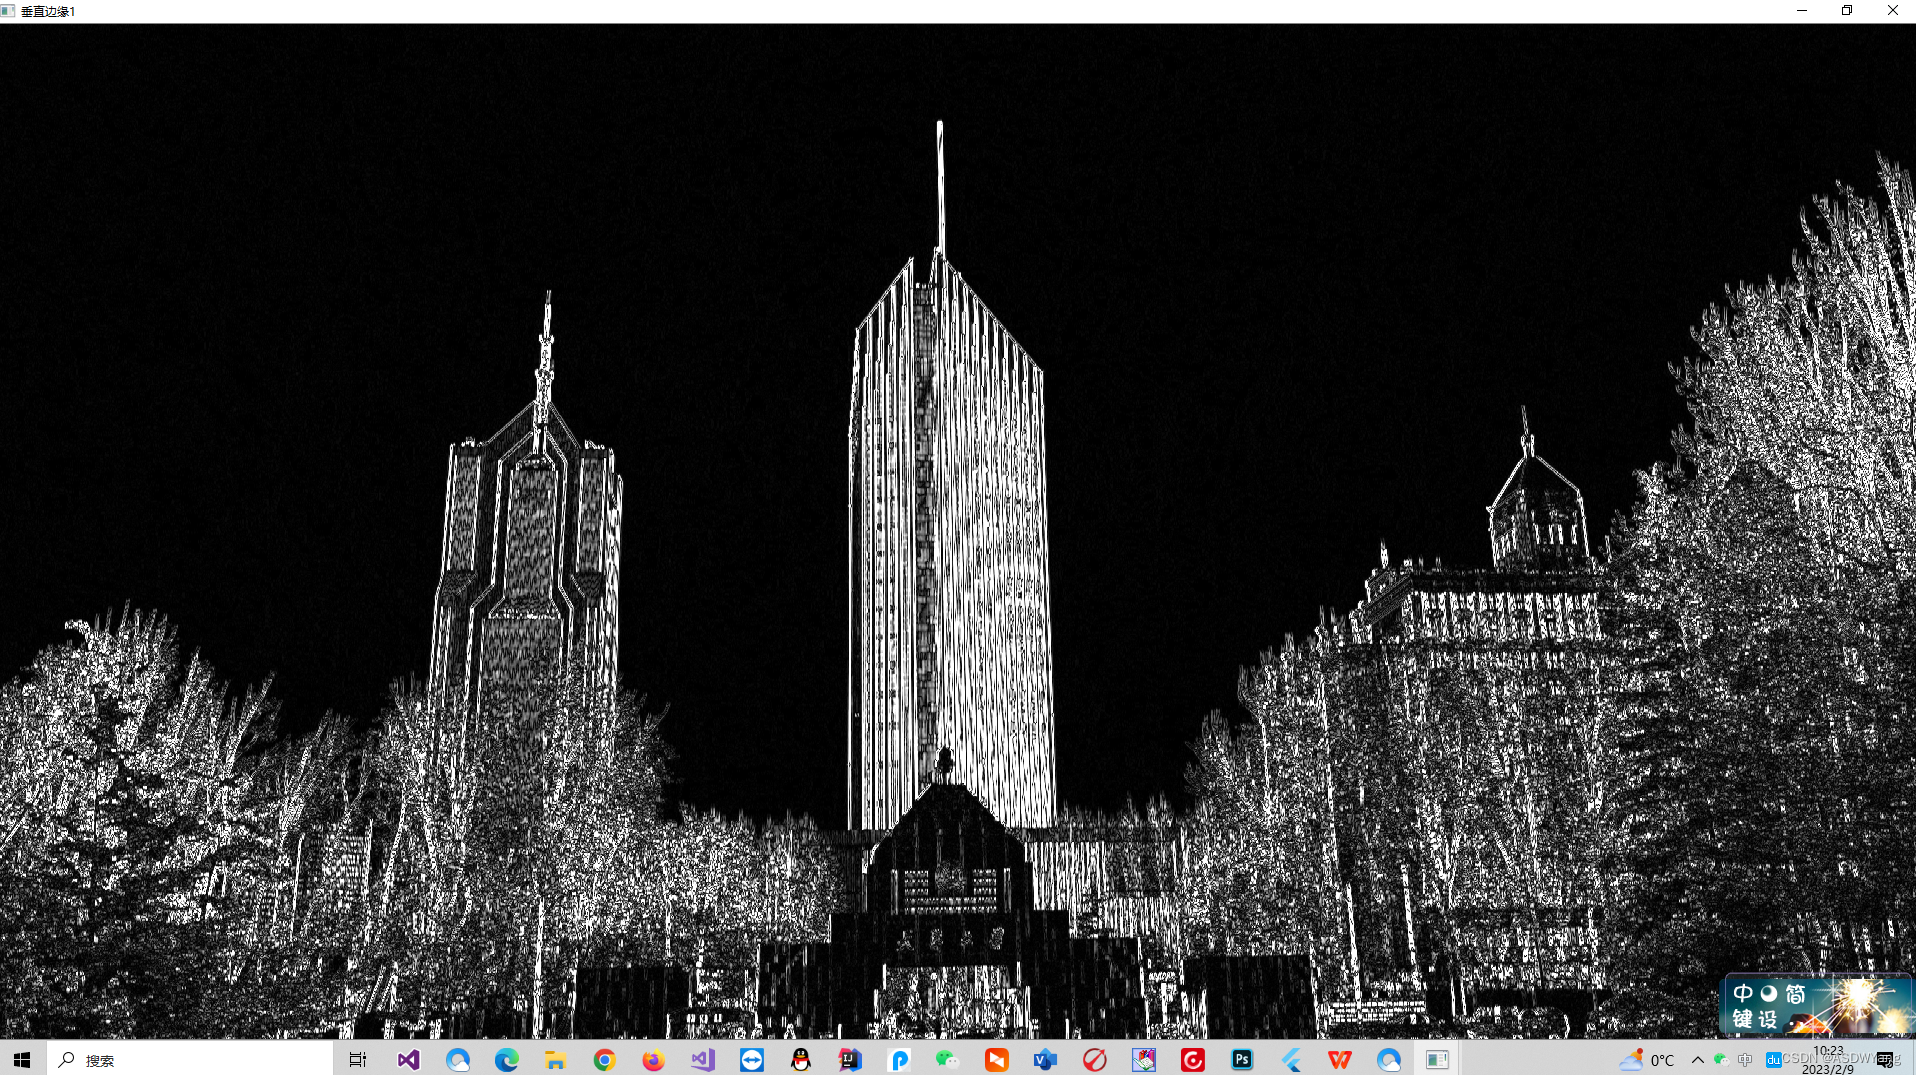
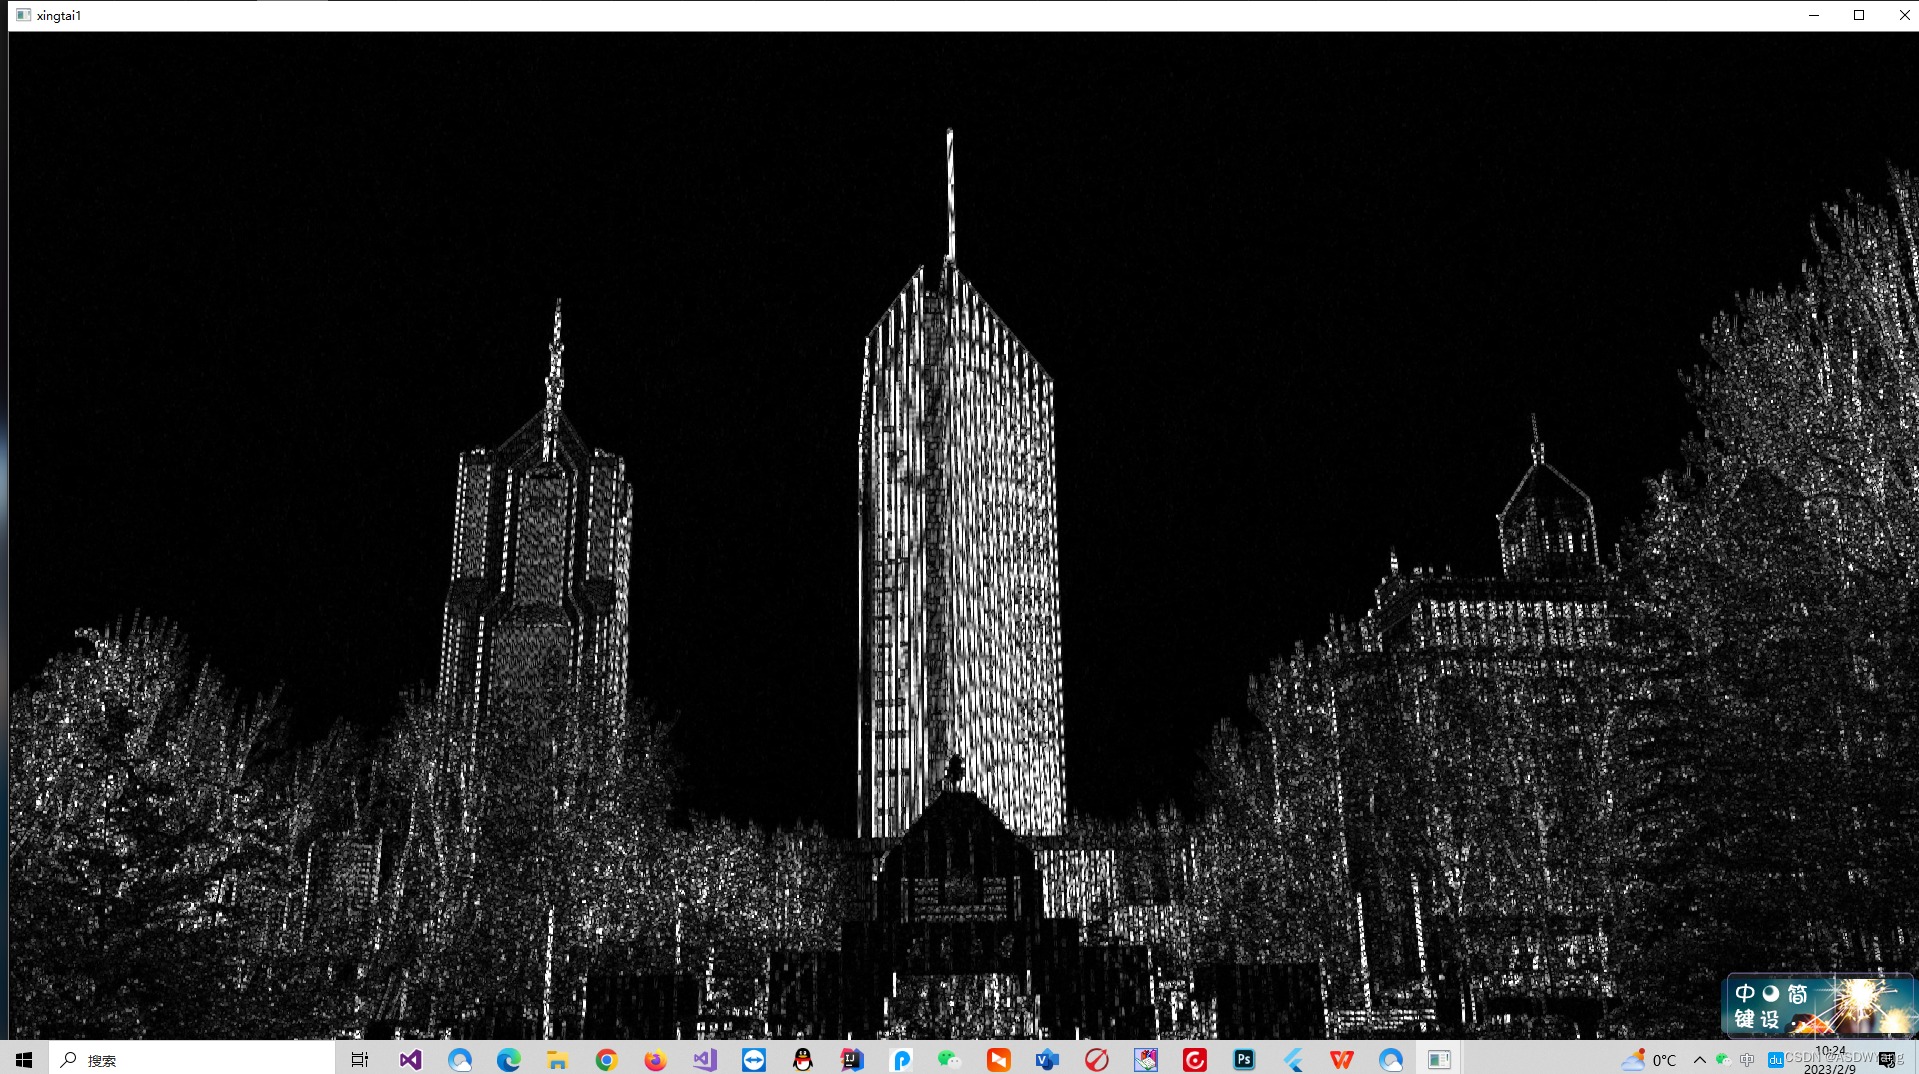
接下来是进行闭操作,将图中的白色线条尽可能连在一起,上图之中的楼左侧的线有一些断开了.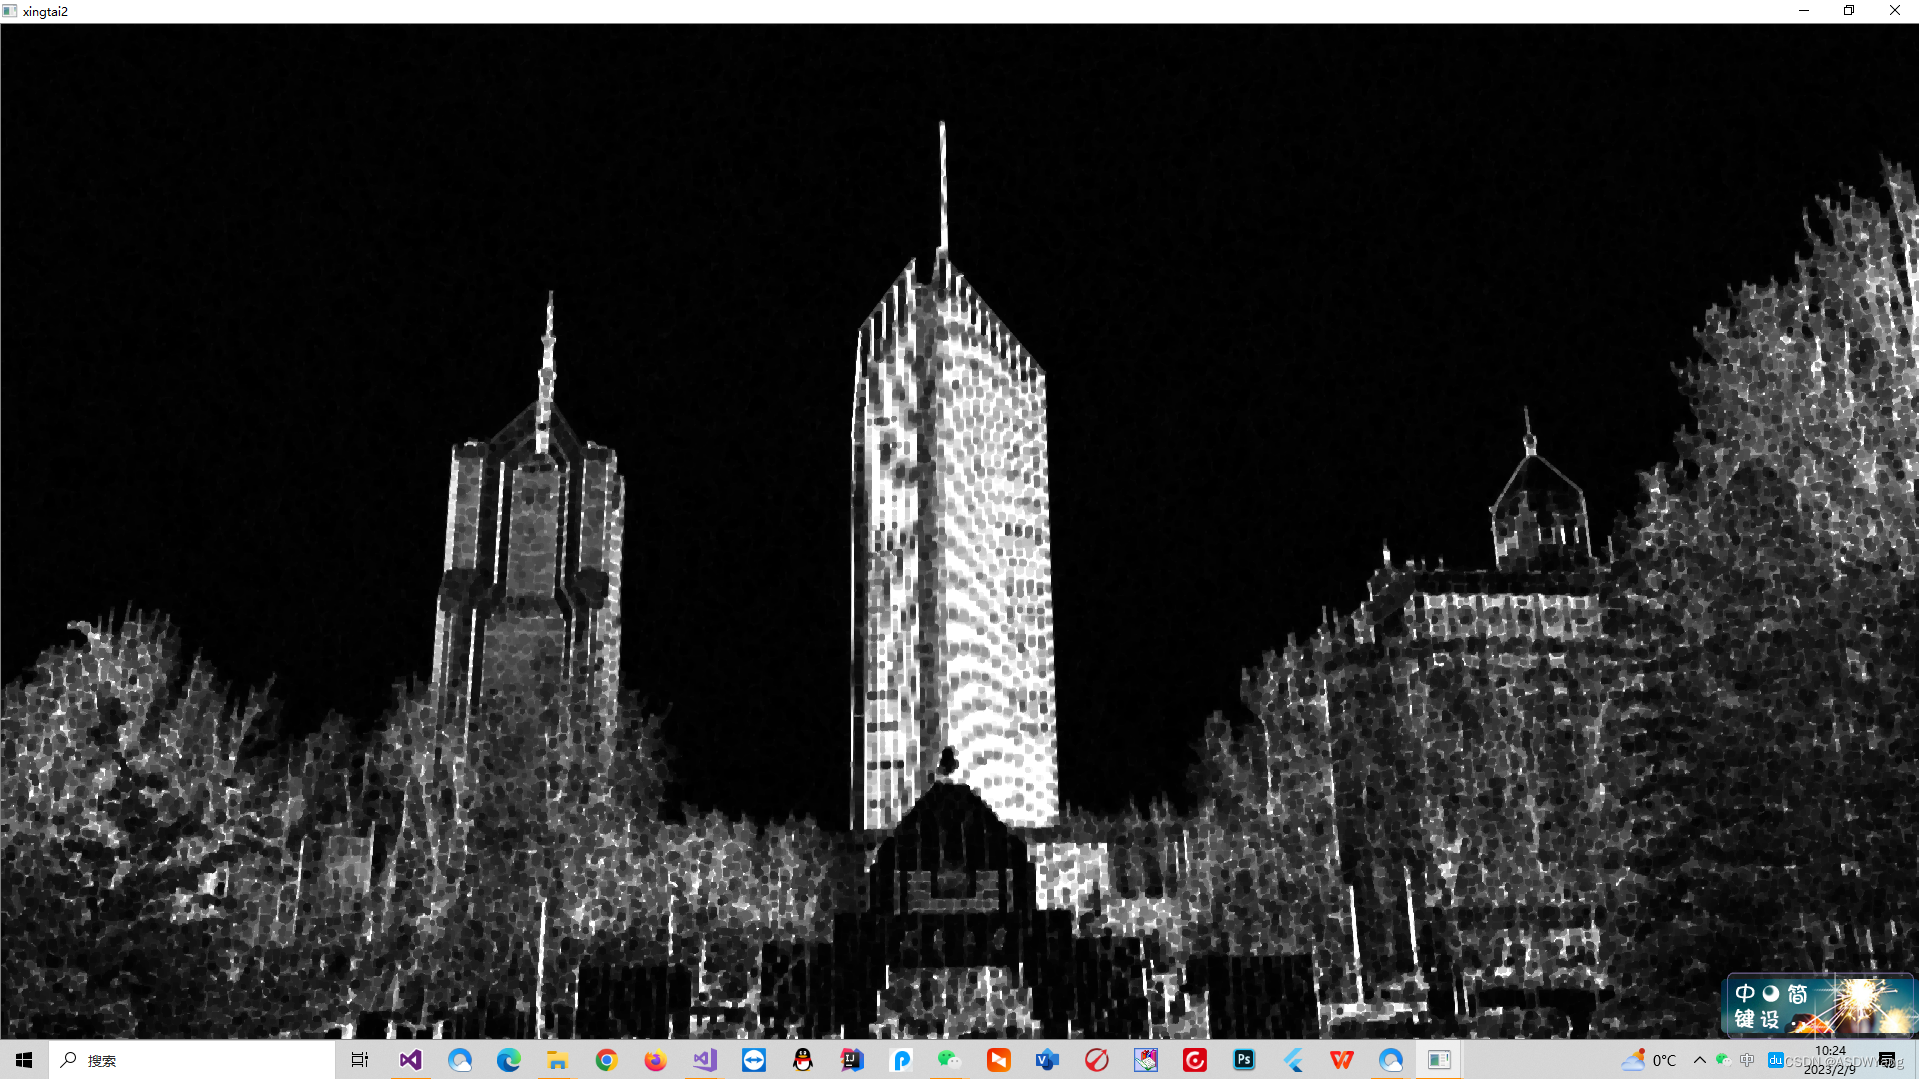
闭操作的缺陷是会产生小白点点.如下二值化过程
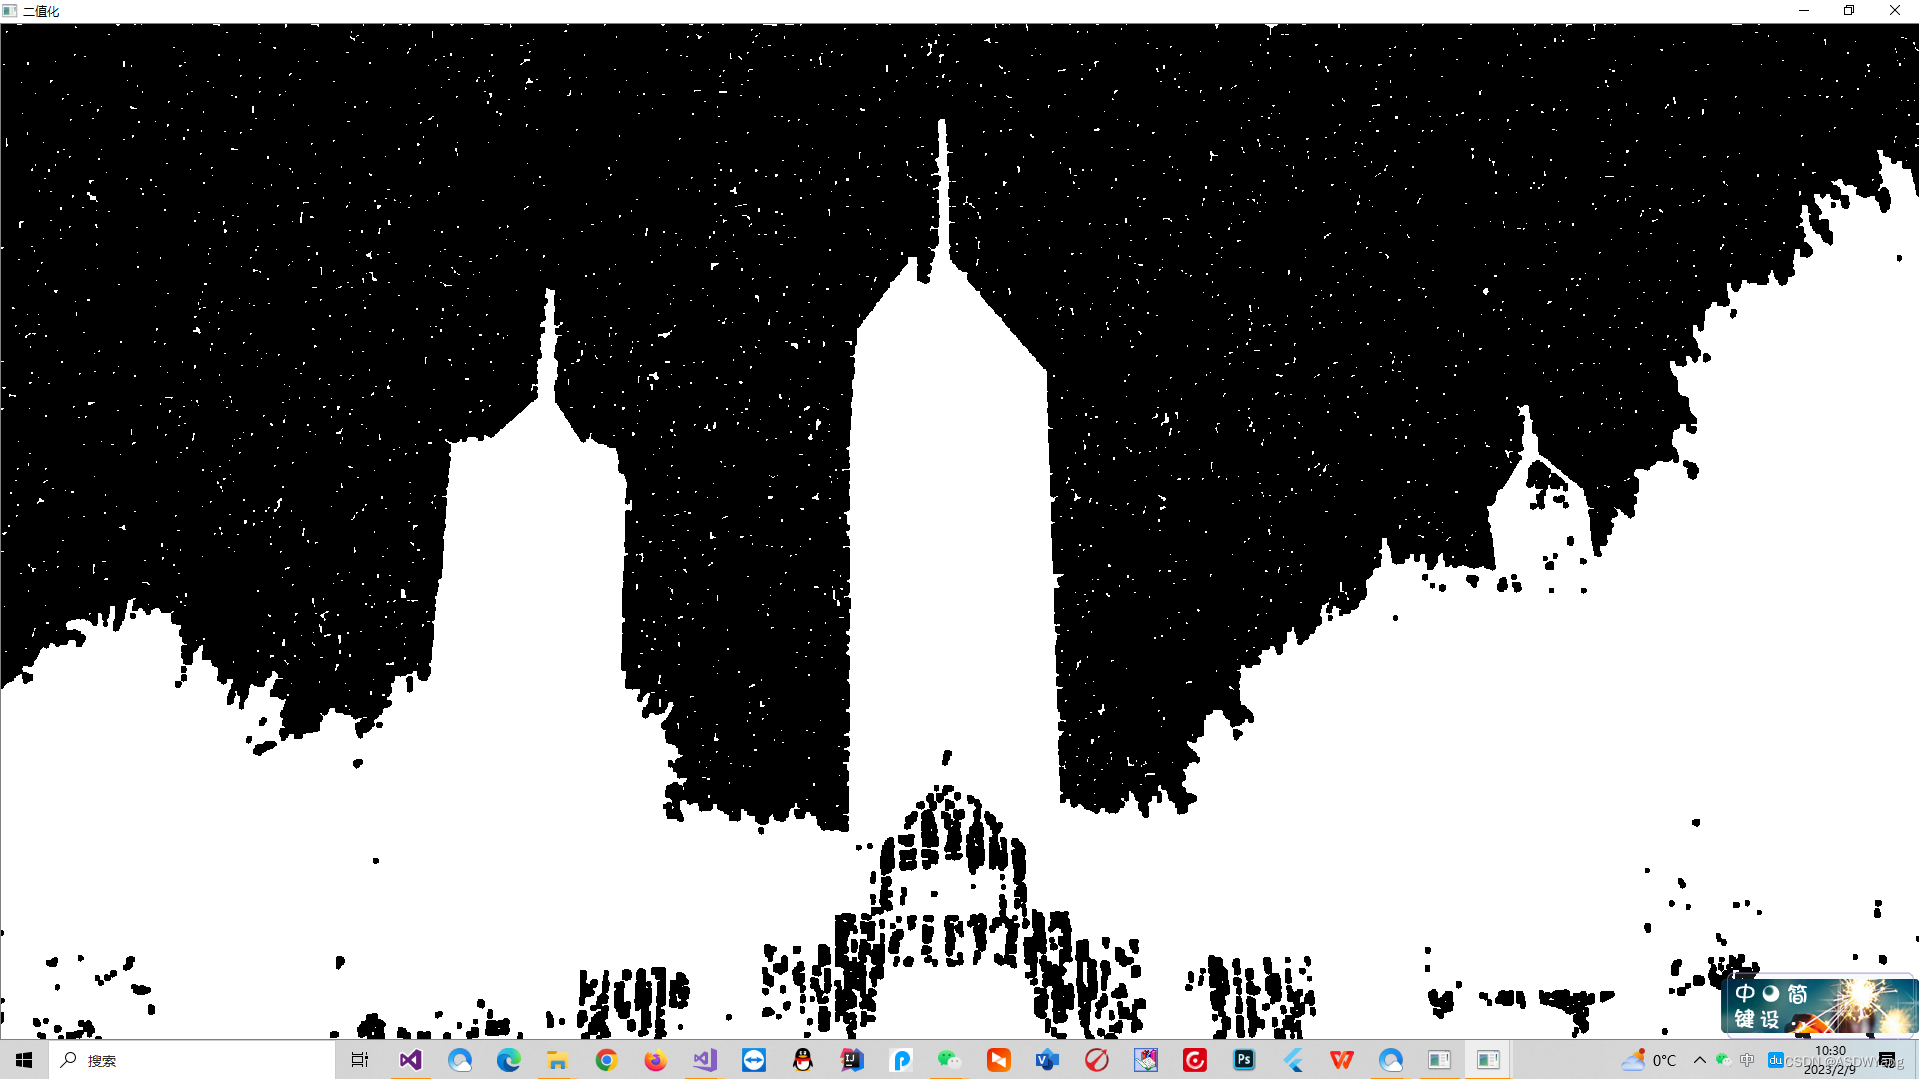
再进行一次反二值化,因为我不会用别的算子结合霍夫直线检测检测出来直线,只能转回去进行操作.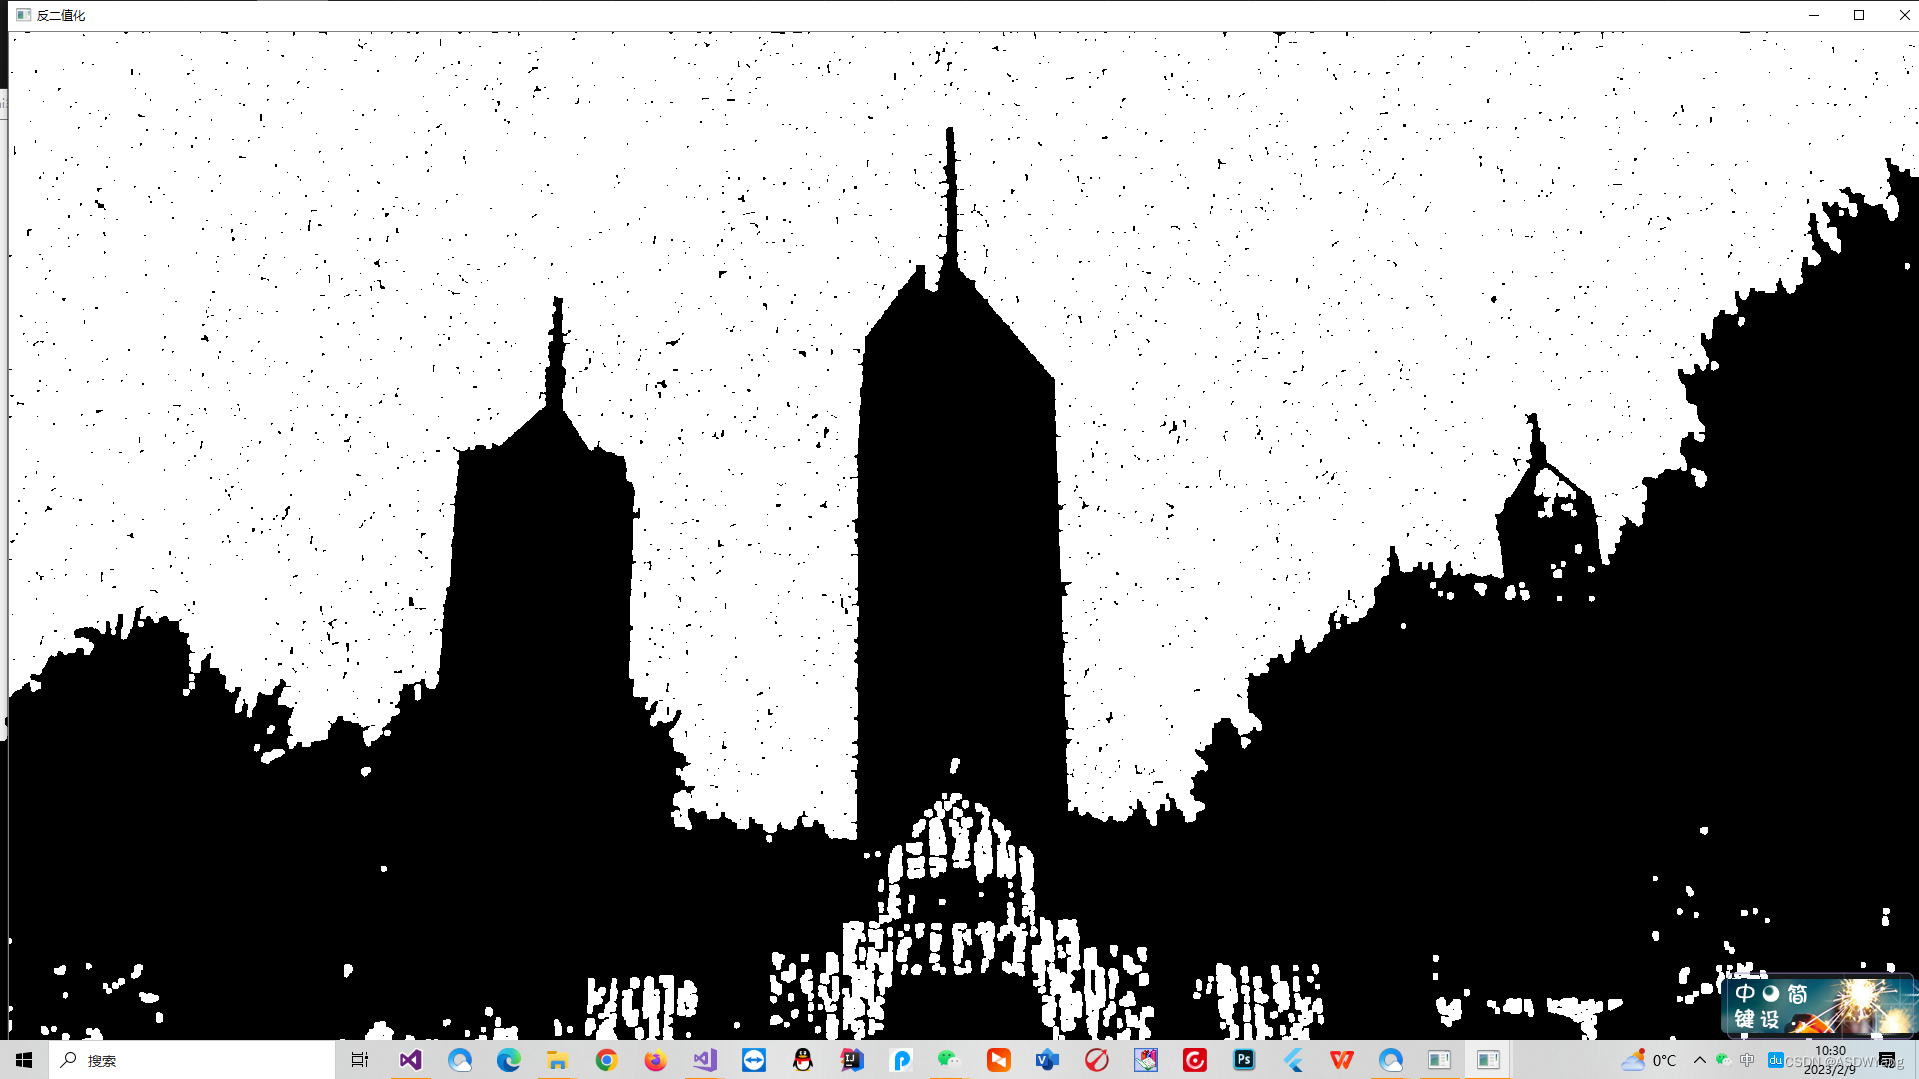
形态学操作,去除白点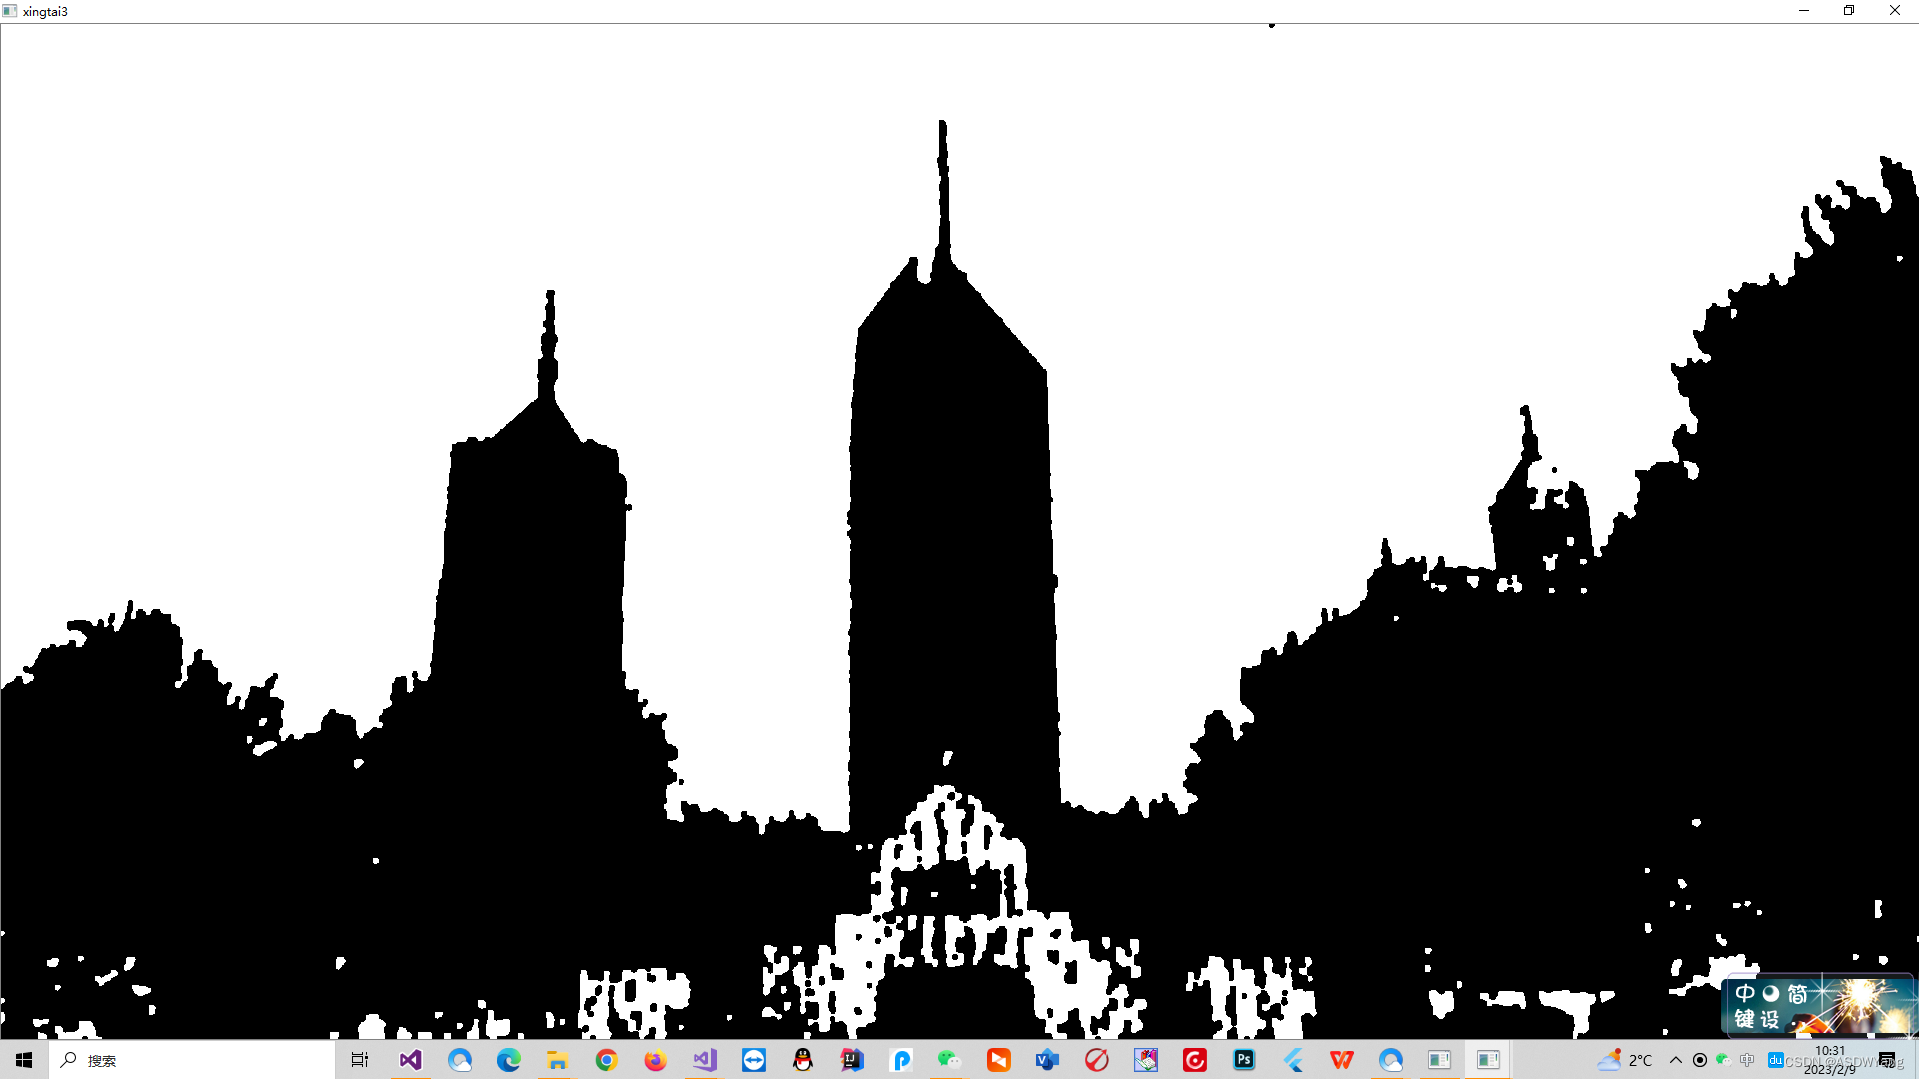
canny一下检测出来轮廓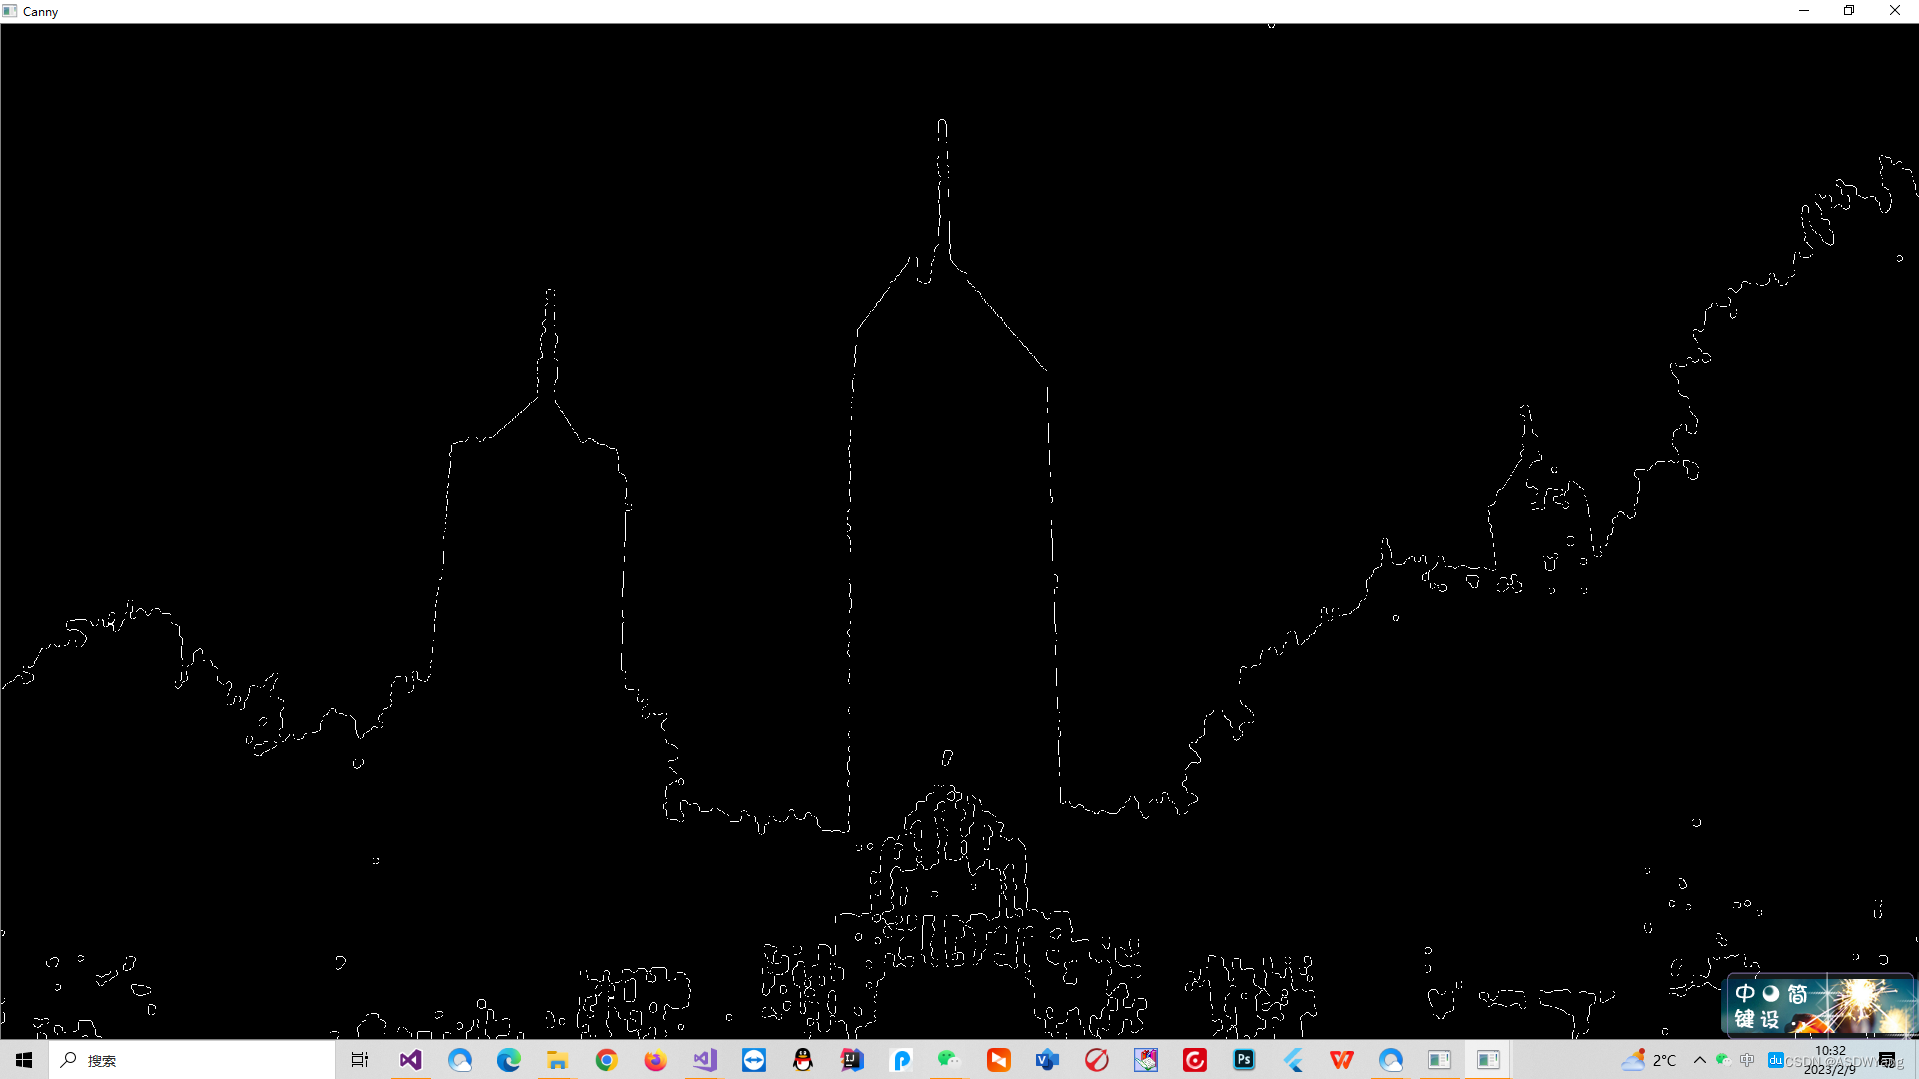
显示全部直线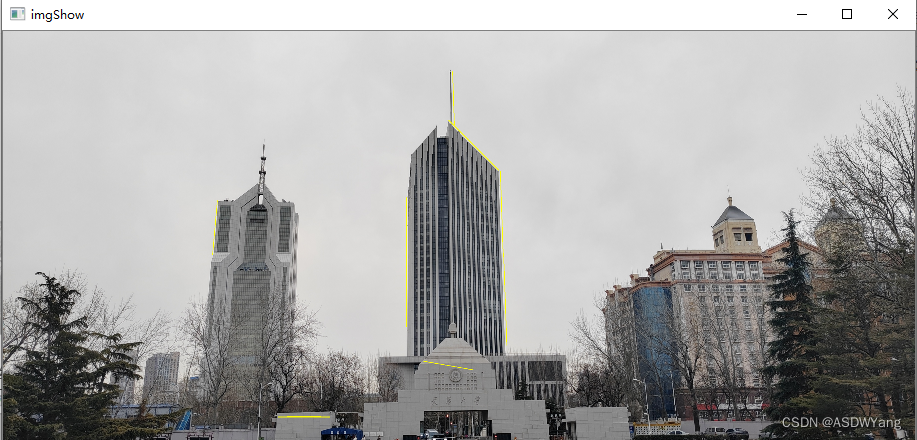
直线提取,我的方式是提取最长的两段直线。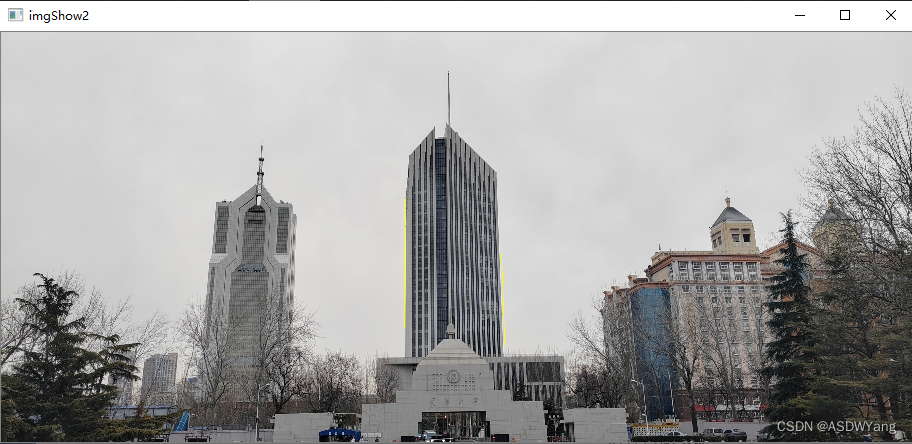
在上述操作完成之后,得到了物体的粗定位直线。
但是上面的算法还是存在相应的问题,换了一个别的图像可能就检测的不准。发现问题就是出在了二值化的过程。
为了修正上方的算法的失败,使用提取外部轮廓的方式进行求取,将代码改了改。
#include <opencv2/opencv.hpp>
#include <opencv2/highgui/highgui.hpp>
#include <iostream>
#include <opencv2/core.hpp>
#include <opencv2/highgui.hpp>
#include <opencv2/imgproc.hpp>
using namespace cv;
using namespace std;


void getPrewitt_oper(cv::Mat& getPrewitt_horizontal, cv::Mat& getPrewitt_vertical, cv::Mat& getPrewitt_Diagonal1, cv::Mat& getPrewitt_Diagonal2) {
	//水平方向
	getPrewitt_horizontal = (cv::Mat_<float>(3, 3) << -1, -1, -1, 0, 0, 0, 1, 1, 1);
	//垂直方向
	getPrewitt_vertical = (cv::Mat_<float>(3, 3) << -1, 0, 1, -1, 0, 1, -1, 0, 1);
	//对角135°
	getPrewitt_Diagonal1 = (cv::Mat_<float>(3, 3) << 0, 1, 1, -1, 0, 1, -1, -1, 0);
	//对角45°
	getPrewitt_Diagonal2 = (cv::Mat_<float>(3, 3) << -1, -1, 0, -1, 0, 1, 0, 1, 1);

	//逆时针反转180°得到卷积核
	cv::flip(getPrewitt_horizontal, getPrewitt_horizontal, -1);
	cv::flip(getPrewitt_vertical, getPrewitt_vertical, -1);
	cv::flip(getPrewitt_Diagonal1, getPrewitt_Diagonal1, -1);
	cv::flip(getPrewitt_Diagonal2, getPrewitt_Diagonal2, -1);
}

void edge_Prewitt(cv::Mat& src, cv::Mat& dst1, cv::Mat& dst2, cv::Mat& dst3, cv::Mat& dst4, cv::Mat& dst, int ddepth, double delta = 0, int borderType = cv::BORDER_DEFAULT) {
	//获取Prewitt算子
	cv::Mat getPrewitt_horizontal;
	cv::Mat getPrewitt_vertical;
	cv::Mat getPrewitt_Diagonal1;
	cv::Mat getPrewitt_Diagonal2;
	getPrewitt_oper(getPrewitt_horizontal, getPrewitt_vertical, getPrewitt_Diagonal1, getPrewitt_Diagonal2);

	//卷积得到水平方向边缘
	cv::filter2D(src, dst1, ddepth, getPrewitt_horizontal, cv::Point(-1, -1), delta, borderType);

	//卷积得到4垂直方向边缘
	cv::filter2D(src, dst2, ddepth, getPrewitt_vertical, cv::Point(-1, -1), delta, borderType);

	//卷积得到45°方向边缘
	cv::filter2D(src, dst3, ddepth, getPrewitt_Diagonal1, cv::Point(-1, -1), delta, borderType);

	//卷积得到135°方向边缘
	cv::filter2D(src, dst4, ddepth, getPrewitt_Diagonal2, cv::Point(-1, -1), delta, borderType);

	//边缘强度(近似)
	cv::convertScaleAbs(dst1, dst1); //求绝对值并转为无符号8位图
	cv::convertScaleAbs(dst2, dst2);

	cv::convertScaleAbs(dst3, dst3); //求绝对值并转为无符号8位图
	cv::convertScaleAbs(dst4, dst4);
	dst = dst1 + dst2;

}

//数组从大到小排序
void reserve(int x[], int n) {
	int i, j, temp;
	for (i = 0; i < n - 1; i++) {     //一共n个元素,则需要比较n-1次
		for (j = 0; j < n - 1 - i; j++) {     //每一个元素需要比较的次数
			if (x[i] < x[i + j + 1]) {
				temp = x[i];
				x[i] = x[i + j + 1];
				x[i + j + 1] = temp;
			}
		}
	}
}


int main()
{
	cv::Mat src = cv::imread("楼.jpg");
	if (src.empty()) {
		return -1;
	}
	cout << "??" << endl;
	if (src.channels() > 1) cv::cvtColor(src, src, CV_RGB2GRAY);
	cv::Mat dst, dst1, dst2, dst3, dst4, dst5;

	Mat src1 = cv::imread("楼.jpg");
	Mat src2 = cv::imread("楼.jpg");

	//medianBlur(src, src, 5);  //均值滤波
	GaussianBlur(src, src, Size(5, 5), 0); //高斯滤波
	cout << "??" << endl;

	//注意:要采用CV_32F,因为有些地方卷积后为负数,若用8位无符号,则会导致这些地方为0
	edge_Prewitt(src, dst1, dst2, dst3, dst4, dst, CV_32F);

	cv::namedWindow("垂直边缘", CV_WINDOW_NORMAL);
	imshow("垂直边缘", dst2);
	cout << "??" << endl;


	/*
	Mat shdjk;
	cv::threshold(dst2, shdjk, 25, 255, cv::THRESH_BINARY);
	cv::namedWindow("二值化1212", CV_WINDOW_NORMAL);
	imshow("二值化1212", shdjk);
	*/

	//获取结构
	cv::Mat element1 = cv::getStructuringElement(cv::MORPH_RECT, cv::Size(3, 3));

	Mat out1;
	//进行形态学开运算操作
	morphologyEx(dst2, out1, MORPH_OPEN, element1);//形态学开运算
	cv::namedWindow("xingtai", CV_WINDOW_NORMAL);
	imshow("xingtai", out1);


	Mat out2;
	//第二次进行形态学操作
	edge_Prewitt(out1, dst1, out1, dst3, dst4, dst, CV_32F);
	cv::namedWindow("垂直边缘1", CV_WINDOW_NORMAL);
	imshow("垂直边缘1", out1);
	cout << "??" << endl;


	/*
	morphologyEx(out1, out1, MORPH_OPEN, element1);//形态学开运算
	cv::namedWindow("xingtai1", CV_WINDOW_NORMAL);
	imshow("xingtai1", out1);

	//获取结构
	cv::Mat element2 = cv::getStructuringElement(cv::MORPH_ELLIPSE, cv::Size(10, 10));


	//进行形态学闭运算操作
	morphologyEx(out1, out2, MORPH_CLOSE, element2);//形态学闭合运算
	cv::namedWindow("xingtai2", CV_WINDOW_NORMAL);
	imshow("xingtai2", out2);
	imwrite("xingtai2.jpg", out2);

	waitKey(0);
	*/
	std::vector<std::vector<cv::Point>> contours;
	std::vector<cv::Vec4i> hierarchy;
	findContours(out1, contours, CV_RETR_EXTERNAL, CV_CHAIN_APPROX_NONE);
	double maxArea = 0;
	int index = 0;
	vector<cv::Point> maxContour;
	for (size_t i = 0; i < contours.size(); i++)
	{
		double area = cv::contourArea(contours[i]);
		if (area > maxArea)
		{
			maxArea = area;
			maxContour = contours[i];
			index = i;
		}
	}
	drawContours(src1, contours, index, Scalar(255));    // 参数
	cv::namedWindow("test", CV_WINDOW_NORMAL);
	imshow("test", src1);
	waitKey(0);
	/*
	Mat shdjk;
	cv::threshold(out1, shdjk, 10, 255, cv::THRESH_BINARY);
	cv::namedWindow("二值化1212", CV_WINDOW_NORMAL);
	imshow("二值化1212", shdjk);

	std::vector<std::vector<cv::Point>> contours;
	std::vector<cv::Vec4i> hierarchy;
	cv::findContours(shdjk, contours, hierarchy, cv::RETR_EXTERNAL, cv::CHAIN_APPROX_NONE);  //只找最外层轮廓


	std::vector<std::vector<cv::Point>> approxCurves(contours.size());
	for (int i = 0; i < contours.size(); ++i) {  //绘制逼近后的轮廓
		double epsilon = 0.1 * cv::arcLength(contours[i], true);
		cv::approxPolyDP(contours[i], approxCurves[i], epsilon, true);

		cv::drawContours(src1, approxCurves, i, cv::Scalar(0, 255, 0), 2);
	}
	cv::namedWindow("success", CV_WINDOW_NORMAL);
	imshow("success", src1);

	cv::waitKey();

	*/


	//
	/*
	Mat dhfjua;
	cv::threshold(out2, dhfjua, 15, 255, cv::THRESH_BINARY);
	cv::namedWindow("二值化000", CV_WINDOW_NORMAL);
	imshow("二值化000", dhfjua);
	*/
	/*
	//膨胀运算,将细小缝隙填补上,非必要
	Mat kernel = getStructuringElement(0, Size(3, 3));
	dilate(out2, dst2, kernel);
	cv::namedWindow("膨胀", CV_WINDOW_NORMAL);
	imshow("膨胀", dst2);
	*/
	/*0
	cv::threshold(out2, dst2, 5, 255, cv::THRESH_BINARY);
	cv::namedWindow("二值化", CV_WINDOW_NORMAL);
	imshow("二值化", dst2);

	cv::threshold(dst2, dst2, 5, 255, cv::THRESH_BINARY_INV);
	cv::namedWindow("反二值化", CV_WINDOW_NORMAL);
	imshow("反二值化", dst2);
	*/
	/*
	Mat out3;
	//进行形态学闭运算操作
	morphologyEx(dst2, out3, MORPH_CLOSE, element2);//形态学开运算
	cv::namedWindow("xingtai3", CV_WINDOW_NORMAL);
	imshow("xingtai3", out3);
	imwrite("xingtai3.jpg", out3);
	*/

	waitKey(0);
	vector<Vec4i> lines;
	HoughLinesP(src1, lines, 1, CV_PI / 180, 100, 400, 30);
	int Length[1000] = { 0 };//存放直线长度
	for (size_t i = 0; i < lines.size(); i++)
	{
		Vec4i I = lines[i];
		double x1 = I[0];
		double y1 = I[1];
		double x2 = I[2];
		double y2 = I[3];

		//筛选满足条件的点
		if (abs(x1 - x2) + abs(y1 - y2) > 50)
		{
			Length[i] = sqrt((x1 - x2)*(x1 - x2) + (y1 - y2) * (y1 - y2));
			//将满足条件的点画出
			line(src1, Point2d(x1, y1), Point2d(x2, y2), Scalar(0, 255, 255), 2);

			cout << " " << "(" << x1 << "," << y1 << ")" << " " << "(" << x2 << "," << y2 << ")" << endl;
			//line(canny, Point2d(x1, y1), Point2d(x2, y2), Scalar(0, 255, 255), 2);
		}
	}


	Mat imgShow;
	imgShow = src1;
	resize(imgShow, imgShow, Size(imgShow.cols / 4, imgShow.rows / 4));
	imshow("imgShow", imgShow);
	imwrite("shuchu.png", src1);


	reserve(Length, 1000);
	for (int i = 0; i < 1000; i++) {
		cout << "长度" << Length[i] << endl;   //输出排序后的数组元素
	}

	for (size_t i = 0; i < lines.size(); i++)
	{
		Vec4i I = lines[i];
		double x1 = I[0];
		double y1 = I[1];
		double x2 = I[2];
		double y2 = I[3];
		cout << "sdjk" << endl;
		cout << int(sqrt((x1 - x2)*(x1 - x2) + (y1 - y2) * (y1 - y2))) << endl;
		//筛选满足条件的点
		if ((int(sqrt((x1 - x2)*(x1 - x2) + (y1 - y2) * (y1 - y2))) == Length[0]) || (int(sqrt((x1 - x2)*(x1 - x2) + (y1 - y2) * (y1 - y2))) == Length[1]))
		{

			//将满足条件的点画出
			line(src2, Point2d(x1, y1), Point2d(x2, y2), Scalar(0, 255, 255), 2);

			cout << "djfkljsa " << "(" << x1 << "," << y1 << ")" << " " << "(" << x2 << "," << y2 << ")" << endl;
			//line(canny, Point2d(x1, y1), Point2d(x2, y2), Scalar(0, 255, 255), 2);
		}
	}

	imgShow = src2;
	resize(imgShow, imgShow, Size(imgShow.cols / 4, imgShow.rows / 4));
	imshow("imgShow2", imgShow);
	imwrite("shuchu2.png", src2);


	waitKey(0);
	return 0;
}
效果还是不好,问题就是出在了相应的一个二值化的过程,因此,想到使用区域增长算法改进
#include <iostream>
#include <string>
#include <list>
#include <vector>
#include <map>
#include <stack>
#include <opencv2/core/core.hpp>
#include <opencv2/highgui/highgui.hpp>
#include <opencv2/imgproc/imgproc.hpp>


using namespace std;
using namespace cv;


//------------------------------【两步法新改进版】----------------------------------------------
// 对二值图像进行连通区域标记,从1开始标号
void  Two_PassNew(const Mat &bwImg, Mat &labImg)
{
	assert(bwImg.type() == CV_8UC1);
	labImg.create(bwImg.size(), CV_32SC1);   //bwImg.convertTo( labImg, CV_32SC1 );
	labImg = Scalar(0);
	labImg.setTo(Scalar(1), bwImg);
	assert(labImg.isContinuous());
	const int Rows = bwImg.rows - 1, Cols = bwImg.cols - 1;
	int label = 1;
	vector<int> labelSet;
	labelSet.push_back(0);
	labelSet.push_back(1);
	//the first pass
	int *data_prev = (int*)labImg.data;   //0-th row : int* data_prev = labImg.ptr<int>(i-1);
	int *data_cur = (int*)(labImg.data + labImg.step); //1-st row : int* data_cur = labImg.ptr<int>(i);
	for (int i = 1; i < Rows; i++)
	{
		data_cur++;
		data_prev++;
		for (int j = 1; j < Cols; j++, data_cur++, data_prev++)
		{
			if (*data_cur != 1)
				continue;
			int left = *(data_cur - 1);
			int up = *data_prev;
			int neighborLabels[2];
			int cnt = 0;
			if (left > 1)
				neighborLabels[cnt++] = left;
			if (up > 1)
				neighborLabels[cnt++] = up;
			if (!cnt)
			{
				labelSet.push_back(++label);
				labelSet[label] = label;
				*data_cur = label;
				continue;
			}
			int smallestLabel = neighborLabels[0];
			if (cnt == 2 && neighborLabels[1] < smallestLabel)
				smallestLabel = neighborLabels[1];
			*data_cur = smallestLabel;
			// 保存最小等价表
			for (int k = 0; k < cnt; k++)
			{
				int tempLabel = neighborLabels[k];
				int& oldSmallestLabel = labelSet[tempLabel];  //这里的&不是取地址符号,而是引用符号
				if (oldSmallestLabel > smallestLabel)
				{
					labelSet[oldSmallestLabel] = smallestLabel;
					oldSmallestLabel = smallestLabel;
				}
				else if (oldSmallestLabel < smallestLabel)
					labelSet[smallestLabel] = oldSmallestLabel;
			}
		}
		data_cur++;
		data_prev++;
	}
	//更新等价队列表,将最小标号给重复区域
	for (size_t i = 2; i < labelSet.size(); i++)
	{
		int curLabel = labelSet[i];
		int prelabel = labelSet[curLabel];
		while (prelabel != curLabel)
		{
			curLabel = prelabel;
			prelabel = labelSet[prelabel];
		}
		labelSet[i] = curLabel;
	}
	//second pass
	data_cur = (int*)labImg.data;
	for (int i = 0; i < Rows; i++)
	{
		for (int j = 0; j < bwImg.cols - 1; j++, data_cur++)
			*data_cur = labelSet[*data_cur];
		data_cur++;
	}
}

//-------------------------------【老版两步法】-------------------------------------------
void Two_PassOld(const cv::Mat& _binImg, cv::Mat& _lableImg)
{
	//connected component analysis (4-component)
	//use two-pass algorithm
	//1. first pass: label each foreground pixel with a label
	//2. second pass: visit each labeled pixel and merge neighbor label
	//
	//foreground pixel: _binImg(x,y) = 1
	//background pixel: _binImg(x,y) = 0

	if (_binImg.empty() || _binImg.type() != CV_8UC1)
	{
		return;
	}

	// 1. first pass
	_lableImg.release();
	_binImg.convertTo(_lableImg, CV_32SC1);

	int label = 1;  // start by 2
	std::vector<int> labelSet;
	labelSet.push_back(0);   //background: 0
	labelSet.push_back(1);   //foreground: 1

	int rows = _binImg.rows - 1;
	int cols = _binImg.cols - 1;
	for (int i = 1; i < rows; i++)
	{
		int* data_preRow = _lableImg.ptr<int>(i - 1);
		int* data_curRow = _lableImg.ptr<int>(i);
		for (int j = 1; j < cols; j++)
		{
			if (data_curRow[j] == 1)
			{
				std::vector<int> neighborLabels;
				neighborLabels.reserve(2); //reserve(n)  预分配n个元素的存储空间
				int leftPixel = data_curRow[j - 1];
				int upPixel = data_preRow[j];
				if (leftPixel > 1)
				{
					neighborLabels.push_back(leftPixel);
				}
				if (upPixel > 1)
				{
					neighborLabels.push_back(upPixel);
				}
				if (neighborLabels.empty())
				{
					labelSet.push_back(++label);   //assign to a new label
					data_curRow[j] = label;
					labelSet[label] = label;
				}
				else
				{
					std::sort(neighborLabels.begin(), neighborLabels.end());
					int smallestLabel = neighborLabels[0];
					data_curRow[j] = smallestLabel;

					//save equivalence
					for (size_t k = 1; k < neighborLabels.size(); k++)
					{
						int tempLabel = neighborLabels[k];
						int& oldSmallestLabel = labelSet[tempLabel];
						if (oldSmallestLabel > smallestLabel)
						{
							labelSet[oldSmallestLabel] = smallestLabel;
							oldSmallestLabel = smallestLabel;
						}
						else if (oldSmallestLabel < smallestLabel)
						{
							labelSet[smallestLabel] = oldSmallestLabel;
						}
					}
				}

			}
		}
	}
	//update equivalent labels
	//assigned with the smallest label in each equivalent label set
	for (size_t i = 2; i < labelSet.size(); i++)
	{
		int curLabel = labelSet[i];
		int prelabel = labelSet[curLabel];
		while (prelabel != curLabel)
		{
			curLabel = prelabel;
			prelabel = labelSet[prelabel];
		}
		labelSet[i] = curLabel;
	}

	//2. second pass
	for (int i = 0; i < rows; i++)
	{
		int *data = _lableImg.ptr<int>(i);
		for (int j = 0; j < cols; j++)
		{
			int& pixelLabel = data[j];
			pixelLabel = labelSet[pixelLabel];
		}
	}
}


//---------------------------------【种子填充法老版】-------------------------------
void SeedFillOld(const cv::Mat& binImg, cv::Mat& lableImg)   //种子填充法
{
	// 4邻接方法


	if (binImg.empty() ||
		binImg.type() != CV_8UC1)
	{
		return;
	}

	lableImg.release();
	binImg.convertTo(lableImg, CV_32SC1);

	int label = 1;

	int rows = binImg.rows - 1;
	int cols = binImg.cols - 1;
	for (int i = 1; i < rows - 1; i++)
	{
		int* data = lableImg.ptr<int>(i);
		for (int j = 1; j < cols - 1; j++)
		{
			if (data[j] == 1)
			{
				std::stack<std::pair<int, int>> neighborPixels;
				neighborPixels.push(std::pair<int, int>(i, j));     // 像素位置: <i,j>
				++label;  // 没有重复的团,开始新的标签
				while (!neighborPixels.empty())
				{
					std::pair<int, int> curPixel = neighborPixels.top(); //如果与上一行中一个团有重合区域,则将上一行的那个团的标号赋给它
					int curX = curPixel.first;
					int curY = curPixel.second;
					lableImg.at<int>(curX, curY) = label;

					neighborPixels.pop();

					if (lableImg.at<int>(curX, curY - 1) == 1)
					{//左边
						neighborPixels.push(std::pair<int, int>(curX, curY - 1));
					}
					if (lableImg.at<int>(curX, curY + 1) == 1)
					{// 右边
						neighborPixels.push(std::pair<int, int>(curX, curY + 1));
					}
					if (lableImg.at<int>(curX - 1, curY) == 1)
					{// 上边
						neighborPixels.push(std::pair<int, int>(curX - 1, curY));
					}
					if (lableImg.at<int>(curX + 1, curY) == 1)
					{// 下边
						neighborPixels.push(std::pair<int, int>(curX + 1, curY));
					}
				}
			}
		}
	}

}


//-------------------------------------------【种子填充法新版】---------------------------
void SeedFillNew(const cv::Mat& _binImg, cv::Mat& _lableImg)
{
	// connected component analysis(4-component)
	// use seed filling algorithm
	// 1. begin with a forgeground pixel and push its forground neighbors into a stack;
	// 2. pop the pop pixel on the stack and label it with the same label until the stack is empty
	//
	//  forground pixel: _binImg(x,y)=1
	//  background pixel: _binImg(x,y) = 0


	if (_binImg.empty() ||
		_binImg.type() != CV_8UC1)
	{
		return;
	}

	_lableImg.release();
	_binImg.convertTo(_lableImg, CV_32SC1);

	int label = 0; //start by 1

	int rows = _binImg.rows;
	int cols = _binImg.cols;

	Mat mask(rows, cols, CV_8UC1);
	mask.setTo(0);
	int *lableptr;
	for (int i = 0; i < rows; i++)
	{
		int* data = _lableImg.ptr<int>(i);
		uchar *masKptr = mask.ptr<uchar>(i);
		for (int j = 0; j < cols; j++)
		{
			if (data[j] == 255 && mask.at<uchar>(i, j) != 1)
			{
				mask.at<uchar>(i, j) = 1;
				std::stack<std::pair<int, int>> neighborPixels;
				neighborPixels.push(std::pair<int, int>(i, j)); // pixel position: <i,j>
				++label; //begin with a new label
				while (!neighborPixels.empty())
				{
					//get the top pixel on the stack and label it with the same label
					std::pair<int, int> curPixel = neighborPixels.top();
					int curY = curPixel.first;
					int curX = curPixel.second;
					_lableImg.at<int>(curY, curX) = label;

					//pop the top pixel
					neighborPixels.pop();

					//push the 4-neighbors(foreground pixels)

					if (curX - 1 >= 0)
					{
						if (_lableImg.at<int>(curY, curX - 1) == 255 && mask.at<uchar>(curY, curX - 1) != 1) //leftpixel
						{
							neighborPixels.push(std::pair<int, int>(curY, curX - 1));
							mask.at<uchar>(curY, curX - 1) = 1;
						}
					}
					if (curX + 1 <= cols - 1)
					{
						if (_lableImg.at<int>(curY, curX + 1) == 255 && mask.at<uchar>(curY, curX + 1) != 1)
							// right pixel
						{
							neighborPixels.push(std::pair<int, int>(curY, curX + 1));
							mask.at<uchar>(curY, curX + 1) = 1;
						}
					}
					if (curY - 1 >= 0)
					{
						if (_lableImg.at<int>(curY - 1, curX) == 255 && mask.at<uchar>(curY - 1, curX) != 1)
							// up pixel
						{
							neighborPixels.push(std::pair<int, int>(curY - 1, curX));
							mask.at<uchar>(curY - 1, curX) = 1;
						}
					}
					if (curY + 1 <= rows - 1)
					{
						if (_lableImg.at<int>(curY + 1, curX) == 255 && mask.at<uchar>(curY + 1, curX) != 1)
							//down pixel
						{
							neighborPixels.push(std::pair<int, int>(curY + 1, curX));
							mask.at<uchar>(curY + 1, curX) = 1;
						}
					}
				}
			}
		}
	}
}


//---------------------------------【颜色标记程序】-----------------------------------
//彩色显示
cv::Scalar GetRandomColor()
{
	uchar r = 255 * (rand() / (1.0 + RAND_MAX));
	uchar g = 255 * (rand() / (1.0 + RAND_MAX));
	uchar b = 255 * (rand() / (1.0 + RAND_MAX));
	return cv::Scalar(b, g, r);
}


void LabelColor(const cv::Mat& labelImg, cv::Mat& colorLabelImg)
{
	int num = 0;
	if (labelImg.empty() ||
		labelImg.type() != CV_32SC1)
	{
		return;
	}

	std::map<int, cv::Scalar> colors;

	int rows = labelImg.rows;
	int cols = labelImg.cols;

	colorLabelImg.release();
	colorLabelImg.create(rows, cols, CV_8UC3);
	colorLabelImg = cv::Scalar::all(0);

	for (int i = 0; i < rows; i++)
	{
		const int* data_src = (int*)labelImg.ptr<int>(i);
		uchar* data_dst = colorLabelImg.ptr<uchar>(i);
		for (int j = 0; j < cols; j++)
		{
			int pixelValue = data_src[j];
			if (pixelValue > 1)
			{
				if (colors.count(pixelValue) <= 0)
				{
					colors[pixelValue] = GetRandomColor();
					num++;
				}

				cv::Scalar color = colors[pixelValue];
				*data_dst++ = color[0];
				*data_dst++ = color[1];
				*data_dst++ = color[2];
			}
			else
			{
				data_dst++;
				data_dst++;
				data_dst++;
			}
		}
	}
	printf("color num : %d \n", num);
}

//------------------------------------------【测试主程序】-------------------------------------
int main()
{

	cv::Mat binImage = cv::imread("sda.jpg", 0);
	//cv::threshold(binImage, binImage, 50, 1, CV_THRESH_BINARY);
	cv::Mat labelImg;
	double time;
	time = getTickCount();

	SeedFillNew(binImage, labelImg);
	time = 1000 * ((double)getTickCount() - time) / getTickFrequency();
	cout << std::fixed << time << "ms" << endl;
	//彩色显示
	/*
	cv::Mat colorLabelImg;
	LabelColor(labelImg, colorLabelImg);
	cv::imshow("colorImg", colorLabelImg);
	*/
	//灰度显示
	cv::Mat grayImg;
	labelImg *= 10;
	labelImg.convertTo(grayImg, CV_8UC1);
	cv::imshow("labelImg", grayImg);
	double minval, maxval;
	minMaxLoc(labelImg, &minval, &maxval);
	cout << "minval" << minval << endl;
	cout << "maxval" << maxval << endl;
	cv::waitKey(0);
	return 0;
}
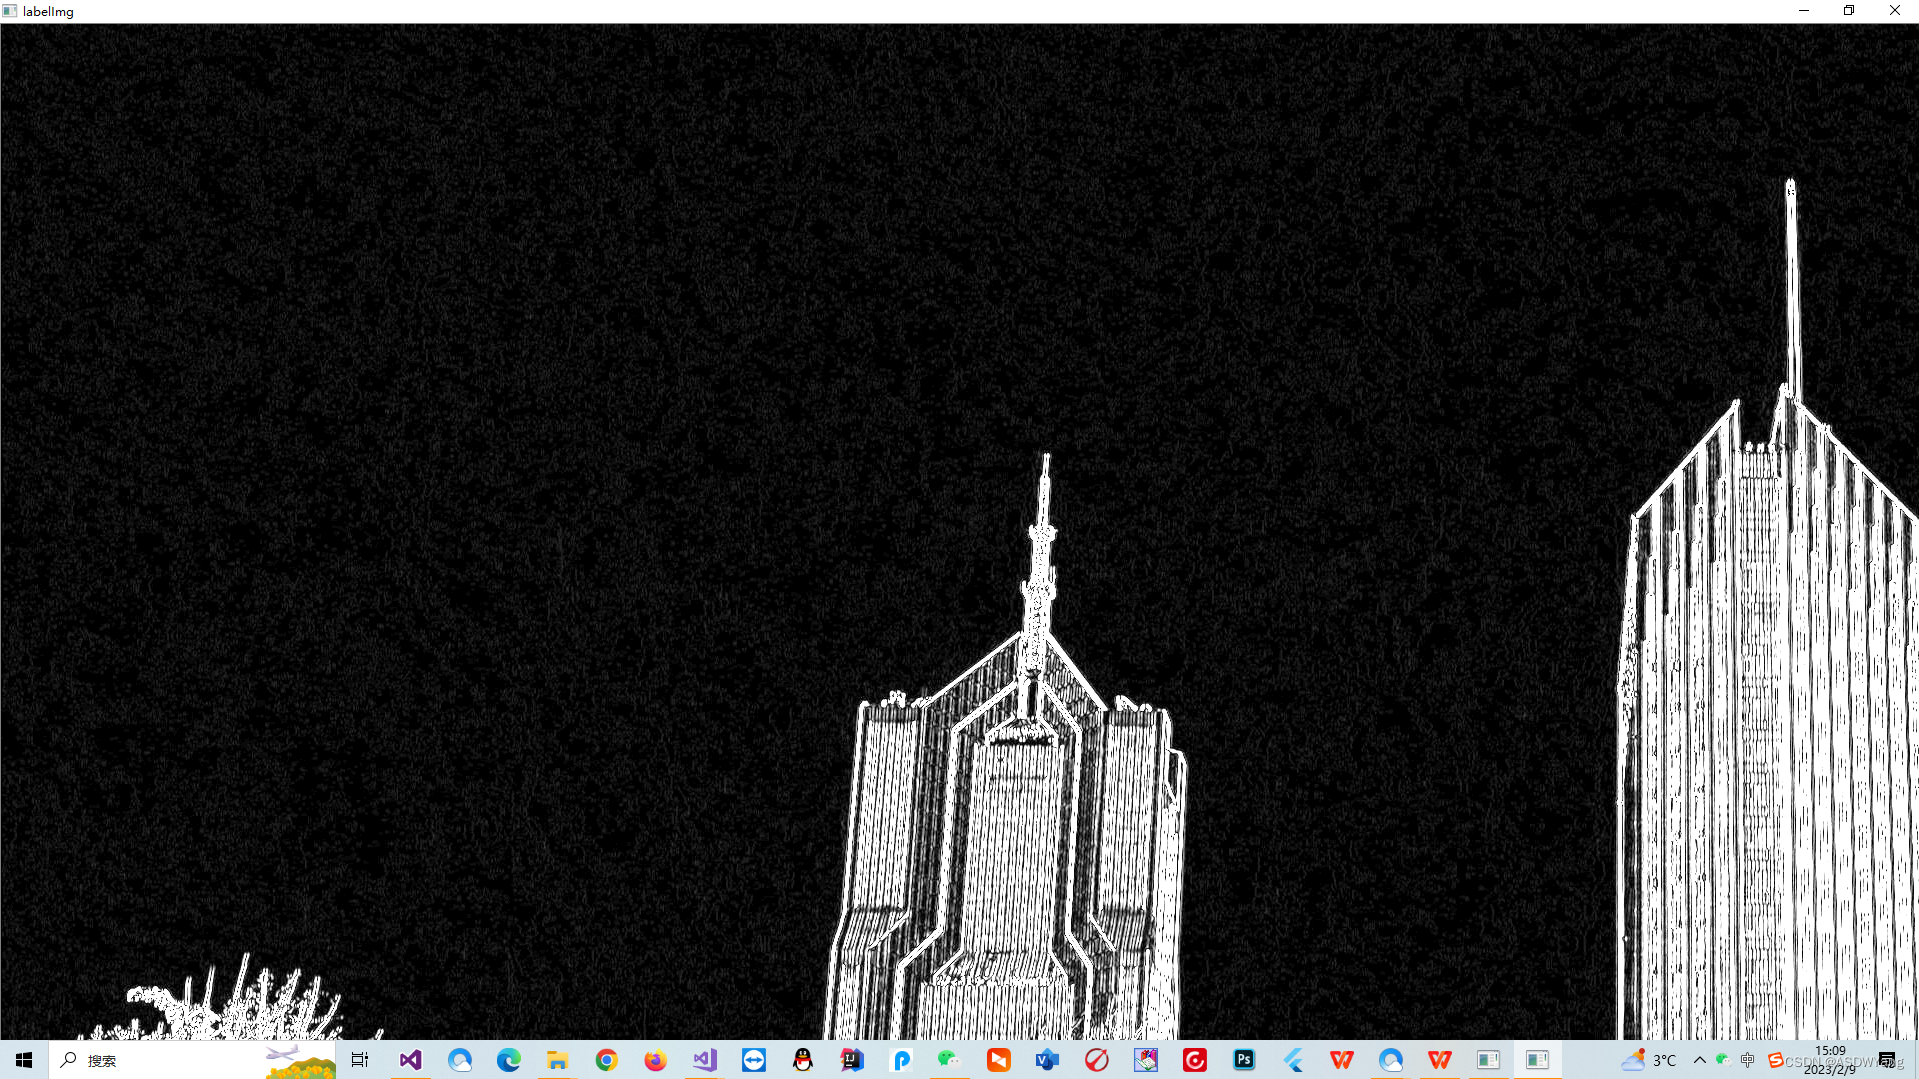
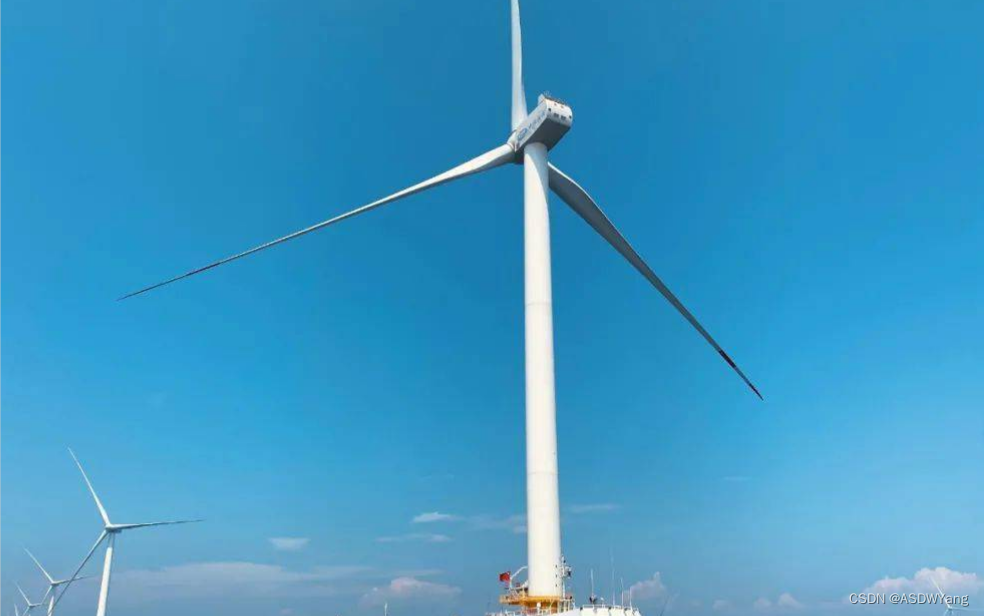
终于知道是啥原因了,我在进行Prewitt算子对边缘进行粗定位检测过后,没有进行去噪处理,一定要把图像转换为二值图像,就方便多了。并且还要记住,霍夫检测的直线像素是255白线才可以,经过长时间的试错终于解决了。输入原图像如下所示,我这里使用的去噪对比了四种,但是下面这种是最好的。Opencv 非局部降噪_51CTO博客_opencv降噪Opencv 非局部降噪,opencv自带的非局部降噪算法:CV_EXPORTS_WvoidfastNlMeansDenoising(InputArraysrc,OutputArraydst,floath=3,inttemplateWindowSize=7,intsearchWindowSize=21);h是过滤强度,templateWindowSize是分块大小,searchWindowSize是搜索区域大小。应用实例intmain(){MatI..https://blog.51cto.com/u_15458280/4843576
#include<opencv2/opencv.hpp>
#include<iostream>
using namespace std;
using namespace cv;

//数组从大到小排序
void reserve(int x[], int n) {
	int i, j, temp;
	for (i = 0; i < n - 1; i++) {     //一共n个元素,则需要比较n-1次
		for (j = 0; j < n - 1 - i; j++) {     //每一个元素需要比较的次数
			if (x[i] < x[i + j + 1]) {
				temp = x[i];
				x[i] = x[i + j + 1];
				x[i + j + 1] = temp;
			}
		}
	}
}

void add_salt_pepper_noise(Mat &image) {
	RNG rng(12345);
	int h = image.rows;
	int w = image.cols;
	int nums = 10000;
	for (int i = 0; i < nums; i++) {
		int x = rng.uniform(0, w);
		int y = rng.uniform(0, h);
		if (i % 2 == 1) {
			image.at<Vec3b>(y, x) = Vec3b(255, 255, 255);
		}
		else {
			image.at<Vec3b>(y, x) = Vec3b(0, 0, 0);
		}
	}
	imshow("salt pepper", image);
}

void gaussian_noise(Mat &image) {
	Mat noise = Mat::zeros(image.size(), image.type());
	randn(noise, (15, 15, 15), (30, 30, 30));
	Mat dst;
	add(image, noise, dst);
	imshow("gaussian noise", dst);
	dst.copyTo(image);
}

Mat convertTo3Channels(const Mat& binImg)
{
	Mat three_channel = Mat::zeros(binImg.rows, binImg.cols, CV_8UC3);
	vector<Mat> channels;
	for (int i = 0; i < 3; i++)
	{
		channels.push_back(binImg);
	}
	merge(channels, three_channel);
	return three_channel;
}

int main(int argc, char*argv[])
{
	//加载图像
	Mat img, gray_image, dst;
	img = imread("垂直边缘.jpg");
	 Mat img1 = imread("垂直边缘.jpg");
	//判断图像是否导入成功
	if (img.empty())
	{
		cout << "加载失败" << endl;
		return -1;
	}
	//显示图像
	namedWindow("original image", WINDOW_AUTOSIZE);
	imshow("original image", img);
	//转换灰度图像
	cvtColor(img, gray_image, COLOR_BGR2GRAY);
	//获取灰度图像宽度和高度
	int width = gray_image.cols;
	int height = gray_image.rows;
	//遍历像素值(单通道)
	for (int row = 0; row < height; row++)
	{
		for (int col = 0; col < width; col++)
		{
			int gray = gray_image.at<uchar>(row, col);
			gray_image.at<uchar>(row, col) = 255 - gray;	//图像取反
		};
	};
	namedWindow("inv_gray_image", WINDOW_AUTOSIZE);
	imshow("inv_gray_image", gray_image);


	Mat sh;

	fastNlMeansDenoising(gray_image, sh, 21, 7, 21);
	namedWindow("inv_gray_image1", WINDOW_AUTOSIZE);
	imshow("inv_gray_image1", sh);


	waitKey(50);


	//Mat s;
	//获取灰度图像宽度和高度
	 width = sh.cols;
	 height = sh.rows;
	//遍历像素值(单通道)
	for (int row = 0; row < height; row++)
	{
		for (int col = 0; col < width; col++)
		{
			int gray = sh.at<uchar>(row, col);
			sh.at<uchar>(row, col) = 255 - gray;	//图像取反
		};
	};
	namedWindow("inv_gray_image2", WINDOW_AUTOSIZE);
	imshow("inv_gray_image2", sh);


	cv::threshold(sh, sh, 50, 255, cv::THRESH_BINARY);
	cv::namedWindow("二值化", CV_WINDOW_NORMAL);
	imshow("二值化", sh);

	vector<Vec4i> lines;
	HoughLinesP(sh, lines, 1, CV_PI / 180, 50,100, 5);
	int Length[100] = { 0 };//存放直线长度
	for (size_t i = 0; i < lines.size(); i++)
	{
		Vec4i I = lines[i];
		double x1 = I[0];
		double y1 = I[1];
		double x2 = I[2];
		double y2 = I[3];

		//筛选满足条件的点
		if (abs(x1 - x2) + abs(y1 - y2) > 50)
		{
			Length[i] = sqrt((x1 - x2)*(x1 - x2) + (y1 - y2) * (y1 - y2));
			//将满足条件的点画出
			line(img, Point2d(x1, y1), Point2d(x2, y2), Scalar(0, 255, 255), 2);

			cout << " " << "(" << x1 << "," << y1 << ")" << " " << "(" << x2 << "," << y2 << ")" << endl;
			//line(canny, Point2d(x1, y1), Point2d(x2, y2), Scalar(0, 255, 255), 2);
		}
	}

	Mat imgShow;
	imgShow = img;
	resize(imgShow, imgShow, Size(imgShow.cols / 4, imgShow.rows / 4));
	imshow("imgShow", imgShow);
	imwrite("shuchu.png", imgShow);


	reserve(Length, 100);
	for (int i = 0; i < 100; i++) {
		cout << "长度" << Length[i] << endl;   //输出排序后的数组元素
	}

	for (size_t i = 0; i < lines.size(); i++)
	{
		Vec4i I = lines[i];
		double x1 = I[0];
		double y1 = I[1];
		double x2 = I[2];
		double y2 = I[3];
		cout << "sdjk" << endl;
		cout << int(sqrt((x1 - x2)*(x1 - x2) + (y1 - y2) * (y1 - y2))) << endl;
		//筛选满足条件的点
		if ((int(sqrt((x1 - x2)*(x1 - x2) + (y1 - y2) * (y1 - y2))) == Length[0]) || (int(sqrt((x1 - x2)*(x1 - x2) + (y1 - y2) * (y1 - y2))) == Length[1]))
		{

			//将满足条件的点画出
			line(img1, Point2d(x1, y1), Point2d(x2, y2), Scalar(0, 255, 255), 2);

			cout << "djfkljsa " << "(" << x1 << "," << y1 << ")" << " " << "(" << x2 << "," << y2 << ")" << endl;
			//line(canny, Point2d(x1, y1), Point2d(x2, y2), Scalar(0, 255, 255), 2);
		}
	}

	imgShow = img1;
	resize(imgShow, imgShow, Size(imgShow.cols / 4, imgShow.rows / 4));
	imshow("imgShow2", imgShow);
	imwrite("shuchu2.png", imgShow);
	waitKey(0);
	return 0;
};
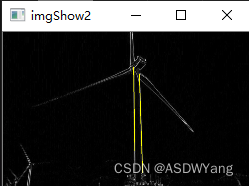
结果图如下所示:
终于弄出来了,去干饭。
