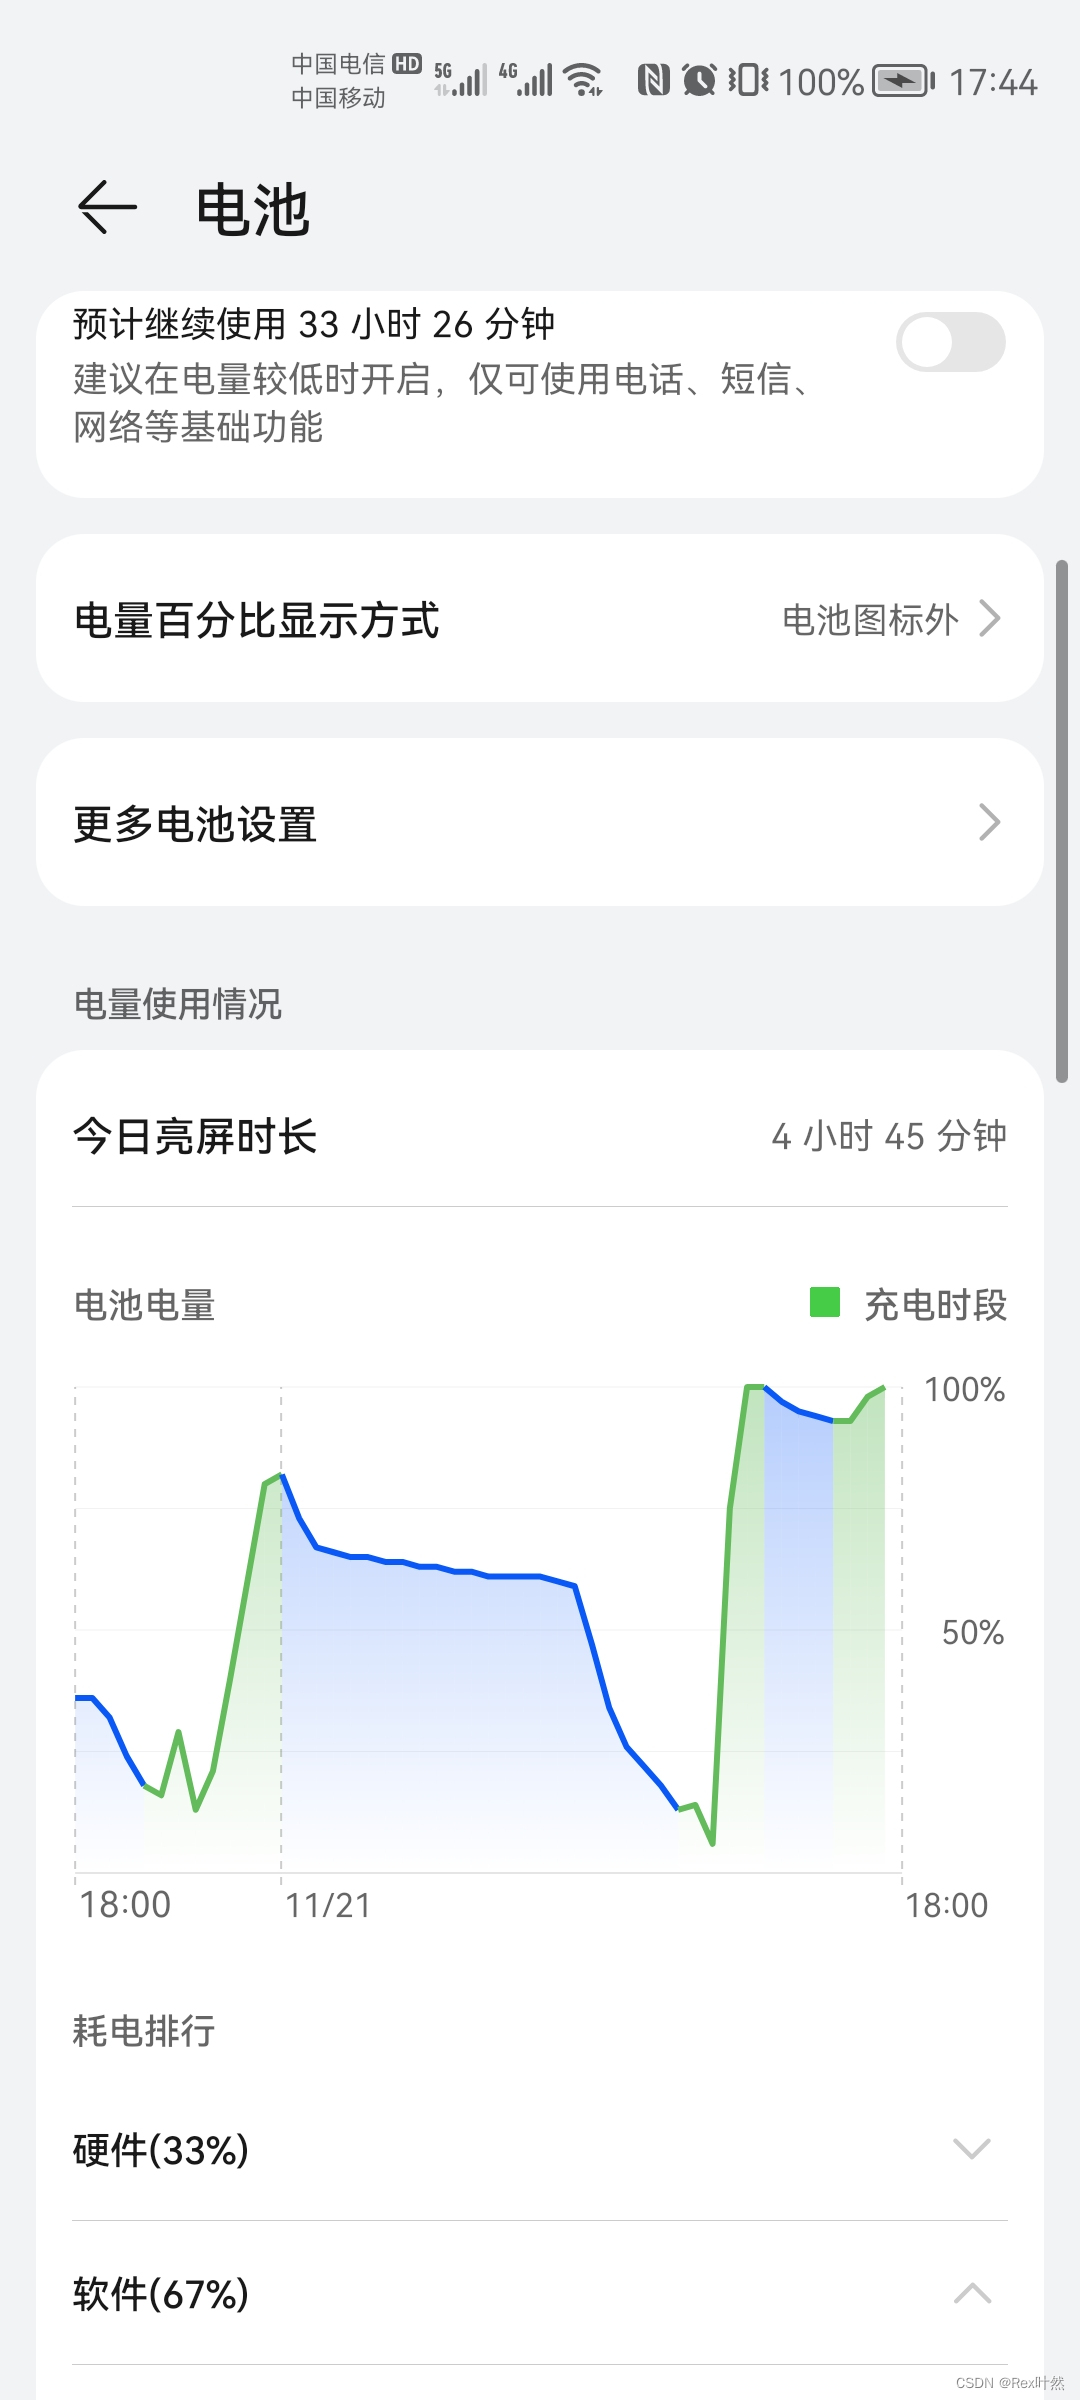
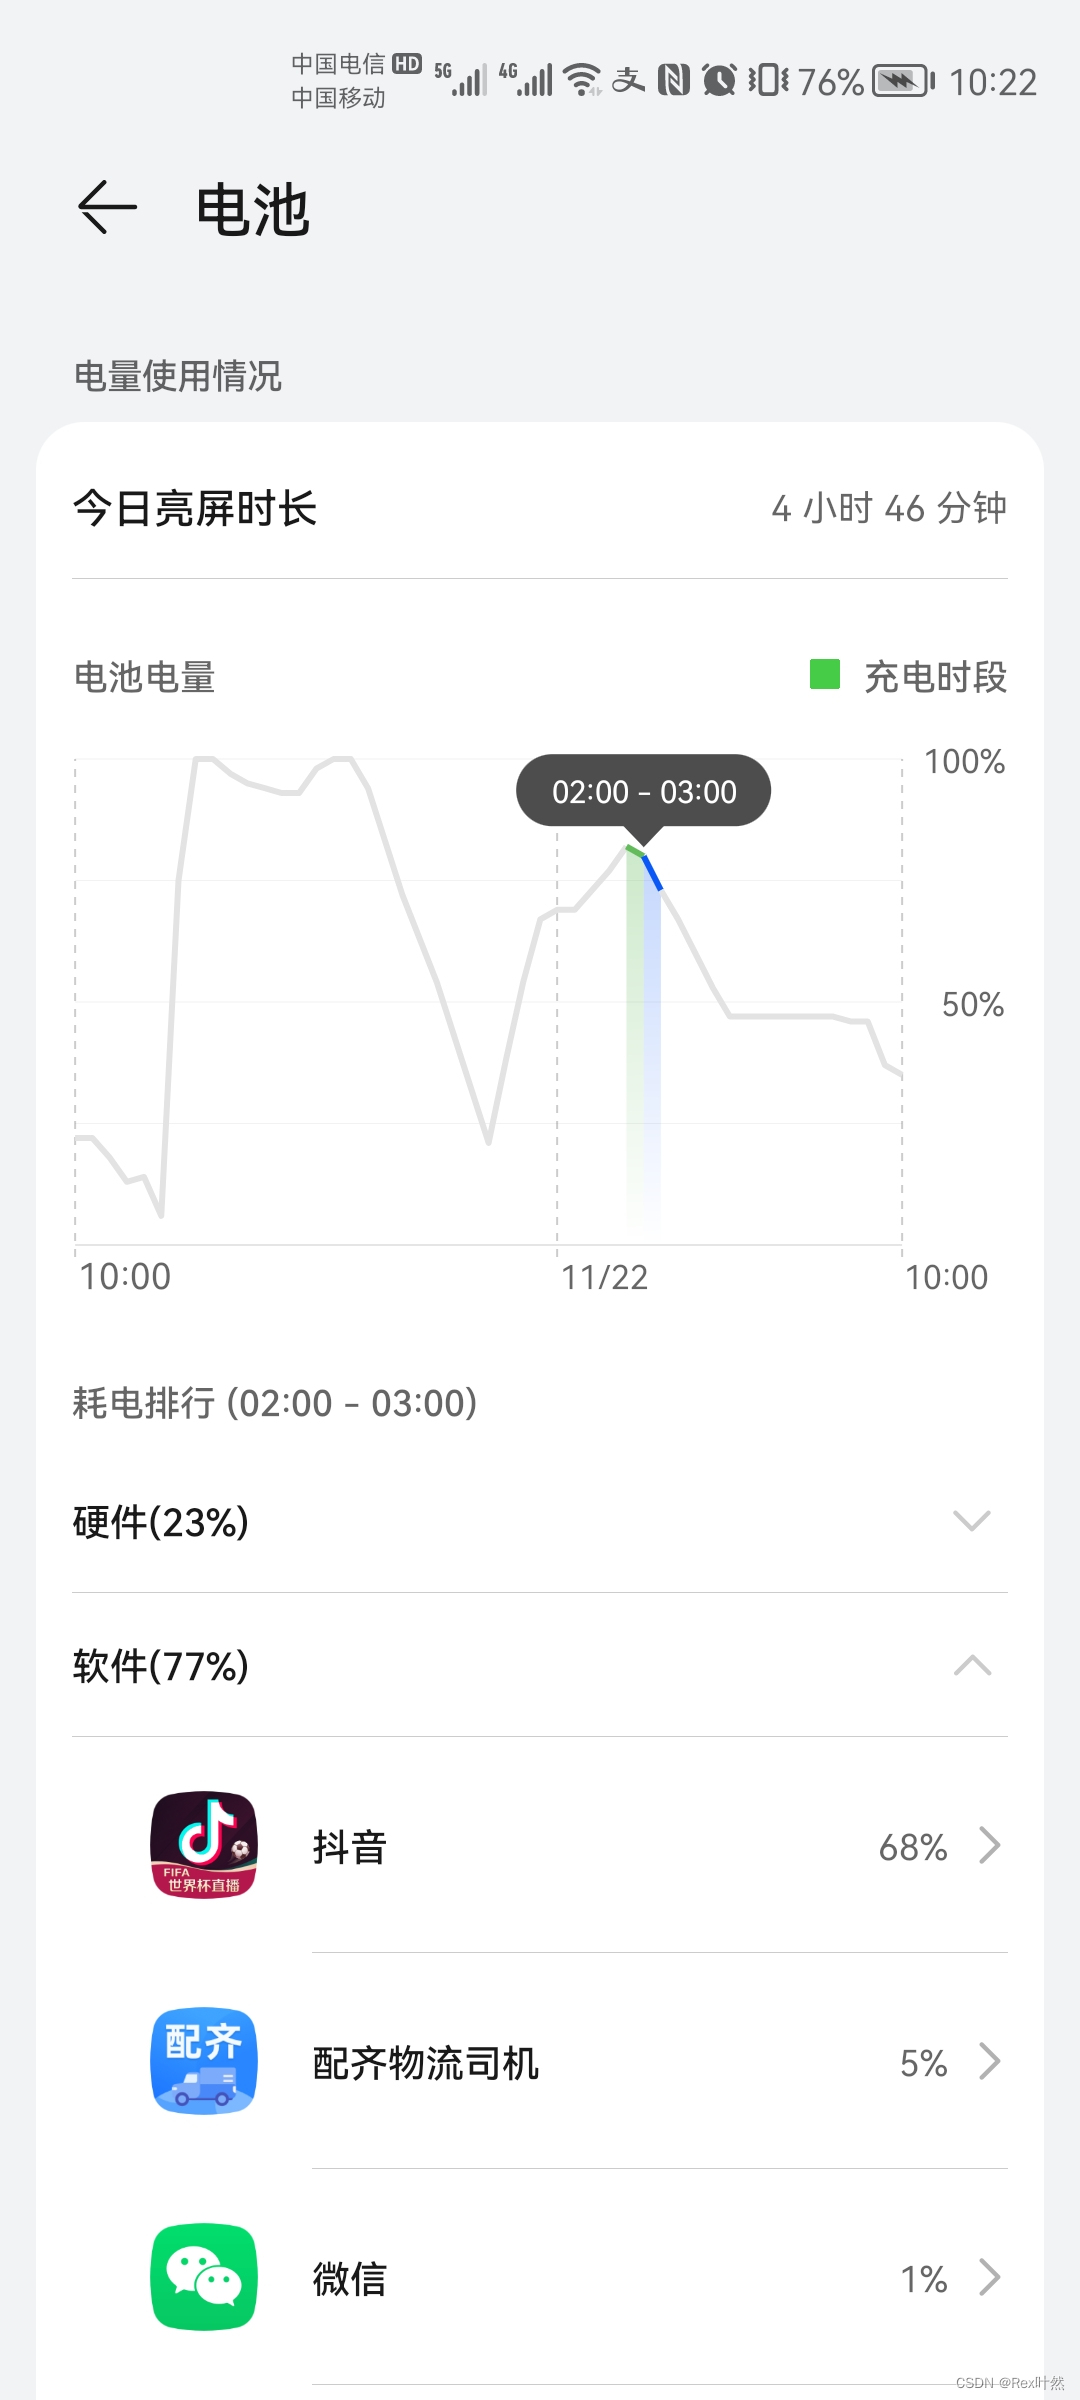
以前一直是改的MPAndroidChart,但最近看到华为手机的电池图表发现一旦设计不符合常规图表逻辑实现起来就很困难,
考虑过path相减(areaPath.op(-,- Path.Op.DIFFERENCE))、图像混合(paint.setXfermode)、裁剪区域(clipRigion)均不满足需求,因为他这个一段包含多个点且Y不相等,就算是我柱状图和折线图混合,然后混合也不行
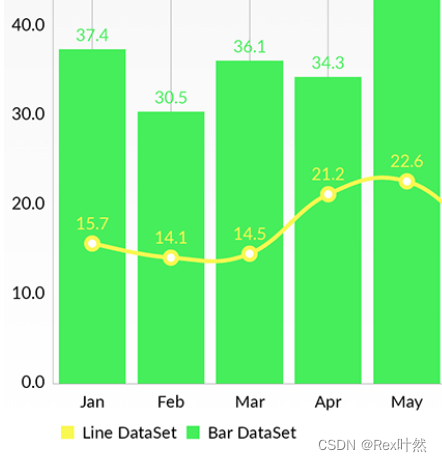
因为底层逻辑就不一样,结合一下常见图表说明一下不方便修改的点,和我们重点复刻的内容,本文多为提供实现思路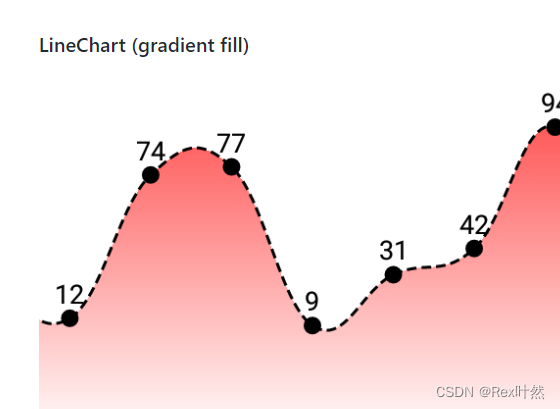
复刻成果预览


1、需求提取
1.1 分段的fill
根据上升和降低分段变色,而常规chart是整个fill
1.2 范围选中逻辑
折线图逻辑只能选择一个点,柱状图可以选择一个范围但其Y是相等的,也就是说我们得实现 Y不相等的多个点,同时选择变色
1.3 网格线和标签等其他问题
=看似简单 但仔细一看不符合框架 修改mp也很困难 比如网格线突出,虚线实线混合,x,y label 特殊摆放位置
2、实现思路思考过程
针对以上问题评估,再加上通常只有图表没有几个集成框架也比较重,所以我们试着从零开始复刻,重点讲解下核心实现
思路如下
2.1 提取最小模型
经过思考提取以下最重要部分,即一段为两条线加两个填充,分别可以自定义颜色

2.2 构建数据
在自定义view数据构建尤为重要,数据控制页面
一个小时内的数据
public class HourChartData {
    public List<ChartEntry> chartEntries;
}
每个点的数据,为简单理解,我们会将真是数据转化为 Y百分比 我们将24小时分为48个段(具体可以根据你实际需求)(x = 0 ~ 48 y= 0 ~ 100)
public class ChartEntry {
    public float x;
    public float y;
//    public Object object ; // 方便后续拓展
//    public int hour;
//    public int upColor;
//    public int downColor;
}
2.3 自定义简单实现最小模型
class ChartView : View {
    lateinit var mPaint: Paint
    lateinit var mPaintDown: Paint
    lateinit var mPaintArea: Paint
    lateinit var mPaintAreaDown: Paint


private fun init() {

        mPaint = Paint()

        mPaint.run {
            color = Color.BLACK
            strokeWidth = 10f
            style = Paint.Style.STROKE
            flags = Paint.ANTI_ALIAS_FLAG
        }

        mPaintDown = Paint()
        mPaintDown.run {
            color = Color.RED
            strokeWidth = 10f
            style = Paint.Style.STROKE
            flags = Paint.ANTI_ALIAS_FLAG

        }

        mPaintArea = Paint()
        mPaintArea.run {
            color = Color.parseColor("#5900BEBE")
            style = Paint.Style.FILL
            flags = Paint.ANTI_ALIAS_FLAG

        }

        mPaintAreaDown = Paint()
        mPaintAreaDown.run {
            color = Color.parseColor("#59123456")
            style = Paint.Style.FILL
            flags = Paint.ANTI_ALIAS_FLAG
        }
}

private fun initTestData() {
        mData.clear()
        val listEntry = arrayListOf<ChartEntry>()

        // 随机24小时 49个点的数据 存在两个0点
        for (i in 0 until count + 1) {
            listEntry.add(ChartEntry(i * 1.0f, (0..10).random() * 10.0f))
        }


        listEntry.forEachIndexed { index, chartEntry ->
            if (index % 2 == 0 && index + 2 < listEntry.size) {
                val chartEntry2 = listEntry[index + 1]
                val chartEntry3 = listEntry[index + 2]
                mData.add(getOneHourData(chartEntry, chartEntry2, chartEntry3))
            }
        }

    }

private fun getOneHourData(
        chartEntry1: ChartEntry,
        chartEntry2: ChartEntry,
        chartEntry3: ChartEntry
    ): HourChartData {
        val tesData = HourChartData()
        val chartEntries: MutableList<ChartEntry> = ArrayList()
        chartEntries.add(ChartEntry(chartEntry1.x, chartEntry1.y))
        chartEntries.add(ChartEntry(chartEntry2.x, chartEntry2.y))
        chartEntries.add(ChartEntry(chartEntry3.x, chartEntry3.y))
        tesData.chartEntries = chartEntries
        return tesData
    }

}
2.3.1 绘制
    private fun drawHalfHourChart(canvas: Canvas, hourChartData: HourChartData, wSpace: Float) {
        for (i in hourChartData.chartEntries.indices) {
            if (i < hourChartData.chartEntries.size - 1) {
                val start = hourChartData.chartEntries[i]
                val end = hourChartData.chartEntries[i + 1]
                val path = Path()
                val moveX = wSpace * start.x
                // view坐标系和图表坐标系Y轴相反 0.8为留出 4/5间距
                val moveY = height * 0.8f * ((100f - start.y) / 100f)
                path.moveTo(moveX, moveY)
                val lineX = wSpace * end.x
                val lineY = height * 0.8f * ((100f - end.y) / 100f)
                path.lineTo(lineX, lineY)
                // 先画背景再画线 遮挡关系
                if (end.y > start.y) {
                    canvas.drawPath(path, mPaint)
                } else {
                    canvas.drawPath(path, mPaintDown)
                }

}

}
2.3.2 填充逻辑
选中小时内变色 松开全部变色
       if (selectPosition < 0 || isSelectCurr) {
                    val areaPath = Path(path)
                    val rectF = RectF()
                    // 0.8为留出 4/5间距
                    areaPath.computeBounds(rectF, true)
                    areaPath.lineTo(rectF.right, height.toFloat() * 0.8f)
                    areaPath.lineTo(rectF.left, height.toFloat() * 0.8f)
                    Log.i("testchart", "start ${start}")
                    Log.i("testchart", "end ${end}")
                    if (end.y >= start.y) {
                        canvas.drawPath(areaPath, mPaintArea)
                    } else {
                        canvas.drawPath(areaPath, mPaintAreaDown)
                    }
                }
2.3.3 选中逻辑
1.判断x是否在第几小时
2.小时内哪些点符合
3.松开则全部充满
    override fun onTouchEvent(event: MotionEvent): Boolean {
        when (event.action) {
            MotionEvent.ACTION_MOVE, MotionEvent.ACTION_DOWN -> {
                val x = event.x
                selectPosition = (x / (width / 48)).toInt()
                Log.i("testchart", "ACTION_DOWN selectPosition $selectPosition")

                invalidate() //更新视图
                return true
            }
            MotionEvent.ACTION_UP -> {
                selectPosition = -1
                mOnSelectListener?.select(-1, 0f, 0f, "")
                Log.i("testchart", "ACTION_UP selectPosition $selectPosition")
                invalidate()
                return true
            }
        }
        return super.onTouchEvent(event)
    }
// 根据x的范围 每两个点的数据一组 24部分选中
var isSelectCurr: Boolean
if (selectPosition % 2 == 0) {
isSelectCurr = selectPosition == start.x.toInt()
|| selectPosition + 1 == start.x.toInt()
} else {
isSelectCurr = selectPosition == (start.x.toInt())
|| selectPosition - 1 == start.x.toInt()
}
if (isSelectCurr && start.x.toInt() % 2 == 0) {
// 前半小时回调 显示在 一个小时 柱子范围中间位置
val des = "${start.x.toInt() / 2}:00 - ${start.x.toInt() / 2 + 1}:00 "
mOnSelectListener?.select(start.x.toInt(), lineX, lineY,des)
}2.3.4 网格线
    private fun drawGridDashLine(canvas: Canvas) {
        val dashPathEffect = DashPathEffect(
            floatArrayOf(
                10f, 5f
            ), 0f
        )
        mPaintLine.pathEffect = dashPathEffect
        val wSpace = width * 1.0f / 4

        val path = Path()
        for (i in 0 until 5) {
            path.moveTo(i * wSpace, 0f)
            path.lineTo(i * wSpace, height.toFloat())
        }
        canvas.drawPath(path, mPaintLine)


        val hSpace = height * 1.0f / 5

        // 留出最后一条线
        mPaintLine.pathEffect = null
        val pathH = Path()
        for (i in 0 until 5) {
            pathH.moveTo(0f, i * hSpace)
            pathH.lineTo(width.toFloat(), i * hSpace)
        }
        canvas.drawPath(pathH, mPaintLine)
    }
2.3.5 MarkView位置和显示
经典clipChildren解决边界处被遮挡的问题
.mOnSelectListener = object : ChartView.OnSelectListener {
            override fun select(position: Int, x: Float, y: Float, des: String) {

                // 开启透视 爷爷布局生效 分内部透视 和使用透视 也可以根局部直接使用
                this@View.let{
                    (it as ViewGroup).clipChildren = false
                }
                this@View.parent?.let {
                    (it as ViewGroup).clipChildren = false
                }

                tvMarkView.text = des
                if (position >= 0) {
                    markView.x = x - markView.width / 2.0f
                    markView.y = y - markView.height
                    markView.visibility = View.VISIBLE
                } else {
                    markView.visibility = View.GONE
                }
            }

        }
2.3.6 XY轴 数值显示
这一块建议大家摆烂 ,虽然绘制也不难,就是得把间距都留出来,类似文中0.8多留出一个网格线,反正一个项目就几个图,也不做通用控件,如果一起绘制调位置都不方便,反正就一个图用view补随意显示改位置🤣,像MPAndroid legend和label 封装起来了 改个位置麻烦的很
<?xml version="1.0" encoding="utf-8"?>
<RelativeLayout xmlns:android="http://schemas.android.com/apk/res/android"
    xmlns:tools="http://schemas.android.com/tools"
    android:layout_width="wrap_content"
    android:layout_height="wrap_content"
    tools:context=".ChartActivity">

    <com.rex.demo.chart.SettingChartView
        android:id="@+id/chartView"
        android:layout_width="240dp"
        android:layout_height="240dp" />

    <LinearLayout
        android:layout_width="300dp"
        android:layout_height="wrap_content"
        android:layout_alignBottom="@+id/chartView"
        android:orientation="horizontal">

        <TextView
            android:layout_width="0dp"
            android:layout_height="wrap_content"
            android:layout_weight="1"
            android:text="00:00" />


        <TextView
            android:layout_width="0dp"
            android:layout_height="wrap_content"
            android:layout_weight="1"
            android:text="06:00" />


        <TextView
            android:layout_width="0dp"
            android:layout_height="wrap_content"
            android:layout_weight="1"
            android:text="12:00" />

        <TextView
            android:layout_width="0dp"
            android:layout_height="wrap_content"
            android:layout_weight="1"
            android:text="18:00" />

        <Space
            android:layout_width="0dp"
            android:layout_height="wrap_content"
            android:layout_weight="1" />

    </LinearLayout>


 <LinearLayout
        android:layout_width="wrap_content"
        android:layout_height="240dp"
        android:layout_marginStart="10dp"
        android:layout_toEndOf="@+id/chartView"
        android:orientation="vertical">

        <TextView
            android:layout_width="wrap_content"
            android:layout_height="0dp"
            android:layout_margin="-10dp"
            android:layout_weight="1"
            android:gravity="top"
            android:text="100%" />


        <TextView
            android:layout_width="wrap_content"
            android:layout_height="0dp"
            android:layout_weight="2"
            android:gravity="center_vertical"
            android:text="50%" />


        <TextView
            android:layout_width="wrap_content"
            android:layout_height="0dp"
            android:layout_weight="1"
            android:gravity="bottom"
            android:text="0%" />


        <TextView
            android:layout_width="wrap_content"
            android:layout_height="0dp"
            android:layout_weight="1"
            android:gravity="bottom"
            android:text="24:00" />


    </LinearLayout>

  <RelativeLayout
        android:id="@+id/markView"
        android:layout_width="100dp"
        android:layout_height="40dp"
        android:background="@drawable/marker2"
        android:visibility="gone"
        tools:ignore="Overdraw">

        <TextView
            android:id="@+id/tvMarkView"
            android:layout_width="wrap_content"
            android:layout_height="wrap_content"
            android:layout_centerHorizontal="true"
            android:layout_marginLeft="5dp"
            android:layout_marginTop="7dp"
            android:layout_marginRight="5dp"
            android:ellipsize="end"
            android:gravity="center"
            android:singleLine="true"
            android:text="markView"
            android:textAppearance="?android:attr/textAppearanceSmall"
            android:textColor="@android:color/white"
            android:textSize="12sp" />

    </RelativeLayout>
</RelativeLayout>
本文主要提供复刻思路暂时没有源码,建议手撸一遍,因为这类需求必须理解每个细节才能方便改动,比如以前发过的断点不连续绘制 mp新版好像又不行了,等会看看

