-
因为很多系统都包含事务,所以Spring提供了相关的Api,属于AOP切面编程的二次封装
-
那么什么是事务(Transaction)呢?
- 指访问并可能更新数据库中各种数据项的一个程序执行单元(unit)
- 在一个业务流程中可能需要多条DML联合执行,这多条语句只能同时成功或同时失败,我们称之为事务【DML就是增删改操作】
-
事务在执行过程中包含哪些过程呢?
- 开启事务
- 执行业务
- 提交事务,没有异常的情况下才会 commit
- 回滚事务 ,出现异常了就会 rollback
-
对于一个基本的事务有哪些特性呢?
- 原子性:事务是计算机操作不可再划分的基本单位 【最小工作单元】
- 一致性:事务只能同时成功或失败,执行前后任务总量不变【保证操作结果的正确性】
- 隔离性:保证事务之间互不干扰【多事务并发的情况】
- 持久性:事务结束的标志【数据存储到数据库的表中了】
-
MVC 三层架构逻辑图:

一、 引入事务场景
- 我们创建一个场景模拟银行转账的业务,引出为什么要添加事务处理
- 准备工作:
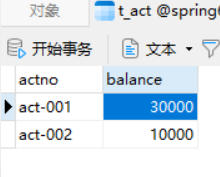
在数据库中建表 t_act2 , 并初始化两条数据用于我们转账【自定义即可】

我们的项目模块中创建 MVC 三层架构的包,因为我们这是一个Jar工程,所以通过测试模拟表现层 【给出目录结构】

修改我们的pom.xml 文件,确定打包方式和配置我们需要的依赖
	<packaging>jar</packaging>

    <!--仓库-->
    <repositories>
        <!--spring里程碑版本的仓库-->
        <repository>
            <id>repository.spring.milestone</id>
            <name>Spring Milestone Repository</name>
            <url>https://repo.spring.io/milestone</url>
        </repository>
    </repositories>

    <!--依赖-->
    <dependencies>
        <!--spring context-->
        <dependency>
            <groupId>org.springframework</groupId>
            <artifactId>spring-context</artifactId>
            <version>6.0.0-M2</version>
        </dependency>
        <!--spring jdbc-->
        <dependency>
            <groupId>org.springframework</groupId>
            <artifactId>spring-jdbc</artifactId>
            <version>6.0.0-M2</version>
        </dependency>
        <!--mysql驱动-->
        <dependency>
            <groupId>mysql</groupId>
            <artifactId>mysql-connector-java</artifactId>
            <version>8.0.30</version>
        </dependency>
        <!--德鲁伊连接池-->
        <dependency>
            <groupId>com.alibaba</groupId>
            <artifactId>druid</artifactId>
            <version>1.2.13</version>
        </dependency>
        <!--@Resource注解-->
        <dependency>
            <groupId>jakarta.annotation</groupId>
            <artifactId>jakarta.annotation-api</artifactId>
            <version>2.1.1</version>
        </dependency>
        <!--junit-->
        <dependency>
            <groupId>junit</groupId>
            <artifactId>junit</artifactId>
            <version>4.13.2</version>
            <scope>test</scope>
        </dependency>
    </dependencies>
创建我们的pojo类,对应封装数据库表中的字段 Account.java
package com.powernode.bank.pojo;

/**
 * @author Bonbons
 * @version 1.0
 */
public class Account {
    private String actno;
    private Double balance;

    public Account() {
    }

    public Account(String actno, Double balance) {
        this.actno = actno;
        this.balance = balance;
    }

    public String getActno() {
        return actno;
    }

    public void setActno(String actno) {
        this.actno = actno;
    }

    public Double getBalance() {
        return balance;
    }

    public void setBalance(Double balance) {
        this.balance = balance;
    }

    @Override
    public String toString() {
        return "User{" +
                "actno='" + actno + '\'' +
                ", balance=" + balance +
                '}';
    }
}
编写我们持久层的接口 AccountDao 【提供对数据库操作的接口,因为我们只实现转账功能,所以只需要查询和更新操作】
package com.powernode.bank.dao;

import com.powernode.bank.pojo.Account;

/**
 * @author Bonbons
 * @version 1.0
 */
public interface AccountDao {
    // 更新
    int update(Account act);
    // 查询
    Account selectByActno(String actno);
}
编写我们dao层接口的实现类 AccountDaoImpl.java
package com.powernode.bank.dao.impl;

import com.powernode.bank.dao.AccountDao;
import com.powernode.bank.pojo.Account;
import jakarta.annotation.Resource;
import org.springframework.jdbc.core.BeanPropertyRowMapper;
import org.springframework.jdbc.core.JdbcTemplate;
import org.springframework.stereotype.Repository;


/**
 * @author Bonbons
 * @version 1.0
 */
@Repository("accountDao")
public class AccountDaoImpl implements AccountDao {
    /*
        我们采用Spring提供的JDBCTemplate来完成操作
     */

    // 创建JdbcTemplate的对象
    @Resource(name = "jdbcTemplate")
    private JdbcTemplate jdbcTemplate;


    @Override
    public int update(Account act) {
        // 编写sql语句
        String sql = "update t_act2 set balance = ? where actno = ?";
        // 调用我们的更新方法 >> sql语句、参数列表
        int count = jdbcTemplate.update(sql, act.getBalance(), act.getActno());
        return count;
    }

    @Override
    public Account selectByActno(String actno) {
        // 编写查询的sql
        String sql = "select actno, balance from t_act2 where actno = ?";
        // 调用我们查询一条语句的方法
        Account account = jdbcTemplate.queryForObject(sql, new BeanPropertyRowMapper<>(Account.class), actno);
        return account;
    }
}
- 我们采用Spring为我们提供的JDK模板进行操作 >> 使用 @Resource 注解注入
- 具体JdbcTemplate模板类的简单用法可以参考我们前面的文章 点击跳转
为了降低MVC层与层之间的耦合度,我们在每层之间都提供接口,编写我们的业务层接口 AccountService
package com.powernode.bank.service;

/**
 * @author Bonbons
 * @version 1.0
 */
public interface AccountService {
    /**
     * 转账业务
     * @param fromActno 转出账户
     * @param toActno 转入账户
     * @param money 具体金额
     */
    public void transfer(String fromActno, String toActno, Double money);
}
编写我们的接口实现类 AccountServiceImpl
package com.powernode.bank.service.impl;

import com.powernode.bank.dao.AccountDao;
import com.powernode.bank.pojo.Account;
import com.powernode.bank.service.AccountService;
import jakarta.annotation.Resource;
import org.springframework.stereotype.Service;

/**
 * @author Bonbons
 * @version 1.0
 */
@Service("accountService")
public class AccountServiceImpl implements AccountService {
    // 需要我们持久层的对象
    @Resource(name = "accountDao")
    private AccountDao accountDao;
    // 转账业务
    @Override
    public void transfer(String fromActno, String toActno, Double money) {
        // 查询转出账户
        Account fromAccount = accountDao.selectByActno(fromActno);
        // 判断余额是否充足
        if(fromAccount.getBalance() < money){
            /*
            System.out.println("余额不足");
            // return直接结束事务
            return;
             */

            // 使用抛出异常来代替这部分的代码
            throw new RuntimeException("余额不足");
        }
        // 获取我们接收账户的信息
        Account toAccount = accountDao.selectByActno(toActno);
        // 在内存中更新余额信息
        toAccount.setBalance(toAccount.getBalance() + money);
        fromAccount.setBalance(fromAccount.getBalance() - money);
        // 将更新后的转入账户对象调用update方法更新到我们的数据库中
        int updateCount = 0;
        updateCount += accountDao.update(fromAccount);
        updateCount += accountDao.update(toAccount);

        // 查看我们是否更新成功
        // System.out.println(updateCount == 2 ? "转账成功" : "转账失败");
        // 此段代码还是采用抛出异常的方式代替
        if(updateCount != 2){
            throw new RuntimeException("转账失败,请联系银行工作人员!!!");
        }
    }
}
- 通过 @Service 注解将我们的类纳入到Spring容器托管
- 通过 @Resource 注解注入我们操作数据库的属性,还有三种通过注解注入属性值的方式可以参考
编写我们的配置文件 spring.xml
<?xml version="1.0" encoding="UTF-8"?>
<beans xmlns="http://www.springframework.org/schema/beans"
       xmlns:xsi="http://www.w3.org/2001/XMLSchema-instance"
       xmlns:context="http://www.springframework.org/schema/context"
       xsi:schemaLocation="http://www.springframework.org/schema/beans http://www.springframework.org/schema/beans/spring-beans.xsd
                           http://www.springframework.org/schema/context http://www.springframework.org/schema/context/spring-context.xsd">
    <!--context扫描包自动创建Bean的实例-->
    <context:component-scan base-package="com.powernode.bank" />

    <!--我们自动扫描Bean是针对我们自己写好的类,但是我们JdbcTemplate类不是我们自己写的,所以就需要手动声明-->
    <bean id="jdbcTemplate" class="org.springframework.jdbc.core.JdbcTemplate">
        <!--这个jdbc模板需要我们配置一个数据源的属性-->
        <property name="dataSource" ref="dataSource" />
    </bean>
    <!--因为我们使用的是德鲁伊的数据源,需要传入数据库的信息,所以还需要手动配一下-->
    <bean id="dataSource" class="com.alibaba.druid.pool.DruidDataSource">
        <!--连接数据库的四个属性-->
        <property name="driverClassName" value="com.mysql.cj.jdbc.Driver" />
        <property name="url" value="jdbc:mysql://localhost:3306/powernode" />
        <property name="username" value="root" />
        <property name="password" value="111111" />
    </bean>
</beans>
编写我们的测试程序
package com.powernode.bank.test;

import com.powernode.bank.service.AccountService;
import com.powernode.bank.service.impl.AccountServiceImpl;
import org.junit.Test;
import org.springframework.context.ApplicationContext;
import org.springframework.context.support.ClassPathXmlApplicationContext;

/**
 * @author Bonbons
 * @version 1.0
 */
public class BankTransferTest {
    // 对我们转账功能的测试
    @Test
    public void testTransfer(){
        // 先解析XML文件
        ApplicationContext applicationContext = new ClassPathXmlApplicationContext("spring.xml");
        // 获取我们业务类的Bean
        AccountService accountService = applicationContext.getBean("accountService", AccountServiceImpl.class);
        try {
            // 调用我们的转账方法 [因为可能发生异常,所以我们执行事务的这个语句需要添加异常处理]
            accountService.transfer("act-001", "act-002", 1000.0);
            System.out.println("转账成功!");
        }catch (Exception e){
            e.printStackTrace();
        }
    }
}

根据程序运行结果以及数据库表中数据的变化,我们可以得知转账操作成功

- 但是,如果在我们从内存写入到数据库的过程中发生了异常【对两个账户操作之间】,会发生什么呢?

我们模拟了一个空指针异常,先看一下测试的运行结果

确实捕获到了空指针异常,接下来看一下数据库表中的信息是否发生了变化

- 我们可以发现,转出账户少了1000元,但是我们待转入账户并没有获得100元,这是我们不期望得到的结果
- 所以我们应该将传出、转入作为一个完整的事务,要么不执行,执行的话只能同时执行成功或失败
二、Spring 对事务的支持
-
Spring 实现了事务的两种方式:
- 编程式事务:自己编写代码来完成事务的管理
- 声明式事务 :
- 基于注解声明
- 基于XML配置声明
-
Spring 专门对事务开发了一套AOP,属于面向切面编程,有一个Spring事务管理器的核心接口 PlatformTransactionManager
- DataSourceTransactionManager实现类:支持JdbcTemplate、MyBatis等业务
- JtaTransactionManager 支持分布式业务管理
-
针对上述案例存在的问题,我们采用注解式事务演示如何处理
需要我们为配置文件添加内容:tx的命名空间、事务管理器的生命、开启注解事务的功能【我直接给出完整的配置文件】
<?xml version="1.0" encoding="UTF-8"?>
<beans xmlns="http://www.springframework.org/schema/beans"
       xmlns:xsi="http://www.w3.org/2001/XMLSchema-instance"
       xmlns:context="http://www.springframework.org/schema/context"
       xmlns:tx="http://www.springframework.org/schema/tx"
       xsi:schemaLocation="http://www.springframework.org/schema/beans http://www.springframework.org/schema/beans/spring-beans.xsd
                           http://www.springframework.org/schema/context http://www.springframework.org/schema/context/spring-context.xsd
                           http://www.springframework.org/schema/tx http://www.springframework.org/schema/tx/spring-tx.xsd">
    <!--context扫描包自动创建Bean的实例-->
    <context:component-scan base-package="com.powernode.bank" />

    <!--我们自动扫描Bean是针对我们自己写好的类,但是我们JdbcTemplate类不是我们自己写的,所以就需要手动声明-->
    <bean id="jdbcTemplate" class="org.springframework.jdbc.core.JdbcTemplate">
        <!--这个jdbc模板需要我们配置一个数据源的属性-->
        <property name="dataSource" ref="dataSource" />
    </bean>
    <!--因为我们使用的是德鲁伊的数据源,需要传入数据库的信息,所以还需要手动配一下-->
    <bean id="dataSource" class="com.alibaba.druid.pool.DruidDataSource">
        <!--连接数据库的四个属性-->
        <property name="driverClassName" value="com.mysql.cj.jdbc.Driver" />
        <property name="url" value="jdbc:mysql://localhost:3306/powernode" />
        <property name="username" value="root" />
        <property name="password" value="111111" />
    </bean>

    <!--配置事务管理器-->
    <bean id="txManager" class="org.springframework.jdbc.datasource.DataSourceTransactionManager">
        <!--因为事务管理器需要连接对象,所以我们要配置数据源-->
        <property name="dataSource" ref="dataSource" />
    </bean>
    <!--我们要通过事务管理器的命名空间 tx, 开启事务注解管理器-->
    <tx:annotation-driven transaction-manager="txManager" />
</beans>
然后在我们的业务类中添加我们的事务注解 @Transactional
如果将注解添加到了我们的具体的方法上,代表这个方法将是一个完整的事务
如果直接将注解添加到了类上,等同于为这个类中的所有方法都添加了注解因为我们这个业务类只有一个方法,所以我就直接添加到 transfer 方法上了
package com.powernode.bank.service.impl;
import com.powernode.bank.dao.AccountDao;
import com.powernode.bank.pojo.Account;
import com.powernode.bank.service.AccountService;
import jakarta.annotation.Resource;
import org.springframework.stereotype.Service;
import org.springframework.transaction.annotation.Transactional;
/**
* @author Bonbons
* @version 1.0
*/
@Service("accountService")
public class AccountServiceImpl implements AccountService {
// 需要我们持久层的对象
@Resource(name = "accountDao")
private AccountDao accountDao;
// 转账业务
@Override
@Transactional
public void transfer(String fromActno, String toActno, Double money) {
// 查询转出账户
Account fromAccount = accountDao.selectByActno(fromActno);
// 判断余额是否充足
if(fromAccount.getBalance() < money){
/*
System.out.println("余额不足");
// return直接结束事务
return;
*/
// 使用抛出异常来代替这部分的代码
throw new RuntimeException("余额不足");
}
// 获取我们接收账户的信息
Account toAccount = accountDao.selectByActno(toActno);
// 在内存中更新余额信息
toAccount.setBalance(toAccount.getBalance() + money);
fromAccount.setBalance(fromAccount.getBalance() - money);
// 将更新后的转入账户对象调用update方法更新到我们的数据库中
int updateCount = 0;
updateCount += accountDao.update(fromAccount);
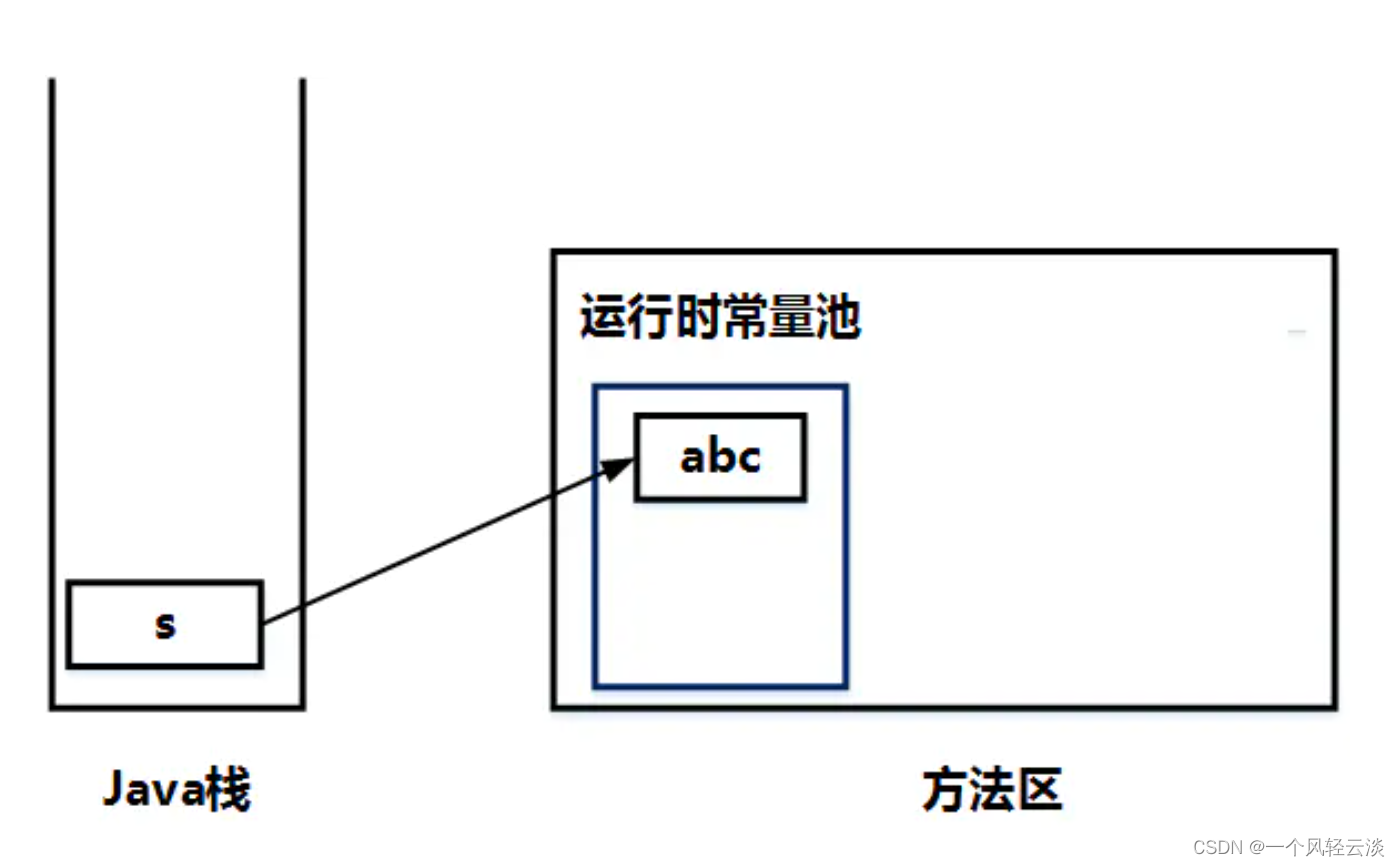
// 我们模拟空指针异常
String s = null;
s.length();
updateCount += accountDao.update(toAccount);
// 查看我们是否更新成功
// System.out.println(updateCount == 2 ? "转账成功" : "转账失败");
// 此段代码还是采用抛出异常的方式代替
if(updateCount != 2){
throw new RuntimeException("转账失败,请联系银行工作人员!!!");
}
}
}
重新执行我们的测试程序 >> 发生了异常,但是此次没有更新我们数据库表的信息

我们去掉空指针异常,测试是否可以成功转账 >> 测试成功

三、事务的属性
- 我们的事务都有哪些属性呢?【给出事务注解的源码,我们解释几个属性的含义】
//
// Source code recreated from a .class file by IntelliJ IDEA
// (powered by FernFlower decompiler)
//

package org.springframework.transaction.annotation;

import java.lang.annotation.Documented;
import java.lang.annotation.ElementType;
import java.lang.annotation.Inherited;
import java.lang.annotation.Retention;
import java.lang.annotation.RetentionPolicy;
import java.lang.annotation.Target;
import org.springframework.core.annotation.AliasFor;

@Target({ElementType.TYPE, ElementType.METHOD})
@Retention(RetentionPolicy.RUNTIME)
@Inherited
@Documented
public @interface Transactional {
    @AliasFor("transactionManager")
    String value() default "";

    @AliasFor("value")
    String transactionManager() default "";

    String[] label() default {};

    Propagation propagation() default Propagation.REQUIRED;

    Isolation isolation() default Isolation.DEFAULT;

    int timeout() default -1;

    String timeoutString() default "";

    boolean readOnly() default false;

    Class<? extends Throwable>[] rollbackFor() default {};

    String[] rollbackForClassName() default {};

    Class<? extends Throwable>[] noRollbackFor() default {};

    String[] noRollbackForClassName() default {};
}

- 接下来我们详细的介绍这些属性是如何使用的
$ 事务的传播行为
- 什么是事务的传播行为呢?(Propagation)
- 就是事务是如何传递的,我们把这种传递的方式称为传播行为
- 比如我们有两个事务A、B,我们在事务A中调用事务B
- 传播行为既然作为属性使用,那么可以指定为哪些值呢?【在Spring框架中的源码】
//
// Source code recreated from a .class file by IntelliJ IDEA
// (powered by FernFlower decompiler)
//

package org.springframework.transaction.annotation;

public enum Propagation {
    REQUIRED(0),
    SUPPORTS(1),
    MANDATORY(2),
    REQUIRES_NEW(3),
    NOT_SUPPORTED(4),
    NEVER(5),
    NESTED(6);

    private final int value;

    private Propagation(int value) {
        this.value = value;
    }

    public int value() {
        return this.value;
    }
}
-
很明显这是枚举类型,有七个变量,那么这些变量又分别代表什么含义呢?
- REQUIRED:支持当前事务,如果不存在就新建一个(默认)【没有就新建,有就加入】
- SUPPORTS:支持当前事务,如果当前没有事务,就以非事务方式执行【有就加入,没有就不管了】
- MANDATORY:必须运行在一个事务中,如果当前没有事务正在发生,将抛出一个异常【有就加入,没有就抛异常】
- REQUIRES_NEW:开启一个新的事务,如果一个事务已经存在,则将这个存在的事务挂起【不管有没有,直接开启一个新事务】
- NOT_SUPPORTED:以非事务方式运行,如果有事务存在,挂起当前事务【不支持事务,存在就挂起】
- NEVER:以非事务方式运行,如果有事务存在,抛出异常【不支持事务,存在就抛异常】
- NESTED:有事务的话,就在这个事务里再嵌套一个完全独立的事务(可以独立的提交和回滚),没有事务就和REQUIRED一样
-
我的一些理解:
- 可以结合线程的概念进行理解,一般一个线程对应一个事务,当前有没有事务的含义就是对于当前正在执行的线程是否已经有存在的事务了
- 新建就是创建新事务,加入就是被调用的事务与当前事务合为一个事务
- 挂起之前的事务开启新事务,得到的是两个事务,如果对被调用的事务进行异常捕获,即使被调用的事务发生了异常也不影响原事务的执行
-
在事务注解中声明传播行为的语法:
@Transactional(propagation = Propagation.REQUIRED) -
我们结合上面的案例编写程序测试一下这个传播行为究竟是怎么个事儿
为了方便查看程序的执行流程,我们引入Log4J查看日志信息 >> 导入依赖和配置文件
<!--log4j2的依赖-->
        <dependency>
            <groupId>org.apache.logging.log4j</groupId>
            <artifactId>log4j-core</artifactId>
            <version>2.19.0</version>
        </dependency>
        <dependency>
            <groupId>org.apache.logging.log4j</groupId>
            <artifactId>log4j-slf4j2-impl</artifactId>
            <version>2.19.0</version>
        </dependency>
这个 Log4j 的核心配置文件推荐放在根目录下,日志级别我们设置为 DEBUG
<?xml version="1.0" encoding="UTF-8"?>

<configuration>

    <loggers>
        <!--
            level指定日志级别,从低到高的优先级:
                ALL < TRACE < DEBUG < INFO < WARN < ERROR < FATAL < OFF
        -->
        <root level="DEBUG">
            <appender-ref ref="spring6log"/>
        </root>
    </loggers>

    <appenders>
        <!--输出日志信息到控制台-->
        <console name="spring6log" target="SYSTEM_OUT">
            <!--控制日志输出的格式-->
            <PatternLayout pattern="%d{yyyy-MM-dd HH:mm:ss SSS} [%t] %-3level %logger{1024} - %msg%n"/>
        </console>
    </appenders>
</configuration>
第一步修改,我们为 AccountDao 接口添加新方法 insert() 为了向数据库中添加新账户
package com.powernode.bank.dao;

import com.powernode.bank.pojo.Account;

/**
 * @author Bonbons
 * @version 1.0
 */
public interface AccountDao {
    // 更新
    int update(Account act);
    // 查询
    Account selectByActno(String actno);
    // 插入
    int insert(Account act);
}
第二步修改,在我们接口的实现类中要实现对应的方法,也就是在 AccountDaoImpl中
@Override
public int insert(Account act) {
	String sql = "insert into t_act2 values (?, ?)";
	int count = jdbcTemplate.update(sql, act.getActno(), act.getBalance());
	return count;
}
第三步修改,在我们银行业务方法中添加一个 save 方法,调用我们持久层对象的 inset 方法
package com.powernode.bank.service;

import com.powernode.bank.pojo.Account;

/**
 * @author Bonbons
 * @version 1.0
 */
public interface AccountService {
    /**
     * 转账业务
     * @param fromActno 转出账户
     * @param toActno 转入账户
     * @param money 具体金额
     */
    public void transfer(String fromActno, String toActno, Double money);

    /**
     * 保存账户信息
     * @param act 账户
     */
    void save(Account act);
}
第四步修改,我们需要在业务层接口的实现类AccountServiceImpl中实现我们新加入的方法,为了调用其他的业务我们添加一个接口的实现类
// 先给出的是我们新增的接口实现类 AccountServiceImpl2
package com.powernode.bank.service.impl;

import com.powernode.bank.dao.AccountDao;
import com.powernode.bank.pojo.Account;
import com.powernode.bank.service.AccountService;
import jakarta.annotation.Resource;
import org.springframework.stereotype.Service;
import org.springframework.transaction.annotation.Propagation;
import org.springframework.transaction.annotation.Transactional;

/**
 * @author Bonbons
 * @version 1.0
 */
@Service("accountService2")
public class AccountServiceImpl2 implements AccountService {
    @Override
    public void transfer(String fromActno, String toActno, Double money) {
        // 不使用transfer方法
    }

    // 需要创建操作数据库的对象
    @Resource(name = "accountDao")
    private AccountDao accountDao;
    @Override
    @Transactional(propagation = Propagation.REQUIRES)
    public void save(Account act) {
        accountDao.insert(act);
    }
}
此处给出的是我们修改后的业务接口原实现类,我们只是想研究一下传播行为,所以我们不用管上面的 transfer 方法
package com.powernode.bank.service.impl;

import com.powernode.bank.dao.AccountDao;
import com.powernode.bank.pojo.Account;
import com.powernode.bank.service.AccountService;
import jakarta.annotation.Resource;
import org.springframework.stereotype.Service;
import org.springframework.transaction.annotation.Propagation;
import org.springframework.transaction.annotation.Transactional;

/**
 * @author Bonbons
 * @version 1.0
 */
@Service("accountService")
public class AccountServiceImpl implements AccountService {
    // 需要我们持久层的对象
    @Resource(name = "accountDao")
    private AccountDao accountDao;
    // 转账业务
    @Override
    @Transactional
    public void transfer(String fromActno, String toActno, Double money) {
        // 查询转出账户
        Account fromAccount = accountDao.selectByActno(fromActno);
        // 判断余额是否充足
        if(fromAccount.getBalance() < money){
            /*
            System.out.println("余额不足");
            // return直接结束事务
            return;
             */

            // 使用抛出异常来代替这部分的代码
            throw new RuntimeException("余额不足");
        }
        // 获取我们接收账户的信息
        Account toAccount = accountDao.selectByActno(toActno);
        // 在内存中更新余额信息
        toAccount.setBalance(toAccount.getBalance() + money);
        fromAccount.setBalance(fromAccount.getBalance() - money);
        // 将更新后的转入账户对象调用update方法更新到我们的数据库中
        int updateCount = 0;
        updateCount += accountDao.update(fromAccount);
        // 我们模拟空指针异常
        String s = null;
        s.length();
        updateCount += accountDao.update(toAccount);
        // 查看我们是否更新成功
        // System.out.println(updateCount == 2 ? "转账成功" : "转账失败");
        // 此段代码还是采用抛出异常的方式代替
        if(updateCount != 2){
            throw new RuntimeException("转账失败,请联系银行工作人员!!!");
        }


    }

    // 创建我们第二个Service的对象
    @Resource(name = "accountService2")
    private AccountService accountService;
    @Override
    @Transactional(propagation = Propagation.REQUIRED) // 默认传播行为就是这个
    public void save(Account act) {
        // 在本方法中也插入数据
        accountDao.insert(act);
        // 创建我们待插入的对象
        Account account = new Account("act-004", 500.0);
        // 调用另一个事务的save方法
        accountService.save(account);
    }
}
接下来就可以编写我们的测试程序了
// 对我们嵌套调用事务,事务的传播级别为 Required 的测试
@Test
public void testPropagation(){
	ApplicationContext applicationContext = new ClassPathXmlApplicationContext("spring.xml");
	// 获取我们第一个业务的实例
	AccountService accountService = applicationContext.getBean("accountService", AccountService.class);
	// 创建我们第一个方法要插入的对象
	Account account = new Account("act-003", 1000.0);
	accountService.save(account);
}

- 根据程序运行结果和数据库表中数据的变化我们可以得知测试成功
- 传播行为为 REQUIRED 时,如果当前已经存在事务了,那么就将新事务就加入当前的事务

- 我们假设一种情况,如果在调用的事务中发生异常,那么结果是怎样的呢?
- 为了方便,我们将之前插入成功的那两条数据直接删除
我们在被调用的那个save方法写一个空指针异常

通过测试结果知道,这两个save操作都回滚了【实际上是一个事务】
- 那么如果我们在第一个save方法对第二个save方法做异常处理了,结果会变化嘛?
- 结果是两个save操作仍然都回滚了,代表EQUIRED传播行为生成的是一个事务
- 如果我们把第二个事务的传播行为切换为 REQUIRES_NEW,那么会产生怎样的效果?
- 我们将自定义的空指针异常先去掉,也去掉异常的捕获
- 在第二个save方法的Transactional注解的propagation属性值修改
@Transactional(propagation = Propagation.REQUIRES_NEW)- 然后执行我们的测试程序


- 我们在第二个save方法上添加空指针异常,再次进行测试 >> 测试结果两条save方法都回滚了
- 那么我们在第一个save方法中对第二个save方法进行异常处理了,效果还是相同的吗?

通过运行结果我们可以得知,这是两个不同的事务,如果将第二个事务异常捕获,并不会影响第一个事务的执行,所以第一个事务正常提交
$ 事务隔离级别
- 什么是事务的隔离?
- 事务隔离级别是为了保证并发读取数据库中数据正确性而采用的一种策略
- 事务隔离用于以下结合的场景,第一读数据、第二并发执行
- 什么是数据读取的三大问题?
- 脏读:读取到了还没有提交的数据
- 不可重复读:在一次事务中,多次读取得到的数据不一致【一次事务读取多次数据,在这个事务执行过程中其他事务修改了数据】
- 幻读: 读到的是假数据,这个假指的是和我们预期想的不一样,只要是并发读取就一定存在幻读
- 既然是事务的隔离级别,那么分为哪几个级别?【我们先查看一下源码】
//
// Source code recreated from a .class file by IntelliJ IDEA
// (powered by FernFlower decompiler)
//

package org.springframework.transaction.annotation;

public enum Isolation {
    DEFAULT(-1),
    READ_UNCOMMITTED(1),
    READ_COMMITTED(2),
    REPEATABLE_READ(4),
    SERIALIZABLE(8);

    private final int value;

    private Isolation(int value) {
        this.value = value;
    }

    public int value() {
        return this.value;
    }
}
- 我们可以看到这个隔离级别分为四级,还有一个为Default
- DEFAULT 代表Spring不提供隔离级别的事务管理,采用数据库默认的隔离级别
- Oracle 数据库默认为 READ_COMMITTED 级别
- MySQL 数据库默认为 REPEATABLE_READ 级别
- READ_UNCOMMITTED 代表读未提交,存在脏读问题,是最低的隔离级别
- READ_COMMITTED 代表读已提交,事务提交后才能读到解决了脏读问题,但是存在不可重复读的问题
- REPEATABLE_READ 代表重复读,当然事务不结束读取到的数据都是一样的,解决了不可重复读问题,但是存在幻读问题
- SERIALIZABLE 代表序列化,事务排队执行,不能并发,隔离级别最高但效率也很低
- DEFAULT 代表Spring不提供隔离级别的事务管理,采用数据库默认的隔离级别
- 我们可以利用下面的表格辅助记忆:

- 在Transactional注解中声明隔离级别的语法:
@Transactional(isolation = Isolation.READ_UNCOMMITTED)【默认为数据库的隔离级别】 - 需求:我们编写两个业务类来演示读未提交和读已提交隔离级别的区别
第一个业务类完成数据查询的操作,还是针对我们的银行账户进行操作 IsolationService1
package com.powernode.bank.service.impl;

import com.powernode.bank.dao.AccountDao;
import com.powernode.bank.pojo.Account;
import jakarta.annotation.Resource;
import org.springframework.stereotype.Service;
import org.springframework.transaction.annotation.Isolation;
import org.springframework.transaction.annotation.Transactional;

/**
 * @author Bonbons
 * @version 1.0
 */
@Service("i1")
public class IsolationService1 {
    @Resource(name = "accountDao")
    private AccountDao accountDao;
    // 事务i1负责查询,事务的隔离级别为读未提交:就是为了演示能读到还没有提交的数据
    @Transactional(isolation = Isolation.READ_UNCOMMITTED)
    public void selectById(String actno){
        // 利用我们操作数据库的对象,调用对应查询的方法
        Account account = accountDao.selectByActno(actno);
        // 此处我们直接输出查询到的数据
        System.out.println(account);
    }
}
第二个业务负责想数据库中插入数据 IsolationService2
package com.powernode.bank.service.impl;

import com.powernode.bank.dao.AccountDao;
import com.powernode.bank.pojo.Account;
import jakarta.annotation.Resource;
import org.springframework.stereotype.Service;
import org.springframework.transaction.annotation.Transactional;

/**
 * @author Bonbons
 * @version 1.0
 */
@Service("i2")
public class IsolationService2 {
    @Resource(name = "accountDao")
    private AccountDao accountDao;
    // 事务i2负责插入数据,因为与读操作无关,我们就无需设置隔离级别
    @Transactional
    public void save(Account act){
        try{
            int count = accountDao.insert(act);
            // 我们采用让进程睡眠的方式来模拟插入数据了,但还没有提交
            Thread.sleep(1000 * 20);
            // 输出一下插入数据成功的条数
            System.out.println(count);
        }catch (Exception e){
            e.printStackTrace();
        }

    }
}
- 可以看到此处通过进程睡眠的方式,让这个事务没结束,也就是没立刻提交
- 然后我们立刻执行查询数据的那个业务,查询的id就是我们刚才要插入但没提交事务的用户id
编写我们保存数据的测试程序 testIsolation1
// 插入数据20s后提交
@Test
public void testIsolation1(){
	ApplicationContext applicationContext = new ClassPathXmlApplicationContext("spring.xml");
	IsolationService2 i2 = applicationContext.getBean("i2", IsolationService2.class);
	// 创建一个我们要插入的数据
	Account account = new Account("act-111", 1888.88);
	i2.save(account);
}
编写我们的查询数据的测试程序 testIsolation2
// 演示读未提交的事务隔离级别,我们直接查找上面那个插入的数据
@Test
public void testIsolation2(){
	ApplicationContext applicationContext = new ClassPathXmlApplicationContext("spring.xml");
	IsolationService1 i1 = applicationContext.getBean("i1", IsolationService1.class);
	i1.selectById("act-111");
}
操作方法,先运行我们的测试程序1,然后运行我们的测试程序2【在20s之内】
-
我们可以看到,当插入数据的程序未运行完,我们就已经获取到了这个用户的信息
-
这就是读未提交的隔离级别,也是最低的隔离级别,存在脏读问题

-
我们将查询数据的隔离级别更改为读已提交再次测试,看看是否还能读取到数据
-
通过结果可以看到,此时已经无法获得未提交的数据了

$ 事务超时
- 设置事务超时的作用,就是如果事务执行时间达到了我们的预设时间并且还存在没有执行完的DML语句,那么就回滚事务
- 事务超时在Transactional注解中的语法格式
@Transactional(timeout = 10)【参数默认为-1代表不设时间限制,也可以手动指定为-1】 - 需求:我们演示一下到时间了执行完DML语句和没执行完DML语句的情况
我们依旧使用上面插入银行账户信息的业务 IsoactionService2 的方法
@Transactional(timeout = 10)
public void save(Account act){
	try{
		int count = accountDao.insert(act);
		// 我们采用让进程睡眠的方式来模拟插入数据了,但还没有提交
		Thread.sleep(1000 * 20);
		// 输出一下插入数据成功的条数
		System.out.println(count);
	}catch (Exception e){
		e.printStackTrace();
	}
}
通过数据库表中的信息我们可以知道,插入数据成功了,虽然说这个事务超时了,但是在我们预设的时间10s之后没有待执行的DML【增删改】

为了演示超时后还有未执行的DML语句,我们交换睡眠进程和插入操作语句的位置 【我们把待插入的记录删除】
@Transactional(timeout = 10)
public void save(Account act){
	try{
		// 我们采用让进程睡眠的方式来模拟插入数据了,但还没有提交
		Thread.sleep(1000 * 20);
		// 位置交换了 >> 预期是没有插入成功,因为事务发生了回滚
		int count = accountDao.insert(act);
		// 输出一下插入数据成功的条数
		System.out.println(count);
	}catch (Exception e){
		e.printStackTrace();
	}
}
我们可以看到抛出了超时异常,而且数据库表中没有插入数据

$ 只读事务
- 什么是只读事务?
- 就是我们的事务中不能存在增删改相关的语句【DML语句】
- 我们前面说事务就是为了让多条DML语句同时成功或失败,那么既然我们只读不让有DML,那么有什么意义呢?
- Spring 提供的这种只读事务可以优化 select 语句的查询效率
- 在只读事务中只允许存在select语句
- 只读事务的默认属性值为 false,那么我们如何开启只读事务呢?【请参考下面的语法】
@Transactional(readOnly = true)
$ 异常回滚控制
- Spring的事务注解为我们提供了两种异常回滚控制
- 第一种 rollBackFor 代表哪些异常回滚
- 第二种 noRollBackFor 代表哪些异常不回滚
- 异常回滚控制的语法格式:【异常包含其子类 >> 例如Exception设置为回滚,那么发生它的子类异常也回滚】
@Transactional(rollbackFor = RuntimeException.class)
@Transactional(noRollbackFor = NullPointerException.class)
四、全注解式开发
- Spring 在很多地方我都谈及了全注解式开发,就是写一个配置类替换配置文件
- 此处我们是想通过配置类实现
- 扫描Bean包
- 创建德鲁伊连接池的数据源
- 使用我们的JdbcTemplate的模板
- 配置事务管理器
- 接下来我们给出配置类的代码,演示如何完成配置的
package com.powernode;

import com.alibaba.druid.pool.DruidDataSource;
import org.springframework.context.annotation.Bean;
import org.springframework.context.annotation.ComponentScan;
import org.springframework.context.annotation.Configuration;
import org.springframework.jdbc.core.JdbcTemplate;
import org.springframework.jdbc.datasource.DataSourceTransactionManager;
import org.springframework.transaction.annotation.EnableTransactionManagement;

import javax.sql.DataSource;

/**
 * @author Bonbons
 * @version 1.0
 */
@Configuration // 声明这是一个配置类
@ComponentScan("com.powernode.bank") // 声明我们扫描哪些包[主要就是扫描类上有没有声明Bean的注解然后创建实例]
@EnableTransactionManagement // 代表开启事务支持 >> 就是我们配置文件中的注解事务
public class Spring6Config {
    // 因为有些Bean需要我们配置类在哪里,在配置文件中我们直接给出类的全限定类名和我们要传递的属性
    // 但是在配置类中,我们只能自己创建Bean然后Spring调用方法获得后纳入到Spring容器中

    /*
        (1)此处我们手动创建了三个Bean >> 连接池、JDK模板、事务管理
        (2)我们想使用事务管理器,不但要创建事务管理器的Bean,还要开启根据注解识别事务的功能[因为此处我们采用的是注解式开发]
     */

    @Bean("dataSource")
    public DruidDataSource getDataSource(){
        // 创建德鲁伊连接池的对象
        DruidDataSource druidDataSource = new DruidDataSource();
        // 对于数据库连接的四个属性我们通过对象的set方法进行传递
        druidDataSource.setDriverClassName("com.mysql.cj.jdbc.Driver");
        druidDataSource.setUrl("jdbc:mysql://localhost:3306/powernode");
        druidDataSource.setUsername("root");
        druidDataSource.setPassword("111111");
        // 返回我们的数据库连接池
        return druidDataSource;
    }

    @Bean("jdbcTemplate")
    public JdbcTemplate getJdbcTemplate(DataSource dataSource){
        // 创建JDK模板类的对象
        JdbcTemplate jdbcTemplate = new JdbcTemplate();
        // 将数据源传递给模板类
        jdbcTemplate.setDataSource(dataSource);
        // 返回Bean的实例
        return jdbcTemplate;
    }

    @Bean
    public DataSourceTransactionManager getDataSourceTransactionManager(DataSource dataSource){
        DataSourceTransactionManager dataSourceTransactionManager = new DataSourceTransactionManager();
        dataSourceTransactionManager.setDataSource(dataSource);
        return dataSourceTransactionManager;
    }

}
我们将配置文件替换为配置类之后,再获取Sprng容器的时候,不采用类路径加载的方式,而是采用下面的语法格式
ApplicationContext applicationContext1 = new AnnotationConfigApplicationContext("配置类的全限定类名");
五、全XML式开发
- 既然有全注解是开发,那么也有全XML开发,就是不使用任何注解
- 但是此处我们还是使用注解来演示的,只是对于事务管理器这块不使用注解,演示如何在配置文件中配置不使用注解的事务管理
- 配置步骤主要包括三步:
- 第一步,配置事务管理器
- 第二步,配置通知 >> 事务管理器的通知
- 第三步,配置切面,这个我们在AOP式开发的时候演示过
在前面我们的依赖基础上还需要添加 aspect 的依赖,因为我们需要手动配置切片了
<!--aspectj依赖-->
<dependency>
  <groupId>org.springframework</groupId>
  <artifactId>spring-aspects</artifactId>
  <version>6.0.0-M2</version>
</dependency>
具体的XML配置可以参考如下内容,因为不使用注解管理事务,我们就把注解事务管理器去掉即可
<?xml version="1.0" encoding="UTF-8"?>
<beans xmlns="http://www.springframework.org/schema/beans"
       xmlns:xsi="http://www.w3.org/2001/XMLSchema-instance"
       xmlns:context="http://www.springframework.org/schema/context"
       xmlns:tx="http://www.springframework.org/schema/tx"
       xmlns:aop="http://www.springframework.org/schema/aop"
       xsi:schemaLocation="http://www.springframework.org/schema/beans http://www.springframework.org/schema/beans/spring-beans.xsd
                           http://www.springframework.org/schema/context http://www.springframework.org/schema/context/spring-context.xsd
                           http://www.springframework.org/schema/tx http://www.springframework.org/schema/tx/spring-tx.xsd
                           http://www.springframework.org/schema/aop http://www.springframework.org/schema/aop/spring-aop.xsd">

    <context:component-scan base-package="com.powernode.bank"/>

    <bean id="dataSource" class="com.alibaba.druid.pool.DruidDataSource">
        <property name="driverClassName" value="com.mysql.cj.jdbc.Driver"/>
        <property name="url" value="jdbc:mysql://localhost:3306/spring6"/>
        <property name="username" value="root"/>
        <property name="password" value="root"/>
    </bean>

    <bean id="jdbcTemplate" class="org.springframework.jdbc.core.JdbcTemplate">
        <property name="dataSource" ref="dataSource"/>
    </bean>

    <!--配置事务管理器-->
    <bean id="transactionManager" class="org.springframework.jdbc.datasource.DataSourceTransactionManager">
        <property name="dataSource" ref="dataSource"/>
    </bean>

    <!--配置通知-->
    <tx:advice id="txAdvice" transaction-manager="txManager">
        <tx:attributes>
            <tx:method name="save*" propagation="REQUIRED" rollback-for="java.lang.Throwable"/>
            <tx:method name="del*" propagation="REQUIRED" rollback-for="java.lang.Throwable"/>
            <tx:method name="update*" propagation="REQUIRED" rollback-for="java.lang.Throwable"/>
            <tx:method name="transfer*" propagation="REQUIRED" rollback-for="java.lang.Throwable"/>
        </tx:attributes>
    </tx:advice>

    <!--配置切面-->
    <aop:config>
        <aop:pointcut id="txPointcut" expression="execution(* com.powernode.bank.service..*(..))"/>
        <!--切面 = 通知 + 切点-->
        <aop:advisor advice-ref="txAdvice" pointcut-ref="txPointcut"/>
    </aop:config>

</beans>
编写我们的测试程序
@Test
public void testTransferXml(){
    ApplicationContext applicationContext = new ClassPathXmlApplicationContext("spring2.xml");
    AccountService accountService = applicationContext.getBean("accountService", AccountService.class);
    try {
        accountService.transfer("act-001", "act-002", 10000);
        System.out.println("转账成功");
    } catch (Exception e) {
        e.printStackTrace();
    }
}
<< XML配置可以正常使用,转账成功