必要组件安装
WSL2 Docker Git Chrome
-
Install WSL2 (Windows subsystem for Linux) refer to this official guide. WSL2 requires Windows 10, version 2004 or higher. After installing WSL2, install a Linux Distribution of your choice.
安装 WSL2(适用于 Linux 的 Windows 子系统),请参阅此官方指南 。WSL2 需要 Windows 10 版本 2004 或更高版本。安装 WSL2 后,安装您选择的 Linux 发行版。 -
Download and install Docker Desktop for Windows. Double-click
Docker for Windows Installerto run the installer. More instructions can be found here. Official guide for docker WSL2 backend can be found here. Note: Check that you are specifically using WSL2 backend for Docker.
下载并安装适用于 Windows 的 Docker Desktop。双击Docker for Windows Installer以运行安装程序。更多说明可以在这里找到。 可以找到 docker WSL2 后端的官方指南 这里 。注意:检查您是否专门使用 Docker 的 WSL2 后端。 -
In Docker Desktop, go to
Settings >> Resources >> WSL Integration, and enable integration with the Linux Distribution that you chose.
在 Docker Desktop 中,转到Settings >> Resources >> WSL Integration,然后启用与您选择的 Linux 发行版的集成。 -
Download and install Git for Windows. When installing the package please keep all options by default. More information about the package can be found here.
下载并安装 适用于 Windows 的 Git。安装包时,请默认保留所有选项。有关该软件包的更多信息, 请参见 此处 。 -
Download and install Google Chrome. It is the only browser which is supported by CVAT.
下载并安装 Google Chrome。它是 CVAT 唯一支持的浏览器。 -
安装完成后在Chrome打开localhost:8080即可进入页面
半自动标注安装
- 首先在Ubuntu进入CVAT
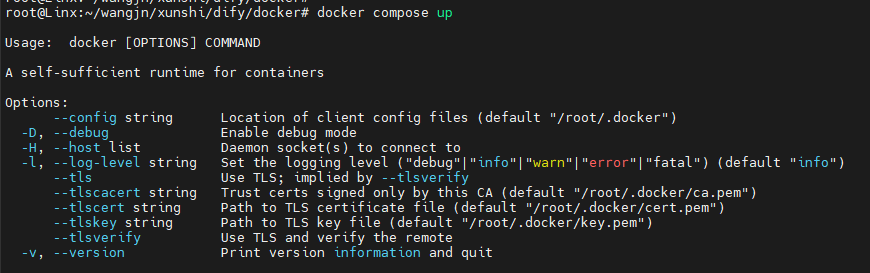
cd cvat- 关闭compose
docker compose down- To bring up cvat with auto annotation tool, from cvat root directory, you need to run:
要使用自动注释工具启动 cavat,您需要从 cvat 根目录运行:
docker compose -f docker-compose.yml -f components/serverless/docker-compose.serverless.yml up -d
- You have to install
nuctlcommand line tool to build and deploy serverless functions. Download version 1.13.0. It is important that the version you download matches the version in docker-compose.serverless.yml. For example, using wget.
您必须安装nuctl命令行工具来构建和部署无服务器功能。下载版本 1.13.0。 您下载的版本必须与 中的版本匹配 docker-compose.serverless.yml. 例如,使用 wget.
wget https://github.com/nuclio/nuclio/releases/download/1.13.0/nuctl-1.13.0-linux-amd64
在localhost:8070可查看Nuclio是否安装
- After downloading the nuclio, give it a proper permission and do a softlink.
- 下载 nuclio 后,给它适当的权限并进行软链接。
sudo chmod +x nuctl-1.13.0-linux-amd64
sudo ln -sf $(pwd)/nuctl-1.13.0-linux-amd64 /usr/local/bin/nuctl
- Deploy a couple of functions. This will automatically create a
cvatNuclio project to contain the functions. Commands below should be run only after CVAT has been installed usingdocker composebecause it runs nuclio dashboard which manages all serverless functions. - 部署几个函数。这将自动创建一个
cvatNuclio 项目来包含函数。以下命令只能在使用docker compose安装 CVAT 后运行,因为它运行管理所有无服务器功能的 nuclio 仪表板。
./serverless/deploy_cpu.sh serverless/openvino/dextr
./serverless/deploy_cpu.sh serverless/openvino/omz/public/yolo-v3-tf
如果出问题,可安装国内镜像
sudo apt update
sudo apt install -y docker.io
sudo mkdir -p /etc/docker
sudo nano /etc/docker/daemon.json
- 进入后粘贴下列网址
{
  "registry-mirrors": [
    "https://docker.mirrors.ustc.edu.cn",
    "https://registry.docker-cn.com",
    "https://hub-mirror.c.163.com",
    "https://mirror.baidubce.com"
  ]
}
- 保存后重启docker
sudo systemctl daemon-reexec
sudo systemctl restart docker
GPU加速
安装教程
【WSL2】在电脑上安装Ubuntu、图形化界面+远程连接图形化界面_哔哩哔哩_bilibili
windows11- wsl2 Docker 安装使用教程!vscode docker插件使用!_哔哩哔哩_bilibili
图像标注平台CVAT的安装和使用_哔哩哔哩_bilibili
官方链接
安装指南 |CVAT 公司 --- Installation Guide | CVAT
Semi-automatic and Automatic Annotation | CVAT
仅自用,侵权删