概述
VMware 是一家专注于虚拟化技术和云计算解决方案的全球领先软件公司,成立于1998年,总部位于美国加州。它的核心技术是通过“虚拟化”将一台物理计算机的硬件资源(如CPU、内存、存储等)分割成多个独立的虚拟环境(称为虚拟机),从而实现多个操作系统或应用同时运行在同一台物理设备上,显著提升资源利用率并降低成本。
核心技术与产品
VMware 的产品覆盖多个领域,主要分为以下几类:
-
桌面虚拟化
VMware Workstation(Windows/Linux) 和 Fusion(macOS):允许用户在单台电脑上创建并运行多个虚拟机(如同时运行Windows、Linux、macOS),常用于开发测试或跨平台工作。
VMware Horizon:提供虚拟桌面(VDI),用户可通过任何设备远程访问企业桌面环境,提升灵活性和数据安全。 -
服务器虚拟化
VMware vSphere:企业级核心平台,包含:
ESXi:直接在物理服务器上运行的“Hypervisor”(虚拟机监控程序),负责分配硬件资源。
vCenter:集中管理多台ESXi服务器,实现资源动态调配、高可用性(HA)和故障迁移(vMotion)。
优势:帮助企业整合服务器资源,降低硬件成本,提升运维效率。 -
云与容器
VMware Cloud Foundation:混合云平台,整合计算、存储、网络和容器服务,支持在私有云和公有云(如AWS、Azure)间无缝迁移工作负载。
Tanzu:专注于容器化应用管理,支持Kubernetes,简化云原生开发。 -
网络与安全
NSX:软件定义网络(SDN)解决方案,提供虚拟化网络、防火墙和负载均衡,增强云环境的安全性。
VMware 是虚拟化领域的先驱,其技术奠定了现代云计算的基础。2023年,VMware被芯片巨头Broadcom(博通)收购,未来可能更聚焦于企业级混合云和订阅服务。尽管面临竞争(如微软Hyper-V、开源KVM),VMware 仍是企业IT基础设施的重要选择。
今天,我们为大家介绍一下如何在Linux mint 22上安装VMware Workstation pro。
下载
注册账号
无论早期的VMware还是现在Broadcom都要求下载者登录系统然后下载,所以,我们还是需要先注册一个账号。
注册账号比较简单,提供一个电子邮件做为账号,再提供一个密码做为账号的密码就可以。
对于想使用企业级授权的话,还是需要用企业邮箱,不能使用非企业邮箱。
下载
注册账号以后,登录以后,系统会将我们导航到broadcom个人主页,如下图所示:
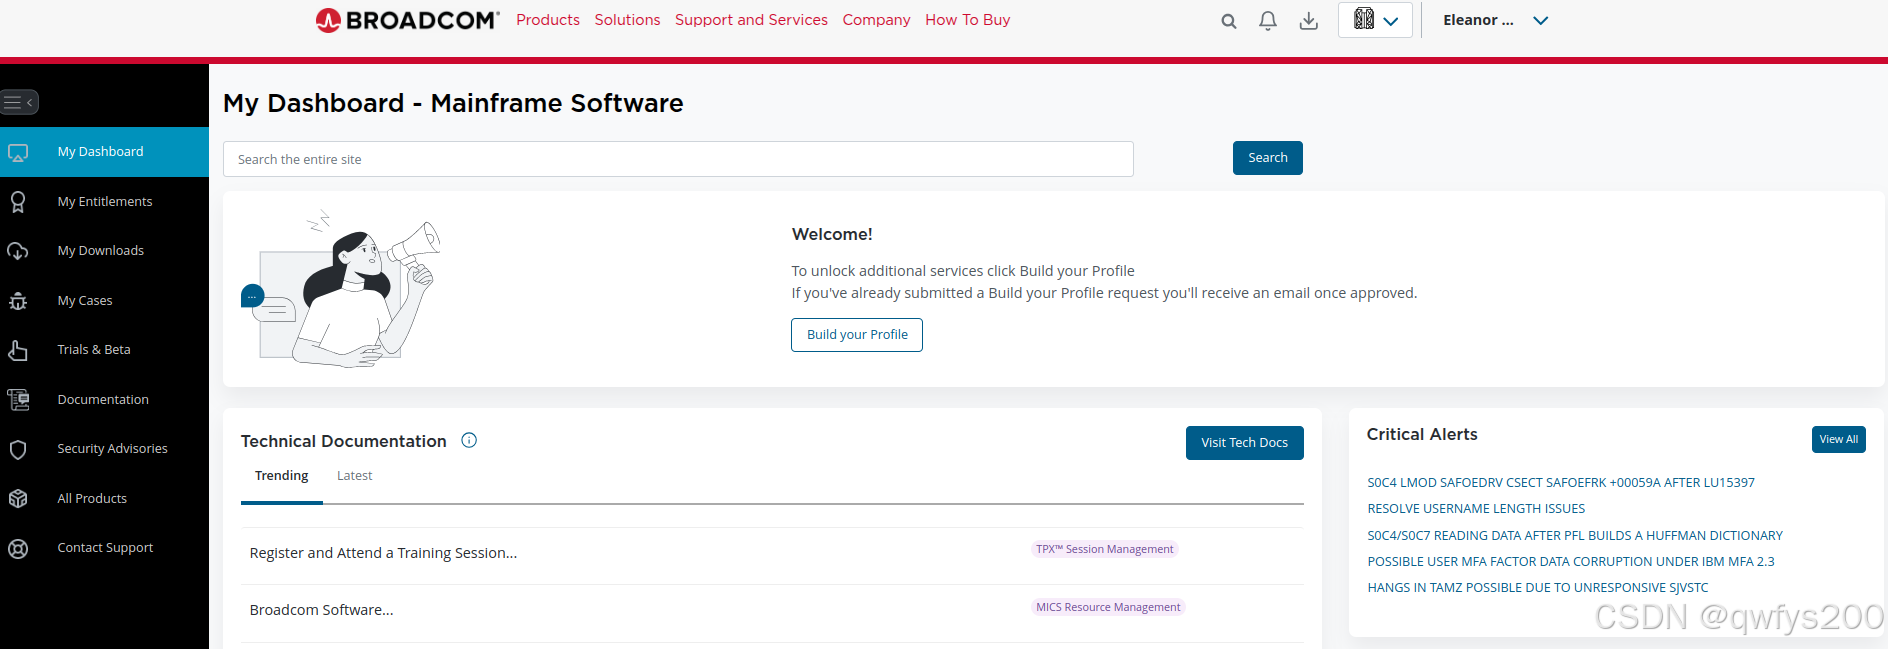
很多人第一次进来以后,看到系统中有一个菜单My Downloads就很高兴,然后点击以后,就会看到下面的页面:
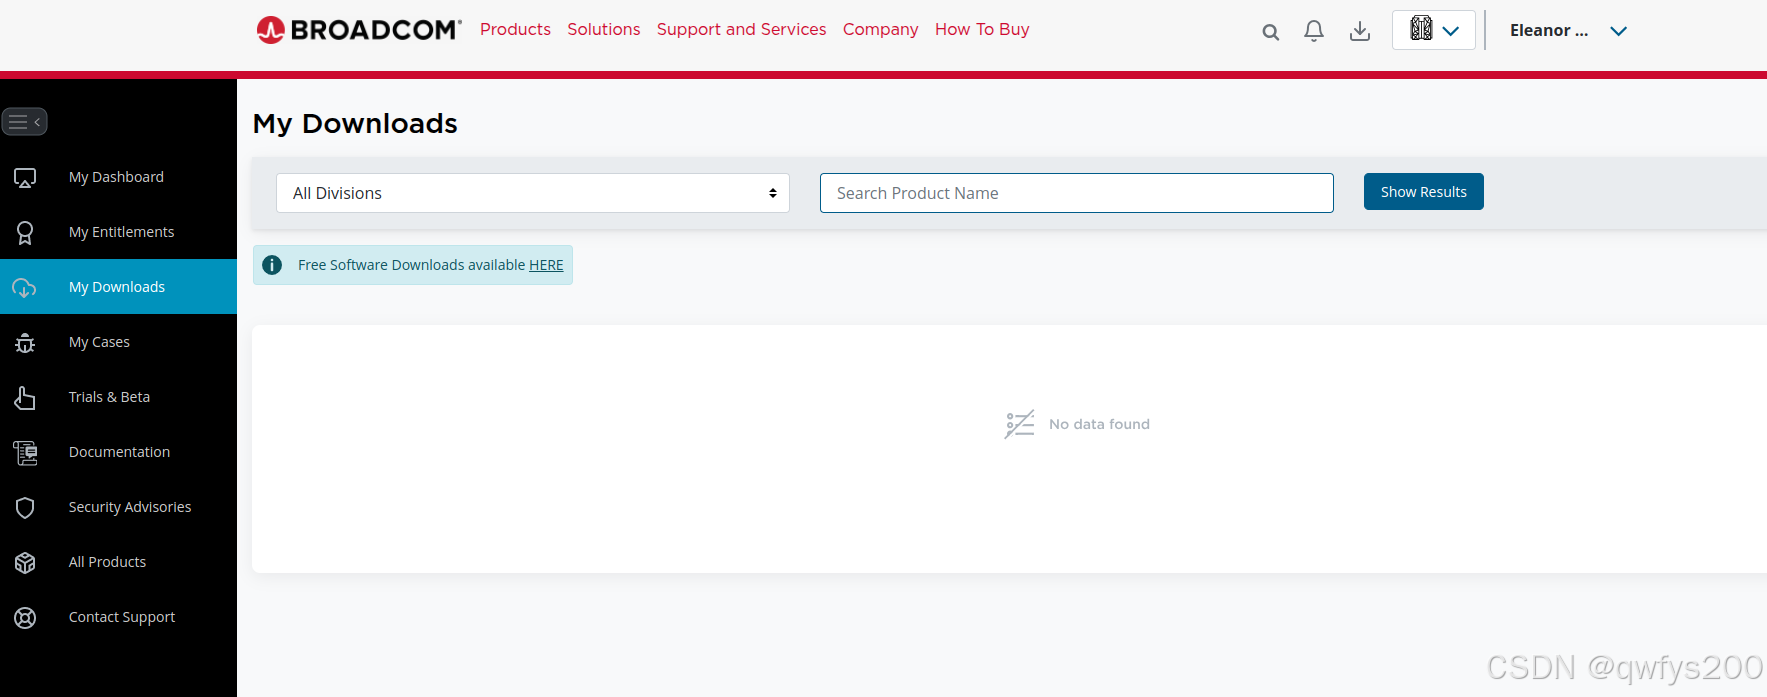
这个时候,如果在搜索框Search Product Name输入vmware workstation,点击按钮Show Results,就会发现什么也没有,如下图所示:
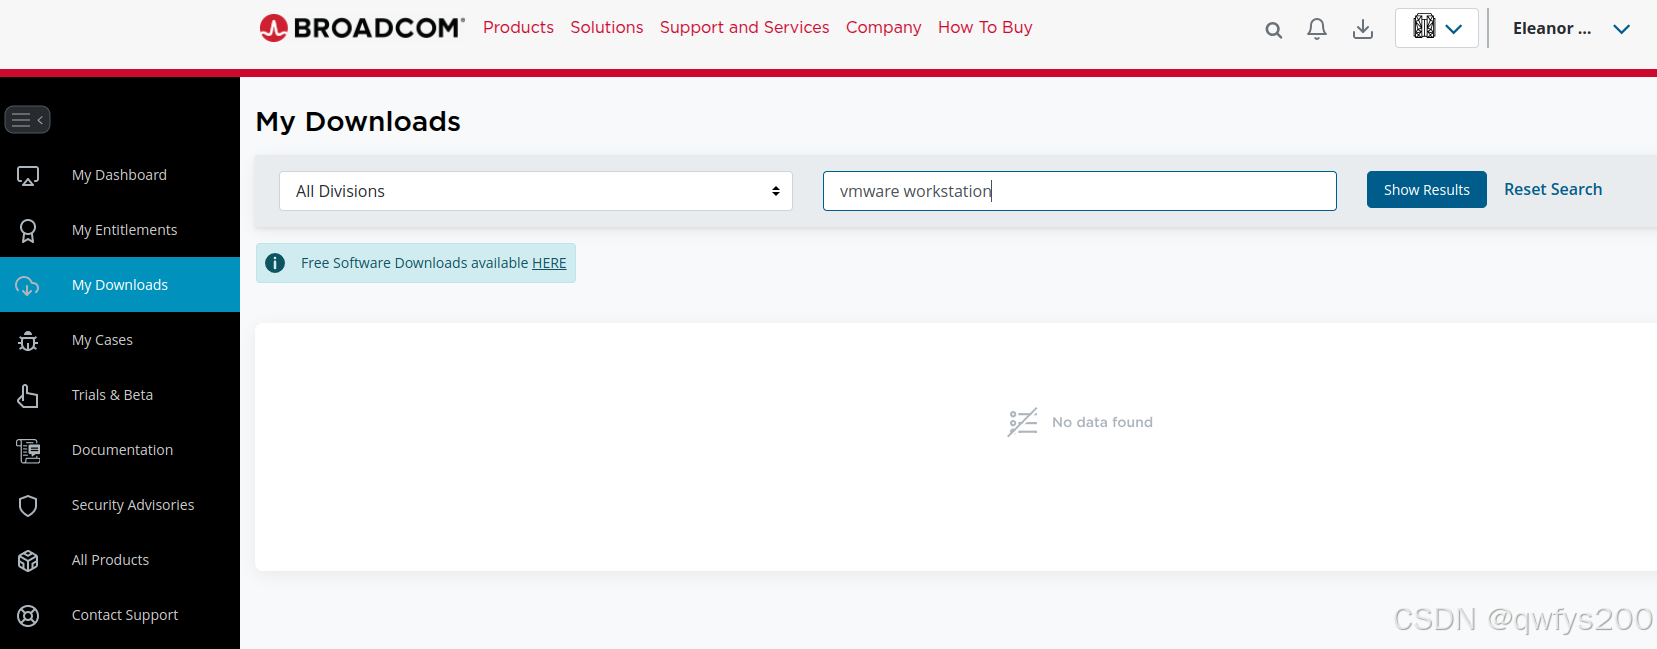
这个时候,大家会很茫然,是不是有一种大白天遇到鬼的感觉。
怎么办呢?
不要慌,这个时候,我们点击提示文本Free Software Downloads available 边上的超连接HERE,系统会将我们导航到面向Free Downloads,地址为:
- https://support.broadcom.com/group/ecx/free-downloads
如下图所示:
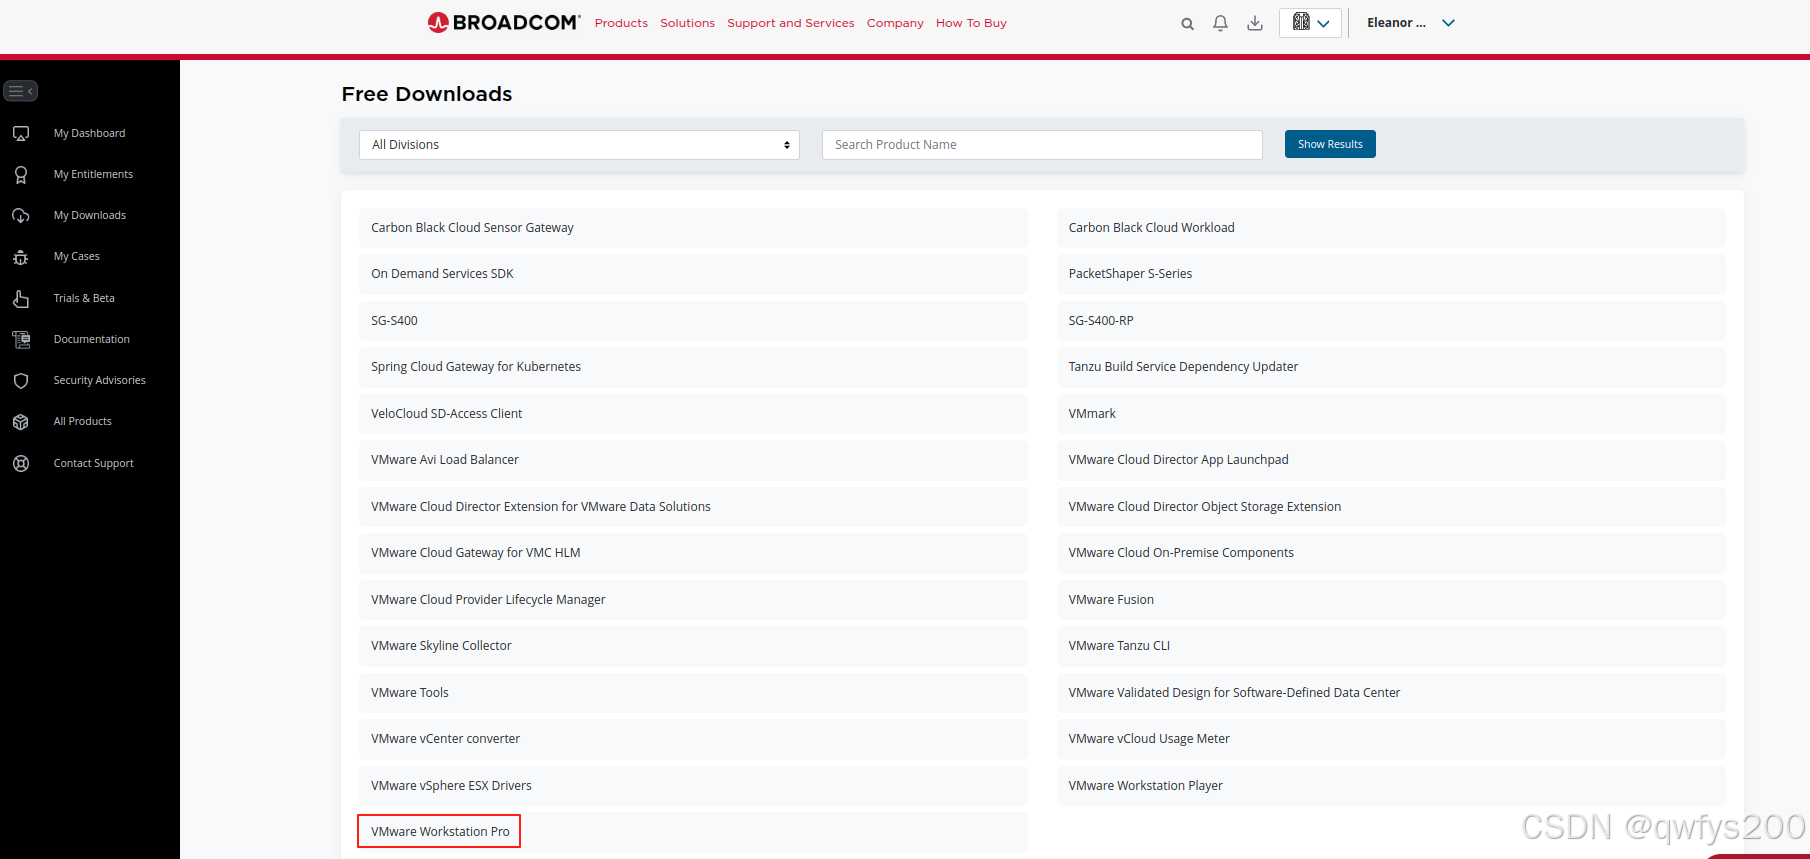
在这里,我们就会找到VMware Workstation Pro了,点击这个超链接,系统会将我们导航下到页面VMware Workstation Pro,如下图所示:
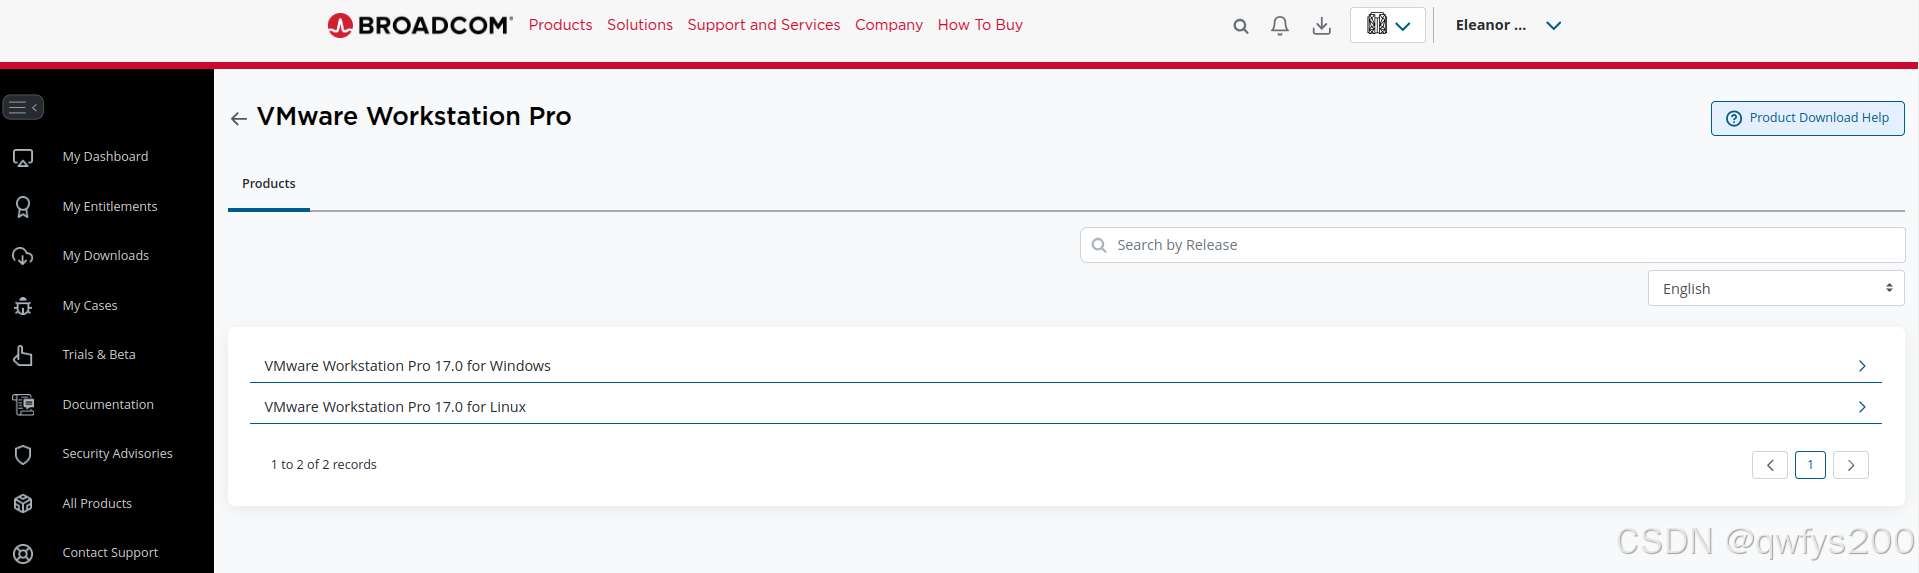
在这里,我们可以看到VMware Workstation Pro 17.0 for Windows、VMware Workstation Pro 17.0 for Linux个列表,点击右侧的图标>可以将其分别展开,如下图所示:
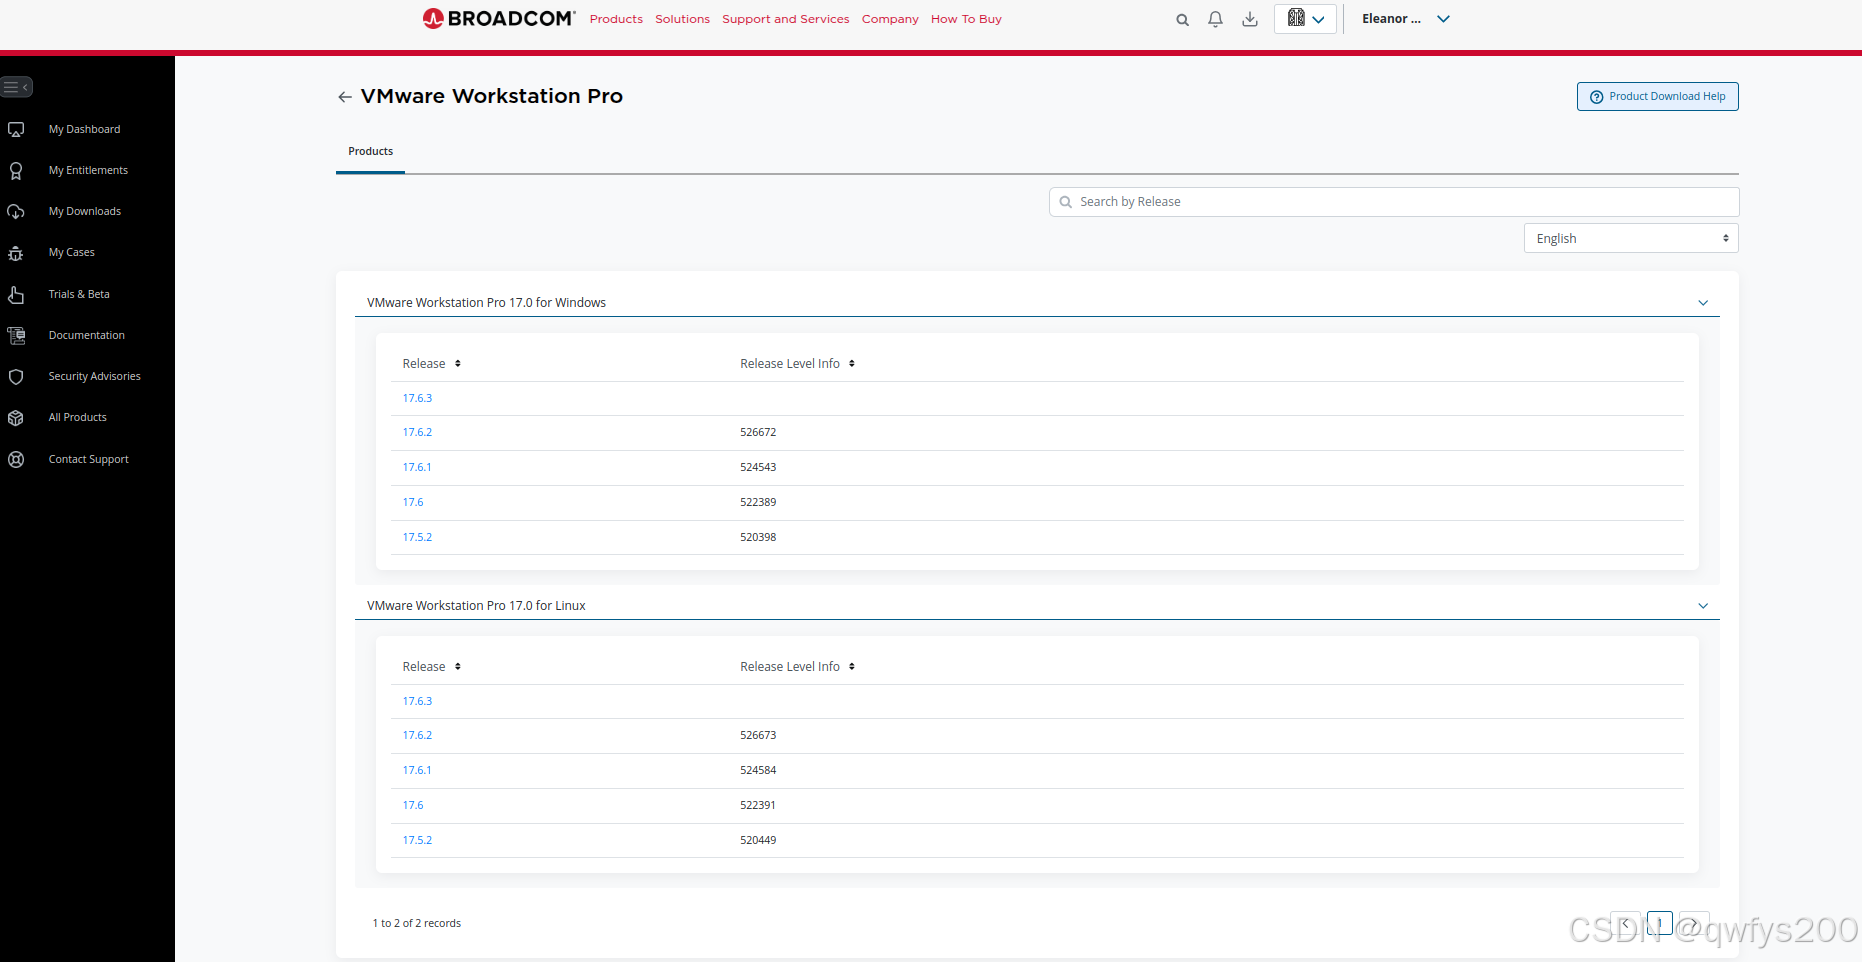
在这里,大家可以依据自己的需要选择自己想要的版本,这里,我们选择VMware Workstation Pro 17.0 for Linux一栏中的17.6.3,点击以后,进入Primary Downloads页签,如下图所示:

在这里,我们可以在右侧找到下载链接。
在页面顶部,我们选择页签Open Source,系统就会将我们导航到Open Source页签,如下图所示:

在这里,我们可以找到一些开源版本,如VMware Workstation 17.6.0 Open Source Disclosure Package等。
这里,我们只是为了演示一下,所以选择在页签Primary Downloads下载对应的版本,下载以后,我们将会得到一个名称为VMware-Workstation-Full-17.6.3-24583834.x86_64.bundle的文件。
安装
VMware-Workstation
上面,我们下载了一个名称为VMware-Workstation-Full-17.6.3-24583834.x86_64.bundle的文件,这个是VMware-Workstation pro的核心安装文件,采用如下命令即可安装:
lwk@qwfys:~$ sudo bash ~/Downloads/VMware-Workstation-Full-17.6.3-24583834.x86_64.bundle
Extracting VMware Installer...done.
Installing VMware Workstation 17.6.3
    Configuring...
[######################################################################] 100%
Installation was successful.
lwk@qwfys:~$
open-vm-tools
仅仅安装名称为VMware-Workstation-Full-17.6.3-24583834.x86_64.bundle的文件是不够的,如果要使用vmware的增强功能,还是要安装VMware-Tools工具。
在Linux环境中,我们可以安装open-vm-tools,这个是VMware针对Linux开源的VMware-Tools版本,两者功能上是一样的。这里,我们采用如下命令安装:
lwk@qwfys:~$ apt install -y open-vm-tools
Reading package lists... Done
Building dependency tree... Done
Reading state information... Done
The following additional packages will be installed:
  libxmlsec1t64-openssl zerofree
Suggested packages:
  open-vm-tools-desktop cloud-init open-vm-tools-containerinfo open-vm-tools-salt-minion
The following NEW packages will be installed:
  libxmlsec1t64-openssl open-vm-tools zerofree
0 upgraded, 3 newly installed, 0 to remove and 3 not upgraded.
Need to get 832 kB of archives.
After this operation, 3,549 kB of additional disk space will be used.
Get:1 https://mirrors.bfsu.edu.cn/ubuntu noble/main amd64 libxmlsec1t64-openssl amd64 1.2.39-5build2 [84.1 kB]
Get:2 https://mirrors.bfsu.edu.cn/ubuntu noble-updates/main amd64 open-vm-tools amd64 2:12.4.5-1~ubuntu0.24.04.1 [740 kB]
Get:3 https://mirrors.bfsu.edu.cn/ubuntu noble/main amd64 zerofree amd64 1.1.1-1build5 [7,888 B]
Fetched 832 kB in 1s (747 kB/s)
Selecting previously unselected package libxmlsec1t64-openssl:amd64.
(Reading database ... 841996 files and directories currently installed.)
Preparing to unpack .../libxmlsec1t64-openssl_1.2.39-5build2_amd64.deb ...
Unpacking libxmlsec1t64-openssl:amd64 (1.2.39-5build2) ...
Selecting previously unselected package open-vm-tools.
Preparing to unpack .../open-vm-tools_2%3a12.4.5-1~ubuntu0.24.04.1_amd64.deb ...
Unpacking open-vm-tools (2:12.4.5-1~ubuntu0.24.04.1) ...
Selecting previously unselected package zerofree.
Preparing to unpack .../zerofree_1.1.1-1build5_amd64.deb ...
Unpacking zerofree (1.1.1-1build5) ...
Setting up zerofree (1.1.1-1build5) ...
Setting up libxmlsec1t64-openssl:amd64 (1.2.39-5build2) ...
Setting up open-vm-tools (2:12.4.5-1~ubuntu0.24.04.1) ...
Created symlink /etc/systemd/system/vmtoolsd.service → /usr/lib/systemd/system/open-vm-tools.s
ervice.
Created symlink /etc/systemd/system/multi-user.target.wants/open-vm-tools.service → /usr/lib/s
ystemd/system/open-vm-tools.service.
Created symlink /etc/systemd/system/open-vm-tools.service.requires/vgauth.service → /usr/lib/s
ystemd/system/vgauth.service.
Processing triggers for man-db (2.12.0-4build2) ...
Processing triggers for libc-bin (2.39-0ubuntu8.4) ...
lwk@qwfys:~$
至此,我们就完成了VMware-Workstation的安装。
卸载
vmware-installer
卸载的话,需要借助命令vmware-installer来卸载。
大家可以采用命令
vmware-installer --help
查看命令vmware-installer的详细用法。
这里,我们用命令
lwk@qwfys:~$ vmware-installer -l
Product Name         Product Version
==================== ====================
vmware-workstation   17.6.3.24583834
lwk@qwfys:~$
查看一下,当前安装的产品名称。
接下来,我们用下面的命令卸载:
lwk@qwfys:~$ sudo vmware-installer -u vmware-workstation
All configuration information is about to be removed. Do you wish to
keep your configuration files? You can also input 'quit' or 'q' to
cancel uninstallation. [yes]: yes

Uninstalling VMware Installer 3.1.0
    Deconfiguring...
[######################################################################] 100%
Uninstallation was successful.
lwk@qwfys:~$
open-vm-tools
卸载open-vm-tools可以用下面的命令:
lwk@qwfys:~$ apt purge open-vm-tools
Reading package lists... Done
Building dependency tree... Done
Reading state information... Done
The following packages were automatically installed and are no longer required:
  libxmlsec1t64-openssl zerofree
Use 'sudo apt autoremove' to remove them.
The following packages will be REMOVED:
  open-vm-tools*
0 upgraded, 0 newly installed, 1 to remove and 3 not upgraded.
After this operation, 3,202 kB disk space will be freed.
Do you want to continue? [Y/n] y
(Reading database ... 842149 files and directories currently installed.)
Removing open-vm-tools (2:12.4.5-1~ubuntu0.24.04.1) ...
Processing triggers for man-db (2.12.0-4build2) ...
Processing triggers for libc-bin (2.39-0ubuntu8.4) ...
(Reading database ... 842035 files and directories currently installed.)
Purging configuration files for open-vm-tools (2:12.4.5-1~ubuntu0.24.04.1) ...
lwk@qwfys:~$ apt autoremove
Reading package lists... Done
Building dependency tree... Done
Reading state information... Done
The following packages will be REMOVED:
  libxmlsec1t64-openssl zerofree
0 upgraded, 0 newly installed, 2 to remove and 3 not upgraded.
After this operation, 347 kB disk space will be freed.
Do you want to continue? [Y/n] y
(Reading database ... 842009 files and directories currently installed.)
Removing libxmlsec1t64-openssl:amd64 (1.2.39-5build2) ...
Removing zerofree (1.1.1-1build5) ...
Processing triggers for man-db (2.12.0-4build2) ...
Processing triggers for libc-bin (2.39-0ubuntu8.4) ...
lwk@qwfys:~$
至此,我们就完成了VMware workstation pro的卸载了。
小结
今天,我们为大家介绍了如何在Linux mint 22中安装与卸载VMware workstation pro。关于VMware workstation pro的详细用法,我们后续抽空为大家介绍。
参考文献
- 使用 VMware VMware Workstation Pro


![[ComfyUI] 如何升级自定义节点(Custom Nodes)](https://i-blog.csdnimg.cn/direct/ea995efbae97424a9a5206ba44607d24.png)


