前言

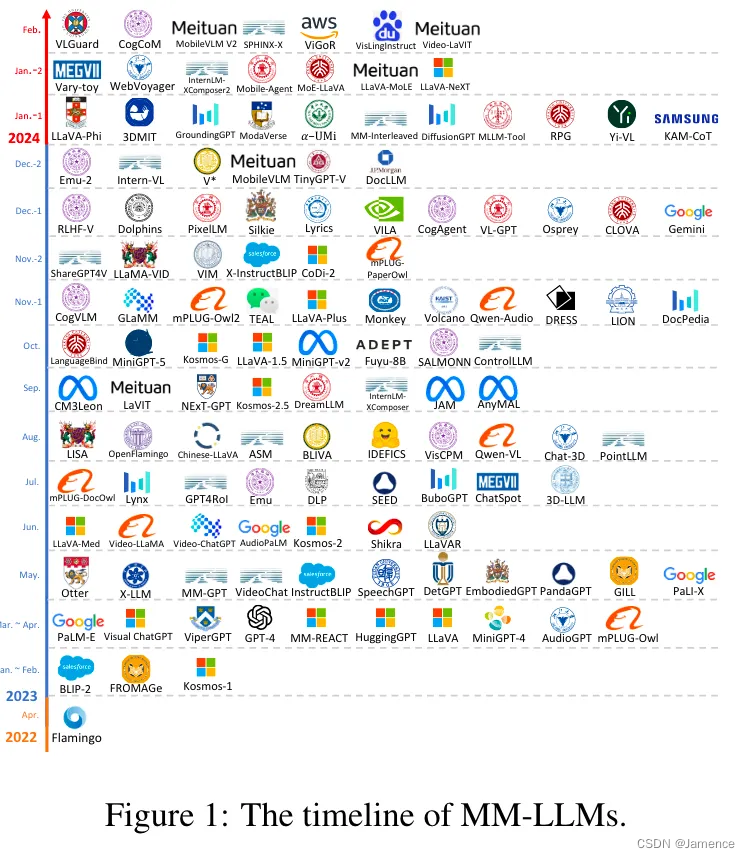
Blip2是一个多模态大语言模型,因其提出时间较早(2023年),且效果较好,很快成为一个标杆性工作。Blip2中提出的Q-former也成为衔接多模态和文本的重要桥梁。
 Blip2发表时间是2023年,现在引用已经3288了,表明大家对Blip2背后的多模态语言模型是多么的追捧。
作者前期的工作还有Albef(先对齐再融合)、Blip1,都是十分硬核的工作。
创新点
- Blip2利用冻结的预训练图像模型和语言模型,来有效减小纯多模态模型的训练成本。提出Q-Former框架,通过两个训练阶段(图文对齐+图文指令微调)来弥补模态GAP。在visual question answering, image captioning, and image-text retrieval等典型视觉-语言任务上表现出色。
- 由LLM驱动,BLIP-2 可以zero-shot得执行图像到文本生成的。因为LLM具备涌现效应,Blip2能够实现视觉知识推理、视觉问答等较难的任务。
- 由于使用了冻结的预训练图像模型和语言模型,Blip2的训练成本更低,例如,BLIP-2 在零样本 VQAv2 上比 Flamingo高出 8.7%,同时可训练参数减少了 54 倍。
具体细节
Blip2通过两阶段训练,来学习Q-Former模块。两阶段训练包含:
- 一阶段视觉-语言表示学习(vision-language representation learning stage)
- 二阶段视觉-语言生成学习(vision-to-language generative learning stage)
Q-former模块
如上图,Q-Former包括左右两列并行的attention模块。左列为self attention+cross attention+feed forward,右列为self attention+feed forward。
左列用于提取图像特征
右列用于提取文本特征
左列+右列用于提取多模态特征
左列-图像特征
左列做的事情整体可以理解为输入N个learned query,对N个learned query做self attention,对输入图像做cross attention,得到N个总结后的图像输出(类似于目标检测的DETR算法,不同query关注不同区域)。论文中,N等于32。
具体如下:
输入learned queries(随机初始化的embedding)
query_tokens = nn.Parameter(
     torch.zeros(1, num_query_token, encoder_config.hidden_size)
 )
 query_tokens.data.normal_(mean=0.0, std=encoder_config.initializer_range)
先过self attention层,再和冻结的图像编码器输出的特征做cross attention,代码如下:
class BertLayer(nn.Module):
    def __init__(self, config, layer_num):
        super().__init__()
        self.config = config
        self.chunk_size_feed_forward = config.chunk_size_feed_forward
        self.seq_len_dim = 1
        self.attention = BertAttention(config)
        self.layer_num = layer_num
        if (
            self.config.add_cross_attention
            and layer_num % self.config.cross_attention_freq == 0
        ):
            self.crossattention = BertAttention(
                config, is_cross_attention=self.config.add_cross_attention
            )
            self.has_cross_attention = True
        else:
            self.has_cross_attention = False
        self.intermediate = BertIntermediate(config)
        self.output = BertOutput(config)

        self.intermediate_query = BertIntermediate(config)
        self.output_query = BertOutput(config)

    def forward(
        self,
        hidden_states,
        attention_mask=None,
        head_mask=None,
        encoder_hidden_states=None,
        encoder_attention_mask=None,
        past_key_value=None,
        output_attentions=False,
        query_length=0,
    ):
        # decoder uni-directional self-attention cached key/values tuple is at positions 1,2
        self_attn_past_key_value = (
            past_key_value[:2] if past_key_value is not None else None
        )
        self_attention_outputs = self.attention(
            hidden_states,
            attention_mask,
            head_mask,
            output_attentions=output_attentions,
            past_key_value=self_attn_past_key_value,
        )
        attention_output = self_attention_outputs[0]
        outputs = self_attention_outputs[1:-1]

        present_key_value = self_attention_outputs[-1]

        if query_length > 0:
            query_attention_output = attention_output[:, :query_length, :]

            if self.has_cross_attention:
                assert (
                    encoder_hidden_states is not None
                ), "encoder_hidden_states must be given for cross-attention layers"
                cross_attention_outputs = self.crossattention(
                    query_attention_output,
                    attention_mask,
                    head_mask,
                    encoder_hidden_states,
                    encoder_attention_mask,
                    output_attentions=output_attentions,
                )
                query_attention_output = cross_attention_outputs[0]
                outputs = (
                    outputs + cross_attention_outputs[1:-1]
                )  # add cross attentions if we output attention weights

            layer_output = apply_chunking_to_forward(
                self.feed_forward_chunk_query,
                self.chunk_size_feed_forward,
                self.seq_len_dim,
                query_attention_output,
            )
            if attention_output.shape[1] > query_length:
                layer_output_text = apply_chunking_to_forward(
                    self.feed_forward_chunk,
                    self.chunk_size_feed_forward,
                    self.seq_len_dim,
                    attention_output[:, query_length:, :],
                )
                layer_output = torch.cat([layer_output, layer_output_text], dim=1)
        else:
            layer_output = apply_chunking_to_forward(
                self.feed_forward_chunk,
                self.chunk_size_feed_forward,
                self.seq_len_dim,
                attention_output,
            )
        outputs = (layer_output,) + outputs

        outputs = outputs + (present_key_value,)

        return outputs
其中,self.crossattention输入包含query_attention_output(self attention输出),encoder_hidden_states(图像编码器输出)。Q-Former的实现就是对BertLayer进行魔改,通过cross_attention_freq参数来控制cross attention的频率,如果等于3,则第0、3、6层BertLayer会对图像特征做cross attention,其他实现流程和原实现的(huggingface实现)BertLayer类似。
提取图像特征的Q-Former调用方式为:
        image = samples["image"]

        image_embeds = self.ln_vision(self.visual_encoder(image))
        image_atts = torch.ones(image_embeds.size()[:-1], dtype=torch.long).to(
            image.device
        )

        query_tokens = self.query_tokens.expand(image_embeds.shape[0], -1, -1)

        query_output = self.Qformer.bert(
            query_embeds=query_tokens,
            encoder_hidden_states=image_embeds,
            encoder_attention_mask=image_atts,
            use_cache=True,
            return_dict=True,
        )

        image_feats = F.normalize(
            self.vision_proj(query_output.last_hidden_state), dim=-1
        )
右列-文本特征
右列的实现流程和左列类似,不同之处在于将BertLayer层中hidden_states改为文本编码,编码方式的实现也类似于原实现的(huggingface实现),如下:
class BertEmbeddings(nn.Module):
    """Construct the embeddings from word and position embeddings."""

    def __init__(self, config):
        super().__init__()
        self.word_embeddings = nn.Embedding(
            config.vocab_size, config.hidden_size, padding_idx=config.pad_token_id
        )
        self.position_embeddings = nn.Embedding(
            config.max_position_embeddings, config.hidden_size
        )

        # self.LayerNorm is not snake-cased to stick with TensorFlow model variable name and be able to load
        # any TensorFlow checkpoint file
        self.LayerNorm = nn.LayerNorm(config.hidden_size, eps=config.layer_norm_eps)
        self.dropout = nn.Dropout(config.hidden_dropout_prob)

        # position_ids (1, len position emb) is contiguous in memory and exported when serialized
        self.register_buffer(
            "position_ids", torch.arange(config.max_position_embeddings).expand((1, -1))
        )
        self.position_embedding_type = getattr(
            config, "position_embedding_type", "absolute"
        )

        self.config = config

    def forward(
        self,
        input_ids=None,
        position_ids=None,
        query_embeds=None,
        past_key_values_length=0,
    ):
        if input_ids is not None:
            seq_length = input_ids.size()[1]
        else:
            seq_length = 0

        if position_ids is None:
            position_ids = self.position_ids[
                :, past_key_values_length : seq_length + past_key_values_length
            ].clone()

        if input_ids is not None:
            embeddings = self.word_embeddings(input_ids)
            if self.position_embedding_type == "absolute":
                position_embeddings = self.position_embeddings(position_ids)
                embeddings = embeddings + position_embeddings

            if query_embeds is not None:
                embeddings = torch.cat((query_embeds, embeddings), dim=1)
        else:
            embeddings = query_embeds

        embeddings = self.LayerNorm(embeddings)
        embeddings = self.dropout(embeddings)
        return embeddings
即将输入文本转为token,再将token转为embedding,embedding作为BertLayer层中hidden_states的输入。
其中,不涉及到cross attention。
提取文本特征的Q-Former调用方式为:
        text = samples["text_input"]

        text_tokens = self.tokenizer(
            text,
            padding="max_length",
            truncation=True,
            max_length=self.max_txt_len,
            return_tensors="pt",
        ).to(image.device)
        text_output = self.Qformer.bert(
            text_tokens.input_ids,
            attention_mask=text_tokens.attention_mask,
            return_dict=True,
        )
        text_feat = F.normalize(
            self.text_proj(text_output.last_hidden_state[:, 0, :]), dim=-1
        )
左列+右列
即输入图像特征,又输入文本,能够提取图文多模态表征,一般用作ITM的loss计算。
一阶段视觉-语言表示学习
该阶段的目的类似于clip,将视觉表征和文本表征拉到统一空间,具备三个损失函数,分别是Image-Text Contrastive Learning (ITC)、Image-grounded Text Generation (ITG)和Image-Text Matching (ITM)
Image-Text Contrastive Learning (ITC)
通过阶梯式的对比学习,缩小pair内图文距离,扩大pair间图文距离。
图像特征:Q-Former左列输出的图像特征,有N个
文本特征:Q-Former右列输出的CLS文本特征,有一个
因为图像特征有N个,每一次仅选择N个中和文本特征最近的那个来算ITC。在计算ITC时,负样本数量非常重要,通过多卡in-batch采样来获取多卡的负样本。代码详见:
		image_feats_all = concat_all_gather(
            image_feats
        )  # [batch_size*num_gpu, num_query_tokens, embed_dim]
        text_feat_all = concat_all_gather(text_feat)  # [batch_size*num_gpu, embed_dim]

        sim_q2t = torch.matmul(
            image_feats.unsqueeze(1), text_feat_all.unsqueeze(-1)
        ).squeeze()
        # [batch_size, batch_size*num_gpu, num_query_tokens]

        # image-text similarity: aggregate across all query tokens
        sim_i2t, _ = sim_q2t.max(-1)
        sim_i2t = sim_i2t / self.temp

        # text-query similarity: [batch_size, batch_size*num_gpu, num_query_tokens]
        sim_t2q = torch.matmul(
            text_feat.unsqueeze(1).unsqueeze(1), image_feats_all.permute(0, 2, 1)
        ).squeeze()

        # text-image similarity: aggregate across all query tokens
        sim_t2i, _ = sim_t2q.max(-1)
        sim_t2i = sim_t2i / self.temp  # [batch_size, batch_size*num_gpu]

        rank = dist.get_rank()
        bs = image.size(0)
        targets = torch.linspace(rank * bs, rank * bs + bs - 1, bs, dtype=int).to(
            image.device
        )

        loss_itc = (
              F.cross_entropy(sim_i2t, targets, label_smoothing=0.1)
              + F.cross_entropy(sim_t2i, targets, label_smoothing=0.1)
          ) / 2
Image-grounded Text Generation (ITG)
通过Q-Former架构,实现image caption任务。首先利用Q-Former提取图像特征,将图像特征作为输入,迭代式得利用LM loss约束文本输出。
       	text_tokens = self.tokenizer(
            text,
            padding="max_length",
            truncation=True,
            max_length=self.max_txt_len,
            return_tensors="pt",
        ).to(image.device)

        image_embeds = self.ln_vision(self.visual_encoder(image))
        image_atts = torch.ones(image_embeds.size()[:-1], dtype=torch.long).to(
            image.device
        )

        query_tokens = self.query_tokens.expand(image_embeds.shape[0], -1, -1)

        query_output = self.Qformer.bert(
            query_embeds=query_tokens,
            encoder_hidden_states=image_embeds,
            encoder_attention_mask=image_atts,
            use_cache=True,
            return_dict=True,
        )

        decoder_input_ids = text_tokens.input_ids.clone()
        decoder_input_ids[:, 0] = self.tokenizer.bos_token_id
        labels = decoder_input_ids.masked_fill(
            decoder_input_ids == self.tokenizer.pad_token_id, -100
        )

        query_atts = torch.ones(query_tokens.size()[:-1], dtype=torch.long).to(
            image.device
        )
        attention_mask = torch.cat([query_atts, text_tokens.attention_mask], dim=1)
        lm_output = self.Qformer(
            decoder_input_ids,
            attention_mask=attention_mask,
            past_key_values=query_output.past_key_values,
            return_dict=True,
            labels=labels,
        )

        loss_lm = lm_output.loss
Image-Text Matching (ITM)
ITM的本质在于输入一个图文pair,用以判断图文pair是否匹配。借助二分类来实现,输出1为匹配;输出0为不匹配。
Blip2在构造图文pair时,采用了多种采样策略
- 匹配的图文pair,label均为1,表示匹配
- 图固定,图-文距离为权值,利用
torch.multinomial采样文,构成图文pair,label均为0 - 文固定,图-文距离为权值,利用
torch.multinomial采样图,构成图文pair,label均为0
代码详见:
		text_input_ids_world = concat_all_gather(text_tokens.input_ids)
        text_attention_mask_world = concat_all_gather(text_tokens.attention_mask)
        image_embeds_world = all_gather_with_grad(image_embeds)
        with torch.no_grad():
            if "image_id" in samples.keys():
                mask = torch.eq(image_ids, image_ids_all.t())
                sim_t2i.masked_fill_(mask, -10000)
                sim_i2t.masked_fill_(mask, -10000)
            else:
                sim_t2i[:, rank * bs : rank * bs + bs].fill_diagonal_(-10000)
                sim_i2t[:, rank * bs : rank * bs + bs].fill_diagonal_(-10000)

            weights_t2i = F.softmax(sim_t2i, dim=1)
            weights_i2t = F.softmax(sim_i2t, dim=1)

        # select a negative image for each text
        image_embeds_neg = []
        for b in range(bs):
            neg_idx = torch.multinomial(weights_t2i[b], 1).item()
            image_embeds_neg.append(image_embeds_world[neg_idx])
        image_embeds_neg = torch.stack(image_embeds_neg, dim=0)

        # select a negative text for each image
        text_ids_neg = []
        text_atts_neg = []
        for b in range(bs):
            neg_idx = torch.multinomial(weights_i2t[b], 1).item()
            text_ids_neg.append(text_input_ids_world[neg_idx])
            text_atts_neg.append(text_attention_mask_world[neg_idx])

        text_ids_neg = torch.stack(text_ids_neg, dim=0)
        text_atts_neg = torch.stack(text_atts_neg, dim=0)

        text_ids_all = torch.cat(
            [text_tokens.input_ids, text_tokens.input_ids, text_ids_neg], dim=0
        )  # pos, pos, neg
        text_atts_all = torch.cat(
            [text_tokens.attention_mask, text_tokens.attention_mask, text_atts_neg],
            dim=0,
        )

        query_tokens_itm = self.query_tokens.expand(text_ids_all.shape[0], -1, -1)
        query_atts_itm = torch.ones(query_tokens_itm.size()[:-1], dtype=torch.long).to(
            image.device
        )
        attention_mask_all = torch.cat([query_atts_itm, text_atts_all], dim=1)

        image_embeds_all = torch.cat(
            [image_embeds, image_embeds_neg, image_embeds], dim=0
        )  # pos, neg, pos
        image_atts_all = torch.ones(image_embeds_all.size()[:-1], dtype=torch.long).to(
            image.device
        )

        output_itm = self.Qformer.bert(
            text_ids_all,
            query_embeds=query_tokens_itm,
            attention_mask=attention_mask_all,
            encoder_hidden_states=image_embeds_all,
            encoder_attention_mask=image_atts_all,
            return_dict=True,
        )

        vl_embeddings = output_itm.last_hidden_state[:, : query_tokens_itm.size(1), :]
        vl_output = self.itm_head(vl_embeddings)
        logits = vl_output.mean(dim=1)

        itm_labels = torch.cat(
            [torch.ones(bs, dtype=torch.long), torch.zeros(2 * bs, dtype=torch.long)],
            dim=0,
        ).to(image.device)
        loss_itm = F.cross_entropy(logits, itm_labels)
输入图像特征、文本,提取图文pair的多模态特征,再送到二元分类器,实现ITM的loss计算。
总体loss
总体loss等于上述三个loss的加和
        return BlipOutput(
            loss=loss_itc + loss_itm + loss_lm,
            loss_itc=loss_itc,
            loss_itm=loss_itm,
            loss_lm=loss_lm,
        )
二阶段视觉-语言生成学习

在生成阶段,需要做
- 输入图像,借助冻结的图像编码器,提取图像特征。图像特征送入Q-Former,提取图文对齐的图像特征(32个embedding)
- 采用一个FC层,将图像特征维度与LLM维度对齐
- 将图像特征作为
soft visual prompts,输入到LLM中,借助图文指令微调数据,训练Q-Former、FC层。
实验数据
预训练
Blip2采用129M图片,包括COCO、Visual Genome、CC3M、CC12M、SBU,以及LAION400M。其中115M来自于LAION400M,使用CapFilt对网图进行生成caption,具体步骤如下:
1、使用Blip模型 生成10个caption;
2、10个caption+原始web caption通过CLIP模型计算图像-caption排序;
3、选取top2作为该图的caption,以此作为训练数据;
预训练图像编码器与LLM
两个SOTA视觉transformer预训练模型:
ViT-L/14 from CLIP、ViT-G/14 from EVA-CLIP
移除ViT最后一层,使用倒数第二层特征。
LLM模型:
无监督训练的OPT作为decoder-based LLM
基于指令训练的FlanT5作为encoder-decoder-based LLM
预训练设置
第一阶段训练250k step,第二阶段训练80k step;ViT和LLM 转为FP16,FlanT5转为BFloat16,作者发现相对于32-bit,性能无下降;由于使用frozen模型,作者预训练比现在大规模VLP方法计算量都小,在16个A100(40G)上,对于ViT-G和FlanT5-XXL第一阶段训练耗时6天,第二阶段少于3天。
因为绝大部分参数(图像编码器、LLM)都冻结,所以训练成本较低,这也是Blip2较流行的一个原因
插一句嘴,目前的多模态LLM范式较Blip2更加简单。Blip2采用Q-Former实现图文对齐,现在的大部分工作直接采用FC层实现图文对齐,效果和Q-Former类似,但训练成本更低。相关工作有Llava1.5等
后续会持续更新多模态LLM的相关论文


