一、Maven的环境搭建
暂时未完成....
二、创建项目
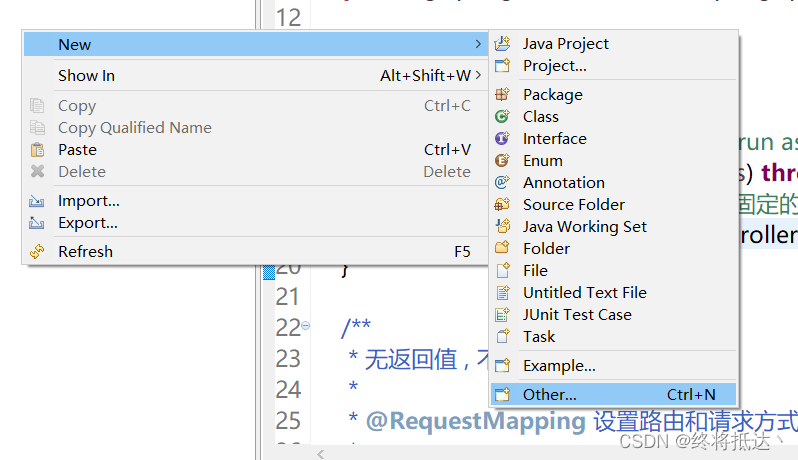
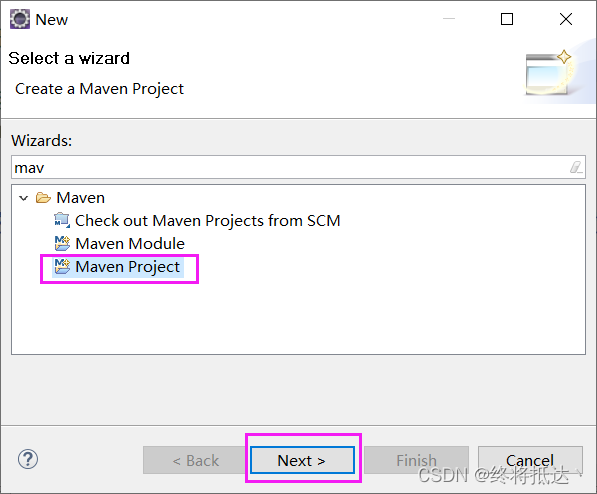
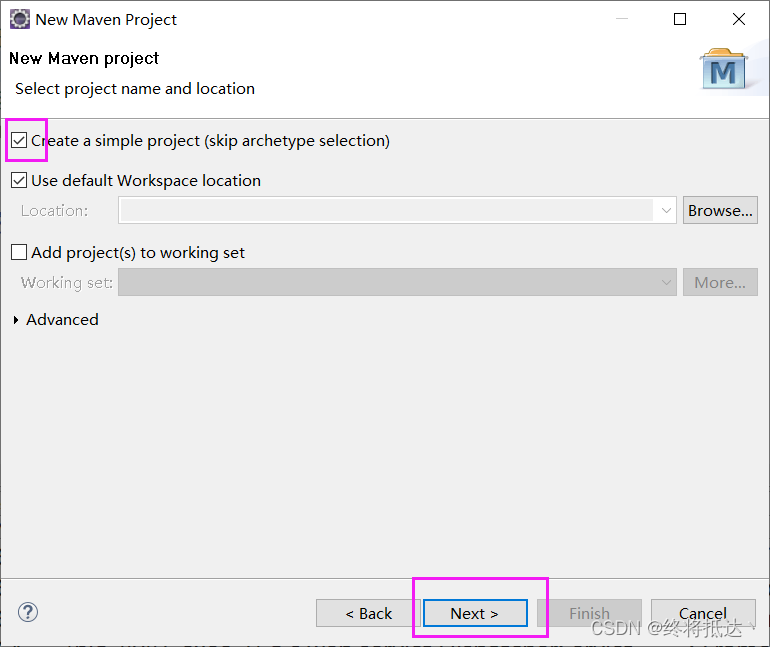
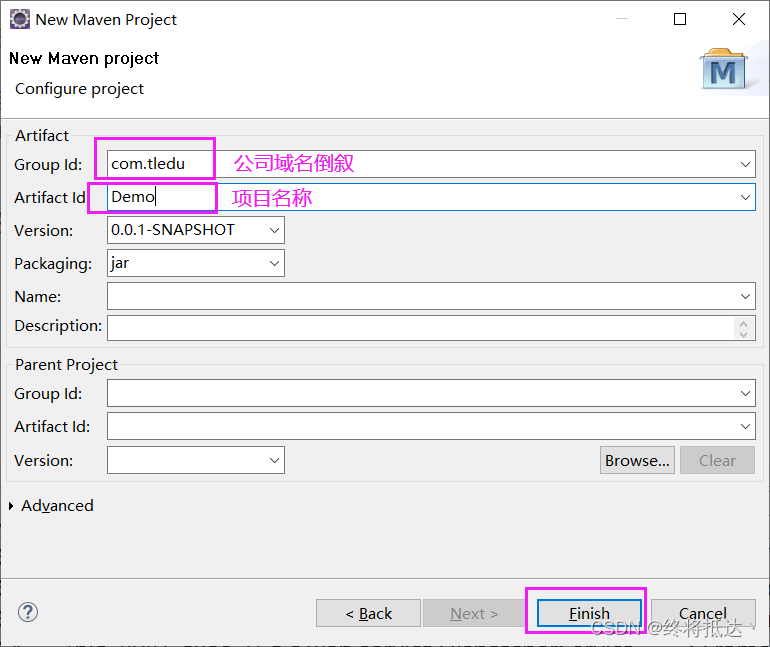
创建完以后的目录如下:
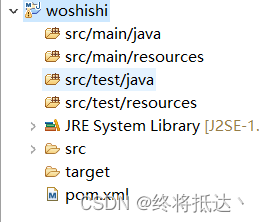
然后配置pom.xml
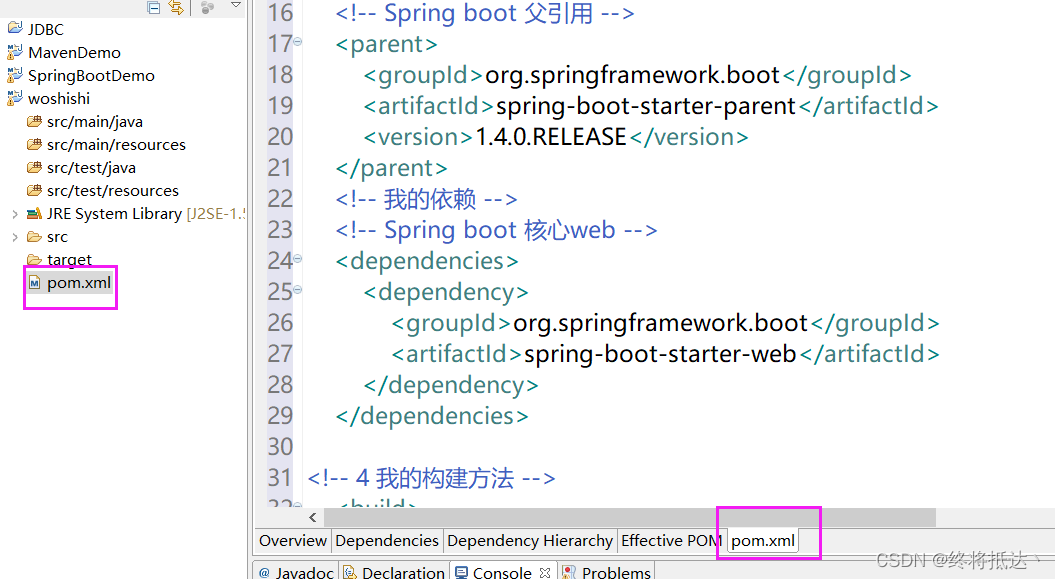
再放入配置项
  	<!-- 2 我的依赖仓库源 , 首先配置仓库的服务器位置,首选阿里云,也可以配置镜像方式,效果雷同 -->
	<repositories>
		<repository>
			<id>nexus-aliyun</id>
			<name>Nexus aliyun</name>
			<url>http://maven.aliyun.com/nexus/content/groups/public</url>
		</repository>
	</repositories>
	<!-- 3 我的依赖(继承之后,相当于引入了相关的依赖) -->
	<!-- Spring boot 父引用 -->
	<parent>
		<groupId>org.springframework.boot</groupId>
		<artifactId>spring-boot-starter-parent</artifactId>
		<version>1.4.0.RELEASE</version>
	</parent>
	<!-- 我的依赖 -->
	<!-- Spring boot 核心web -->
	<dependencies>
		<dependency>
			<groupId>org.springframework.boot</groupId>
			<artifactId>spring-boot-devtools</artifactId>
			<optional>true</optional>
	</dependency>
		<!-- Spring boot web页面模板引擎 -->
		<dependency>
			<groupId>org.springframework.boot</groupId>
			<artifactId>spring-boot-starter-thymeleaf</artifactId>
		</dependency>
	</dependencies>

	<!-- 4 我的构建方法 -->
	<build>
		<plugins>
			<plugin>
				<artifactId>maven-compiler-plugin</artifactId>
				<version>2.3.2</version>
				<configuration>
					<source>1.8</source>
					<target>1.8</target>
					<encoding>UTF-8</encoding>
				</configuration>
			</plugin>
			<plugin>
				<groupId>org.springframework.boot</groupId>
				<artifactId>spring-boot-maven-plugin</artifactId>
			</plugin>
		</plugins>
</build>
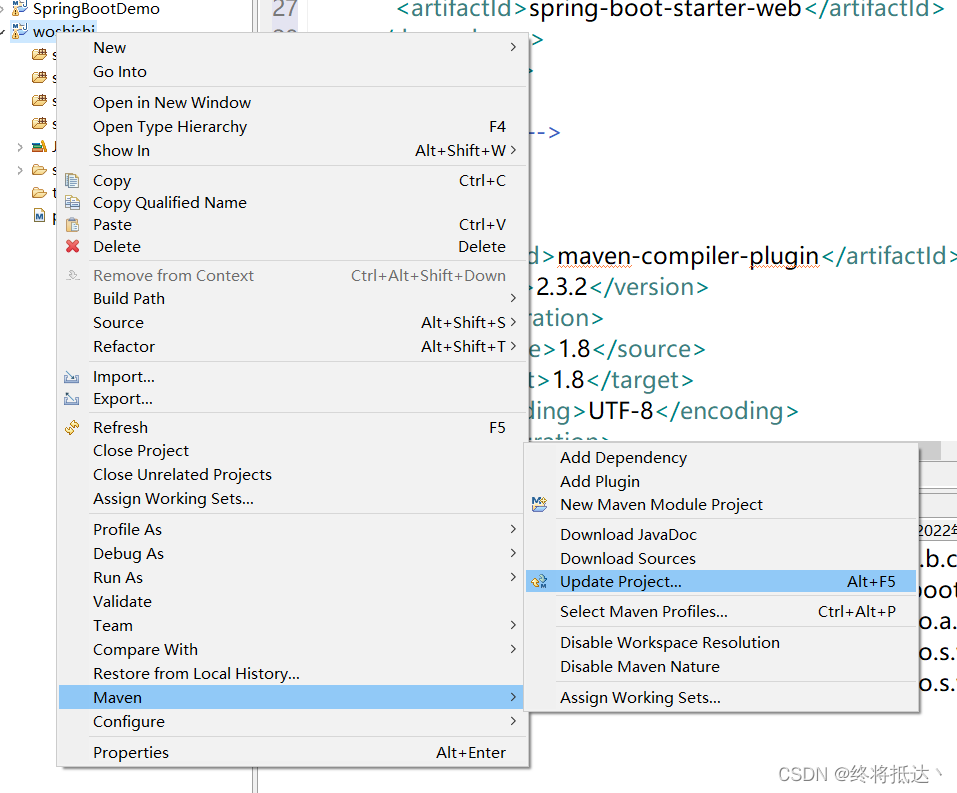
再右键-->Mavent-->Update更新
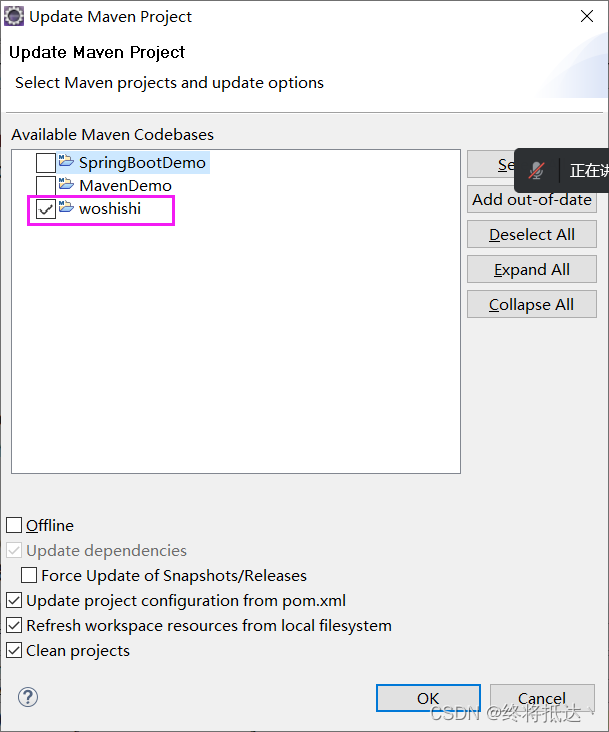
选中当前项目
三、 文件热部署
1.application.properties参数配置
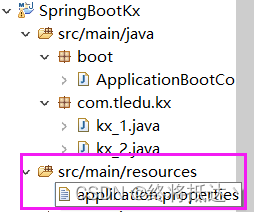
里面加上——spring.devtools.restart.enabled=true
server.port=8081(改启动端口号为8081)
2.在pom.xml中改为一下信息(上面的应该是已经改过的)
依赖包

	<!-- 热部署,程序修改会自动重启,不需要停下程序再启动 -->
		<dependency>
			<groupId>org.springframework.boot</groupId>
			<artifactId>spring-boot-devtools</artifactId>
			<optional>true</optional>
	</dependency>


	<build>
		<plugins>
			<plugin>
				<artifactId>maven-compiler-plugin</artifactId>
				<version>2.3.2</version>
				<configuration>
					<source>1.8</source>
					<target>1.8</target>
					<encoding>UTF-8</encoding>
				</configuration>
			</plugin>
			<plugin>
				<groupId>org.springframework.boot</groupId>
				<artifactId>spring-boot-maven-plugin</artifactId>
			</plugin>
		</plugins>
</build>
配置上去 即可
四、配置启动项
1.新建文件 ApplicationBootController
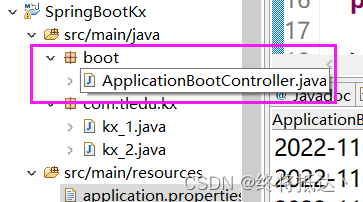
2.加入如下配置
package boot;

import org.springframework.boot.SpringApplication;
import org.springframework.boot.autoconfigure.SpringBootApplication;
import org.springframework.context.annotation.ComponentScan;

//声明为启动类
@SpringBootApplication
/**
* 管理包下所有的Component注解,包含Component的子注解,比如Service,Controller等
*/
@ComponentScan(basePackages = { "com.tledu.kx" })
public class ApplicationBootController {
	public static void main(String[] args) {
		SpringApplication.run(ApplicationBootController.class, args);
	}
}
注意:@ComponentScan(basePackages = { "里面为要管理的文件夹的名字" })
3.在要控制的文件类上面都要加上 @Controller 这样才能被启动类监听到
package com.tledu.kx;

import org.springframework.boot.autoconfigure.EnableAutoConfiguration;
import org.springframework.stereotype.Controller;
import org.springframework.web.bind.annotation.CrossOrigin;
import org.springframework.web.bind.annotation.RequestMapping;
import org.springframework.web.bind.annotation.RequestMethod;
import org.springframework.web.bind.annotation.ResponseBody;

@Controller
@EnableAutoConfiguration
public class kx_1 {
//	请求的地址
	@RequestMapping(value = "/userDemo1", method = RequestMethod.GET)
	@ResponseBody
//	解决跨域
	@CrossOrigin
	public void add(){
		System.out.println("--------------11111---------");
	}
}
