目录
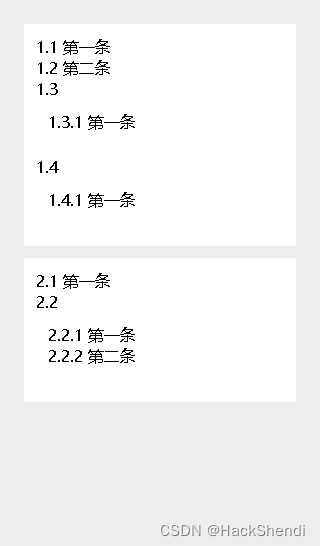
一.使用路由
1.1配置路由
1.2采用路由
二.路由懒加载
三.路由重定向
四.嵌套路由
五.路由跳转
1.1标签式
1.2编程式
1.3路由的query参数
1.4命名路由
前言:
vue 属于单页面应用,所谓的路由,就是根据浏览器路径不同,用不同的视图组件替换这个页面内容展示
一.使用路由
1.1配置路由
新建一个路由index.js 文件,建立【路径】与【视图组件】之间的映射关系
import Vue from 'vue'
import VueRouter from 'vue-router'
import ContainerView from '@/views/example/ContainerView.vue'
import LoginView from '@/views/example/LoginView.vue'
import NotFoundView from '@/views/example/NotFoundView.vue'

Vue.use(VueRouter)

const routes = [
  {
    path:'/',
    component: ContainerView
  },
  {
    path:'/login',
    component: LoginView
  },
  {
    path:'/404',
    component: NotFoundView
  }
]

const router = new VueRouter({
  routes
})

export default router
注:@代表src下
1.2采用路由
在 main.js 中采用我们的路由 js,其实在引入时可以省略index,因为index是个特殊的东西,默认找不到就找index
import Vue from 'vue'
import App from './views/App.vue'
import router from './router/index'//引入路由
import store from './store'
import Element from 'element-ui'
import 'element-ui/lib/theme-chalk/index.css'

Vue.config.productionTip = false

Vue.use(Element)
new Vue({
  router,
  store,
  render: h => h(App)
}).$mount('#app')
根组件是App.vue,内容为:
<template>
    <div class="all">
        <router-view></router-view>
    </div>
</template>
<router-view> 起到占位作用,改变路径后,这个路径对应的视图组件就会占据 <router-view> 的位置,替换掉它之前的内容
二.路由懒加载
import Vue from 'vue'
import VueRouter from 'vue-router'

Vue.use(VueRouter)

const routes = [
  {
    path:'/',
    component: () => import('@/views/example/ContainerView.vue')
  },
  {
    path:'/login',
    component: () => import('@/views/example/LoginView.vue')
  },
  {
    path:'/404',
    component: () => import('@/views/example/NotFoundView.vue')
  }
]

const router = new VueRouter({
  routes
})

export default router
静态导入是将所有组件的 js 代码打包到一起,如果组件非常多,打包后的 js 文件会很大,影响页面加载速度
动态导入是将组件的 js 代码放入独立的文件,用到时才加载
三.路由重定向
const routes = [
   {
    path:'/404',
    component: () => import('@/views/example/NotFoundView.vue')
  },
  {
    path:'*',
    redirect: '/404'
  }

]
①redirect 可以用来重定向(跳转)到一个新的地址
②path 的取值为 * 表示匹配不到其它 path 时,就会匹配它
四.嵌套路由
比如当我们进入主页之后有分类,然后当选择其中一个分类之后进入对应的详情,这个时候组件内再要切换内容,就需要用到嵌套路由(子路由) ;官方文档中给我们提供了一个children属性,这个属性是一个数组类型,里面实际放着一组路由;这个时候父子关系结构就出来了,所以children属性里面的是路由相对来说是children属性外部路由的子路由;
const routes = [
  {
    path:'/',
    component: () => import('@/views/example/ContainerView.vue'),
    redirect: '/c/p1',
    children: [
      {
        path:'c/p1',
        component: () => import('@/views/example/container/P1View.vue')
      },
      {
        path:'c/p2',
        component: () => import('@/views/example/container/P2View.vue')
      },
      {
        path:'c/p3',
        component: () => import('@/views/example/container/P3View.vue')
      }
    ]
  },
  {
    path:'/login',
    component: () => import('@/views/example/LoginView.vue')
  },
  {
    path:'/404',
    component: () => import('@/views/example/NotFoundView.vue')
  },
  {
    path:'*',
    redirect: '/404'
  }
]
子路由变化,切换的是 ContainerView 组件 中 <router-view></router-view> 部分的内容
<template>
    <div class="container">
       //路由占位标签
        <router-view></router-view>
    </div>
</template>
五.路由跳转
1.1标签式
container组件内:
<template>
    <div class="container">
            <el-container>
                <el-aside width="200px">
                    <router-link to="/c1/p1">P1</router-link>
                    <router-link to="/c1/p2">P2</router-link>
                    <router-link to="/c1/p3">P3</router-link>
            </el-container>
    </div>
</template>
<script>

export default options;
</script>
标签导航<router-link>,<router-link>是通过转义为<a></a>标签进行跳转,其中router-link标签中的to属性会被转义为a标签中的href属性;
router-link属性介绍:
- to:用于指定跳转的路径
- tag:tag可以指定
<router-link>之后渲染成什么组件,比如我们下面的代码会被渲染成一个<li>元素,而不是<a>。 如:<router-link to='/home' tag='li'>- replace:replace不会留下history记录,所以指定replace的情况下,后退键返回不能返回到上一个页面中
- active-class:当
<router-link>对应的路由匹配成功时,会自动给当前元素设置一个router-link-active的class,设置active-class可以修改默认的名称。
1.2编程式
container组件内:
<template>
    <div class="container">
            <el-header>
               <el-button type="primary" icon="el-icon-edit"
                   circle size="mini" @click="jump('/c1/p1')"></el-button>
               <el-button type="success" icon="el-icon-check"
                   circle size="mini" @click="jump('/c1/p2')"></el-button>
               <el-button type="warning" icon="el-icon-star-off"
                   circle size="mini" @click="jump('/c1/p3')"></el-button>
            </el-header>
    </div>
</template>
<script>
const options = {
    methods : {
        jump(url) {
            this.$router.push(url);//跳转路由
        }
    }
}
export default options;
</script>
其中 this.$router 是拿到路由对象
push 方法根据 url 进行跳转
补充:

1.3路由的query参数
①传递参数
<!-- 跳转并携带query参数,to的字符串写法 -->
<router-link :to="`/home/message/detail?id=${m.id}&title=${m.title}`">跳转</router-link>

<!-- 跳转并携带query参数,to的对象写法(推荐) -->
<router-link
	:to="{
		path:'/home/message/detail',
		query:{
		   id: m.id,
       title: m.title
		}
	}"
>跳转</router-link>
②接收参数
$route.query.id
$route.query.title
实例如下:
src/router.index.js
Vue Router query 命名路由 params props

import VueRouter from "vue-router";
import Home from '../pages/Home'
import About from '../pages/About'
import News from '../pages/News'
import Message from '../pages/Message'
import Detail from '../pages/Detail'
  routes:[
    {
      path:'/about',
      component:About
    },
    {
      path:'/home',
      component:Home,
      children:[
        {
          path:'news',
          component:News
        },
        {
          path:'message',
          component:Message,
          children:[
            {
              path:'detail',
              component:Detail
            }
          ]
        }
      ]
    }
  ]
})
src/pages/Message.vue
Vue Router query 命名路由 params props
<template>
<div>
<ul>
<li v-for="m in messageList" :key="m.id">
<!-- 跳转路由并携带query参数,to的字符串写法 -->
<!-- <router-link :to="`/home/message/detail?id=${m.id}&title=${m.title}`">
{{m.title}}
</router-link> -->
<!-- 跳转路由并携带query参数,to的对象写法 -->
<router-link :to="{
path:'/home/message/detail',
query:{
}
}">
{{m.title}}
</router-link>
</li>
</ul>
<hr/>
<router-view></router-view>
</div>
</template>
<script>
export default {
name:'News',
data(){
return{
messageList:[
{id:'001',title:'消息001'},
{id:'002',title:'消息002'},
{id:'003',title:'消息003'}
]
}
}
}
</script>src/pages/Detail.vue
<template>
    <ul>
        <li>消息编号:{{ $route.query.id }}</li>
        <li>消息标题:{{ $route.query.title }}</li>
    </ul>
</template>
<script>
    export default {
        name:'Detail'
    }
</script>
1.4命名路由
作用:可以简化路由的跳转
使用:
①给路由命名
{
	path:'/demo',
	component:Demo,
	children:[
		{
			path:'test',
			component:Test,
			children:[
				{
          name:'hello' // 给路由命名
					path:'welcome',
					component:Hello,
				}
			]
		}
	]
}
②简化跳转
<!--简化前,需要写完整的路径 -->
<router-link to="/demo/test/welcome">跳转</router-link>
<!--简化后,直接通过名字跳转 -->
<router-link :to="{name:'hello'}">跳转</router-link>
<!--简化写法配合传递参数 -->
<router-link
	:to="{
		name:'hello',
		query:{
		    id:666,
            title:'你好'
		}
	}"
>跳转</router-link>





![[Linux/初学者]Vim文本编译器的模式切换及其常用指令](https://img-blog.csdnimg.cn/a357f502362943cebd1d868d312688f7.png)



![[附源码]Python计算机毕业设计白果园网上水果超市](https://img-blog.csdnimg.cn/91193d3ee84f434f86e85317e2b6db3e.png)


