基于 HuggingFace的Transformer库,在Colab或Kaggle进行预训练。
鉴于算力限制,选用了较小的英文数据集wikitext-2
目的:跑通Mask语言模型的预训练流程
一、准备
1.1 安装依赖
!pip3 install --upgrade pip
!pip install -U datasets
!pip install accelerate -U
注意:在Kaggle上训练时,最好将datasets更新到最新版(再重启kernel),避免版本低报错
colab和kaggle已经预安装transformers库
所有资料 ⚡️ ,朋友们如果有需要全套 《LLM大模型入门+进阶学习资源包》,扫码获取~
👉CSDN大礼包🎁:全网最全《LLM大模型入门+进阶学习资源包》免费分享(安全链接,放心点击)👈

1.2 数据准备
加载数据
from datasets import concatenate_datasets, load_dataset

wikitext2 = load_dataset("liuyanchen1015/VALUE_wikitext2_been_done", split="train")

# concatenate_datasets可以合并数据集,这里为了减少训练数据量,只用1个数据集
dataset = concatenate_datasets([wikitext2])
# 将数据集合切分为 90% 用于训练,10% 用于测试
d = dataset.train_test_split(test_size=0.1)
type(d["train"])
可以看到d的类型是
datasets.arrow_dataset.Dataset
def __init__(arrow_table: Table, info: Optional[DatasetInfo]=None, split: Optional[NamedSplit]=None, indices_table: Optional[Table]=None, fingerprint: Optional[str]=None)
A Dataset backed by an Arrow table.
训练集和测试集数量
print(len(d["train"]), len(d["test"]))
5391 600
查看数据
d["train"][0]
sentence、idx和score构成的字典,sentence为文本
{'sentence': "Rowley dismissed this idea given the shattered state of Africaine and instead towed the frigate back to Île Bourbon , shadowed by Astrée and Iphigénie on the return journey . The French frigates did achieve some consolation in pursuing Rowley from a distance , running into and capturing the Honourable East India Company 's armed brig Aurora , sent from India to reinforce Rowley . On 15 September , Boadicea , Africaine and the brigs done arrived at Saint Paul , Africaine sheltering under the fortifications of the harbour while the others put to sea , again seeking to drive away the French blockade but unable to bring them to action . Bouvet returned to Port Napoleon on 18 September , and thus was not present when Rowley attacked and captured the French flagship Vénus and Commodore Hamelin at the Action of 18 September 1810 .",
 'idx': 1867,
 'score': 1}
接下来将训练和测试数据,分别保存在本地文件中(后续用于训练tokenizer)
def dataset_to_text(dataset, output_filename="data.txt", num=1000):
    """Utility function to save dataset text to disk,
    useful for using the texts to train the tokenizer
    (as the tokenizer accepts files)"""
    cnt = 0
    with open(output_filename, "w") as f:
        for t in dataset["sentence"]:
            print(t, file=f) # 重定向到文件
            # print(len(t), t)
            cnt += 1
            if cnt == num:
                break

    print("Write {} sample in {}".format(num, output_filename))

# save the training set to train.txt
dataset_to_text(d["train"], "train.txt", len(d["train"]))
# save the testing set to test.txt
dataset_to_text(d["test"], "test.txt", len(d["test"]))
二、训练分词器(Tokenizer)
BERT采用了WordPiece分词,即
根据训练语料先训练一个语言模型,迭代每次在合并词元对时,会对所有词元进行评分,然后选择使训练数据似然增加最多的token对。直到,到达预定的词表大小。
相比BPE的选取频词最高的token对,WordPiece使用了语言模型来计算似然值:
score = 词元对出现的概率 / (第1个词元出现的概率 * 第1个词元出现的概率)。
因此,需要首先这里使用transformers库中的BertWordPieceTokenizer 类来完成分词器(Tokenizer)训练
import os, json
from transformers import BertTokenizerFast
from tokenizers import BertWordPieceTokenizer

special_tokens = [
"[PAD]", "[UNK]", "[CLS]", "[SEP]", "[MASK]", "<S>", "<T>"
]

# 加载之前存储的训练语料(可同时选择训练集和测试集)
# files = ["train.txt", "test.txt"]

# 在training set上训练tokenizer
files = ["train.txt"]

# 设定词表大小,BERT模型vocab size为30522,可自行更改
vocab_size = 30_522

# 最大序列长度, 较小的长度可以增加batch数量、提升训练速度
# 最大序列长度同时也决定了,BERT预训练的PositionEmbedding的大小,决定了其最大推理长度
max_length = 512

# 是否截断处理, 这边开启截断处理
# truncate_longer_samples = False
truncate_longer_samples = True

# 初始化WordPiece tokenizer
tokenizer = BertWordPieceTokenizer()

# 训练tokenizer
tokenizer.train(files=files,
                vocab_size=vocab_size,
                special_tokens=special_tokens)

# 截断至最大序列长度-512 tokens
tokenizer.enable_truncation(max_length=max_length)

model_path = "pretrained-bert"
# make the directory if not already there
if not os.path.isdir(model_path):
    os.mkdir(model_path)

# 存储tokenizer(其实就是词表文件vocab.txt)
tokenizer.save_model(model_path)

# 存储tokenizer的配置信息到config文件,
# including special tokens, whether to lower case and the maximum sequence length
with open(os.path.join(model_path, "config.json"), "w") as f:
    tokenizer_cfg = {
    "do_lower_case": True,
    "unk_token": "[UNK]",
    "sep_token": "[SEP]",
    "pad_token": "[PAD]",
    "cls_token": "[CLS]",
    "mask_token": "[MASK]",
    "model_max_length": max_length,
    "max_len": max_length,
    }
    json.dump(tokenizer_cfg, f)

# when the tokenizer is trained and configured, load it as BertTokenizerFast
tokenizer = BertTokenizerFast.from_pretrained(model_path)

vocab.txt内容,包括特殊7个token以及训练得到的tokens
[PAD]
[UNK]
[CLS]
[SEP]
[MASK]
<S>
<T>
!
"
#
$
%
&
'
(
config.json文件
{"do_lower_case": true, "unk_token": "[UNK]", "sep_token": "[SEP]", "pad_token": "[PAD]", "cls_token": "[CLS]", "mask_token": "[MASK]", "model_max_length": 512, "max_len": 512}
config.json和vocab.txt文件都是我们平时微调BERT或GPT经常见到的文件,其来源就是这个。
三 预处理语料集合
在开始BERT预训前,还需要将预训练语料根据训练好的 Tokenizer进行处理,将文本转换为分词后的结果。
如果文档长度超过512个Token),那么就直接进行截断。
数据处理代码如下所示:
def encode_with_truncation(examples):
    """Mapping function to tokenize the sentences passed with truncation"""
    return tokenizer(examples["sentence"], truncation=True, padding="max_length",
    max_length=max_length, return_special_tokens_mask=True)

def encode_without_truncation(examples):
    """Mapping function to tokenize the sentences passed without truncation"""
    return tokenizer(examples["sentence"], return_special_tokens_mask=True)

# 上述encode函数的使用,取决于truncate_longer_samples变量
encode = encode_with_truncation if truncate_longer_samples else encode_without_truncation

# tokenizing训练集
train_dataset = d["train"].map(encode, batched=True)
# tokenizing测试集
test_dataset = d["test"].map(encode, batched=True)
if truncate_longer_samples:
    # remove other columns and set input_ids and attention_mask as PyTorch tensors
    train_dataset.set_format(type="torch", columns=["input_ids", "attention_mask"])
    test_dataset.set_format(type="torch", columns=["input_ids", "attention_mask"])
else:
    # remove other columns, and remain them as Python lists
    test_dataset.set_format(columns=["input_ids", "attention_mask", "special_tokens_mask"])
    train_dataset.set_format(columns=["input_ids", "attention_mask", "special_tokens_mask"])
truncate_longer_samples变量控制对数据集进行词元处理的 encode() 函数。
- 如果设置为True,则会截断超过最大序列长度(max_length)的句子。否则不截断。
- 如果truncate_longer_samples设为False,需要将没有截断的样本连接起来,并组合成固定长度的向量。
这边开启截断处理( 不截断处理,代码有为解决的bug )。便于拼成chunk,batch处理。
Map: 100%
 5391/5391 [00:15<00:00, 352.72 examples/s]
Map: 100%
 600/600 [00:01<00:00, 442.19 examples/s]
观察分词结果
x = d["train"][10]['sentence'].split(".")[0]
x
In his foreword to John Marriott 's book , Thunderbirds Are Go ! , Anderson put forward several explanations for the series ' enduring popularity : it " contains elements that appeal to most children – danger , jeopardy and destruction
按max_length=33进行截断处理
tokenizer(x, truncation=True, padding="max_length", max_length=33, return_special_tokens_mask=True)
多余token被截断了,没有padding。
- 句子首部加上了(token id为2的[CLS])
- 句子尾部加上了(token id为3的[SEP])
{'input_ids': [2, 502, 577, 23750, 649, 511, 1136, 29823, 13, 59, 1253, 18, 4497, 659, 762, 7, 18, 3704, 2041, 3048, 1064, 26668, 534, 492, 1005, 13, 12799, 4281, 32, 555, 8, 4265, 3],
'token_type_ids': [0, 0, 0, 0, 0, 0, 0, 0, 0, 0, 0, 0, 0, 0, 0, 0, 0, 0, 0, 0, 0, 0, 0, 0, 0, 0, 0, 0, 0, 0, 0, 0, 0],
'attention_mask': [1, 1, 1, 1, 1, 1, 1, 1, 1, 1, 1, 1, 1, 1, 1, 1, 1, 1, 1, 1, 1, 1, 1, 1, 1, 1, 1, 1, 1, 1, 1, 1, 1],
'special_tokens_mask': [1, 0, 0, 0, 0, 0, 0, 0, 0, 0, 0, 0, 0, 0, 0, 0, 0, 0, 0, 0, 0, 0, 0, 0, 0, 0, 0, 0, 0, 0, 0, 0, 1]}
按max_length=70进行截断处理
tokenizer(x, truncation=True, padding="max_length", max_length=70, return_special_tokens_mask=True)
不足max_length的token进行了padding(token id为0, 即[PAD]), 对应attention_mask为0(注意力系数会变成无穷小,即mask掉)
{'input_ids': [2, 11045, 13, 61, 1248, 3346, 558, 8, 495, 4848, 1450, 8, 18, 981, 1146, 578, 17528, 558, 18652, 513, 13102, 18, 749, 1660, 819, 1985, 548, 566, 11279, 579, 826, 3881, 8079, 505, 495, 28263, 360, 18, 16273, 505, 570, 4145, 1644, 18, 505, 652, 757, 662, 2903, 1334, 791, 543, 3008, 810, 495, 817, 8079, 4436, 505, 579, 1558, 3, 0, 0, 0, 0, 0, 0, 0, 0],
'token_type_ids': [0, 0, 0, 0, 0, 0, 0, 0, 0, 0, 0, 0, 0, 0, 0, 0, 0, 0, 0, 0, 0, 0, 0, 0, 0, 0, 0, 0, 0, 0, 0, 0, 0, 0, 0, 0, 0, 0, 0, 0, 0, 0, 0, 0, 0, 0, 0, 0, 0, 0, 0, 0, 0, 0, 0, 0, 0, 0, 0, 0, 0, 0, 0, 0, 0, 0, 0, 0, 0, 0],
'attention_mask': [1, 1, 1, 1, 1, 1, 1, 1, 1, 1, 1, 1, 1, 1, 1, 1, 1, 1, 1, 1, 1, 1, 1, 1, 1, 1, 1, 1, 1, 1, 1, 1, 1, 1, 1, 1, 1, 1, 1, 1, 1, 1, 1, 1, 1, 1, 1, 1, 1, 1, 1, 1, 1, 1, 1, 1, 1, 1, 1, 1, 1, 1, 0, 0, 0, 0, 0, 0, 0, 0],
'special_tokens_mask': [1, 0, 0, 0, 0, 0, 0, 0, 0, 0, 0, 0, 0, 0, 0, 0, 0, 0, 0, 0, 0, 0, 0, 0, 0, 0, 0, 0, 0, 0, 0, 0, 0, 0, 0, 0, 0, 0, 0, 0, 0, 0, 0, 0, 0, 0, 0, 0, 0, 0, 0, 0, 0, 0, 0, 0, 0, 0, 0, 0, 0, 1, 1, 1, 1, 1, 1, 1, 1, 1]}
如果,设置为不截断
tokenizer(x, truncation=False, return_special_tokens_mask=True)
比较正常的结果
{'input_ids': [2, 502, 577, 23750, 649, 511, 1136, 29823, 13, 59, 1253, 18, 4497, 659, 762, 7, 18, 3704, 2041, 3048, 1064, 26668, 534, 492, 1005, 13, 12799, 4281, 32, 555, 8, 4265, 2603, 545, 3740, 511, 843, 1970, 178, 8021, 18, 19251, 362, 510, 6681, 3], 'token_type_ids': [0, 0, 0, 0, 0, 0, 0, 0, 0, 0, 0, 0, 0, 0, 0, 0, 0, 0, 0, 0, 0, 0, 0, 0, 0, 0, 0, 0, 0, 0, 0, 0, 0, 0, 0, 0, 0, 0, 0, 0, 0, 0, 0, 0, 0, 0], 'attention_mask': [1, 1, 1, 1, 1, 1, 1, 1, 1, 1, 1, 1, 1, 1, 1, 1, 1, 1, 1, 1, 1, 1, 1, 1, 1, 1, 1, 1, 1, 1, 1, 1, 1, 1, 1, 1, 1, 1, 1, 1, 1, 1, 1, 1, 1, 1], 'special_tokens_mask': [1, 0, 0, 0, 0, 0, 0, 0, 0, 0, 0, 0, 0, 0, 0, 0, 0, 0, 0, 0, 0, 0, 0, 0, 0, 0, 0, 0, 0, 0, 0, 0, 0, 0, 0, 0, 0, 0, 0, 0, 0, 0, 0, 0, 0, 1]}
反tokenize
y = tokenizer.decode(y["input_ids"])
y
直观看到,加入了[CLS]和[SEP],而且这个例子是无损解码的。
[CLS] in his foreword to john marriott's book, thunderbirds are go!, anderson put forward several explanations for the series'enduring popularity : it " contains elements that appeal to most children – danger, jeopardy and destruction [SEP]
四、模型训练
在构建了处理好的预训练语料后,可以开始模型训练。
直接使用transformers的trainer类型,其代码如下所示:
from transformers import BertConfig, BertForMaskedLM
from transformers import DataCollatorForLanguageModeling, TrainingArguments, Trainer

# 使用config初始化model
model_config = BertConfig(vocab_size=vocab_size,
                          max_position_embeddings=max_length)
model = BertForMaskedLM(config=model_config)

# 初始化BERT的data collator, 随机Mask 20% (default is 15%)的token
# 掩码语言模型建模(Masked Language Modeling ,MLM)。预测[Mask]token对应的原始token
data_collator = DataCollatorForLanguageModeling(
tokenizer=tokenizer, mlm=True, mlm_probability=0.2
)

# 训练参数
training_args = TrainingArguments(
  output_dir=model_path,          # output directory to where save model checkpoint
  evaluation_strategy="steps",    # evaluate each `logging_steps` steps
  overwrite_output_dir=True,
  num_train_epochs=10,            # number of training epochs, feel free to tweak
  per_device_train_batch_size=10, # the training batch size, put it as high as your GPU memory fits
  gradient_accumulation_steps=8,  # accumulating the gradients before updating the weights
  per_device_eval_batch_size=64,  # evaluation batch size
  logging_steps=1000,             # evaluate, log and save model checkpoints every 1000 step
  save_steps=1000,
  # load_best_model_at_end=True, # whether to load the best model (in terms of loss)
  # at the end of training
  # save_total_limit=3, # whether you don't have much space so you
  # let only 3 model weights saved in the disk
  )

trainer = Trainer(
  model=model,
  args=training_args,
  data_collator=data_collator,
  train_dataset=train_dataset,
  eval_dataset=test_dataset,
  )

# 训练模型
trainer.train()
训练日志
wandb: Logging into wandb.ai. (Learn how to deploy a W&B server locally: https://wandb.me/wandb-server)
wandb: You can find your API key in your browser here: https://wandb.ai/authorize
wandb: Paste an API key from your profile and hit enter, or press ctrl+c to quit:
  ········································
wandb: Appending key for api.wandb.ai to your netrc file: /root/.netrc
Tracking run with wandb version 0.16.3
Run data is saved locally in /kaggle/working/wandb/run-20240303_135646-j2ki48iz
Syncing run crimson-microwave-1 to Weights & Biases (docs)
View project at https://wandb.ai/1506097817gm/huggingface
View run at https://wandb.ai/1506097817gm/huggingface/runs/j2ki48iz
 [ 19/670 1:27:00 < 55:32:12, 0.00 it/s, Epoch 0.27/10]
这里我尝试在kaggle CPU上训练了下的,耗时太长
GPU训练时, 切换更大的数据集
开始训练后,可以如下输出结果:
 [ 19/670 1:27:00 < 55:32:12, 0.00 it/s, Epoch 0.27/10]
Step Training Loss Validation Loss
1000 6.904000 6.558231
2000 6.498800 6.401168
3000 6.362600 6.277831
4000 6.251000 6.172856
5000 6.155800 6.071129
6000 6.052800 5.942584
7000 5.834900 5.546123
8000 5.537200 5.248503
9000 5.272700 4.934949
10000 4.915900 4.549236
五、模型使用
5.1 直接推理
# 加载模型参数 checkpoint
model = BertForMaskedLM.from_pretrained(os.path.join(model_path, "checkpoint-10000"))
# 加载tokenizer
tokenizer = BertTokenizerFast.from_pretrained(model_path)
fill_mask = pipeline("fill-mask", model=model, tokenizer=tokenizer)
# 模型推理
examples = [
"Today's most trending hashtags on [MASK] is Donald Trump",
"The [MASK] was cloudy yesterday, but today it's rainy.",
]
for example in examples:
for prediction in fill_mask(example):
print(f"{prediction['sequence']}, confidence: {prediction['score']}")
print("="*50)
进行,mask的token预测(完形填空😺),可以得到如下输出:
```python
today's most trending hashtags on twitter is donald trump, confidence: 0.1027069091796875
today's most trending hashtags on monday is donald trump, confidence: 0.09271949529647827
today's most trending hashtags on tuesday is donald trump, confidence: 0.08099588006734848
today's most trending hashtags on facebook is donald trump, confidence: 0.04266013577580452
today's most trending hashtags on wednesday is donald trump, confidence: 0.04120611026883125
==================================================
the weather was cloudy yesterday, but today it's rainy., confidence: 0.04445931687951088
the day was cloudy yesterday, but today it's rainy., confidence: 0.037249673157930374
the morning was cloudy yesterday, but today it's rainy., confidence: 0.023775646463036537
the weekend was cloudy yesterday, but today it's rainy., confidence: 0.022554103285074234
## 如何系统的去学习大模型LLM ?
作为一名热心肠的互联网老兵,我意识到有很多经验和知识值得分享给大家,也可以通过我们的能力和经验解答大家在人工智能学习中的很多困惑,所以在工作繁忙的情况下还是坚持各种整理和分享。
但苦于知识传播途径有限,很多互联网行业朋友无法获得正确的资料得到学习提升,故此将并将**重要的 `AI大模型资料` 包括AI大模型入门学习思维导图、精品AI大模型学习书籍手册、视频教程、实战学习等录播视频免费分享出来**。
所有资料 ⚡️ ,朋友们如果有需要全套 《**LLM大模型入门+进阶学习资源包**》,**扫码获取~**
> 👉[<font color="#FF0000">CSDN大礼包</font>🎁:全网最全《LLM大模型入门+进阶学习资源包》免费分享<b><font
> color="#177f3e">(安全链接,放心点击)</font></b>]()👈
<img src="https://img-blog.csdnimg.cn/img_convert/26251143424d87c136848cef8c0f603a.jpeg" style="margin: auto" />
## 一、全套AGI大模型学习路线
**AI大模型时代的学习之旅:从基础到前沿,掌握人工智能的核心技能!**

## 二、640套AI大模型报告合集
这套包含640份报告的合集,涵盖了AI大模型的理论研究、技术实现、行业应用等多个方面。无论您是科研人员、工程师,还是对AI大模型感兴趣的爱好者,这套报告合集都将为您提供宝贵的信息和启示。

## 三、AI大模型经典PDF籍
随着人工智能技术的飞速发展,AI大模型已经成为了当今科技领域的一大热点。这些大型预训练模型,如GPT-3、BERT、XLNet等,以其强大的语言理解和生成能力,正在改变我们对人工智能的认识。 那以下这些PDF籍就是非常不错的学习资源。


### 四、AI大模型商业化落地方案

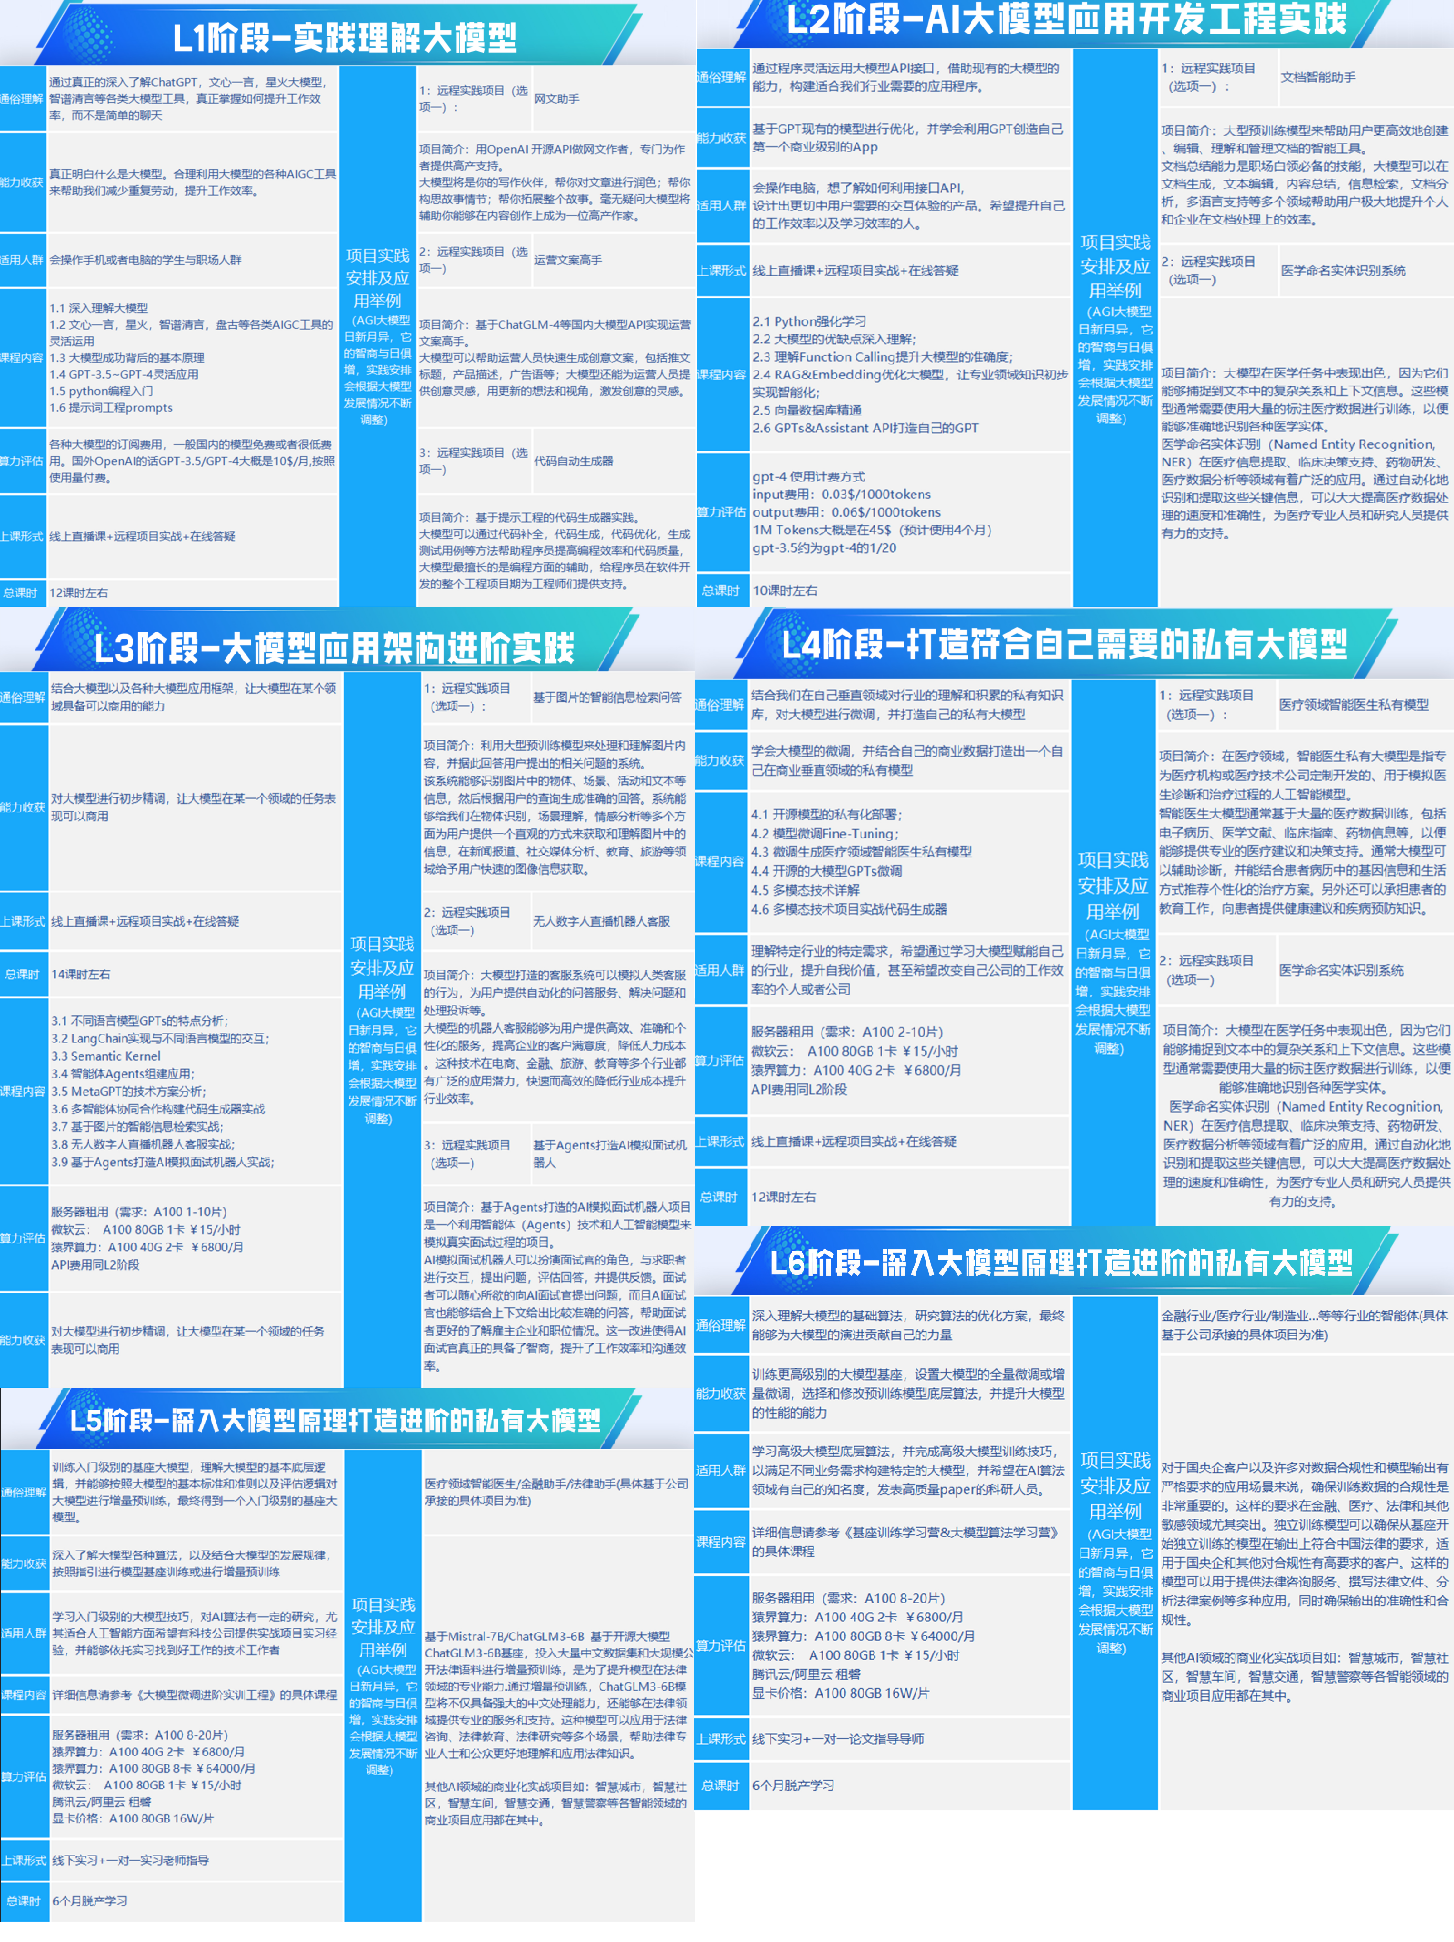
### 阶段1:AI大模型时代的基础理解
- **目标**:了解AI大模型的基本概念、发展历程和核心原理。
- **内容**:
- L1.1 人工智能简述与大模型起源
- L1.2 大模型与通用人工智能
- L1.3 GPT模型的发展历程
- L1.4 模型工程
- L1.4.1 知识大模型
- L1.4.2 生产大模型
- L1.4.3 模型工程方法论
- L1.4.4 模型工程实践
- L1.5 GPT应用案例
### 阶段2:AI大模型API应用开发工程
- **目标**:掌握AI大模型API的使用和开发,以及相关的编程技能。
- **内容**:
- L2.1 API接口
- L2.1.1 OpenAI API接口
- L2.1.2 Python接口接入
- L2.1.3 BOT工具类框架
- L2.1.4 代码示例
- L2.2 Prompt框架
- L2.2.1 什么是Prompt
- L2.2.2 Prompt框架应用现状
- L2.2.3 基于GPTAS的Prompt框架
- L2.2.4 Prompt框架与Thought
- L2.2.5 Prompt框架与提示词
- L2.3 流水线工程
- L2.3.1 流水线工程的概念
- L2.3.2 流水线工程的优点
- L2.3.3 流水线工程的应用
- L2.4 总结与展望
### 阶段3:AI大模型应用架构实践
- **目标**:深入理解AI大模型的应用架构,并能够进行私有化部署。
- **内容**:
- L3.1 Agent模型框架
- L3.1.1 Agent模型框架的设计理念
- L3.1.2 Agent模型框架的核心组件
- L3.1.3 Agent模型框架的实现细节
- L3.2 MetaGPT
- L3.2.1 MetaGPT的基本概念
- L3.2.2 MetaGPT的工作原理
- L3.2.3 MetaGPT的应用场景
- L3.3 ChatGLM
- L3.3.1 ChatGLM的特点
- L3.3.2 ChatGLM的开发环境
- L3.3.3 ChatGLM的使用示例
- L3.4 LLAMA
- L3.4.1 LLAMA的特点
- L3.4.2 LLAMA的开发环境
- L3.4.3 LLAMA的使用示例
- L3.5 其他大模型介绍
### 阶段4:AI大模型私有化部署
- **目标**:掌握多种AI大模型的私有化部署,包括多模态和特定领域模型。
- **内容**:
- L4.1 模型私有化部署概述
- L4.2 模型私有化部署的关键技术
- L4.3 模型私有化部署的实施步骤
- L4.4 模型私有化部署的应用场景
### 学习计划:
- **阶段1**:1-2个月,建立AI大模型的基础知识体系。
- **阶段2**:2-3个月,专注于API应用开发能力的提升。
- **阶段3**:3-4个月,深入实践AI大模型的应用架构和私有化部署。
- **阶段4**:4-5个月,专注于高级模型的应用和部署。
##### 这份完整版的所有 ⚡️ 大模型 LLM 学习资料已经上传CSDN,朋友们如果需要可以微信扫描下方CSDN官方认证二维码免费领取【`保证100%免费`】
全套 《**LLM大模型入门+进阶学习资源包**》**↓↓↓** **获取~**
> 👉[<font color="#FF0000">CSDN大礼包</font>🎁:全网最全《LLM大模型入门+进阶学习资源包》免费分享<b><font
> color="#177f3e">(安全链接,放心点击)</font></b>]()👈
<img src="https://img-blog.csdnimg.cn/img_convert/26251143424d87c136848cef8c0f603a.jpeg" style="margin: auto" />


![[论文阅读笔记34] LISA (LISA: Reasoning Segmentation via Large Language Model) 代码精读](https://i-blog.csdnimg.cn/direct/5279bced92d84a04a2b4f732146eeaa7.png)