详细介绍SpringBoot整合阿里云短信服务的每一步过程,同时会将验证码存放到Redis中并设置过期时间,尽量保证实战的同时也让没做过的好兄弟也能实现发短信的功能~
1. 注册阿里云账号和创建Access Key
首先,你需要注册一个阿里云账号(如果还没有),然后在控制台中创建Access Key。这个Access Key将用于通过API调用阿里云短信服务。在控制台中创建Access Key非常简单,只需遵循阿里云的步骤即可。
2. 添加相关的依赖
在Spring Boot项目中,你需要添加阿里云短信服务、Redis的依赖、还有mybatis-plus
,这里直接用mybatis-plus了,非常的方便,省去了大量的DOM操作,你可以在pom.xml文件中添加以下依赖:
        <dependency>
            <groupId>com.baomidou</groupId>
            <artifactId>mybatis-plus-boot-starter</artifactId>
            <version>3.5.7</version>
        </dependency>

        <dependency>
            <groupId>com.aliyun</groupId>
            <artifactId>dysmsapi20170525</artifactId>
            <version>3.0.0</version>
        </dependency>

        <dependency>
            <groupId>org.springframework.boot</groupId>
            <artifactId>spring-boot-starter-data-redis</artifactId>
        </dependency>
3. 配置阿里云短信服务、Redis参数
application.yml:
# 服务器配置
server:
  # 设置服务器端口
  port: 8080
  # 配置Servlet的上下文路径
  servlet:
    context-path: /api

# 数据源配置,用于连接MySQL数据库
spring:
  datasource:
    # 数据库驱动类名
    driver-class-name: com.mysql.cj.jdbc.Driver
    # 数据库连接URL
    url: jdbc:mysql://localhost:3306/×××
    # 数据库用户名
    username: ×××
    # 数据库密码
    password:×××
  # Redis配置
  redis:
    # Redis服务器地址
    host: ×××
    # Redis服务器端口
    port: ×××
    # Redis数据库索引
    database: ×××

# MyBatis-Plus配置
mybatis-plus:
  # 全局配置
  global-config:
    # 数据库配置
    db-config:
      # 表名前缀
      table-prefix: ×××
      # 主键类型,自动根据数据库生成
      id-type: auto
  # 映射器位置,指定mapper接口的XML文件位置
  mapper-locations: classpath*:mapper/*.xml
  # MyBatis配置
  configuration:
    # 日志实现类,使用控制台输出日志
    log-impl: org.apache.ibatis.logging.stdout.StdOutImpl
配置Redis:
@Configuration
public class RedisConfig {

    @Bean
    public RedisTemplate<String,Object> redisTemplate(RedisConnectionFactory factory){
        RedisTemplate<String, Object> template = new RedisTemplate<>();
        StringRedisSerializer redisSerializer = new StringRedisSerializer();
        Jackson2JsonRedisSerializer jackson2JsonRedisSerializer = new Jackson2JsonRedisSerializer(Object.class);
        ObjectMapper om = new ObjectMapper();
        om.setVisibility(PropertyAccessor.ALL, JsonAutoDetect.Visibility.ANY);
        om.enableDefaultTyping(ObjectMapper.DefaultTyping.NON_FINAL);
        jackson2JsonRedisSerializer.setObjectMapper(om);
        template.setConnectionFactory(factory);
        // key序列化
        template.setKeySerializer(redisSerializer);
        // value序列化
        template.setValueSerializer(jackson2JsonRedisSerializer);

        // value hashmap序列化 filed value
        template.setHashValueSerializer(jackson2JsonRedisSerializer);
        template.setHashKeySerializer(redisSerializer);
        return template;
    }
}
4. 创建工具类MsgController
阿里云短信服务Utils:
public class SendMsgUtil {

    /**
     * 使用AK&SK初始化账号Client
     * @return Client
     * @throws Exception
     */
    public static Client createClient() throws Exception {
        com.aliyun.teaopenapi.models.Config config = new com.aliyun.teaopenapi.models.Config()
                // 必填,请确保代码运行环境设置了环境变量 ALIBABA_CLOUD_ACCESS_KEY_ID。
                .setAccessKeyId("xxxxxxxxxx")

                // 必填,请确保代码运行环境设置了环境变量 ALIBABA_CLOUD_ACCESS_KEY_SECRET。
                .setAccessKeySecret("xxxxxxxx");
        config.endpoint = "dysmsapi.aliyuncs.com";
        return new Client(config);
    }

    /**
     * API 相关
     * @return OpenApi.Params
     */
    public static com.aliyun.teaopenapi.models.Params createApiInfo() throws Exception {
        com.aliyun.teaopenapi.models.Params params = new com.aliyun.teaopenapi.models.Params()
                .setAction("SendSms")
                .setVersion("2017-05-25")
                .setProtocol("HTTPS")
                .setMethod("POST")
                .setAuthType("AK")
                .setStyle("RPC")
                .setPathname("/")
                .setReqBodyType("json")
                .setBodyType("json");
        return params;
    }

    public static String sendCode(String phone) throws Exception {
        Client client = createClient();
        com.aliyun.teaopenapi.models.Params params = createApiInfo();
        java.util.Map<String, Object> queries = new java.util.HashMap<>();
        queries.put("PhoneNumbers", xxxx);
        queries.put("SignName", "xxxx");
        queries.put("TemplateCode", "xxxxx"); //您正在申请手机注册,验证码为:${code},5分钟内有效!
        String code = generateVerificationCode();
        queries.put("TemplateParam", "{\"code\":\"" + code + "\"}");
        com.aliyun.teautil.models.RuntimeOptions runtime = new com.aliyun.teautil.models.RuntimeOptions();
        com.aliyun.teaopenapi.models.OpenApiRequest request = new com.aliyun.teaopenapi.models.OpenApiRequest()
                .setQuery(com.aliyun.openapiutil.Client.query(queries));
        client.callApi(params, request, runtime);
        return code;
    }
    // 生成六位数的验证码
    public static String generateVerificationCode() {
        Random random = new Random();
        int firstDigit = random.nextInt(9) + 1;
        StringBuilder sb = new StringBuilder().append(firstDigit);
        for (int i = 0; i < 5; i++) {
            sb.append(random.nextInt(10));
        }
        return sb.toString();
    }


}
像service层和mapper层以及entity层 都可以直接用mybatis-plus生成:

5. 短信验证码实现登录注册
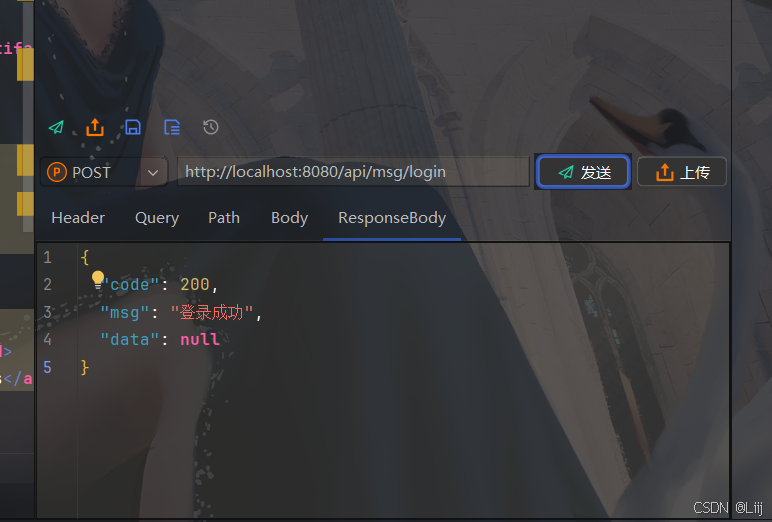
接下来直接测试,我是在idea里使用插件Apipost进行测试的,也非常的好用:

点击发送后,输入的手机号就会收到一个验证码来进行验证:

然后,点击登陆测试:

结果:
还有一个注册功能,大概流程跟这一样,只不过会判断手机号是不是被注册过,接下来跟大家聊聊为什么要把验证码存储在redis当中:
将验证码保存到 Redis 中的优势在于其高性能、分布式特性、易设置过期时间、减少数据库负担和提升安全性。Redis 提供快速读写和自动过期管理,确保高效响应和验证码的及时失效,从而提高系统整体性能和安全性。