背景
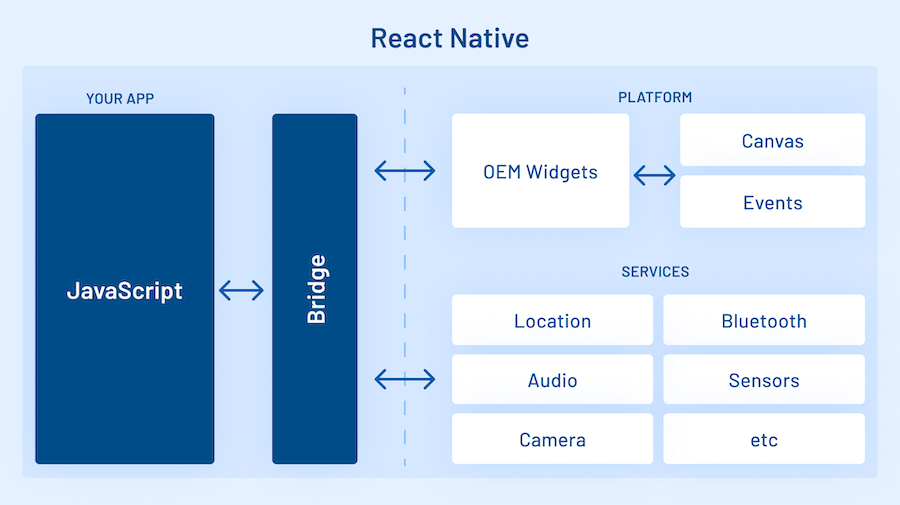
remote是个老库,早期Electron版本中有个remote对象,这个对象可以横跨所有进程,随意通信,后来官方认为不安全,被干掉了,之后有人利用Electron的IPC通信,底层通过Promise的await能力,模拟了一个类似的remote对象,即@electron/remote没有当年的remote那么强大,但是也很好用,当然,若觉得自己生命值较长,可以不屑一顾,自己再造轮子。
新版remote的使用
我目前均在 `"electron": "22.3.6"` 版本来讲东西,这个版本虽然有点老,但是起到承上启下的作用,往上改进的不多,往下优化的点又很大,向下不兼容,所以围绕这个版本讲比较好,大家可以看另外一篇,完全按照步骤一步步走,就能搭建好一个可以运行的Electron,否则新手在搞版本兼容时,搞到崩溃。Electron-Vue 脚手架避坑实录,兼容Win11,升级electron22,清理控制台错误_electron 脚手架-CSDN博客文章浏览阅读1k次,点赞10次,收藏12次。electron 这东西文档乱七八糟,版本迭代飞快,里面技术还多得不得了,但强大是真的强大,好用是真的好用,头疼是真的头疼,搞不好就内存泄漏了,问题多多,踩坑多多,后期我把代码整理号了,发到gitee上,再追加上来。npm可以设置代理,如果不会的,请自行搜索,这里就细讲了,有时候代理也不行就需要,在控制台,设置环境,不加这个,也能让你下载安装包下到怀疑人生,实在搞不了安装包问题的,可以私信我发node-modules。还有个热更新报错,这个去年已经讲了,这里就不再赘述,改了即可。_electron 脚手架https://blog.csdn.net/wangsenling/article/details/138638605
第一步:主进程中启用
1. 刚才也说了,这是其他人通过IPC通信模拟原老版Electron中的remote对象,因此就得在主进程中,追加一堆监听函数,用以监听渲染进程的消息,学过控制翻转的应该很容易理解下面 `remoteMain.initialize();` 和 `remoteMain.enable(mainWindow.webContents)` ,前置实例化监听函数,后者根据这个窗口参数来对应创建一些事件,来进行一一对应
2. 这里要注意的是,主进程引入方式多了个main,渲染进程引入没这东西
import {app, BrowserWindow, Menu} from 'electron'
import * as remoteMain from "@electron/remote/main"
import '../renderer/store'
import webdriver from "selenium-webdriver";

remoteMain.initialize();
/**
 * Set `__static` path to static files in production
 * https://simulatedgreg.gitbooks.io/electron-vue/content/en/using-static-assets.html
 */
if (process.env.NODE_ENV !== 'development') {
    global.__static = require('path').join(__dirname, '/static').replace(/\\/g, '\\\\')
}

let mainWindow
const winURL = process.env.NODE_ENV === 'development'
    ? `http://localhost:9080`
    : `file://${__dirname}/index.html`


process.env.ELECTRON_DISABLE_SECURITY_WARNINGS = "true";

function createWindow() {
    /**
     * Initial window options
     */
    mainWindow = new BrowserWindow({
        height: 563,
        useContentSize: true,
        width: 1000,
        webPreferences: {
            enableRemoteModule: true,
            webviewTag: true,
            nodeIntegration: true,
            nodeIntegrationInWorker: true,
            contextIsolation: false,
            webSecurity: false
        }
    })

    remoteMain.enable(mainWindow.webContents)

    mainWindow.loadURL(winURL)

    // 去除默认菜单
    Menu.setApplicationMenu(null)

    mainWindow.webContents.openDevTools()
    mainWindow.on('closed', () => {
        mainWindow = null
    })
}
第二步:渲染进程中引入
以下代码就可以在渲染进程中创建新窗口,并且还能获得窗口的变量,此外可以获取主进程中的session搞事情,比如动态获取所有session,并且设置setProxy,比在主进程中要方便,代码也解耦了,但是这是代码层面解耦,底层仍然是主进程在搞事情,并且还多了一部来回通信的过程。
const { BrowserWindow } = require('@electron/remote')
let win = new BrowserWindow({ width: 800, height: 600 })
win.loadURL('https://github.com')
remote的用途
-
调用主进程模块:在渲染进程中调用主进程模块(如
fs,path等)。例如,可以在渲染进程中使用@electron/remote访问文件系统,而不需要在主进程中编写额外的 IPC 通信代码。 -
访问主进程对象:获取并操作主进程中的对象。例如,可以通过
@electron/remote获取BrowserWindow实例,并对其进行操作,如改变窗口大小、位置等。 -
简化 IPC 通信:简化渲染进程与主进程之间的通信。在没有
@electron/remote的情况下,需要使用ipcRenderer和ipcMain模块进行进程间通信,而@electron/remote可以直接调用主进程的方法。
-
在渲染进程中创建新的主进程窗口:
const { BrowserWindow } = require('@electron/remote');
const newWin = new BrowserWindow({ width: 800, height: 600 }); newWin.loadURL('https://example.com');-
在渲染进程中使用主进程的对话框:
const { dialog } = require('@electron/remote'); dialog.showMessageBox({ message: 'Hello from the renderer process!', buttons: ['OK'] }); -
在渲染进程中使用主进程的菜单:
const { Menu, MenuItem } = require('@electron/remote'); const menu = new Menu(); menu.append(new MenuItem({ label: 'Hello', click: () => { console.log('Hello clicked'); } })); menu.popup(); -
获取主进程的环境变量:
const { process } = require('@electron/remote'); console.log(process.env); -
在渲染进程中使用主进程的剪贴板:
const { clipboard } = require('@electron/remote');
clipboard.writeText('Hello from the renderer process!');
console.log(clipboard.readText());
![Cannot perform upm operation: connect ETIMEDOUT 34.36.199.114:443 [NotFound]](https://i-blog.csdnimg.cn/direct/17c4f76abb1e40899e381f966ed55eb3.png)


