设计数据表::
分类表 id主键 分类类型 分类名称 父级id 图标链接
题目标签表 主键 标签名称 分类id(标签会和分类进行连接 直接将分类表写进来 减少另一个关联表) 排序
题目的信息表 id name 难度 出题人姓名 题目的类别(123)题目分数 题目解析
单选题表 id 题目id 选项内容 选项类型abcd 是否正确
多选题表 id 题目id 选项类型 选项内容 是否正确
判断表 id 题目id 是否正确
简答题表 id 题目id
首页的查询分类 因为很长时间不会变 所以我们可以将它做成一个缓存 直接从redis查缓存 缓存预热这种 启动项目之后 扔进去
标签的查询 我们在标签设计的时候 和分类做成联动缓存
新增题目的时候 采用工厂加策略的模式去做扩展 现在有四种题型 无论未来加多少 我们都不用动主流程
题目列表 难度不大 就是简单的分页查询 分类 标签 难度这些都是入参的场景 查标签 难度 出题人等等 这些都是直接查不做join
题目的详情 也做一下工厂加策略
--------------------------------------------------------------------------------------
传统的项目结构是 controller service dao
他会有一些问题 把所有的业务放到了一起 拆不卡
之后 加了biz 原子性的接口放到service中 biz中放service接口的一些整合
现有的 架构::
因为我们是微服务 首先是api层 是把本项目对外提供的接口放到这里 里面有接口 req resp
application 应用层 所有复杂的一些东西还有入口 controller mq job
domain层 非常原子性的层 不和任何的复杂业务污染
infra层 基础设施层
common层 公用的逻辑 类
starter层 一些启动 不和其他层做耦合
-------------------------------------------------------------
api层没有resource 也没有test 就是一个纯净的jar包
starter里面没有test 但里面有resource
domain里面没有resource和teco
common里面没有resource和test
application里面的mq没有test job和controller里面都没有
infra中没有test和resource
--------------------------------------------------------------------------------------
首先先在最外面的P O M文件中设置相关依赖,比如说spring boot dependencies他的形式是pom文件
机子就是阿里云的配置
这个服务的启动类是统一放在start里面 所以我们要给这个starter一些启动的依赖,首先先在P O M文件中引入SpringBoard的启动依赖,紧接着创立一个启动累声明,springboot Applications 和componentscan注解
@SpringBootApplication
@ComponentScan("com.jingdianjichi")
public class SubjectApplication {
    public static void main(String[] args) {
        SpringApplication.run(SubjectApplication.class);
    }
试一下可以启动
Resource文件下创建Y M L文件用来声明端口号
server:
  port: 3000
在application controller里面的pom文件中先 引入
    <dependency>
        <groupId>org.springframework.boot</groupId>
        <artifactId>spring-boot-starter-web</artifactId>
        <version>2.4.2</version>
    </dependency>
在刷题controller中先在P O M文件中声明spring boot的启动依赖因为他们是单独的模块,所有的启动要在start里面,所以要将controller放到start的pom文件中去扫描
<dependency>
            <groupId>com.jingdianjichi</groupId>
            <artifactId>jc-club-application-controller</artifactId>
            <version>1.0-SNAPSHOT</version>
        </dependency>
然后使用apipost

查看是否成功 上面是为了在application controller层中集成springmvc
接下来mysql druid mybatis集成
在infra的pom文件中
   <dependencies>
        <!-- jdbcStarter -->
        <dependency>
            <groupId>org.springframework.boot</groupId>
            <artifactId>spring-boot-starter-jdbc</artifactId>
            <version>2.4.2</version>
        </dependency>
        <!-- druid连接池 -->
        <dependency>
            <groupId>com.alibaba</groupId>
            <artifactId>druid-spring-boot-starter</artifactId>
            <version>1.1.22</version>
        </dependency>
        <!-- mysql -->
        <dependency>
            <groupId>mysql</groupId>
            <artifactId>mysql-connector-java</artifactId>
            <version>8.0.22</version>
        </dependency>
        <!-- mybatisplus -->
        <dependency>
            <groupId>com.baomidou</groupId>
            <artifactId>mybatis-plus-boot-starter</artifactId>
            <version>3.4.0</version>
        </dependency>
    </dependencies>
infra放数据库
pom文件中引入string boot starter jdbc
druid sbs
mysql connector java
mybatis plus boot starter
接着去引入数据库 在idea右边点数据库

用easycode去生成代码
需要生成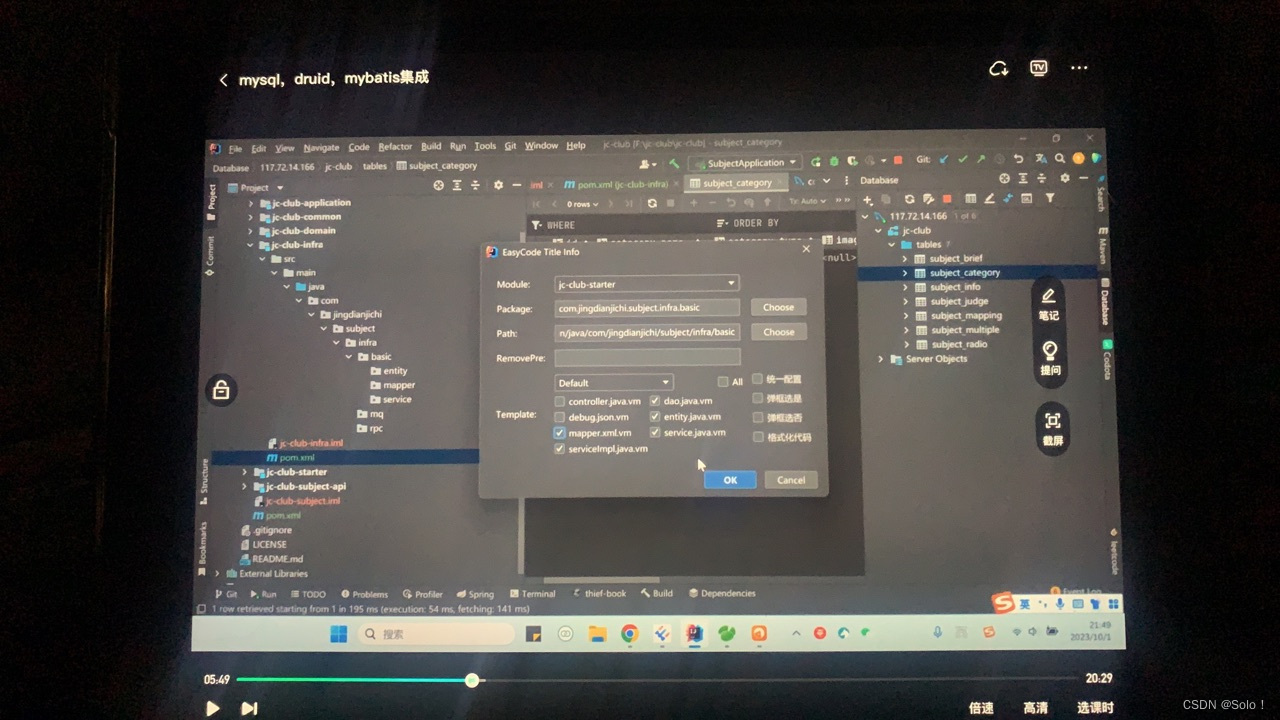
生成之后 都在infra中

紧接着用start启动
先讲infra放到pom依赖中
用mapperscan去扫描 mapper 中间两个星星


要启动数据库 在start的yml中配置数据库
server:
  port: 3000
spring:
  datasource:
    username: root
    password: 123456
    driver-class-name: com.mysql.cj.jdbc.Driver
    url: jdbc:mysql://localhost:3306/doc_jc-club-init.sql?serverTimezone=Asia/Shanghai&useUnicode=true&characterEncoding=utf8&useSSL=false
    type: com.alibaba.druid.pool.DruidDataSource
    druid:
      initial-size: 20
      min-idle: 20
      max-active: 100
      max-wait: 60000
      stat-view-servlet:
        enabled: true
        url-pattern: /druid/*
        login-username: admin
        login-password: 123456
      filter:
        stat:
          enabled: true
          slow-sql-millis: 2000
          log-slow-sql: true
        wall:
          enabled: true
        config:
          enabled: true
数据库的密码应该加密
继续配置druid的属性

进行数据库连接的测试 在starter启动类中
这里是在

application的controller中 他首先要把基础设施层的infra引入到pom中 然后就可以引入infra的subjectcategoryservice 调用里面的querybyid方法
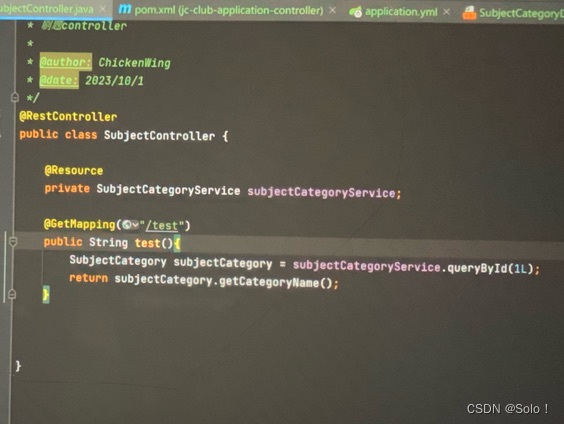
用aipost

由于是使用druid数据库,连接池可以使用阿里巴巴的加密 在infra下的basic⬇️创建一个utils 再创建一个druidencryptutil在其中声明,加密的公钥和解密的工钥创建两个方法,加密方法和解密方法,最后将数据库的密码用加密方法输出
package com.jingdianjichi.subject.infra.basic.utils;

import com.alibaba.druid.filter.config.ConfigTools;

import java.security.NoSuchAlgorithmException;
import java.security.NoSuchProviderException;

/**
 * @author lhj
 * @date 24/6/23
 * @description 数据库加密util
 */

public class DruidEncryptUtil {
    private static String publicKey;
    private static String privateKey;

    static {
        try {
            String[] keyPair = ConfigTools.genKeyPair(512);
            privateKey = keyPair[0];
            System.out.println("privateKey:" + privateKey);
            publicKey = keyPair[1];
            System.out.println("publicKey:" + publicKey);
        } catch (NoSuchAlgorithmException e) {
            e.printStackTrace();
        } catch (NoSuchProviderException e) {
            e.printStackTrace();
        }

    }

    public static String encrypt(String plainText) throws Exception {
        String encrypt = ConfigTools.encrypt(privateKey, plainText);
        System.out.println("encrypt:" + encrypt);
        return encrypt;
    }


    public static String decrypt(String encryptText) throws Exception {
        String decrypt = ConfigTools.decrypt(publicKey, encryptText);
        System.out.println("decrypt:" + decrypt);
        return decrypt;
    }

    public static void main(String[] args) throws Exception {
        String encrypt = encrypt("123456");
        System.out.println("encrypt:" + encrypt);
    }


}

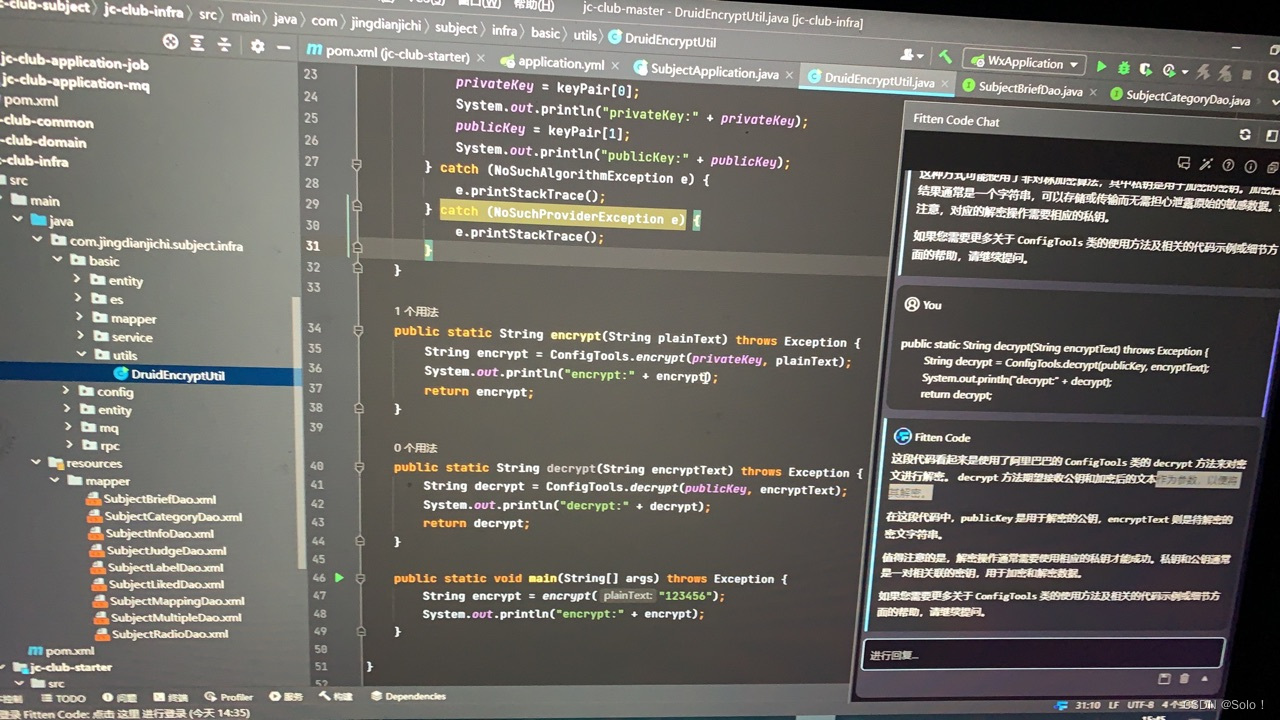
最后要在yml的druid中配置

config要是true 不然识别不到加密的密码
这边遇到一个bug就是在配置yam文件的时候这个解密加密问题
server:
  port: 3000
spring:
  datasource:
    username: root
    password: bXAZEs5aXmEGr8fdD8m22lewAcb9N8yrL00cjzTJihpT/v81LSjYNZsK8r5j0Rfvqi9KxpVhSmPXIdTIAWRLDg==
    driver-class-name: com.mysql.cj.jdbc.Driver
    url: jdbc:mysql://localhost:3306/doc_jc-club-init.sql?serverTimezone=Asia/Shanghai&useUnicode=true&characterEncoding=utf8&useSSL=false
    type: com.alibaba.druid.pool.DruidDataSource
    druid:
      initial-size: 20
      min-idle: 20
      connectionProperties: config.decrypt=true;config.decrypt.key=MFwwDQYJKoZIhvcNAQEBBQADSwAwSAJBAInZ/YULz8N/hx6dMu2Z7lH3/08Z6vZr79manvca5px6GDvIfkbHe87D1JjBK9Y9QKv73YEHX7W811x3xznvAzcCAwEAAQ==;
      max-active: 100
      max-wait: 60000
      stat-view-servlet:
        enabled: true
        url-pattern: /druid/*
        login-username: admin
        login-password: 123456
      filter:
        stat:
          enabled: true
          slow-sql-millis: 2000
          log-slow-sql: true
        wall:
          enabled: true
        config:
          enabled: true

-------------------------------------------------------------
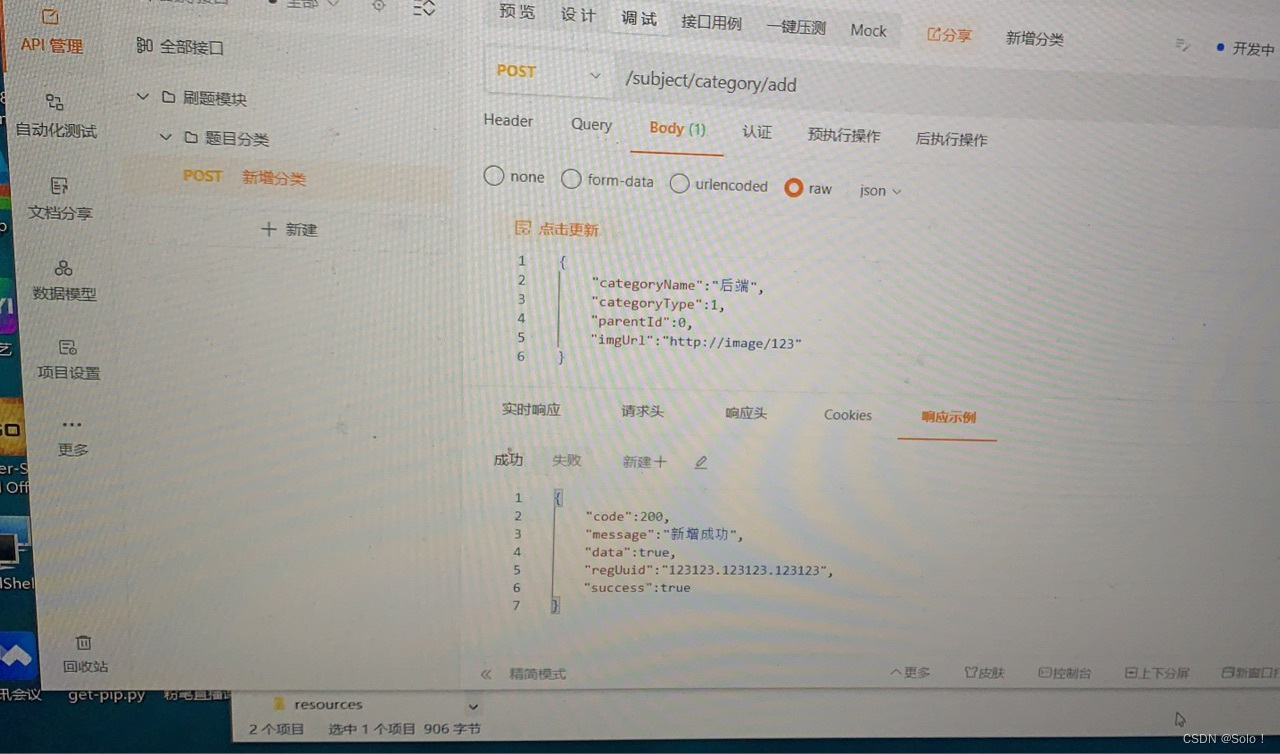
相关的业务代码 先在apipost里面创建一个刷题模块 下面再创建一个题目分类 定义post和raw 响应示例uuid是为了看报错 然后可以显示在日志里面
在common中的pom文件中我们先用lombook和mapstruct对实体层现做简化 这里要注意lombook应该在mapstruct的前面首先先loombook提供好getset然后mapstruct再去对getset去做转换
 <dependencies>
        <dependency>
            <groupId>org.projectlombok</groupId>
            <artifactId>lombok</artifactId>
            <version>1.18.16</version>
        </dependency>
        <dependency>
            <groupId>org.mapstruct</groupId>
            <artifactId>mapstruct</artifactId>
            <version>1.4.2.Final</version>
        </dependency>
        <dependency>
            <groupId>org.mapstruct</groupId>
            <artifactId>mapstruct-processor</artifactId>
            <version>1.4.2.Final</version>
        </dependency>
在common的pom中引入依赖
接下来将实体类中没用的代码删掉 写@data注解

接着在infra 的pom文件中将common引入
我们可以有两种方式 一种是直接用application去用infra(基础设施层)
一种是以domain为中介 我们用第二种方法
在domain中建立service接口和impl
我们要用domain去饮用基础设施层infra 所以要在domain的pom中引入infra的依赖
我们将infra中的category的实体层复制到 domain的实体类 并重命名加bo 将里面的创建人什么的删掉 因为只需要保留功能就可以

接口那边代码
impl去实现接口 然后发现insert那边报错 这边要用一个拦截器
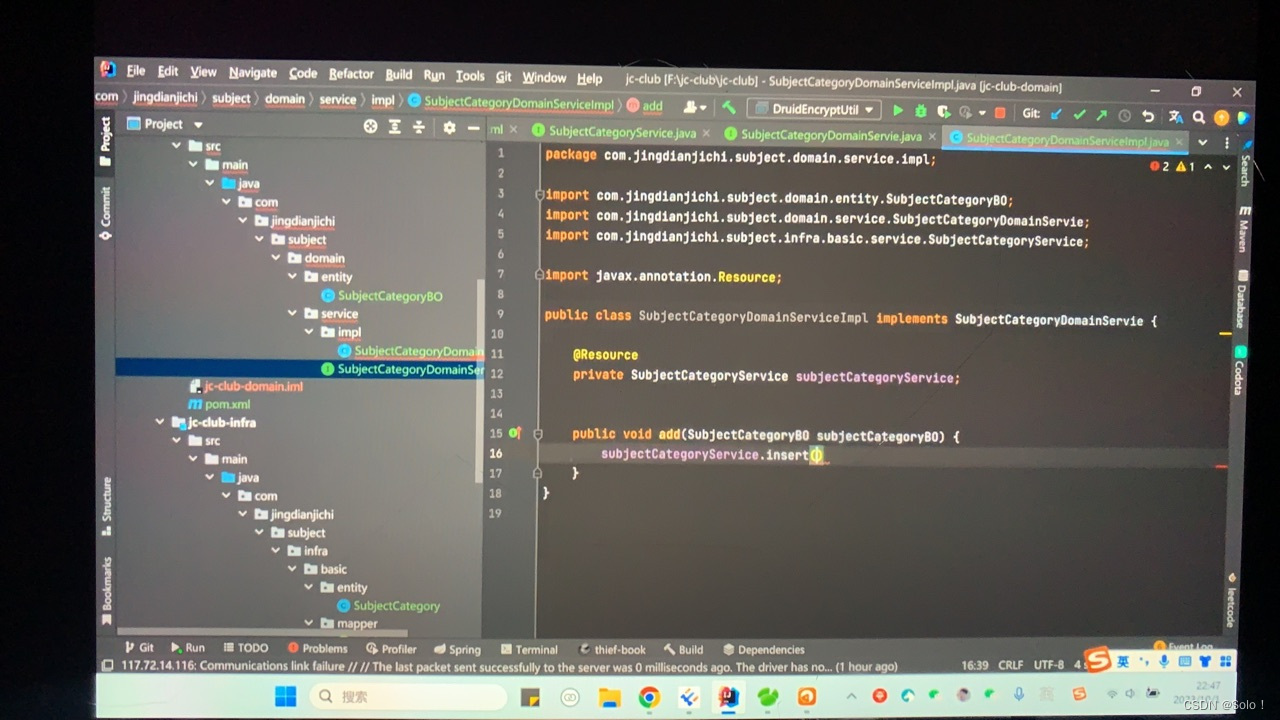
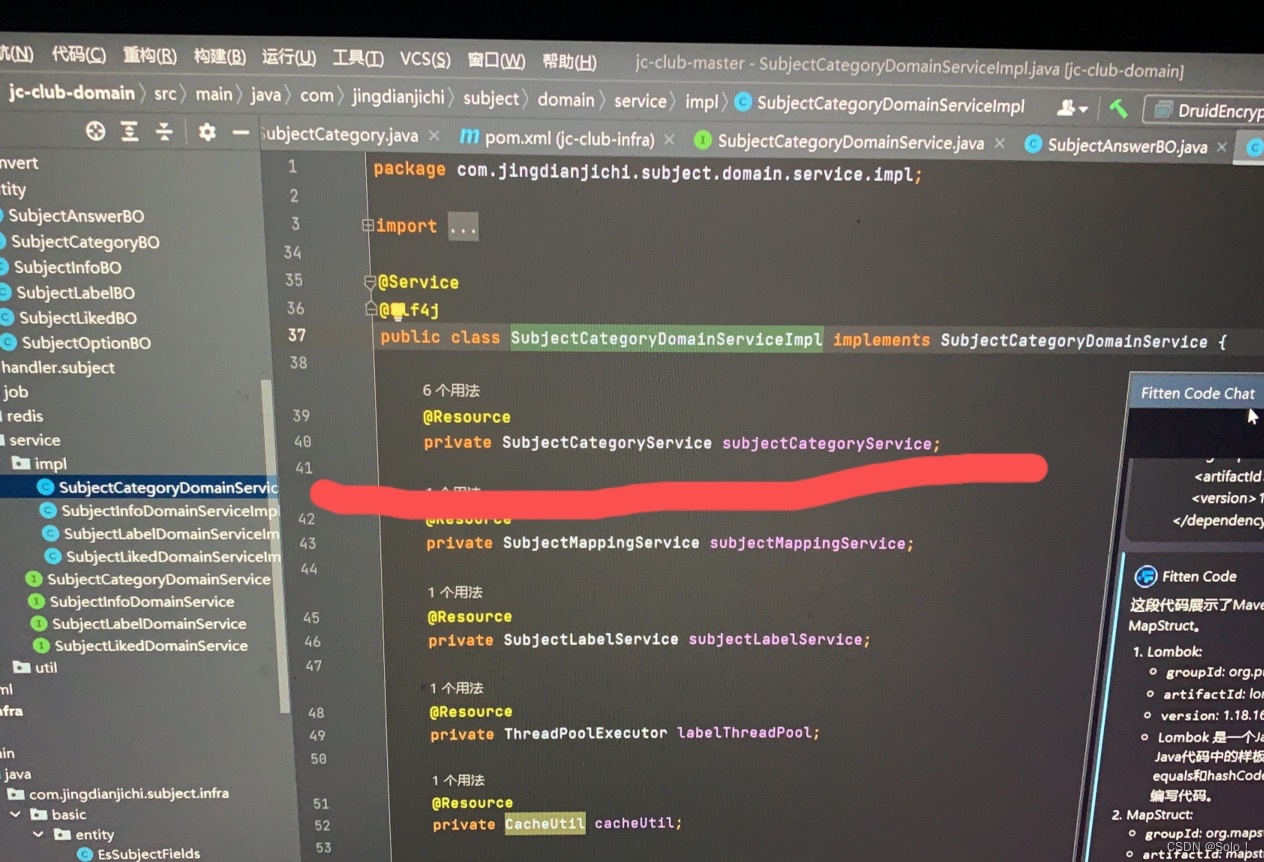
因为他要的是subjectcategory而我们是bo所以就要去写一个拦截器
直接在domain建一个convert的包 里面建一个接口

将bo转换
那applicarion的controller层的pom文件中引入domain和infra的依赖 其实我们这边用的是infra去做交互
想简单地A D D可以用基础设施程序进行交互,也可以用domain层去进行交互
在controller下建立subjectcategorycontroller
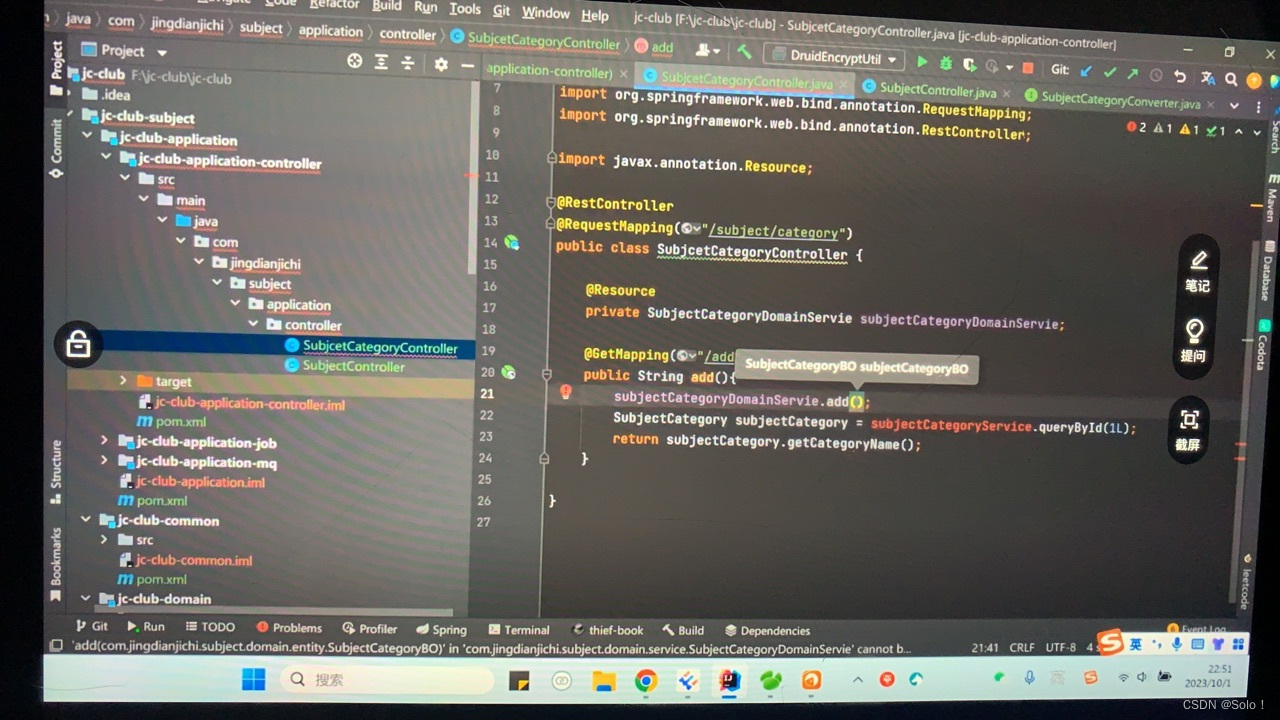
那些注解是根据之前自己写的接口去写的注解
然后遇到了一个问题就是 这边add需要一个bo
也涉及到类型转换
我们去建立一个package叫dto
我们将bo的实体类直接复制过来
然后创建一个convert包建立一个dto接口去转换
将dto转换成bo

现在我们返回的是一个string 也不是json格式 和前端交互也很麻烦 所以 我们可以去弄一个result
在common的entity包中建立一个result
package com.jingdianjichi.subject.common.entity;

import com.jingdianjichi.subject.common.enums.ResultCodeEnum;
import lombok.Data;

@Data
public class Result<T> {

    private Boolean success;

    private Integer code;

    private String message;

    private T data;

    public static Result ok(){
        Result result = new Result();
        result.setSuccess(true);
        result.setCode(ResultCodeEnum.SUCCESS.getCode());
        result.setMessage(ResultCodeEnum.SUCCESS.getDesc());
        return result;
    }

    public static <T> Result ok(T data){
        Result result = new Result();
        result.setSuccess(true);
        result.setCode(ResultCodeEnum.SUCCESS.getCode());
        result.setMessage(ResultCodeEnum.SUCCESS.getDesc());
        result.setData(data);
        return result;
    }

    public static Result fail(){
        Result result = new Result();
        result.setSuccess(false);
        result.setCode(ResultCodeEnum.FAIL.getCode());
        result.setMessage(ResultCodeEnum.FAIL.getDesc());
        return result;
    }

    public static <T> Result fail(T data){
        Result result = new Result();
        result.setSuccess(false);
        result.setCode(ResultCodeEnum.FAIL.getCode());
        result.setMessage(ResultCodeEnum.FAIL.getDesc());
        result.setData(data);
        return result;
    }

}

像共用的东西我们可以放到common中
我们在common中建立一个entity 创建一个result

这边的数据其实就是我们之前设置的
然后data那边我们设置一个范型 这样的话什么类型我们都可以往里面去放
我们要写上data 不然set不了
我们定义一些枚举 在common的enums下创建resultcodeenum这边类型一定要些enum
我们要拿这些代码的话 我们要设置一个getter注解
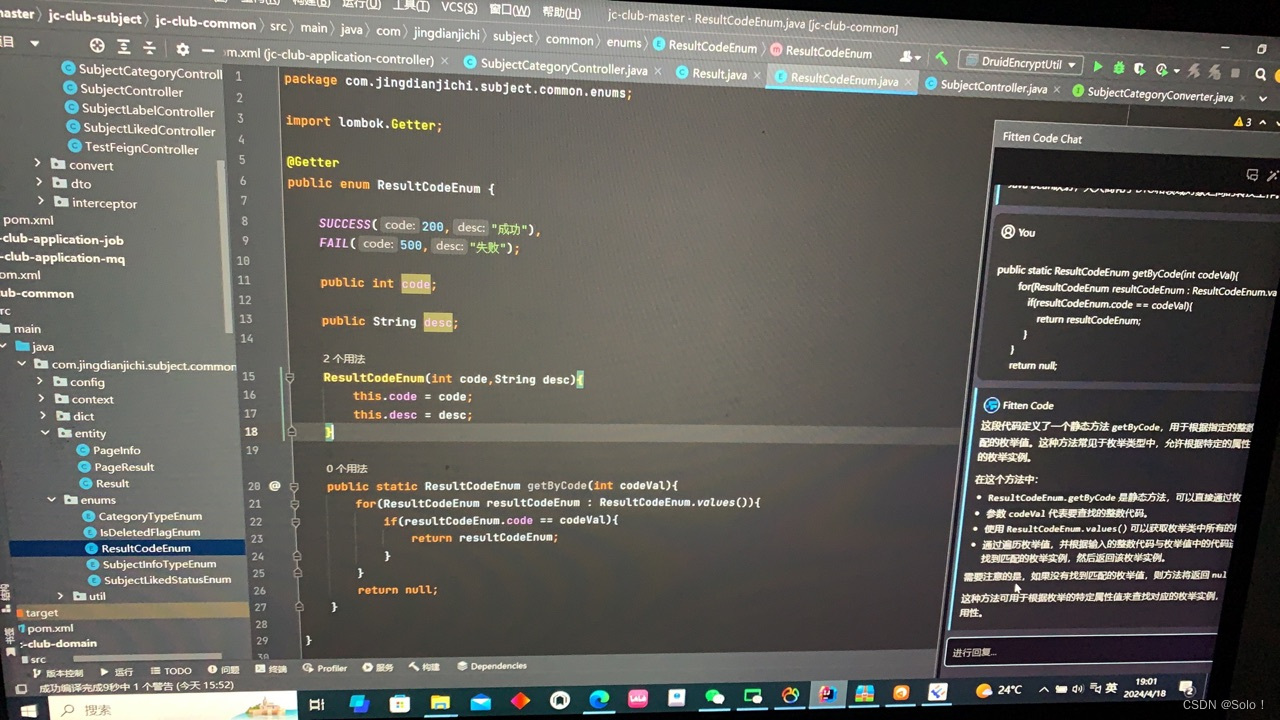
package com.jingdianjichi.subject.common.enums;

import lombok.Getter;

// 我们要拿的时候应该有一个getter
@Getter
public enum ResultCodeEnum {

    SUCCESS(200, "成功"),
    FAIL(500, "失败");

    public int code;

    public String desc;

    ResultCodeEnum(int code, String desc) {
        this.code = code;
        this.desc = desc;
    }
    //接收一个整数类型的代码值作为参数。
    //遍历 ResultCodeEnum 枚举类型的所有值。
    //检查每个枚举值的代码属性是否与传入的代码值匹配。
    //如果找到匹配的枚举值,则返回该枚举值;否则返回 null。
    public static ResultCodeEnum getByCode(int codeVal){
        for(ResultCodeEnum resultCodeEnum : ResultCodeEnum.values()){
            if(resultCodeEnum.code == codeVal){
                return resultCodeEnum;
            }
        }
        return null;
    }


}
然后在result中直接运用枚举就行
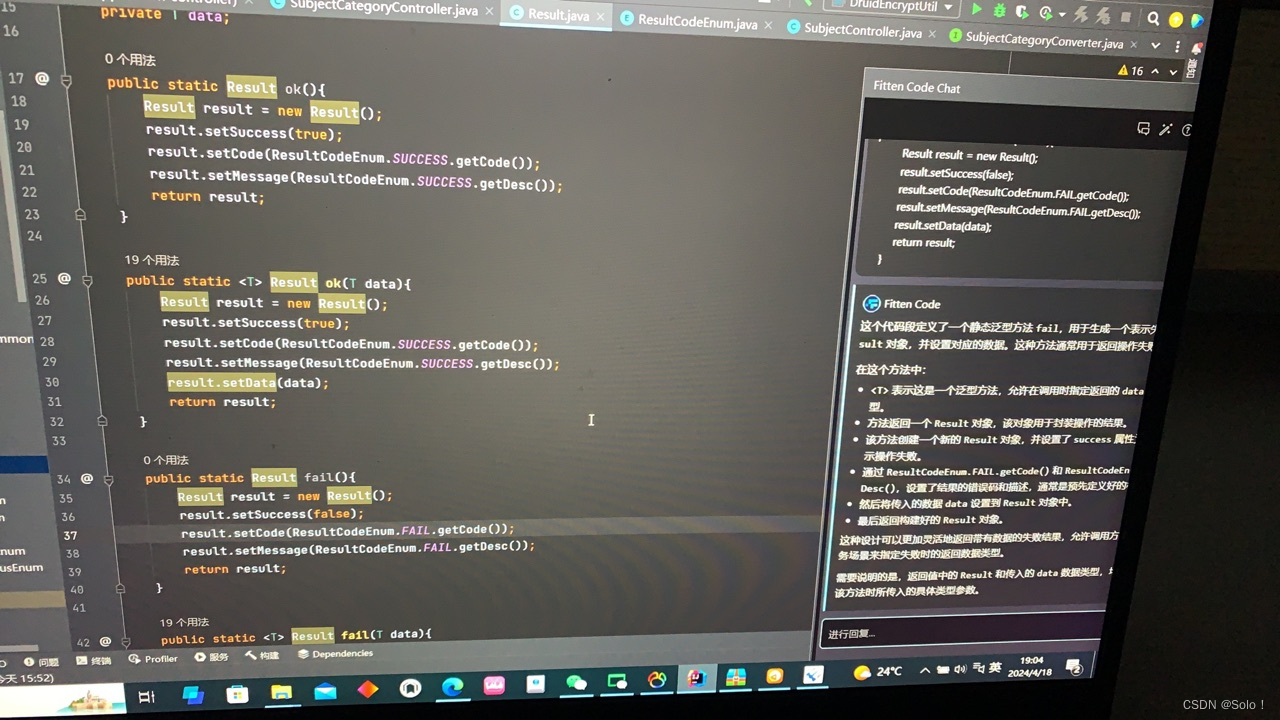
result设置好之后 我们就可以去 controller中
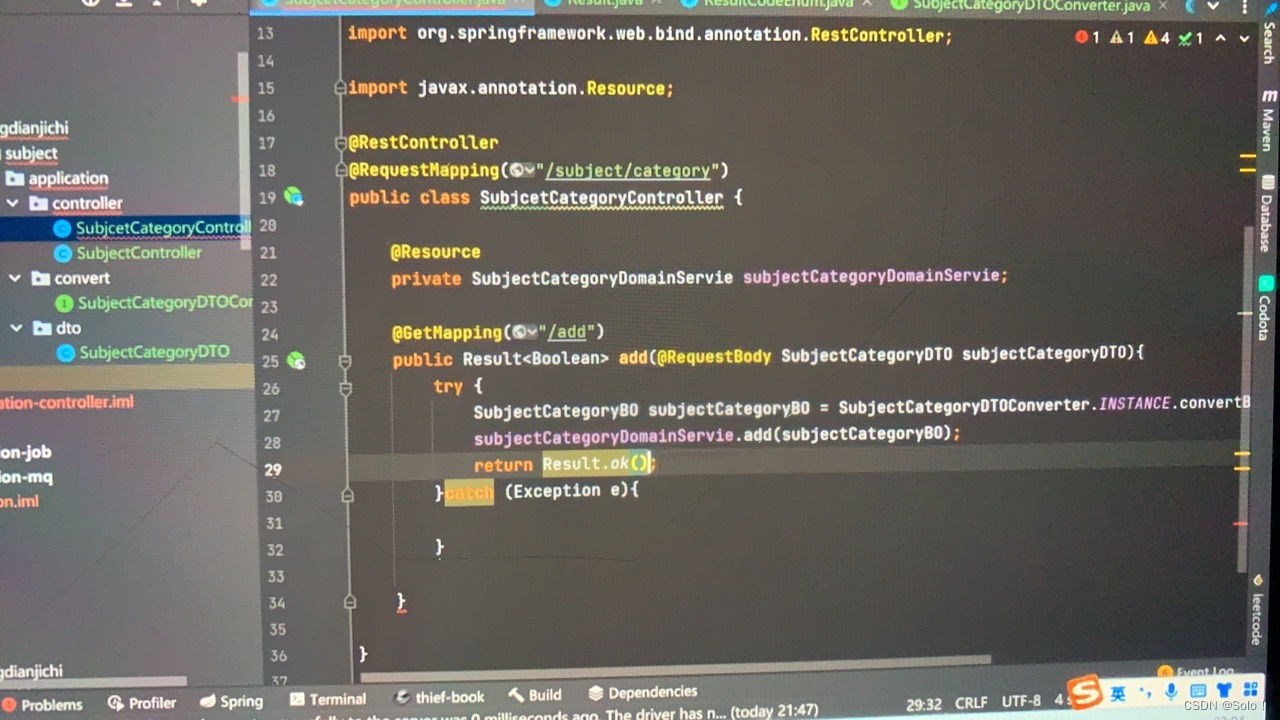
顺便做一个try catch 括号里写data数据 true
失败在catch中写return result.fail
这边我的系统报错!!!!!!!!!!!!!!
说是log4j2和logback冲突 有这么些解决办法 但没成功 我先把log4j2删了在common的pom中 因为common是共同的代码是
<dependency>
<groupId>org.springframework.boot</groupId>
<artifactId>spring-boot-starter-log4j2</artifactId>
<version>2.4.2</version>
</dependency>
报错提示


解决完之后
到这里就会报一个错 事domainservice中需要加一个注解


在使用apipost的时候

原因是少打了个3000

img url插不到数据库里面

这种样子
这里讲日志
首先在common的pom引入log4j2 和fastjson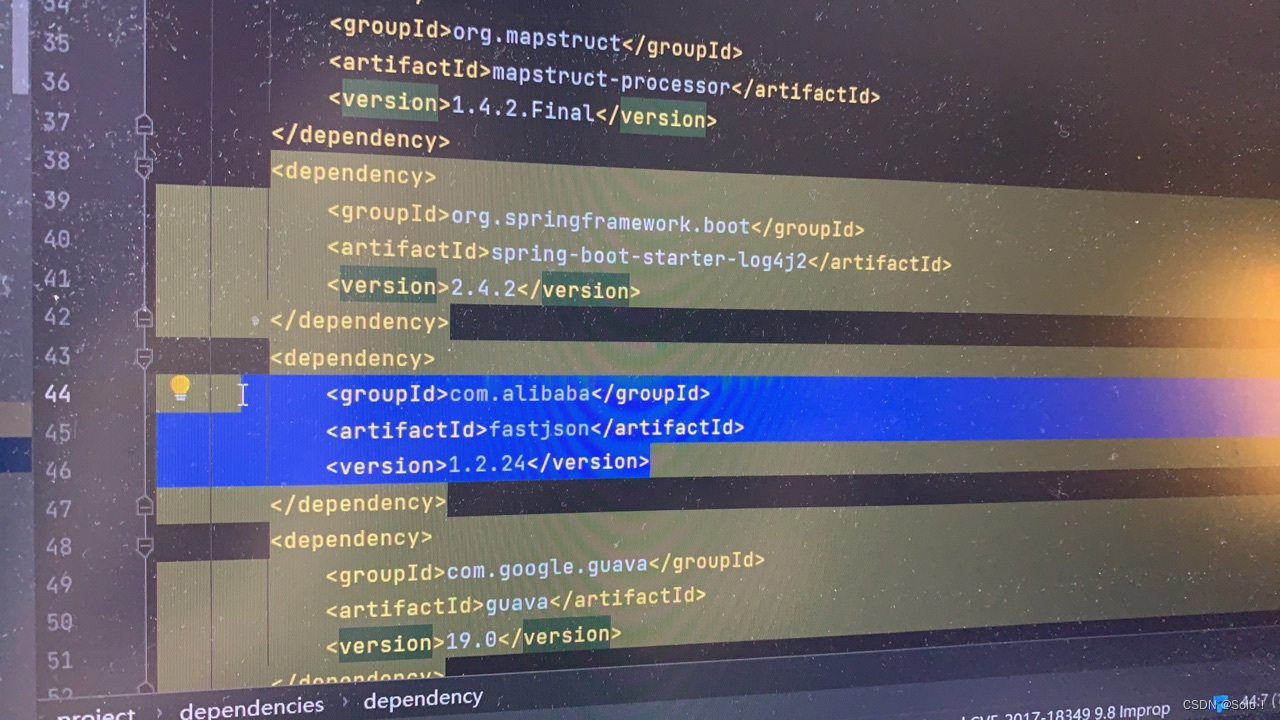
接着在subjectcategorycontroller中

if (log.isDebugEnabled()){
log.info("subjectCategoryController.add.dto:{}", JSON.toJSONString(subjectCategoryDTO)); 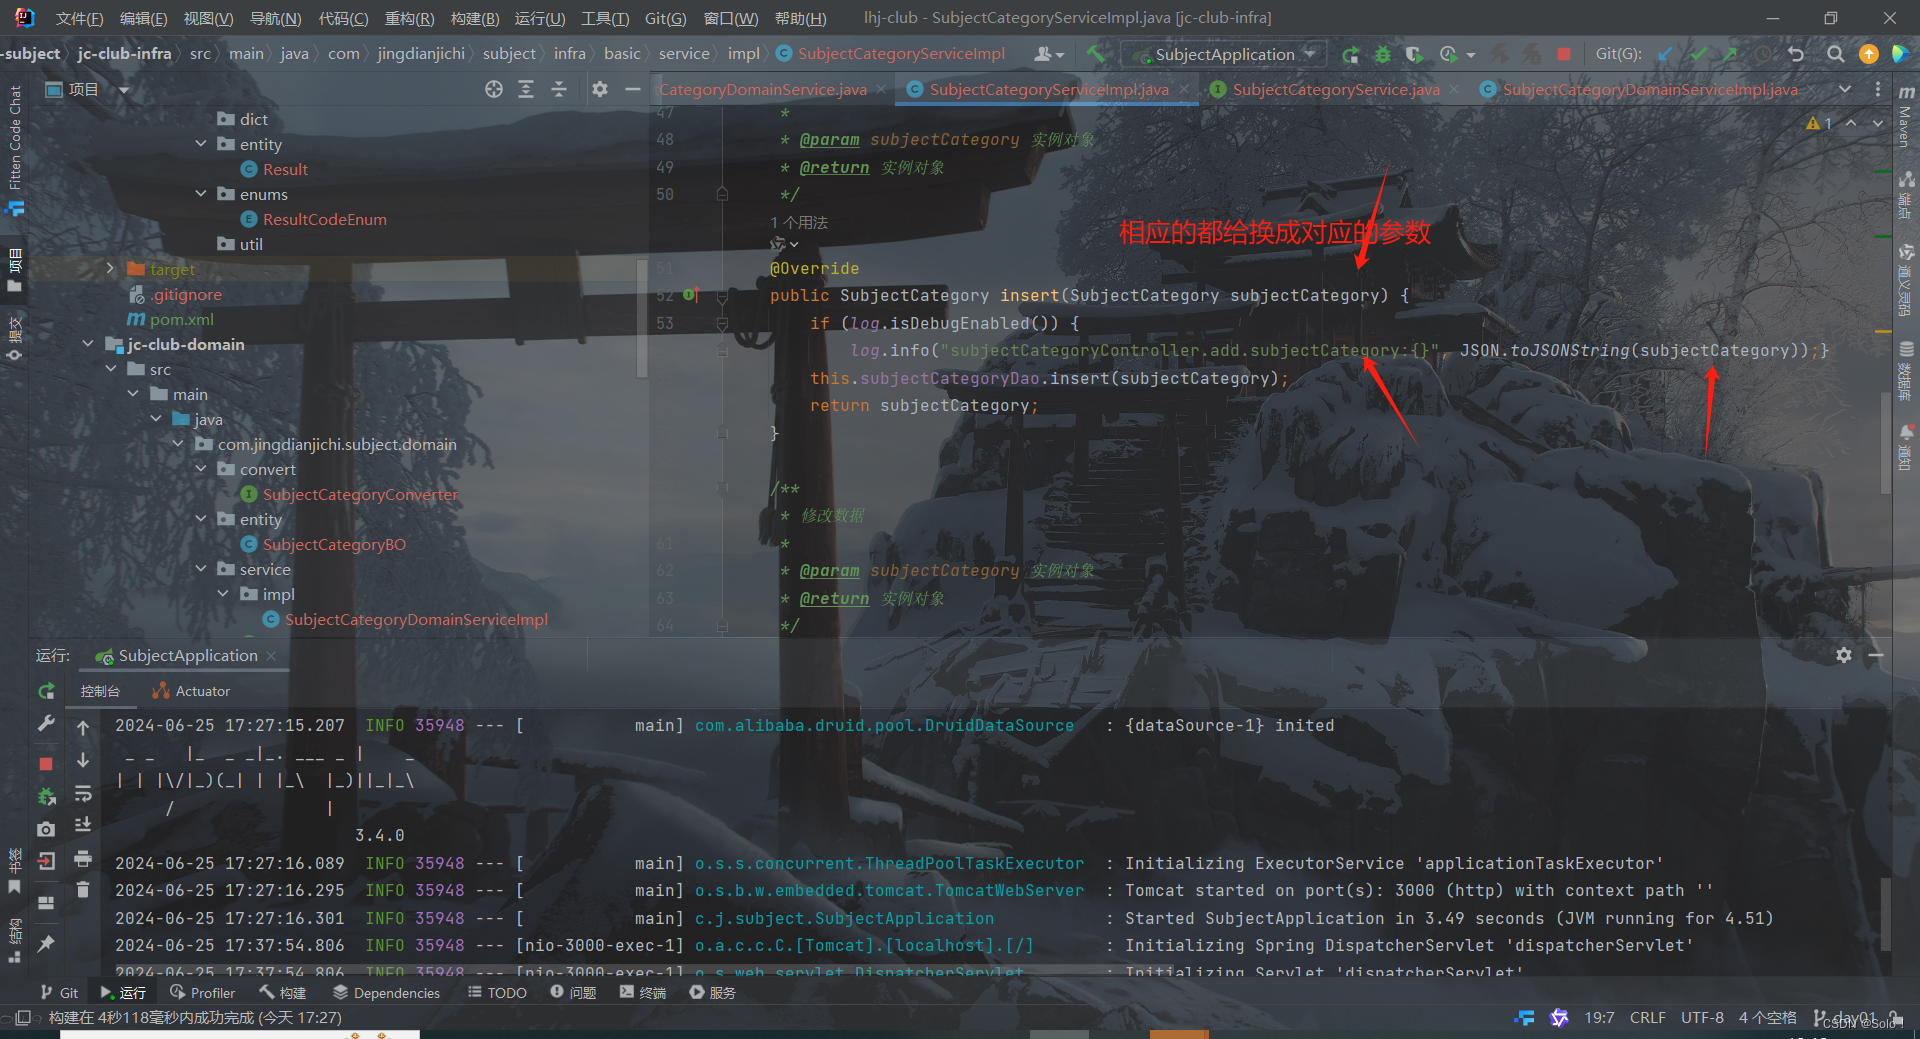
bo的话在subjectcategorydomainserviceimpl中再写一个log4j2
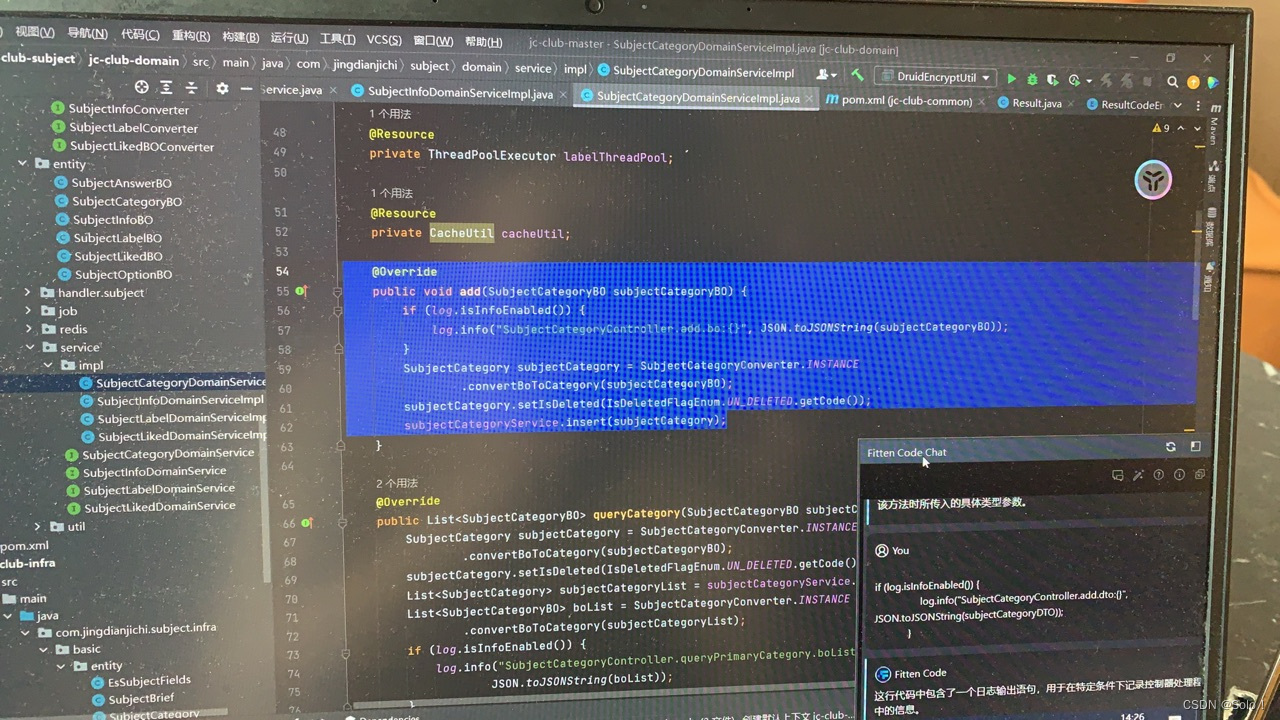
再继续在subjectcategoryserviceimpl下写一个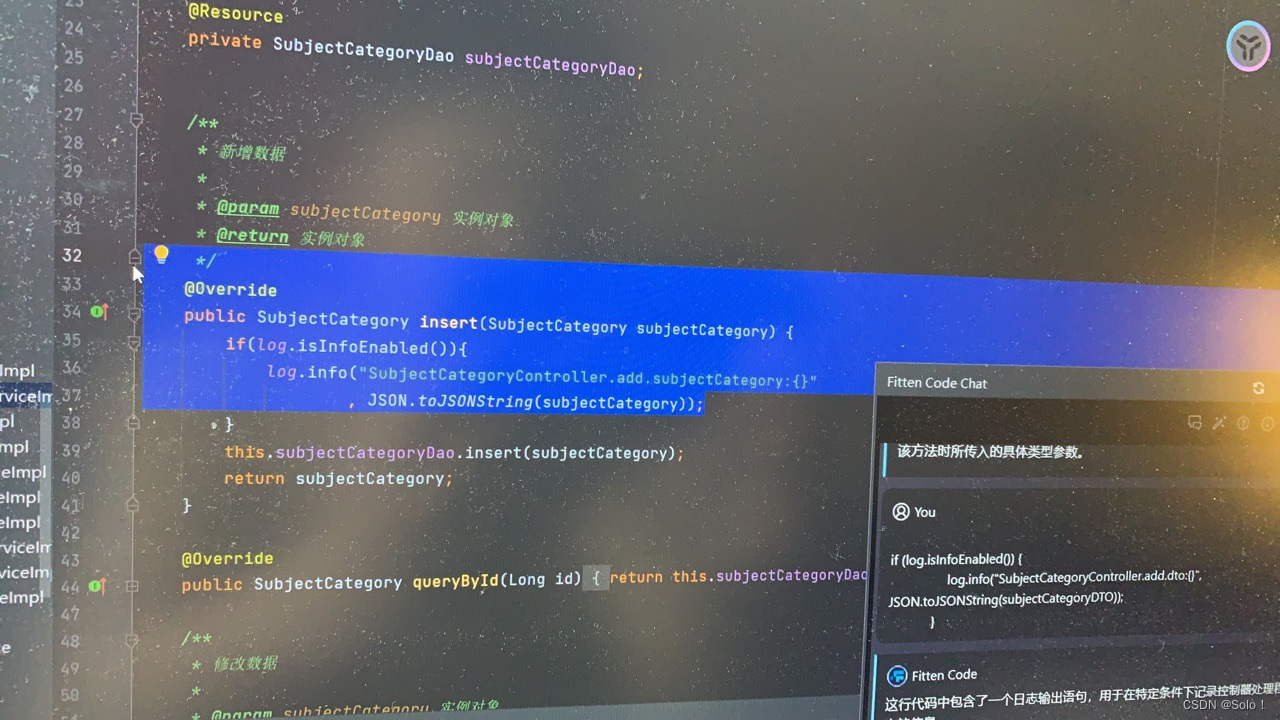
然后在starter下写一个现成的在resource下创建一个file文件 文件名叫log4j2-spring.xml
<?xml version="1.0" encoding="UTF-8"?>
<!--Configuration后面的status,这个用于设置log4j2自身内部的信息输出,可以不设置,当设置成trace时,你会看到log4j2内部各种详细输出-->
<!--monitorInterval:Log4j能够自动检测修改配置 文件和重新配置本身,设置间隔秒数-->
<configuration status="INFO" monitorInterval="5">
    <!--日志级别以及优先级排序: OFF > FATAL > ERROR > WARN > INFO > DEBUG > TRACE > ALL -->
    <!--变量配置-->
    <Properties>
        <!-- 格式化输出:%date表示日期,%thread表示线程名,%-5level:级别从左显示5个字符宽度 %msg:日志消息,%n是换行符-->
        <!-- %logger{36} 表示 Logger 名字最长36个字符 -->
        <property name="LOG_PATTERN" value="%date{HH:mm:ss.SSS} %X{PFTID} [%thread] %-5level %logger{36} - %msg%n" />
        <!-- 定义日志存储的路径 -->
        <property name="FILE_PATH" value="../log" />
        <property name="FILE_NAME" value="jcClub.log" />
    </Properties>

    <!--https://logging.apache.org/log4j/2.x/manual/appenders.html-->
    <appenders>

        <console name="Console" target="SYSTEM_OUT">
            <!--输出日志的格式-->
            <PatternLayout pattern="${LOG_PATTERN}"/>
            <!--控制台只输出level及其以上级别的信息(onMatch),其他的直接拒绝(onMismatch)-->
            <ThresholdFilter level="info" onMatch="ACCEPT" onMismatch="DENY"/>
        </console>

        <!--文件会打印出所有信息,这个log每次运行程序会自动清空,由append属性决定,适合临时测试用-->
        <File name="fileLog" fileName="${FILE_PATH}/temp.log" append="false">
            <PatternLayout pattern="${LOG_PATTERN}"/>
        </File>

        <!-- 这个会打印出所有的info及以下级别的信息,每次大小超过size,则这size大小的日志会自动存入按年份-月份建立的文件夹下面并进行压缩,作为存档-->
        <RollingFile name="RollingFileInfo" fileName="${FILE_PATH}/info.log" filePattern="${FILE_PATH}/${FILE_NAME}-INFO-%d{yyyy-MM-dd}_%i.log.gz">
            <!--控制台只输出level及以上级别的信息(onMatch),其他的直接拒绝(onMismatch)-->
            <ThresholdFilter level="info" onMatch="ACCEPT" onMismatch="DENY"/>
            <PatternLayout pattern="${LOG_PATTERN}"/>
            <Policies>
                <!--interval属性用来指定多久滚动一次,默认是1 hour-->
                <TimeBasedTriggeringPolicy interval="1"/>
                <SizeBasedTriggeringPolicy size="10MB"/>
            </Policies>
            <!-- DefaultRolloverStrategy属性如不设置,则默认为最多同一文件夹下7个文件开始覆盖-->
            <DefaultRolloverStrategy max="15"/>
        </RollingFile>

        <!-- 这个会打印出所有的warn及以下级别的信息,每次大小超过size,则这size大小的日志会自动存入按年份-月份建立的文件夹下面并进行压缩,作为存档-->
        <RollingFile name="RollingFileWarn" fileName="${FILE_PATH}/warn.log" filePattern="${FILE_PATH}/${FILE_NAME}-WARN-%d{yyyy-MM-dd}_%i.log.gz">
            <!--控制台只输出level及以上级别的信息(onMatch),其他的直接拒绝(onMismatch)-->
            <ThresholdFilter level="warn" onMatch="ACCEPT" onMismatch="DENY"/>
            <PatternLayout pattern="${LOG_PATTERN}"/>
            <Policies>
                <!--interval属性用来指定多久滚动一次,默认是1 hour-->
                <TimeBasedTriggeringPolicy interval="1"/>
                <SizeBasedTriggeringPolicy size="10MB"/>
            </Policies>
            <!-- DefaultRolloverStrategy属性如不设置,则默认为最多同一文件夹下7个文件开始覆盖-->
            <DefaultRolloverStrategy max="15"/>
        </RollingFile>

        <!-- 这个会打印出所有的error及以下级别的信息,每次大小超过size,则这size大小的日志会自动存入按年份-月份建立的文件夹下面并进行压缩,作为存档-->
        <RollingFile name="RollingFileError" fileName="${FILE_PATH}/error.log" filePattern="${FILE_PATH}/${FILE_NAME}-ERROR-%d{yyyy-MM-dd}_%i.log.gz">
            <!--控制台只输出level及以上级别的信息(onMatch),其他的直接拒绝(onMismatch)-->
            <ThresholdFilter level="error" onMatch="ACCEPT" onMismatch="DENY"/>
            <PatternLayout pattern="${LOG_PATTERN}"/>
            <Policies>
                <!--interval属性用来指定多久滚动一次,默认是1 hour-->
                <TimeBasedTriggeringPolicy interval="1"/>
                <SizeBasedTriggeringPolicy size="10MB"/>
            </Policies>
            <!-- DefaultRolloverStrategy属性如不设置,则默认为最多同一文件夹下7个文件开始覆盖-->
            <DefaultRolloverStrategy max="15"/>
        </RollingFile>

    </appenders>

    <!--Logger节点用来单独指定日志的形式,比如要为指定包下的class指定不同的日志级别等。-->
    <!--然后定义loggers,只有定义了logger并引入的appender,appender才会生效-->
    <loggers>
        <root level="info">
            <appender-ref ref="Console"/>
            <appender-ref ref="RollingFileInfo"/>
            <appender-ref ref="RollingFileWarn"/>
            <appender-ref ref="RollingFileError"/>
            <appender-ref ref="fileLog"/>
        </root>
    </loggers>

</configuration>
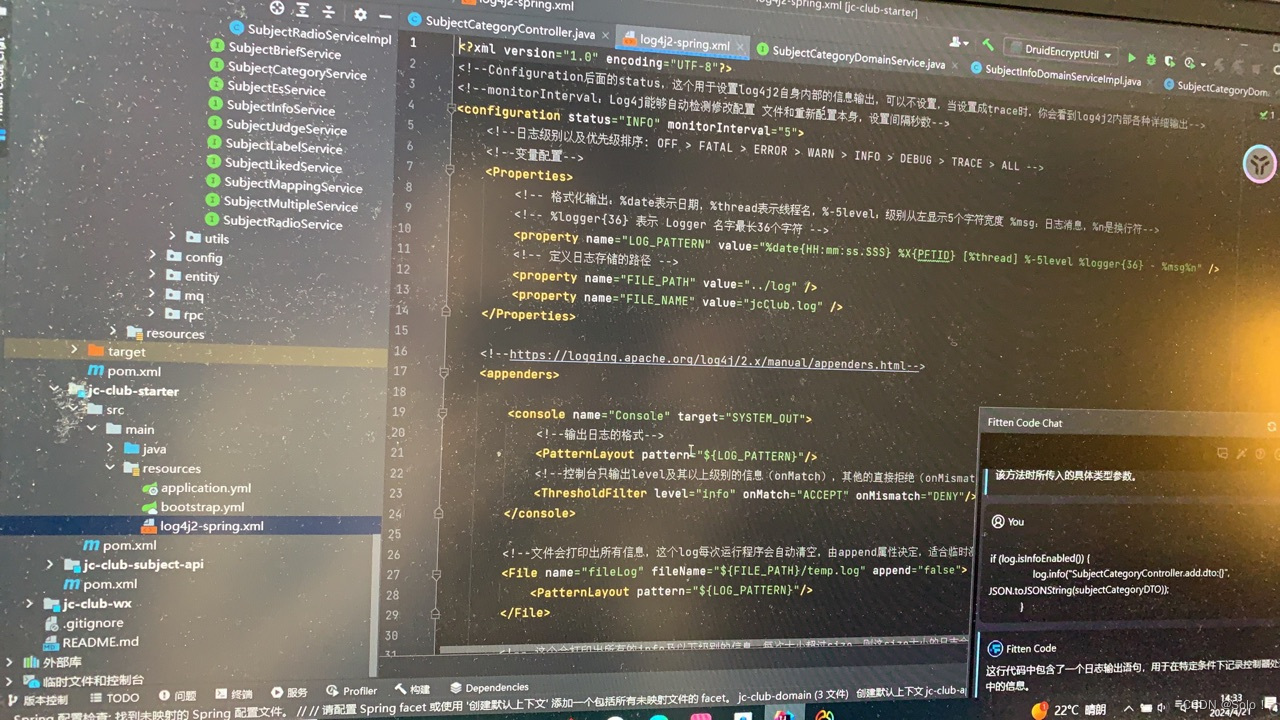
写好日志之后 要把他加载进来 需要在starter的application中引入

logging:
  config:classpath:log4j2-spring.xml
这里会出现一个经典的bug


这是因为有log包重复了 和我们刚才遇到的那个bug一样
下载dependency analyzer插件

在上面的springbootstarter已经有了log4j2了所以要把下面的给排除去
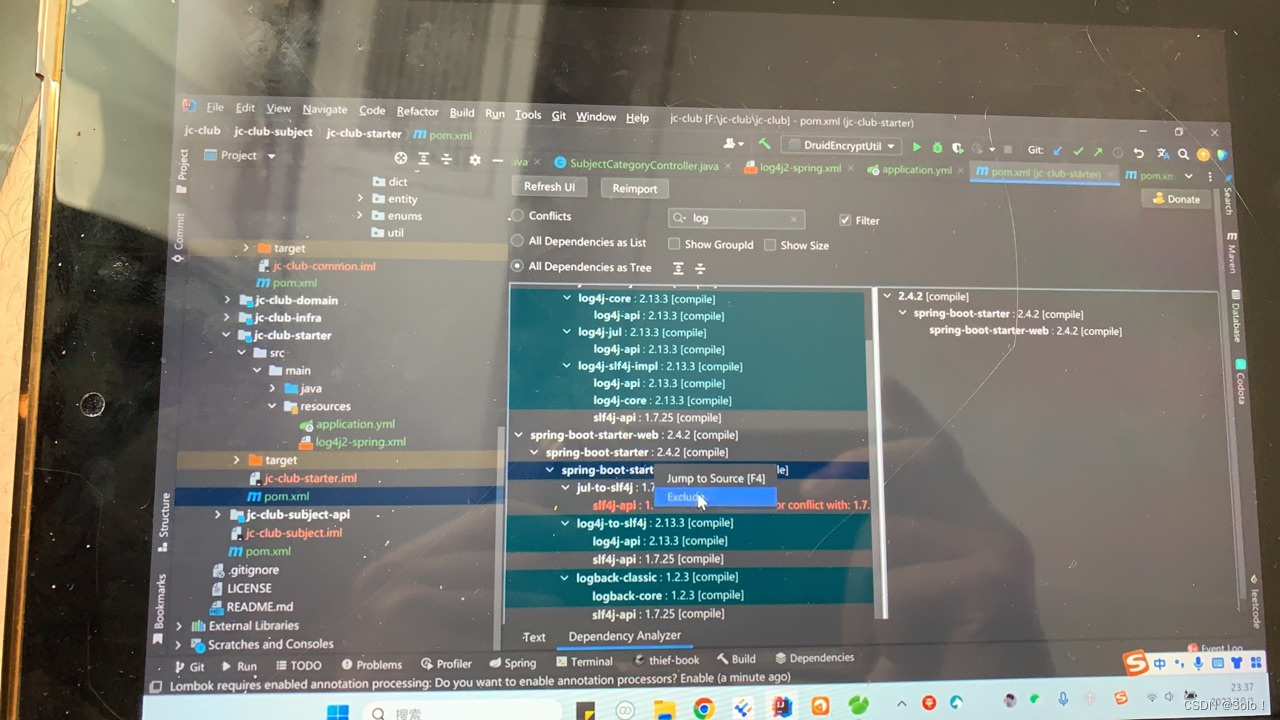
 将starterpom下打开 排除里面的log
这是一个很经典的日志冲突问题 然后启动项目发现我没有日志的打印

要把controller和serviceimpl(两个)里面的都给改了 因为我都写错了

我们刚才写的这些代码其实是一个入参和出参日志的打印 我们可以去做一个切面 去帮助我们把入参和出参进行一个打印
 if (log.isInfoEnabled()){
            log.info("subjectCategoryController.add.subjectCategory:{}", JSON.toJSONString(subjectCategory));}
接着在common的pom下映入guava
<dependency>
            <groupId>com.google.guava</groupId>
            <artifactId>guava</artifactId>
            <version>19.0</version>
        </dependency>


 public Result<Boolean> add(@RequestBody SubjectCategoryDTO subjectCategoryDTO) {
        try {
            if (log.isInfoEnabled()){
                log.info("subjectCategoryController.add.dto:{}", JSON.toJSONString(subjectCategoryDTO));
            }
            //这行代码和assert断言一样
            Preconditions.checkNotNull(subjectCategoryDTO.getCategoryType(), "分类类型不能为空");
            Preconditions.checkArgument(StringUtils.isEmpty(subjectCategoryDTO.getCategoryName()), "分类名称不能为空");
            Preconditions.checkNotNull(subjectCategoryDTO.getParentId(), "分类父级id不能为空");
            SubjectCategoryBO subjectCategoryBO = SubjectCategoryDTOConverter.INSTANCE.convertDtoToCategoryBO(subjectCategoryDTO);
            subjectCategoryDomainService.add(subjectCategoryBO);

            return Result.ok(true);
        } catch (Exception e) {
            log.error("subjectCategoryController.add.error:{}", e.getMessage(),e);
            return Result.fail(e.getMessage());

        }

    }
进行参数校验

接下来设计接口
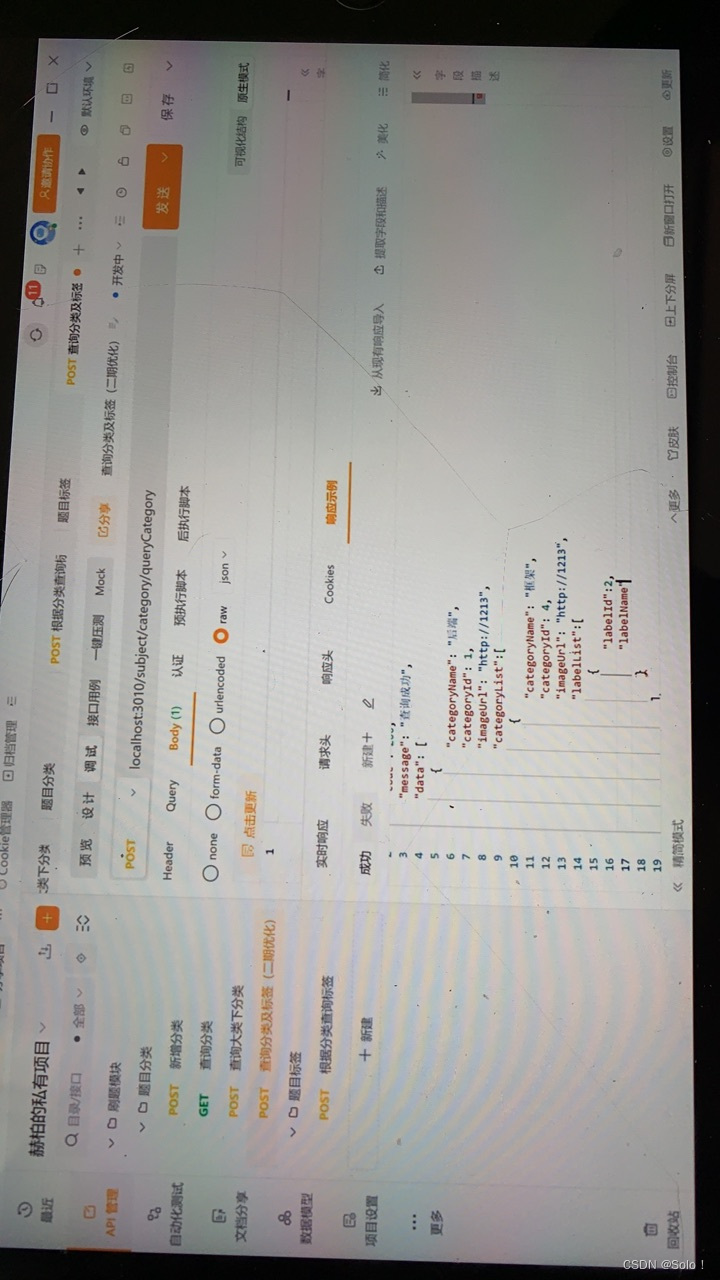
刚开始设计的接口是先查询打类 然后查询大类下分类 在大类下分类查询标签 这样的话就给前端制造了麻烦
我们进行优化
{
	"success": true,
	"code": 200,
	"message": "成功",
	"data": [
		{
			"id": 2,
			"categoryName": "缓存",
			"categoryType": 2,
			"imageUrl": "https://image/category.icon",
			"parentId": 1,
			"labelDTOList": [
				{
					"id": 1,
					"categoryId": 1,
					"labelName": "Redis",
					"sortNum": 1
				},
				{
					"id": 8,
					"categoryId": 1,
					"labelName": "集群",
					"sortNum": 1
				},
				{
					"id": 23,
					"categoryId": 1,
					"labelName": "实际应用",
					"sortNum": 1
				},
				{
					"id": 34,
					"categoryId": 1,
					"labelName": "多线程",
					"sortNum": 1
				},
				{
					"id": 44,
					"categoryId": 1,
					"labelName": "数据一致性",
					"sortNum": 1
				},
				{
					"id": 46,
					"categoryId": 1,
					"labelName": "分布式",
					"sortNum": 1
				},
				{
					"id": 47,
					"categoryId": 1,
					"labelName": "持久化",
					"sortNum": 1
				},
				{
					"id": 49,
					"categoryId": 1,
					"labelName": "事务",
					"sortNum": 1
				}
			]
		},
		{
			"id": 3,
			"categoryName": "数据库",
			"categoryType": 2,
			"imageUrl": "https://image/category.icon",
			"parentId": 1,
			"labelDTOList": [
				{
					"id": 2,
					"categoryId": 1,
					"labelName": "进程",
					"sortNum": 1
				},
				{
					"id": 4,
					"categoryId": 1,
					"labelName": "Mysql",
					"sortNum": 1
				},
				{
					"id": 16,
					"categoryId": 1,
					"labelName": "索引",
					"sortNum": 1
				},
				{
					"id": 23,
					"categoryId": 1,
					"labelName": "实际应用",
					"sortNum": 1
				},
				{
					"id": 33,
					"categoryId": 1,
					"labelName": "存储引擎",
					"sortNum": 1
				},
				{
					"id": 44,
					"categoryId": 1,
					"labelName": "数据一致性",
					"sortNum": 1
				},
				{
					"id": 49,
					"categoryId": 1,
					"labelName": "事务",
					"sortNum": 1
				}
			]
		},
		{
			"id": 4,
			"categoryName": "JavaSE",
			"categoryType": 2,
			"imageUrl": "https://image/category.icon",
			"parentId": 1,
			"labelDTOList": [
				{
					"id": 15,
					"categoryId": 1,
					"labelName": "基础",
					"sortNum": 1
				}
			]
		},
		{
			"id": 5,
			"categoryName": "框架",
			"categoryType": 2,
			"imageUrl": "https://image/category.icon",
			"parentId": 1,
			"labelDTOList": [
				{
					"id": 38,
					"categoryId": 1,
					"labelName": "Spring",
					"sortNum": 1
				},
				{
					"id": 62,
					"categoryId": 1,
					"labelName": "SpringBoot",
					"sortNum": 1
				}
			]
		},
		{
			"id": 6,
			"categoryName": "消息队列",
			"categoryType": 2,
			"imageUrl": "https://image/category.icon",
			"parentId": 1,
			"labelDTOList": [
				{
					"id": 15,
					"categoryId": 1,
					"labelName": "基础",
					"sortNum": 1
				},
				{
					"id": 23,
					"categoryId": 1,
					"labelName": "实际应用",
					"sortNum": 1
				}
			]
		},
		{
			"id": 7,
			"categoryName": "代码管理工具",
			"categoryType": 2,
			"imageUrl": "https://image/category.icon",
			"parentId": 1,
			"labelDTOList": [
				{
					"id": 25,
					"categoryId": 1,
					"labelName": "Git",
					"sortNum": 1
				}
			]
		},
		{
			"id": 9,
			"categoryName": "网络",
			"categoryType": 2,
			"imageUrl": "https://image/category.icon",
			"parentId": 1,
			"labelDTOList": [
				{
					"id": 15,
					"categoryId": 1,
					"labelName": "基础",
					"sortNum": 1
				}
			]
		},
		{
			"id": 10,
			"categoryName": "操作系统",
			"categoryType": 2,
			"imageUrl": "https://image/category.icon",
			"parentId": 1,
			"labelDTOList": [
				{
					"id": 15,
					"categoryId": 1,
					"labelName": "基础",
					"sortNum": 1
				}
			]
		},
		{
			"id": 11,
			"categoryName": "最佳实践",
			"categoryType": 2,
			"imageUrl": "https://image/category.icon",
			"parentId": 1,
			"labelDTOList": [
				{
					"id": 23,
					"categoryId": 1,
					"labelName": "实际应用",
					"sortNum": 1
				},
				{
					"id": 53,
					"categoryId": 1,
					"labelName": "Jvm",
					"sortNum": 1
				}
			]
		}
	]
}
把上面的接口设计完了之后我们在点击对应的标签的时候 下面会有多个题 设计这样的接口 并且每个题下面还有创建人 难度等一系列数据

-----------------------------------------------------------------------------------------------------------------------------
接下来视频讲解和apipost文档接口不统一 可以直接去看apipost文档
在题目模块设置接口
pageindex 第几页
pagesize一行十页
因为根据标签去查所以设置lqbelid
categoryid多对多的挂载
difficulty难度 等等定义枚举 0是初级什么的
入参完毕
出餐开始设置
data层面是一个对象
total 一共一百条
totalpage 有二十页
pagelist{subjectname springboot的自动装配原理
subjectid 1
difficulty 1
labelname【集合形式 并发 集合】}
出餐完毕
接着进入题目详情
上一页下一页的话要把分类和标签的id带过来
题目模块下 写查询题目详情
入参
subjectid 1
pageindex1
pagrsize1
categoryid1
labelid2
出餐那边加上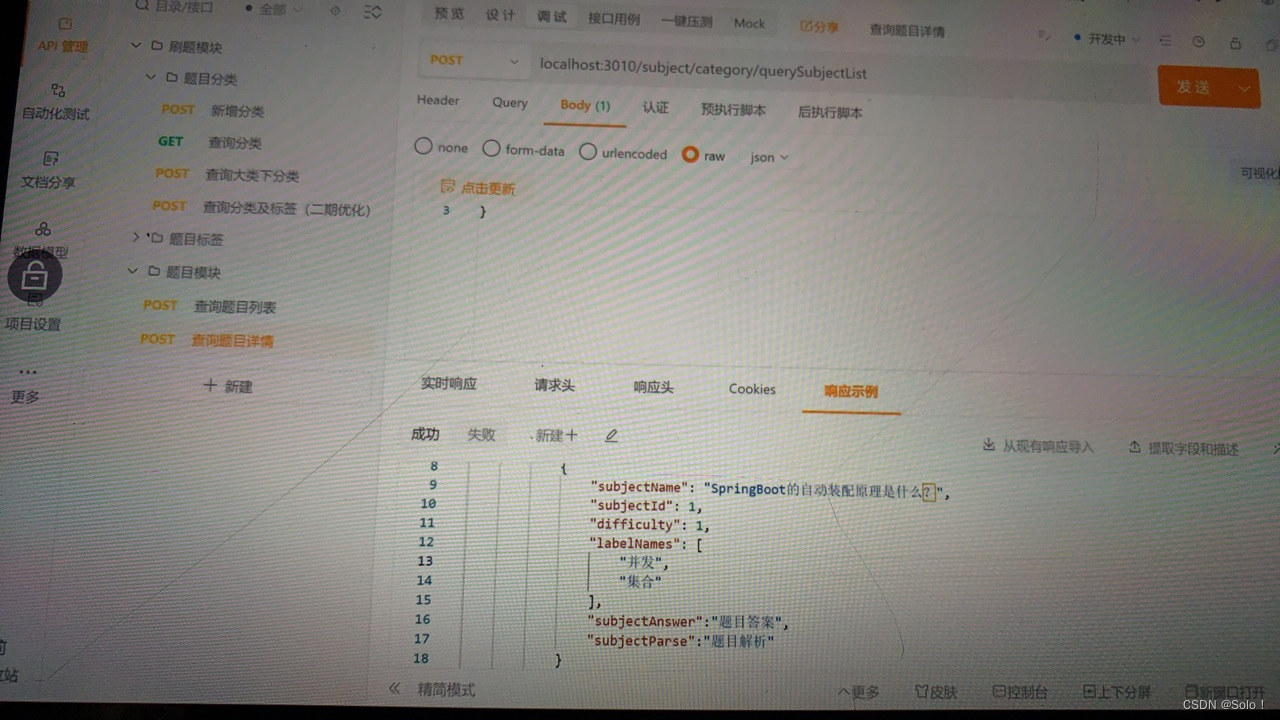
----------------------------------------------------------------------------------------------------------------
分类接口的开发
我们首先是要先查询一个大类 大类下有后端和前端

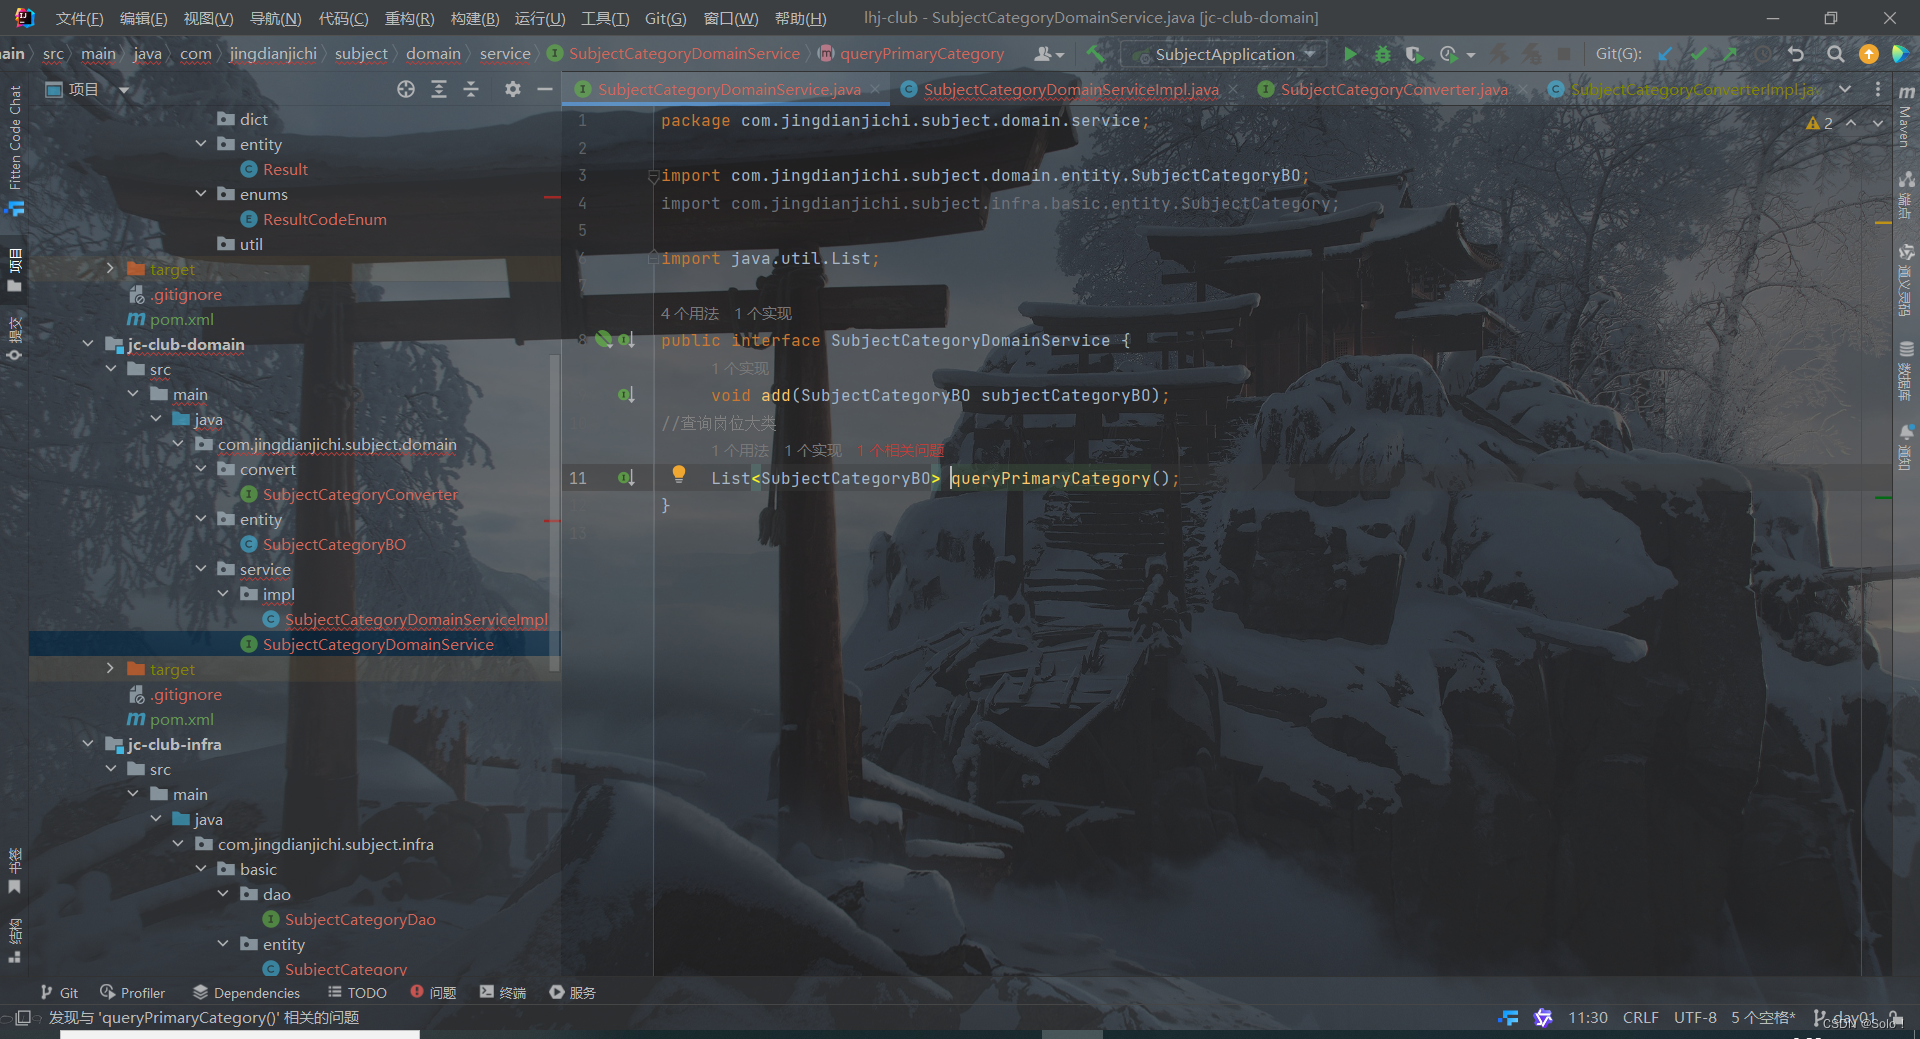
这里在domainservice中我们希望domain返回的是一个岗位大类 是一个集合 然后实现service
报错!!!!!!!!!!!!!

 在mapper映射文件那边加上就ok了 但是后面有优化
视频中报的错是由于没有is deleted字段

解决方法::只需要在navicate中加一行is_deleted就ok

视频那边可以成功运行了 但是还是查不出数据来 原因是因为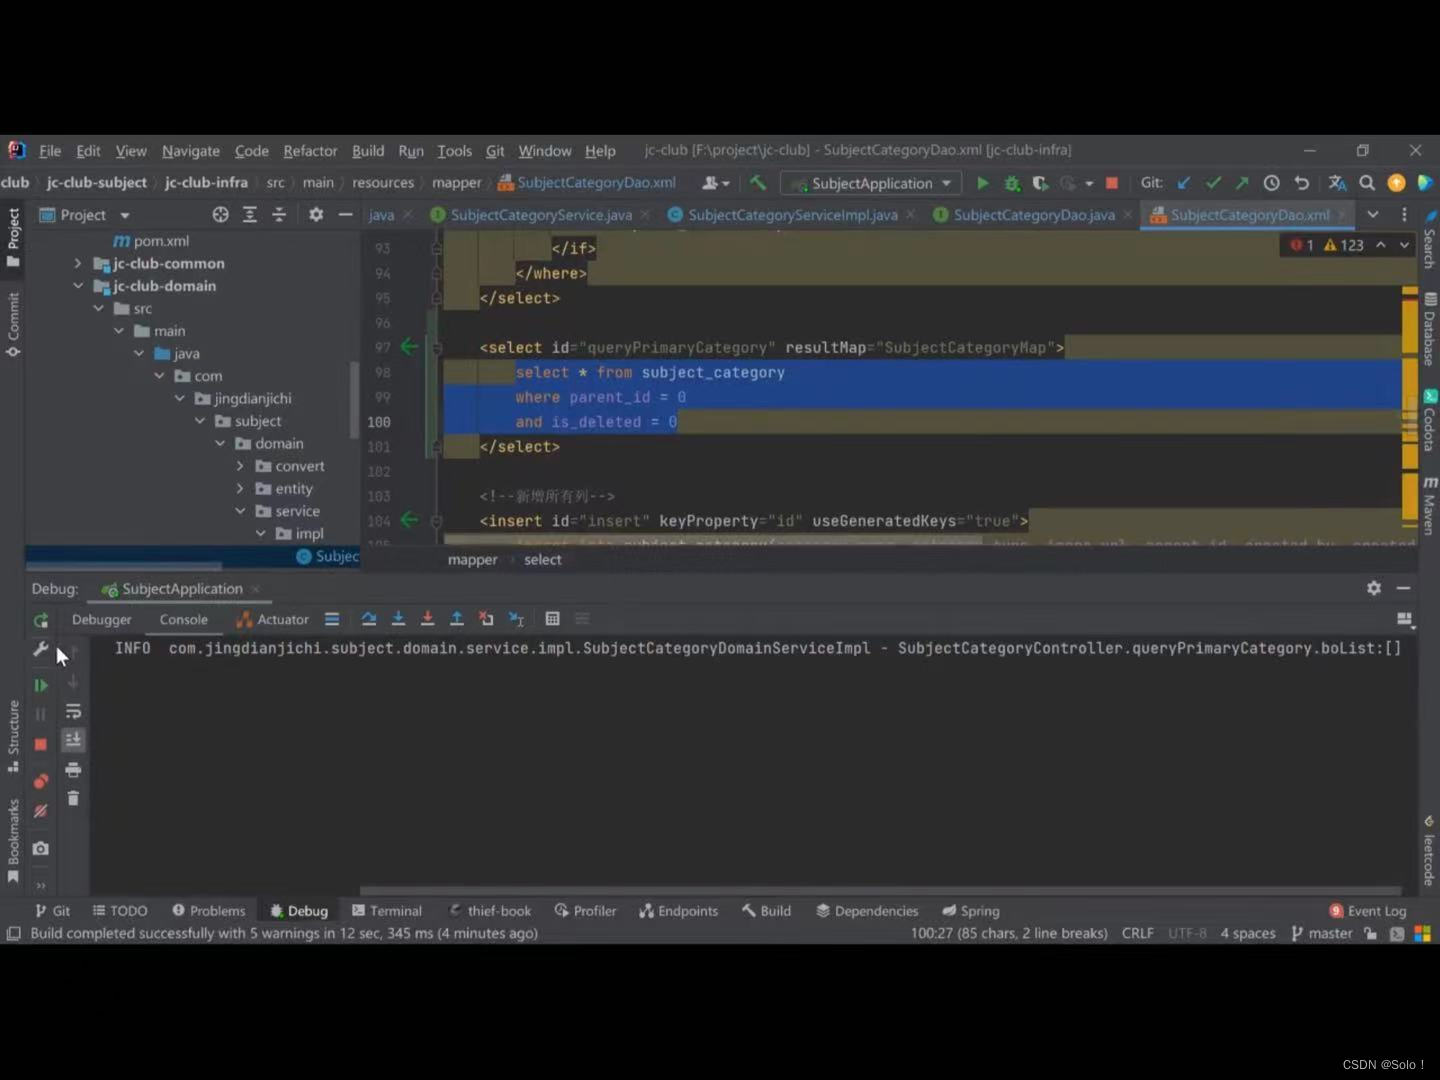
他mapper设置的要求是id-deleted和parentid都要设置 而他数据库中忘了设置parentid的值了 所以查不出来
但是这样写mapper有弊端 比如我们想更改查询条件为categoryname不能为0 还得修改
优化 我们可以根据这种形似加一个where
<select id="count" resultType="java.lang.Long">
        select count(1)
        from subject_category
        <where>
            <if test="id != null">
                and id = #{id}
            </if>
            <if test="categoryName != null and categoryName != ''">
                and category_name = #{categoryName}
            </if>
            <if test="categoryType != null">
                and category_type = #{categoryType}
            </if>
            <if test="imageUrl != null and imageUrl != ''">
                and image_url = #{imageUrl}
            </if>
            <if test="parentId != null">
                and parent_id = #{parentId}
            </if>
            <if test="createdBy != null and createdBy != ''">
                and created_by = #{createdBy}
            </if>
            <if test="createdTime != null">
                and created_time = #{createdTime}
            </if>
            <if test="updateBy != null and updateBy != ''">
                and update_by = #{updateBy}
            </if>
            <if test="updateTime != null">
                and update_time = #{updateTime}
            </if>
            <if test="isDeleted != null">
                and is_deleted = #{isDeleted}
            </if>
        </where>
    </select>
更改之后的mapper。xml
<select id="queryPrimaryCategory" resultMap="SubjectCategoryMap">
    select *from subject_category
        <where>
            <if test="id != null">
                and id = #{id}
            </if>
            <if test="categoryName != null and categoryName != ''">
                and category_name = #{categoryName}
            </if>
            <if test="categoryType != null">
                and category_type = #{categoryType}
            </if>
            <if test="imageUrl != null and imageUrl != ''">
                and image_url = #{imageUrl}
            </if>
            <if test="parentId != null">
                and parent_id = #{parentId}
            </if>
            <if test="createdBy != null and createdBy != ''">
                and created_by = #{createdBy}
            </if>
            <if test="createdTime != null">
                and created_time = #{createdTime}
            </if>
            <if test="updateBy != null and updateBy != ''">
                and update_by = #{updateBy}
            </if>
            <if test="updateTime != null">
                and update_time = #{updateTime}
            </if>
            <if test="isDeleted != null">
                and is_deleted = #{isDeleted}
            </if>
        </where>
    </select>
在修改这个的同时也得加入参数
 传入两个参数 并且将相应的代码都给修改


在这个查询大类下分类的时候
controller主要就是做一个转换
  @PostMapping("/queryPrimaryCategory")
    public Result<List<SubjectCategoryDTO>> queryPrimaryCategory() {
        try {
            List<SubjectCategoryBO> stubjectCategoryBOList =subjectCategoryDomainService.queryPrimaryCategory();
            List<SubjectCategoryDTO> subjectCategoryDTOList= SubjectCategoryDTOConverter.INSTANCE.
                    convertBoToCategoryDTOList(stubjectCategoryBOList);
            return Result.ok(subjectCategoryDTOList);
        } catch (Exception e) {
            log.error("subjectCategoryController.queryPrimaryCategory.error:{}", e.getMessage(),e);
            return Result.fail("查询失败");
        }


    }
convert里面的代码
@Mapper
public interface SubjectCategoryDTOConverter {

    SubjectCategoryDTOConverter INSTANCE = Mappers.getMapper(SubjectCategoryDTOConverter.class);


    SubjectCategoryBO convertDtoToCategoryBO(SubjectCategoryDTO subjectCategoryDTO);
    List<SubjectCategoryDTO> convertBoToCategoryDTOList(List<SubjectCategoryBO> subjectCategoryDTO);


}
subjectcategorydomainservice层
//查询岗位大类
     List<SubjectCategoryBO> queryPrimaryCategory();
impl层
 public List<SubjectCategoryBO> queryPrimaryCategory() {
        SubjectCategory subjectCategory = new SubjectCategory();
        subjectCategory.setParentId(0L);
        List<SubjectCategory> subjectCategoryList=subjectCategoryService.queryPrimaryCategory(subjectCategory);
        List<SubjectCategoryBO> boList = SubjectCategoryConverter.INSTANCE
                .convertBoToCategory(subjectCategoryList);
        if (log.isInfoEnabled()){
            log.info("subjectCategoryController.queryPrimaryCategory.boList:{}",
                    JSON.toJSONString(boList));}

        return boList;
    }
也主要就是做一个转换
接下来是查询大类下分类接口的开发
这边的话把之前的查询大类下接口queryprimatercategory改为了querycategory


 @PostMapping("/queryCategoryByPrimary")
    public Result<List<SubjectCategoryDTO>> queryCategoryByPrimary(SubjectCategoryDTO subjectCategoryDTO) {
        try {
            if (log.isInfoEnabled()) {
                log.info("subjectCategoryController.add.dto:{}"
                        , JSON.toJSONString(subjectCategoryDTO));
            }
            Preconditions.checkNotNull(subjectCategoryDTO.getId(), "分类id不能为空");
            SubjectCategoryBO subjectCategoryBO = SubjectCategoryDTOConverter.INSTANCE.
                    convertDtoToCategoryBO(subjectCategoryDTO);
            List<SubjectCategoryBO> stubjectCategoryBOList = subjectCategoryDomainService.queryCategory(subjectCategoryBO);
            List<SubjectCategoryDTO> subjectCategoryDTOList = SubjectCategoryDTOConverter.INSTANCE.
                    convertBoToCategoryDTOList(stubjectCategoryBOList);
            return Result.ok(subjectCategoryDTOList);
        } catch (Exception e) {
            log.error("subjectCategoryController.queryPrimaryCategory.error:{}", e.getMessage(), e);
            return Result.fail("查询失败");
        }
报错!!!!!!!!!!


但是这边的结果有问题 相当于我们查了上层了 所以代码有问题

首先先apipost那边应该写parentid(刚才查的id就错了)
然后修改代码


-----------------------------------------------------------------------------------------------------
接下来做update更新模块
    /**
     * 更新分类
     * 李华杰
     */
    @PostMapping("/update")
    public Result<Boolean> update(@RequestBody SubjectCategoryDTO subjectCategoryDTO) {
        try {
            if (log.isInfoEnabled()) {
                log.info("subjectCategoryController.update.dto:{}"
                        , JSON.toJSONString(subjectCategoryDTO));
            }
            SubjectCategoryBO subjectCategoryBO = SubjectCategoryDTOConverter.INSTANCE.
                    convertDtoToCategoryBO(subjectCategoryDTO);
            Boolean result= subjectCategoryDomainService.update(subjectCategoryBO);

            return Result.ok(result);
        } catch (Exception e) {
            log.error("subjectCategoryController.update.error:{}", e.getMessage(), e);
            return Result.fail("更新分类失败");
        }

    }
domainserviceimpl
/*
更新分类
 */
    @Override
    public Boolean update(SubjectCategoryBO subjectCategoryBO) {
        SubjectCategory subjectCategory = SubjectCategoryConverter.INSTANCE
                .convertBoToCategory(subjectCategoryBO);
        int count = subjectCategoryService.update(subjectCategory);


        return count > 0;
    }
这边主要是吧update的返回结果做了一个调整 原先要返回一个数据 现在返回一个int就ok但是相应的要跟着做调整
他impl里面吧


因为更新操作和其他表没有很大的联系 所以就不用添加事务
------------------------------------------------------------------------------------------
删除分类
主要是要设置一下isdeleted 你得保证你的entity有isdeleted 保证mapper。xml文件中也有 并且都相对应


/*
    * 删除分类
     */
    @PostMapping("/delete")
    public Result<Boolean> delete(@RequestBody SubjectCategoryDTO subjectCategoryDTO) {
        try {
            if (log.isInfoEnabled()) {
                log.info("subjectCategoryController.delete.dto:{}"
                        , JSON.toJSONString(subjectCategoryDTO));
            }
            SubjectCategoryBO subjectCategoryBO = SubjectCategoryDTOConverter.INSTANCE.
                    convertDtoToCategoryBO(subjectCategoryDTO);
            Boolean result= subjectCategoryDomainService.delete(subjectCategoryBO);

            return Result.ok(result);
        } catch (Exception e) {
            log.error("subjectCategoryController.update.error:{}", e.getMessage(), e);
            return Result.fail("删除分类失败");
        }

    }
删除分类 主要的话是吧isdeleted那一行标为一
*/
@Override
public Boolean delete(SubjectCategoryBO subjectCategoryBO) {
SubjectCategory subjectCategory = SubjectCategoryConverter.INSTANCE
.convertBoToCategory(subjectCategoryBO);
//这里我们吧isdeleted定义一个枚举
subjectCategory.setIsDeleted(IsDeletedFlagEnum.DELETED.getCode());
int count = subjectCategoryService.update(subjectCategory);
return count > 0;
}-----------------------------------------------------------------
修复一下这个bug

我们先在pom的那边引一下配置文件
<dependency>
            <groupId>org.apache.commons</groupId>
            <artifactId>commons-lang3</artifactId>
            <version>3.11</version>
        </dependency>
然后还有一点就是在domainserviceimpl中

这边写入isdeleted有两种方式一种就是把它当作一个常量来写进去 另外就是set
同时你写isdeleted的时候要注意你的dao和mapper。xml文件中是否写入

查询这边其实是有两个

一个是查询大类
一个是查询大类下分类

这边的话我们就需要去调试接口 通过传入一个categorytype来进行辨别


紧接着 测试之前所有的接口
现在navicate里面使用截断表
在进行查询操作的时候categorytype查询发生错误 查询的是1 反而2也出来了


这下就ok了

----------------------------------------------------------------------------------------------
标签基础模块的开发
sort_num 是一个排序字段 他可以把火热的题排序顺序往前移
一个标签属于多个分类
先代码生成器生成

这边主要是复制之前的代码稍作修改

一些注入要记得

 ---------------------------------------------------------------------------------------
继续写更新标签的接口

删除标签


自动删除无用的import包 用ctrl+alt+o

--------------------------------------
mapping表自动生成
在subjectlabeldomainserviceimpl下做一些跨层级的东西
    @Resource
    private SubjectMappingService subjectMappingService;

这边改成这个语言风格就可以了

is_deleted没有插进去
 给他设置一个默认值
 在根据分类查标签的时候
显示分类id不能为空 我是少写了一个category

可以正常查询之后
查询不到labelname

使用debug去调试代码

在主启动的地方使用调试启动 然后在可能出现问题的地方打上断点 使用apipost发送


这里打断点的情况下 看labellist和数据库中的代码一致 证明这边接收到了数据


接收到数据了

这里的参数名字要和mapper的xml文件中的对应 大小写也要对应 不然会查不出数据来


************************************************
新增题目接口开发
先做新增题目的接口 --------这边运用到了工厂加策略的设计模式
先快速生成题目的一些类
在dao层 import org.springframework.data.domain.Pageable; springframework的pageable不好用 我们给他删了

将这些删除


dto是根据接口文档进行修改的

本来在这个接口文档中修改的dto 但是由于答案很多 又去创建了一个dto只负责管理answer

我们在写名字 的时候尽量少用is开头的 其实这是针对于boolean来说的
然后通过这种方式把答案dto引入


紧接着在subjectcontroller中写代码


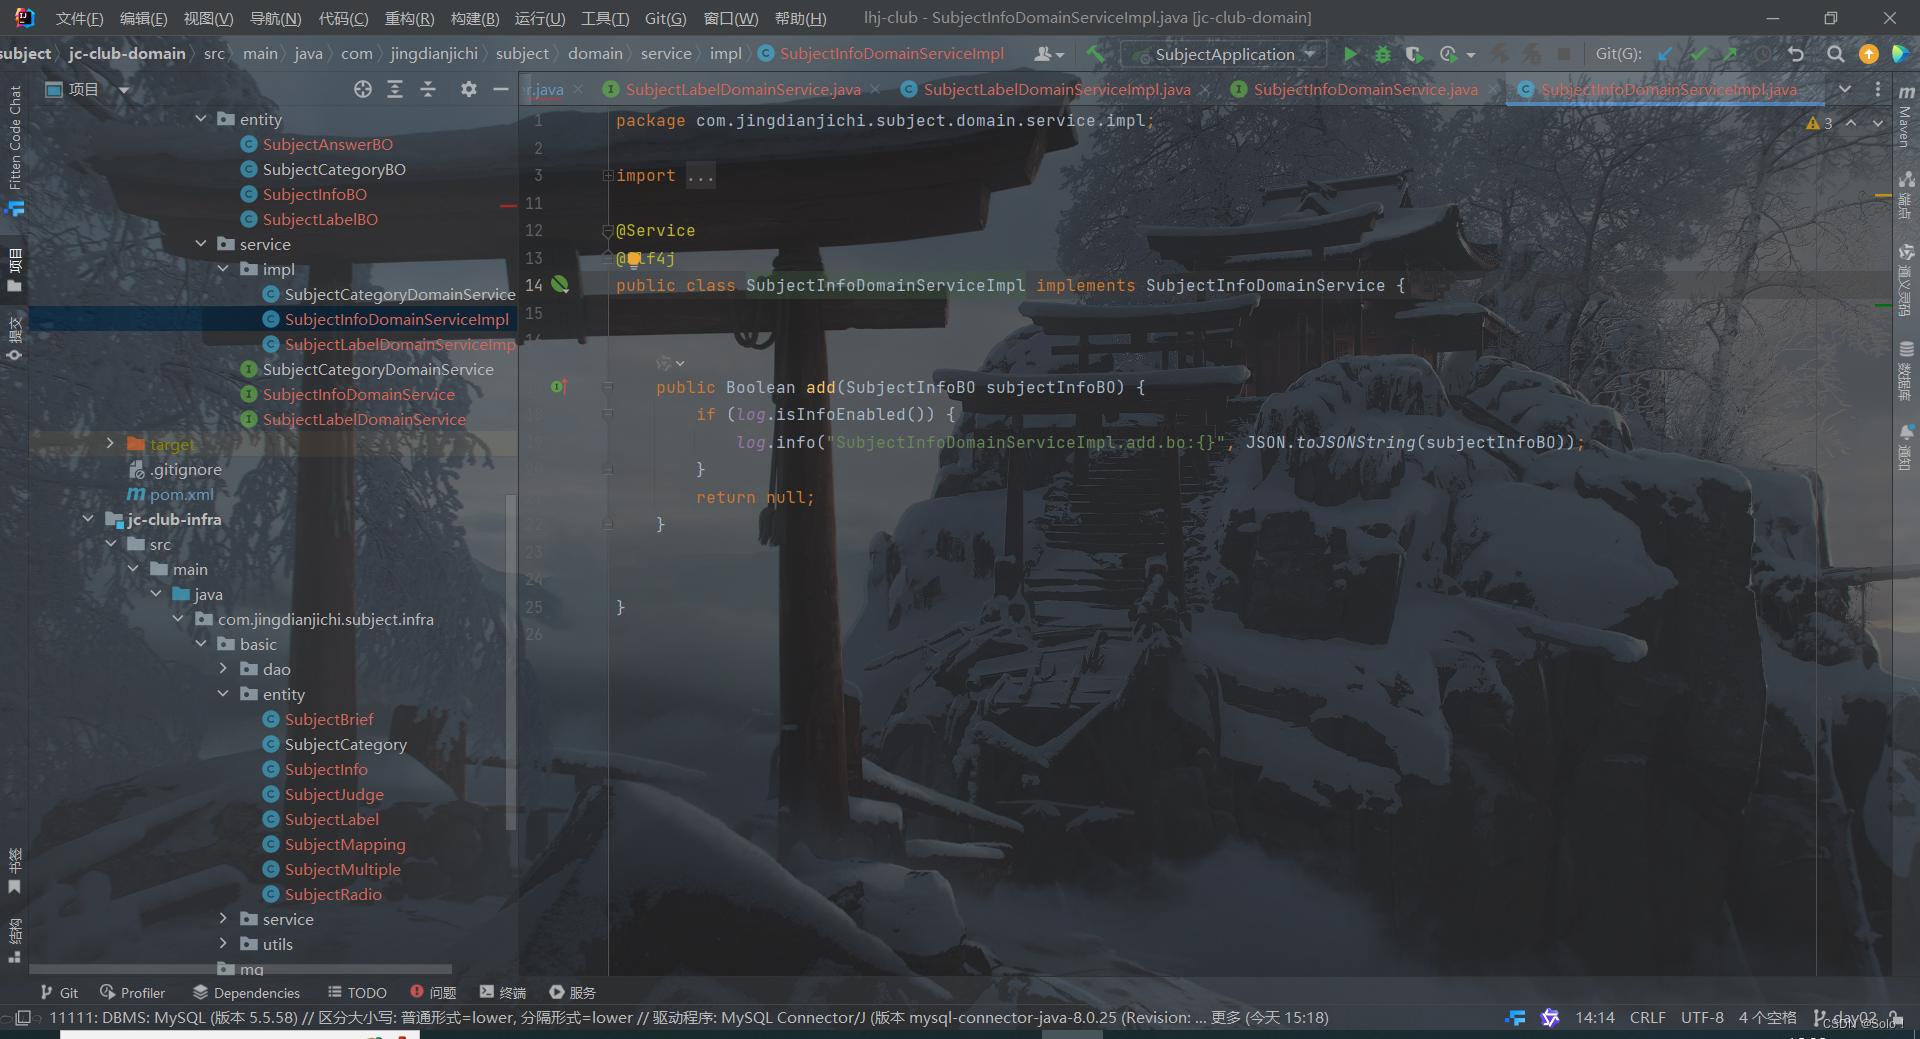
******************************************
工厂加策略实现题目分别处理
假设我们要在subjectinfodomainserviceimpl中直接写代码的话
我们需要去判断一下type 单选的调用单选的service 多选的调用多选的
会存在一大堆的if
我们就可以上一个工厂加策略的形式去开发
一个工厂包含了四种类型 根据传入的type自动映射选择处理
先在

接着去common层中定义一下1234枚举 也就是单选多选判断简答
在domain层创建一个handler。subject
在里面先创建一个接口

再分别创建实现类让实现这个接口

初步成型是这个样子

现在的话我们需要去实现一个工厂 只需要在subjecrinfodomainserviceimpl中与工厂进行交互就可以将题目插进去.

domainserviceimpl层

接下来去每一个handler中书写自己的逻辑

批量新增


我们做完上面这些之后漏掉了一个subjectmapping这张表

这边我们需要去注意category id和label id是一种多对多的映射关系 比如说有两个分类id 一个标签id 对应的是两条数据库语句 有两个分类id 两个标签id对应的是四条数据库语句 我们要处理这种多层映射关系p34(视频第三十四讲 重复讲了一下这边)

*******************************************************************
分页处理封装
先在common的entity类中写一个pageinfo类
package com.jingdianjichi.subject.common.entity;

public class PageInfo {

    private Integer pageNo =1;
    private Integer pageSize = 20;
    public Integer getPageNo() {
        if (pageNo==null||pageNo<1){
            return 1;
        }
        return pageNo;
    }
    public Integer getPageSize(){
        if (pageSize==null||pageSize<1||pageSize>Integer.MAX_VALUE){
            return 20;
        }
        return pageSize;
    }
}
接着创建一个pageresult类
package com.jingdianjichi.subject.common.entity;

import java.util.Collections;
import java.util.List;

/**
 * 分页返回实体
 */

public class PageResult<T> {
    private Integer pageNo = 1;
    private Integer pageSize = 20;
    private Integer total = 0;
    private Integer totalPages = 0;
    private List<T> result = Collections.emptyList();
    private Integer start = 1;
    private Integer end = 0;

    public void setRecords(List<T> result) {
        this.result = result;
        if (result != null && result.size() > 0) {
            setTotal(result.size());
        }
    }

    public void setTotal(Integer total) {
        this.total = total;
        if (this.pageSize > 0) {
            this.totalPages = (total / this.pageSize) + (total % this.pageSize == 0 ? 0 : 1);
        } else {
            this.totalPages = 0;
        }
        this.start = (this.pageSize > 0 ? (this.pageNo - 1) * this.pageSize : 0) + 1;
        this.end = (this.start - 1 + this.pageSize * (this.pageNo > 0 ? 1 : 0));
    }

    private void setPageSize(Integer pageSize) {
        this.pageSize = pageSize;
    }

    private void setPageNo(Integer pageNo) {
        this.pageNo = pageNo;
    }
}

题目列表的开发


    /**
     * 题目列表的开发
     *
     * @param subjectInfoBO
     * @return
     */
    @Override
    public PageResult<SubjectInfoBO> getSubjectPage(SubjectInfoBO subjectInfoBO) {
        PageResult<SubjectInfoBO> pageResult = new PageResult<>();
        pageResult.setPageNo(subjectInfoBO.getPageNo());
        pageResult.setPageSize(subjectInfoBO.getPageSize());
        int start = (subjectInfoBO.getPageNo() - 1) * subjectInfoBO.getPageSize();
        SubjectInfo subjectInfo = SubjectInfoConverter.INSTANCE.convertBoToInfo(subjectInfoBO);
        int count = subjectInfoService.countByCondition(subjectInfo, subjectInfoBO.getCategoryId()
                , subjectInfoBO.getLabelId());
        if (count == 0) {
            return pageResult;
        }
        List<SubjectInfo> subjectInfoList=subjectInfoService.queryPage(subjectInfo, subjectInfoBO.getCategoryId()
                , subjectInfoBO.getLabelId(), start, subjectInfoBO.getPageSize());
        List<SubjectInfoBO> subjectInfoBOS = SubjectInfoConverter.INSTANCE.convertListInfoToBo(subjectInfoList);
        pageResult.setRecords(subjectInfoBOS);
        pageResult.setTotal(count);

        return pageResult;
    }


********************************************
查询题目信息接口的开发
*
*
*
*
*
************************************************
39 jacksonconverter初探
在进行
发生了一个报错

这个是由于springmvc在使用的时候是基于一个jackon的方式去做的
当我们查出来的result的这个泛型为空的话 就会报错
我们可以去处理一个全局的变量 可以在application下创建一个config
package com.jingdianjichi.subject.application.config;

import com.fasterxml.jackson.annotation.JsonInclude;
import com.fasterxml.jackson.databind.ObjectMapper;
import com.fasterxml.jackson.databind.SerializationFeature;
import org.springframework.context.annotation.Configuration;
import org.springframework.http.converter.HttpMessageConverter;
import org.springframework.http.converter.json.MappingJackson2HttpMessageConverter;
import org.springframework.web.servlet.config.annotation.InterceptorRegistry;
import org.springframework.web.servlet.config.annotation.WebMvcConfigurationSupport;

import java.util.List;

/**
 * mvc的全局处理
 *
 * @author: ChickenWing
 * @date: 2023/10/7
 */
@Configuration
public class GlobalConfig extends WebMvcConfigurationSupport {

    @Override
    protected void configureMessageConverters(List<HttpMessageConverter<?>> converters) {
        super.configureMessageConverters(converters);
        converters.add(mappingJackson2HttpMessageConverter());
    }
//
//    @Override
//    protected void addInterceptors(InterceptorRegistry registry) {
//        registry.addInterceptor(new LoginInterceptor())
//                .addPathPatterns("/**");
//    }

    /**
     * 自定义mappingJackson2HttpMessageConverter
     * 目前实现:空值忽略,空字段可返回
     */
    private MappingJackson2HttpMessageConverter mappingJackson2HttpMessageConverter() {
        ObjectMapper objectMapper = new ObjectMapper();
        objectMapper.configure(SerializationFeature.FAIL_ON_EMPTY_BEANS, false);
        objectMapper.setSerializationInclusion(JsonInclude.Include.NON_NULL);
        return new MappingJackson2HttpMessageConverter(objectMapper);
    }
}


****************************
空值全局处理

我们只想收到我们想要的值 有些值是null的话可以不用放回 我们可以做一个空值的处理
空值我们就不返回了

查询题目测试的时候一个bug一直修复不了p41

bug自己修复 了
*********************************sql拦截器自动翻译
当我们遇到问题 只打印日志 mapper层的sql语句我们不知道哪里错了 我们可以使用sql拦截器自动翻译
先在infra下创建一个config包 创建sqlstatementinterceptor
package com.jingdianjichi.subject.infra.config;

import org.apache.ibatis.cache.CacheKey;
import org.apache.ibatis.executor.Executor;
import org.apache.ibatis.mapping.BoundSql;
import org.apache.ibatis.mapping.MappedStatement;
import org.apache.ibatis.plugin.*;
import org.apache.ibatis.session.ResultHandler;
import org.apache.ibatis.session.RowBounds;
import org.slf4j.Logger;
import org.slf4j.LoggerFactory;

import java.util.Properties;


@Intercepts({
        @Signature(type = Executor.class, method = "update", args = {MappedStatement.class,
                Object.class}),
        @Signature(type = Executor.class, method = "query", args = {MappedStatement.class,
                Object.class, RowBounds.class, ResultHandler.class, CacheKey.class, BoundSql.class})})
public class SqlStatementInterceptor implements Interceptor {

    public static final Logger log = LoggerFactory.getLogger("sys-sql");

    @Override
    public Object intercept(Invocation invocation) throws Throwable {
        long startTime = System.currentTimeMillis();
        try {
            return invocation.proceed();
        } finally {
            long timeConsuming = System.currentTimeMillis() - startTime;
            log.info("执行SQL:{}ms", timeConsuming);
            if (timeConsuming > 999 && timeConsuming < 5000) {
                log.info("执行SQL大于1s:{}ms", timeConsuming);
            } else if (timeConsuming >= 5000 && timeConsuming < 10000) {
                log.info("执行SQL大于5s:{}ms", timeConsuming);
            } else if (timeConsuming >= 10000) {
                log.info("执行SQL大于10s:{}ms", timeConsuming);
            }
        }
    }

    @Override
    public Object plugin(Object target) {
        return Plugin.wrap(target, this);
    }

    @Override
    public void setProperties(Properties properties) {

    }
}
然后创建mybatisallsqllog
package com.jingdianjichi.subject.infra.config;

import com.baomidou.mybatisplus.extension.plugins.inner.InnerInterceptor;
import org.apache.ibatis.executor.Executor;
import org.apache.ibatis.mapping.BoundSql;
import org.apache.ibatis.mapping.MappedStatement;
import org.apache.ibatis.mapping.ParameterMapping;
import org.apache.ibatis.reflection.MetaObject;
import org.apache.ibatis.session.Configuration;
import org.apache.ibatis.session.ResultHandler;
import org.apache.ibatis.session.RowBounds;
import org.apache.ibatis.type.TypeHandlerRegistry;
import org.slf4j.Logger;
import org.slf4j.LoggerFactory;
import org.springframework.util.CollectionUtils;

import java.sql.SQLException;
import java.text.DateFormat;
import java.util.Date;
import java.util.List;
import java.util.Locale;
import java.util.regex.Matcher;

public class MybatisPlusAllSqlLog implements InnerInterceptor {
    public static final Logger log = LoggerFactory.getLogger("sys-sql");

    @Override
    public void beforeQuery(Executor executor, MappedStatement ms, Object parameter, RowBounds rowBounds, ResultHandler resultHandler, BoundSql boundSql) throws SQLException {
        logInfo(boundSql, ms, parameter);
    }

    @Override
    public void beforeUpdate(Executor executor, MappedStatement ms, Object parameter) throws SQLException {
        BoundSql boundSql = ms.getBoundSql(parameter);
        logInfo(boundSql, ms, parameter);
    }

    private static void logInfo(BoundSql boundSql, MappedStatement ms, Object parameter) {
        try {
            log.info("parameter = " + parameter);
            // 获取到节点的id,即sql语句的id
            String sqlId = ms.getId();
            log.info("sqlId = " + sqlId);
            // 获取节点的配置
            Configuration configuration = ms.getConfiguration();
            // 获取到最终的sql语句
            String sql = getSql(configuration, boundSql, sqlId);
            log.info("完整的sql:{}", sql);
        } catch (Exception e) {
            log.error("异常:{}", e.getLocalizedMessage(), e);
        }
    }

    // 封装了一下sql语句,使得结果返回完整xml路径下的sql语句节点id + sql语句
    public static String getSql(Configuration configuration, BoundSql boundSql, String sqlId) {
        return sqlId + ":" + showSql(configuration, boundSql);
    }

    // 进行?的替换
    public static String showSql(Configuration configuration, BoundSql boundSql) {
        // 获取参数
        Object parameterObject = boundSql.getParameterObject();
        List<ParameterMapping> parameterMappings = boundSql.getParameterMappings();
        // sql语句中多个空格都用一个空格代替
        String sql = boundSql.getSql().replaceAll("[\\s]+", " ");
        if (!CollectionUtils.isEmpty(parameterMappings) && parameterObject != null) {
            // 获取类型处理器注册器,类型处理器的功能是进行java类型和数据库类型的转换
            TypeHandlerRegistry typeHandlerRegistry = configuration.getTypeHandlerRegistry();
            // 如果根据parameterObject.getClass()可以找到对应的类型,则替换
            if (typeHandlerRegistry.hasTypeHandler(parameterObject.getClass())) {
                sql = sql.replaceFirst("\\?",
                        Matcher.quoteReplacement(getParameterValue(parameterObject)));
            } else {
                // MetaObject主要是封装了originalObject对象,提供了get和set的方法用于获取和设置originalObject的属性值,主要支持对JavaBean、Collection、Map三种类型对象的操作
                MetaObject metaObject = configuration.newMetaObject(parameterObject);
                for (ParameterMapping parameterMapping : parameterMappings) {
                    String propertyName = parameterMapping.getProperty();
                    if (metaObject.hasGetter(propertyName)) {
                        Object obj = metaObject.getValue(propertyName);
                        sql = sql.replaceFirst("\\?",
                                Matcher.quoteReplacement(getParameterValue(obj)));
                    } else if (boundSql.hasAdditionalParameter(propertyName)) {
                        // 该分支是动态sql
                        Object obj = boundSql.getAdditionalParameter(propertyName);
                        sql = sql.replaceFirst("\\?",
                                Matcher.quoteReplacement(getParameterValue(obj)));
                    } else {
                        // 打印出缺失,提醒该参数缺失并防止错位
                        sql = sql.replaceFirst("\\?", "缺失");
                    }
                }
            }
        }
        return sql;
    }

    // 如果参数是String,则添加单引号, 如果是日期,则转换为时间格式器并加单引号; 对参数是null和不是null的情况作了处理
    private static String getParameterValue(Object obj) {
        String value;
        if (obj instanceof String) {
            value = "'" + obj.toString() + "'";
        } else if (obj instanceof Date) {
            DateFormat formatter = DateFormat.getDateTimeInstance(DateFormat.DEFAULT,
                    DateFormat.DEFAULT, Locale.CHINA);
            value = "'" + formatter.format(new Date()) + "'";
        } else {
            if (obj != null) {
                value = obj.toString();
            } else {
                value = "";
            }
        }
        return value;
    }

}
创建MybatisConfiguration
package com.jingdianjichi.subject.infra.config;

import com.baomidou.mybatisplus.extension.plugins.MybatisPlusInterceptor;
import org.springframework.context.annotation.Bean;
import org.springframework.context.annotation.Configuration;

@Configuration
public class MybatisConfiguration {

    @Bean
    public MybatisPlusInterceptor mybatisPlusInterceptor(){
        MybatisPlusInterceptor mybatisPlusInterceptor = new MybatisPlusInterceptor();
        mybatisPlusInterceptor.addInnerInterceptor(new MybatisPlusAllSqlLog());
        return mybatisPlusInterceptor;
    }

}

完整的sql就打印出来了 通过这种方式就可以打印完整的sql
*****************如何购买域名
****************传统的部署形式
启动类的配置文件引入build

<build>
        <finalName>${project.artifactId}</finalName>
        <!--打包成jar包时的名字-->
        <plugins>
            <plugin>
                <groupId>org.springframework.boot</groupId>
                <artifactId>spring-boot-maven-plugin</artifactId>
                <version>2.3.0.RELEASE</version>
                <executions>
                    <execution>
                        <goals>
                            <goal>repackage</goal>
                        </goals>
                    </execution>
                </executions>
            </plugin>
        </plugins>
    </build>
先clean后install

讲生成的jar包复制到一个文件夹中使用窗口启动jar包

cicd jenckins实现自动打包持续集成45

![CTF-Web习题:[BJDCTF2020]Mark Loves cat](https://i-blog.csdnimg.cn/direct/166d3d717ca548ac82a461b1b2cf12aa.png)


