App使用Flutter,数据库考虑到要存储的对象并不规整选择使用MongoDB,尝试为自己的App搭建一个简易的后端。
1.通过IDEA脚手架创建项目
New Project->Spring Initializr->Next,输入相关信息并选择Java版本1.8,->Next选择依赖项(注意此时Spring Boot版本选择2.X.X),最后确定项目位置Finish,参考此处。
等待Maven依赖项下载加载。完成后,再添加对mongodb的依赖项。
此时pom.xml内容如下:
<?xml version="1.0" encoding="UTF-8"?>
<project xmlns="http://maven.apache.org/POM/4.0.0" xmlns:xsi="http://www.w3.org/2001/XMLSchema-instance"
         xsi:schemaLocation="http://maven.apache.org/POM/4.0.0 https://maven.apache.org/xsd/maven-4.0.0.xsd">
    <modelVersion>4.0.0</modelVersion>
    <parent>
        <groupId>org.springframework.boot</groupId>
        <artifactId>spring-boot-starter-parent</artifactId>
        <version>2.7.8</version>
        <relativePath/> <!-- lookup parent from repository -->
    </parent>
    <groupId>indi.nicolasHuang</groupId>
    <artifactId>lazymanrecipedemo</artifactId>
    <version>0.0.1-SNAPSHOT</version>
    <name>lazymanrecipedemo</name>
    <description>Demo project for Spring Boot</description>
    <properties>
        <java.version>1.8</java.version>
    </properties>
    <dependencies>
        <dependency>
            <groupId>org.springframework.boot</groupId>
            <artifactId>spring-boot-starter-web</artifactId>
        </dependency>

        <dependency>
            <groupId>org.springframework.boot</groupId>
            <artifactId>spring-boot-starter-test</artifactId>
            <scope>test</scope>
        </dependency>

        <dependency>
            <groupId>org.springframework.boot</groupId>
            <artifactId>spring-boot-starter-data-mongodb</artifactId>
        </dependency>
    </dependencies>

    <build>
        <plugins>
            <plugin>
                <groupId>org.springframework.boot</groupId>
                <artifactId>spring-boot-maven-plugin</artifactId>
            </plugin>
        </plugins>
    </build>

</project>
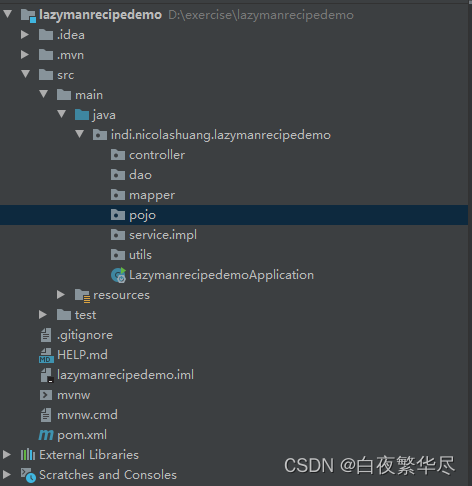
在项目下添加不同类的文件夹。
暂且添加如此多:
2.IDEA连接数据库
右侧选择Database,新建连接,在Database一栏,输入对应的已在本地创建完成的mongodb数据库名,可点击Test Connection测试是否能连接上,点击OK确定。
3.测试页面访问
测试页面访问需要先添加依赖thymeleaf,才能访问静态页面,于pom.xml中添加如下以方便测试:
        <dependency>
            <groupId>org.springframework.boot</groupId>
            <artifactId>spring-boot-starter-thymeleaf</artifactId>
        </dependency>

        <dependency>
            <groupId>org.slf4j</groupId>
            <artifactId>slf4j-api</artifactId>
        </dependency>

        <dependency>
            <groupId>junit</groupId>
            <artifactId>junit</artifactId>
            <version>4.12</version>
            <scope>compile</scope>
        </dependency>
在resources的templates中新建index.html作为欢迎页面:
<!DOCTYPE html>
<html lang="en">
<head>
    <meta charset="UTF-8">
    <title>Title</title>
</head>
<body>
    Hello
</body>
</html>
同目录可以新建error.html作为报错页面。
在配置中心application.properties设置项目端口和mongodb详细数据:
# 应用名称
spring.application.name=lazymanrecipedemo
# 应用服务 WEB 访问端口
server.port=8080

#mongodb设置
# 数据库名称
spring.data.mongodb.database=lazymanrecipe
# 地址
spring.data.mongodb.host=localhost
# 端口
spring.data.mongodb.port=27017
设置好后启动项目,访问http://localhost:8080/,即为index.html(默认欢迎页面)。
4.添加实体类
在entity目录中新增实体类Recipe,作为食谱数据类,参考:
package indi.nicolashuang.lazymanrecipedemo.entity;

import org.bson.types.ObjectId;
import org.springframework.data.annotation.Id;
import org.springframework.data.mongodb.core.mapping.Document;
import org.springframework.data.mongodb.core.mapping.Field;

import java.io.Serializable;

@Document(collection = "recipe")
public class Recipe implements Serializable {

    @Id
    private ObjectId id;

    private Integer recipeIndex;

    private String name;

    private String type;

    private String foods;

    private String steps;

    @Field("created_time")
    private Long createdTime;

    public Recipe(){

    }

    public Recipe(String name, String type, String foods, String steps){
        this.name = name;
        this.type = type;
        this.foods = foods;
        this.steps = steps;
    }

    public Recipe(String id, Integer recipeIndex, String name, String type, String foods, String steps, Long createdTime) {
        this.id = new ObjectId(id);
        this.recipeIndex = recipeIndex;
        this.name = name;
        this.type = type;
        this.foods = foods;
        this.steps = steps;
        this.createdTime = createdTime;
    }

    public String getId() {
        return id.toHexString();
    }

    public void setId(String id) {
        this.id = new ObjectId(id);
    }

    public Integer getRecipeIndex() {
        return recipeIndex;
    }

    public void setRecipeIndex(Integer recipeIndex) {
        this.recipeIndex = recipeIndex;
    }

    public String getName() {
        return name;
    }

    public void setName(String name) {
        this.name = name;
    }

    public String getType() {
        return type;
    }

    public void setType(String type) {
        this.type = type;
    }

    public String getFoods() {
        return foods;
    }

    public void setFoods(String foods) {
        this.foods = foods;
    }

    public String getSteps() {
        return steps;
    }

    public void setSteps(String steps) {
        this.steps = steps;
    }

    public Long getCreatedTime() {
        return createdTime;
    }

    public void setCreatedTime(Long createdTime) {
        this.createdTime = createdTime;
    }
}
尝试做了下构造方法内部的转换。
5.数据库访问测试
在text->java->indi->nicolashuang->lazymanrecipedemo目录下进行mongodb数据库访问测试,新建MongodbTests.java:
package indi.nicolashuang.lazymanrecipedemo;

import indi.nicolashuang.lazymanrecipedemo.entity.Recipe;
import org.junit.jupiter.api.Test;
import org.springframework.boot.test.context.SpringBootTest;
import org.springframework.data.mongodb.core.MongoTemplate;

import javax.annotation.Resource;

@SpringBootTest
class MongodbTests {

    @Resource
    private MongoTemplate mongoTemplate;

    @Test
    public void findId(){
        Recipe recipe = mongoTemplate.findById("6392d1c6ba580db0d7a105aa", Recipe.class);
        assert recipe != null;
        System.out.println(recipe.getName());
    }
}
报错:Test包出现Autowired注入提示Could not autowire. No beans of 'Autowired' type found.多次尝试后替换为@Resource,此时运行Test可以得到recipe的name。
6.控制层
编写控制层代码,先实现全部Recipe数据的获取,新建RecipeController.java:
package indi.nicolashuang.lazymanrecipedemo.controller;

import indi.nicolashuang.lazymanrecipedemo.entity.Recipe;
import indi.nicolashuang.lazymanrecipedemo.service.RecipeService;
import org.springframework.beans.factory.annotation.Autowired;
import org.springframework.web.bind.annotation.*;

import java.util.List;

@RestController
@RequestMapping("/recipe")
public class RecipeController {
    @Autowired
    private RecipeService recipeService;

    @RequestMapping("/getAll")
    @ResponseBody
    public List<Recipe> getAllRecipes(){
        return recipeService.getAll();
    }
}
在service中新建RecipeService.java,注入的RecipeService代码如下,RecipeService类为接口,同目录下新建Impl文件夹,在子文件夹内新建RecipeServiceImpl类继承RecipeService类,算是解耦吧:
import com.mongodb.client.result.UpdateResult;
import indi.nicolashuang.lazymanrecipedemo.entity.Recipe;
import org.springframework.stereotype.Service;

import java.util.List;


@Service
public interface RecipeService {
    public List<Recipe> getAll();
}
package indi.nicolashuang.lazymanrecipedemo.service.impl;
import com.mongodb.client.result.DeleteResult;
import com.mongodb.client.result.UpdateResult;
import indi.nicolashuang.lazymanrecipedemo.entity.Recipe;
import indi.nicolashuang.lazymanrecipedemo.service.RecipeService;
import indi.nicolashuang.lazymanrecipedemo.utils.MongodbUtils;
import org.springframework.beans.factory.annotation.Autowired;
import org.springframework.stereotype.Service;
import java.util.List;
//接口实现
@Service("RecipeService")
public class RecipeServiceImpl implements RecipeService {
@Autowired
private MongodbUtils mongodbUtils;
@Override
public List<Recipe> getAll(){
return MongodbUtils.findAll(Recipe.class,"recipe");
}
}
此处注入的mongodbUtils参考此处。
完成后运行Application,访问http://localhost:8080/recipe/getAll即可显示Recipe的具体内容。