nuxt[文档数据] https://www.xuanmo.xin/details/3240
nuxt文档:https://zhuanlan.zhihu.com/p/76703748
nuxt文档:https://www.cnblogs.com/chanwahfung/p/12899714.html
axios:https://axios.nuxtjs.org/
参考:https://www.w3cschool.cn/nuxtjs/nuxtjs-b4kl36fw.html
案例实现:https://blog.csdn.net/qq_41387882/article/details/106294485
api 鉴权:https://zhuanlan.zhihu.com/p/76703748
参考:https://www.jianshu.com/p/b2d9ff24f7a5
参考:https://www.cnblogs.com/chanwahfung/p/12899714.html
参考:https://www.w3cschool.cn/nuxtjs/nuxtjs-mtod36fx.html
参考:https://blog.csdn.net/qq_41387882/article/details/106294485
创建nuxt.js 项目
npx create-nuxt-app <项目名>
启动
npm i
npm run dev
设置端口号 ip
package.json
  "config": {
    "nuxt": {
      "host": "0.0.0.0",
      "port": "1818"
    }
  },

"dev": "nuxt --hostname 0.0.0.0 --port 3001", // 端口3001,默认是3000
nuxt.config.js
  server: {
     port: 8000, // default: 3000
     host: "0.0.0.0", // default: localhost
   },
资源引入
import NuxtLogo from "~/components/NuxtLogo.vue";
请注意: 从 Nuxt 2.0 开始,~/alias将无法在CSS 文件中正确解析。你必须在 url CSS 引用中使用assets(没有斜杠)或@别名,即background:url("assets/banner.svg")


scss 引入
#node 16+
npm i sass-loader@7.2.0 node-sass@6.0.0 -D
npm i -D sass-loader node-sass

npm uninstall sass-loader
npm install sass-loader@4.1.0 --save

npm i sass-loader@7.2.0 node-sass@4.14.1 -D
1.注意 default.vue 全局 不需要
<style lang="scss">
ul {
  li {
    display: inline-block;
  }
}
</style>
2.注意 nuxt.config.js
  // css: ["@/style/base.scss", "@/style/mixin.scss"],
  css: [
    {
      src: "@/style/base.scss",
      lang: "scss",
    },
    {
      src: "@/style/mixin.scss",
      lang: "scss",
    },
  ],
3.注意 局部应用
<style scoped lang="scss">
@import "@/style/mixin.scss";
ul {
  @include center;
  li {
    display: inline-block;
    height: rpx(108);
    line-height: rpx(108);
  }
}
</style>
4.全局引入应用
npm i @nuxtjs/style-resources --save
 modules: [
    "@nuxtjs/style-resources", // 添加对应的模块
  ],
  styleResources: {
    scss: [
      "@/style/base.scss", // 全局 scss 变量
      "@/style/mixin.scss", // 全局 scss 混合
    ],
  },
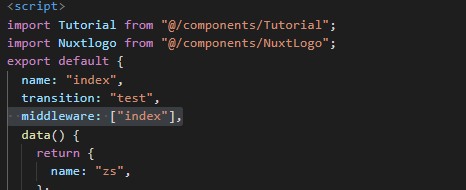
.vue文件其他常用配置
Nuxt和常规Vue页面配置中,出现了很多变化。比如: anyncData() 函数比创建之前还早执行的。或者fecth函数,这些都是为开发者提供更多开发体验。
anyncData() > 组件创造之前就最早执行,如果是首屏则是先是 nuxtServerInit
fecth() > 和anyncData类似获取会在组件创造之前执行。不过在anyncData后面 并且 fetch ⽅法不会设
置组件的数据
head() > 设定HTML的头部信息
layout: “” > 设定使用的布局是那个
middleware: [“”] > 设定中间件名称
transition: Nuxt.js 使用 Vue.js transition组件来实现路由切换时的过渡动效
scrollToTop: true/false > 属性用于控制页面渲染前是否滚动至页面顶部
validate: 可以让你在动态路由对应的页面组件中配置一个校验方法用于校验动态路由参数的有效性
loading: 手动设置页面进度条时间颜色大小等。也可以nuxt.config.js全局配置
参考:https://zh.nuxtjs.org/api/configuration-loading/
组件应用
<template>
  <div>
    <NuxtLogo></NuxtLogo>
    <Tutorial></Tutorial>
    我是index
    <a href="/about">about</a>
    <nuxt-link to="/about">about</nuxt-link>
  </div>
</template>

<script>
import NuxtLogo from "~/components/NuxtLogo.vue";
export default {
  name: "index",
  components: {
    NuxtLogo,
  },
};
</script>

<style scoped lang="scss">
</style>
plugins 的应用
插件只是初始化一次 middleware 中间件每次路由 都会刷新
全局组件应用
参考:https://nuxtjs.org/docs/directory-structure/middleware/
import Vue from "vue";
import Tutorial from "~/components/Tutorial.vue";
Vue.component("Tutorial", Tutorial);
封装axios 内容
1.下载axios内容
npm install @nuxtjs/axios -S
2.配置axios 在nuxt.config.js
modules: [
	'@nuxtjs/axios',
],
axios: {
	proxy: true
},
proxy: {
    // 饿了么
    "/restapi": "https://h5.ele.me",
     "/ss": "http://127.0.0.1:8080/",
},
$axios 内容
async asyncData({ $axios, params, error }) {
    // 这个方法执行时间很早,没有this。所以不能用this.route.params

    //const data = await $axios.get('/xxx');

    // $get 直接只返回data 不用开发者自己去点出来
    // const data = await $axios.$get(
    //   "/restapi/bgs/poi/search_poi_nearby_alipay?keyword=广州&offset=0&limit=20"
    // );
    const data = await $axios.$get("/ss/data");

    console.log(data, "===");

    if (data) {
      // asyncData 返回对象 会和data中的对象合并,
      return { list: data };
    }
    error({ statusCode: 400, message: "失败--" });
  },
axios 进行二次封装
// 1 interceptor.js中定义函数
export default function ({ $axios, store }) {
  // onRequest 是请求之前执行函数 详细文档: @nuxt-axios
  $axios.onRequest((config) => {
    if (store.state.user.token) {
      console.log("请求之前 token:", store.state.user.token);
      // config.headers.Authorization = "Bearer " + store.state.user.token;
    }
    return config;
  });

  // 请求响应
  $axios.onResponse((config) => {
    //判断请求回来的code
    return config;
  });
}
插件封装
/*
*  参数1: 是vue上下文,我们可以结构取值想要的对象或属性。
*  参数2: 注入函数
* */
export default ({ $axios }, inject) => {
  // 在这里注入一个全局方法 ,  那么以后我们在vue实例中即可用 this.$getCity 函数
  // 参数 【函数名称, 接受参数】
  inject("getCity", potions => {
    console.log(potions);
    const url = "https://shadow.elemecdn.com/lib/city-list@0.0.3/city_list.json"
    return $axios.$get(url);
  });
};
3.类似stare的vuex的数据 action进行封装
/*
 *  参数1: 是vue上下文,我们可以结构取值想要的对象或属性。
 *  参数2: 注入函数
 * */
export default ({ $axios }, inject) => {
  // 在这里注入一个全局方法 ,  那么以后我们在vue实例中即可用 this.$getCity 函数
  // 参数 【函数名称, 接受参数】
  inject("getCity", (potions) => {
    // console.log(potions);
    const url =
      "https://shadow.elemecdn.com/lib/city-list@0.0.3/city_list.json";

    return $axios.$get(url);
  });
};
/2 nuxt.config
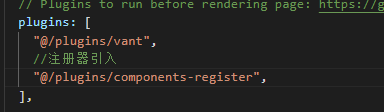
plugins: [
        "@/plugins/api-inject",
        "@/plugins/interceptor",
      ],
应用
methods: {
    onGetCity() {
        this.$getCity('深圳').then(res => {
        	this.list = res
        })
    }
}

async asyncData({ $axios, params, error, app}) {
        app.$getCity('深圳').then(res => {
        	this.list = res
        })
}
当我项目完成时候,需要打包上线。发布到外网。nuxt提供2中方式打包。
服务端渲染应用部署
他会以往vue打包部署很相似。打包后生成的文件在 .next/dist 目录中
npm run build
npm start
如何你电脑就是服务器 那么使用nginx 代理端口后,执行完事。外网可以访问了,提前你服务器装node
静态应⽤部署
这种方式会每个页面都打包出一和html页面。提前是 渲染和接⼝服务器都需要处于启动状态 这样打包的话效率很好,因为服务端已经渲染过浏览器不用重新渲染。 生成文件在 根目录/dist 中
npm run generate
导报出来的文件,就和我们Jquery时代的目录差不多了,都是html页面
开发中额外注意点
首屏时候看不到浏览器的接口请求,原因:首屏已经服务端执行了,所以不同浏览执行
nuxtServerInit 首屏获取服务端数据
有时候当我刷新页面。发现保存后台的数据状态就没有了,这个时候我们可以使用 nuxtServerInit 函数解决。页面重新刷新[首屏] 时候,可以执行,拿到服务端数据,然后在保存当我们状态中
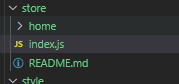
演示: 在store 文件中创建 index.js 注意:nuxtServerInit 只能用 store/index.js 中,且在服务端执行
export const actions = {
  // 参数1: 组件上下文
  // 参数2: 服务端事例
  nuxtServerInit({ commit }, { app }) {
    console.log('我在服务端执行了');
    // 重新给用户存值
    commit('user/init', 'store index token: 12345')
  }
};
vuex 数据处理
import Axios from "axios";

export const state = () => ({
  token: "null token",
  dataLoading: false,
});

export const mutations = {
  init(state, token) {
    state.token = token;
  },
  setDataLoading(state, payload) {
    state.dataLoading = payload;
  },
  settoken(state, payload) {
    state.token = payload;
  },
};
export const getters = {
  isLogin(state) {
    return !!state.token;
  },
};

export const actions = {
  // 异步登录
  login({ commit, getters }, params) {
    Promise.resolve().then(() => {
      commit("init", params);
      return getters.isLogin;
    });
  },
  message(state, payload) {
    console.log(payload, "===", state);
    return Axios.request({
      url: "/ss/logo",
      method: "get",
      params: {
        contentId: 408,
      },
    }).then((res) => {
      return Promise.resolve(res);
    });
  },
};
调用
    <div>--{{$store.state.token}}--{{$store.state.home.token}}</div>
    <button @click="$store.commit('settoken','888')">settoken</button>
    <button @click="$store.commit('home/settoken','999')">home/settoken</button>
        <button @click="$store.dispatch('message')">home/settoken</button>
middleware/auth.js

export default function (context) {
  // Add the userAgent property to the context
  context.userAgent = process.server
    ? context.req.headers['user-agent']
    : navigator.userAgent
}
中间件 middleware
参考:https://nuxtjs.org/docs/directory-structure/middleware/
1.全局
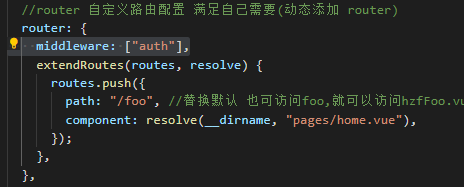
2.布局

3.单个页面
引入第三方框架
npm i vant@latest-v2
vant按需引入
// import Vue from "vue";
// import vant from "vant";
// import "vant/lib/index.css";
// Vue.use(vant);

import Vue from "vue";
import { Button, Cell, CellGroup } from "vant";
Vue.use(Button);
Vue.use(Cell);
Vue.use(CellGroup);
 <client-only>
      <van-cell-group>
        <van-cell
          title="单元格"
          value="内容"
        />
        <van-cell
          title="单元格"
          value="内容"
          label="描述信息"
        />

      </van-cell-group>
    </client-only>
import Vue from "vue";
import Global from "~/components/Global.vue";
Vue.component("Global", Global);

Vue.options = Object.assign(Vue.options, { data: { zzz: "888" } });

var comp = {
  //声明第一个对象comp
  render(h) {
    return h(
      "div",
      {
        on: {
          click: () => {
            console.log("点击事件");
            this.hand2();
          },
        },
      },
      ["我是extendcomp" + this.a]
    );
  },
  data() {
    return {
      a: 0,
    };
  },
  methods: {
    hand2() {
      // this.onChange()
      this.a++;
    },
  },
};

// vue 模板金经过webpack 编译后才会形成这种函数render模式
var extendall = Vue.extend({
  extends: {
    data() {
      return {
        a1: 0,
      };
    },
    methods: {
      handl() {
        // this.onChange()
        this.a1++;
      },
    },
  },
  render(h) {
    return h(
      "div",
      {
        on: {
          click: () => {
            console.log("点击事件");
            this.handl();
          },
        },
      },
      ["我是extend" + this.name + this.a1, <comp></comp>]
    );
  },
  data() {
    return {
      name: "-=",
    };
  },
  component: {
    comp,
  },
});

Vue.component("extendall", extendall);

Vue.component("todo", {
  props: {
    type: {
      type: String,
      default: "normal",
    },
    text: {
      type: String,
      default: "normal",
    },
  },
  render(h) {
    //  单个数据render函数
    return h(
      "div",
      {
        //给div绑定样式
        style: {
          color: "#F00",
        },
        attrs: {
          id: "foo",
        },
        class: {
          bnt: true,
          success: this.type == "success",
          "bnt-danger": this.type == "danger",
          "bnt-warning": this.type == "warning",
          normal: !this.type,
        },

        // domProps: {
        //   innerText: this.text || "默认",
        // },
        on: {
          click: () => {
            console.log("点击事件");
          },
        },
      },
      [
        "up",
        h(
          "div",
          {
            style: { color: "#ff0" },
            // 全部替换
            // domProps: {
            //   innerText: "默认",
            // },
          },
          "sss1"
        ),
        h(
          "div",
          {
            style: { color: "#ff0" },
            domProps: {
              innerText: "默认",
            },
          },
          "sss2"
        ),
      ]
    );
  },
});

Vue.mixin({
  methods: {
    clicks() {
      console.log("mixin");
    },
  },
});

Vue.use({
  // install 是默认的方法。当外界在 use 这个组件的时候,就会调用本身的 install 方法,同时传一个 Vue 这个类的参数。
  install: function (Vue) {
    // Vue.component("Loading", LoadingComponent);
    Vue.mixin({
      data() {
        return {
          obj: {},
        };
      },
      methods: {
        clicks1() {
          console.log("mixin1");
          Vue.set(this.obj, "namess", "zs");
        },
        clicks2() {
          console.log("mixin1");
          Vue.delete(this.obj, "namess");
        },
        clicks3() {
          Vue.nextTick(() => {
            let foo = document.getElementById("foo");
            console.log(foo, "===foo");
          });
        },
        clicks4() {
          // 类似vuex 少数数据管理
          const state = Vue.observable({
            screenCars: {},
          });
          const mutations = {
            updateScreenCars(payload) {
              state.screenCars = Object.assign({}, payload);
            },
          };
        },
      },
    });
  },
});
Vue.directive("hello", function (el, binding, vnode) {
  el.style["color"] = binding.value;

  // el:指令所绑定的元素,可以用来直接操作 DOM 。
  // binding:一个对象,包含以下属性:
  //  name:指令名,不包括 v- 前缀。
  //  value:指令的绑定值,例如:v-my-directive="1 + 1" 中,绑定值为 2。
  //  oldValue:指令绑定的前一个值,仅在 update 和 componentUpdated 钩子中可用。无论值是否改变都可用。
  //  expression:字符串形式的指令表达式。例如 v-my-directive="1 + 1"中,表达式为 "1 + 1"。
  //  arg:传给指令的参数,可选。例如 v-my-directive:foo 中,参数为 "foo"。
  //  modifiers:一个包含修饰符的对象。例如:v-my-directive.foo.bar中,修饰符对象为 { foo: true, bar: true }。
  //  vnode:Vue 编译生成的虚拟节点。移步 VNode API 来了解更多详情。
  //  oldVnode:上一个虚拟节点,仅在 update 和 componentUpdated 钩子中可用。

  // 作者:果汁凉茶丶
  // 链接:https://www.jianshu.com/p/8d3980334b80
  // 来源:简书
  // 著作权归作者所有。商业转载请联系作者获得授权,非商业转载请注明出处。
});

Vue.directive("hello3", {
  bind(el) {
    console.log("bind:", el);
  },
  inserted(el) {
    console.log("inserted:", el);
  },
  update(el) {
    console.log("update:", el);
  },
  componentUpdated(el) {
    console.log("updated:", el);
  },
  unbind(el) {
    console.log("unbind:", el);
  },

  // 指令的钩子	描述
  // bind	只调用一次,指令第一次绑定到元素时调用
  // inserted	被绑定元素插入父节点时调用
  // update	所在组件的VNode 更新时调用,可能发生在其子VNode更新之前
  // componentUpdated	指令所在组件的VNode及其子VNode全部更新后调用
  // unbind	只调用一次,指令与元素解绑时调用
});

Vue.filter("namesl", function (el) {
  console.log(el, "tian");
  return "tian";
});

console.log(Vue, "===");

// 数据:data、 props、 propsData、 computed、methods、 Watch

// DOM: el、 template、 render、 renderError

// 生命周期钩子: beforeCreate、 created、beforeMount、 mounted、 beforeUpdate、 updated、activated、 deactivated、 beforeDestroy、 destroyed、errorCaptured

// 资源: directives、 filters、 components

// 组合: parent, mixins、 extends、 provide、 inject

// Vue2.0生命钩子	描述
// beforeCreate	组件实例刚被创建,组件属性被计算之前,如:data
// creaated	组件实例创建完成,属性值已绑定,DOM还未生成,$el属性还不存在
// beforeMount	模板编译/挂载之前
// mounted	模板编译/挂载之后
// beforeUpdate	组件更新之前
// updated	组件已更新
// activated	for keep-alive,组件被激活时调用
// deactivated	for keep-alive,组件被移除时调用
// beforeDestory	组件被销毁之前
// destoryed	组件销毁后调用

// 作者:果汁凉茶丶
// 链接:https://www.jianshu.com/p/8d3980334b80
// 来源:简书
// 著作权归作者所有。商业转载请联系作者获得授权,非商业转载请注明出处。
nuxt.js 鉴权内容借鉴:https://blog.csdn.net/qq_21567385/article/details/108459773