//从事微服务开发工作
SpringBoot提供一种快速使用Spring的方式
1、自动化 2、设置多个starter配置依赖比Maven直接管理更便捷 3、内置服务器
总结:自动配置,起步依赖,辅助功能
2.6.11版本的说明书
Spring Boot Reference Documentation
maven依赖黏贴
Spring Boot Maven Plugin Documentation
1、创建Maven工程
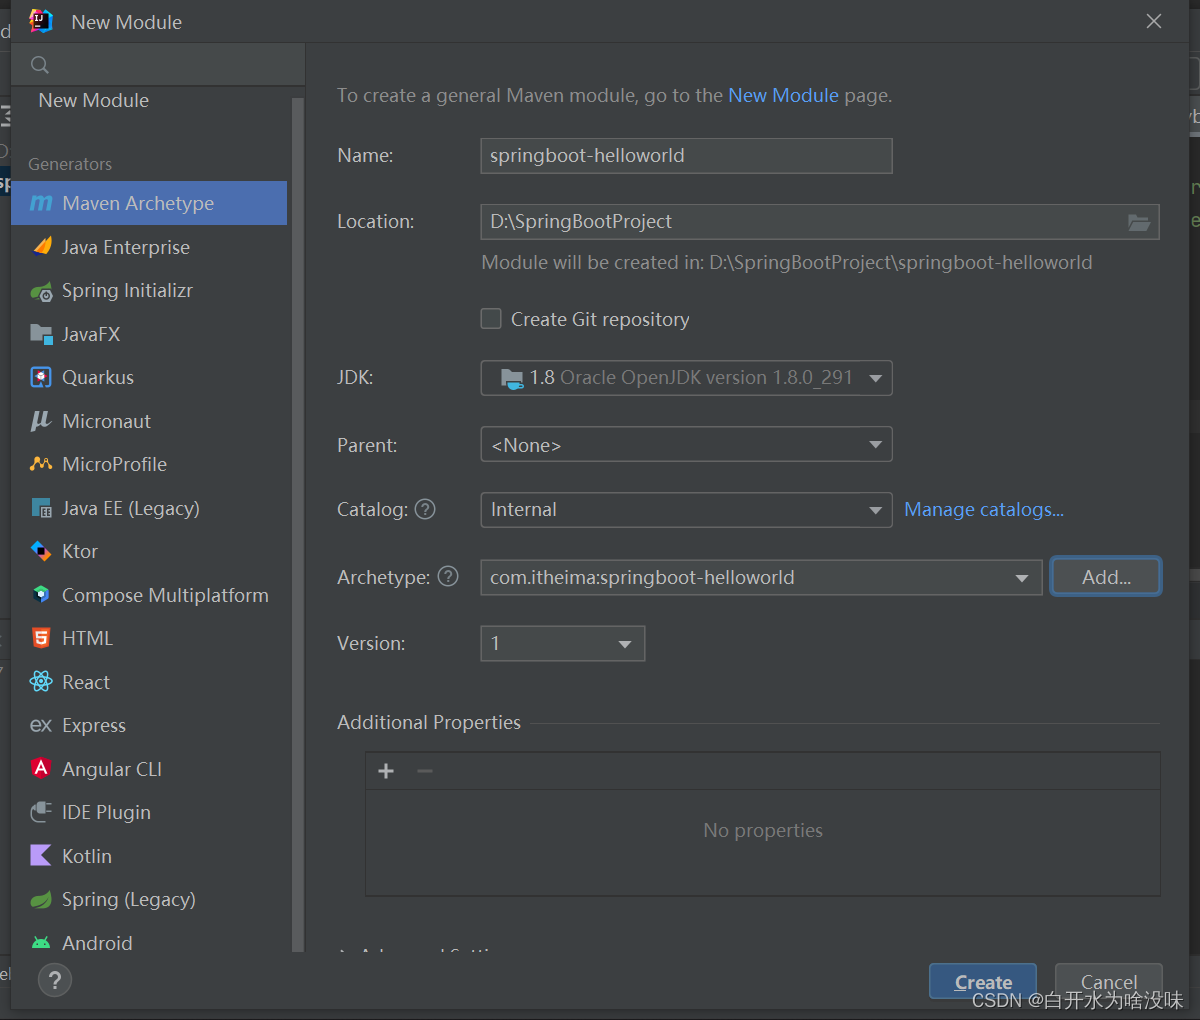
Archetype表
(100条消息) maven项目的Archetype常用选择_世界,你好的博客-CSDN博客_maven 常用archetype
是使用哪一个模板来初始化我们的项目:简单的说,Archetype是Maven工程的模板工具包。一个Archetype定义了要做的相同类型事情的初始样式或模型。这个名称给我们提供来了一个一致的生成Maven工程的方式。Archetype会帮助作者给用户创建Maven工程模板,并给用户提供生成相关工程模板版本的参数化方法。
(100条消息) maven项目的Archetype常用选择_世界,你好的博客-CSDN博客_maven 常用archetype
常用Archetype
maven-archetype-quickstart
默认的Archetype,基本内容包括:
一个包含junit依赖声明的pom.xml
src/main/java主代码目录及一个名为App的类
src/test/java测试代码目录及一个名为AppTest的测试用例

maven-archetype-webapp
一个最简单的Maven war项目模板,当需要快速创建一个Web应用的时候可以使用它。生成的项目内容包括:
一个packaging为war且带有junit依赖声明的pom.xml
src/main/webapp/目录
src/main/webapp/index.jsp文件
src/main/webapp/WEB-INF/web.xml文件
问题一:Archetype quick start 模板中没有resources
(100条消息) intelliJ IDEA新建maven webapp原型项目没有resource文件夹_Katherine_ZXL的博客-CSDN博客
2、配置起步依赖
只需要导入两个坐标
<!--springboot工程需要继承的父工程-->
    <parent>
        <groupId>org.springframework.boot</groupId>
        <artifactId>spring-boot-starter-parent</artifactId>
        <version>2.6.11</version>
    </parent>

    <dependencies>
    <!--web开发的起步依赖-->
        <dependency>
            <groupId>org.springframework.boot</groupId>
            <artifactId>spring-boot-starter-web</artifactId>
        </dependency>

    </dependencies>
3、配置项目
项目结构
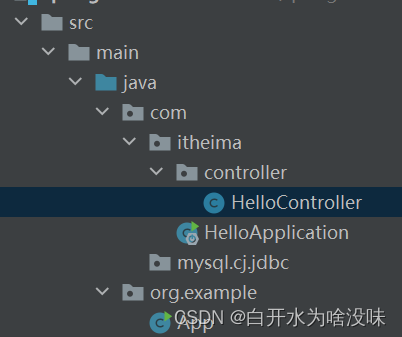
写一个Controller
package com.itheima.controller;

import org.springframework.web.bind.annotation.RequestMapping;
import org.springframework.web.bind.annotation.RestController;

@RestController
public class HelloController {

    @RequestMapping("/hello")   //访问路径
    public String hello(){
        return "hello springboot";
    }

}
写一个引入类
package com.itheima;

//引导类 后缀一般是Application结尾
//springboot 项目的入口
//运行整个Spring项目运行main方法即可
import org.springframework.boot.SpringApplication;
import org.springframework.boot.autoconfigure.SpringBootApplication;

@SpringBootApplication
public class HelloApplication {
    public static void main(String[] args) {
        SpringApplication.run(HelloApplication.class,args);
    }
}
SpringBoot快速构架
spring initializr

起步原理分析
(1)spring-boot-starter-parentg
(2)spring-boot-starter-web
依赖继承,所定义的版本内调试好了要用的所有的东西的版本
yml
语法:
1、大小写敏感
2、数据值前必须有空格作为分隔符
3、缩进表示层级关系
4、缩进不允许使用tab键,只允许使用空格
5、缩进的空格数目不重要,只要相同的层级的元素左侧对齐即可
6、#表示注释
优先级顺序: properties>yml>yaml
方便度:properties->xml->yml(以数据为核心)
数据格式:
1、对象(map):键值对的集合
server:
  port: 8081

//也可以是行内写法
person:
  name: zhangsan
# 行内写法
person: {name:zhangsan}
2、数组:一组按次序排序的值
address:
  - bejing
  - shanghai
#行内写法:
address:[beijing,shanghai]
3、纯量: 单个的、不可再分的值
msg1: 'hello \n world'  #单引忽略转义字符
msg2: "hello \n world"  #双引识别转义字符
*4、参数引用
三种获取配置内容的方式
(1)VALUE注入
用美元符引用上面定义的变量
name:list

person:
    name: ${name} # 引用上边定义的name值

属性名可以是任意 ,绑定的要和yml一致
(2)ENVIRONMENT注入
但是一个一个写私有变量太麻烦了
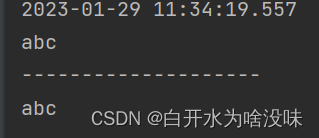
于是加入@Autowired 注解 定义environment对象 然后通过getProperty访问
这种注入方式比value注入更加整洁 值少的话可以选择用value
@Autowired
    private Environment env;

    @RequestMapping("/eee")   //访问路径
    public String hello2(){
        System.out.println(name);
        System.out.println("--------------------");
        System.out.println(env.getProperty("name"));


        return "真他吗是个大傻逼";
    }
(3)CONFIGURATION注入
1、@Component 注解 使SpringBoot识别为Bean文件
2、ConfigurationProperties
要注意注入时候的所要的属性是否有前缀,是否是前缀下的属性

定义在person前缀下的属性address数组,然后用这种方法注入传数组
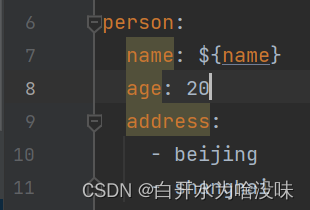
 String[] address = person.getAddress();
        for (String s : address) {
            System.out.println(s);
        }
加上这个依赖,书写配置时候会根据定义好的类给予提示
<dependency>
    <groupId>org.springframework.boot</groupId>
    <artifactId>spring-boot-configuration-processor</artifactId>
    <optional>true</optional>
</dependency>
profile:
动态配置切换,适应不同的环境安装,如适配不同的数据库地址,服务端口等
(1)配置方式:
多profile文件方式
yml多文档方式
(2)激活方式:
配置文件
虚拟机参数
命令行参数
设置如下文件,分别是开发,测试,生产设置,端口设置分别为8080,8081,8082,8083

在默认的里面写入以下代码即可配置成dev结尾的文件
spring.profiles.active=devyml版本的:
---
server:
  port: 8081

spring:
  config:
    activate:
      on-profile: dev
---
server:
  port: 8082

spring:
  config:
    activate:
      on-profile: test
---
server:
  port: 8083

spring:
  config:
    activate:
      on-profile: pro
---
spring:
  profiles:
    active: pro
用三个横杠可以分割yml文件 “---”
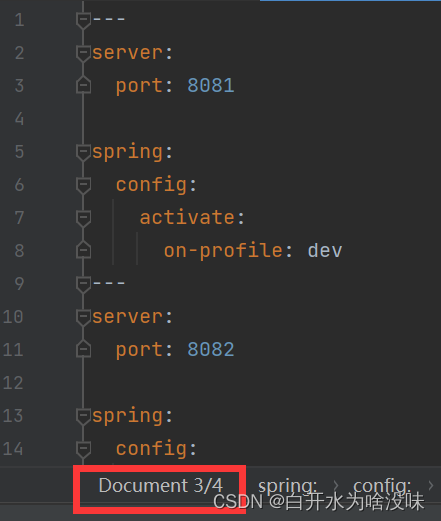
以上是通过更改配置文件来更改,以下提供不用更改配置文件的方式
设置虚拟机参数

或者设置命令行参数:前面固定写法为两个-
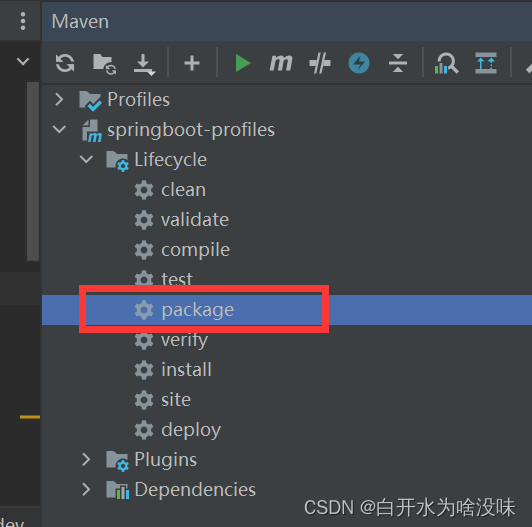
命令行可以通过idea上面窗口设置,也可以在程序被打成jar包后在windows shell里设置

项目内置文件加载顺序:
1、file:./config/: 当前项目下的/config目录下
2、file:./ :当前项目下的根目录
3、classpath:/config/: classpath的/config目录
4、classpath:/: classpath的根目录
加载顺序为上文的排列顺序,高优先级配置的属性会生效
可以理解为:
file为总文件目录
classpath是moudule模块目录
但是打包jar包不会将非模块的配置文件打包入内
项目访问默认方式设置:
srver.servlet.context-path=/hello在controller里面的"/hello"是资源访问方式
项目外部配置加载顺序:
Core Features (spring.io)
上传部署时候会用到 统一适配 到时候再查
整合Redis(待学习Redis)
默认连接本地ip 端口号:6379
 @Autowired
    private RedisTemplate redisTemplate;

    @Test
    void testSet() {
        //存入数据
        redisTemplate.boundValueOps("name").set("zhangsan");

    }

    @Test
    void testGet() {
        //获取数据
        Object name = redisTemplate.boundValueOps("name").get();
        System.out.println(name);
    }
如果想要更改端口号,(不用本机的时候)对Redis进行配置
可以在yml里更改:
spring:
  redis:
    host: 127.0.0.1 #redis的主机ip
    port: 6379
整合Mybatis
纯注解开发
![]()
代表编译时候坐标不生效,启动时候生效
先写实体类
再定义配置信息
配置数据库

注解开发
@Mapper
public interface UserMapper {

    @Select("select * from user")
    public  List<User> findAll();
如果不写注解需要编写配置文件来制作映射
@Mapper
public interface UserXmlMapper {

    public List<User> findAll();
}
PostMan
(100条消息) 接口测试之Postman使用全图文指南(原来使用Postman测试API接口如此简单)_软测小生的博客-CSDN博客_本地测试用postman怎么设置url


