最终效果

文章目录
- 最终效果
- 前言
- 素材下载
- 图片配置
- 获取格子坐标
- 动态控制背包大小
- 添加物品
- 移动物品
- 物品跟随鼠标
- 创建物品的容器,定义不同物品
- 修改物品尺寸
- 修复物品放置位置问题
- 按物品尺寸占用对应大小的格子
- 判断物品是否超出边界范围
- 物品放置重叠,交换物品
- 放置加入点偏移量
- 突出显示我们选中的物品
- 优化
- 多个背包
- 自动入库物品
- 旋转物品
- 修改旋转高亮背景和占位也跟着旋转
- 选中拖拽物品排序问题
- 最终效果
- 源码
- 完结
前言
在这一集中我将使用Unity制作基于瓦片的网格库存系统。 就像在《逃离塔科夫》、《暗黑破坏神》或《流放之路》等游戏中一样。
素材下载
https://assetstore.unity.com/packages/2d/gui/icons/gui-parts-159068
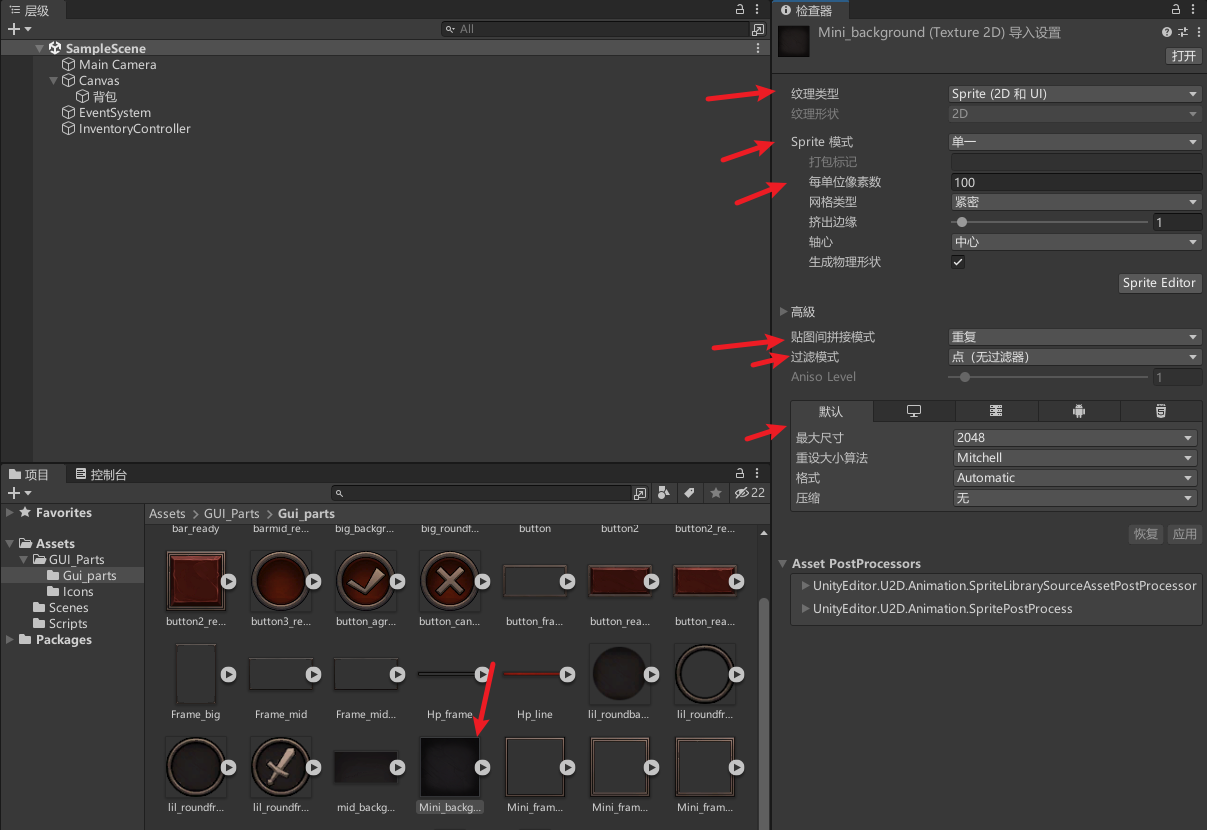
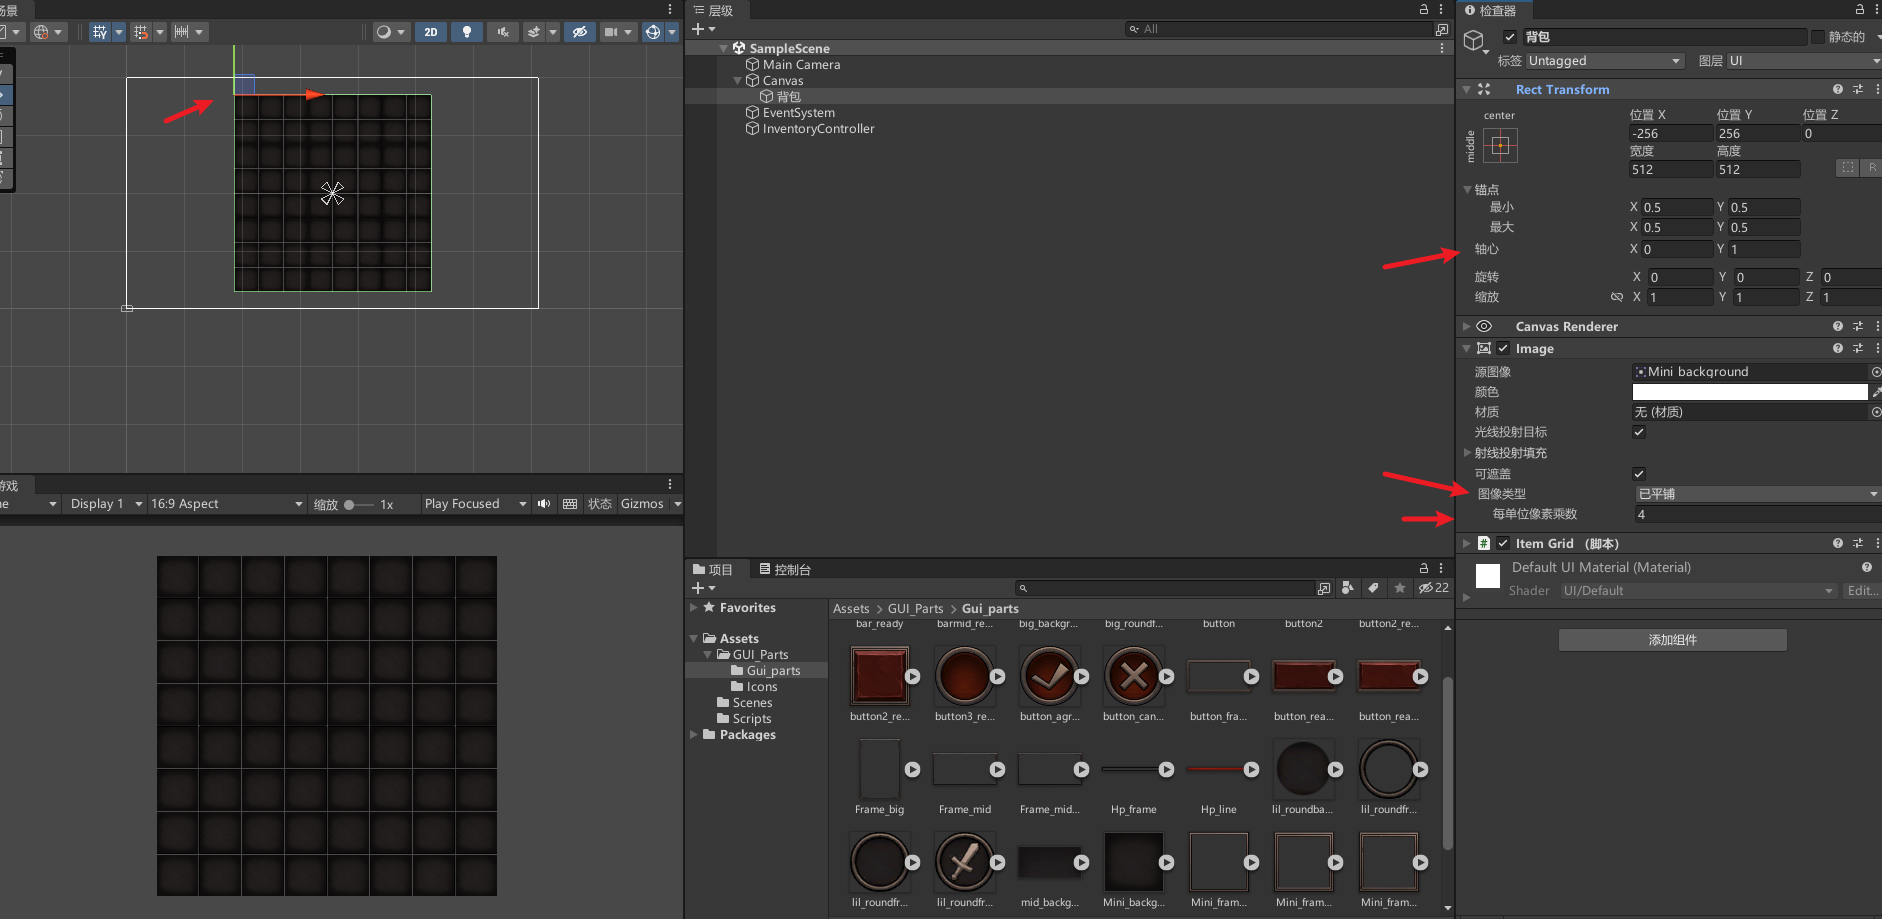
图片配置
配置图片为重复
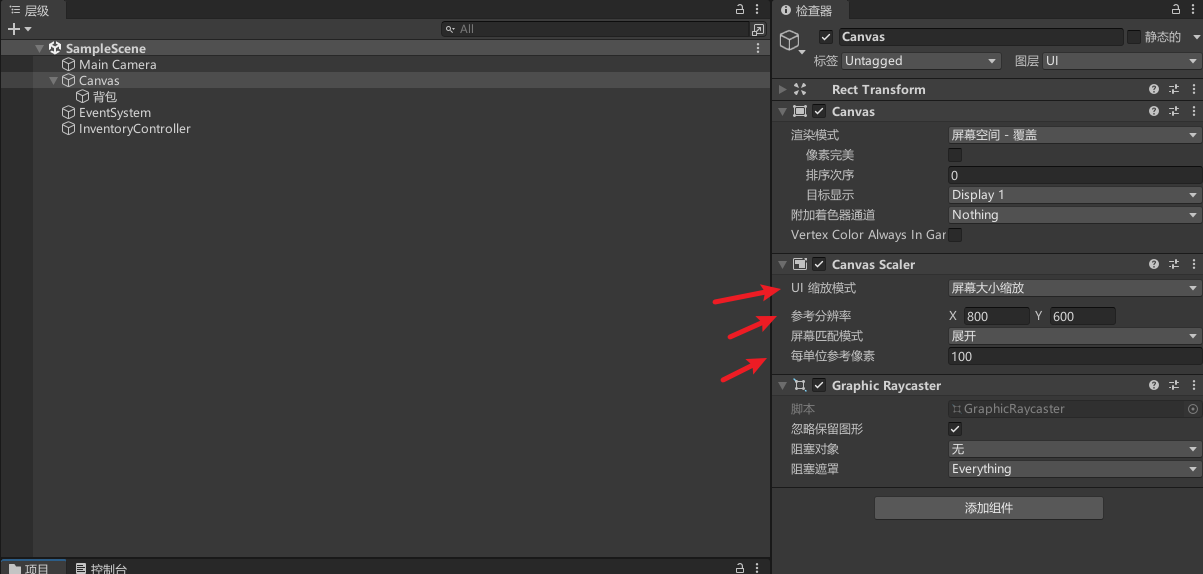
不懂UI画布适配查看:【Unity小技巧】最简单的UI设置适配方案
修改UI画布适配
新增UI图片,类型改为平铺,默认图片是256的,太大了,所以我们选择缩小4倍,每单位像素为4,同时注意修改轴心在左上角
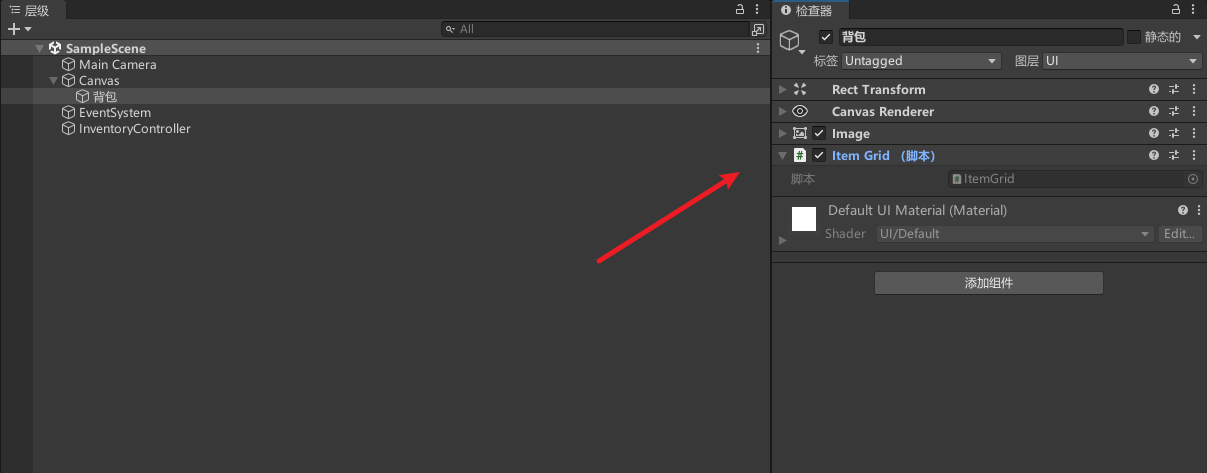
获取格子坐标
新增ItemGrid代码
public class ItemGrid : MonoBehaviour
{
    // 定义每个格子的宽度和高度
    const float tileSizeWidth = 256 / 4;
    const float tileSizeHeight = 256 / 4;

    // 计算在格子中的位置
    Vector2 positionOnTheGrid = new Vector2();
    Vector2Int tileGridPosition = new Vector2Int();

    RectTransform rectTransform;
    Canvas canvas;
    private void Start()
    {
        rectTransform = GetComponent<RectTransform>();
        canvas = FindObjectOfType<Canvas>();
    }

    private void Update()
    {

        if (Input.GetMouseButtonDown(0))
        {
            // 获取当前鼠标位置在网格中的格子坐标,并打印到控制台
            Debug.Log(GetTileGridPosition(Input.mousePosition));
        }

    }

    // 根据鼠标位置计算在格子中的位置
    public Vector2Int GetTileGridPosition(Vector2 mousePosition)
    {
        // 计算鼠标位置相对于 RectTransform 的偏移量
        positionOnTheGrid.x = mousePosition.x - rectTransform.position.x;
        positionOnTheGrid.y = rectTransform.position.y - mousePosition.y;

        // 将偏移量转换为网格位置
        // 这里假设 tileSizeWidth 和 tileSizeHeight 是单个瓦片的宽度和高度
        // canvas.scaleFactor 是 Canvas 的缩放因子(通常用于 UI 适配不同分辨率)
        tileGridPosition.x = (int)(positionOnTheGrid.x / tileSizeWidth / canvas.scaleFactor);
        tileGridPosition.y = (int)(positionOnTheGrid.y / tileSizeHeight / canvas.scaleFactor);

        // 返回计算出的网格位置
        return tileGridPosition;
    }
}
挂载脚本
效果,点击格子打印位置
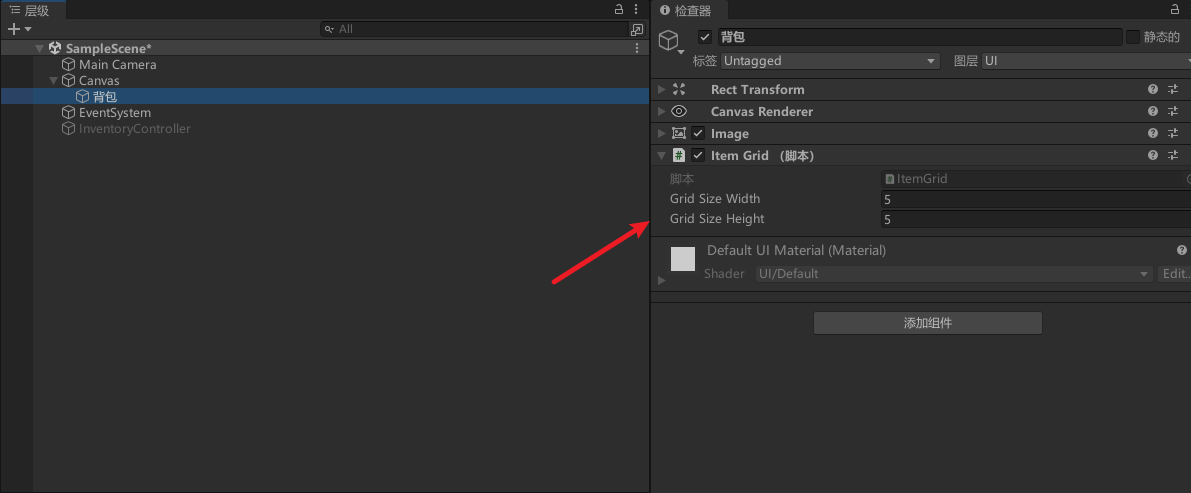
动态控制背包大小
修改ItemGrid
[SerializeField] int gridSizeWidth = 10;
[SerializeField] int gridSizeHeight = 10;

private void Start()
{
    rectTransform = GetComponent<RectTransform>();
    canvas = FindObjectOfType<Canvas>();

    Init(gridSizeWidth, gridSizeHeight);
}

void Init(int width, int height){
    Vector2 size = new Vector2(width * tileSizeWidth, height * tileSizeHeight);
    rectTransform.sizeDelta = size;
}
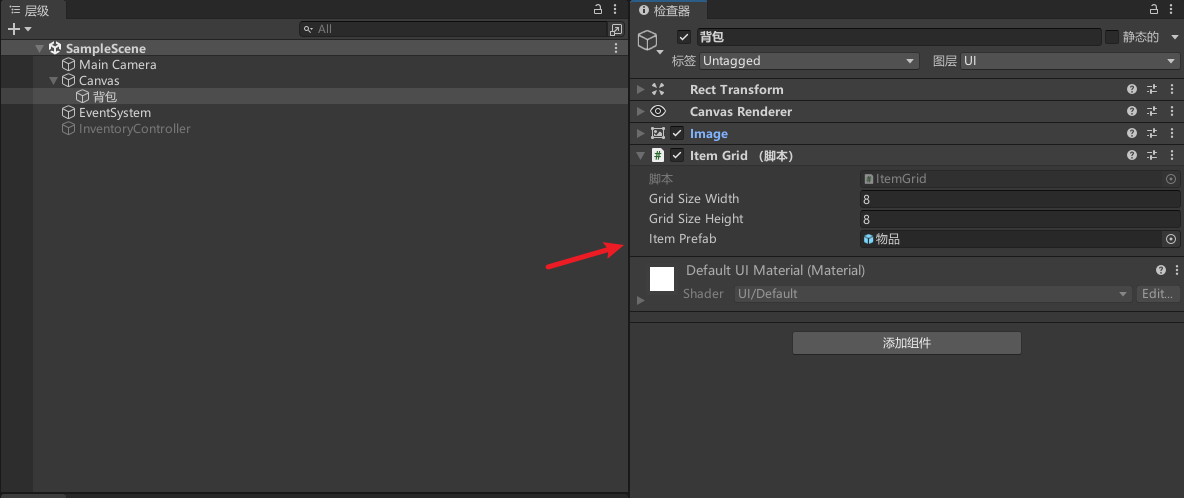
配置
效果

添加物品
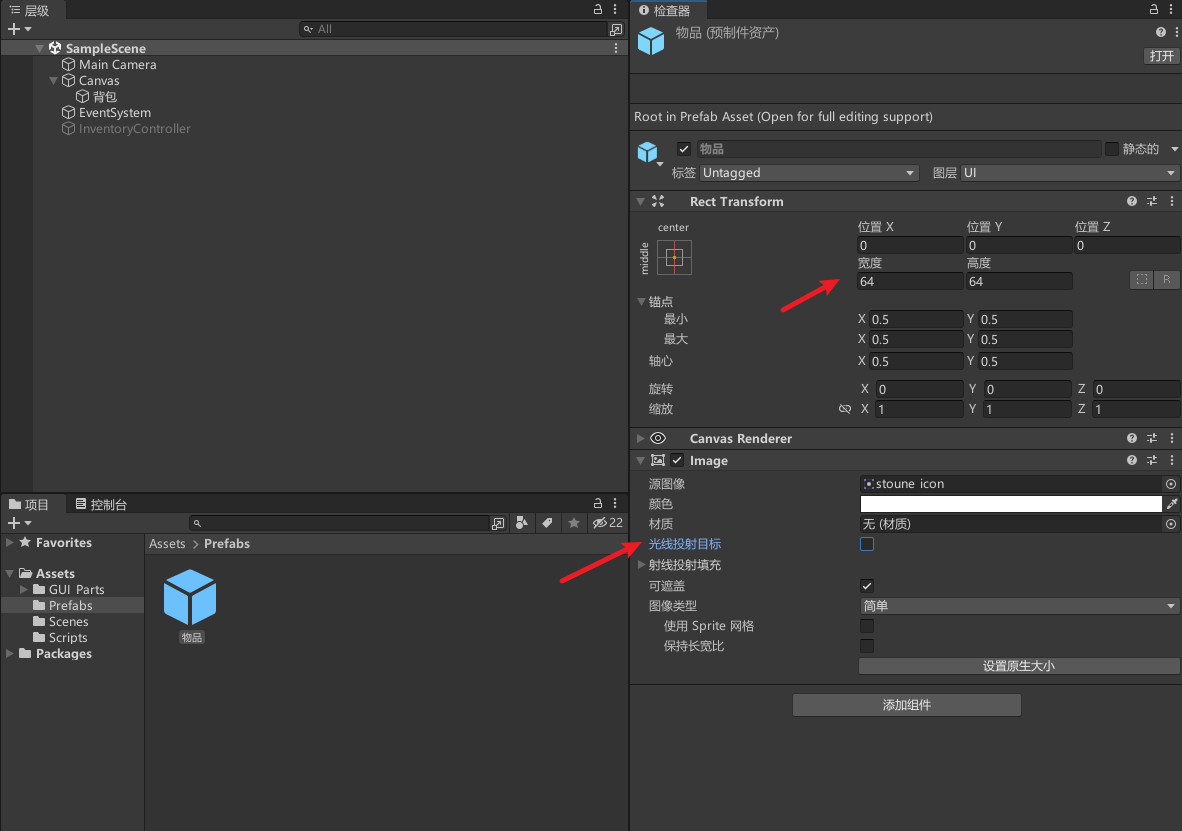
配置物品预制体。修改尺寸和去掉光线投射目标
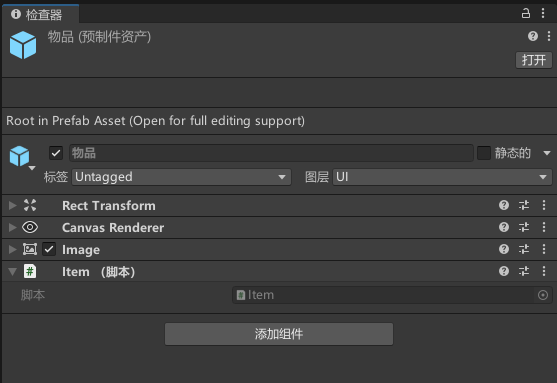
新增Item脚本,挂载在物品上
public class Item : MonoBehaviour {

}
动态添加测试物品,修改ItemGrid
Item[,] itemSlot;//存储物品位置信息

private void Start()
{
	itemSlot= new Item[gridSizeWidth, gridSizeHeight];

    rectTransform = GetComponent<RectTransform>();
    canvas = FindObjectOfType<Canvas>();

    Init(gridSizeWidth, gridSizeHeight);

    //动态添加测试物品
    Item item = Instantiate(itemPrefab).GetComponent<Item>();
    PlaceItem(item, 0, 0);

    item = Instantiate(itemPrefab).GetComponent<Item>();
    PlaceItem(item, 3, 2);

    item = Instantiate(itemPrefab).GetComponent<Item>();
    PlaceItem(item, 2, 4);
}

//按格子坐标添加物品
public void PlaceItem(Item item, int posX, int posY){
    itemSlot[posX, posY] = item;
    item.transform.SetParent(transform, false);
    Vector2 positon = new Vector2();
    positon.x = posX * tileSizeWidth + tileSizeWidth / 2;
    positon.y = -(posY * tileSizeHeight + tileSizeHeight / 2);
    item.transform.localPosition = positon;
}
配置
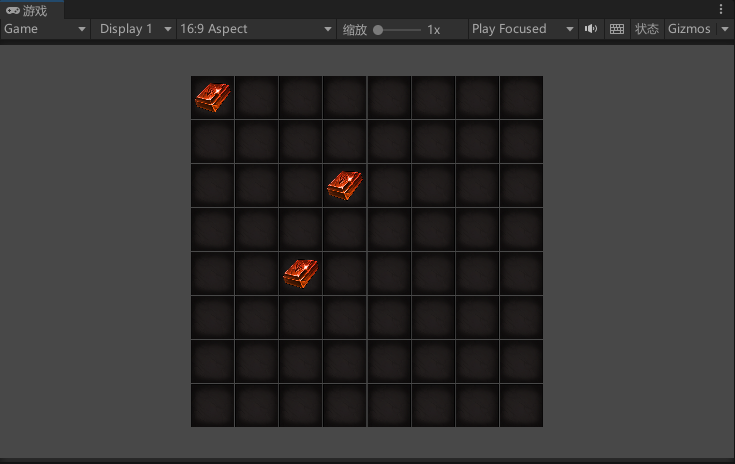
运行效果
移动物品
修改ItemGrid,按格子坐标获取物品
//按格子坐标获取物品
public Item PickUpItem(int x, int y){
    Item toReturn = itemSlot[x, y];
    itemSlot[x, y] = null;
    return toReturn;
}
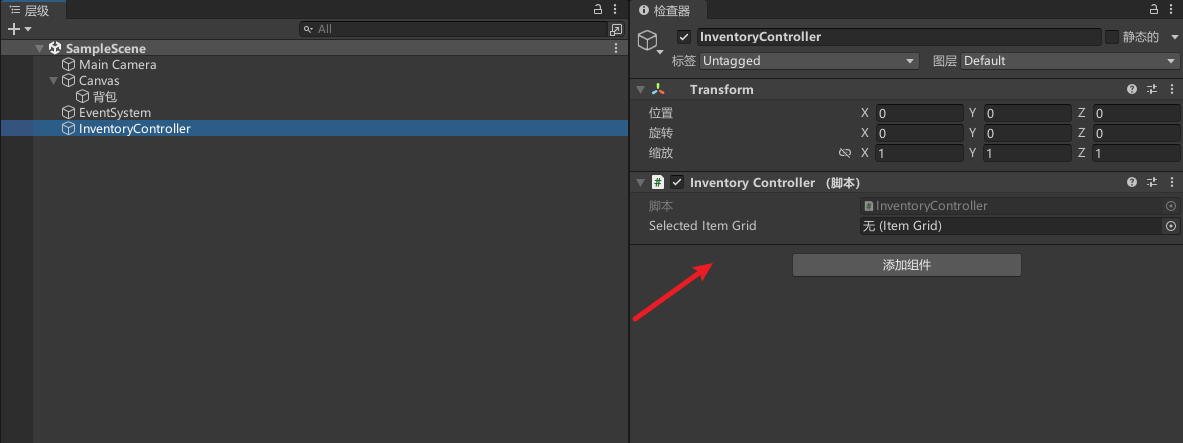
新增InventoryController,实现物品交互功能
public class InventoryController : MonoBehaviour
{
    public ItemGrid selectedItemGrid;//操作的背包
    Item selectedItem;//选中物品

    private void Update()
    {
        if (selectedItemGrid == null) return;

        if (Input.GetMouseButtonDown(0))
        {
            // 获取当前鼠标位置在网格中的格子坐标,并打印到控制台
            Debug.Log(selectedItemGrid.GetTileGridPosition(Input.mousePosition));

            //获取物品
            Vector2Int tileGridPosition = selectedItemGrid.GetTileGridPosition(Input.mousePosition);
            if(selectedItem == null){
                selectedItem = selectedItemGrid.PickUpItem(tileGridPosition.x, tileGridPosition.y);
            }else{
                selectedItemGrid.PlaceItem(selectedItem, tileGridPosition.x, tileGridPosition.y);
                selectedItem = null;
            }
        }
    }
}
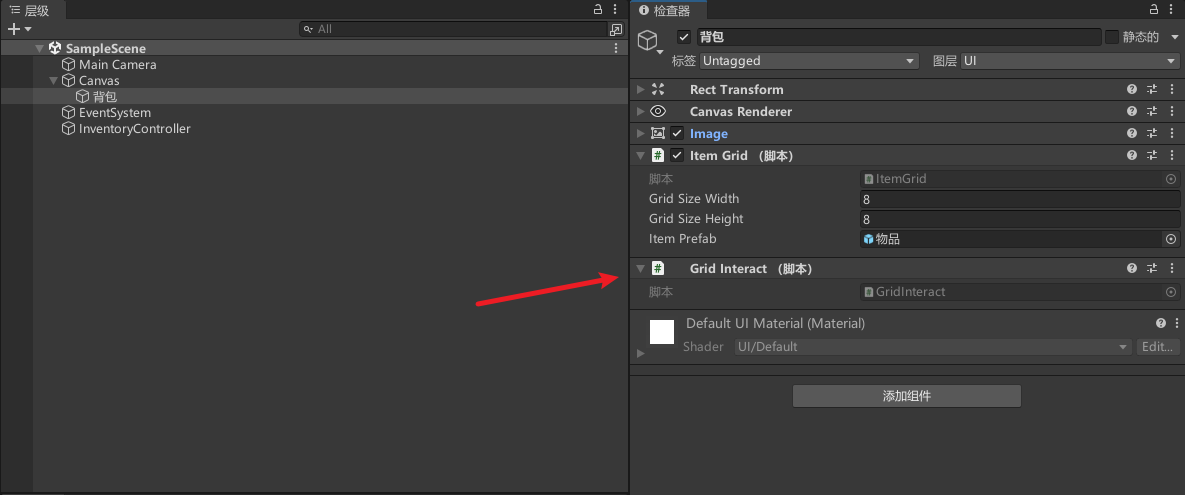
新增GridInteract,动态赋值背包数据
[RequireComponent(typeof(ItemGrid))]
public class GridInteract : MonoBehaviour, IPointerEnterHandler, IPointerExitHandler
{
    private InventoryController inventoryController;
    private ItemGrid itemGrid;

    private void Awake()
    {
        inventoryController = FindObjectOfType<InventoryController>();
        itemGrid = GetComponent<ItemGrid>();
    }

    // 鼠标进入触发
    public void OnPointerEnter(PointerEventData eventData)
    {
        inventoryController.selectedItemGrid = itemGrid;
    }

    // 鼠标退出触发
    public void OnPointerExit(PointerEventData eventData)
    {
        inventoryController.selectedItemGrid = null;
    }
}
挂载
效果
物品跟随鼠标
修改InventoryController
private void Update()
{
    //物品跟随鼠标
    if(selectedItem) selectedItem.transform.position = Input.mousePosition;

	//...
}
效果

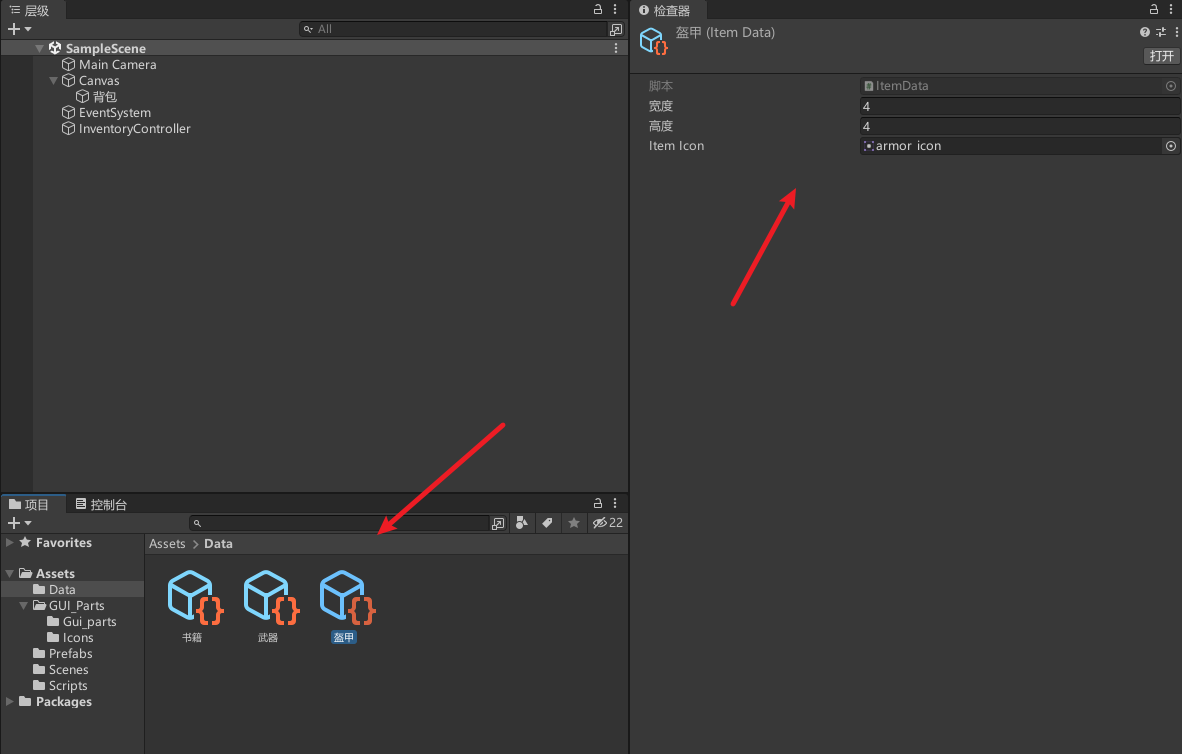
创建物品的容器,定义不同物品
新增ItemData
[CreateAssetMenu]
public class ItemData : ScriptableObject
{
    public int width = 1;
    public int height = 1;
    public Sprite itemIcon;
}
配置物品
修改Item
public class Item : MonoBehaviour
{
    public ItemData itemData;

    public void Set(ItemData itemData){
        this.itemData = itemData;
        GetComponent<Image>().sprite = itemData.itemIcon;
    }
}
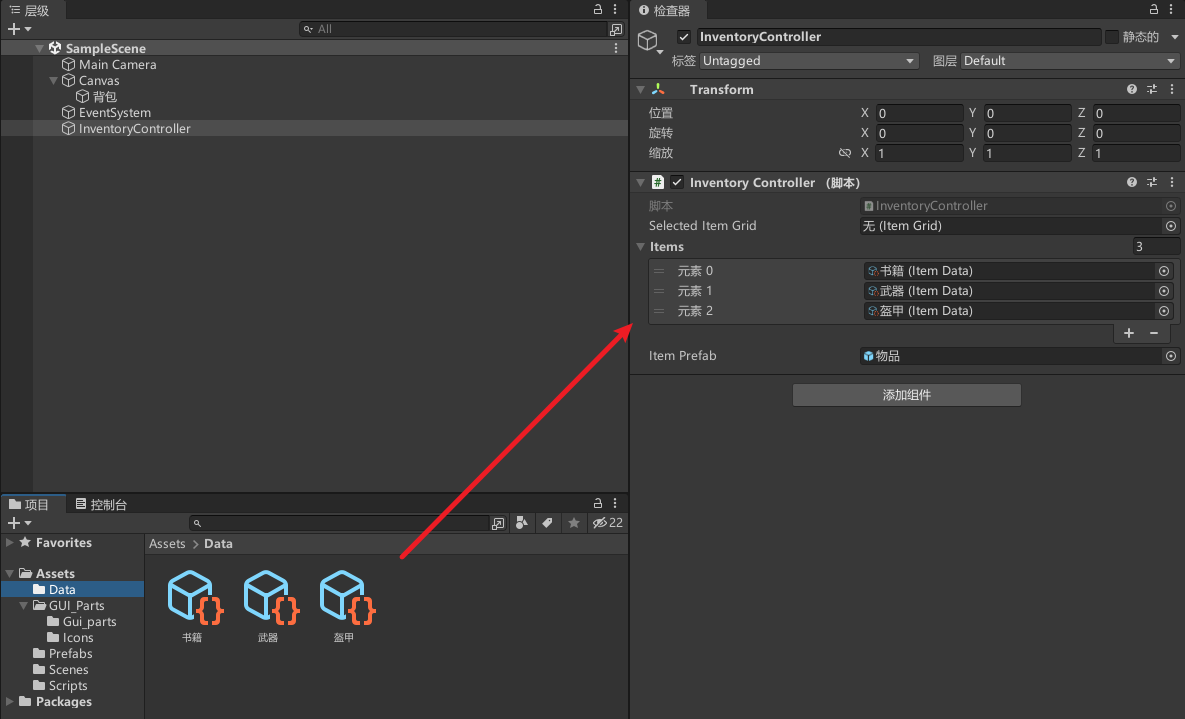
修改InventoryController
[SerializeField] List<ItemData> items;
[SerializeField] GameObject itemPrefab;
Canvas canvas;

private void Start() {
    canvas = FindObjectOfType<Canvas>();
}

private void Update()
{
    //TODO: 方便测试,动态随机添加物品
    if (Input.GetKeyDown(KeyCode.Q))
    {
        CreateRandomItem();
    }

    //...
}

//随机添加物品
private void CreateRandomItem()
{
	if (selectedItem) return;
    Item item = Instantiate(itemPrefab).GetComponent<Item>();
    selectedItem = item;
    selectedItem.transform.SetParent(canvas.transform, false);
    int index = UnityEngine.Random.Range(0, items.Count);
    item.Set(items[index]);
}
配置
效果,按Q生成不同物品

修改物品尺寸
修改Item
public void Set(ItemData itemData){
    this.itemData = itemData;
    GetComponent<Image>().sprite = itemData.itemIcon;

    //修改物品尺寸
    Vector2 size = new Vector2();
    size.x = itemData.width * ItemGrid.tileSizeWidth;
    size.y = itemData.height * ItemGrid.tileSizeHeight;
    GetComponent<RectTransform>().sizeDelta = size;
}
效果
修复物品放置位置问题
修改ItemGrid
//按格子坐标添加物品
public void PlaceItem(Item item, int posX, int posY){
    itemSlot[posX, posY] = item;
    item.transform.SetParent(transform, false);
    Vector2 positon = new Vector2();
    positon.x = posX * tileSizeWidth + tileSizeWidth * item.itemData.width / 2;
    positon.y = -(posY * tileSizeHeight + tileSizeHeight * item.itemData.height / 2);
    item.transform.localPosition = positon;
}
效果
按物品尺寸占用对应大小的格子
修改ItemGrid
//按格子坐标添加物品
public void PlaceItem(Item item, int posX, int posY)
{
    item.transform.SetParent(transform, false);

    // 按物品尺寸占用对应大小的格子
    for (int ix = 0; ix < item.itemData.width; ix++){
        for (int iy = 0; iy < item.itemData.height; iy++){
            itemSlot[posX + ix, posY + iy] = item;
        }
    }
    item.onGridPositionX = posX;
    item.onGridPositionY = posY;

    Vector2 positon = new Vector2();
    positon.x = posX * tileSizeWidth + tileSizeWidth * item.itemData.width / 2;
    positon.y = -(posY * tileSizeHeight + tileSizeHeight * item.itemData.height / 2);
    item.transform.localPosition = positon;
}

//按格子坐标获取物品
public Item PickUpItem(int x, int y)
{
    Item toReturn = itemSlot[x, y];

	if(toReturn == null) return null;

    CleanGridReference(toReturn);

    return toReturn;
}

//按物品尺寸取消对应大小的格子的占用
void CleanGridReference(Item item){
    for (int ix = 0; ix < item.itemData.width; ix++)
    {
        for (int iy = 0; iy < item.itemData.height; iy++)
        {
            itemSlot[item.onGridPositionX + ix, item.onGridPositionY + iy] = null;
        }
    }
}
运行看是否正常
判断物品是否超出边界范围
修改ItemGrid
//按格子坐标添加物品
public bool PlaceItem(Item item, int posX, int posY)
{
    //判断物品是否超出边界
    if (BoundryCheck(posX, posY, item.itemData.width, item.itemData.height) == false) return false;

    //...

	return true;
}

//判断物品是否超出边界
bool BoundryCheck(int posX, int posY, int width, int height)
{
    if (PositionCheck(posX, posY) == false) return false;

    posX += width - 1;
    posY += height - 1;
    if (PositionCheck(posX, posY) == false) return false;
    return true;
}

//判断格子坐标是否超出
bool PositionCheck(int posX, int posY)
{
    if (posX < 0 || posY < 0) return false;

    if (posX >= gridSizeWidth || posY >= gridSizeHeight) return false;

    return true;
}
修改InventoryController
private void Update()
{
   //...

   if (Input.GetMouseButtonDown(0))
   {
       Vector2Int tileGridPosition = selectedItemGrid.GetTileGridPosition(Input.mousePosition);
       if (selectedItem == null)
       {
           //选中物品
           selectedItem = selectedItemGrid.PickUpItem(tileGridPosition.x, tileGridPosition.y);
       }
       else
       {
           // 移动物品
           PlaceItem(tileGridPosition);
       }
   }
}

//移动物品
void PlaceItem(Vector2Int tileGridPosition){
    bool complete = selectedItemGrid.PlaceItem(selectedItem, tileGridPosition.x, tileGridPosition.y);
    if(complete) selectedItem = null;
}
效果

物品放置重叠,交换物品
修改InventoryController
Item overlapItem;//重叠物品

//移动物品
void PlaceItem(Vector2Int tileGridPosition){
    bool complete = selectedItemGrid.PlaceItem(selectedItem, tileGridPosition.x, tileGridPosition.y, ref overlapItem);
    if(complete) {
        selectedItem = null;

        //如果存在重叠物品
        if(overlapItem != null) {
            selectedItem = overlapItem;
            overlapItem = null;
        }
    }
}
修改ItemGrid
//按格子坐标添加物品
public bool PlaceItem(Item item, int posX, int posY, ref Item overlapItem)
{
    //判断物品是否超出边界
    if (BoundryCheck(posX, posY, item.itemData.width, item.itemData.height) == false) return false;

    //检查指定位置和范围内是否存在重叠物品,有多个重叠物品退出
    if (OverlapCheck(posX, posY, item.itemData.width, item.itemData.height, ref overlapItem) == false) return false;

    if(overlapItem) CleanGridReference(overlapItem);

	//...
}

//检查指定位置和范围内是否存在重叠物品,并overlapItem返回重叠物品,,有多个重叠物品返回false
private bool OverlapCheck(int posX, int posY, int width, int height, ref Item overlapItem)
{
    for (int x = 0; x < width; x++)
    {
        for (int y = 0; y < height; y++)
        {
            // 如果当前位置有物品
            if (itemSlot[posX + x, posY + y] != null)
            {
                // 如果 overlapItem 还未被赋值(第一次找到重叠物品)
                if (overlapItem == null)
                {
                    overlapItem = itemSlot[posX + x, posY + y];
                }
                else
                {
                    // 如果发现范围有多个重叠物品
                    if (overlapItem != itemSlot[posX + x, posY + y]){
                        overlapItem = null;
                        return false;
                    }
                }
            }
        }
    }
    // 如果所有被检查的位置都有相同的重叠物品,则返回 true
    return true;
}
效果

放置加入点偏移量
修改InventoryController放置时加入点偏移量,让放置效果更好
private void Update()
{
    //TODO: 方便测试,动态随机添加物品
    if (Input.GetKeyDown(KeyCode.Q))
    {
        CreateRandomItem();
    }

    //物品跟随鼠标
    if (selectedItem) selectedItem.transform.position = Input.mousePosition;

    if (selectedItemGrid == null) return;

    if (Input.GetMouseButtonDown(0))
    {
        LeftMouseButtonPress();
    }
}

//点击操作
private void LeftMouseButtonPress()
{
    Vector2 position = Input.mousePosition;
    if (selectedItem != null)
    {
        position.x -= (selectedItem.itemData.width - 1) * ItemGrid.tileSizeWidth / 2;
        position.y += (selectedItem.itemData.height - 1) * ItemGrid.tileSizeHeight / 2;
    }

    Vector2Int tileGridPosition = selectedItemGrid.GetTileGridPosition(position);
    if (selectedItem == null)
    {
        //选中物品
        selectedItem = selectedItemGrid.PickUpItem(tileGridPosition.x, tileGridPosition.y);
    }
    else
    {
        // 移动物品
        PlaceItem(tileGridPosition);
    }
}
效果

突出显示我们选中的物品
修改ItemGrid
//按格子坐标转化为UI坐标位置
public Vector2 CalculatePositionOnGrid(Item item, int posX, int posY)
{
    Vector2 position = new Vector2();
    position.x = posX * tileSizeWidth + tileSizeWidth * item.itemData.width / 2;
    position.y = -(posY * tileSizeHeight + tileSizeHeight * item.itemData.height / 2);
    return position;
}

//按格子坐标获取物品
internal Item GetItem(int x, int y)
{
    return itemSlot[x, y];
}
新增InventoryHighlight,控制高亮背景显示
//控制高亮背景显示
public class InventoryHighlight : MonoBehaviour
{
    [SerializeField] RectTransform highlighter;

    // 设置高亮框大小
    public void SetSize(Item targetItem)
    {
        Vector2 size = new Vector2();
        size.x = targetItem.itemData.width * ItemGrid.tileSizeWidth;
        size.y = targetItem.itemData.height * ItemGrid.tileSizeHeight;
        highlighter.sizeDelta = size;
    }

    // 设置高亮框位置
    public void SetPosition(ItemGrid targetGrid, Item targetItem)
    {
        Vector2 pos = targetGrid.CalculatePositionOnGrid(targetItem, targetItem.onGridPositionX, targetItem.onGridPositionY);
        highlighter.localPosition = pos;
    }

    //显示隐藏
    public void Show(bool b){
        highlighter.gameObject.SetActive(b);
    }

    //设置高亮背景父级
    public void SetParent(ItemGrid targetGrid){
        highlighter.SetParent(targetGrid.GetComponent<RectTransform>());
    }

    //设置高亮框位置
    public void SetPosition(ItemGrid targetGrid, Item targetItem, int posX, int posY)
    {
        Vector2 pos = targetGrid.CalculatePositionOnGrid(targetItem, posX, posY);
        highlighter.localPosition = pos;
    }

}
修改InventoryController
InventoryHighlight inventoryHighlight;
Item itemToHighlight;//高亮显示物品

private void Start()
{
    canvas = FindObjectOfType<Canvas>();
    inventoryHighlight = GetComponent<InventoryHighlight>();
}

private void Update()
{
    //TODO: 方便测试,动态随机添加物品
    if (Input.GetKeyDown(KeyCode.Q))
    {
        CreateRandomItem();
    }

    //物品跟随鼠标
    if (selectedItem) selectedItem.transform.position = Input.mousePosition;

    if (selectedItemGrid == null)
    {
        inventoryHighlight.Show(false);
        return;
    }

    if (Input.GetMouseButtonDown(0))
    {
        // 获取当前鼠标位置在网格中的格子坐标,并打印到控制台
        Debug.Log(selectedItemGrid.GetTileGridPosition(Input.mousePosition));

        LeftMouseButtonPress();
    }

    //高亮显示
    HandleHighlight();
}

//点击操作,选中物品
private void LeftMouseButtonPress()
{
    Vector2Int tileGridPosition = GetTileGridPosition();
    if (selectedItem == null)
    {
        //选中物品
        selectedItem = selectedItemGrid.PickUpItem(tileGridPosition.x, tileGridPosition.y);
    }
    else
    {
        // 移动物品
        PlaceItem(tileGridPosition);
    }
}

//鼠标坐标转化为格子坐标
private Vector2Int GetTileGridPosition()
{
    Vector2 position = Input.mousePosition;
    if (selectedItem != null)
    {
        position.x -= (selectedItem.itemData.width - 1) * ItemGrid.tileSizeWidth / 2;
        position.y += (selectedItem.itemData.height - 1) * ItemGrid.tileSizeHeight / 2;
    }
    Vector2Int tileGridPosition = selectedItemGrid.GetTileGridPosition(position);
    return tileGridPosition;
}

//高亮显示
private void HandleHighlight()
{
    Vector2Int positionOnGrid = GetTileGridPosition();
    if (selectedItem == null)
    {
        itemToHighlight = selectedItemGrid.GetItem(positionOnGrid.x, positionOnGrid.y);
        if (itemToHighlight != null)
        {
            inventoryHighlight.Show(true);
            inventoryHighlight.SetSize(itemToHighlight);
            inventoryHighlight.SetParent(selectedItemGrid);
            inventoryHighlight.SetPosition(selectedItemGrid, itemToHighlight);
        }else{
            inventoryHighlight.Show(false);
        }
    }
    else
    {
        inventoryHighlight.Show(selectedItemGrid.BoundryCheck(
                positionOnGrid.x,
                positionOnGrid.y,
                selectedItem.itemData.width,
                selectedItem.itemData.height)
        );//防止显示跨界
        inventoryHighlight.SetSize(selectedItem);
        inventoryHighlight.SetParent(selectedItemGrid);
        inventoryHighlight.SetPosition(selectedItemGrid, selectedItem, positionOnGrid.x, positionOnGrid.y);
    }
}
新增高亮背景
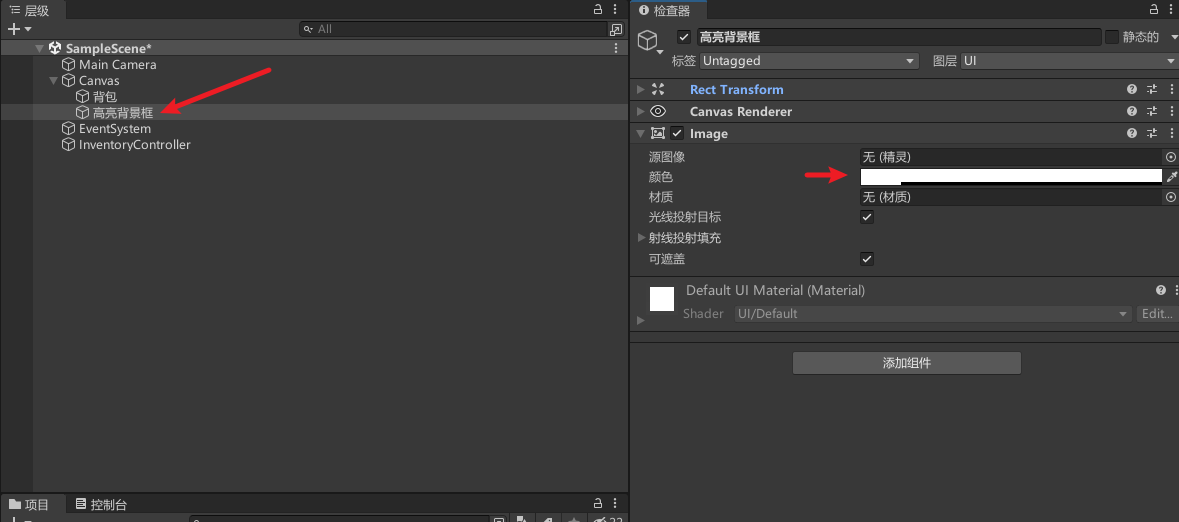
挂载配置
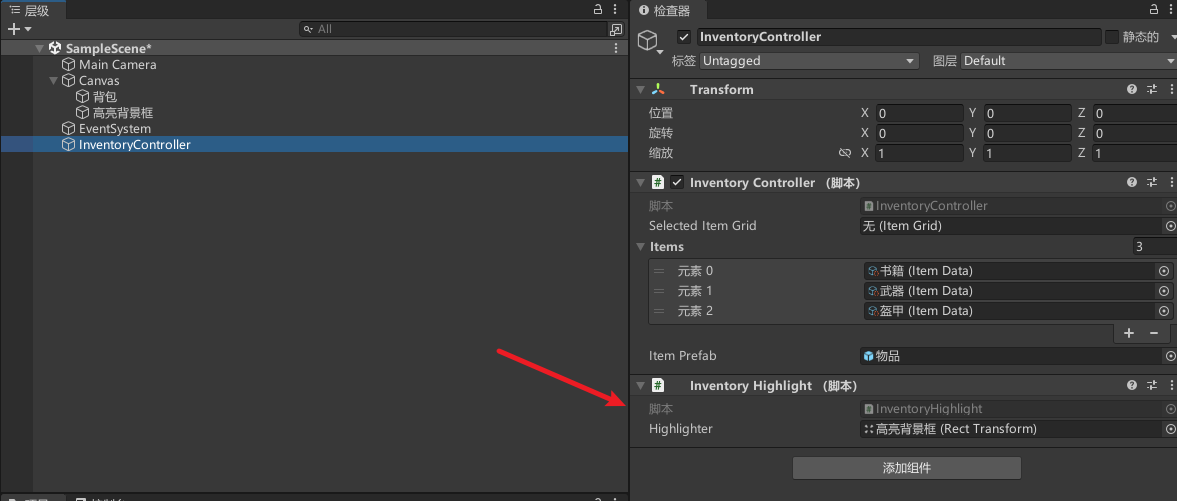
效果
优化
修改InventoryController,节约不必要的计算
Vector2Int oldPosition;

//高亮显示
private void HandleHighlight()
{
    Vector2Int positionOnGrid = GetTileGridPosition();

    //节约没必要的计算
    if(oldPosition == positionOnGrid) return;
    oldPosition = positionOnGrid;
    //...
}
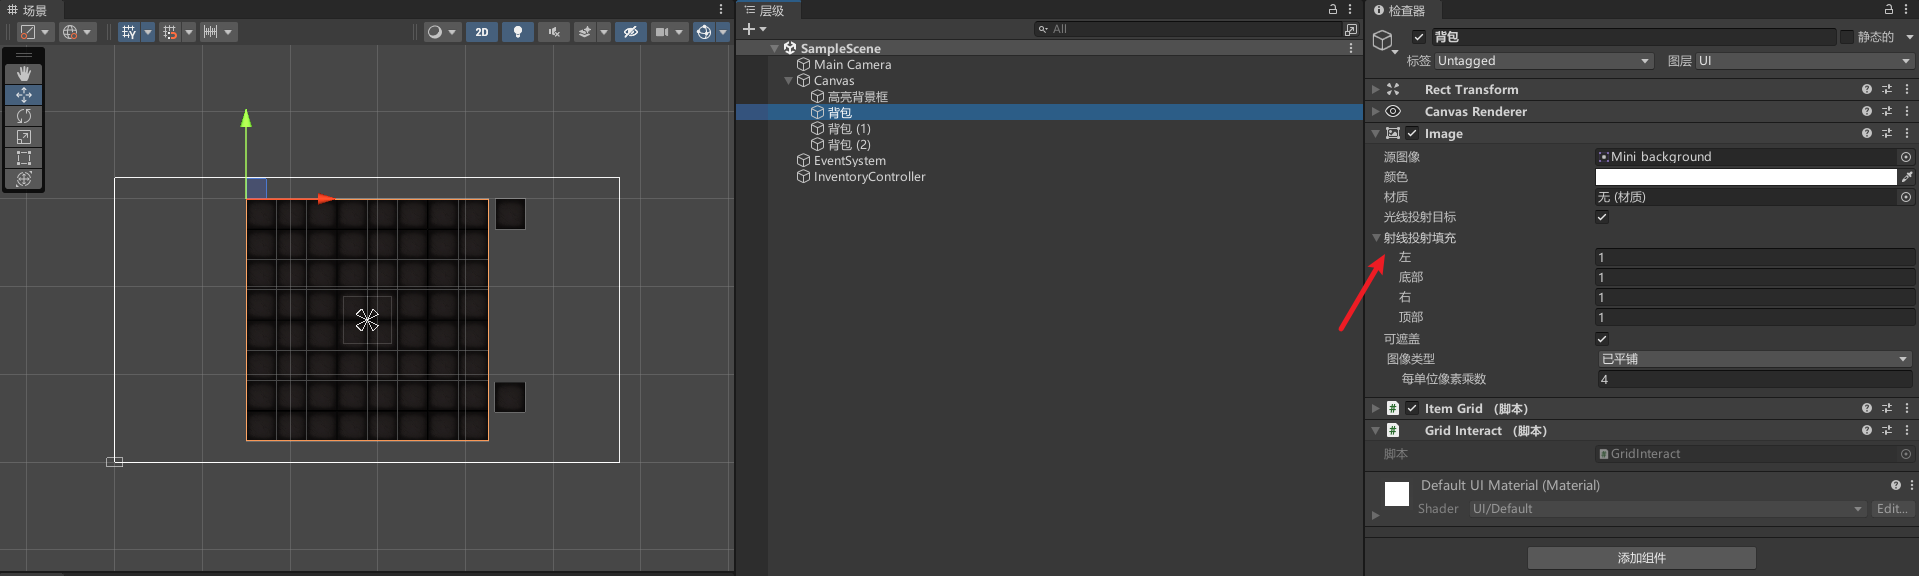
最好为光线投射添加一些填充,Raycast Padding区域
参考:Unity 显示Raycast Padding区域
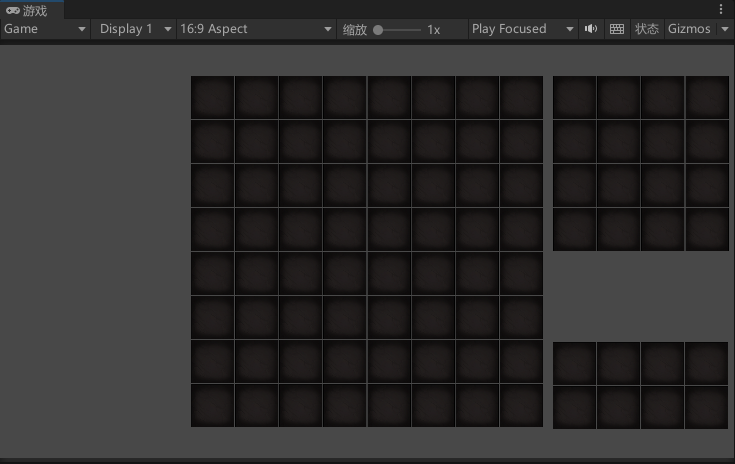
多个背包
只要复制背包,修改尺寸即可

效果
自动入库物品
修改ItemGrid
//按格子坐标添加物品
public bool PlaceItem(Item item, int posX, int posY, ref Item overlapItem)
{
    //判断物品是否超出边界
    if (BoundryCheck(posX, posY, item.itemData.width, item.itemData.height) == false) return false;

    //检查指定位置和范围内是否存在重叠物品,有多个重叠物品退出
    if (OverlapCheck(posX, posY, item.itemData.width, item.itemData.height, ref overlapItem) == false) return false;

    if (overlapItem) CleanGridReference(overlapItem);

    PlaceItem(item, posX, posY);

    return true;
}

//按格子坐标添加物品
public void PlaceItem(Item item, int posX, int posY)
{
    item.transform.SetParent(transform, false);

    // 按物品尺寸占用对应大小的格子
    for (int ix = 0; ix < item.itemData.width; ix++)
    {
        for (int iy = 0; iy < item.itemData.height; iy++)
        {
            itemSlot[posX + ix, posY + iy] = item;
        }
    }
    item.onGridPositionX = posX;
    item.onGridPositionY = posY;

    Vector2 position = CalculatePositionOnGrid(item, posX, posY);

    item.transform.localPosition = position;
}

// 检查指定位置是否有足够的空间来放置物品
private bool CheckAvailableSpace(int posX, int posY, int width, int height)
{
    for (int x = 0; x < width; x++)
    {
        for (int y = 0; y < height; y++)
        {
            if (itemSlot[posX + x, posY + y] != null)
            {
                return false; // 如果当前位置已经有物品,则返回false
            }
        }
    }
    return true; // 如果所有位置都空闲,则返回true
}

// 在网格中找到适合放置物品的位置Data
public Vector2Int? FindSpaceForObject(ItemData itemData)
{
    int height = gridSizeHeight - itemData.height + 1;
    int width = gridSizeWidth - itemData.width + 1;

    for (int y = 0; y < height; y++)
    {
        for (int x = 0; x < width; x++)
        {
            if (CheckAvailableSpace(x, y, itemData.width, itemData.height) == true)
            {
                return new Vector2Int(x, y); // 返回找到的空闲位置
            }
        }
    }
    return null; // 如果没有找到合适的位置,则返回null
}
修改InventoryController
//TODO:方便测试,随机入库物品
if (Input.GetKeyDown(KeyCode.W))
{
    InsertRandomItem();
}

//随机入库物品
private void InsertRandomItem()
{
    if(selectedItemGrid == null) return;

    int index = UnityEngine.Random.Range(0, items.Count);
    // 在网格中找到适合放置物品的位置
    Vector2Int? posOnGrid = selectedItemGrid.FindSpaceForObject(items[index]);
    if (posOnGrid == null) return;

    Item item = Instantiate(itemPrefab).GetComponent<Item>();
    item.transform.SetParent(canvas.transform, false);
    item.Set(items[index]);

    // 将物品放置到网格中的指定位置
    selectedItemGrid.PlaceItem(item, posOnGrid.Value.x, posOnGrid.Value.y);
}
效果

旋转物品
修改Item
public bool rotated = false;

//旋转物品
public void Rotate()
{
    rotated = !rotated;
    transform.rotation = Quaternion.Euler(0, 0, rotated == true ? 90f : 0f);
}
修改InventoryController
//旋转物品
if (Input.GetKeyDown(KeyCode.R))
{
    RotateItem();
}

//旋转物品
void RotateItem(){
    if (selectedItem == null) return;
    selectedItem.Rotate();
}
效果

修改旋转高亮背景和占位也跟着旋转
修改Item
public int WIDTH{
    get{
        if(rotated == false){
            return itemData.width;
        }
        return itemData.height;
    }
}

public int HEIGHT{
    get{
        if(rotated == false){
            return itemData.height;
        }
        return itemData.width;
    }
}
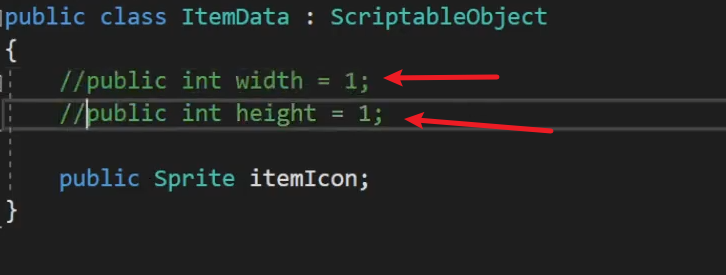
然后修改InventoryController、ItemGrid和InventoryHighlight把
item.itemData.width改为 item.WIDTH
item.itemData.height改为item.HEIGHT
给大家提供一个技巧,可以先修改ItemData宽高注释,这时代码会报错,对应修改位置即可,然后再还原回去
效果
选中拖拽物品排序问题
修改InventoryController,大概就是添加selectedItem.transform.SetAsLastSibling();保证选中对象排最后,及排序最靠前
//点击操作,选中物品
private void LeftMouseButtonPress()
{
    Vector2Int tileGridPosition = GetTileGridPosition();
    if (selectedItem == null)
    {
        //选中物品
        selectedItem = selectedItemGrid.PickUpItem(tileGridPosition.x, tileGridPosition.y);
        selectedItem.transform.SetAsLastSibling();
    }
    else
    {
        // 移动物品
        PlaceItem(tileGridPosition);
    }
}

//移动物品
void PlaceItem(Vector2Int tileGridPosition)
{
    bool complete = selectedItemGrid.PlaceItem(selectedItem, tileGridPosition.x, tileGridPosition.y, ref overlapItem);
    if (complete)
    {
        selectedItem = null;

        //如果存在重叠物品
        if (overlapItem != null)
        {
            selectedItem = overlapItem;
            overlapItem = null;
            selectedItem.transform.SetAsLastSibling();
        }
    }
}

//随机添加物品
private void CreateRandomItem()
{
     if (selectedItem) return;
    Item item = Instantiate(itemPrefab).GetComponent<Item>();
    selectedItem = item;
    selectedItem.transform.SetParent(canvas.transform, false);
    selectedItem.transform.SetAsLastSibling();
    int index = UnityEngine.Random.Range(0, items.Count);
    item.Set(items[index]);
}
效果

最终效果
源码
整理好了我会放上来
完结
赠人玫瑰,手有余香!如果文章内容对你有所帮助,请不要吝啬你的点赞评论和关注,以便我第一时间收到反馈,你的每一次支持都是我不断创作的最大动力。当然如果你发现了文章中存在错误或者有更好的解决方法,也欢迎评论私信告诉我哦!
好了,我是向宇,https://xiangyu.blog.csdn.net
一位在小公司默默奋斗的开发者,出于兴趣爱好,最近开始自学unity,闲暇之余,边学习边记录分享,站在巨人的肩膀上,通过学习前辈们的经验总是会给我很多帮助和启发!php是工作,unity是生活!如果你遇到任何问题,也欢迎你评论私信找我, 虽然有些问题我也不一定会,但是我会查阅各方资料,争取给出最好的建议,希望可以帮助更多想学编程的人,共勉~