在解析Netty源码时,在解析NioEventLoop 创建过程中,有一段这样的代码。
protected MultithreadEventExecutorGroup(int nThreads, Executor executor,
                                        EventExecutorChooserFactory chooserFactory, Object... args) {
    if (nThreads <= 0) {
        throw new IllegalArgumentException(String.format("nThreads: %d (expected: > 0)", nThreads));
    }

    if (executor == null) {
        executor = new ThreadPerTaskExecutor(newDefaultThreadFactory());
    }

    children = new EventExecutor[nThreads];

    for (int i = 0; i < nThreads; i ++) {
        boolean success = false;
        try {
            children[i] = newChild(executor, args);
            success = true;
        } catch (Exception e) {
            // TODO: Think about if this is a good exception type
            throw new IllegalStateException("failed to create a child event loop", e);
        } finally {
            if (!success) {
                for (int j = 0; j < i; j ++) {
                    children[j].shutdownGracefully();
                }

                for (int j = 0; j < i; j ++) {
                    EventExecutor e = children[j];
                    try {
                        while (!e.isTerminated()) {
                            e.awaitTermination(Integer.MAX_VALUE, TimeUnit.SECONDS);
                        }
                    } catch (InterruptedException interrupted) {
                        // Let the caller handle the interruption.
                        Thread.currentThread().interrupt();
                        break;
                    }
                }
            }
        }
    }

    chooser = chooserFactory.newChooser(children);

    final FutureListener<Object> terminationListener = new FutureListener<Object>() {
        @Override
        public void operationComplete(Future<Object> future) throws Exception {
            if (terminatedChildren.incrementAndGet() == children.length) {
                terminationFuture.setSuccess(null);
            }
        }
    };
    for (EventExecutor e: children) {
        e.terminationFuture().addListener(terminationListener);
    }


    Set<EventExecutor> childrenSet = new LinkedHashSet<EventExecutor>(children.length);
    Collections.addAll(childrenSet, children);
    readonlyChildren = Collections.unmodifiableSet(childrenSet);
}
今天就围绕着加粗代码进行分析 。
首先来看children是什么?从前面的代码children = new EventExecutor[nThreads],可以看出children是EventExecutor数组。

而EventExecutor和NioEventLoop是什么关系呢?请看下图 。

接着分析chooser = chooserFactory.newChooser(children);这一行代码,chooserFactory的默认值为DefaultEventExecutorChooserFactory类,在newChooser中使用不同的策略来获取NioEventLoop。
public final class DefaultEventExecutorChooserFactory implements EventExecutorChooserFactory {

    public static final DefaultEventExecutorChooserFactory INSTANCE = new DefaultEventExecutorChooserFactory();

    private DefaultEventExecutorChooserFactory() { }

    @Override
    public EventExecutorChooser newChooser(EventExecutor[] executors) {
    	// 判断数组的长度是否是2的幂次方
        if (isPowerOfTwo(executors.length)) {
        	// 如果是2的倍数,则使用PowerOfTwoEventExecutorChooser
        	// 选择器策略
            return new PowerOfTwoEventExecutorChooser(executors);
        } else {
        	// 如果不是2的幂次方,则使用GenericEventExecutorChooser选择器策略
            return new GenericEventExecutorChooser(executors);
        }
    }

    private static boolean isPowerOfTwo(int val) {
        return (val & -val) == val;
    }

    private static final class PowerOfTwoEventExecutorChooser implements EventExecutorChooser {
        private final AtomicInteger idx = new AtomicInteger();
        private final EventExecutor[] executors;

        PowerOfTwoEventExecutorChooser(EventExecutor[] executors) {
            this.executors = executors;
        }

        @Override
        public EventExecutor next() {
            return executors[idx.getAndIncrement() & executors.length - 1];
        }
    }

    private static final class GenericEventExecutorChooser implements EventExecutorChooser {
        private final AtomicInteger idx = new AtomicInteger();
        private final EventExecutor[] executors;

        GenericEventExecutorChooser(EventExecutor[] executors) {
            this.executors = executors;
        }

        @Override
        public EventExecutor next() {
            return executors[Math.abs(idx.getAndIncrement() % executors.length)];
        }
    }
}
DefaultEventExecutorChooserFactory类中两种策略执行结果一样,都是采用轮询方式,如果数组长度是2的幂次方,则用求&的方式来计算要取数组下标的索引值,如果不是2的幂次方,则用求余的方式来计算数组下标的索引值,为什么要区分一下呢? 因为求 & 的方式比求余的方式效率更高,如果数组长度不是2的倍数,则不能使用求 & 的方式 。其实像HashMap,MpscChunkedArrayQueue源码中都用到了求&的方式,如果阅读过相关源码的小伙伴肯定比较熟悉了,但如果还有小伙伴不明白,我们可以来看一个例子,假如数组的长度为14。

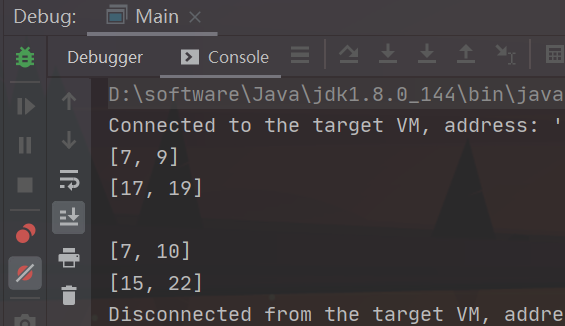
当idx.getAndIncrement()的值为16和18时,和17和19时,计算出索引位置为0,1,则存在数组索引冲突,因此不符合轮询的条件。而在DefaultEventExecutorChooserFactory中使用 PowerOfTwoEventExecutorChooser和GenericEventExecutorChooser两种策略,主要是为了提高轮询效率 。
这段代码先放一边。
final FutureListener<Object> terminationListener = new FutureListener<Object>() {
    @Override
    public void operationComplete(Future<Object> future) throws Exception {
        if (terminatedChildren.incrementAndGet() == children.length) {
            terminationFuture.setSuccess(null);
        }
    }
};
先看后面的
for (EventExecutor e: children) {
e.terminationFuture().addListener(terminationListener);
}
这一段代码 。

因为NioEventLoop继承SingleThreadEventExecutor类,而SingleThreadEventExecutor类中实现了terminationFuture()方法。
private final Promise<?> terminationFuture = new DefaultPromise<Void>(GlobalEventExecutor.INSTANCE);

public Future<?> terminationFuture() {
    return terminationFuture;
}
从上面方法中得知,调用e.terminationFuture().addListener(terminationListener);这一行代码,实际上调用的是DefaultPromise的addListener()方法,进入addListener()方法 。
public Promise<V> addListener(GenericFutureListener<? extends Future<? super V>> listener) {
    checkNotNull(listener, "listener");
	// 使用同步的方式,避免并发
    synchronized (this) {
        addListener0(listener);
    }

    if (isDone()) {
        notifyListeners();
    }

    return this;
}

private void addListener0(GenericFutureListener<? extends Future<? super V>> listener) {
    if (listeners == null) {
        listeners = listener;
    } else if (listeners instanceof DefaultFutureListeners) {
        ((DefaultFutureListeners) listeners).add(listener);
    } else {
        listeners = new DefaultFutureListeners((GenericFutureListener<?>) listeners, listener);
    }
}
光从上面两个方法,看不出什么东西,好像也看不清DefaultPromise的意图。 进入DefaultFutureListeners类中 。
final class DefaultFutureListeners {
    private GenericFutureListener<? extends Future<?>>[] listeners;
    private int size;
    private int progressiveSize; // the number of progressive listeners


    DefaultFutureListeners(
            GenericFutureListener<? extends Future<?>> first, GenericFutureListener<? extends Future<?>> second) {
        listeners = new GenericFutureListener[2];
        listeners[0] = first;
        listeners[1] = second;
        size = 2;
        if (first instanceof GenericProgressiveFutureListener) {
            progressiveSize ++;
        }
        if (second instanceof GenericProgressiveFutureListener) {
            progressiveSize ++;
        }
    }

    public void add(GenericFutureListener<? extends Future<?>> l) {
        GenericFutureListener<? extends Future<?>>[] listeners = this.listeners;
        final int size = this.size;
        if (size == listeners.length) {
            this.listeners = listeners = Arrays.copyOf(listeners, size << 1);
        }
        listeners[size] = l;
        this.size = size + 1;

        if (l instanceof GenericProgressiveFutureListener) {
            progressiveSize ++;
        }
    }

    public void remove(GenericFutureListener<? extends Future<?>> l) {
        final GenericFutureListener<? extends Future<?>>[] listeners = this.listeners;
        int size = this.size;
        for (int i = 0; i < size; i ++) {
            if (listeners[i] == l) {
                int listenersToMove = size - i - 1;
                if (listenersToMove > 0) {
                    System.arraycopy(listeners, i + 1, listeners, i, listenersToMove);
                }
                listeners[-- size] = null;
                this.size = size;

                if (l instanceof GenericProgressiveFutureListener) {
                    progressiveSize --;
                }
                return;
            }
        }
    }

    public GenericFutureListener<? extends Future<?>>[] listeners() {
        return listeners;
    }

    public int size() {
        return size;
    }

    public int progressiveSize() {
        return progressiveSize;
    }
}
从DefaultFutureListeners代码中可以看出DefaultFutureListeners和GenericFutureListener的关系,在DefaultFutureListeners实例中有一个GenericFutureListener数组。从DefaultFutureListeners的构造方法中可以看出, 默认初始化GenericFutureListener数组长度为2,因此再来理解addListener0()方法的原理就很简单了。
private void addListener0(GenericFutureListener<? extends Future<? super V>> listener) {
    if (listeners == null) {
        listeners = listener;
    } else if (listeners instanceof DefaultFutureListeners) {
        ((DefaultFutureListeners) listeners).add(listener);
    } else {
        listeners = new DefaultFutureListeners((GenericFutureListener<?>) listeners, listener);
    }
}
如果向DefaultPromise添加一个listener,则用DefaultPromise的listener属性存储即可,如果向DefaultPromise添加两个listener,则用DefaultFutureListeners对象存储,但DefaultFutureListeners中listeners数组初始化长度为2,刚好存储添加的两个listener,如果向DefaultPromise添加的listener超过两个,则需要扩容DefaultFutureListeners的listener数组来存储了,扩容方式如上加粗代码,listener数组扩容为原来两倍,Netty这样做的原因,一方面是提升性能,另一方面为了节省存储空间吧。
既然listener已经存储好了,什么时候调用operationComplete()方法呢?接下来看DefaultPromise的setSuccess()和setFailure()方法。

当然,我们挑选setSuccess()看即可。 setFailure()方法和setSuccess()方法原理一样。
private boolean setSuccess0(V result) {
    return setValue0(result == null ? SUCCESS : result);
}

private boolean setValue0(Object objResult) {
    if (RESULT_UPDATER.compareAndSet(this, null, objResult) ||
        RESULT_UPDATER.compareAndSet(this, UNCANCELLABLE, objResult)) {
        if (checkNotifyWaiters()) {
            notifyListeners();
        }
        return true;
    }
    return false;
}
看源码多的小伙伴肯定一眼就知道这里又用到了AQS。
private static final AtomicReferenceFieldUpdater<DefaultPromise, Object> RESULT_UPDATER =
        AtomicReferenceFieldUpdater.newUpdater(DefaultPromise.class, Object.class, "result");
private volatile Object result;
设置result的值时,如果其值当前为为null或UNCANCELLABLE,是可以被设置成功的,默认情况下,result值为null。那什么情况下会为UNCANCELLABLE呢? 请看DefaultPromise中的setUncancellable()方法 。
public boolean setUncancellable() {
    if (RESULT_UPDATER.compareAndSet(this, null, UNCANCELLABLE)) {
        return true;
    }
    Object result = this.result;
    return !isDone0(result) || !isCancelled0(result);
}
将result的值设置为UNCANCELLABLE后有什么影响呢? 请看cancel()方法 。
public boolean cancel(boolean mayInterruptIfRunning) {
    if (RESULT_UPDATER.get(this) == null &&
            RESULT_UPDATER.compareAndSet(this, null, new CauseHolder(new CancellationException()))) {
        if (checkNotifyWaiters()) {
            notifyListeners();
        }
        return true;
    }
    return false;
}
当result的值必须为空时,cancel()方法才能调用成功,接着调用notifyListeners()方法,最终调用才Listener的operationComplete()方法 。如果 result的值被设置为UNCANCELLABLE后,cancel()方法将不会调用成功。 言归正传,继续看setValue0()的checkNotifyWaiters()方法 。
private synchronized boolean checkNotifyWaiters() {
    if (waiters > 0) {
        notifyAll();
    }
    return listeners != null;
}
如果waiters大于0,则调用notifyAll()方法。 notifyAll()方法是Object类中的方法,就是唤醒所有等待线程的意思,接下来看waiters值何时修改的呢? 请看下图。

在DefaultPromise类中有两个方法,incWaiters()和decWaiters()方法,这两个方法对waiters值做了修改,何时调用waiters的值呢?能举个例子不? 当 ChannelFuture cf = bootstrap.bind(9000).sync(); 的sync()方法调用时。

也就是DefaultPromise的sync()方法被调用时。 waiters的值会++,同时会触发当前线程进入wait()。
public Promise<V> sync() throws InterruptedException {
    await();
    rethrowIfFailed();
    return this;
}


public Promise<V> await() throws InterruptedException {
    if (isDone()) {
        return this;
    }

    if (Thread.interrupted()) {
        throw new InterruptedException(toString());
    }

    checkDeadLock();

    synchronized (this) {
        while (!isDone()) {
            incWaiters();
            try {
                wait();
            } finally {
                decWaiters();
            }
        }
    }
    return this;
}
因此在 setValue0() 方法的notifyListeners调用之前,先要唤醒正在等待的线程,接着调用notifyListeners()方法 。接下来进入notifyListeners()方法 。
private void notifyListeners() {
    EventExecutor executor = executor();
    if (executor.inEventLoop()) {
        final InternalThreadLocalMap threadLocals = InternalThreadLocalMap.get();
        final int stackDepth = threadLocals.futureListenerStackDepth();
        if (stackDepth < MAX_LISTENER_STACK_DEPTH) {
            threadLocals.setFutureListenerStackDepth(stackDepth + 1);
            try {
                notifyListenersNow();
            } finally {
                threadLocals.setFutureListenerStackDepth(stackDepth);
            }
            return;
        }
    }

    safeExecute(executor, new Runnable() {
        @Override
        public void run() {
            notifyListenersNow();
        }
    });
}
大家可能会想,上述这段代码什么意思?先来看executor()方法。
protected EventExecutor executor() {
    return executor;
}
executor的值为GlobalEventExecutor。

因此inEventLoop()方法实际上是调用GlobalEventExecutor的inEventLoop()方法 。
public boolean inEventLoop() {
    return inEventLoop(Thread.currentThread());
}

public boolean inEventLoop(Thread thread) {
    return thread == this.thread;
}
判断的依据就是thread是否是当前线程,那GlobalEventExecutor中的thread又在什么时候初始化的呢? 看DefaultPromise的safeExecute()方法 。
final BlockingQueue<Runnable> taskQueue = new LinkedBlockingQueue<Runnable>();

private final AtomicBoolean started = new AtomicBoolean();

private static void safeExecute(EventExecutor executor, Runnable task) {
    try {
        executor.execute(task);
    } catch (Throwable t) {
        rejectedExecutionLogger.error("Failed to submit a listener notification task. Event loop shut down?", t);
    }
}
因为知道executor为GlobalEventExecutor,因此这里的execute方法实际为GlobalEventExecutor中的方法。
public void execute(Runnable task) {
    if (task == null) {
        throw new NullPointerException("task");
    }
    addTask(task);
    if (!inEventLoop()) {
        startThread();
    }
}

private void addTask(Runnable task) {
    if (task == null) {
        throw new NullPointerException("task");
    }
    taskQueue.add(task);
}


private void startThread() {
	// 保证同一时间,只有一个线程在执行消费任务操作
    if (started.compareAndSet(false, true)) {
        final Thread t = threadFactory.newThread(taskRunner);
        // Set to null to ensure we not create classloader leaks by holds a strong reference to the inherited
        // classloader.
        // See:
        // - https://github.com/netty/netty/issues/7290
        // - https://bugs.openjdk.java.net/browse/JDK-7008595
        AccessController.doPrivileged(new PrivilegedAction<Void>() {
            @Override
            public Void run() {
                t.setContextClassLoader(null);
                return null;
            }
        });
        // Set the thread before starting it as otherwise inEventLoop() may return false and so produce
        // an assert error.
        // See https://github.com/netty/netty/issues/4357
        thread = t;
        t.start();
    }
}
大家发现没有,调用GlobalEventExecutor的execute方法,并没有直接执行任务的run()方法,而是将任务添加到taskQueue队列中,接着调用threadFactory的newThread()方法,创建一个新线程,新线程中执行TaskRunner任务,在TaskRunner的run()方法中,从队列中取出任务,并执行其run()方法 ,看 TaskRunner的源码 。
final class TaskRunner implements Runnable {
    @Override
    public void run() {
        for (;;) {
            Runnable task = takeTask();
            if (task != null) {
                try {
                	// 执行任务的run()方法
                    task.run();
                } catch (Throwable t) {
                    logger.warn("Unexpected exception from the global event executor: ", t);
                }

                if (task != quietPeriodTask) {
                    continue;
                }
            }

            Queue<ScheduledFutureTask<?>> scheduledTaskQueue = GlobalEventExecutor.this.scheduledTaskQueue;
            // Terminate if there is no task in the queue (except the noop task).
            if (taskQueue.isEmpty() && (scheduledTaskQueue == null || scheduledTaskQueue.size() == 1)) {
                // Mark the current thread as stopped.
                // The following CAS must always success and must be uncontended,
                // because only one thread should be running at the same time.
                boolean stopped = started.compareAndSet(true, false);
                assert stopped;

                // Check if there are pending entries added by execute() or schedule*() while we do CAS above.
                if (taskQueue.isEmpty() && (scheduledTaskQueue == null || scheduledTaskQueue.size() == 1)) {
                    // A) No new task was added and thus there's nothing to handle
                    //    -> safe to terminate because there's nothing left to do
                    // B) A new thread started and handled all the new tasks.
                    //    -> safe to terminate the new thread will take care the rest
                    break;
                }

                // There are pending tasks added again.
                if (!started.compareAndSet(false, true)) {
                    // startThread() started a new thread and set 'started' to true.
                    // -> terminate this thread so that the new thread reads from taskQueue exclusively.
                    break;
                }

                // New tasks were added, but this worker was faster to set 'started' to true.
                // i.e. a new worker thread was not started by startThread().
                // -> keep this thread alive to handle the newly added entries.
            }
        }
    }
}
上面这段代码还是令人费解的,先来看takeTask()方法 。
public Runnable takeTask() {
    BlockingQueue<Runnable> taskQueue = this.taskQueue;
    for (;;) {
        ScheduledFutureTask<?> scheduledTask = peekScheduledTask();
        if (scheduledTask == null) {
            Runnable task = null;
            try {
                task = taskQueue.take();
            } catch (InterruptedException e) {
                // Ignore
            }
            return task;
        } else {
        	// 第一种情况,如果ScheduledFutureTask创建到代码执行到这一行为止,时间没有超过deadlineNanos,
        	// 则delayNanos = deadlineNanos - (currentTime - createTime)
        	// 第二种情况,如果ScheduledFutureTask是被移除了,并重新加入到scheduledTaskQueue中
        	// 则 delayNanos = deadlineNanos - (currentTime - 加入到scheduledTaskQueue中的时间)
            long delayNanos = scheduledTask.delayNanos();
            Runnable task;
            if (delayNanos > 0) {
                try {
                    task = taskQueue.poll(delayNanos, TimeUnit.NANOSECONDS);
                } catch (InterruptedException e) {
                    // Waken up.
                    return null;
                }
            } else {
                task = taskQueue.poll();
            }

            if (task == null) {
                fetchFromScheduledTaskQueue();
                task = taskQueue.poll();
            }

            if (task != null) {
                return task;
            }
        }
    }
}


final ScheduledFutureTask<?> peekScheduledTask() {
    Queue<ScheduledFutureTask<?>> scheduledTaskQueue = this.scheduledTaskQueue;
    if (scheduledTaskQueue == null) {
        return null;
    }
    return scheduledTaskQueue.peek();
}
上面 long delayNanos = scheduledTask.delayNanos();这一行代码,先看delayNanos()的计算规则。
ScheduledFutureTask{
    public long delayNanos() {
        return Math.max(0, deadlineNanos() - nanoTime());
    }

    public long deadlineNanos() {
        return deadlineNanos;
    }

	// ScheduledFutureTask实例创建时间
    private static final long START_TIME = System.nanoTime();

	// 当前时间减去创建时间
    public static long nanoTime() {
        return System.nanoTime() - START_TIME;
    }
}
那scheduledTask的值是何时初始化的呢?


从上图中得知, deadlineNanos的值来源于ScheduledFutureTask的deadlineNanos()方法,且在GlobalEventExecutor中传入的值为1秒。 而deadlineNanos的值与ScheduledFutureTask START_TIME静态变量初始化,以及ScheduledFutureTask实例化时间有关。 他们之间的关系为。

假如SCHEDULE_QUIET_PERIOD_INTERVAL 的值为1秒,如果ScheduledFutureTask的START_TIME变量初始化到ScheduledFutureTask实例化花了0.5秒 ,则deadlineNanos的值为1.5秒。

其实 netty 这么做原因就是要保证 delayNanos 有充足的1秒时间,排除掉ScheduledFutureTask初始化的时间,可能是一种更加精准的考虑吧。 在addTask() 方法中将任务加入到taskQueue中。

根据上图第一种情况当执行到long delayNanos = scheduledTask.delayNanos(); 这一行代码的时间小于deadlineNanos时,和第二种情况,当执行到long delayNanos = scheduledTask.delayNanos(); 大于deadlineNanos时。

对应执行代码行如上图所示 。 Netty这么做的目的可能是。

addTask()方法,将任务添加到taskQueue队列中,和takeTask()方法从队列中获取任务,两者之间是异步的。 可能会存在taskQueue.poll()方法比taskQueue.add()方法先执行,因此这里设置一个deadlineNanos参数,来等待任务吧。
接下来看fetchFromScheduledTaskQueue()这个方法 。
public void fetchFromScheduledTaskQueue() {
    long nanoTime = AbstractScheduledEventExecutor.nanoTime();
    Runnable scheduledTask = pollScheduledTask(nanoTime);
    while (scheduledTask != null) {
        taskQueue.add(scheduledTask);
        scheduledTask = pollScheduledTask(nanoTime);
    }
}

protected final Runnable pollScheduledTask(long nanoTime) {
    assert inEventLoop();
    Queue<ScheduledFutureTask<?>> scheduledTaskQueue = this.scheduledTaskQueue;
    ScheduledFutureTask<?> scheduledTask = scheduledTaskQueue == null ? null : scheduledTaskQueue.peek();
    if (scheduledTask == null) {
        return null;
    }
	// 如果超过了deadlineNanos时间还没有从taskQueue队列中获取任务
	// 则将scheduledTask任务添加到taskQueue中
    if (scheduledTask.deadlineNanos() <= nanoTime) {
        scheduledTaskQueue.remove();
        return scheduledTask;
    }
    return null;
}
如果taskQueue中已经没有元素,则将scheduledTaskQueue队列中的元素添加到taskQueue队列中。

上述 pollScheduledTask()方法有点像优先级队列,因为peek()方法取队头元素,但元素并没有弹出队列,如果时间还未达到,是不能从优先级队列中取出元素的,因此在pollScheduledTask()方法中,加了一行scheduledTask.deadlineNanos() <= nanoTime作为条件,如果时间还未达到,返回的是空,只有时间达到了,才能从scheduledTaskQueue中取到元素。
在fetchFromScheduledTaskQueue()方法中写了一个while()循环,只要scheduledTaskQueue中有元素满足条件,则都加到taskQueue队列中,请看下面例子。

自己写了一个MyGlobalEventExecutor继承GlobalEventExecutor,当然在netty源码中GlobalEventExecutor是final类型的,为了方便测试,我修改了netty源码相关内容,重新编译了netty源码,因此在我的代码中是可以实现的。 在GlobalEventExecutor的构造函数中, 向scheduledTaskQueue中添加了一个quietPeriodTaskNew任务。在GlobalEventExecutor构造函数中也添加了一个quietPeriodTask任务。因此scheduledTaskQueue中已经有两个ScheduledFutureTask任务。

测试例子
public static void main(String[] args) throws Exception {
    GlobalEventExecutor INSTANCE = new MyGlobalEventExecutor();
    Promise<String> promise = new DefaultPromise<>(INSTANCE);
    promise.addListener(new GenericFutureListener<Future<? super String>>() {
        @Override
        public void operationComplete(Future<? super String> future) throws Exception {
            Object s = future.get();
            System.out.println(new Date() + "listner1---promise的future返回值:" + s);
        }
    });
    promise.setSuccess(Thread.currentThread().getName() + " promise set ");
}
打断点查看循环情况

我觉得fetchFromScheduledTaskQueue() 方法的while()循环应该是考虑到这种情况吧,如果获取到正常任务,则调用其run()方法,最终调用的就是notifyListenersNow()方法。

关于notifyListenersNow()方法的实现逻辑,后面来分析。先分析,如果取到的任务是ScheduledFutureTask,其run()方法的实现逻辑。
public void run() {
    assert executor().inEventLoop();
    try {
        if (periodNanos == 0) {
            if (setUncancellableInternal()) {
                V result = task.call();
                setSuccessInternal(result);
            }
        } else {
            // check if is done as it may was cancelled
            if (!isCancelled()) {
                task.call();
                if (!executor().isShutdown()) {
                    long p = periodNanos;
                    if (p > 0) {
                        deadlineNanos += p;
                    } else {
                        deadlineNanos = nanoTime() - p;
                    }
                    if (!isCancelled()) {
                        // scheduledTaskQueue can never be null as we lazy init it before submit the task!
                        Queue<ScheduledFutureTask<?>> scheduledTaskQueue =
                                ((AbstractScheduledEventExecutor) executor()).scheduledTaskQueue;
                        assert scheduledTaskQueue != null;
                        scheduledTaskQueue.add(this);
                    }
                }
            }
        }
    } catch (Throwable cause) {
        setFailureInternal(cause);
    }
}
正常情况下,executor()并没有被关闭也没有被取消,因此isCancelled() && executor().isShutdown() 都为false,则只和periodNanos相关了,如果periodNanos = 0 ,则ScheduledFutureTask将从scheduledTaskQueue中移除掉,如果 periodNanos 不等于0 , 则重新计算 deadlineNanos 的值,并将原ScheduledFutureTask从taskQueue中移动到scheduledTaskQueue中。 当然deadlineNanos的计算也分两种情况,
第一种情况,当periodNanos 大于0 ,假设为5秒,ScheduledFutureTask 初始化开始时间为 18:00:00,初始化耗时为1秒,ScheduledFutureTask对象创建时间为18:00:01秒,delay 时间为1秒(也就是GlobalEventExecutor 的 SCHEDULE_QUIET_PERIOD_INTERVAL参数默认为1 秒),则deadlineNanos = 2 秒,如果periodNanos为5秒,则第一次调用ScheduledFutureTask的run方法后,deadlineNanos = 7 秒,如果在18:00:07秒之前调用GlobalEventExecutor的takeTask()方法 。 则会走下图中的1 的情况,如果在18:00:07秒之后调用takeTask()方法,则会走下图中2的情况。
takeTask方法图

第二种情况,当periodNanos 小于0 ,假设为-5秒,ScheduledFutureTask 初始化开始时间为 18:00:00,初始化耗时为1秒,ScheduledFutureTask对象创建时间为18:00:01秒,delay 时间为1秒(也就是GlobalEventExecutor 的 SCHEDULE_QUIET_PERIOD_INTERVAL参数默认为1 秒),则deadlineNanos = 2 秒,如果执行到下图中的

deadlineNanos = nanoTime() - p;这一行代码的时间为18:00:08秒,则deadlineNanos = 8 + 5 = 13,也就是说在18:00:13秒之前,会执行takeTask方法图的第一种情况,否则会执行takeTask方法图第二种情况。 这可能是代码上的含义,从字面意义上来说呢?periodNanos不为0的情况,如果当前线程从队列中取不到任务,当前线程则会退出循环,当其他线程向taskQueue中添加任务,则又会调用TaskRunner的run()方法,此时又会调用taskTask()方法从taskQueue中取元素,如果从队列中获取元素的时间小于deadlineNanos,则会调用调用taskTask()方法的这一行代码task = taskQueue.poll(delayNanos, TimeUnit.NANOSECONDS); 方法来获取队列中的任务,如果大于deadlineNanos,则会调用taskTask()方法的这一行代码task = taskQueue.poll();来获取队列中的任务 。
第三种情况,如果periodNanos等于0时,会出现什么情况呢?

为什么必须将父类中构造函数GlobalEventExecutor添加的scheduledTaskQueue().add(quietPeriodTask);这一行代码移除掉呢?如果不移除掉。

当scheduledTaskQueue中只有我们手动添加的quietPeriodTaskNew时,而quietPeriodTaskNew的periodNanos为0。

为什么呢? 因为在scheduledTask的run()方法中,走了下面这一行代码。

并没有将ScheduledFutureTask添加到scheduledTaskQueue中,则peekScheduledTask()方法中获取到的scheduledTaskQueue队列中的任务为空,因此进入一直等待。 要测试效果也很容易。

分析完safeExecute()方法后,再来分析notifyListeners()方法 。

在notifyListeners()方法中,上面加红框代码,是什么意思呢? 依然还是来看一个例子。

在GenericFutureListener的operationComplete()方法中,又加入新的Listener,此时新加入的Listener的operationComplete方法依然被调用。

InternalThreadLocalMap在之前的博客 Netty源码性能分析 - ThreadLocal PK FastThreadLocal 分析过,也可以直接将其当成ThreadLocal来看,但有一点还是在疑问? 想了很久没有想明白 。
public class TestPromise2 {

    public static void main(String[] args) throws Exception {


        NioEventLoopGroup loopGroup = new NioEventLoopGroup();
        EventLoop next = loopGroup.next();
        Promise<String> promise = (Promise) next.terminationFuture();

        promise.addListener(new GenericFutureListener<Future<? super String>>() {
            @Override
            public void operationComplete(Future<? super String> future) throws Exception {
                Object s = future.get();
                System.out.println(new Date() + "listner1---promise的future返回值:" + s);

                ((DefaultPromise) future).addListener(new GenericFutureListener<Future<? super String>>() {
                    @Override
                    public void operationComplete(Future<? super String> future) throws Exception {
                        Object s = future.get();

                        final InternalThreadLocalMap threadLocals = InternalThreadLocalMap.get();
                        final int stackDepth = threadLocals.futureListenerStackDepth();
                        System.out.println(new Date() + "listner1 inner ---promise的future返回值:" + s + ", stackDepth = " + stackDepth);


                        ((DefaultPromise) future).addListener(new GenericFutureListener<Future<? super String>>() {
                            @Override
                            public void operationComplete(Future<? super String> future) throws Exception {
                                final InternalThreadLocalMap threadLocals = InternalThreadLocalMap.get();
                                final int stackDepth = threadLocals.futureListenerStackDepth();

                                Object s = future.get();
                                System.out.println(new Date() + "listner1 inner  inner ---promise的future返回值:" + s + ", stackDepth ="+stackDepth);
                            }
                        });


                    }
                });
            }
        });


        promise.setSuccess("promise set ");//设置返回结果 并且通知所有Listeners执行回调方法operationComplete方法
    }
}

从上例子中,我嵌套了两层,但是threadLocals.futureListenerStackDepth()的值始终是0,并没有随着嵌套的层数增加,而增加。为什么源码中stackDepth < MAX_LISTENER_STACK_DEPTH) 要做这个限制呢?

为什么打印两次stackDepth 的值都是0,感兴趣的小伙伴可以去打断点试试 。 还是解释一下吧。


因此在operationComplete()方法的内部调用addListener()并没有我要想像中的,继续调用notifyListenersNow()中的notifyListeners0()方法,而是发现notifyingListeners为true,则直接返回了。 相应的futureListenerStackDepth值也被设置为原来的值, 所以嵌套调用的逻辑就是


我弄了很多的图片,主要想通过打断点的过程来分析notifyListenersNow()方法的执行过程,notifyListenersNow()这个方法看上去简单,但包含的情况还是很多的,因此有兴趣的小伙伴,可以自己写例子去分析为好 。 notifyListener0()方法的内部就是直接调用回调方法operationComplete()了。
private void notifyListeners0(DefaultFutureListeners listeners) {
    GenericFutureListener<?>[] a = listeners.listeners();
    int size = listeners.size();
    for (int i = 0; i < size; i ++) {
        notifyListener0(this, a[i]);
    }
}

private static void notifyListener0(Future future, GenericFutureListener l) {
    try {
        l.operationComplete(future);
    } catch (Throwable t) {
        if (logger.isWarnEnabled()) {
            logger.warn("An exception was thrown by " + l.getClass().getName() + ".operationComplete()", t);
        }
    }
}
总结
关于DefaultPromise 源码解析又告一段落了,在分析DefaultPromise 源码过程中,心情也是一波三折, 有些东西,感觉自己懂了,但是一测试,发现又不是那么回事,可能还是测试用例不全面,随着Netty源码的分析深入,我相信这些问题都会得到解决,这篇博客中也有一些疑问没有解决,可能在后面再遇到类似问题,再来补全博客了吧。 下一篇博客见。
源码地址:
https://github.com/quyixiao/test_netty.git
https://gitee.com/quyixiao/netty-netty-4.1.38.Final.git

