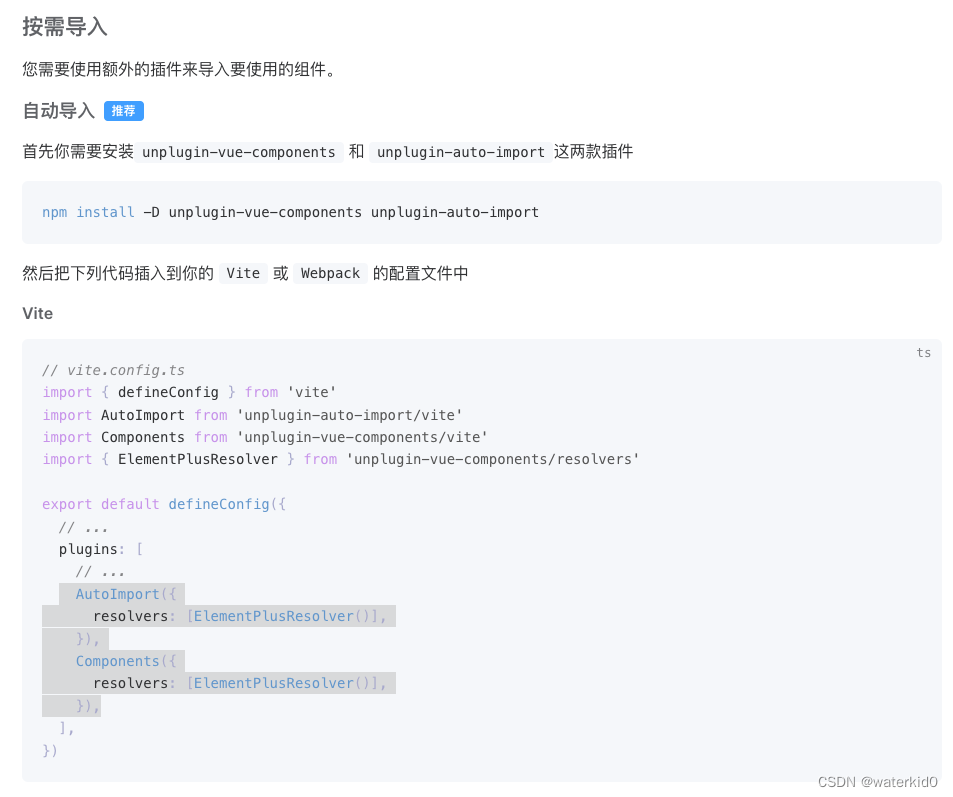
elementplus自动按需引入
elementplus主题色定制
安装sass
npm install sass -D
要替换的主题色内容:
/* 只需要重写你需要的即可 */
@forward 'element-plus/theme-chalk/src/common/var.scss' with (
  $colors: (
    'primary': (
      // 主色
      'base': #27ba9b,
    ),
    'success': (
      // 成功色
      'base': #1dc779,
    ),
    'warning': (
      // 警告色
      'base': #ffb302,
    ),
    'danger': (
      // 危险色
      'base': #e26237,
    ),
    'error': (
      // 错误色
      'base': #cf4444,
    ),
  )
);
vite配置:
-
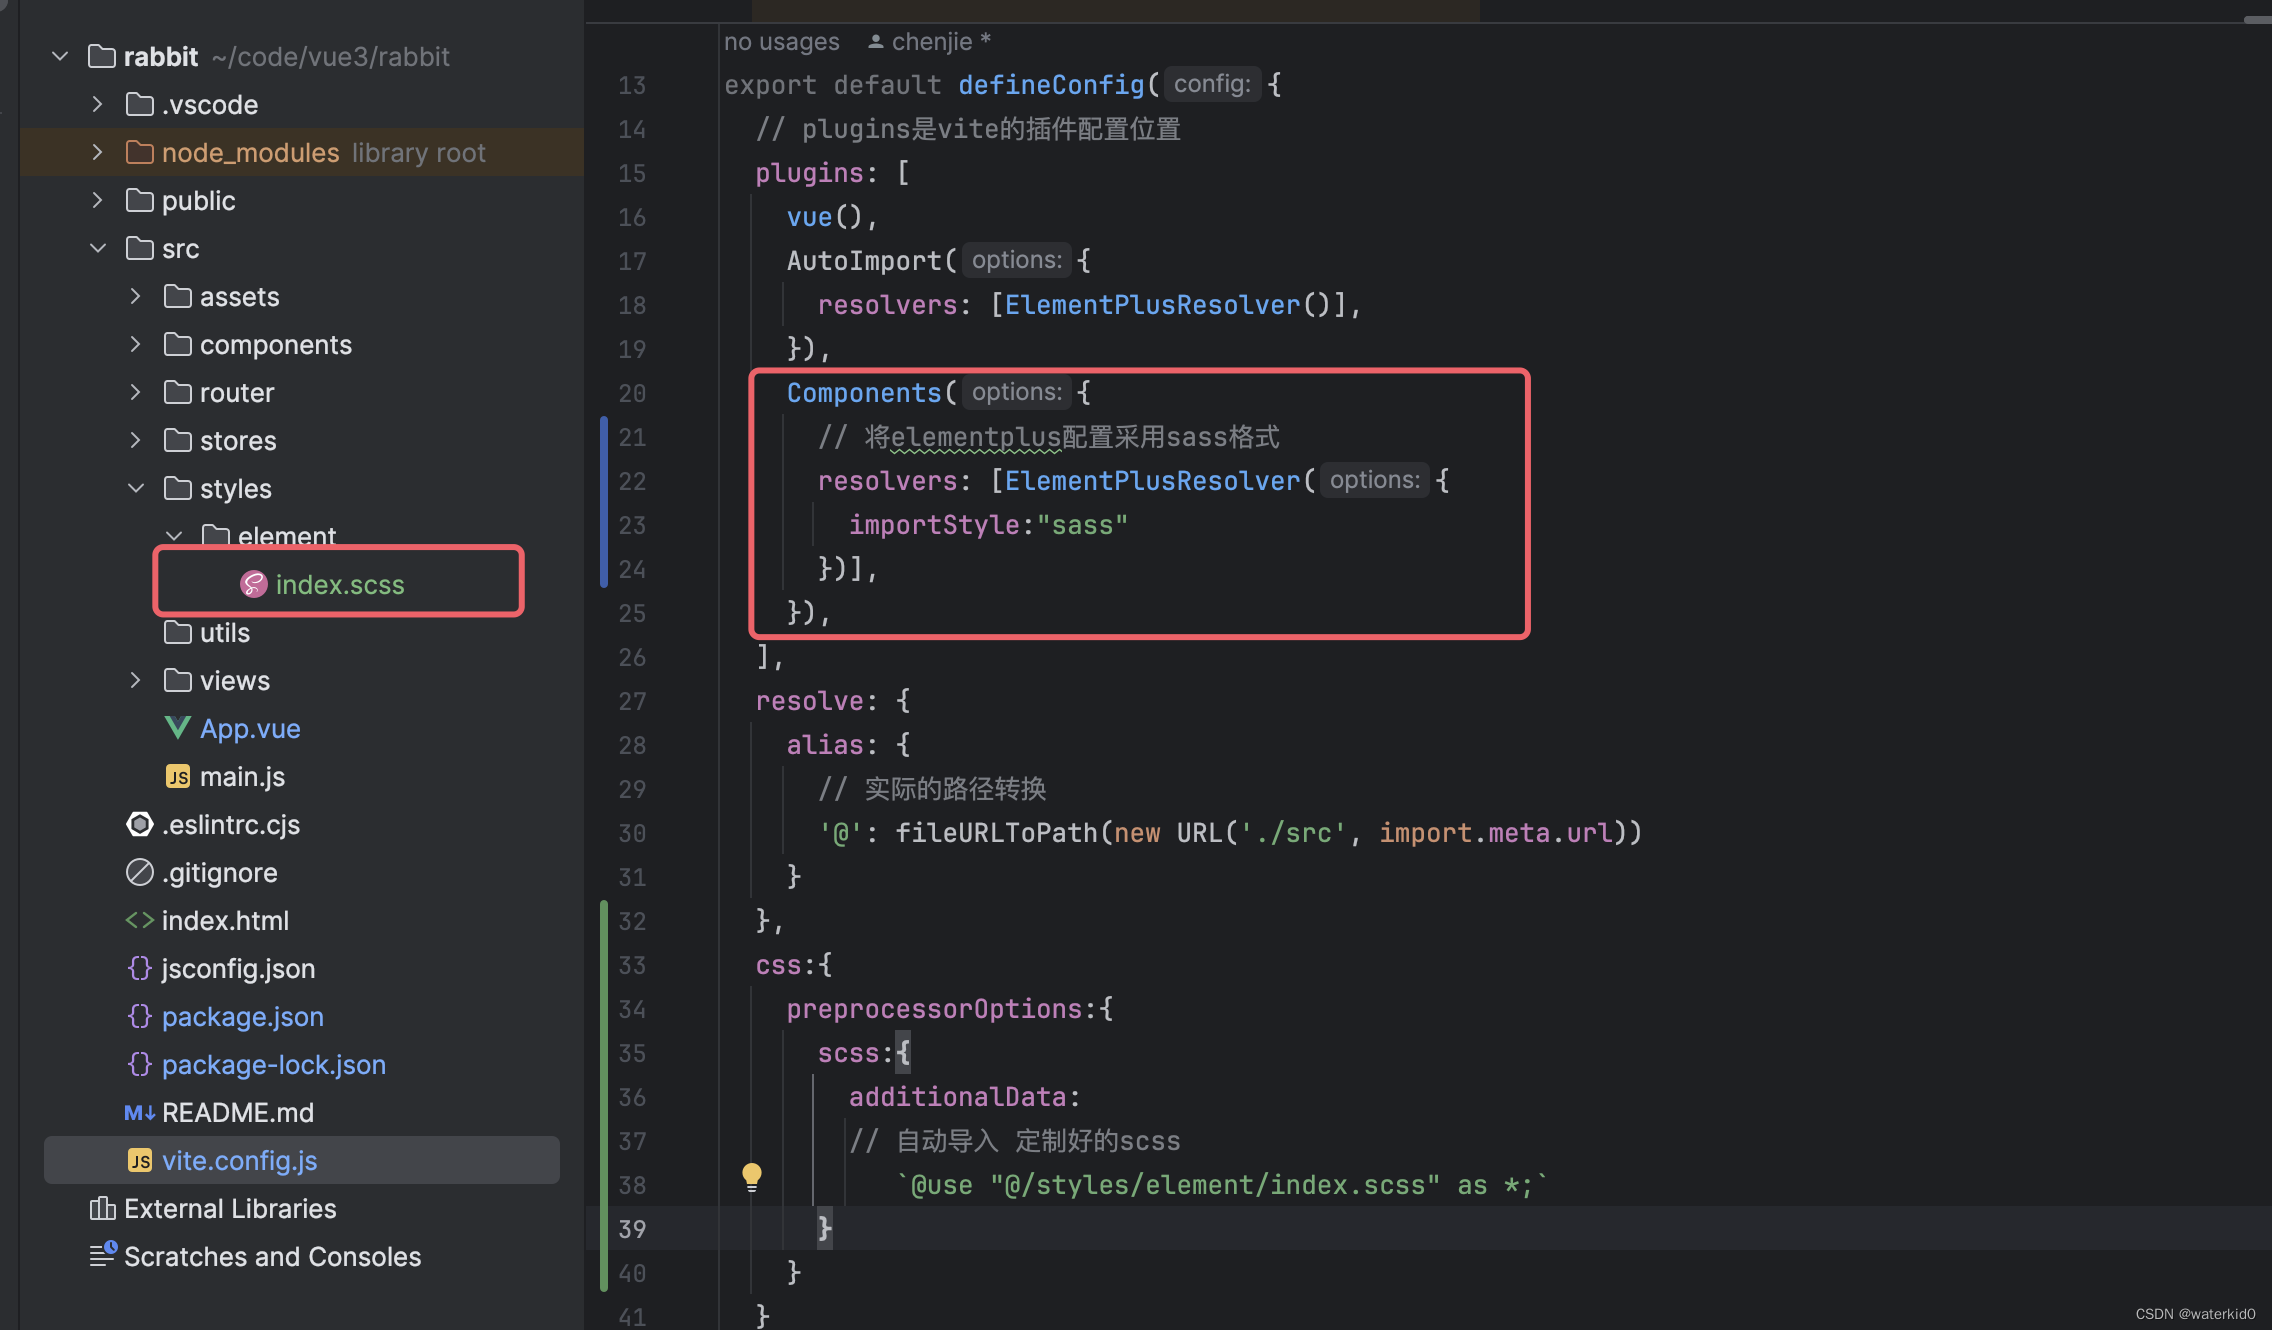
告知elementplus引入的文件是 sass文件
-
自动导入这个sass文件
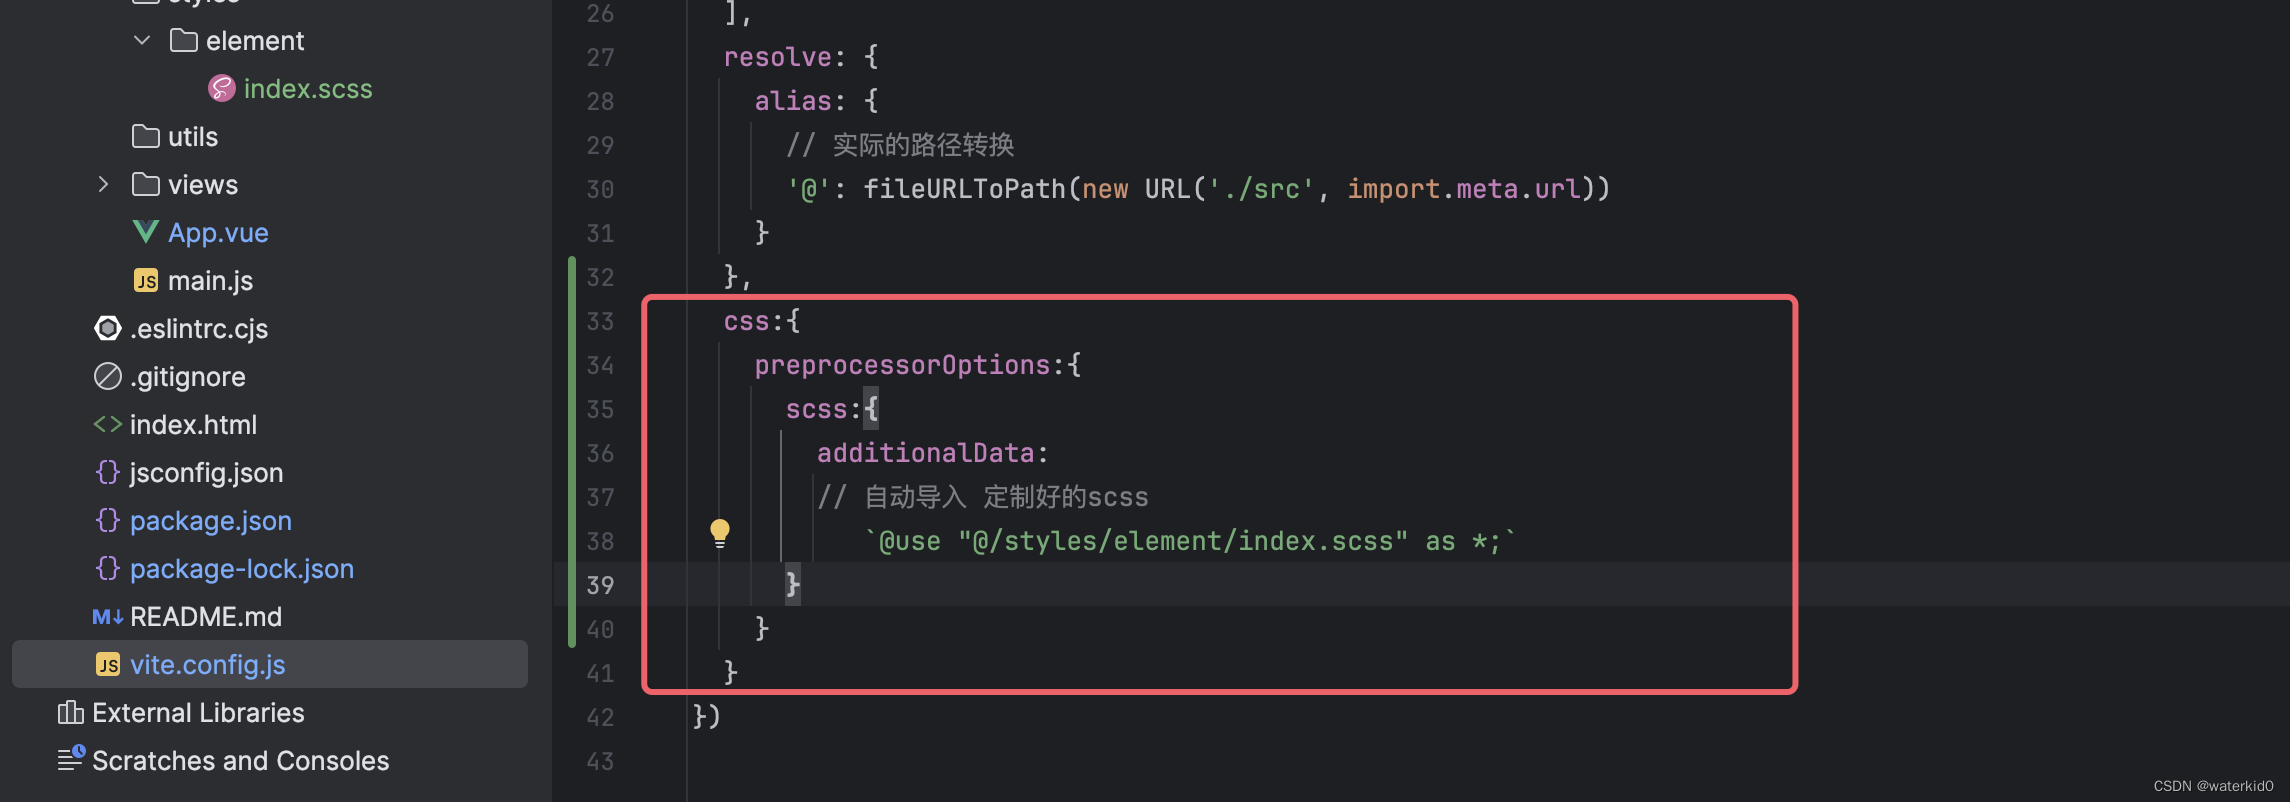
import { fileURLToPath, URL } from 'node:url'

import { defineConfig } from 'vite'
import vue from '@vitejs/plugin-vue'


// elementplus 按需导入
import AutoImport from 'unplugin-auto-import/vite'
import Components from 'unplugin-vue-components/vite'
import { ElementPlusResolver } from 'unplugin-vue-components/resolvers'

// https://vitejs.dev/config/
export default defineConfig({
  // plugins是vite的插件配置位置
  plugins: [
    vue(),
    AutoImport({
      resolvers: [ElementPlusResolver()],
    }),
    Components({
      // 将elementplus配置采用sass格式
      resolvers: [ElementPlusResolver({
        importStyle:"sass"
      })],
    }),
  ],
  resolve: {
    alias: {
      // 实际的路径转换
      '@': fileURLToPath(new URL('./src', import.meta.url))
    }
  },
  css:{
    preprocessorOptions:{
      scss:{
        additionalData:
        // 自动导入 定制好的scss
           `@use "@/styles/element/index.scss" as *;`
      }
    }
  }
})
重置样式
// 重置样式
* {
  box-sizing: border-box;
}

html {
  height: 100%;
  font-size: 14px;
}
body {
  height: 100%;
  color: #333;
  min-width: 1240px;
  font: 1em/1.4 'Microsoft Yahei', 'PingFang SC', 'Avenir', 'Segoe UI',
    'Hiragino Sans GB', 'STHeiti', 'Microsoft Sans Serif', 'WenQuanYi Micro Hei',
    sans-serif;
}
body,
ul,
h1,
h3,
h4,
p,
dl,
dd {
  padding: 0;
  margin: 0;
}
a {
  text-decoration: none;
  color: #333;
  outline: none;
}
i {
  font-style: normal;
}
input[type='text'],
input[type='search'],
input[type='password'],
input[type='checkbox'] {
  padding: 0;
  outline: none;
  border: none;
  -webkit-appearance: none;
  &::placeholder {
    color: #ccc;
  }
}
img {
  max-width: 100%;
  max-height: 100%;
  vertical-align: middle;
  background: #ebebeb url('@/assets/images/200.png') no-repeat center / contain;
}
ul {
  list-style: none;
}

#app {
  background: #f5f5f5;
  user-select: none;
}

.container {
  width: 1240px;
  margin: 0 auto;
  position: relative;
}
.ellipsis {
  white-space: nowrap;
  text-overflow: ellipsis;
  overflow: hidden;
}

.ellipsis-2 {
  word-break: break-all;
  text-overflow: ellipsis;
  display: -webkit-box;
  -webkit-box-orient: vertical;
  -webkit-line-clamp: 2;
  overflow: hidden;
}

.fl {
  float: left;
}

.fr {
  float: right;
}

.clearfix:after {
  content: '.';
  display: block;
  visibility: hidden;
  height: 0;
  line-height: 0;
  clear: both;
}

// reset element
.el-breadcrumb__inner.is-link {
  font-weight: 400 !important;
}
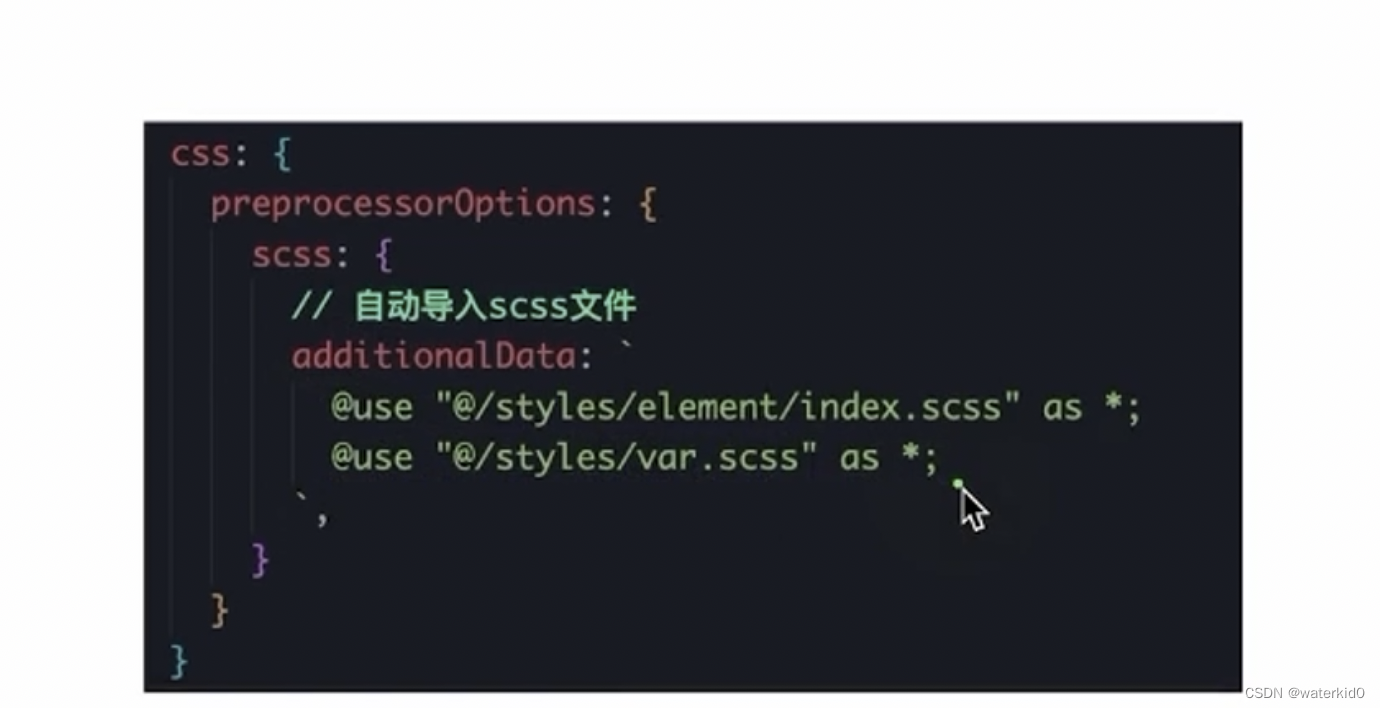
sass文件自动导入公共变量,避免手动导入
sass文件可能会存一些共享颜色,等
$xtxColor: #27ba9b;
$helpColor: #e26237;
$sucColor: #1dc779;
$warnColor: #ffb302;
$priceColor: #cf4444;
字体图标引入

监听滚动距离,显示吸顶
定义好一个写好的nav,,,作为吸顶nav,,,当滚动条滚动到一定位置,,显示这个吸顶nav,,并一直吸顶,,当滚动条小于某个高度,,隐藏这个吸顶nav
const y = ref(0)
const handleScroll = ()=>{
  console.log(window.scrollY)
  y.value = window.scrollY
}
onMounted(()=>{
  window.addEventListener("scroll",handleScroll)
})
pinia共享导航数据
axios
axios-http.com
props 和 slot 写模板
自定义指令实现懒加载图片
app.direactive("lazy-img",(el,binding)=>{
	// el :绑定这个指令的 dom
	// binding :  这个指令绑定的值
})
懒加载图片,就是等图片进入可视区域之后再去加载图片,,
预先不设置src属性,,等图片进入可视区域之后,在设置src属性,去请求图片。。
js中可以使用Intersection Observer API 监测元素是否在视口区域,,,
<!DOCTYPE html>
<html lang="en">
<head>
    <meta charset="UTF-8">
    <title>Title</title>
</head>
<body>
<style>
    .content {
        height: 1500px;
        background-color: lightgrey;
        width: 1000px;
    }
    .target {
        margin: 1000px 0;
        padding: 20px;
        background-color: lightcoral;
        text-align: center;
    }
    .in-view {
        background-color: lightgreen;
    }
</style>
<div class="content">
    <div id="target" class="target">监测的目标元素</div>
</div>
<script>
    const observer= new IntersectionObserver((entries)=>{
        entries.forEach(entry=>{
            if (entry.isIntersecting){
                console.log("进入")
            }else{
                console.log("leave")
            }
        })
    })

    var element = document.querySelector("#target");
    observer.observe(element)
</script>
</body>
</html>
定义指令的时候,监测视口:
// 定义全局指令
app.directive("img-lazy",{
    mounted(el,binding){
        // el :指令绑定的那个元素
        // binding : 指令的等于号后面 的表达式值
        console.log(el,binding.value)

       const observer =  new IntersectionObserver((entries)=>{
            for (const entry of entries) {
                if (entry.isIntersecting){
                    // 进入了
                    console.log("进入了")
                    el.src = binding.value
                }
            }
        })


        observer.observe(el)

    }
})
图片加载完成后,存在重复监听,需要将监听移除掉
observer.unobserve(entry.target)
vue3插件
js代码不应该直接写在入口函数中,,可以使用插件形式,去执行这些js代码,,
定义一个插件:
export const lazyPlugin = {
    install(app){
        app.directive("img-lazy",(el,binding)=>{

            console.log(el,binding.value)

           const observer =   new IntersectionObserver((entries)=>{
               for (const entry of entries) {
                   if (entry.isIntersecting){
                       // 进去了
                       console.log("enter")
                       el.src = binding.value

                       // 监听完一次后,取消监听,,图片只需要加载一次
                       observer.unobserve(entry.target)
                   }
               }
           })

            observer.observe(el)
        })
    }
}
在main.js中导入插件:
import {lazyPlugin} from "@/directives/index.js";
app.use(lazyPlugin)
vue3使用路由参数
import {useRoute} from "vue-router"
const route = useRoute()

console.log(route.params.id)
router-link激活时设置样式名
<RouterLink :to="`/category/${item.id}`" active-class="active">{{item.name}}</RouterLink> </li>
路由缓存问题
一个路由跳转到另一个路由的时候,如果是相同的组件会被复用,,,
解决:
- 不让组件复用,强制销毁重建,在路由出口添加一个key,破坏复用机制
<!--  二级路由出口-->
  <RouterView :key="$route.fullPath"/>
销毁重建会导致所有的请求都重新发送,,如果是复用的数据,就会存在资源浪费
2. 监听路由变化
onBeforeRouteUpdate((to,from)=>{}),router里面的钩子函数,,监测路由变化,,to是到哪个页面
import {onBeforeRouteUpdate} from "vue-router";
// 路由变化

onBeforeRouteUpdate((to, from, next)=>{
  console.log("路由变化了",to)
  getCategory(to.params.id)
})
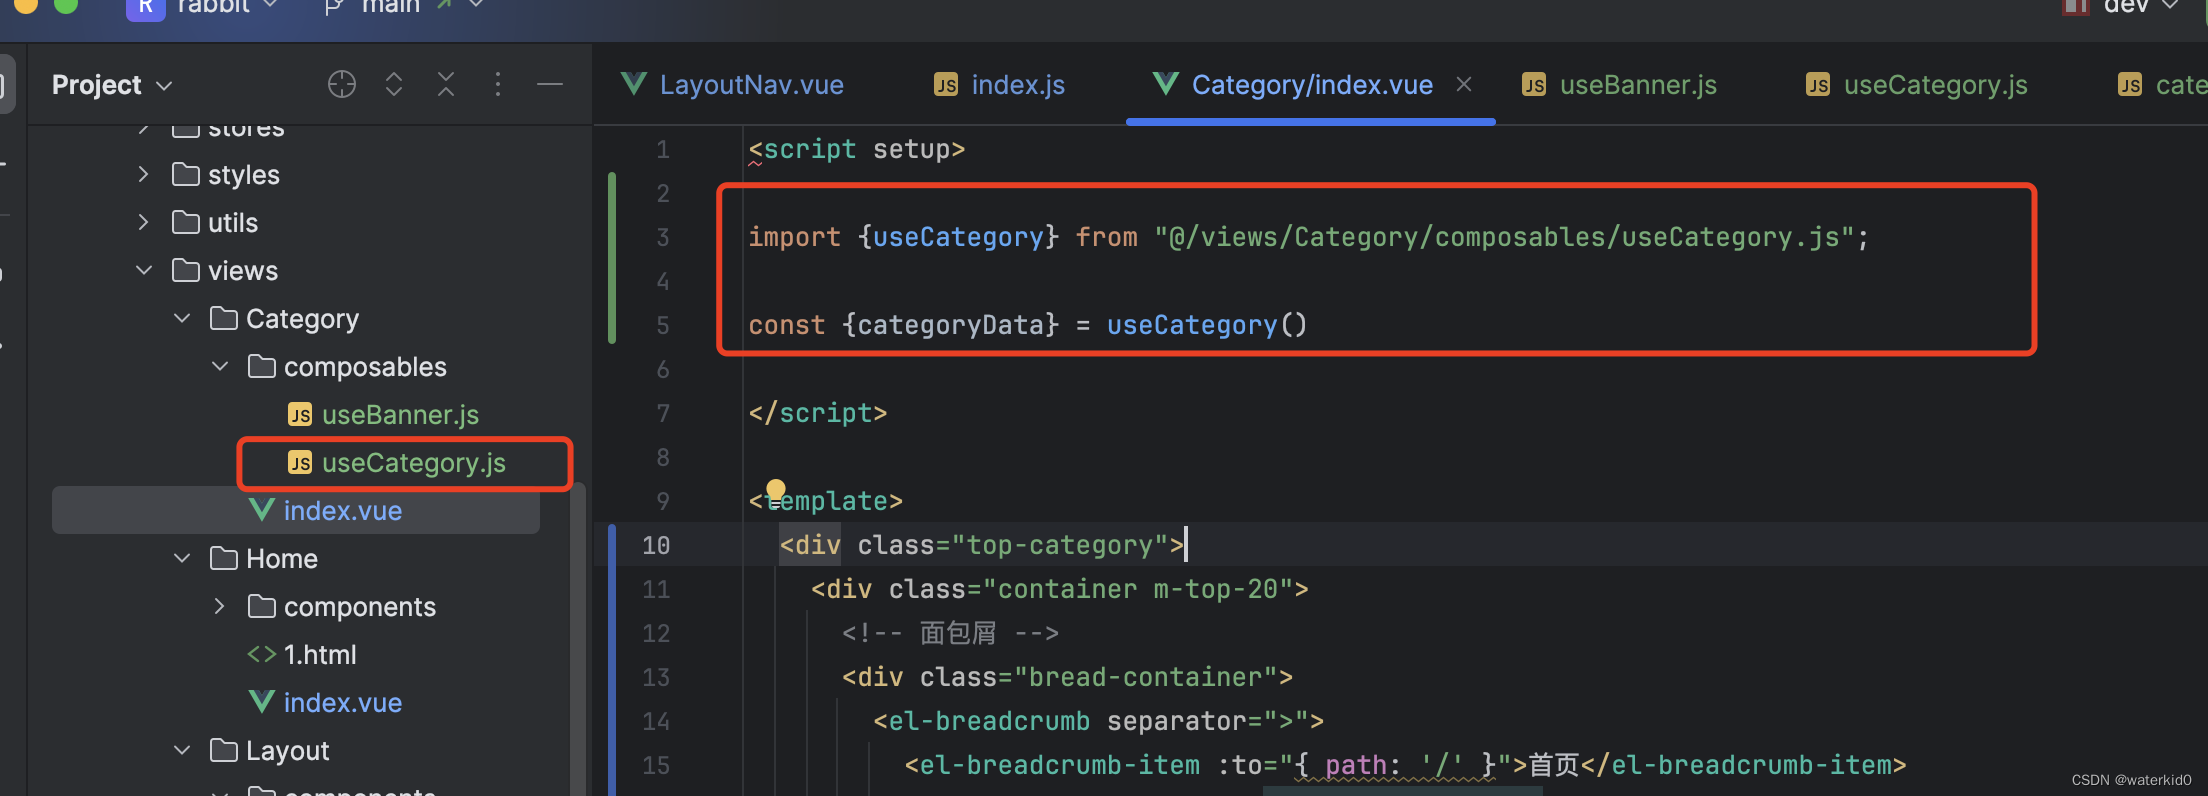
业务代码拆分
