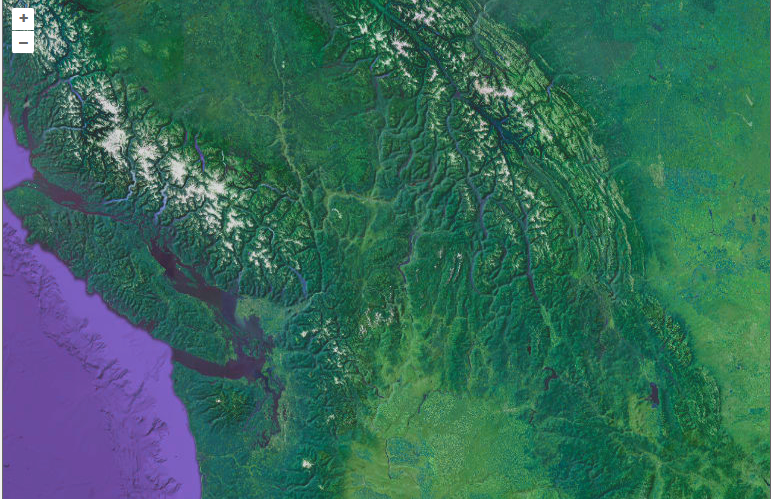
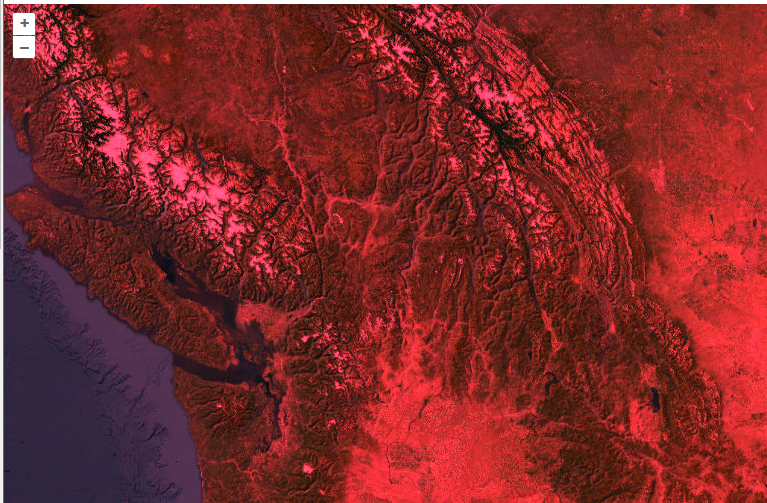
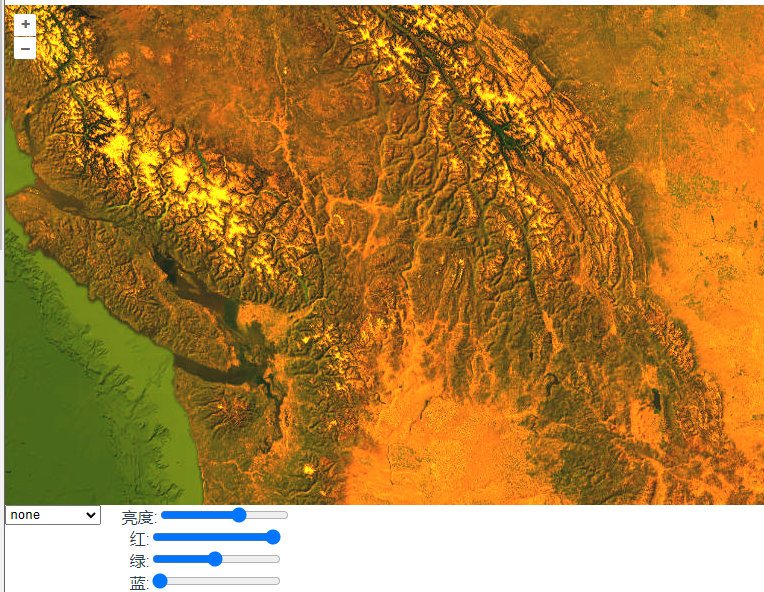
这篇是对滤镜的总结,方便工作中直接使用。
想要调整图层的颜色,有两种方法。
方法一:
加载图层时使用tileLoadFunction函数拿到context添加canvas滤镜效果。
 this.imagery = new TileLayer({
        source: new XYZ({
          url: "https://server.arcgisonline.com/arcgis/rest/services/World_Imagery/MapServer/tile/{z}/{y}/{x}",
          crossOrigin: "anonymous",
            tileLoadFunction: function (imageTile, src) {
              let img = new Image();
              // 设置图片不从缓存取,从缓存取可能会出现跨域,导致加载失败
              img.setAttribute("crossOrigin", "anonymous");
              img.onload = function () {
                let canvas = document.createElement("canvas");
                let w = img.width;
                let h = img.height;
                canvas.width = w;
                canvas.height = h;
                let context = canvas.getContext("2d");

                context.filter =
                  "grayscale(0%) invert(15%) sepia(0%) hue-rotate(75deg) saturate(200%) brightness(100%) contrast(100%)";
                // grayscale 灰度   invert反相   sepia将图像转化成深褐色  saturate饱和度   brightness暗度 contrast对比度

                context.drawImage(img, 0, 0, w, h, 0, 0, w, h);
                imageTile.getImage().src = canvas.toDataURL("image/png");
              };
              img.src = src;
            },
        }),
      });
方法二:
利用postrender事件手动获取像素数据修改每一个像素点的值。
   this.imagery.on("postrender", (event) => {
      this.convolve(event.context, this.selectedKernel);
    });
convolve(context, kernel) {
const canvas = context.canvas;
const width = canvas.width;
const height = canvas.height;
// 假设 kernel 是一个归一化的卷积核矩阵,其大小为 size x size
const size = Math.sqrt(kernel.length);
const half = Math.floor(size / 2);
// 获取输入图像数据
const inputData = context.getImageData(0, 0, width, height).data;
// 创建一个新的 ImageData 对象用于输出图像数据
const output = context.createImageData(width, height);
const outputData = output.data;
// 遍历每个像素
for (let pixelY = 0; pixelY < height; ++pixelY) {
const pixelsAbove = pixelY * width;
for (let pixelX = 0; pixelX < width; ++pixelX) {
let r = 0,
g = 0,
b = 0,
a = 0;
// 遍历卷积核
for (let kernelY = 0; kernelY < size; ++kernelY) {
for (let kernelX = 0; kernelX < size; ++kernelX) {
let weight = kernel[kernelY * size + kernelX];
const neighborY = Math.min(
height - 1,
Math.max(0, pixelY + kernelY - half)
);
const neighborX = Math.min(
width - 1,
Math.max(0, pixelX + kernelX - half)
);
const inputIndex = (neighborY * width + neighborX) * 4;
// 累加加权后的像素值
r += inputData[inputIndex] * weight;
g += inputData[inputIndex + 1] * weight;
b += inputData[inputIndex + 2] * weight;
a += inputData[inputIndex + 3] * weight;
}
}
const outputIndex = (pixelsAbove + pixelX) * 4;
outputData[outputIndex] = r;
outputData[outputIndex + 1] = g;
outputData[outputIndex + 2] = b;
outputData[outputIndex + 3] = kernel.normalized ? a : 255; // 如果卷积核是归一化的,则使用计算后的 alpha,否则设为 255
//添加红绿蓝通道的值
outputData[outputIndex] *= this.palette.red;
outputData[outputIndex + 1] *= this.palette.green;
outputData[outputIndex + 2] *= this.palette.blue;
//添加亮度
outputData[outputIndex] += this.palette.brightness;
outputData[outputIndex + 1] += this.palette.brightness;
outputData[outputIndex + 2] += this.palette.brightness;
}
}
context.putImageData(output, 0, 0);
},如果要添加模糊、锐化、浮雕等效果需要进行卷积核相关的操作,如果只是修改颜色则不需要。
两种方法总结:
第一种比较简单,代码较少。
第二种代码较多,但是修改的自由度比较高,可以添加更多的效果。
第二种方法的原理可以看这篇:
四十七、openlayers官网示例Image Filters——给地图添加锐化、浮雕、边缘等滤镜效果-CSDN博客
完整代码:
<template>
<div class="box">
<h1>滤镜效果</h1>
<div id="map" class="map"></div>
<div class="tools">
<select
id="kernel"
name="kernel"
style="height: 20px; margin-right: 20px"
@change="paletteChange"
v-model="kernelValue"
>
<option v-for="(value, key, index) in kernels" :key="index">
{{ key }}
</option>
</select>
<div>
<label for="brightness">亮度:</label>
<input
type="range"
v-model.number="palette.brightness"
id="brightness"
min="-100"
max="100"
value="0"
@change="paletteChange"
/>
<br />
<label for="redInput">红:</label>
<input
type="range"
v-model="palette.red"
id="redInput"
min="0"
max="2"
step="0.01"
@change="paletteChange"
/>
<br />
<label for="redInput">绿:</label>
<input
type="range"
v-model="palette.green"
id="greenInput"
min="0"
max="2"
step="0.01"
@change="paletteChange"
/>
<br />
<label for="redInput">蓝:</label>
<input
type="range"
v-model="palette.blue"
id="blueInput"
min="0"
max="2"
step="0.01"
@change="paletteChange"
/>
</div>
</div>
</div>
</template>
<script>
import Map from "ol/Map.js";
import View from "ol/View.js";
import XYZ from "ol/source/XYZ.js";
import { fromLonLat } from "ol/proj.js";
import { Tile as TileLayer, Vector as VectorLayer } from "ol/layer.js";
import { OGCMapTile, Vector as VectorSource } from "ol/source.js";
export default {
name: "",
components: {},
data() {
return {
map: null,
extentData: "",
palette: {
brightness: 0,
red: 1,
green: 1,
blue: 1,
},
imagery: null,
//卷积核
kernels: {
none: [0, 0, 0, 0, 1, 0, 0, 0, 0], //无
sharpen: [0, -1, 0, -1, 5, -1, 0, -1, 0], //锐化滤波器
sharpenless: [0, -1, 0, -1, 10, -1, 0, -1, 0], //增强图像的边缘和细节,但比 sharpen 更强烈。
blur: [1, 1, 1, 1, 1, 1, 1, 1, 1], //平滑滤波器,通过对邻域像素值求平均来模糊图像
shadow: [1, 2, 1, 0, 1, 0, -1, -2, -1], //阴影滤波器
emboss: [-2, 1, 0, -1, 1, 1, 0, 1, 2], //浮雕滤波器
edge: [0, 1, 0, 1, -4, 1, 0, 1, 0], //边缘检测滤波器
},
kernelValue: "none",
selectedKernel: "",
};
},
computed: {},
created() {},
mounted() {
this.initMap();
this.selectedKernel = this.normalize(this.kernels[this.kernelValue]);
this.imagery.on("postrender", (event) => {
this.convolve(event.context, this.selectedKernel);
});
},
methods: {
convolve(context, kernel) {
      const canvas = context.canvas;
      const width = canvas.width;
      const height = canvas.height;
      // 假设 kernel 是一个归一化的卷积核矩阵,其大小为 size x size
      const size = Math.sqrt(kernel.length);
      const half = Math.floor(size / 2);
      // 获取输入图像数据
      const inputData = context.getImageData(0, 0, width, height).data;
      // 创建一个新的 ImageData 对象用于输出图像数据
      const output = context.createImageData(width, height);
      const outputData = output.data;
      //   遍历每个像素
      for (let pixelY = 0; pixelY < height; ++pixelY) {
        const pixelsAbove = pixelY * width;
        for (let pixelX = 0; pixelX < width; ++pixelX) {
          let r = 0,
            g = 0,
            b = 0,
            a = 0;
          // 遍历卷积核
          for (let kernelY = 0; kernelY < size; ++kernelY) {
            for (let kernelX = 0; kernelX < size; ++kernelX) {
              let weight = kernel[kernelY * size + kernelX];
              const neighborY = Math.min(
                height - 1,
                Math.max(0, pixelY + kernelY - half)
              );
              const neighborX = Math.min(
                width - 1,
                Math.max(0, pixelX + kernelX - half)
              );
              const inputIndex = (neighborY * width + neighborX) * 4;

              // 累加加权后的像素值
              r += inputData[inputIndex] * weight;
              g += inputData[inputIndex + 1] * weight;
              b += inputData[inputIndex + 2] * weight;
              a += inputData[inputIndex + 3] * weight;
            }
          }
          const outputIndex = (pixelsAbove + pixelX) * 4;
          outputData[outputIndex] = r;
          outputData[outputIndex + 1] = g;
          outputData[outputIndex + 2] = b;
          outputData[outputIndex + 3] = kernel.normalized ? a : 255; // 如果卷积核是归一化的,则使用计算后的 alpha,否则设为 255
          //添加红绿蓝通道的值
          outputData[outputIndex] *= this.palette.red;
          outputData[outputIndex + 1] *= this.palette.green;
          outputData[outputIndex + 2] *= this.palette.blue;
          //添加亮度
          outputData[outputIndex] += this.palette.brightness;
          outputData[outputIndex + 1] += this.palette.brightness;
          outputData[outputIndex + 2] += this.palette.brightness;
        }
      }
      context.putImageData(output, 0, 0);
    },
normalize(kernel) {
// 获取卷积核的长度
const len = kernel.length;
// 创建一个与卷积核相同长度的新数组
const normal = new Array(len);
let i,
sum = 0;
// 计算卷积核中所有元素的总和
for (i = 0; i < len; ++i) {
sum += kernel[i];
}
// 如果总和小于等于0,设置sum为1并标记为未归一化
if (sum <= 0) {
normal.normalized = false;
sum = 1;
} else {
// 如果总和大于0,标记为已归一化
normal.normalized = true;
}
// 将卷积核中的每个元素除以总和,得到归一化后的值
for (i = 0; i < len; ++i) {
normal[i] = kernel[i] / sum;
}
// 返回归一化后的卷积核
return normal;
},
initMap() {
this.imagery = new TileLayer({
source: new XYZ({
url: "https://server.arcgisonline.com/arcgis/rest/services/World_Imagery/MapServer/tile/{z}/{y}/{x}",
crossOrigin: "anonymous",
// tileLoadFunction: function (imageTile, src) {
// let img = new Image();
// // 设置图片不从缓存取,从缓存取可能会出现跨域,导致加载失败
// img.setAttribute("crossOrigin", "anonymous");
// img.onload = function () {
// let canvas = document.createElement("canvas");
// let w = img.width;
// let h = img.height;
// canvas.width = w;
// canvas.height = h;
// let context = canvas.getContext("2d");
// context.filter =
// "grayscale(0%) invert(15%) sepia(0%) hue-rotate(75deg) saturate(200%) brightness(100%) contrast(100%)";
// // grayscale 灰度 invert反相 sepia将图像转化成深褐色 saturate饱和度 brightness暗度 contrast对比度
// context.drawImage(img, 0, 0, w, h, 0, 0, w, h);
// imageTile.getImage().src = canvas.toDataURL("image/png");
// };
// img.src = src;
// },
}),
});
this.map = new Map({
layers: [this.imagery],
target: "map",
view: new View({
center: fromLonLat([-120, 50]),
zoom: 6,
}),
});
},
paletteChange() {
console.log("this.palette", this.palette);
this.selectedKernel = this.normalize(this.kernels[this.kernelValue]);
this.map.render();
},
},
};
</script>
<style lang="scss" scoped>
#map {
width: 100%;
height: 500px;
}
.box {
height: 100%;
}
.tools {
display: flex;
}
</style>



![[16] 使用Opencv_CUDA 实现访问图像像素、直方图均衡化、几何变换](https://img-blog.csdnimg.cn/direct/b50d91de48d24ad98f8aa32b71acca3e.png)


