背景需求:
幼儿益智早教玩具❗️鱼骨拼图 - 小红书在家也能自制的木棒鱼骨拼图,你也收藏起来试一试吧。 #母婴育儿 #新手爸妈 #玩具 #宝宝玩具怎么选 #早教 #早教玩具 #幼儿早教 #益智早教 #玩具 #宝宝早教 #益智拼图 #宝宝拼图 #玩不腻的益智玩具 #儿童益智桌游 #早教日常 #益智玩具 #玩具推荐![]() https://www.xiaohongshu.com/discovery/item/65f6e28e000000000d00dfb6?app_platform=android&ignoreEngage=true&app_version=8.40.0&share_from_user_hidden=true&xsec_source=app_share&type=video&xsec_token=CBdYq1lS_6_4JwSht55RRS6a0Us2oO80T58vVXzFTNLcI=&author_share=1&xhsshare=WeixinSession&shareRedId=ODszMTs4Nk82NzUyOTgwNjg3OTlHS0xC&apptime=1718805172&share_id=d7d2836a6bf8482fa9d9a16a71418e15
https://www.xiaohongshu.com/discovery/item/65f6e28e000000000d00dfb6?app_platform=android&ignoreEngage=true&app_version=8.40.0&share_from_user_hidden=true&xsec_source=app_share&type=video&xsec_token=CBdYq1lS_6_4JwSht55RRS6a0Us2oO80T58vVXzFTNLcI=&author_share=1&xhsshare=WeixinSession&shareRedId=ODszMTs4Nk82NzUyOTgwNjg3OTlHS0xC&apptime=1718805172&share_id=d7d2836a6bf8482fa9d9a16a71418e15

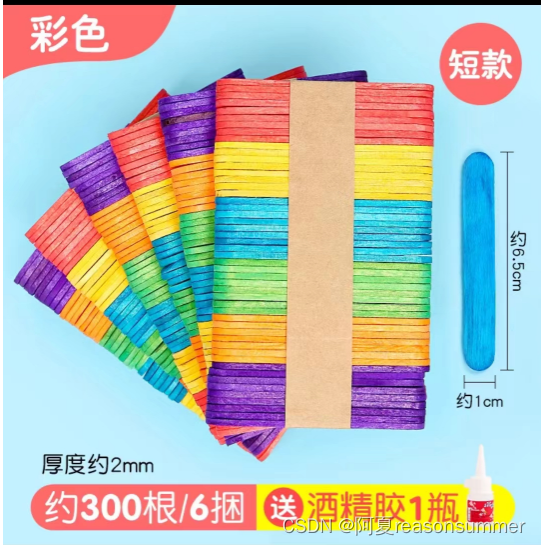
显示用六根彩色冰棍棒做排序,淘宝上有三款尺寸的彩色冰棍棒。

我先做一套6.5*1CM的鱼骨图
素材准备


 代码展示
代码展示
'''
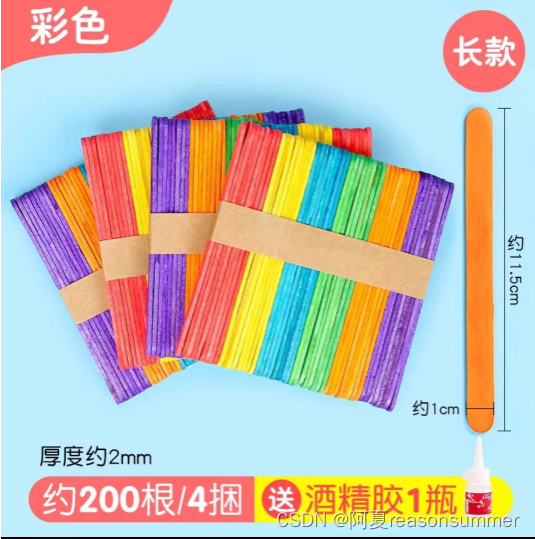
冰棍棒六色720种 鱼骨图 红橙黄绿蓝紫(短款)6.5*1(长款) 11.5*1 大号(15*1.8)
时间:2024年6月18日
作者:星火讯飞 阿夏
'''
from PIL import Image, ImageDraw
import os
from PIL import ImageFont
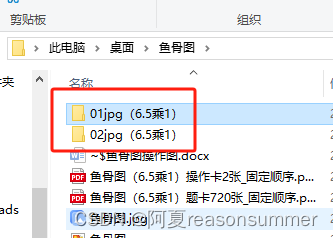
path=r'C:\Users\jg2yXRZ\OneDrive\桌面\鱼骨图'
new_path=path+r'\01jpg(6.5乘1)'
os.makedirs(new_path,exist_ok=True)
name='6.5乘1'
print('-----1、制作图卡--------')
# 六色所有排序方式 720种
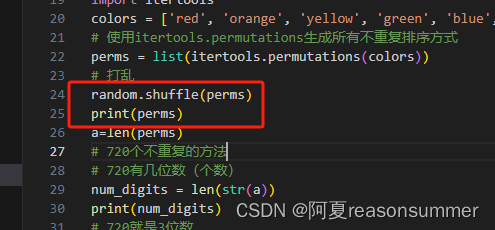
import itertools
colors = ['red', 'orange', 'yellow', 'green', 'blue', 'purple']
# 使用itertools.permutations生成所有不重复排序方式
perms = list(itertools.permutations(colors))
# 打乱
# random.shuffle(perms)
# print(perms)
a=len(perms)
# 720个不重复的方法
# 720有几位数(个数)
num_digits = len(str(a))
print(num_digits)
# 720就是3位数
for a in range(len(perms)):
# 打开图片
image = Image.open(path+r'\鱼骨图.jpg')
# 创建一个800*600的画布
long=844
wide=378
s=6
# 6根棒子
canvas = Image.new('RGB', (long, wide), 'white')
draw = ImageDraw.Draw(canvas)
# 定义圆角矩形的参数
# 棒子的圆心
radius = 20
# 左侧间距
left = 220
# 右侧间距
right = 180
# 棒子的间距
padding = 30
# 棒子的宽
rect_width = float((long-left-right-padding*7)/6)
print(rect_width)
# 40
# 棒子的高
rect_height = float(rect_width*6.5)
# 棒子的高度坐标
padding2=float((wide- rect_height-20))
# wide-padding*2
# 计算每个圆角矩形的位置
rect_positions = [
(padding+left, padding2),
(rect_width + padding * 2+left, padding2),
(rect_width * 2 + padding * 3+left, padding2),
(rect_width * 3 + padding * 4+left, padding2),
(rect_width * 4 + padding * 5+left, padding2),
(rect_width * 5 + padding * 6+left, padding2)
]
colors = perms[a]
# 绘制圆角矩形
draw = ImageDraw.Draw(image)
# 绘制圆角矩形
for i, position in enumerate(rect_positions):
x, y = position
draw.rounded_rectangle([x, y, x + rect_width, y + rect_height], radius, fill=colors[i], outline='black', width=1)
# 设置字体路径和大小
font_path = r'C:\Windows\Fonts\AdobeHeitiStd-Regular.otf'
font_size = 40
# 加载字体
font = ImageFont.truetype(font_path, font_size)
# 在指定位置绘制文字
draw.text((200, 30), f'彩色鱼骨图({name}CM)-{a+1:03d}', font=font, fill='black')
# 保存图片
image.save(new_path + fr'\{a+1:0{num_digits}d}.png')
print('-----2、制作大图--------')
# 六色所有排序方式 720种
# 使用itertools.permutations生成所有不重复排序方式
from PIL import Image, ImageDraw
import itertools
path = r'C:\Users\jg2yXRZ\OneDrive\桌面\鱼骨图'
new_path_jpg = path + r'\02jpg(6.5乘1)'
os.makedirs(new_path_jpg, exist_ok=True)
name = '6.5乘1'
for b in range(2):
image = Image.open(path + r'\鱼骨图.jpg')
long = 844
wide = 378
s = 6
canvas = Image.new('RGB', (long, wide), 'white')
draw = ImageDraw.Draw(canvas)
radius = 20
left = 220
right = 180
padding = 30
rect_width = float((long - left - right - padding * 7) / 6)
print(rect_width)
rect_height = float(rect_width * 6.5)
padding2 = float((wide - rect_height - 20))
rect_positions = [
(padding + left, padding2),
(rect_width + padding * 2 + left, padding2),
(rect_width * 2 + padding * 3 + left, padding2),
(rect_width * 3 + padding * 4 + left, padding2),
(rect_width * 4 + padding * 5 + left, padding2),
(rect_width * 5 + padding * 6 + left, padding2)
]
colors = perms[a]
draw = ImageDraw.Draw(image)
# 绘制圆角矩形
for i, position in enumerate(rect_positions):
x, y = position
draw.rounded_rectangle([x, y, x + rect_width, y + rect_height], radius, fill='white', outline='black', width=1)
# 设置字体路径和大小
font_path = r'C:\Windows\Fonts\AdobeHeitiStd-Regular.otf'
font_size = 40
# 加载字体
font = ImageFont.truetype(font_path, font_size)
# 在指定位置绘制文字
draw.text((150, 30), f'彩色鱼骨图({name}CM)-操作图{b+1}', font=font, fill='black')
# 保存图片
# image.save(new_path + fr'\{a+1:0{num_digits}d}.png')
image.save(new_path_jpg + fr'\鱼骨图{name}_大图{b+1}.png')
print('-----3、图卡制作成图片格式----------')
import os
import random
from docx import Document
from docx.shared import Cm
from docx2pdf import convert
from PyPDF2 import PdfFileMerger
new_folder = path + r'\零时文件夹'
os.makedirs(new_folder, exist_ok=True)
image_files = [os.path.join(new_path, file) for file in os.listdir(new_path) if file.endswith('.png')]
# random.shuffle(image_files)
grouped_files = [image_files[i:i + 6] for i in range(0, len(image_files), 6)]
for group_index, group in enumerate(grouped_files):
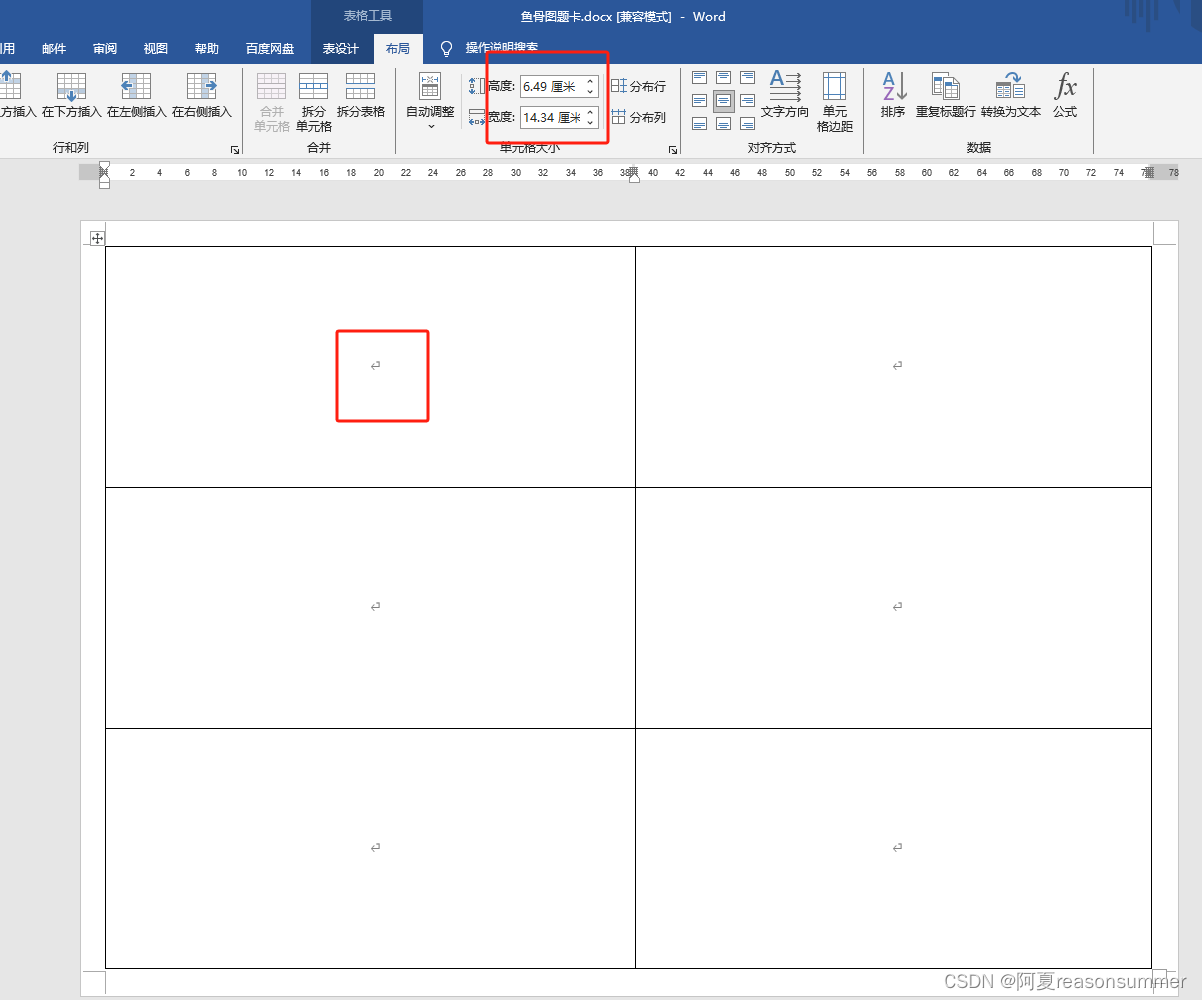
doc = Document(path + r'\鱼骨图题卡.docx')
table = doc.tables[0]
for cell_index, image_file in enumerate(group):
cell = table.cell(int(cell_index / 2), cell_index % 2)
cell_paragraph = cell.paragraphs[0]
cell_paragraph.clear()
run = cell_paragraph.add_run()
run.add_picture(image_file, width=Cm(13.92), height=Cm(6.49))
doc.save(os.path.join(new_folder, f'{group_index + 1:03d}.docx'))
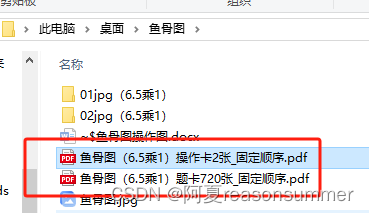
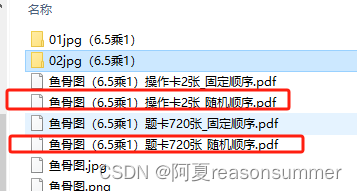
pdf_output_path = path + fr'\\鱼骨图({name})题卡{len(perms)}张_固定顺序.pdf'
# pdf_output_path = path + fr'\\鱼骨图({name})题卡{len(perms)}张_随机顺序.pdf'
for docx_file in os.listdir(new_folder):
if docx_file.endswith('.docx'):
docx_path = os.path.join(new_folder, docx_file)
convert(docx_path, docx_path.replace('.docx', '.pdf'))
merger = PdfFileMerger()
for pdf_file in os.listdir(new_folder):
if pdf_file.endswith('.pdf'):
pdf_path = os.path.join(new_folder, pdf_file)
merger.append(pdf_path)
merger.write(pdf_output_path)
merger.close()
import shutil
shutil.rmtree(new_folder)
print('-----3、图卡制作成图片格式----------')
import os
import random
from docx import Document
from docx.shared import Cm
from docx2pdf import convert
from PyPDF2 import PdfFileMerger
new_folder = path + r'\零时文件夹'
os.makedirs(new_folder, exist_ok=True)
image_files = [os.path.join(new_path, file) for file in os.listdir(new_path_jpg) if file.endswith('.png')]
# random.shuffle(image_files)
grouped_files = [image_files[i:i + 2] for i in range(0, len(image_files), 2)]
for group_index, group in enumerate(grouped_files):
doc = Document(path + r'\鱼骨图操作图.docx')
table = doc.tables[0]
for cell_index, image_file in enumerate(group):
cell = table.cell(int(cell_index / 1), cell_index % 1)
cell_paragraph = cell.paragraphs[0]
cell_paragraph.clear()
run = cell_paragraph.add_run()
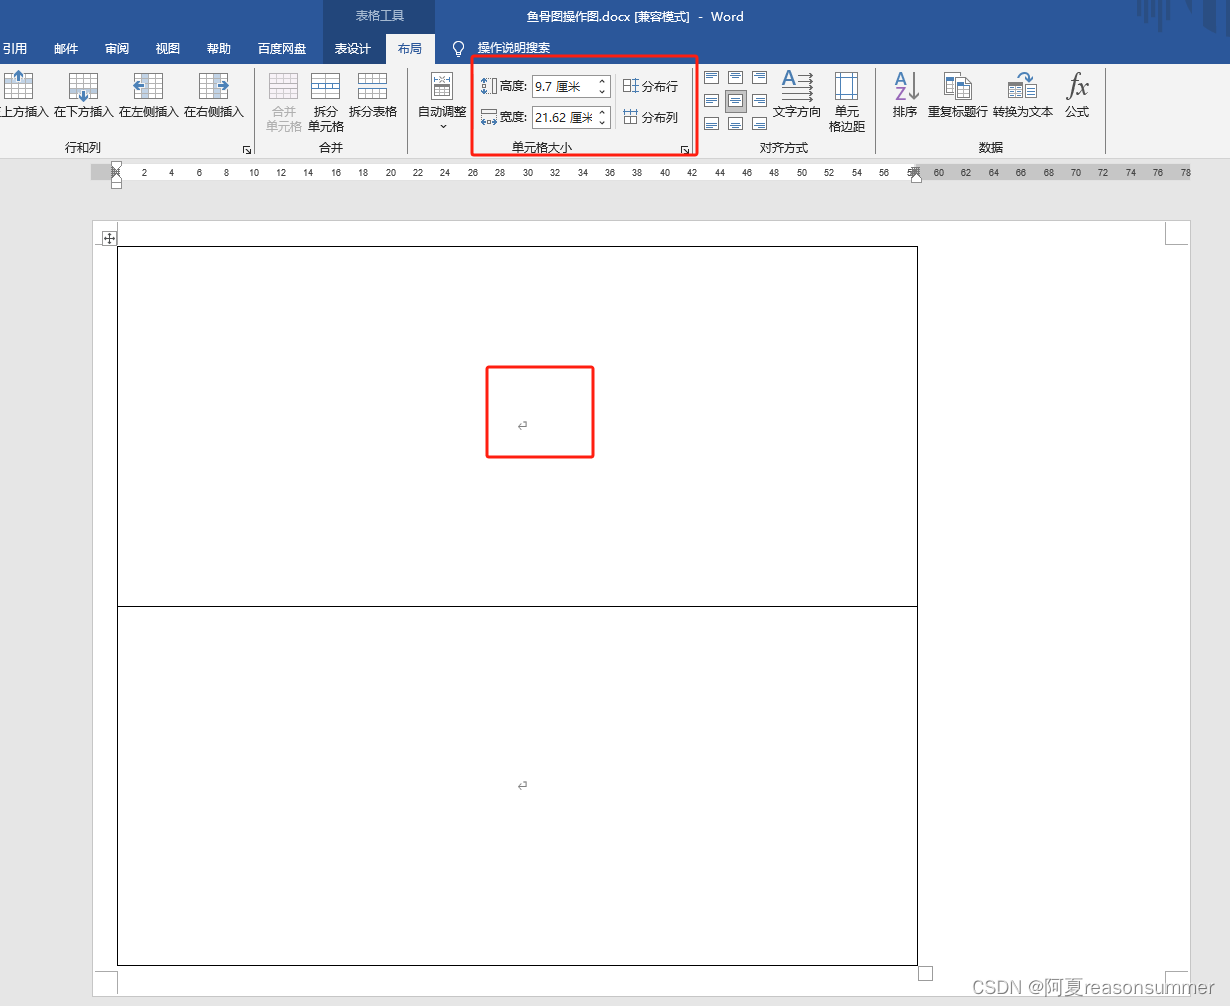
run.add_picture(image_file, width=Cm(21.62), height=Cm(9.7))
doc.save(os.path.join(new_folder, f'{group_index + 1:03d}.docx'))
pdf_output_path = path + fr'\\鱼骨图({name})操作卡2张_固定顺序.pdf'
# pdf_output_path = path + fr'\\鱼骨图({name})操作卡2张_随机顺序.pdf'
for docx_file in os.listdir(new_folder):
if docx_file.endswith('.docx'):
docx_path = os.path.join(new_folder, docx_file)
convert(docx_path, docx_path.replace('.docx', '.pdf'))
merger = PdfFileMerger()
for pdf_file in os.listdir(new_folder):
if pdf_file.endswith('.pdf'):
pdf_path = os.path.join(new_folder, pdf_file)
merger.append(pdf_path)
merger.write(pdf_output_path)
merger.close()
import shutil
shutil.rmtree(new_folder)
第一步第二步生成结果(按照正序排列)


因为正序排列的顺序会比较相近,所以可以加上乱序
'''
冰棍棒六色720种 鱼骨图 红橙黄绿蓝紫(短款)6.5*1(长款) 11.5*1 大号(15*1.8) -乱序
时间:2024年6月18日
作者:星火讯飞 阿夏

'''
from PIL import Image, ImageDraw
import os,random
from PIL import ImageFont

path=r'C:\Users\jg2yXRZ\OneDrive\桌面\鱼骨图'
new_path=path+r'\01jpg(6.5乘1)'
os.makedirs(new_path,exist_ok=True)

name='6.5乘1'

print('-----1、制作图卡--------')
# 六色所有排序方式 720种
import itertools
colors = ['red', 'orange', 'yellow', 'green', 'blue', 'purple']
# 使用itertools.permutations生成所有不重复排序方式
perms = list(itertools.permutations(colors))
# 打乱
random.shuffle(perms)
print(perms)
a=len(perms)
# 720个不重复的方法
# 720有几位数(个数)
num_digits = len(str(a))
print(num_digits)
# 720就是3位数

for a in range(len(perms)):
        # 打开图片
    image = Image.open(path+r'\鱼骨图.jpg')
    # 创建一个800*600的画布
    long=844
    wide=378
    s=6
    # 6根棒子

    canvas = Image.new('RGB', (long, wide), 'white')
    draw = ImageDraw.Draw(canvas)

    # 定义圆角矩形的参数

    # 棒子的圆心
    radius = 20
    # 左侧间距
    left = 220
    #  右侧间距
    right = 180
    # 棒子的间距
    padding = 30
    # 棒子的宽
    rect_width = float((long-left-right-padding*7)/6)
    print(rect_width)
    # 40
    # 棒子的高
    rect_height = float(rect_width*6.5)

    # 棒子的高度坐标
    padding2=float((wide- rect_height-20))
    # wide-padding*2


    # 计算每个圆角矩形的位置
    rect_positions = [
        (padding+left, padding2),
        (rect_width + padding * 2+left, padding2),
        (rect_width * 2 + padding * 3+left, padding2),
        (rect_width * 3 + padding * 4+left, padding2),
        (rect_width * 4 + padding * 5+left, padding2),
        (rect_width * 5 + padding * 6+left, padding2)
    ]


    colors = perms[a]
    #  绘制圆角矩形
    draw = ImageDraw.Draw(image)

    # 绘制圆角矩形
    for i, position in enumerate(rect_positions):
        x, y = position
        draw.rounded_rectangle([x, y, x + rect_width, y + rect_height], radius, fill=colors[i], outline='black', width=1)

    # 设置字体路径和大小
    font_path = r'C:\Windows\Fonts\AdobeHeitiStd-Regular.otf'
    font_size = 40

    # 加载字体
    font = ImageFont.truetype(font_path, font_size)

    # 在指定位置绘制文字
    draw.text((200, 30), f'彩色鱼骨图({name}CM)-{a+1:03d}', font=font, fill='black')

    # 保存图片
    image.save(new_path + fr'\{a+1:0{num_digits}d}.png')

print('-----2、制作大图--------')
# 六色所有排序方式 720种

# 使用itertools.permutations生成所有不重复排序方式


from PIL import Image, ImageDraw
import itertools

path = r'C:\Users\jg2yXRZ\OneDrive\桌面\鱼骨图'
new_path_jpg = path + r'\02jpg(6.5乘1)'
os.makedirs(new_path_jpg, exist_ok=True)

name = '6.5乘1'

for b in range(2):
    image = Image.open(path + r'\鱼骨图.jpg')
    long = 844
    wide = 378
    s = 6
    canvas = Image.new('RGB', (long, wide), 'white')
    draw = ImageDraw.Draw(canvas)

    radius = 20
    left = 220
    right = 180
    padding = 30
    rect_width = float((long - left - right - padding * 7) / 6)
    print(rect_width)
    rect_height = float(rect_width * 6.5)
    padding2 = float((wide - rect_height - 20))

    rect_positions = [
        (padding + left, padding2),
        (rect_width + padding * 2 + left, padding2),
        (rect_width * 2 + padding * 3 + left, padding2),
        (rect_width * 3 + padding * 4 + left, padding2),
        (rect_width * 4 + padding * 5 + left, padding2),
        (rect_width * 5 + padding * 6 + left, padding2)
    ]

    colors = perms[a]
    draw = ImageDraw.Draw(image)

    # 绘制圆角矩形
    for i, position in enumerate(rect_positions):
        x, y = position
        draw.rounded_rectangle([x, y, x + rect_width, y + rect_height], radius, fill='white', outline='black', width=1)

    # 设置字体路径和大小
    font_path = r'C:\Windows\Fonts\AdobeHeitiStd-Regular.otf'
    font_size = 40

    # 加载字体
    font = ImageFont.truetype(font_path, font_size)

    # 在指定位置绘制文字
    draw.text((150, 30), f'彩色鱼骨图({name}CM)-操作图{b+1}', font=font, fill='black')

    # 保存图片
    # image.save(new_path + fr'\{a+1:0{num_digits}d}.png')

    image.save(new_path_jpg + fr'\鱼骨图{name}_大图{b+1}.png')

print('-----3、图卡制作成图片格式----------')

import os
import random
from docx import Document
from docx.shared import Cm
from docx2pdf import convert
from PyPDF2 import PdfFileMerger


new_folder = path + r'\零时文件夹'
os.makedirs(new_folder, exist_ok=True)

image_files = [os.path.join(new_path, file) for file in os.listdir(new_path) if file.endswith('.png')]
# random.shuffle(image_files)

grouped_files = [image_files[i:i + 6] for i in range(0, len(image_files), 6)]

for group_index, group in enumerate(grouped_files):
    doc = Document(path + r'\鱼骨图题卡.docx')
    table = doc.tables[0]

    for cell_index, image_file in enumerate(group):
        cell = table.cell(int(cell_index / 2), cell_index % 2)
        cell_paragraph = cell.paragraphs[0]
        cell_paragraph.clear()
        run = cell_paragraph.add_run()
        run.add_picture(image_file, width=Cm(13.92), height=Cm(6.49))

    doc.save(os.path.join(new_folder, f'{group_index + 1:03d}.docx'))

# pdf_output_path = path + fr'\\鱼骨图({name})题卡{len(perms)}张_固定顺序.pdf'
pdf_output_path = path + fr'\\鱼骨图({name})题卡{len(perms)}张_随机顺序.pdf'

for docx_file in os.listdir(new_folder):
    if docx_file.endswith('.docx'):
        docx_path = os.path.join(new_folder, docx_file)
        convert(docx_path, docx_path.replace('.docx', '.pdf'))

merger = PdfFileMerger()
for pdf_file in os.listdir(new_folder):
    if pdf_file.endswith('.pdf'):
        pdf_path = os.path.join(new_folder, pdf_file)
        merger.append(pdf_path)

merger.write(pdf_output_path)
merger.close()

import shutil
shutil.rmtree(new_folder)


print('-----4、图卡制作成操作图格式----------')

import os
import random
from docx import Document
from docx.shared import Cm
from docx2pdf import convert
from PyPDF2 import PdfFileMerger


new_folder = path + r'\零时文件夹'
os.makedirs(new_folder, exist_ok=True)

image_files = [os.path.join(new_path_jpg, file) for file in os.listdir(new_path_jpg) if file.endswith('.png')]
# random.shuffle(image_files)

grouped_files = [image_files[i:i + 2] for i in range(0, len(image_files), 2)]

for group_index, group in enumerate(grouped_files):
    doc = Document(path + r'\鱼骨图操作图.docx')
    table = doc.tables[0]

    for cell_index, image_file in enumerate(group):
        cell = table.cell(int(cell_index / 1), cell_index % 1)
        cell_paragraph = cell.paragraphs[0]
        cell_paragraph.clear()
        run = cell_paragraph.add_run()
        run.add_picture(image_file, width=Cm(21.62), height=Cm(9.7))

    doc.save(os.path.join(new_folder, f'{group_index + 1:03d}.docx'))

# pdf_output_path = path + fr'\\鱼骨图({name})操作卡2张_固定顺序.pdf'
pdf_output_path = path + fr'\\鱼骨图({name})操作卡2张_随机顺序.pdf'

for docx_file in os.listdir(new_folder):
    if docx_file.endswith('.docx'):
        docx_path = os.path.join(new_folder, docx_file)
        convert(docx_path, docx_path.replace('.docx', '.pdf'))

merger = PdfFileMerger()
for pdf_file in os.listdir(new_folder):
    if pdf_file.endswith('.pdf'):
        pdf_path = os.path.join(new_folder, pdf_file)
        merger.append(pdf_path)

merger.write(pdf_output_path)
merger.close()

import shutil
shutil.rmtree(new_folder)

 以上就是6.5*1冰棍棒的教具,不过我还要把操作图打印出来看看,空白的棒子是不是正好6.5*1CM,与实体棒子一样长短大小。


![[16] 使用Opencv_CUDA 实现访问图像像素、直方图均衡化、几何变换](https://img-blog.csdnimg.cn/direct/b50d91de48d24ad98f8aa32b71acca3e.png)