目录
1. Splash 布局(第一页)
1.1 目标
1.2 当前效果图
1.3 创建 Splash 界面
1.4 设置 MaterialApp
1.5 设置 Splash 背景色
1.6 布局 Splash 界面
1.7 总结
2. Splash 圆角图片
2.1 目标
2.2 当前效果图
2.3 蓝湖下载图片
2.4 图片导入项目
2.5 编写 assets 索引
2.6 编写标志 Logo
2.7 总结
3. Splash 文字
3.1 目标
3.2 当前效果图
3.3 蓝湖标注查看
3.4 字体下载导入
3.5 编写 TextStyle
3.6 加入间距
3.7 总结
4. Splash 倒计时
4.1 目标
4.2 当前效果图
4.3 改成有状态组件
4.4 实现倒计时
4.5 重构文字显示函数
4.6 完整代码
4.7 总结
1. Welcome 图片尺寸适应(第二页)
1.1 目标
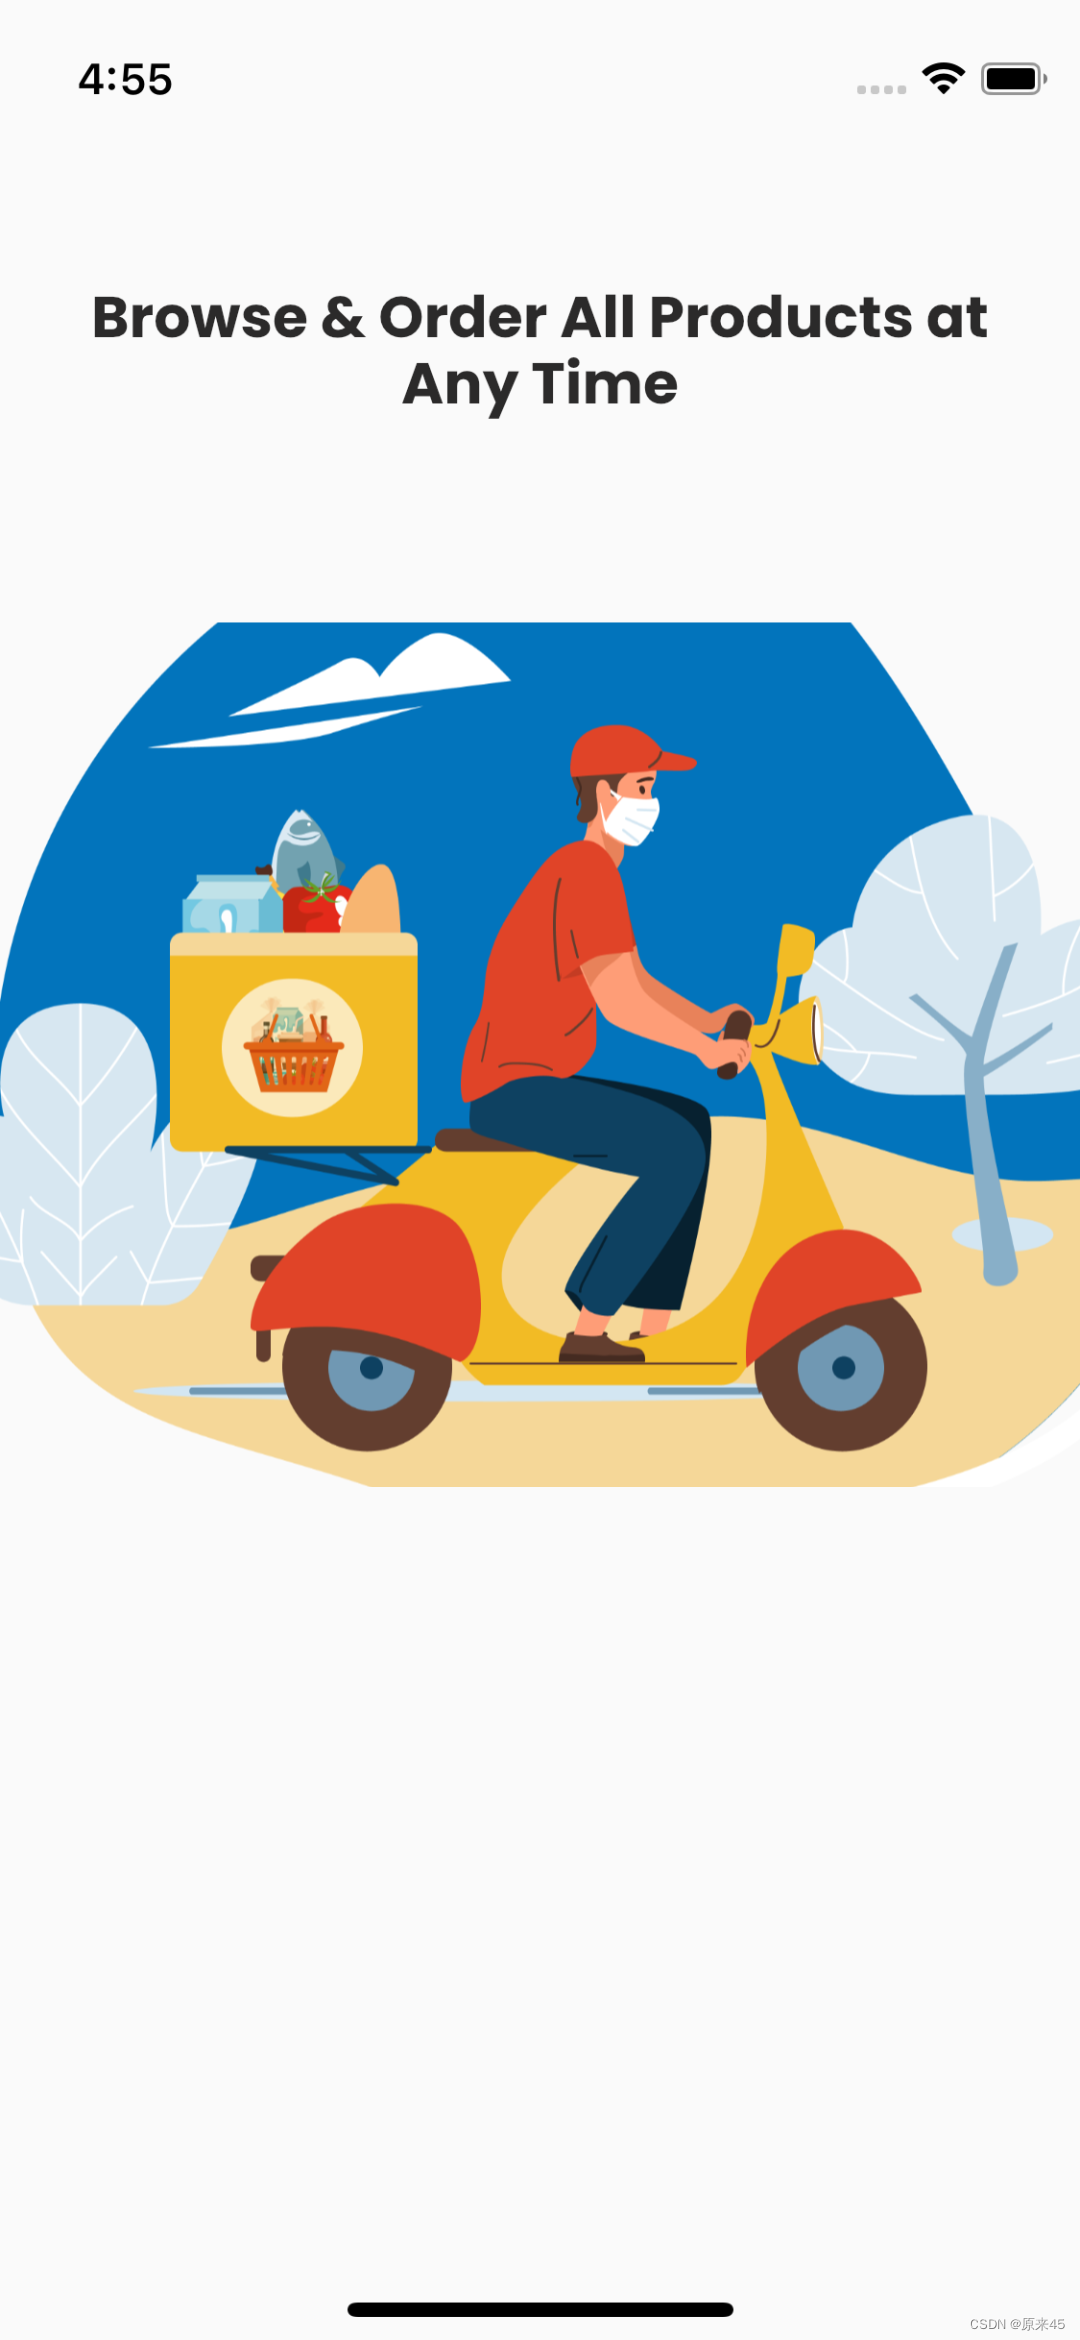
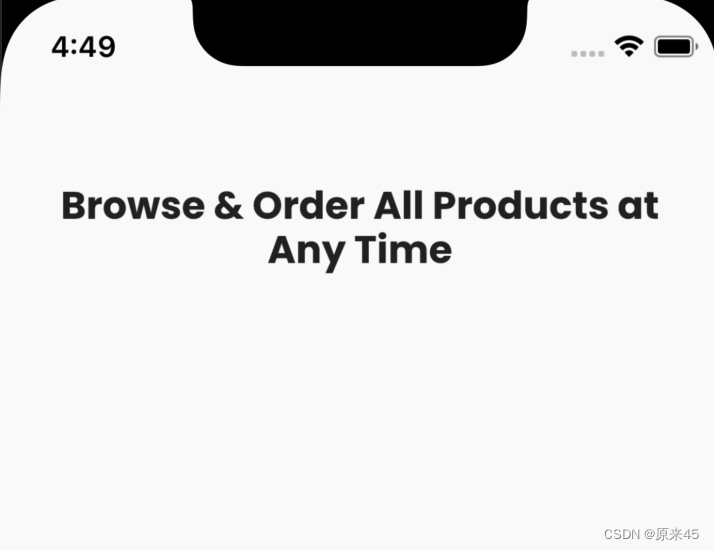
1.2 当前效果图
1.3 设置全局字体
1.4 界面布局、标题
1.5 图片尺寸适应
1.6 总结
2. Welcome 导航切换
2.1 目标
2.2 当前效果图
2.3 底部按钮
2.4 导航切换
2.5 总结
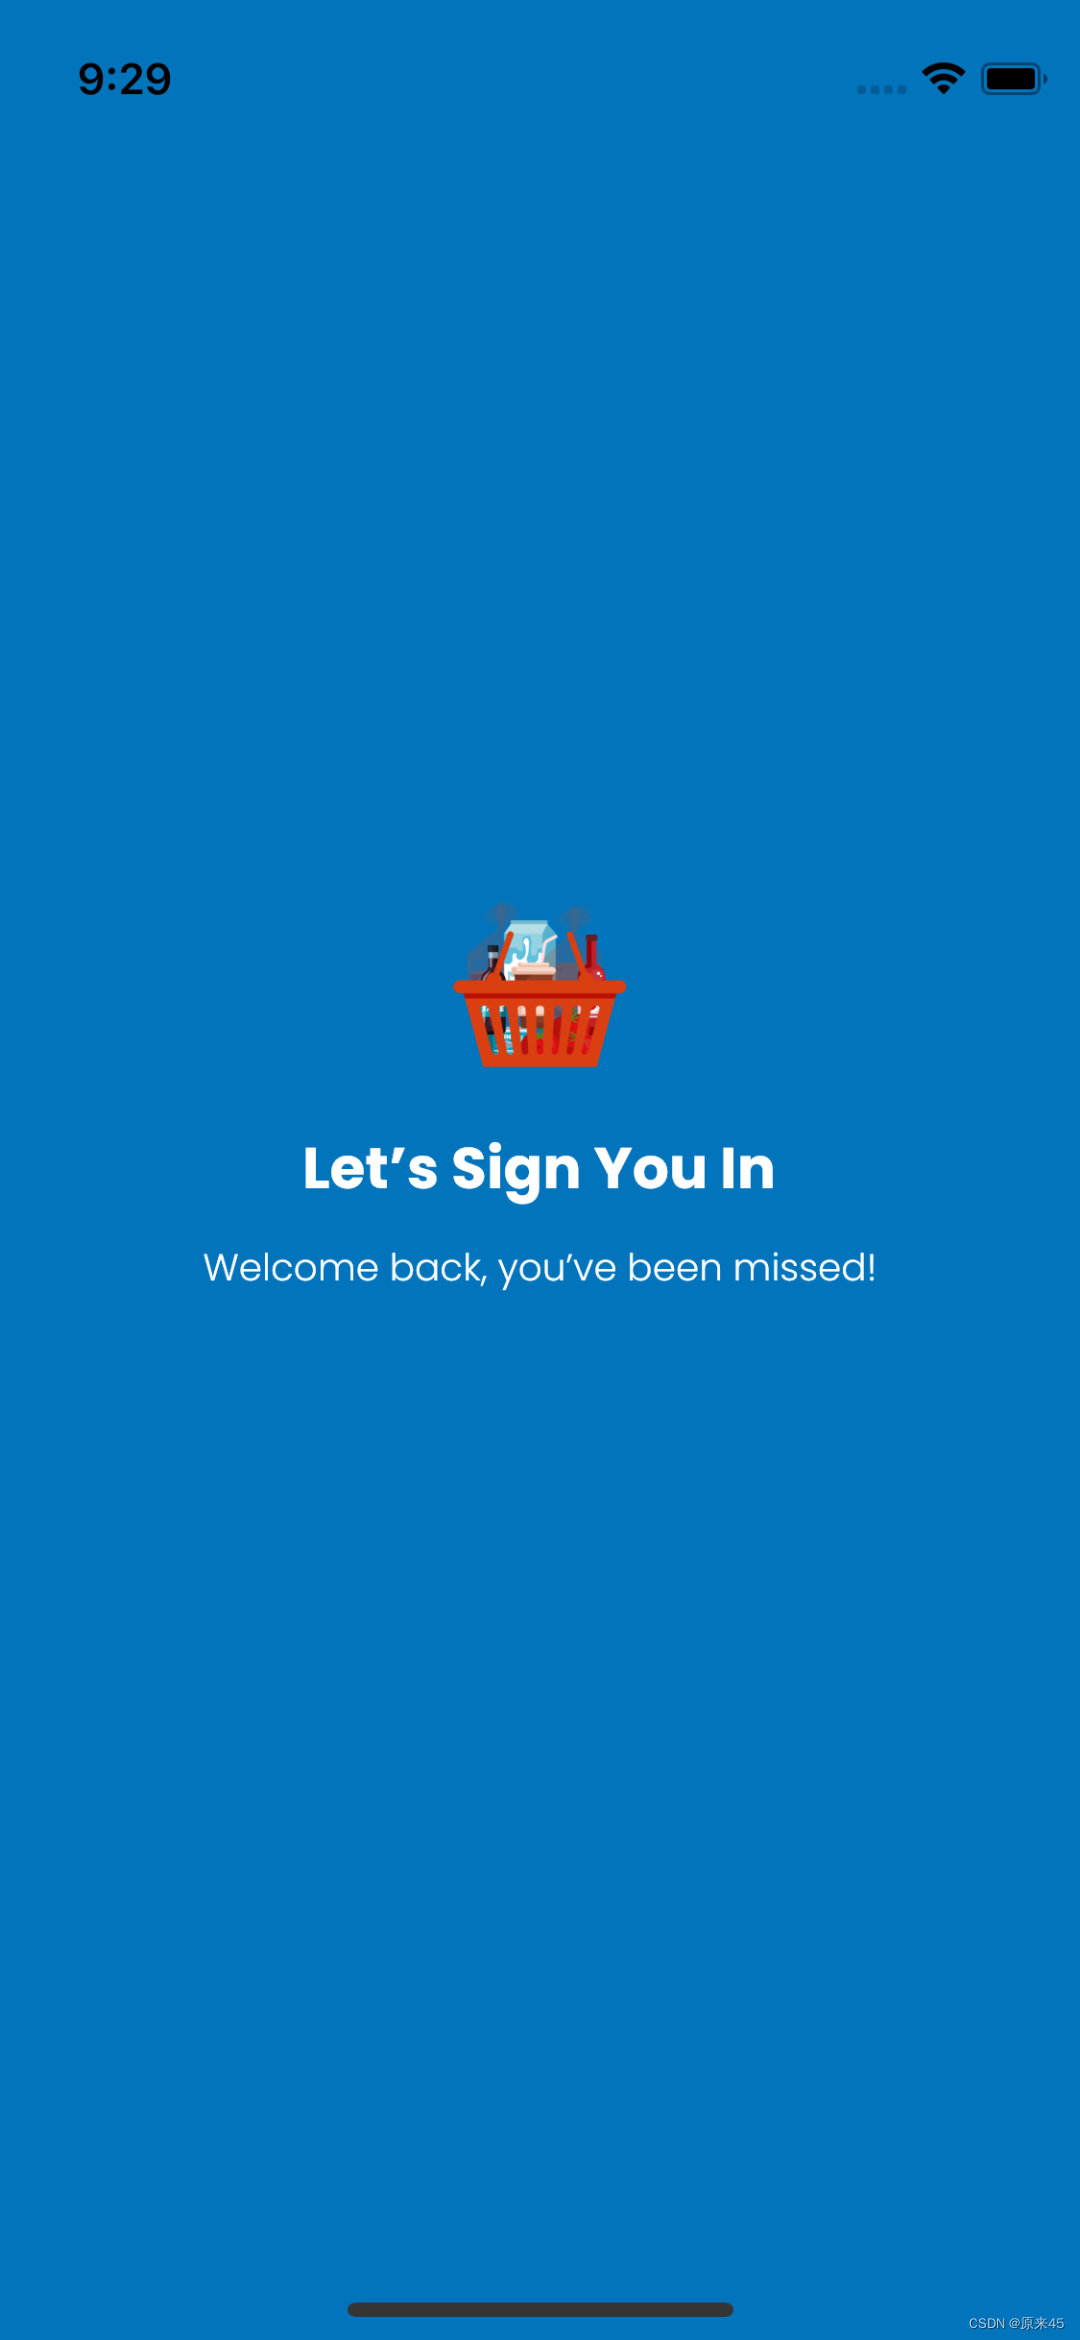
1. login 布局(第三页)
1.1 目标
1.2 布局
1.3 总结
2. login 登录表单
2.1 目标
2.2 当前效果图
2.3 登录表单
2.4 总结
3. login 按钮抽取
3.1 目标
3.2 当前效果图
3.3 按钮组件抽取
3.4 登录按钮
3.5 欢迎按钮
3.6 总结
博主wx:yuanlai45_csdn 博主qq:2777137742
后期会创建粉丝群,为同学们提供分享交流平台以及提供官方发送的福利奖品~
1. Splash 布局(第一页)
1.1 目标
- 查看蓝湖标注
- 初始项目
- 创建 splash 界面
github 目标图片在里面
https://github.com/ducafecat/flutter_quickstart_learn
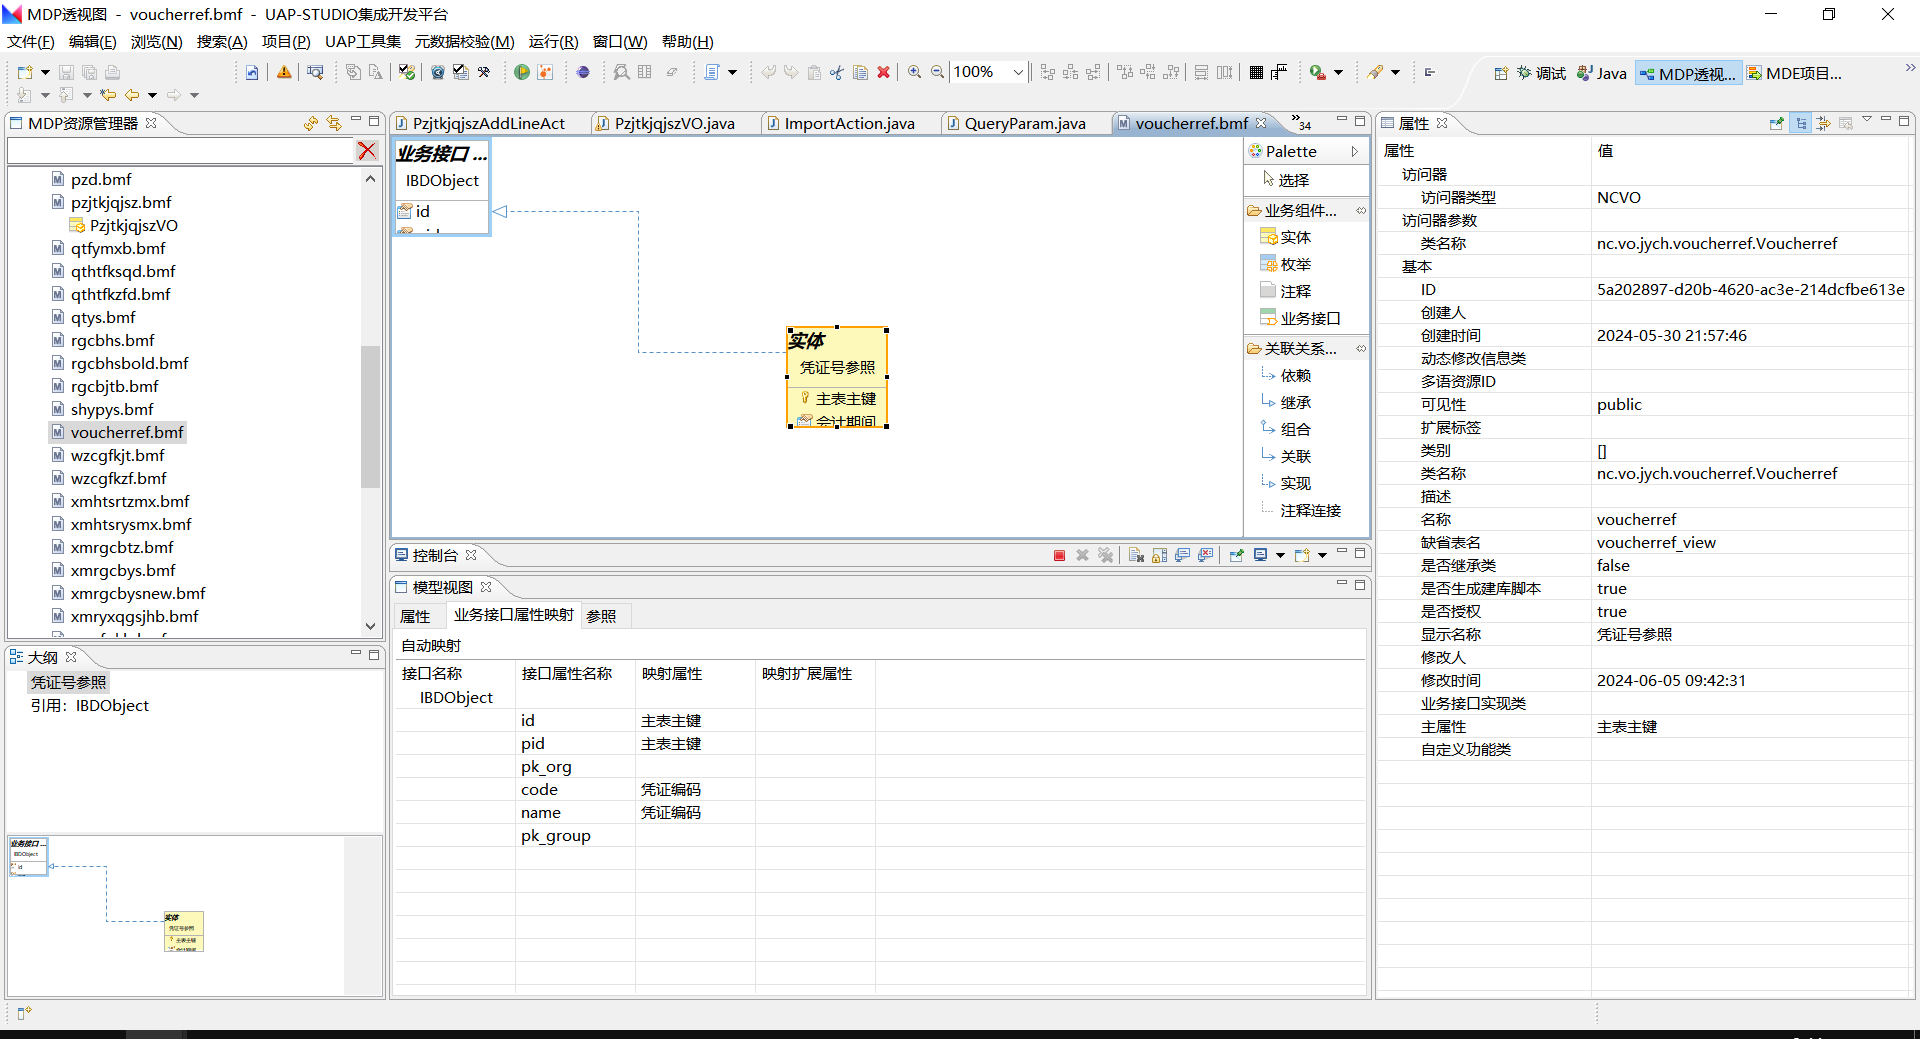
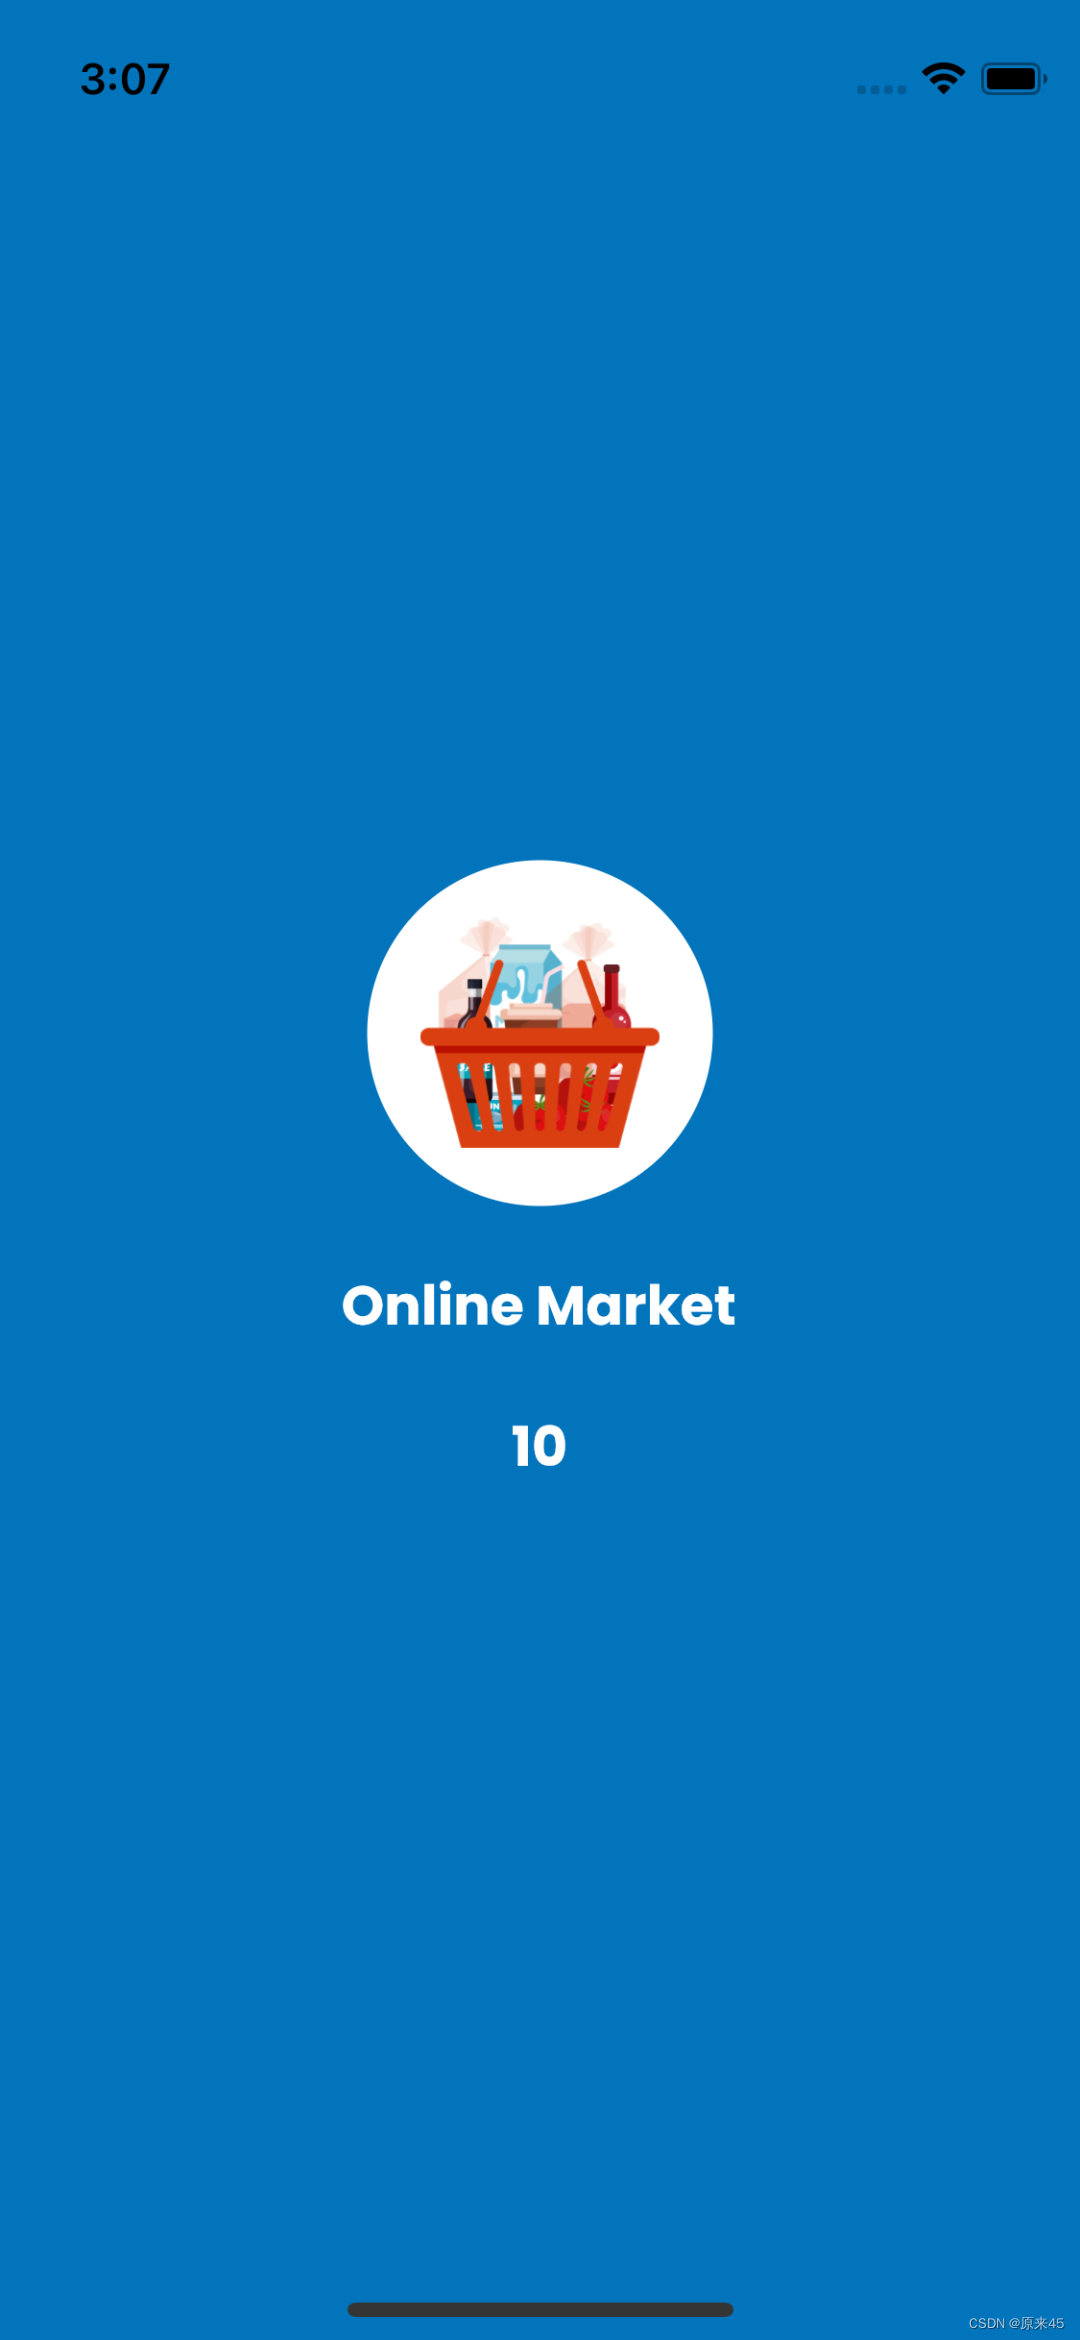
1.2 当前效果图
1.3 创建 Splash 界面
lib/pages/splash.dart
import 'package:flutter/material.dart';

import '../common/index.dart';

class SplashPage extends StatelessWidget {
  const SplashPage({Key? key}) : super(key: key);

  // 主视图
  Widget _buildView(BuildContext context) {
    return Text("splash");
  }

  @override
  Widget build(BuildContext context) {
    return Scaffold(
      body: Center(child: _buildView(context)),
    );
  }
}
1.4 设置 MaterialApp
lib/main.dart
import 'package:flutter/material.dart';

import 'pages/splash.dart';

void main() {
  runApp(const MyApp());
}

class MyApp extends StatelessWidget {
  const MyApp({Key? key}) : super(key: key);

  @override
  Widget build(BuildContext context) {
    return MaterialApp(
      title: 'Flutter Quick Start',

      // 首页
      home: const SplashPage(),

      // 关闭 debug 标签
      debugShowCheckedModeBanner: false,
    );
  }
}
1.5 设置 Splash 背景色
lib/common/app_colors.dart
import 'package:flutter/material.dart';

/// 颜色配置
class AppColors {
  /// splash 背景色
  static const Color backgroundSplash = Color(0xff0274bc);
}
lib/pages/splash.dart
import '../common/index.dart';

...

	@override
  Widget build(BuildContext context) {
    return Scaffold(
      backgroundColor: AppColors.backgroundSplash, // 背景色
      body: _buildView(context),
    );
  }
1.6 布局 Splash 界面
lib/pages/splash.dart
  // 主视图
  Widget _buildView(BuildContext context) {
    return Column(
      mainAxisAlignment: MainAxisAlignment.center,
      crossAxisAlignment: CrossAxisAlignment.center,
      children: [
        // 图标
        Container(
          color: Colors.white,
          width: 120,
          height: 120,
        ),
        // 标题
        const Text("Online Market"),
        // 倒计时
        const Text("10"),
      ],
    );
  }
1.7 总结
-
蓝湖标注平台 布局、尺寸、字体、颜色...
-
初始项目
pagescommon目录创建 -
配置
MaterialApp.home首页 -
配置
Scaffold脚手架背景色 -
全局颜色管理
AppColors -
布局
Splash界面
2. Splash 圆角图片
2.1 目标
- 导入图片资源
- 使用层叠布局编写
logo
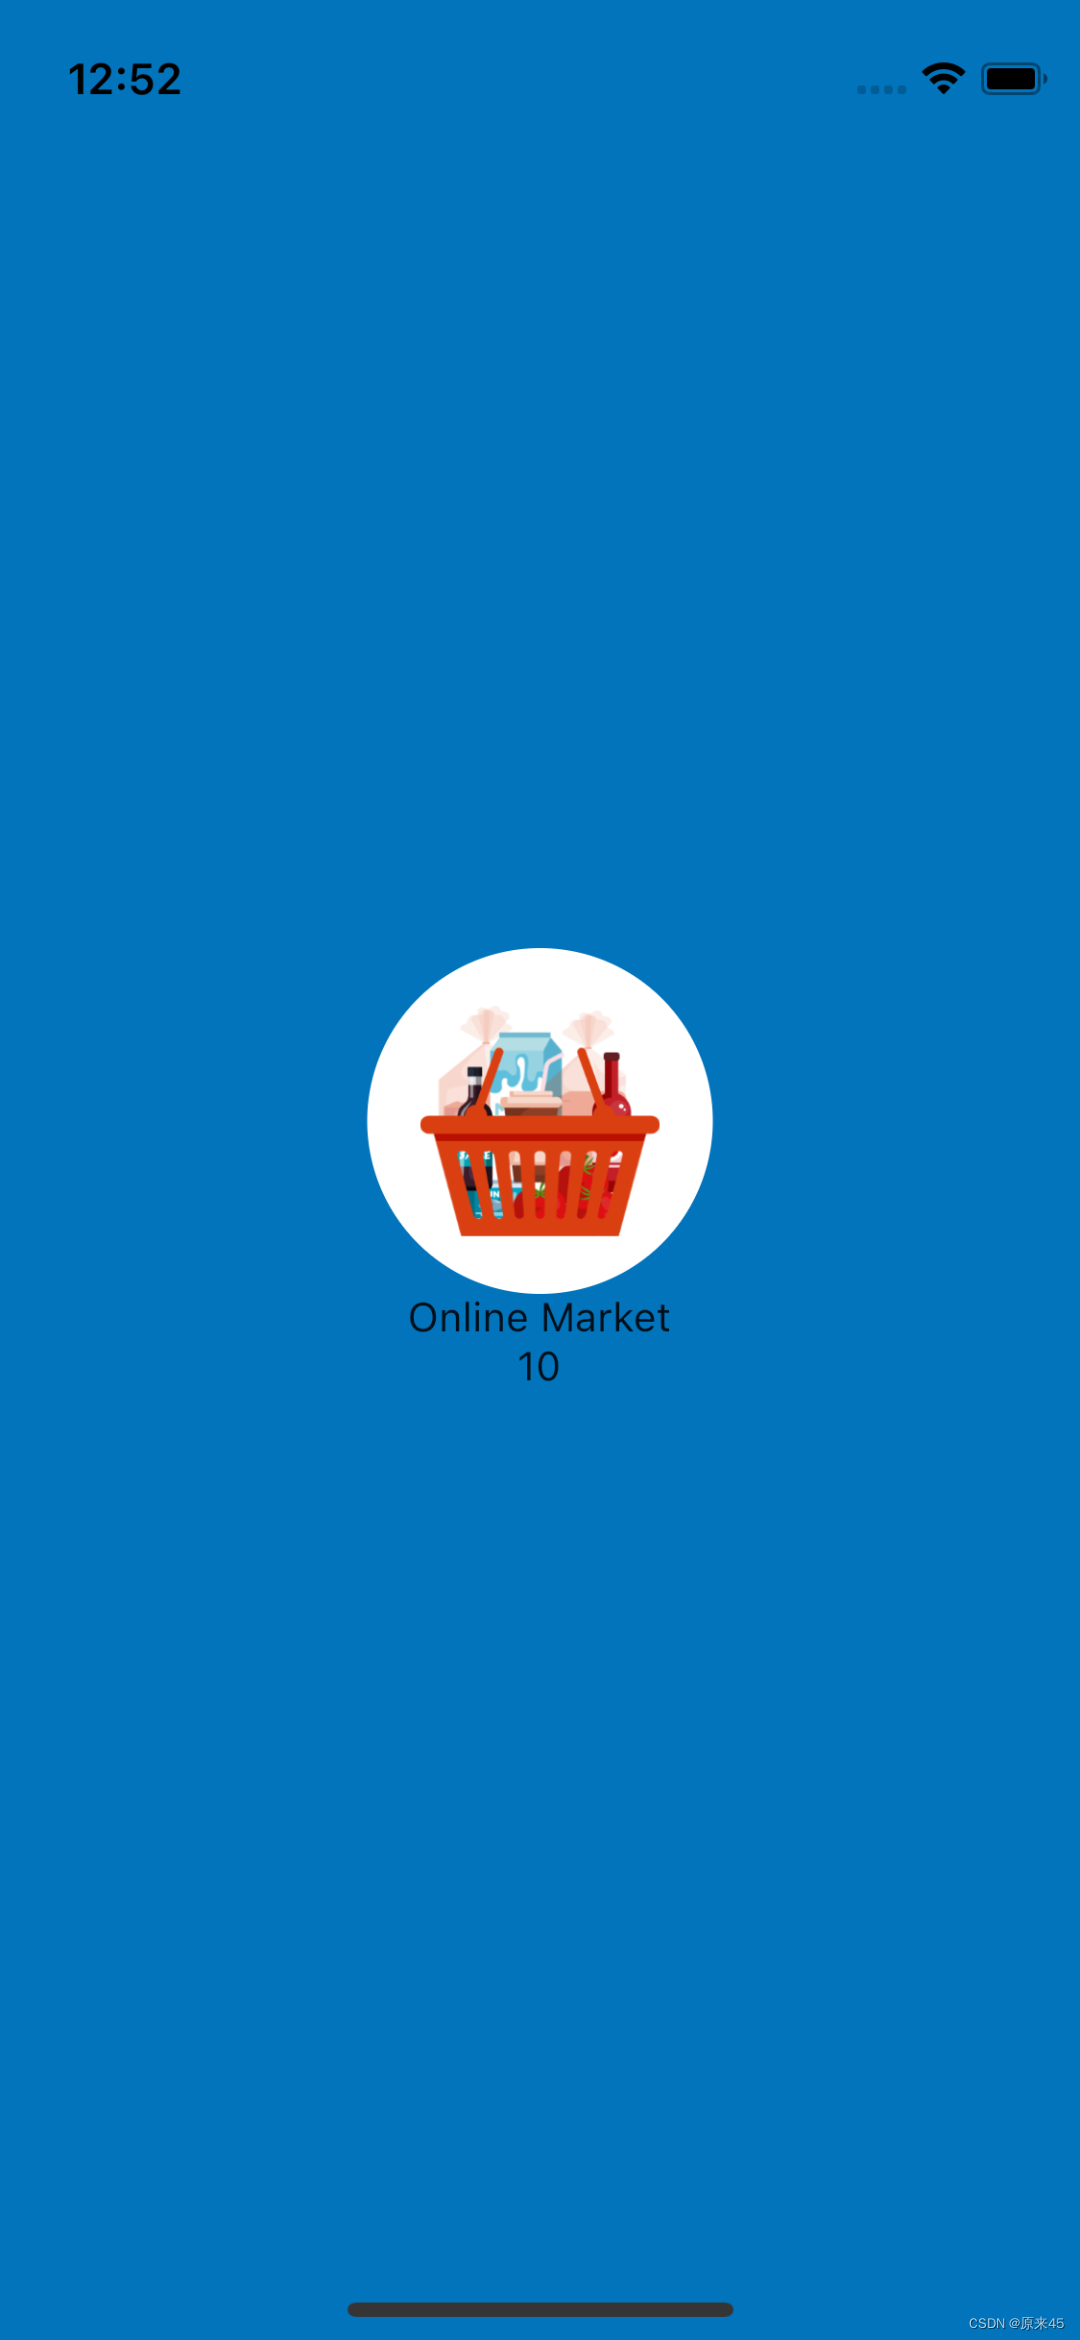
2.2 当前效果图
2.3 蓝湖下载图片
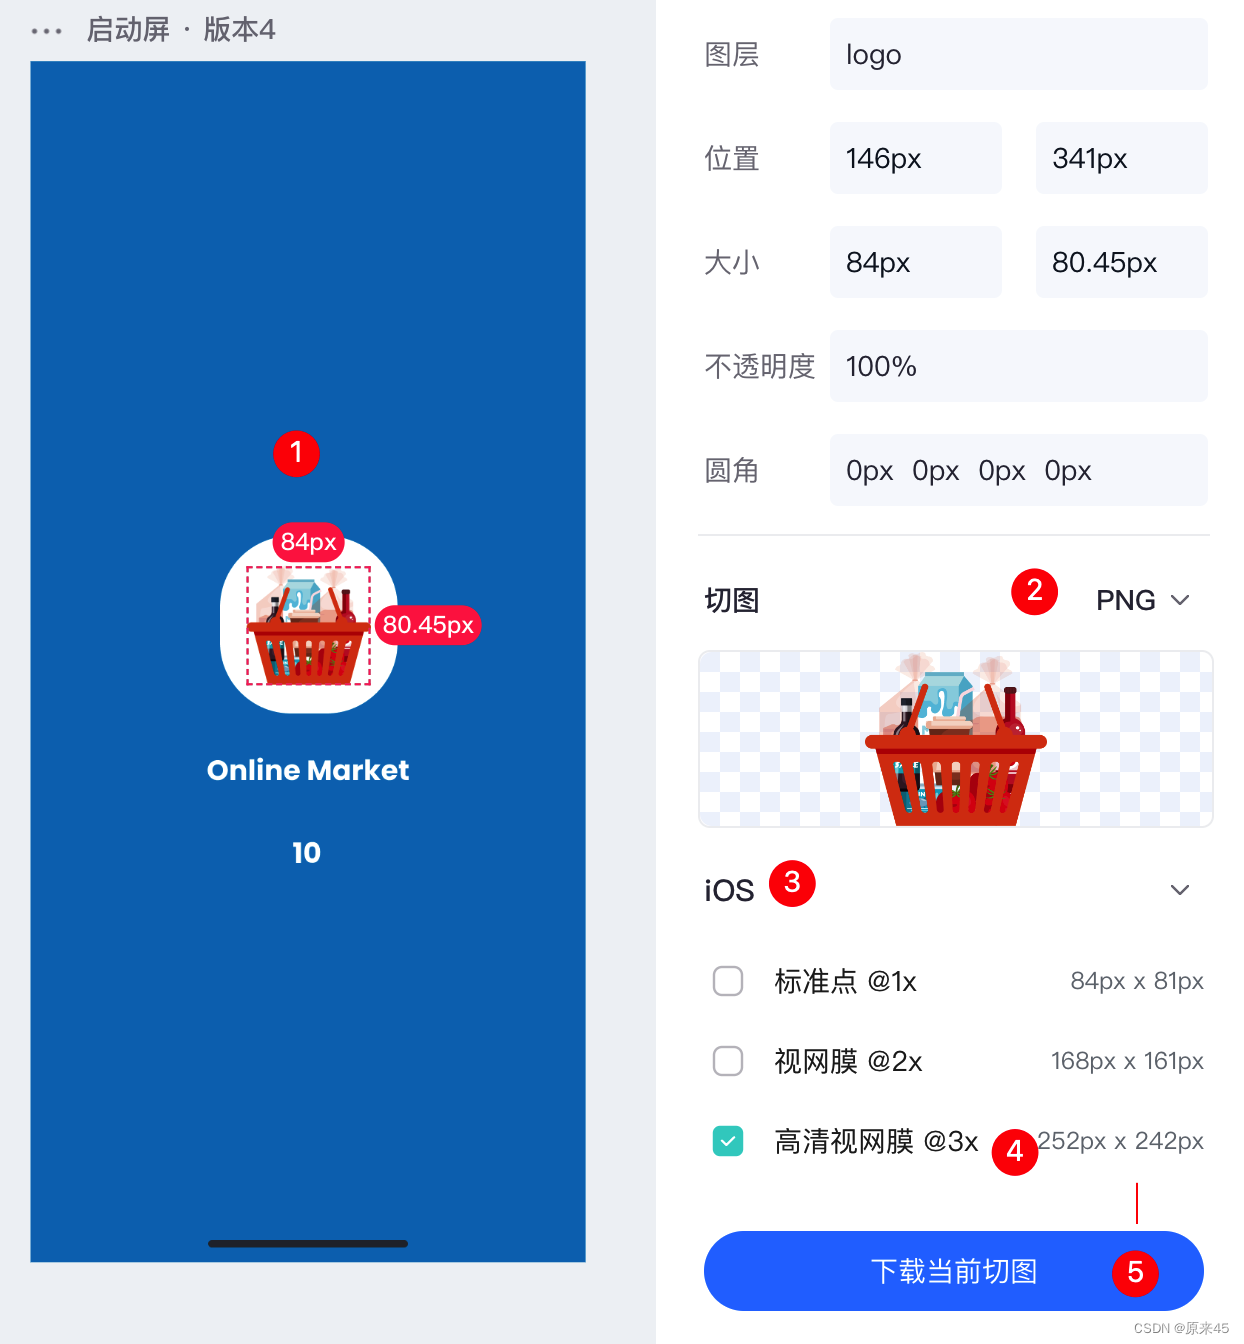
依次选中图片,选中 PNG 格式,IOS 类型,3X 高清,最后下载当前切图
2.4 图片导入项目
放入你的项目 assets/images/3.0x/logo.pn

生成 1x 2x 图片
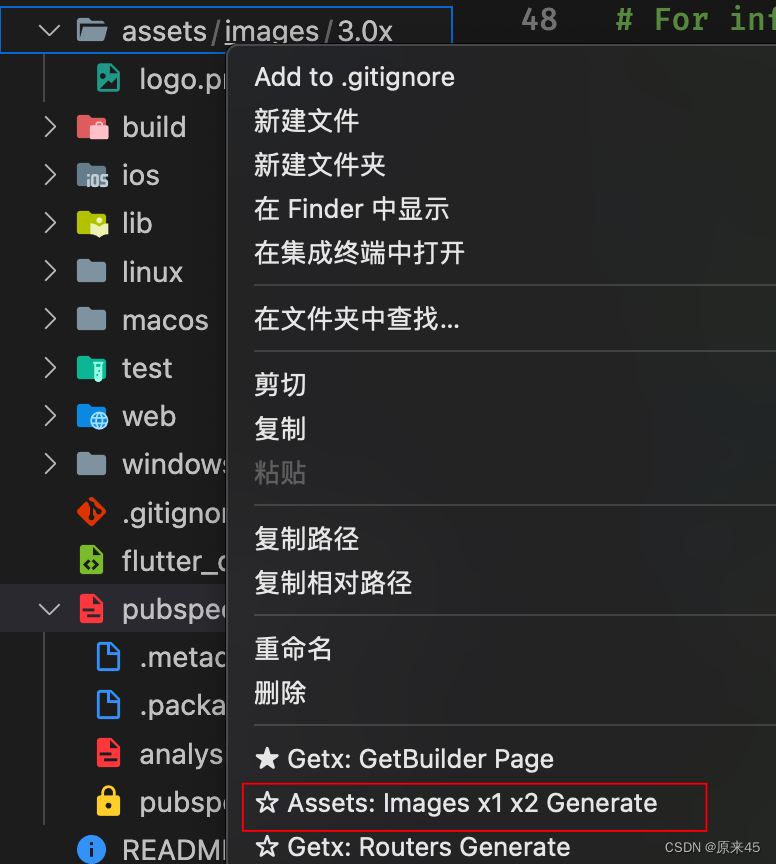

插件地址 Flutter GetX Generator - 猫哥 - Visual Studio Marketplace
修改 pubspec.yaml
flutter:
  ...

  assets:
    - assets/images/
2.5 编写 assets 索引
编写 lib/common/assets.dart, 将 assets/images/files.txt 内容复制进去,这个文件是插件生成的,防止文件太多,手写出错
/// 图片资源
class AssetsImages {
  static const logoPng = 'assets/images/logo.png';
}
2.6 编写标志 Logo
lib/pages/splash.dart
  // 图标
  Widget _buildLogo() {
    return Stack(
      alignment: Alignment.center,
      children: [
        // 底部
        Container(
          width: 120,
          height: 120,
          decoration: BoxDecoration(
            color: Colors.white,
            borderRadius: BorderRadius.circular(120 / 2),
          ),
        ),
        // 图标
        Image.asset(
          AssetsImages.logoPng,
          width: 84,
          height: 80,
        ),
      ],
    );
  }
// 主视图
Widget _buildView(BuildContext context) {
return Column(
mainAxisAlignment: MainAxisAlignment.center,
crossAxisAlignment: CrossAxisAlignment.center,
children: [
// 图标
_buildLogo(),
// 标题
const Text("Online Market"),
// 倒计时
const Text("10"),
],
);
}2.7 总结
- 下载蓝湖切图 选择
png格式ios模式3x尺寸 - 使用猫哥插件生成
1x2x图片,创建资源索引管理 - 使用层叠布局创建
logo - 使用函数进一步的管理代码
3. Splash 文字
3.1 目标
- 导入字体文件
- 配置文字样式
3.2 当前效果图
3.3 蓝湖标注查看
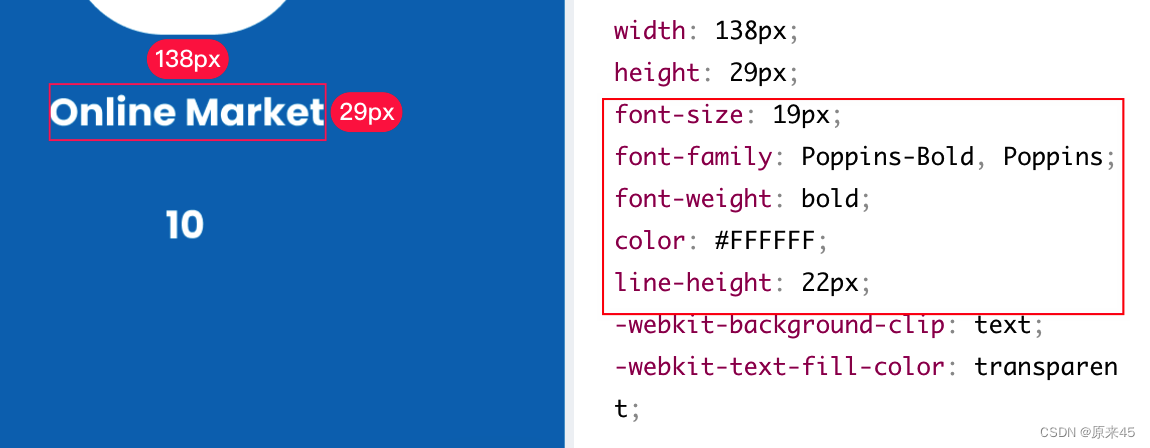
需要关注的属性有:
- font-size 字体大小
- font-family 字体名称
- font-weight 字体重度
- color 颜色
- line-height 行高
3.4 字体下载导入
google 字体下载
https://fonts.google.com/
下载后导入 assets/fonts/
编辑 pubspec.yaml
  fonts:
    - family: Poppins
      fonts:
        - asset: assets/fonts/Poppins-Light.ttf
          weight: 300
        - asset: assets/fonts/Poppins-Regular.ttf
          weight: 400
        - asset: assets/fonts/Poppins-Medium.ttf
          weight: 500
        - asset: assets/fonts/Poppins-Bold.ttf
          weight: 700
3.5 编写 TextStyle
lib/pages/splash.dart
  // 标题
  const Text(
    "Online Market",
    style: TextStyle(
      fontSize: 19,
      fontFamily: "Poppins",
      fontWeight: FontWeight.bold,
      color: Colors.white,
      height: 22 / 19,
    ),
  ),
fontFamily 中写入字体名称 Poppins
height 文本跨度的行高将为 [fontSize] 的倍数并且正好是 fontSize *height 逻辑像素 高。换行的时候才有意义

3.6 加入间距
标题和图标间距 24,和计数器 27
lib/pages/splash.dart
  // 主视图
  Widget _buildView(BuildContext context) {
    return Column(
      mainAxisAlignment: MainAxisAlignment.center,
      crossAxisAlignment: CrossAxisAlignment.center,
      children: [
        // 图标
        _buildLogo(),

        const SizedBox(height: 24),

        // 标题
        const Text(
          "Online Market",
          style: TextStyle(
            fontSize: 19,
            fontFamily: "Poppins",
            fontWeight: FontWeight.bold,
            color: Colors.white,
            height: 22 / 19,
          ),
        ),

        const SizedBox(height: 27),

        // 倒计时
        const Text(
          "10",
          style: TextStyle(
            fontSize: 19,
            fontFamily: "Poppins",
            fontWeight: FontWeight.bold,
            color: Colors.white,
            height: 22 / 19,
          ),
        ),
      ],
    );
  }
3.7 总结
- 导入字体
pubspec中详细明确字体名称、字体文件、字体weight - 用不到的字体文件不用方式
assets/fonts目录中 - 设置文字样式
fontSize、fontFamily、fontWeight、color - 具体值的间距用
SizedBox来配置
4. Splash 倒计时
4.1 目标
- 使用有状态组件
- 倒计时更新组件
4.2 当前效果图
4.3 改成有状态组件
lib/pages/splash.dart
import 'package:flutter/foundation.dart';
import 'package:flutter/material.dart';

import '../common/index.dart';

class SplashPage extends StatefulWidget {
  const SplashPage({Key? key}) : super(key: key);

  @override
  State<SplashPage> createState() => _SplashPageState();
}

class _SplashPageState extends State<SplashPage> {
  // 图标
  Widget _buildLogo() {
    return Stack(
      alignment: Alignment.center,
      children: [
        // 底部
        Container(
          width: 120,
          height: 120,
          decoration: BoxDecoration(
            color: Colors.white,
            borderRadius: BorderRadius.circular(120 / 2),
          ),
        ),
        // 图标
        Image.asset(
          AssetsImages.logoPng,
          width: 84,
          height: 80,
        ),
      ],
    );
  }

  // 主视图
  Widget _buildView(BuildContext context) {
    return Column(
      mainAxisAlignment: MainAxisAlignment.center,
      crossAxisAlignment: CrossAxisAlignment.center,
      children: [
        // 图标
        _buildLogo(),

        const SizedBox(height: 24),

        // 标题
        const Text(
          "Online Market",
          style: TextStyle(
            fontSize: 19,
            fontFamily: "Poppins",
            fontWeight: FontWeight.bold,
            color: Colors.white,
            height: 22 / 19,
          ),
        ),

        const SizedBox(height: 27),

        // 倒计时
        Text(
          "0",
          style: const TextStyle(
            fontSize: 19,
            fontFamily: "Poppins",
            fontWeight: FontWeight.bold,
            color: Colors.white,
            height: 22 / 19,
          ),
        ),
      ],
    );
  }

  @override
  Widget build(BuildContext context) {
    return Scaffold(
      backgroundColor: AppColors.backgroundSplash,
      body: Center(child: _buildView(context)),
    );
  }
}
4.4 实现倒计时
lib/pages/splash.dart
计数 num
  // 计数 num
  final duration = 10;
  int number = 0;
倒计时函数
  // 倒计时
  Future<void> _countdown() async {
    number = duration;
    for (int i = 0; i < duration; i++) {
      await Future.delayed(const Duration(seconds: 1), () {
        if(mounted == ture) {
          setState(() {
            number--;
          });
        }
      });
      // 倒计时结束, 进入 welcome
      if (number == 0) {
        if (kDebugMode) {
          print("倒计时结束");
        }
      }
    }
  }
注意 await async 异步函数的语法
初始执行
  @override
  void initState() {
    super.initState();
    _countdown();
  }
打印显示
  // 主视图
  Widget _buildView(BuildContext context) {
    		...

				// 倒计时
        Text(
          number > 0 ? "$number" : "done",
          style: const TextStyle(
            fontSize: 19,
            fontFamily: "Poppins",
            fontWeight: FontWeight.bold,
            color: Colors.white,
            height: 22 / 19,
          ),
        ),
4.5 重构文字显示函数
macos 下是 option + enter , 也可以在组件上 右键 -> 重构...
文字显示函数
  // 文字显示
  Text _buildText(String text) {
    return Text(
      text,
      style: const TextStyle(
        fontSize: 19,
        fontFamily: "Poppins",
        fontWeight: FontWeight.bold,
        color: Colors.white,
        height: 22 / 19,
      ),
    );
  }
主视图代码
  // 主视图
  Widget _buildView(BuildContext context) {
    return Center(
      child: Column(
        mainAxisAlignment: MainAxisAlignment.center,
        children: [
          // logo
          _buildLogo(),
          const SizedBox(height: 24),

          // 标题
          _buildText("Online Market"),
          const SizedBox(height: 27),

          // 计数器
          _buildText("10"),

          // end
        ],
      ),
    );
  }
4.6 完整代码
lib/pages/splash.dart
import 'package:flutter/material.dart';

import '../common/app_colors.dart';
import '../common/assets.dart';

class SplashPage extends StatefulWidget {
  const SplashPage({Key? key}) : super(key: key);

  @override
  State<SplashPage> createState() => _SplashPageState();
}

class _SplashPageState extends State<SplashPage> {
  // 计数变量
  final duration = 3;
  int number = 0;

  // 倒计时函数
  Future<void> _countdown() async {
    number = duration;
    for (var i = 0; i < duration; i++) {
      await Future.delayed(const Duration(seconds: 1), () {
        if (mounted == true) {
          setState(() {
            number--;
          });
        }
      });

      if (number == 0) {
        print("倒计时结束");
      }
    }
  }

  @override
  void initState() {
    super.initState();
    _countdown();
  }

  // logo
  Widget _buildLogo() {
    return Stack(
      alignment: Alignment.center,
      children: [
        // 底部
        Container(
          width: 120,
          height: 120,
          decoration: BoxDecoration(
            color: Colors.white,
            borderRadius: BorderRadius.circular(120 / 2),
          ),
        ),

        // 图片
        Image.asset(
          AssetsImages.logoPng,
          width: 84,
          height: 80,
        ),
      ],
    );
  }

  // 文字显示
  Text _buildText(String text) {
    return Text(
      text,
      style: const TextStyle(
        fontSize: 19,
        fontFamily: "Poppins",
        fontWeight: FontWeight.bold,
        color: Colors.white,
        height: 22 / 19,
      ),
    );
  }

  // 主视图
  Widget _buildView(BuildContext context) {
    return Center(
      child: Column(
        mainAxisAlignment: MainAxisAlignment.center,
        children: [
          // logo
          _buildLogo(),
          const SizedBox(height: 24),

          // 标题
          _buildText("Online Market"),
          const SizedBox(height: 27),

          // 计数器
          _buildText(number > 0 ? "$number" : "done"),

          // end
        ],
      ),
    );
  }

  @override
  Widget build(BuildContext context) {
    return Scaffold(
      backgroundColor: AppColors.backgroundSplash,
      body: _buildView(context),
    );
  }
}
4.7 总结
- 无状态组件重构成有状态组件
- 使用
Future.delayed方式实现倒计时 - 使用
三目运算符控制显示
1. Welcome 图片尺寸适应(第二页)
1.1 目标
- 全局配置样式、字体
- 图片适配高宽
- 布局代码练习
1.2 当前效果图
1.3 设置全局字体
lib/main.dart
class MyApp extends StatelessWidget {
  const MyApp({Key? key}) : super(key: key);

  @override
  Widget build(BuildContext context) {
    return MaterialApp(
      ...

      // 样式
      theme: ThemeData(
        primarySwatch: Colors.orange,
        fontFamily: "Poppins", // 字体
      ),
字体全局放在 theme fontFamily 属性中
1.4 界面布局、标题
lib/pages/welcome.dart
import 'package:flutter/material.dart';

/// 欢迎页面
class WelcomePage extends StatelessWidget {
  const WelcomePage({Key? key}) : super(key: key);

  // 主视图
  Widget _buildView() {
    return Column(
      mainAxisAlignment: MainAxisAlignment.center,
      children: [
        // 标题
        const Padding(
          padding: EdgeInsets.symmetric(horizontal: 30),
          child: Text(
            "Browse & Order All Products at Any Time",
            textAlign: TextAlign.center,
            style: TextStyle(
              fontSize: 20,
              fontFamily: "Poppins",
              fontWeight: FontWeight.bold,
              color: Color(0xff2B2A2A),
              height: 23 / 20,
            ),
          ),
        ),

        // 图
        Container(),

        // 底部按钮
        Container(),
      ],
    );
  }

  @override
  Widget build(BuildContext context) {
    return Scaffold(
      body: _buildView(),
    );
  }
}
标题代码抽取函数,整理代码
  // 标题
  Padding _buildTitle() {
    return const Padding(
      padding: EdgeInsets.symmetric(horizontal: 30),
      child: Text(
        "Browse & Order All Products at Any Time",
        textAlign: TextAlign.center,
        style: TextStyle(
          fontSize: 20,
          fontFamily: "Poppins",
          fontWeight: FontWeight.bold,
          color: Color(0xff2B2A2A),
          height: 23 / 20,
        ),
      ),
    );
  }
// 主视图
Widget _buildView() {
return Column(
children: [
const SizedBox(height: 100),
// 标题
_buildTitle(),
...
1.5 图片尺寸适应
从蓝湖下载图片导入项目,这里不再重复叙述
lib/pages/welcome.dart
  // 图片
  Image _buildImage() {
    return Image.asset(
      AssetsImages.welcomePng,
      height: 300,
      width: double.infinity,
      fit: BoxFit.none,
      //fit:BoxFit.fitWidth
    );
  }
// 主视图
Widget _buildView() {
return Column(
mainAxisAlignment: MainAxisAlignment.center,
children: [
// 标题
_buildTitle(),
const SizedBox(height: 70),
// 图
_buildImage(),
// 底部按钮
_buildBtns(),
],
);
}1.6 总结
- 通过
ThemeData.fontFamily设置全局字体 padding: EdgeInsets.symmetric(horizontal: 30)水平Padding距离- 图片组件
Image.fit设置宽高适配 - 布局第一规则
从上往下
2. Welcome 导航切换
2.1 目标
- 布局规则 “从上往下、从左往右”
- 全局按钮颜色样式
- 布局训练 横向、纵向 混合
2.2 当前效果图
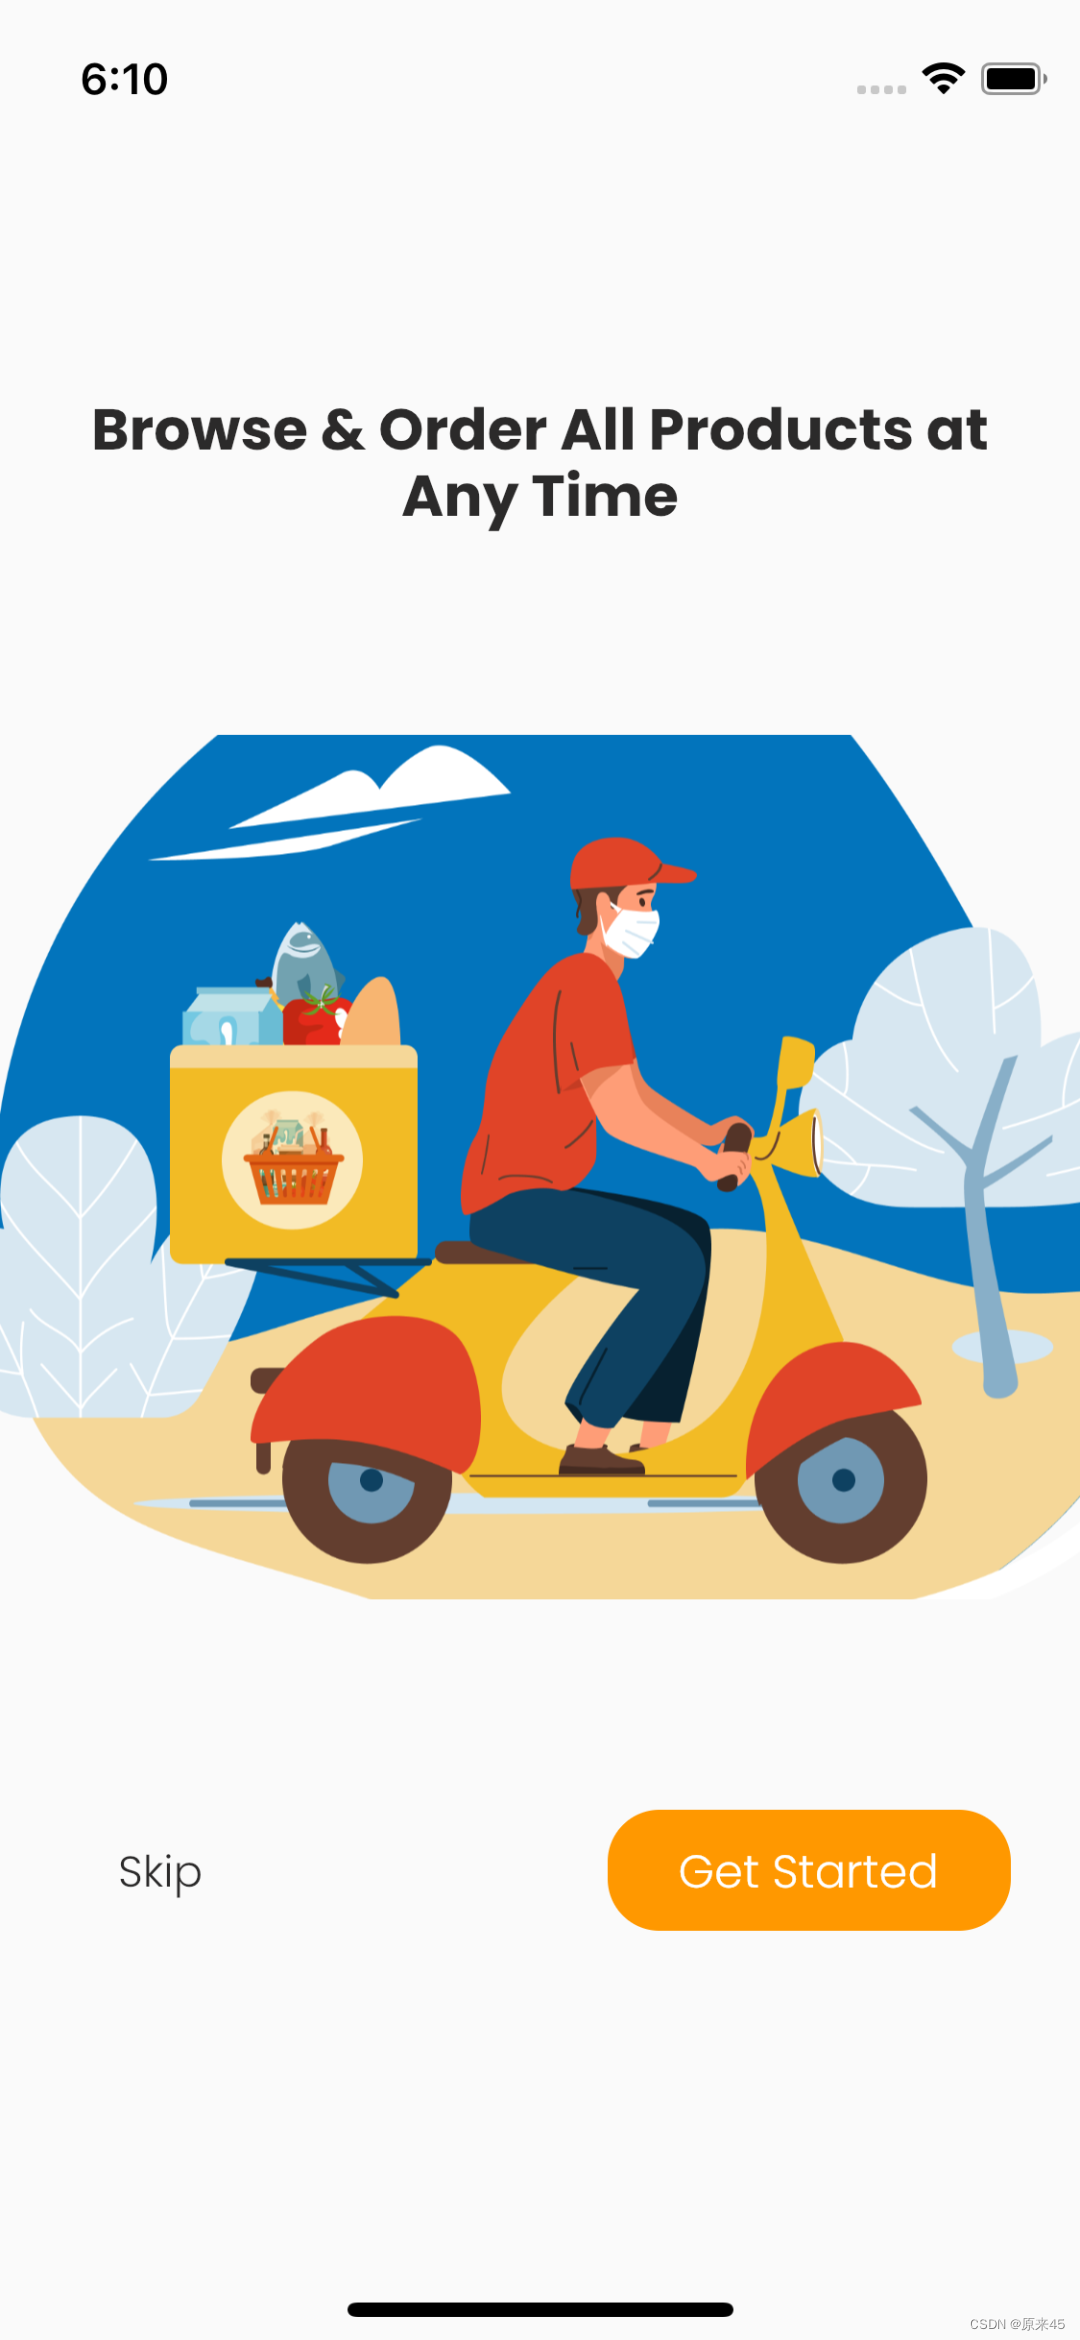
2.3 底部按钮
lib/pages/welcome.dart
  // goto 登录页面
  void onLogin(BuildContext context) {}

	// 底部按钮
  Padding _buildBtns(BuildContext context) {
    return Padding(
      padding: const EdgeInsets.symmetric(horizontal: 24),
      child: Row(
        children: [
          // skip
          TextButton(
            onPressed: () => onLogin(context),
            child: const Text(
              "Skip",
              style: TextStyle(
                fontSize: 15,
                fontWeight: FontWeight.w300,
                color: Color(0xff2B2A2A),
              ),
            ),
          ),

          // 撑开
          const Expanded(
            child: SizedBox(),
          ),

          // Get Started
          Container(
            height: 42,
            width: 140,
            clipBehavior: Clip.antiAlias,
            decoration: const BoxDecoration(
              borderRadius: BorderRadius.all(
                Radius.circular(18),
              ),
            ),
            child: ElevatedButton(
              onPressed: () => onLogin(context),
              style: ButtonStyle(
                elevation: MaterialStateProperty.all(0),
                minimumSize: MaterialStateProperty.all(Size.zero),
              ),
              child: const Text(
                "Get Started",
                style: TextStyle(
                  fontSize: 16,
                  fontWeight: FontWeight.w300,
                  color: Colors.white,
                ),
              ),
            ),
          ),
        ],
      ),
    );
  }
// 主视图
Widget _buildView(BuildContext context) {
return Column(
mainAxisAlignment: MainAxisAlignment.center,
children: [
// 标题
_buildTitle(),
const SizedBox(height: 70),
// 图
_buildImage(),
const SizedBox(height: 70),
// 底部按钮
_buildBtns(context),
],
);
}2.4 导航切换
splash 倒计时结束进入 welcome 界面
  // 倒计时
  Future<void> _countdown() async {
    number = duration;
    for (int i = 0; i < duration; i++) {
      ...
      // 倒计时结束, 进入 welcome
      if (number == 0) {
        Navigator.pushReplacement(context,
            MaterialPageRoute(builder: (context) => const WelcomePage()));
      }
    }
  }
2.5 总结
设计稿布局分析 “从上往下、从左往右”
先写布局代码结构
注意命名 _buildXXX 开头都是私有布局函数
导航 Navigator.pushReplacement 进入新界面并替换当前
1. login 布局(第三页)
1.1 目标
看标注布局界面(千锤百炼就会了)
1.2 布局
lib/pages/login.dart
  // 登录表单
  Widget _buildForm() {
    return Container();
  }
// 主视图
Widget _buildView() {
return Container(
padding: const EdgeInsets.symmetric(horizontal: 15),
color: AppColors.backgroundSplash,
child: Column(
mainAxisAlignment: MainAxisAlignment.center,
children: [
// 图标
Image.asset(
AssetsImages.logoPng,
width: 60,
),
const SizedBox(height: 20),
// 主标
const Text(
"Let’s Sign You In",
style: TextStyle(
fontSize: 20,
color: Colors.white,
fontWeight: FontWeight.bold,
),
),
const SizedBox(height: 10),
// 子标
const Text(
"Welcome back, you’ve been missed!",
style: TextStyle(
fontSize: 13,
color: Colors.white,
fontWeight: FontWeight.w300,
),
),
const SizedBox(height: 50),
// 表单
_buildForm(),
],
),
);
} @override
Widget build(BuildContext context) {
return Scaffold(
body: _buildView(),
);
}1.3 总结
- 记住布局规则 “从上往下、从左往右”
- 用函数拆分视图结构
2. login 登录表单
2.1 目标
- 编写表单
- 有效性检查
2.2 当前效果图
2.3 登录表单
lib/pages/login.dart
  // 账号输入是否有效
  bool isUserNameValid = false;
// 登录表单
Widget _buildForm() {
return Container(
padding: const EdgeInsets.fromLTRB(20, 50, 20, 20),
decoration: BoxDecoration(
color: Colors.white,
borderRadius: BorderRadius.circular(35),
),
child: Column(
crossAxisAlignment: CrossAxisAlignment.start,
children: [
// Username or E-Mail
const Text(
"Username or E-Mail",
style: TextStyle(
fontSize: 15,
color: Color(0xff838383),
fontWeight: FontWeight.w300,
),
),
TextField(
onChanged: (value) {
bool valid = false;
if (value.length >= 6) {
valid = true;
} else {
valid = false;
}
setState(() {
isUserNameValid = valid;
});
},
decoration: InputDecoration(
hintText: "@",
// labelText: "Username or E-Mail",
// labelStyle: const TextStyle(
// fontSize: 15,
// color: Color(0xff838383),
// fontWeight: FontWeight.w300,
// ),
prefixIcon: Image.asset(
AssetsImages.iconUserPng,
width: 23,
height: 23,
),
suffixIcon: isUserNameValid == true
? const Icon(
Icons.done,
color: Colors.green,
)
: null,
),
),
// 间距
const SizedBox(height: 35),
// Password
const Text(
"Password",
style: TextStyle(
fontSize: 15,
color: Color(0xff838383),
fontWeight: FontWeight.w300,
),
),
TextField(
obscureText: true,
decoration: InputDecoration(
hintText: "6 digits",
// labelText: "Password",
// labelStyle: const TextStyle(
// fontSize: 15,
// color: Color(0xff838383),
// fontWeight: FontWeight.w300,
// ),
prefixIcon: Image.asset(
AssetsImages.iconLockPng,
width: 23,
height: 23,
),
suffixIcon: TextButton(
onPressed: () {},
child: const Text(
"Forget?",
style: TextStyle(
fontSize: 15,
color: Color(0xff0274bc),
fontWeight: FontWeight.w500,
),
),
),
),
),
// 间距
const SizedBox(height: 30),
// Sign In
// 间距
const SizedBox(height: 16),
// Don’t have an account? + Sign Up
Row(
mainAxisAlignment: MainAxisAlignment.center,
children: [
// 文字
const Text(
"Don’t have an account? ",
style: TextStyle(
fontSize: 15,
color: Color(0xff171717),
fontWeight: FontWeight.w300,
),
),
// 按钮
TextButton(
onPressed: () {},
child: const Text(
"Sign Up",
style: TextStyle(
fontSize: 15,
color: Color(0xff0274bc),
fontWeight: FontWeight.bold,
),
),
),
],
),
],
),
);
}2.4 总结
- 通过
TextField.decoration属性进行装饰 TextField.obscureText开启密码
3. login 按钮抽取
3.1 目标
- 抽取公共按钮组件
- 修改成纯
ElevatedButton按钮
3.2 当前效果图
3.3 按钮组件抽取
lib/common/widgets.dart
import 'package:flutter/material.dart';

/// 按钮组件
class ButtonWidget extends StatelessWidget {
  const ButtonWidget({
    Key? key,
    this.height,
    this.widget,
    this.radius,
    this.onPressed,
    this.text,
  }) : super(key: key);

  /// 文字
  final String? text;

  /// 高度
  final double? height;

  /// 宽度
  final double? widget;

  /// 圆角
  final double? radius;

  /// 点击事件
  final void Function()? onPressed;

  @override
  Widget build(BuildContext context) {
    return ElevatedButton(
      onPressed: onPressed,
      style: ButtonStyle(
        // 阴影高度
        elevation: MaterialStateProperty.all(0),
        // 最小尺寸
        minimumSize: MaterialStateProperty.all(
            Size(widget ?? double.infinity, height ?? double.infinity)),
        // 形状 圆角
        shape: MaterialStateProperty.all(
          RoundedRectangleBorder(
            borderRadius: BorderRadius.all(
              Radius.circular(radius ?? 18),
            ),
          ),
        ),
      ),
      child: Text(
        // 文字
        text ?? "",
        // 文字样式
        style: const TextStyle(
          fontSize: 16,
          fontWeight: FontWeight.w300,
          color: Colors.white,
        ),
      ),
    );
  }
}
3.4 登录按钮
lib/pages/login.dart
  // 登录表单
  Widget _buildForm() {
					...
    			// Sign In
          ButtonWidget(
            text: 'Sign In',
            onPressed: () {},
            height: 60,
            widget: double.infinity,
            radius: 18,
          ),
3.5 欢迎按钮
lib/pages/welcome.dart
  // 底部按钮
  Padding _buildBtns(BuildContext context) {
    ...
    // Get Started
    ButtonWidget(
      text: "Get Started",
      height: 42,
      widget: 140,
      radius: 32,
      onPressed: () => onLogin(context),
    ),
// goto 登录页面
void onLogin(BuildContext context) {
Navigator.push(
context,
MaterialPageRoute(builder: (context) => const LoginPage()),
);
}3.6 总结
- 公共组件类抽取方法
ElevatedButton组件属性配置
创作不易,希望读者三连支持 💖
赠人玫瑰,手有余香 💖