一个不断在迭代的项目,Controller层与POJO层肯定会是经常变动的,在目前前后端分离的大环境背景下有一份接口文档可以极大减少项目组成员之间的交流成本,也能支持自动化测试,但靠人工维护该文档总是不够稳妥,因此我们可以使用Swagger,为响应式接口文档提供了一种解决方案。
文章目录
- 一,准备工作
- 二,准备配置信息类、相关注解使用
- 三,测试查看接口文档
一,准备工作
首先在项目中引入Swagger依赖
<!-- swagger -->
<dependency>
    <groupId>io.springfox</groupId>
    <artifactId>springfox-swagger2</artifactId>
    <version>3.0.0</version>
</dependency>
<dependency>
    <groupId>io.springfox</groupId>
    <artifactId>springfox-swagger-ui</artifactId>
    <version>3.0.0</version>
</dependency>
二,准备配置信息类、相关注解使用
如果没有特殊需求的话,下列配置信息只需要修改apiInfo方法中的联系人信息即可。
package com.sy;

/**
 * Swagger3.0 接口文档配置类
 */
@Configuration
@EnableOpenApi //表示开启生成接口文档功能(只有开启了OpenApi,才可以实现生成接口文档的功能)
@EnableWebMvc
public class SwaggerConfig implements WebMvcConfigurer {
    @Override
    public void addResourceHandlers(ResourceHandlerRegistry registry) {
        registry.addResourceHandler("/**").addResourceLocations(
            "classpath:/static/");
        registry.addResourceHandler("swagger-ui.html").addResourceLocations(
            "classpath:/META-INF/resources/");
        registry.addResourceHandler("/webjars/**").addResourceLocations(
            "classpath:/META-INF/resources/webjars/");
        WebMvcConfigurer.super.addResourceHandlers(registry);
    }

    @Bean
    public Docket createRestApi() {
        return new Docket(DocumentationType.OAS_30)
            .apiInfo(apiInfo())
            .select()
            .apis( RequestHandlerSelectors.withMethodAnnotation(ApiOperation.class))
            .paths(PathSelectors.any())
            .build();
    }

    private ApiInfo apiInfo() {
        return new ApiInfoBuilder()
            .title("项目接口文档")//标题
            .description("更多请咨询服务开发者y。") // 描述
            .contact(new Contact("C", "http://www.y.com", "y@email.com")) // 附加信息
            .version("0.0.1-SNAPSHOT") // 版本
            .build();
    }
}
接着在controller层中的接口上配置相关的信息,以便能被Swagger识别,下面介绍几个Swagger常用注解,更多注解信息可参考这篇博客https://blog.csdn.net/weixin_38568503/article/details/125890583:
@Api():多用于Controller层类上,为类添加描述信息;tags:“该值会覆盖value值”value:“url的路径”description:“对api资源的描述信息”
@ApiOperation():用于方法上,表示是一个http请求的操作,为方法添加描述信息;tags:“该值会覆盖value值”value:“url的路径”
@ApiParam():用于方法、参数、字段说明,表示对参数添加描述;name:“属性名称”value:“属性值”defaultValue:“默认属性值”required:“是否属性必填”example:“举例属性”
@ApiModel():用于实体类上,为实体类添加描述信息;description:pojo描述信息
@ApiModelProperty():用于实体类的属性上,为属性添加描述信息;value:pojo类字段描述信息
@ApiIgnore():用于类、方法、方法参数,表示这个方法或类被忽略。
默认情况下,Swagger-Core只会扫描具有@Api注解的类,上代码举例:
@Api(tags = "菜单信息控制器", description = "菜单信息控制器", value = "/dish")
@RestController
@RequestMapping(value = "/dish", produces = "application/json; charset=utf-8")
public class DishController {
    @ApiOperation(value = "/dish/select/{dishId}", tags = "根据dishId查询具体菜品信息")
    @GetMapping("/select/{dishId}")
    public String select(@PathVariable @ApiParam(
        name = "dishId", value = "dishID菜品主键", required = true, example = "1413385247889891331"
    ) String dishId) {
        return dishServices.selectDishDefault(dishId);
    }
}

@ApiModel(description= "返回人员信息")
@Data
@AllArgsConstructor
@NoArgsConstructor/**/
public class Dish implements Serializable {
    @ApiModelProperty("菜品主键")
    private String id;

    @ApiModelProperty("菜品名称")
    private String name;
	...
}
三,测试查看接口文档
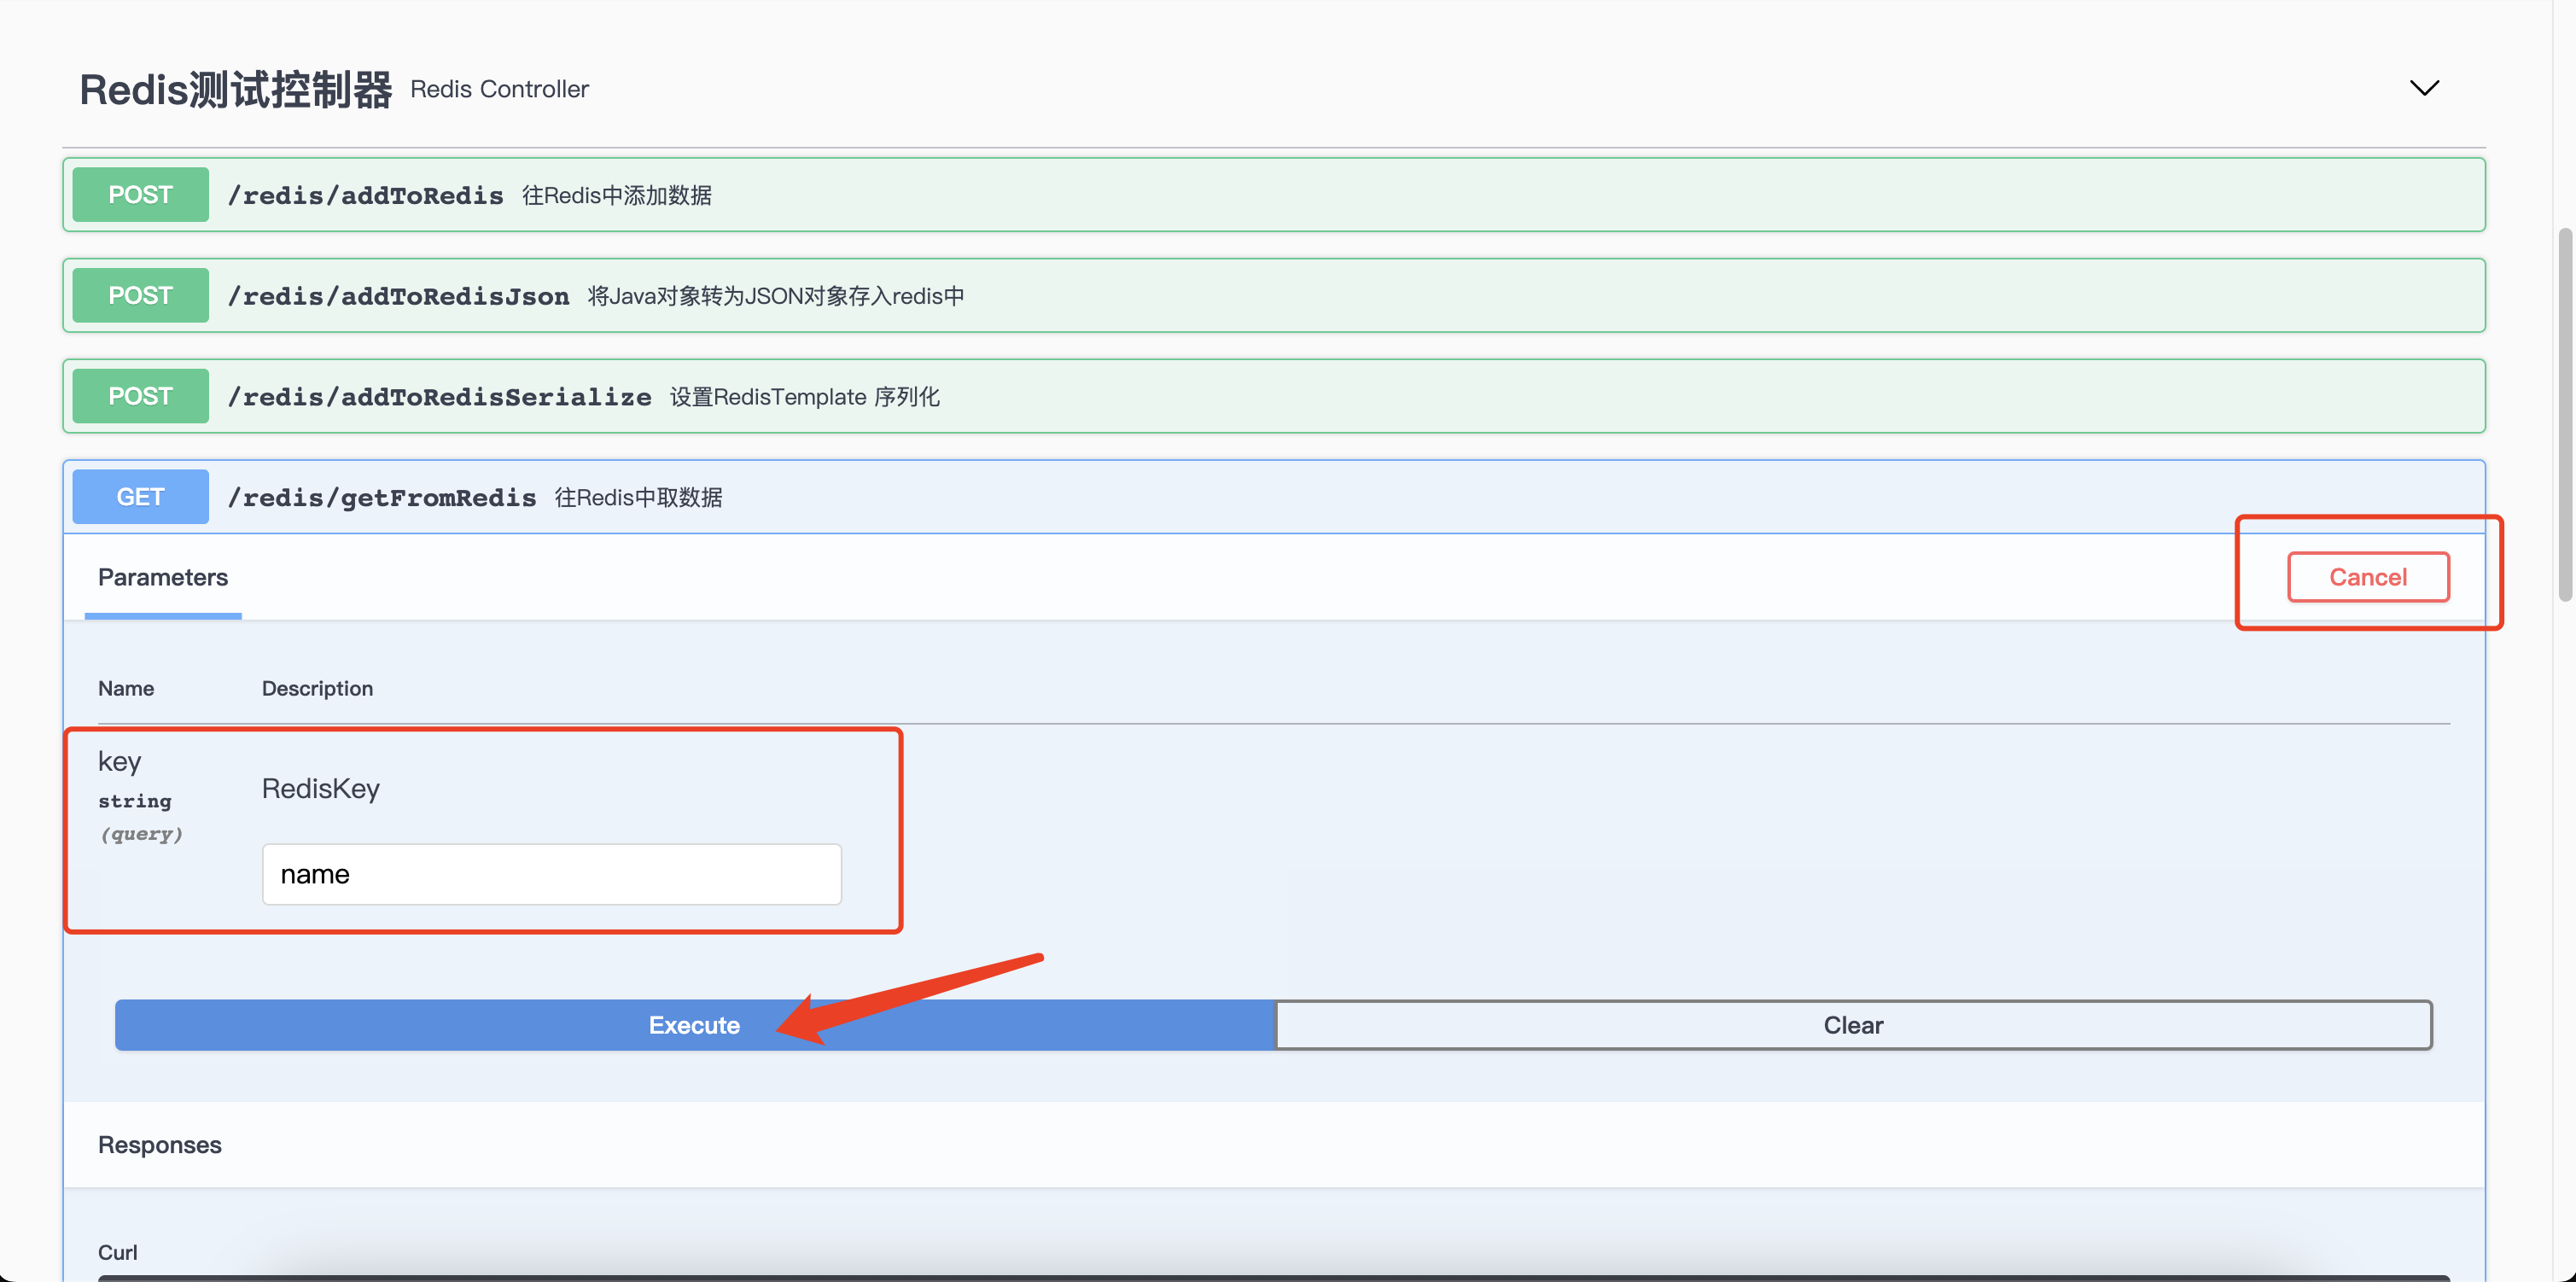
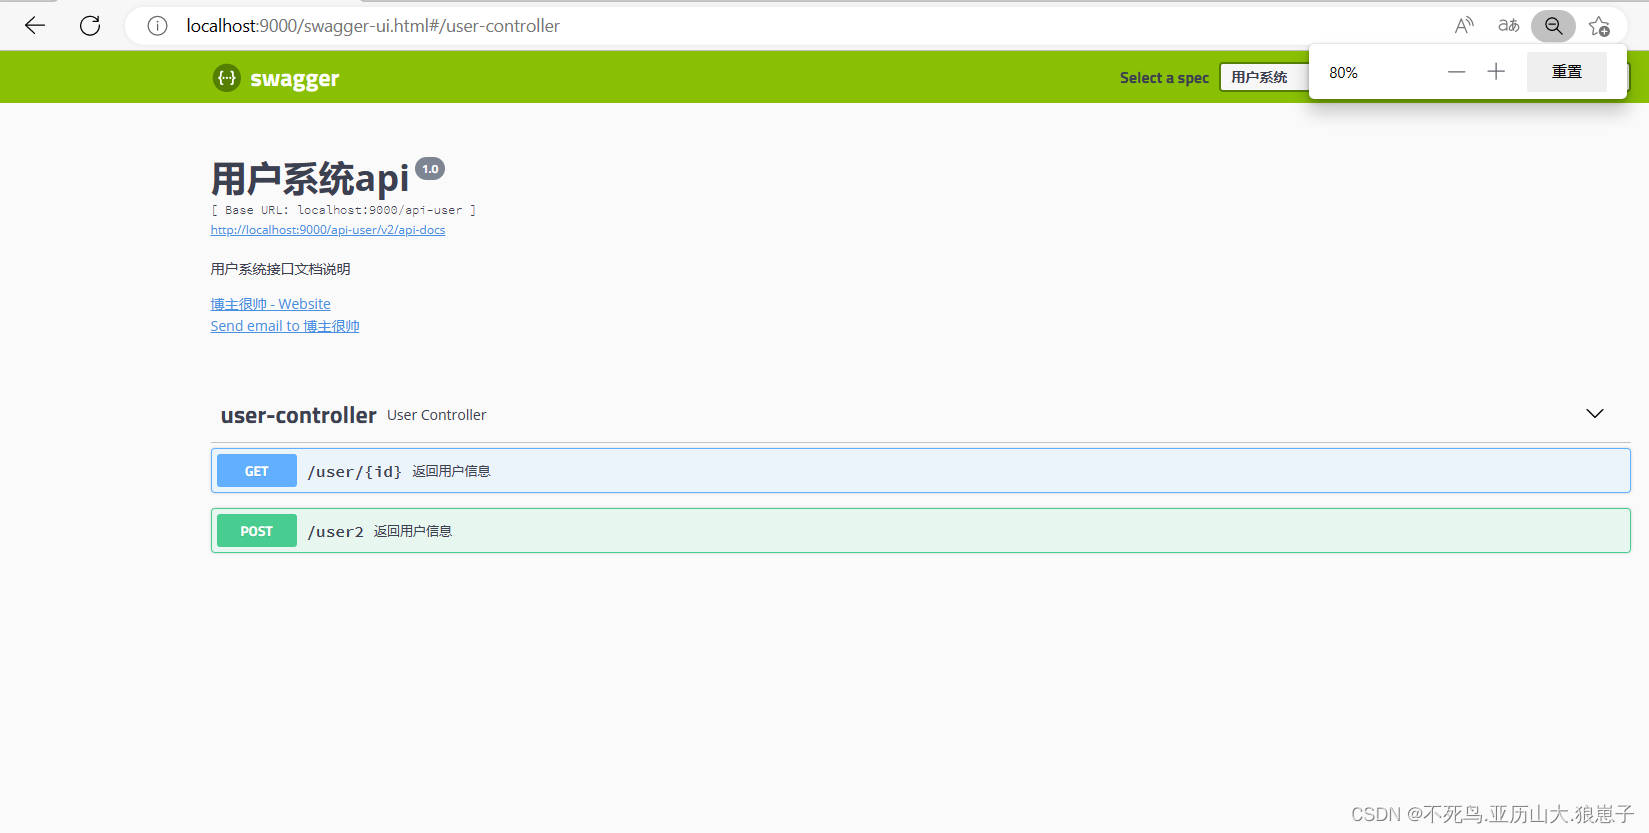
启动项目,访问http://ip:port/swagger-ui/index.html,出现以下界面则表示成功了:
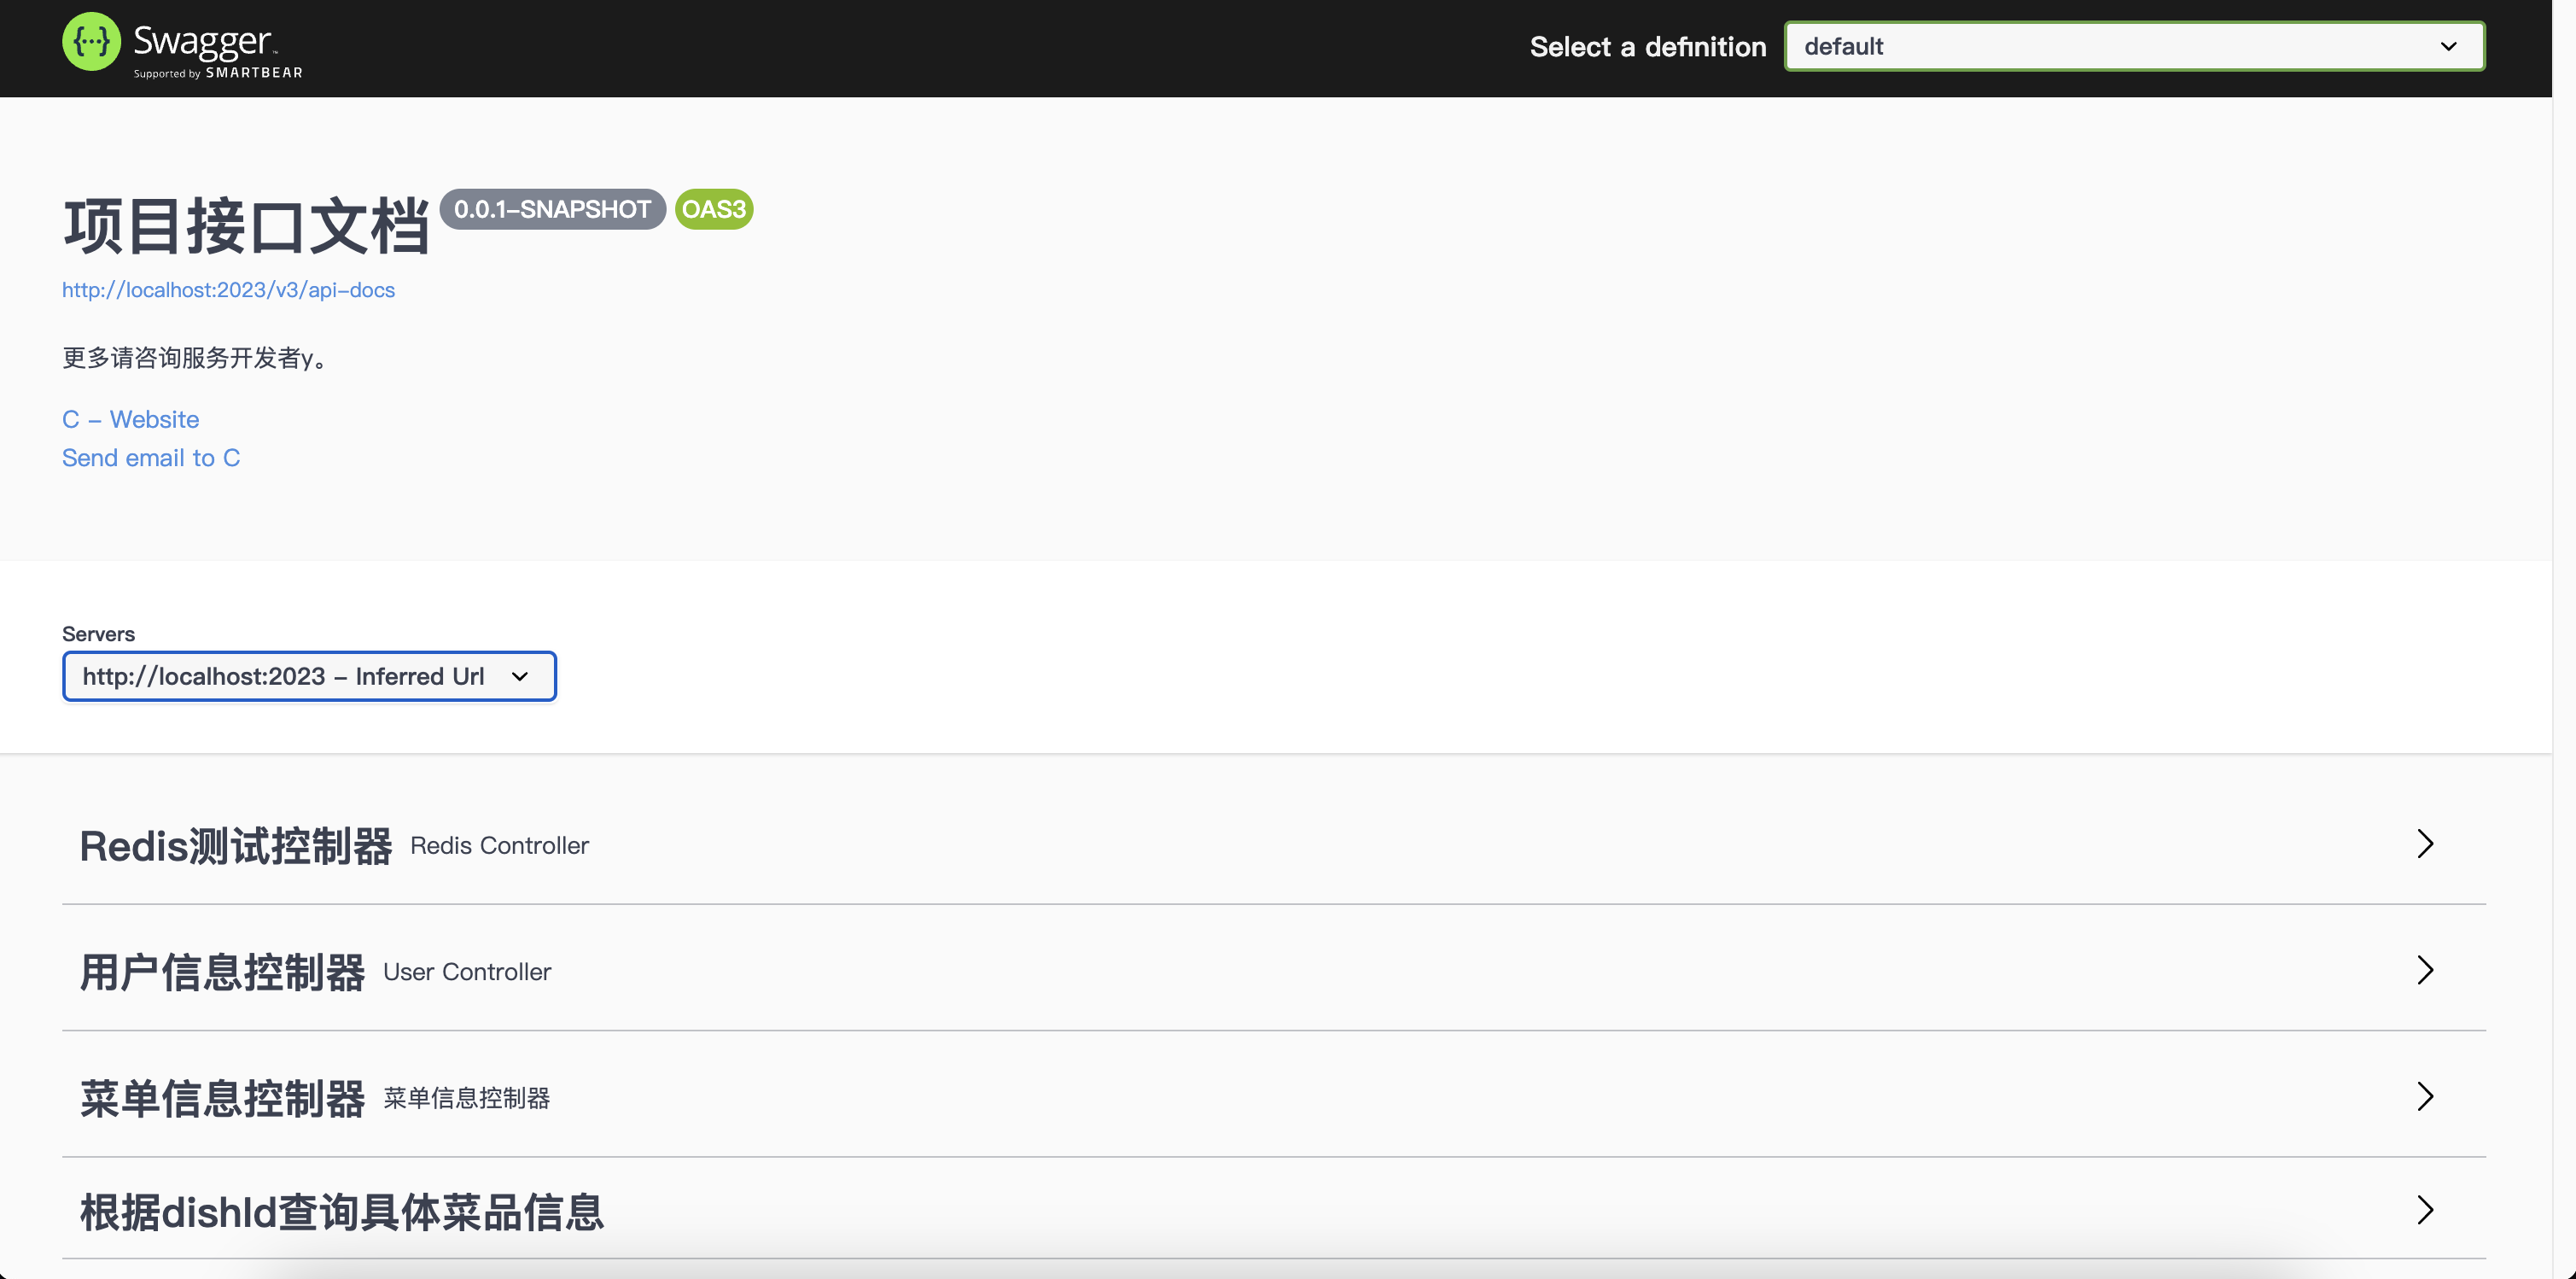
选择一个接口,Try it out,如果有参数填一下对应的参数,然后就可以直接从该页面发送请求到后端了,十分便捷,直接省去了前后端接口文档,新员工看接口也能快速上手~
