剪枝比例
问题:我们应该如何找到每层的剪枝比率?
- 较浅的层,低层次的特征
- 较深的层,抽象的特征
问题:哪些层的冗余度最高?
- 非统一剪枝(每一层的稀疏度不一样)比统一剪枝(每一层的稀疏度都设成一样)的效果更好
- 较深的层有更多的冗余(更多的通道,更多的重复使用的特征),所以它们可以被更积极地修剪
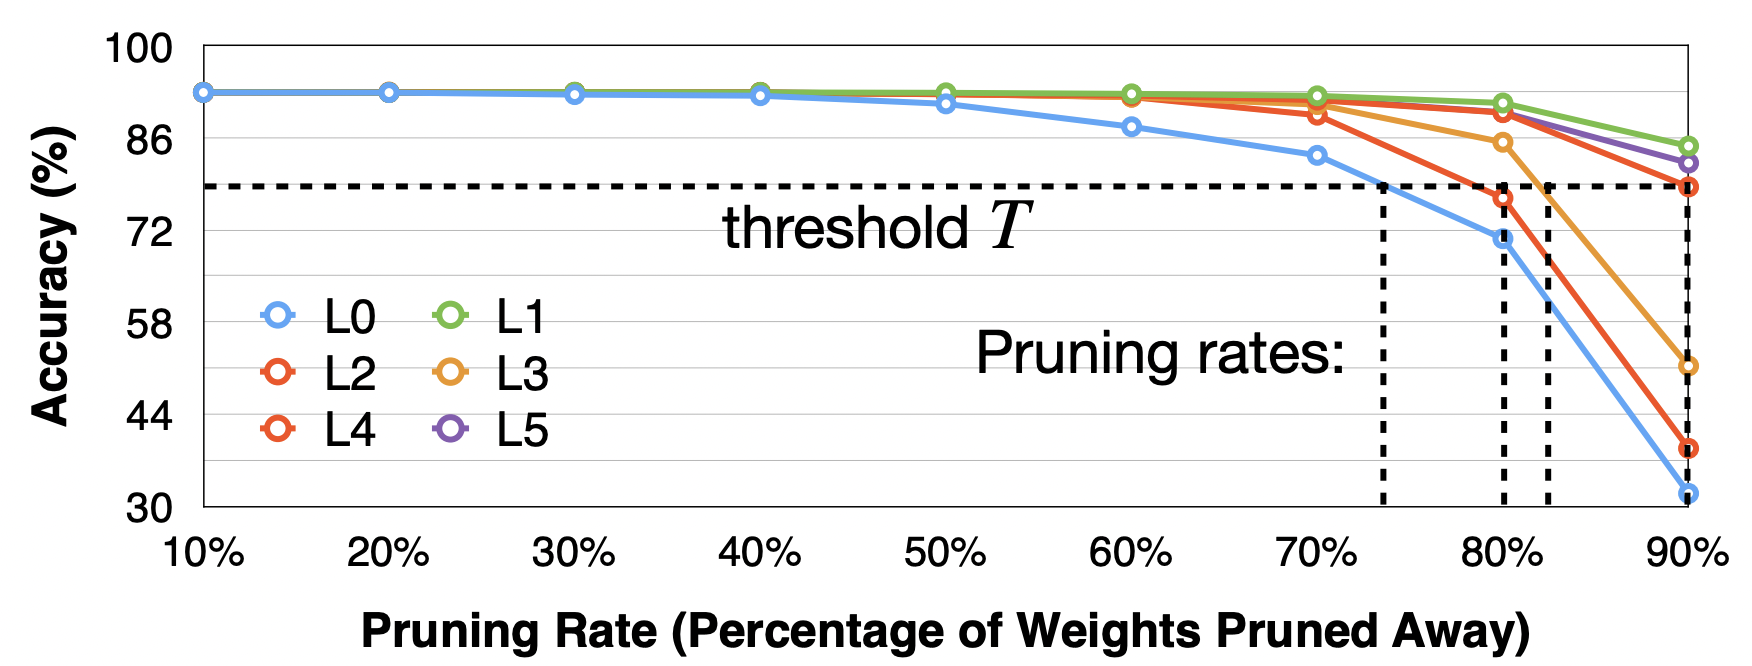
分析每个层的敏感性
- 敏感性:当该层被修剪时,准确率下降了多少
- 敏感度较高的层应减少修剪,敏感度较低的层表明有冗余。
敏感度分析
- 在模型中挑选一个层
L
i
L_i
Li
- 设定一组剪枝比例,即 r ∈ { 0.1 , 0.2 , … , 0.9 } r\in \{0.1,0.2,\dots,0.9\} r∈{0.1,0.2,…,0.9}
- 观察每一个比例 r r r对准确率的影响,记录每个比例时的 Δ Acc i r \Delta{\text{Acc}_i^r} ΔAccir
- 对所有层进行重复
- 设定恢复的准确率阈值 T T T,找到每个层对应的剪枝比例阈值
优点
- 很容易看到哪些层对修剪最不敏感
- 实现简单
缺点
- 忽略了各层之间的相互作用,如果两个层同时被修剪,准确性会如何下降?
- 忽略了层的参数大小,对大层进行少量修剪比对小层进行大量修剪要好。
实现
在上一篇的基础上,实现敏感度扫描记录
@torch.inference_mode()
def evaluate(
model: nn.Module,
dataloader: DataLoader,
verbose = True,
device = torch.device("cuda" if torch.cuda.is_available() else "cpu")
) -> float:
model.eval()
num_samples = 0
num_correct = 0
for inputs, targets in tqdm(dataloader, desc="eval", leave=False, disable=not verbose):
# Move the data from CPU to GPU
inputs = inputs.to(device)
targets = targets.to(device)
# Inference
outputs = model(inputs)
# Convert logits to class indices
outputs = outputs.argmax(dim=1)
# Update metrics
num_samples += targets.size(0)
num_correct += (outputs == targets).sum()
return (num_correct / num_samples * 100).cpu().item()
@torch.no_grad()
def sensitivity_scan(model, dataloader, scan_step=0.1, scan_start=0.4, scan_end=1.0, verbose=True):
sparsities = np.arange(start=scan_start, stop=scan_end, step=scan_step)
accuracies = []
named_conv_weights = [(name, param) for (name, param) in model.named_parameters() if param.dim() > 1]
# choose one layer
for i_layer, (name, param) in enumerate(named_conv_weights):
# keep the param to recover
param_clone = param.detach().clone()
accuracy = []
# choose one sparsity
for sparsity in tqdm(sparsities, desc=f'scanning {i_layer}/{len(named_conv_weights)} weight - {name}'):
# prune the layer
fine_grained_prune(param.detach(), sparsity=sparsity)
acc = evaluate(model, dataloader, verbose=False)
if verbose:
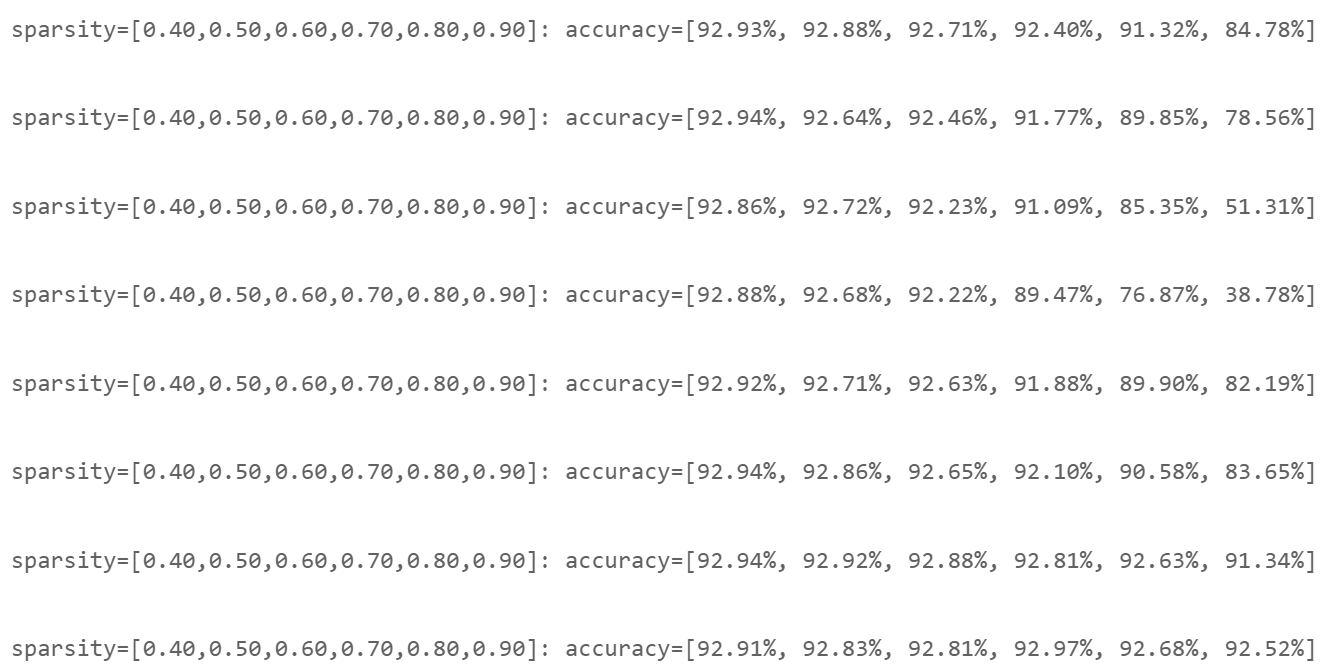
print(f'\r sparsity={sparsity:.2f}: accuracy={acc:.2f}%', end='')
# restore
param.copy_(param_clone)
accuracy.append(acc)
if verbose:
print(f'\r sparsity=[{",".join(["{:.2f}".format(x) for x in sparsities])}]: accuracy=[{", ".join(["{:.2f}%".format(x) for x in accuracy])}]', end='')
accuracies.append(accuracy)
return sparsities, accuracies
sparsities, accuracies = sensitivity_scan(model, dataloader['test'], scan_step=0.1, scan_start=0.4, scan_end=1.0)
可视化
def plot_sensitivity_scan(sparsities, accuracies, dense_model_accuracy):
    lower_bound_accuracy = 100 - (100 - dense_model_accuracy) * 1.5
    fig, axes = plt.subplots(3, int(math.ceil(len(accuracies) / 3)),figsize=(15,8))
    axes = axes.ravel()
    plot_index = 0
    for name, param in model.named_parameters():
        if param.dim() > 1:
            ax = axes[plot_index]
            curve = ax.plot(sparsities, accuracies[plot_index])
            line = ax.plot(sparsities, [lower_bound_accuracy] * len(sparsities))
            ax.set_xticks(np.arange(start=0.4, stop=1.0, step=0.1))
            ax.set_ylim(80, 95)
            ax.set_title(name)
            ax.set_xlabel('sparsity')
            ax.set_ylabel('top-1 accuracy')
            ax.legend([
                'accuracy after pruning',
                f'{lower_bound_accuracy / dense_model_accuracy * 100:.0f}% of dense model accuracy'
            ])
            ax.grid(axis='x')
            plot_index += 1
    fig.suptitle('Sensitivity Curves: Validation Accuracy vs. Pruning Sparsity')
    fig.tight_layout()
    fig.subplots_adjust(top=0.925)
    plt.show()
plot_sensitivity_scan(sparsities, accuracies, dense_model_accuracy)
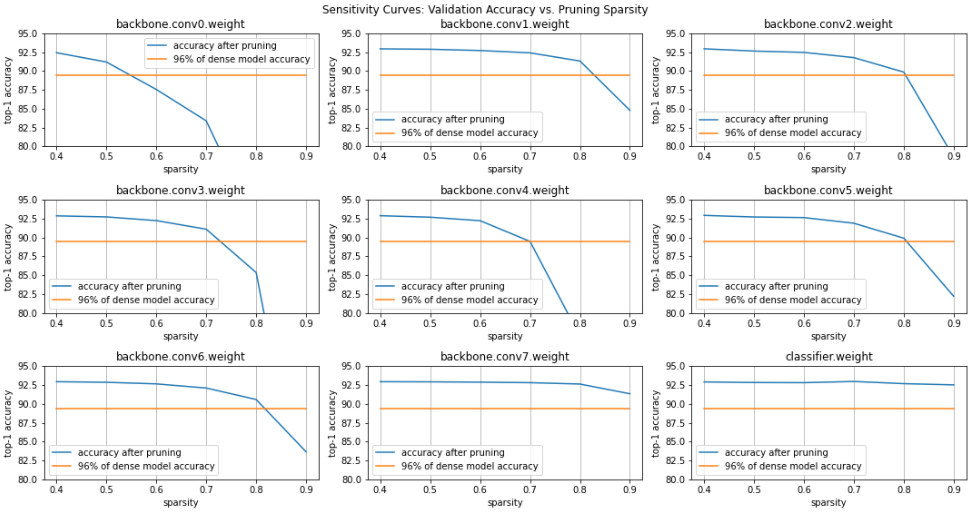
根据上图进行敏感度分析,设定每一层的稀疏度
sparsity_dict = {
    'backbone.conv0.weight': 0.55,
    'backbone.conv1.weight': 0.85,
    'backbone.conv2.weight': 0.8,
    'backbone.conv3.weight': 0.75,
    'backbone.conv4.weight': 0.7,
    'backbone.conv5.weight': 0.8,
    'backbone.conv6.weight': 0.8,
    'backbone.conv7.weight': 0.9,
    'classifier.weight': 0.9
}
pruner = FineGrainedPruner(model, sparsity_dict)
微调
num_finetune_epochs = 5
optimizer = torch.optim.SGD(model.parameters(), lr=0.01, momentum=0.9, weight_decay=1e-4)
scheduler = torch.optim.lr_scheduler.CosineAnnealingLR(optimizer, num_finetune_epochs)
criterion = nn.CrossEntropyLoss()
best_sparse_model_checkpoint = dict()
best_accuracy = 0
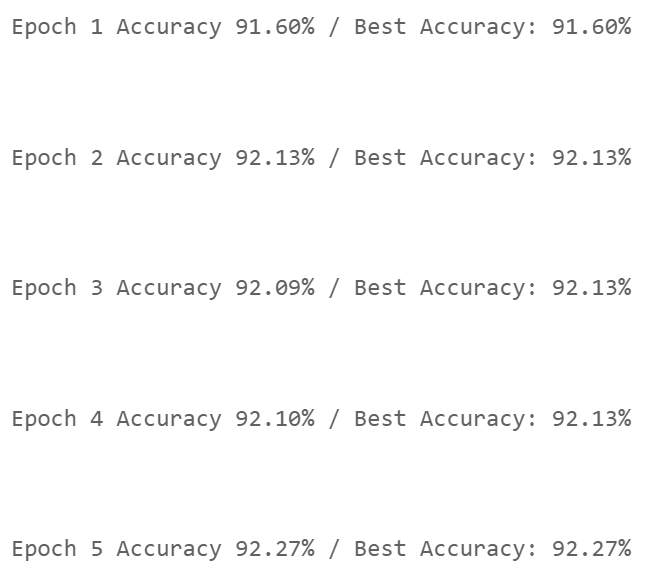
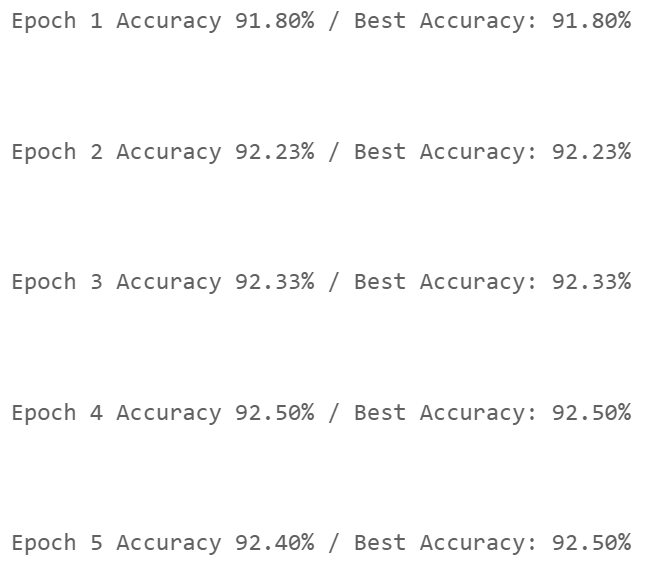
print(f'Finetuning Fine-grained Pruned Sparse Model')
for epoch in range(num_finetune_epochs):
# At the end of each train iteration, we have to apply the pruning mask
# to keep the model sparse during the training
train(model, dataloader['train'], criterion, optimizer, scheduler,
callbacks=[lambda: pruner.apply(model)], device=device)
accuracy = evaluate(model, dataloader['test'], device=device)
# save the best model
is_best = accuracy > best_accuracy
if is_best:
best_sparse_model_checkpoint['state_dict'] = copy.deepcopy(model.state_dict())
best_accuracy = accuracy
print(f' Epoch {epoch+1} Accuracy {accuracy:.2f}% / Best Accuracy: {best_accuracy:.2f}%')
基于通道的剪枝 Channel Pruning
-
# o u t _ c h a n n e l s n e w = # o u t _ c h a n n e l s o r i g i n ⋅ ( 1 − s p a r s i t y ) \#\mathrm{out\_channels}_{\mathrm{new}} = \#\mathrm{out\_channels}_{\mathrm{origin}} \cdot (1 - \mathrm{sparsity}) #out_channelsnew=#out_channelsorigin⋅(1−sparsity)
-
通道修剪后,权重张量 W W W仍然是密集的
-
对所有层使用一样的剪枝比例
-
找到不那么重要的通道权重来删除
-
i m p o r t a n c e i = ∥ W i ∥ 2 , i = 0 , 1 , 2 , ⋯ , # i n _ c h a n n e l s − 1 importance_{i} = \|W_{i}\|_2, \;\; i = 0, 1, 2,\cdots, \#\mathrm{in\_channels}-1 importancei=∥Wi∥2,i=0,1,2,⋯,#in_channels−1
-
对于每个输入的通道,使用Frobenius规范来计算 i m p o r t a n c e importance importance
-
将通道权重从重要到不重要进行排序,然后保留每层中最重要的 k k k个通道
def get_num_channels_to_keep(channels: int, prune_ratio: float) -> int:
    """A function to calculate the number of layers to PRESERVE after pruning
    Note that preserve_rate = 1. - prune_ratio
    """
    return int(round(channels * (1. - prune_ratio)))


@torch.no_grad()
def channel_prune(model: nn.Module,
                  prune_ratio: Union[List, float]) -> nn.Module:
    """Apply channel pruning to each of the conv layer in the backbone
    Note that for prune_ratio, we can either provide a floating-point number,
    indicating that we use a uniform pruning rate for all layers, or a list of
    numbers to indicate per-layer pruning rate.
    """
    # sanity check of provided prune_ratio
    assert isinstance(prune_ratio, (float, list))
    n_conv = len([m for m in model.backbone if isinstance(m, nn.Conv2d)])
    # note that for the ratios, it affects the previous conv output and next
    # conv input, i.e., conv0 - ratio0 - conv1 - ratio1-...
    if isinstance(prune_ratio, list):
        assert len(prune_ratio) == n_conv - 1
    else:  # convert float to list
        prune_ratio = [prune_ratio] * (n_conv - 1)

    # we prune the convs in the backbone with a uniform ratio
    model = copy.deepcopy(model)  # prevent overwrite
    # we only apply pruning to the backbone features
    all_convs = [m for m in model.backbone if isinstance(m, nn.Conv2d)]
    all_bns = [m for m in model.backbone if isinstance(m, nn.BatchNorm2d)]
    # apply pruning. we naively keep the first k channels
    assert len(all_convs) == len(all_bns)
    for i_ratio, p_ratio in enumerate(prune_ratio):
        prev_conv = all_convs[i_ratio]
        prev_bn = all_bns[i_ratio]
        next_conv = all_convs[i_ratio + 1]
        original_channels = prev_conv.out_channels  # same as next_conv.in_channels
        n_keep = get_num_channels_to_keep(original_channels, p_ratio)

        # prune the output of the previous conv and bn
        prev_conv.weight.set_(prev_conv.weight.detach()[:n_keep])
        prev_bn.weight.set_(prev_bn.weight.detach()[:n_keep])
        prev_bn.bias.set_(prev_bn.bias.detach()[:n_keep])
        prev_bn.running_mean.set_(prev_bn.running_mean.detach()[:n_keep])
        prev_bn.running_var.set_(prev_bn.running_var.detach()[:n_keep])

        # prune the input of the next conv
        next_conv.weight.set_(next_conv.weight.detach()[:, :n_keep])

    return model
# function to sort the channels from important to non-important
def get_input_channel_importance(weight):
    in_channels = weight.shape[1]
    importances = []
    # compute the importance for each input channel
    for i_c in range(weight.shape[1]):
        channel_weight = weight.detach()[:, i_c]
        importance = torch.norm(channel_weight)
        importances.append(importance.view(1))
    return torch.cat(importances)


@torch.no_grad()
def apply_channel_sorting(model):
    model = copy.deepcopy(model)  # do not modify the original model
    # fetch all the conv and bn layers from the backbone
    all_convs = [m for m in model.backbone if isinstance(m, nn.Conv2d)]
    all_bns = [m for m in model.backbone if isinstance(m, nn.BatchNorm2d)]
    # iterate through conv layers
    for i_conv in range(len(all_convs) - 1):
        # each channel sorting index, we need to apply it to:
        # - the output dimension of the previous conv
        # - the previous BN layer
        # - the input dimension of the next conv (we compute importance here)
        prev_conv = all_convs[i_conv]
        prev_bn = all_bns[i_conv]
        next_conv = all_convs[i_conv + 1]
        # note that we always compute the importance according to input channels
        importance = get_input_channel_importance(next_conv.weight)
        # sorting from large to small
        sort_idx = torch.argsort(importance, descending=True)

        # apply to previous conv and its following bn
        prev_conv.weight.copy_(torch.index_select(
            prev_conv.weight.detach(), 0, sort_idx))
        for tensor_name in ['weight', 'bias', 'running_mean', 'running_var']:
            tensor_to_apply = getattr(prev_bn, tensor_name)
            tensor_to_apply.copy_(
                torch.index_select(tensor_to_apply.detach(), 0, sort_idx)
            )

        # apply to the next conv input (hint: one line of code)
        next_conv.weight.copy_(
            torch.index_select(next_conv.weight.detach(), 1, sort_idx)
        )


    return model
剪枝后
channel_pruning_ratio = 0.3 # pruned-out ratio
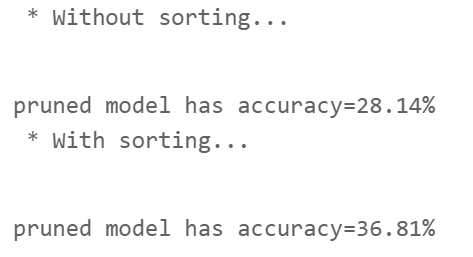
print(" * Without sorting...")
pruned_model = channel_prune(model, channel_pruning_ratio)
pruned_model_accuracy = evaluate(pruned_model, dataloader['test'], device=device)
print(f"pruned model has accuracy={pruned_model_accuracy:.2f}%")
print(" * With sorting...")
sorted_model = apply_channel_sorting(model)
pruned_model = channel_prune(sorted_model, channel_pruning_ratio)
pruned_model_accuracy = evaluate(pruned_model, dataloader['test'], device=device)
print(f"pruned model has accuracy={pruned_model_accuracy:.2f}%")
微调后
num_finetune_epochs = 5
optimizer = torch.optim.SGD(pruned_model.parameters(), lr=0.01, momentum=0.9, weight_decay=1e-4)
scheduler = torch.optim.lr_scheduler.CosineAnnealingLR(optimizer, num_finetune_epochs)
criterion = nn.CrossEntropyLoss()

best_accuracy = 0
for epoch in range(num_finetune_epochs):
    train(pruned_model, dataloader['train'], criterion, optimizer, scheduler, device=device)
    accuracy = evaluate(pruned_model, dataloader['test'], device=device)
    is_best = accuracy > best_accuracy
    if is_best:
        best_accuracy = accuracy
    print(f'Epoch {epoch+1} Accuracy {accuracy:.2f}% / Best Accuracy: {best_accuracy:.2f}%')