一. OrangePi AIpro简介
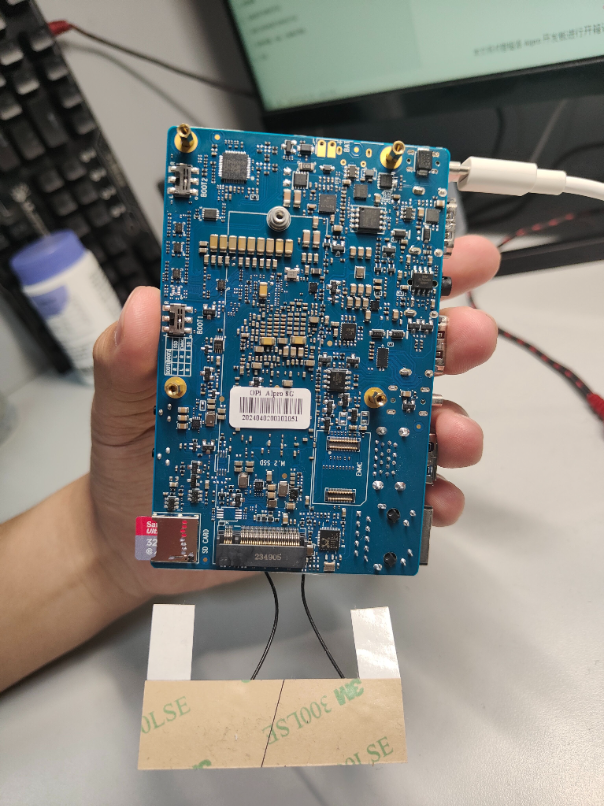
1.1 OrangePi AIpro外观

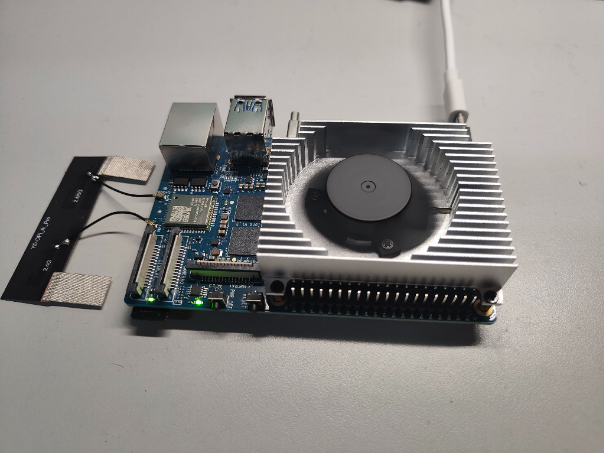
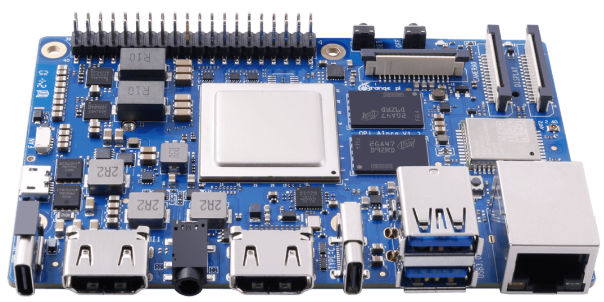

1.2 OrangePi AIpro配置
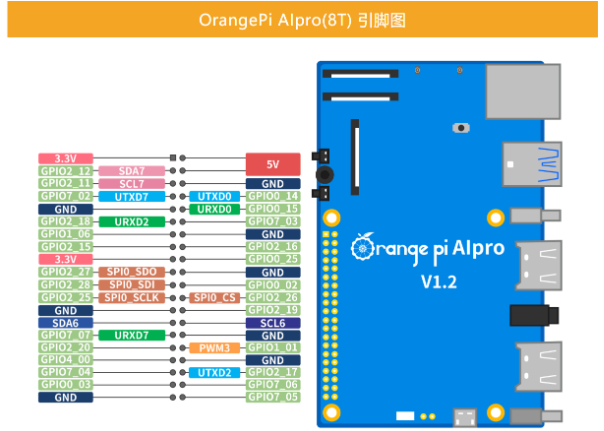
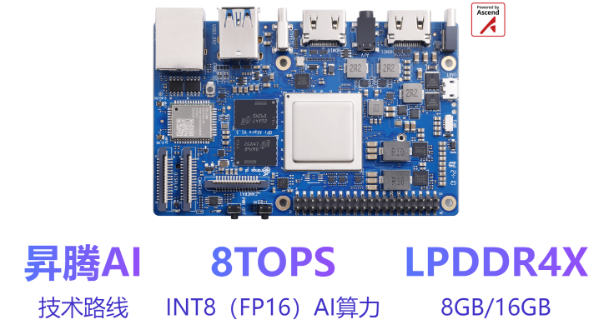
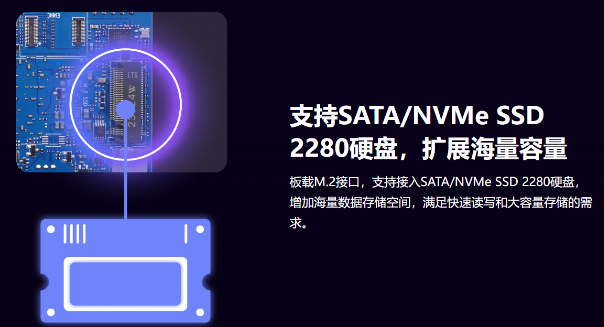
OrangePi AIpro(8T)采用昇腾AI技术路线,具体为4核64位处理器+AI处理器,集成图形处理器,支持8TOPS AI算力,拥有8GB/16GB LPDDR4X,可以外接32GB/64GB/128GB/256GB eMMC模块,支持双4K高清输出。 Orange Pi AIpro引用了相当丰富的接口,包括两个HDMI输出、GPIO接口、Type-C电源接口、支持SATA/NVMe SSD 2280的M.2插槽、TF插槽、千兆网口、两个USB3.0、一个USB Type-C 3.0、一个Micro USB(串口打印调试功能)、两个MIPI摄像头、一个MIPI屏等,预留电池接口,可广泛适用于AI边缘计算、深度视觉学习及视频流AI分析、视频图像分析、自然语言处理、智能小车、机械臂、人工智能、无人机、云计算、AR/VR、智能安防、智能家居等领域,覆盖 AIoT各个行业。 Orange Pi AIpro支持Ubuntu、openEuler操作系统,满足大多数AI算法原型验证、推理应用开发的需求。硬件参数如下。
| 组件 | 规格 |
|---|---|
| CPU | 4核64位处理器+ AI处理器 |
| GPU | 集成图形处理器 |
| AI算力 | 8TOPS算力 |
| 内存 | LPDDR4X:8GB/16GB(可选),速率:3200Mbps |
| 存储 | - SPI FLASH:32MB |
| - SATA/NVME SSD(M.2接口2280) | |
| - eMMC插槽:32GB/64GB/128GB/256GB(可选),eMMC5.1 HS400 | |
| - TF插槽 | |
| WIFI+蓝牙 | Wi-Fi 5双频2.4G和5G |
| BT4.2/BLE | |
| 以太网收发器 | 10/100/1000Mbps以太网 |
| 显示 | - 2xHDMI2.0 Type-A TX 4K@60FPS |
| - 1x2 lane MIPI DSI via FPC connector | |
| 摄像头 | 2x2-lane MIPI CSI camera interface,兼容树莓派摄像头 |
| USB | - USB 3.0 HOST x2 |
| - USB Type-C 3.0 HOST x1 | |
| - Micro USB x1 串口打印功能 | |
| 音频 | 3.5mm耳机孔音频输入/输出 |
| 按键 | - 1x关机键 |
| - 1xRESET键 | |
| - 2x启动方式拨动键 | |
| - 1x烧录按键 | |
| 40PIN | GPIO、UART、I2C、SPI、 I2S、PWM |
| 风扇 | 风扇接口x1 |
| 预留接口 | 2PIN电池接口 |
| 电源 | Type-C PD 20V IN ,标准65W |
| 操作系统 | Ubuntu、openEuler |
| 产品尺寸 | 107*68mm |
| 重量 | 82g |






1.3 OrangePi AIpro资料
-
外观及散热器安装资料:https://pan.baidu.com/s/1BK3AS5mhrUntJKegU0NMqg?pwd=87ne
-
官方工具:https://pan.baidu.com/s/1Jho73pw91r5GJD2KijY45Q?pwd=3xuz
-
用户手册:https://pan.baidu.com/s/1clOIklNzsHSigsrZzeWWMA?pwd=va56
-
原理图:https://pan.baidu.com/s/15tVnYKyeRQd9Ora38Q9orw?pwd=xe5p
-
机械图:https://pan.baidu.com/s/1vp9RHJQa6WOckskJhc2JAw?pwd=ydq5
-
linux源码:https://pan.baidu.com/s/16ee2y0N0g79vWXLzWKvC2A?pwd=rth7
-
香橙派AIpro资料汇总:https://metaxiaoyu.feishu.cn/docx/CE0bdHxyTocRGFxLoDPcG6I5nJd?from=from_copylink
-
香橙派AIpro学习资源一站式导航:https://www.hiascend.com/forum/thread-0285140173361311056-1-1.html
-
香橙派论坛:http://forum.orangepi.cn/
-
昇腾社区:https://www.hiascend.com/
-
硬件文档:https://pan.baidu.com/s/1H2o6k3EwGhG8O60L1H9U1g?pwd=abc1
-
开发工具:https://pan.baidu.com/s/1HJ3P4vRjBkJ9F1oL1J2G3k?pwd=def2
-
快速入门指南:https://pan.baidu.com/s/1JK4Q5vSgGhL2R3pK2L4G5n?pwd=ghi3
-
SDK下载:https://pan.baidu.com/s/1LM6N7oUhGhM3R4rL3M5G6o?pwd=jkl4
-
驱动程序:https://pan.baidu.com/s/1OP7P8pViGhN4S5sL4N6G7p?pwd=mno5
-
详细教程:https://pan.baidu.com/s/1QR9P0qWiGhO5T6uL5P7G8q?pwd=pqr6
二. 开发板初步配置
2.1 公网访问
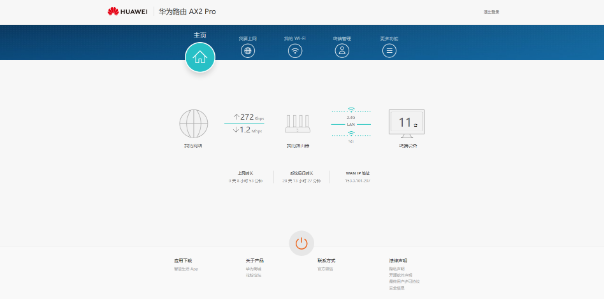
申请公网ip较为麻烦,这里采用路由器端口映射实现公网访问,这里以华为路由 AX2 Pro为例讲解流程。
首先在路由器背面查看路由器管理页面的地址,进入页面。
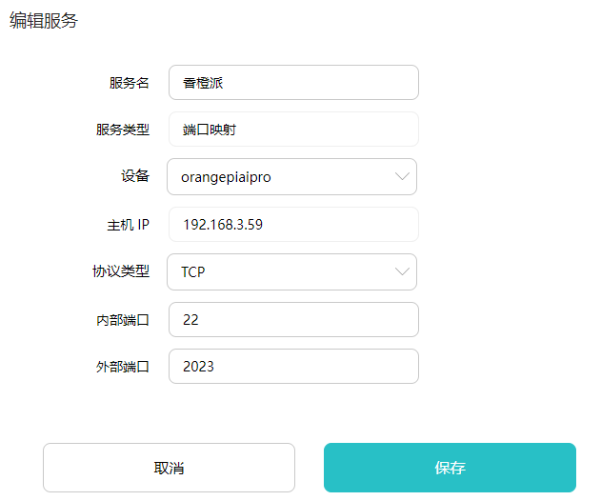
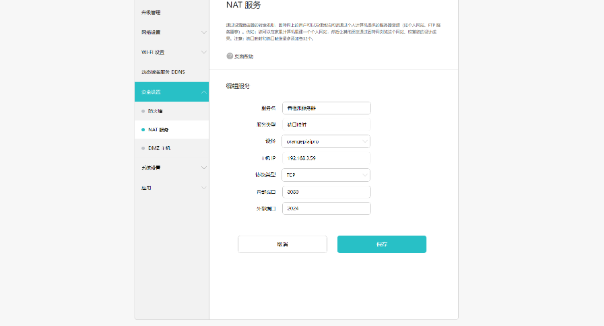
在页面里面点击更多功能,选择安全设置中的NAT服务,在端口映射添加映射端口,内部端口设置为22,外面端口设置1024以上,低的话有些可能不太行。

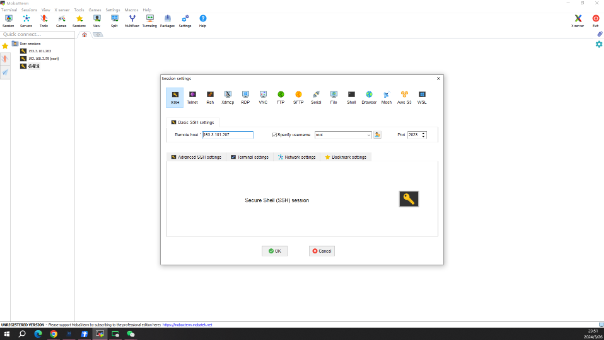
设置完成后,使用MobaXterm_Personal连接即可,即可实现远程访问。

2.2 系统换源
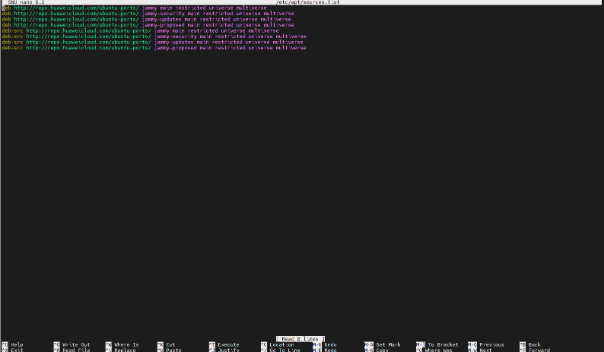
# 安装nano编辑器
sudo apt install nano
# 备份源列表文件
sudo cp /etc/apt/sources.list /etc/apt/sources.list.backup
# 修改源列表文件
sudo nano /etc/apt/sources.list
# 替换源
# 根据自己需求选择,原有的里面用的是华为
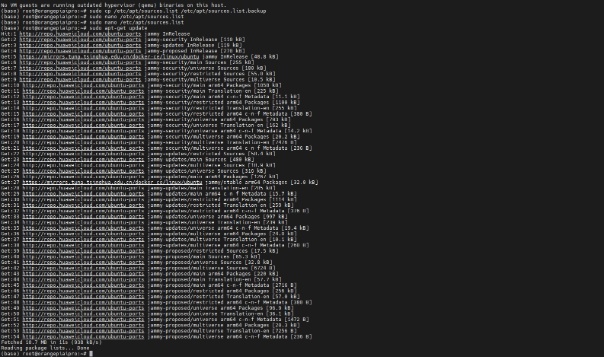
# 更新软件源
sudo apt-get update
源链接
# 默认官方源
deb http://archive.ubuntu.com/ubuntu/ focal main restricted universe multiverse
deb-src http://archive.ubuntu.com/ubuntu/ focal main restricted universe multiverse

deb http://archive.ubuntu.com/ubuntu/ focal-updates main restricted universe multiverse
deb-src http://archive.ubuntu.com/ubuntu/ focal-updates main restricted universe multiverse

deb http://archive.ubuntu.com/ubuntu/ focal-security main restricted universe multiverse
deb-src http://archive.ubuntu.com/ubuntu/ focal-security main restricted universe multiverse

deb http://archive.ubuntu.com/ubuntu/ focal-backports main restricted universe multiverse
deb-src http://archive.ubuntu.com/ubuntu/ focal-backports main restricted universe multiverse

# 阿里云源
deb http://mirrors.aliyun.com/ubuntu/ focal main restricted universe multiverse
deb-src http://mirrors.aliyun.com/ubuntu/ focal main restricted universe multiverse

deb http://mirrors.aliyun.com/ubuntu/ focal-updates main restricted universe multiverse
deb-src http://mirrors.aliyun.com/ubuntu/ focal-updates main restricted universe multiverse

deb http://mirrors.aliyun.com/ubuntu/ focal-security main restricted universe multiverse
deb-src http://mirrors.aliyun.com/ubuntu/ focal-security main restricted universe multiverse

deb http://mirrors.aliyun.com/ubuntu/ focal-backports main restricted universe multiverse
deb-src http://mirrors.aliyun.com/ubuntu/ focal-backports main restricted universe multiverse
2.3 bash终端美化(根据个人需求)
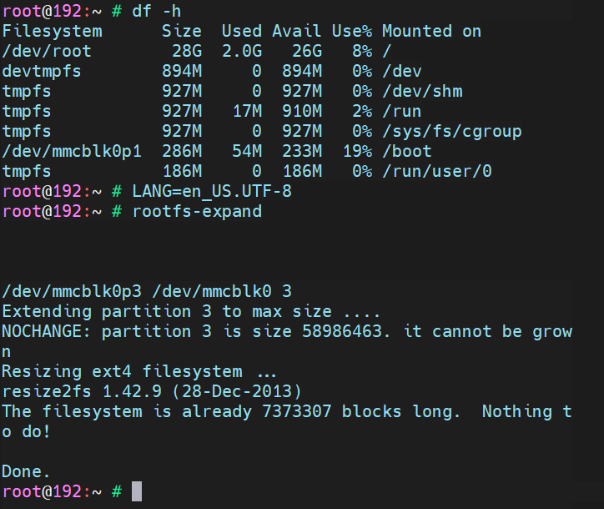
bash终端美化有两种方案,第一种是修改配置文件,下面是centos中修改方式,在ubuntu也与之类似。
# 打开/etc/bashrc文件,在最后一行添加
PS1='${debian_chroot:+($debian_chroot)}\[\033[01;35;40m\]\u\[\033[00;00;40m\]@\[\033[01;35;40m\]\h\[\033[00;31;40m\]:\[\033[00;00;40m\]\w \[\033[01;32;40m\]\$ \[\033[01;36;40m\]'

export LS_COLORS=$LS_COLORS"*.py=00;35:*.pl=00;32:*.sh=01;32:*.xls=04;36:*.png=04;35;43:*.fa=04;33:*.R=00;32:*.r=00;32:*.vcf=04;35:"
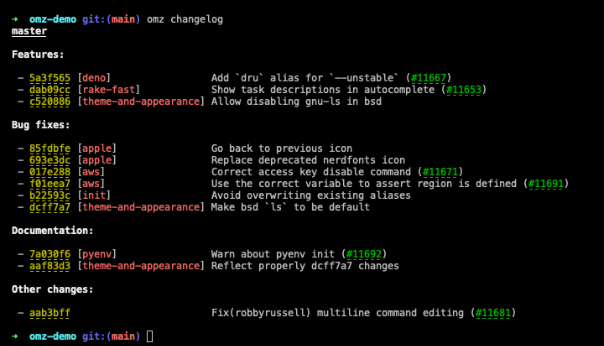
第二种是切换终端,使用zsh终端,zsh相较于原有终端会方便很多
# 安装zsh
sudo apt install zsh
# 设置为默认的
chsh -s /bin/zsh
# 安装oh-my-zsh
wget --no-check-certificate https://github.com/robbyrussell/oh-my-zsh/raw/master/tools/install.sh -O - | sh
# 安装插件
# zsh-autosuggestions 命令行命令键入时的历史命令建议
git clone https://github.com/zsh-users/zsh-autosuggestions ${ZSH_CUSTOM:-~/.oh-my-zsh/custom}/plugins/zsh-autosuggestions
# zsh-syntax-highlighting 命令行语法高亮插件
git clone https://gitee.com/Annihilater/zsh-syntax-highlighting.git ${ZSH_CUSTOM:-~/.oh-my-zsh/custom}/plugins/zsh-syntax-highlighting

三. 后端服务器构建及部署
3.1 环境安装
JDK安装(以一个版本为例)
https://www.oracle.com/java/technologies/javase/javase8u211-later-archive-downloads.html
下载完成后将其放置在/usr/local目录下,并解压

配置环境变量,
cd /etc
vim profile
# 添加
export JAVA_HOME=/usr/local/jdk1.8.0_221
export JRE_HOME=$JAVA_HOME/jre
export CLASSPATH=.:$JAVA_HOME/lib:$JRE_HOME/lib
export PATH=$JAVA_HOME/bin:$PATH
# 重启或重新加载配置
source profile
# 查看java版本,安装完成
java -version

Tomcat安装(8.5.46)
https://archive.apache.org/dist/tomcat/tomcat-8/v8.5.46/bin/
下载完成后将其放置在/usr/local目录下,并解压

进入解压目录中的bin目录
cd /apache-tomcat-8.5.46
cd bin
# 启动服务
./startup.sh
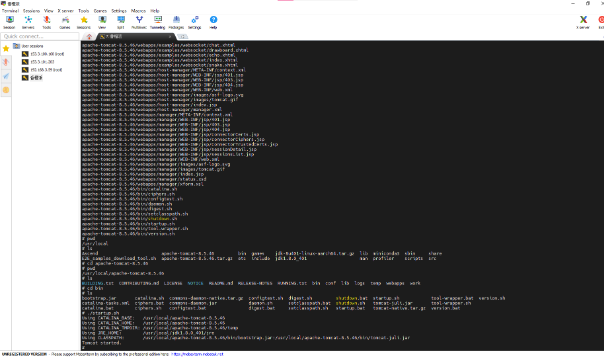
添加端口映射,访问成功,
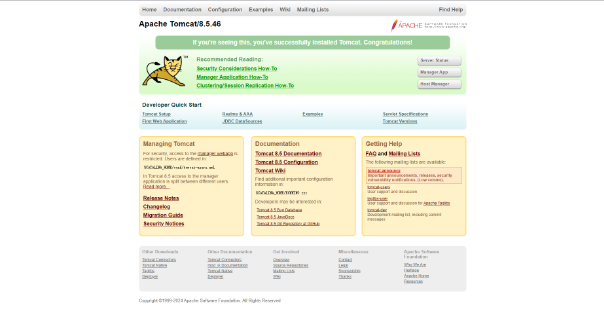
服务器关闭
# 查询端口服务
lsof -i:8080
# 关闭服务
kill -9 19141
MySQL安装
# 安装MySQL
sudo apt-get install mysql-server
#启动:
sudo service mysql start
#重启:
sudo  service mysql restart
#关闭:
sudo service mysql stop

# 更改密码
mysql> use mysql;
#开启远程连接
update user set host='%' where user='root';
#修改了之后刷新以下权限
flush privileges;
#修改数据库密码.
ALTER USER 'root'@'%' identified with mysql_native_password BY '123456';
#修改了之后刷新以下权限
flush privileges;
#退出数据库
quit;
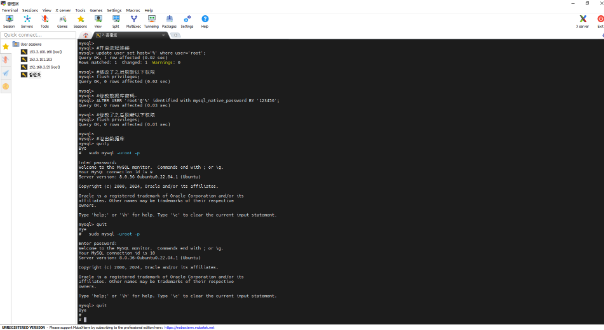
3.2 数据准备
由于OrangePi AIpro开发板自带python环境,使用浏览器下载linux版本的vscode,然后下载jupyter拓展,随后开始使用爬虫爬数据。以一部分数据举例。
接口分析
# 接口分析
# 全部数据
# https://bbs.robomaster.com/forum.php?mod=forumdisplay&fid=63   20
# 机械设计
# https://bbs.robomaster.com/forum.php?mod=forumdisplay&fid=63&filter=typeid&typeid=11   20
# 嵌入式
# https://bbs.robomaster.com/forum.php?mod=forumdisplay&fid=63&filter=typeid&typeid=12    20
# 视觉算法
# https://bbs.robomaster.com/forum.php?mod=forumdisplay&fid=63&filter=typeid&typeid=13   9
# 其他
# https://bbs.robomaster.com/forum.php?mod=forumdisplay&fid=63&filter=typeid&typeid=14
# 分页
# &filter=typeid&page=3
通过selenium爬取网页结构
import urllib.request
from lxml import etree
import json
from selenium.webdriver.common.by import By
from selenium import webdriver
import random
import time
import pyautogui
from datetime import datetime
import random
def seleniumRequest(url,chrome_path,waitTime):
        options = webdriver.ChromeOptions()
        options.add_experimental_option('excludeSwitches', ['enable-automation'])
        options.add_experimental_option('useAutomationExtension', False)
        # 谷歌浏览器exe位置
        options.binary_location = chrome_path
        # 是否要启动页面
        # options.add_argument("--headless")  # 启用无头模式
        # GPU加速有时候会出bug
        options.add_argument("--disable-gpu")  # 禁用GPU加速
        options.add_argument("--disable-blink-features=AutomationControlled")
        driver = webdriver.Chrome(options=options)
        driver.execute_cdp_cmd('Page.addScriptToEvaluateOnNewDocument',
                                {'source': 'Object.defineProperty(navigator, "webdriver", {get: () => undefined})'})
        # 启动要填写的地址,这就启动浏览器
        driver.get(url)
        # 这是关闭浏览器
        # 等待页面加载,可以根据实际情况调整等待时间
        driver.implicitly_wait(waitTime)

        # 获取完整页面结构
        full_page_content = driver.page_source

        # 关闭浏览器
        driver.quit()

        return full_page_content
# # 处理完整页面结构
# print(full_page_content)
url = "https://bbs.robomaster.com/forum.php?mod=forumdisplay&fid=63&page=2"
print(url)

chrome_path = r"C:\Program Files\Google\Chrome\Application\chrome.exe"
waitTime = 8
# 获取网页结构
# 通过selenium调用浏览器访问
content = seleniumRequest(url,chrome_path,waitTime)
print(content)
从网页结构中爬出数据,存入json文件中
import random
from datetime import datetime, timedelta

def generate_random_date(start_date, end_date):
    random_days = random.randint(0, (end_date - start_date).days)
    random_date = start_date + timedelta(days=random_days)
    return random_date.strftime("%Y-%m-%d")

start_date = datetime(2021, 1, 1)
end_date = datetime(2023, 12, 31)

# 给html变成tree用于xpath解析用
tree = etree.HTML(content)
# 改进的XPath表达式,选择你感兴趣的div元素
# 解析对应数据
contents = tree.xpath("//*[starts-with(@id, 'normalthread')]")


img = contents[0].xpath(".//*[@id='aaa']//img/@src")

baseurl = "	https://bbs.robomaster.com/"

lists=[]
id = 1
for index, url in enumerate(contents):
    imgurl = contents[index].xpath(".//*[@id='aaa']//img/@src")
    imgurl = baseurl + imgurl[0]

    all = contents[index].xpath(".//p//a//text()")
    url = contents[index].xpath(".//p//a/@href")
    url = baseurl + url[1]
    # 题目
    title = all[1]
    end_index = title.find('】')
    title = all[1][end_index+1:]
    end_index= 0
    if title == None:
        continue

    # 作者
    name = all[2]
    if "作者" not in name:
        continue
    # 查看
    view = random.randint(1000, 50000)
    # 评论
    comment = all[3]
    if "回复" not in comment:
        continue
    # 时间
    time = generate_random_date(start_date, end_date)

    # print(index,url)
    item = {
        id: id,
        'imgurl': imgurl,
        'title':title,
        'name':name,
        'view':view,
        'comment':comment,
        'time':time,
        'type':1,
        'url': url
    }


    lists.append(item)
    id = id + 1
json_data = json.dumps(lists, indent=4)
 # 将JSON数据写入文件
with open("data.json", "w") as json_file:
    json_file.write(json_data)
print("JSON数据已保存到文件")
json存入数据库总
import json
import mysql.connector

# 读取JSON文件
with open('data.json', 'r') as file:
    data = json.load(file)

# 连接到MySQL数据库
conn = mysql.connector.connect(
    host='localhost',
    port=3306,  # MySQL默认端口号
    user='root',
    password='1234qwer',
    database='competitionassistant'
)

cursor = conn.cursor()

# 创建表(如果不存在的话),并清空表数据
cursor.execute('''
CREATE TABLE IF NOT EXISTS message_user (
    id INT AUTO_INCREMENT PRIMARY KEY,
    strid VARCHAR(64),
    avatar VARCHAR(128),
    createTime VARCHAR(64),
    fansDigitalShow VARCHAR(8),
    nickname VARCHAR(64),
    updateTime VARCHAR(64),
    userid VARCHAR(64),
    unReadCount VARCHAR(8),
    messageType VARCHAR(8)
)
''')

# 先清空一下表
cursor.execute('TRUNCATE TABLE message_user')

# 将数据插入数据库
for item in data:
    try:
        sql_statement = '''
        INSERT INTO message_user (strid, avatar, createTime, fansDigitalShow, nickname, updateTime, userid, unReadCount, messageType)
        VALUES (%s, %s, %s, %s, %s, %s, %s, %s, %s)
        '''
        values = (10, item['avatar'], item['createTime'], item['fansDigitalShow'], item['nickname'], item['updateTime'], item['username'], item['unReadCount'], item['messageType'])
        cursor.execute(sql_statement, values)
    except Exception as e:
        print(f"Error inserting data: {e}")
        continue

    print()

# 提交更改并关闭连接
conn.commit()
conn.close()
结果

3.3 后端项目部署
后端项目打包,得到api-1.0-SNAPSHOT.jar包,将其放入linux中,
# 运行jar包
java -jar api-1.0-SNAPSHOT.jar &
部分接口
package com.ca.controller;


import com.ca.dao.MessageContentMapper;
import com.ca.dao.MessageUserMapper;
import com.ca.entity.MessageContent;
import com.ca.entity.Users;
import com.ca.utils.MD5Utils;
import com.ca.vo.ResultVO;
import com.ca.vo.ResultVO1;
import io.swagger.annotations.Api;
import io.swagger.annotations.ApiOperation;
import org.apache.ibatis.session.RowBounds;
import org.springframework.web.bind.annotation.CrossOrigin;
import org.springframework.web.bind.annotation.RequestMapping;
import org.springframework.web.bind.annotation.RequestMethod;
import org.springframework.web.bind.annotation.RestController;
import tk.mybatis.mapper.entity.Example;

import javax.annotation.Resource;
import java.util.Date;
import java.util.List;

@RestController
@RequestMapping("/message")
// value是详细说明,tags是标签
@Api(value = "聊天接口",tags = "聊天数据")
// 允许跨域
@CrossOrigin
public class MessageController {
    @Resource
    private MessageUserMapper messageUserMapper;
    @Resource
    private MessageContentMapper messageContentMapper;

    @ApiOperation("消息列表")
    @RequestMapping(value = "/chat",method = RequestMethod.GET)
    public ResultVO1 chatList(int strid,int pageNum, int pageSize){
        // 实体类,需要写好
        Example example = new Example(com.ca.entity.MessageUser.class);
        Example.Criteria criteria = example.createCriteria();
        // 查询符合条件的记录数量
        int count = messageUserMapper.selectCountByExample(example);
        criteria.andEqualTo("strid", strid);
//        // 分页处理
//        PageHelper.startPage(pageNum, pageSize);
        int start = (pageNum - 1)*pageSize;
        RowBounds rowBounds = new RowBounds(start,pageSize);

        List<com.ca.entity.MessageUser> result= messageUserMapper.selectByExampleAndRowBounds(example,rowBounds);
        return new ResultVO1(10000,"查询成功!",result,count);
    }


    @ApiOperation("聊天内容")
    @RequestMapping(value = "/content",method = RequestMethod.GET)
    public ResultVO1 chatContent(String strid,String userid, int pageNum,int pageSize){
        // 实体类,需要写好
        Example example = new Example(com.ca.entity.MessageContent.class);
        Example.Criteria criteria = example.createCriteria();

        // 添加按 updateTime 字段降序排序的条件
        example.setOrderByClause("updateTime ASC");
        // 查询符合条件的记录数量
        int count = messageContentMapper.selectCountByExample(example);
        criteria.andEqualTo("strid", strid)
                .andEqualTo("userid", userid);
//        // 分页处理
//        PageHelper.startPage(pageNum, pageSize);
        int start = (pageNum - 1)*pageSize;
        RowBounds rowBounds = new RowBounds(start,pageSize);

        List<com.ca.entity.MessageContent> result= messageContentMapper.selectByExampleAndRowBounds(example,rowBounds);
        return new ResultVO1(10000,"查询成功!",result,count);
    }

    @ApiOperation("添加聊天内容")
    @RequestMapping(value = "/addContent",method = RequestMethod.GET)
    public ResultVO addContent(String avatar,String strid,String userid,String createtime,String formusername,String messagebody,String messagestatus,String messagetype,String tousername,String updatetime ){


        // 如果没有注册,则进行保存操

        MessageContent messageContent = new MessageContent();
        messageContent.setAvatar(avatar);
        messageContent.setStrid(strid);
        messageContent.setUserid(userid);
        messageContent.setCreatetime(createtime);
        messageContent.setFromusername(formusername);
        messageContent.setMessagebody(messagebody);
        messageContent.setMessagestatus(messagestatus);
        messageContent.setMessagetype(messagetype);
        messageContent.setTousername(tousername);
        messageContent.setUpdatetime(updatetime);

//        int i = messageContentMapper.insert(messageContent);
        int i = messageContentMapper.insertUseGeneratedKeys(messageContent);
            if (i > 0){


                return new ResultVO(10000,"注册成功",messageContent);
            }else {
                return new ResultVO(10002,"注册失败!",null);
            }
    }

}


package com.ca.controller;

import com.ca.dao.FormContentMapper;
import com.ca.dao.FormListMapper;
import com.ca.dao.FormStarMapper;
import com.ca.entity.FormContent;
import com.ca.entity.FormStar;
import com.ca.entity.Users;
import com.ca.vo.ResultVO;
import io.swagger.annotations.Api;
import io.swagger.annotations.ApiOperation;
import org.apache.ibatis.session.RowBounds;
import org.springframework.web.bind.annotation.*;
import tk.mybatis.mapper.entity.Example;

import javax.annotation.Resource;
import java.util.List;

@RestController
@RequestMapping("/form")
// value是详细说明,tags是标签
@Api(value = "论坛接口",tags = "论坛接口")
// 允许跨域
@CrossOrigin
public class FormList {

    @Resource
    private FormListMapper formListMapper;

    @Resource
    private FormContentMapper formContentMapper;
    @Resource
    private FormStarMapper formStarMapper;


    @ApiOperation("论坛列表数据")
    @RequestMapping(value = "/list", method = RequestMethod.GET)
    public ResultVO getList(String type, int pageNum, int pageSize) {
        // 实体类,需要写好

        Example example = new Example(com.ca.entity.FormList.class);
        Example.Criteria criteria = example.createCriteria();
        criteria.andEqualTo("type", type);
//        // 分页处理
//        PageHelper.startPage(pageNum, pageSize);

        int start = (pageNum - 1) * pageSize;
        RowBounds rowBounds = new RowBounds(start, pageSize);

        List<com.ca.entity.FormList> formLists = formListMapper.selectByExampleAndRowBounds(example, rowBounds);
        return new ResultVO(10000, "查询成功!", formLists);

    }


    @ApiOperation("论坛搜索接口")
    @RequestMapping(value = "/search", method = RequestMethod.GET)
    public ResultVO searchList(String word, int pageNum, int pageSize) {
        // 实体类,需要写好
        Example example = new Example(com.ca.entity.FormList.class);
        Example.Criteria criteria = example.createCriteria();
        criteria.andLike("title", "%" + word + "%");
//        // 分页处理
//        PageHelper.startPage(pageNum, pageSize);

        int start = (pageNum - 1) * pageSize;
        RowBounds rowBounds = new RowBounds(start, pageSize);

        List<com.ca.entity.FormList> formLists = formListMapper.selectByExampleAndRowBounds(example, rowBounds);
        return new ResultVO(10000, "查询成功!", formLists);
    }


    @ApiOperation("论坛内容数据设置")
    @RequestMapping(value = "/setContent", method = RequestMethod.PUT)
    public ResultVO setContent(@RequestBody FormContent formContent) {
        // 实体类,需要写好
        int i = formContentMapper.updateByPrimaryKeySelective(formContent);
        if (i > 0) {
            // 更新成功
            // return new ResultVO(10000,"更新成功",existingRecord);
            return new ResultVO(10000, "设置成功!", formContent);
        } else {
            // 更新失败
            return new ResultVO(10003,"更新失败",null);
        }


    }

    @ApiOperation("论坛内容数据获取")
    @RequestMapping(value = "/getContent", method = RequestMethod.GET)
    public ResultVO getContent(String id) {
        // 实体类,需要写好

        Example example = new Example(com.ca.entity.FormContent.class);
        Example.Criteria criteria = example.createCriteria();
        criteria.andEqualTo("id", id);


        List<com.ca.entity.FormContent> result = formContentMapper.selectByExample(example);
        return new ResultVO(10000, "查询成功!", result);
    }


    @ApiOperation("论坛状态数据设置")
    @RequestMapping(value = "/setStatus", method = RequestMethod.GET)
    public ResultVO setStatus(String articleId, String userId,String isfollowed
            ,String isCollected,String isLikeed) {
        // 实体类,需要写好
        Example example = new Example(com.ca.entity.FormStar.class);
        Example.Criteria criteria = example.createCriteria();
        criteria.andEqualTo("articleid", articleId);
        criteria.andEqualTo("userid", userId);

        List<com.ca.entity.FormStar> result = formStarMapper.selectByExample(example);

        FormStar formStar = new FormStar();
        formStar.setArticleid(articleId);
        formStar.setUserid(userId);
        formStar.setIsfollowed(isfollowed);
        formStar.setIscollected(isCollected);
        formStar.setIslikeed(isLikeed);
        if(result.size() == 0){
            // 如果数据库中不存在的话,进行添加操作
            int i = formStarMapper.insert(formStar);
            if (i > 0){
                // 注册成功
                // return new ResultVO(10000,"注册成功",user);
                return new ResultVO(10000, "设置成功!", formStar);
            }else {
                // 注册失败
                 return new ResultVO(10002,"注册失败!",null);
            }
        }else{
            // 如果数据库中不存在的话,进行更新操作
            // 如果数据库中已经存在对应的记录,则进行更新操作
            FormStar existingRecord = result.get(0); // 获取第一个对象
            existingRecord.setIsfollowed(isfollowed);
            existingRecord.setIscollected(isCollected);
            existingRecord.setIslikeed(isLikeed);
            int i = formStarMapper.updateByPrimaryKeySelective(existingRecord);
            if (i > 0) {
                // 更新成功
                // return new ResultVO(10000,"更新成功",existingRecord);
                return new ResultVO(10000, "设置成功!", result);
            } else {
                // 更新失败
                 return new ResultVO(10003,"更新失败",null);
            }
        }

    }


    @ApiOperation("论坛状态数据获取")
    @RequestMapping(value = "/getStatus", method = RequestMethod.GET)
    public ResultVO getStatus(String articleId, String userId) {
        // 实体类,需要写好
        Example example = new Example(com.ca.entity.FormStar.class);
        Example.Criteria criteria = example.createCriteria();
        criteria.andEqualTo("articleid", articleId);
        criteria.andEqualTo("userid", userId);

        List<com.ca.entity.FormStar> result = formStarMapper.selectByExample(example);

        FormStar formStar = new FormStar();
        formStar.setArticleid(articleId);
        formStar.setUserid(userId);
        formStar.setIsfollowed("0");
        formStar.setIscollected("0");
        formStar.setIslikeed("0");
        if(result.size() == 0){
            // 如果数据库中不存在的话,进行添加操作
            int i = formStarMapper.insert(formStar);
            if (i > 0){
                // 注册成功
                // return new ResultVO(10000,"注册成功",user);
                return new ResultVO(10000, "设置成功!", formStar);
            }else {
                // 注册失败
                return new ResultVO(10000, "设置成功!", formStar);
            }
        }else{

            return new ResultVO(10000, "设置成功!",  result.get(0));
        }

    }
}

//    Example example = new Example(Users.class);
//    Example.Criteria criteria = example.createCriteria();
//        criteria.andEqualTo("username",name);
//                List<Users> users = usersMapper.selectByExample(example);
//
//        // 如果没有注册,则进行保存操作
//        if(users.size() == 0){
//        String md5Pwd = MD5Utils.md5(pwd);
//        Users user = new Users();
//        user.setUsername(name);
//        user.setPassword(md5Pwd);
//        user.setUserImg("img/default.png");
//        user.setUserRegtime(new Date());
//        user.setUserModtime(new Date());
//        int i = usersMapper.insert(user);
//        if (i > 0){
//        return new ResultVO(10000,"注册成功",user);
//        }else {
//        return new ResultVO(10002,"注册失败!",null);
//        }
//        }else {
//        return new ResultVO(10001,"用户已存在!",null);
//        }

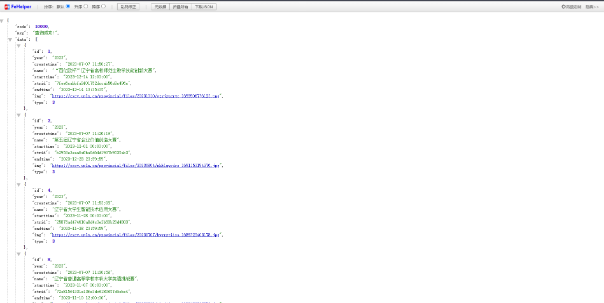
接口测试
3.4 前端项目部署
首先需要将vue项目打包
npm run build

主页面代码
<!--  -->
<template>
  <div class="container">
    <van-nav-bar title="竞赛助手" class="nav-bar" ref="nav_bar" />
    <div
      class="index_container"
      :style="{
        height: device.height - device.tarbar_height - narbarHeight + 'px',
      }"
    >
      <van-swipe class="my-swipe" :autoplay="2000" indicator-color="#000000">
        <van-swipe-item v-for="item in images" :key="item.id">
          <img :src="baseUrl + item.imgUrl" />
        </van-swipe-item>
      </van-swipe>

      <div class="nav_content">
        <van-grid :border="false" icon-size="34px">
          <van-grid-item
            icon="/img/index/nav_competition.png"
            text="竞赛信息"
            to="/index/competition"
          />
          <van-grid-item
            icon="/img/index/nav_route.png"
            to="/user/course"
            text="课程资料"
          />
          <van-grid-item
            icon="/img/index/nav_result.png"
            to="/index/search"
            text="结果查询"
          />
          <van-grid-item
            icon="/img/index/nav_login.png"
            text="管理系统"
            to="/user/login"
          />
        </van-grid>
      </div>

      <div class="competiton">
        <div class="title">最新比赛</div>
        <div class="items">
          <router-link
            v-for="item in competiton"
            :key="item.id"
            class="item"
            tag="div"
            :to="`/index/competition/article/${item.strid}`"
          >
            {{ item.name.replace(/^.*大学生/, "") }}
          </router-link>
        </div>
      </div>

      <div class="notice">
        <div class="top">
          政策通知
          <router-link :to="`/index/all/${0}`" tag="div" class="arrow">
            <van-icon name="arrow" size="16px" :to="`/index/all/${0}`" />
          </router-link>
        </div>
        <div class="content">
          <router-link
            v-for="i in notice_policy"
            :key="i.id"
            class="item"
            tag="div"
            :to="`/index/article/${i.strid}`"
          >
            <div class="left">
              <img src="/img/index/notice_policy.png" alt="" />
            </div>
            <div class="right">
              <div class="name">{{ i.name }}</div>
              <div class="time">{{ i.createtime.substring(0, 10) }}</div>
            </div>
          </router-link>
        </div>
      </div>

      <div class="notice">
        <div class="top">
          大赛动态
          <router-link :to="`/index/all/${1}`" tag="div" class="arrow">
            <van-icon name="arrow" size="16px" :to="`/index/all/${1}`" />
          </router-link>
        </div>
        <div class="content">
          <router-link
            v-for="i in notice_competiton"
            :key="i.id"
            class="item"
            tag="div"
            :to="`/index/article/${i.strid}`"
          >
            <div class="left">
              <img src="/img/index/notice_competition.jpg" alt="" />
            </div>
            <div class="right">
              <div class="name">{{ i.name }}</div>
              <div class="time">{{ i.createtime.substring(0, 10) }}</div>
            </div>
          </router-link>
        </div>
      </div>

      <div class="notice">
        <div class="top">
          高校动态
          <router-link :to="`/index/all/${3}`" tag="div" class="arrow">
            <van-icon name="arrow" size="16px" :to="`/index/all/${3}`" />
          </router-link>
        </div>
        <div class="content">
          <router-link
            v-for="i in notice_school"
            :key="i.id"
            class="item"
            tag="div"
            :to="`/index/article/${i.strid}`"
          >
            <div class="left">
              <img src="/img/index/notice_school.jpg" alt="" />
            </div>
            <div class="right">
              <div class="name">{{ i.name }}</div>
              <div class="time">{{ i.createtime.substring(0, 10) }}</div>
            </div>
          </router-link>
        </div>
      </div>
      <div class="kong"></div>
    </div>
  </div>
</template>

<script>
//这里可以导入其他文件(比如:组件,工具js,第三方插件js,json文件,图片文件等等)
//例如:import 《组件名称》 from '《组件路径》';
import { Lazyload } from "vant";
import { request } from "@/utils/request";
export default {
  //import引入的组件需要注入到对象中才能使用
  name: "",
  props: {},
  components: {},
  data() {
    //这里存放数据
    return {
      baseUrl: "https://cxcy.upln.cn/",
      images: [],
      competiton: [],
      notice_policy: [],
      notice_competiton: [],
      notice_school: [],
      device: this.$store.state.device,
      narbarHeight: 0,
    };
  },
  //监听属性 类似于data概念
  computed: {},
  //监控data中的数据变化
  watch: {},
  //方法集合
  methods: {},
  //生命周期 - 创建完成(可以访问当前this实例)
  created() {},
  //生命周期 - 挂载完成(可以访问DOM元素)
  mounted() {
    this.narbarHeight = this.$refs.nav_bar.$el.offsetHeight;
    // 请求轮播图
    request({
      method: "get",
      url: "/index/indeximg", // 移除多余的斜杠
      // post请求需要
      // 加个请求头
      headers: {
        //   "Content-Type": "application/json",
      },
      params: {
        len: 3,
      },
    }).then((res) => {
      // console.log(res.data.data);
      this.images.push(...res.data.data);
    });
    // 请求最近比赛
    request({
      method: "get",
      url: "/index/competition", // 移除多余的斜杠
      // post请求需要
      // 加个请求头
      headers: {
        //   "Content-Type": "application/json",
      },
      params: {
        type: 1,
        pageSize: 10,
        pageNum: 1,
      },
    }).then((res) => {
      // console.log(res.data.data);
      this.competiton.push(...res.data.data);
    });

    // 请求政策
    request({
      method: "get",
      url: "/index/notice", // 移除多余的斜杠
      // post请求需要
      // 加个请求头
      headers: {
        //   "Content-Type": "application/json",
      },
      params: {
        type: 0,
        pageSize: 3,
        pageNum: 1,
      },
    }).then((res) => {
      console.log(res.data.data);
      this.notice_policy.push(...res.data.data);
    });

    // 请求比赛
    request({
      method: "get",
      url: "/index/notice", // 移除多余的斜杠
      // post请求需要
      // 加个请求头
      headers: {
        //   "Content-Type": "application/json",
      },
      params: {
        type: 1,
        pageSize: 3,
        pageNum: 1,
      },
    }).then((res) => {
      // console.log(res.data.data);
      this.notice_competiton.push(...res.data.data);
    });

    // 请求比赛
    request({
      method: "get",
      url: "/index/notice", // 移除多余的斜杠
      // post请求需要
      // 加个请求头
      headers: {
        //   "Content-Type": "application/json",
      },
      params: {
        type: 3,
        pageSize: 3,
        pageNum: 1,
      },
    }).then((res) => {
      // console.log(res.data.data);
      this.notice_school.push(...res.data.data);
    });
  },
  beforeCreate() {}, //生命周期 - 创建之前
  beforeMount() {}, //生命周期 - 挂载之前
  beforeUpdate() {}, //生命周期 - 更新之前
  updated() {}, //生命周期 - 更新之后
  beforeDestroy() {}, //生命周期 - 销毁之前
  destroyed() {}, //生命周期 - 销毁完成
  activated() {}, //如果页面有keep-alive缓存功能,这个函数会触发
};
</script>
<style lang='less' scoped>
//@import url(); 引入公共css类
.container {
  width: 100%;

  display: flex;
  flex-direction: column;
  font-family: Arial, Helvetica, sans-serif;
}

.index_container {
  margin: 0;
  padding: 0;

  background-color: #f2f4f8;

  /* 不指定就会消失 */
  // display: flex;
  flex-direction: column;
  font-family: Arial, sans-serif;
  padding-left: 16px;
  padding-right: 16px;
  overflow: hidden;
  overflow-y: auto;
  // 单行:justify-content 主轴居中,align-items 次轴居中

  // 多行:justify-content 主轴居中, align-content 次轴整体居中, align-items 各行内居中

  // justify对应主轴,align对应次轴。content对应的是整体,items对应的是每个元素所在的那个周边区域
  // ————————————————
  // 版权声明:本文为CSDN博主「小翔努力变强」的原创文章,遵循CC 4.0 BY-SA版权协议,转载请附上原文出处链接及本声明。
  // 原文链接:https://blog.csdn.net/grx1125/article/details/128785335
  .my-swipe {
    height: 150px;
    background-color: #ffffff;
    border-radius: 10px;
    display: flex;
    align-items: center;

    overflow: hidden;
    // .van-swipe__indicators {
    //   margin-top: 20px;
    // }
    // justify-items: center;
    .van-swipe-item {
      height: 150x;
      color: #39a9ed;
      background-color: #ffffff;

      img {
        height: 150px;
      }
    }
  }

  .nav_content {
    margin-top: 10px;
    background-color: #f2f4f8;
    /deep/ .van-grid-item__content {
      background-color: #f2f4f8 !important;
    }
  }
  .competiton {
    background-color: #ffffff;
    border-radius: 10px;
    margin-top: 10px;
    padding-left: 10px;
    padding-right: 10px;
    padding-bottom: 1px;
    position: relative;
    .title {
      padding-top: 12px;
      margin-left: 10px;
      font-size: 14px;
      line-height: 24px;
    }

    .items {
      margin-top: 10px;
      display: flex;
      flex-direction: row;
      align-items: center;
      overflow: hidden;
      margin-bottom: 9px;
      overflow-x: auto; /* 水平滚动 */
      width: 322px;

      // justify-content: center;
      .item {
        display: inline-block;
        font-size: 14px;
        margin-right: 10px;
        width: 135px;
        min-width: 135px; /* 指定最小宽度 */
        display: flex;
        align-items: center;
        justify-content: center;

        height: 70px;
        line-height: 30px;
        // background-color: #f2f4f8;
        color: rgb(15, 98, 254);
        border-radius: 8px;
        background: url(https://main.qcloudimg.com/raw/c920c5d7f4993e295af9faefcb24d543.png)
          round;
      }
    }
    .items::-webkit-scrollbar {
      display: none;
    }
  }

  .notice {
    font-size: 14px;
    background-color: #ffffff;
    border-radius: 10px;
    margin-top: 14px;
    padding-left: 10px;
    padding-right: 10px;
    padding-bottom: 1px;
    .top {
      margin-left: 10px;
      margin-right: 10px;
      font-size: 14px;
      display: flex;
      height: 40px;
      //   color: #646566;
      flex-direction: row;
      display: flex;
      align-items: center;
      position: relative;
      .arrow {
        position: absolute;
        color: #646566;
        right: 0px;
      }
    }
    .content {
      margin-left: 10px;
      margin-right: 10px;
      font-size: 12px;
      margin-bottom: 10px;
      padding-bottom: 1px;

      .item {
        margin-top: 4px;
        border-bottom: 1px solid #f0f0f2;
        display: flex;
        flex-direction: row;
        justify-content: center;
        .left {
          img {
            height: 50px;
          }
        }
        .right {
          .name {
            display: -webkit-box;
            -webkit-box-orient: vertical;
            overflow: hidden;
            -webkit-line-clamp: 2; /* 设置显示的最大行数 */
            -webkit-box-lines: 2; /* 显示两行 */
          }
          margin-left: 10px;
          .time {
            margin-top: 2px;
            text-align: right;
            color: #646566;
          }
        }
      }
    }
  }
  .kong {
    margin-left: 10px;
    margin-right: 10px;
    font-size: 12px;
    margin-bottom: 20px;
    padding-bottom: 1px;
  }
}
</style>
将文件放入/usr/local/apache-tomcat-8.5.46/webapps/目录下,即可,

访问测试

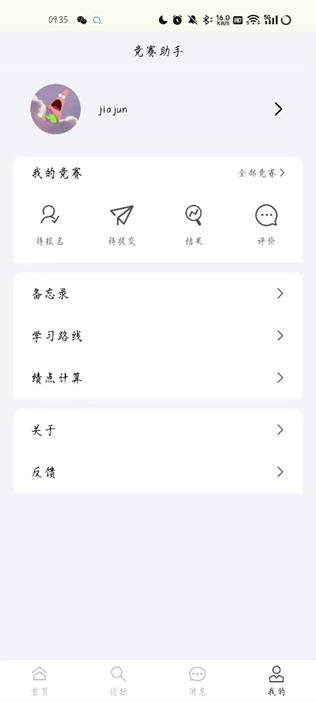
3.5 项目运行


四. 总结
在本地开发代码完成后,需要将代码部署到公网上,以便随时访问。我先前使用了树莓派来部署服务器,但是树莓派的价格有些高昂。相比之下,OrangePi AIpro具有更强的性能和更快的反应速度,因此我现在选择使用OrangePi AIpro来部署我的服务端,以支持软件开发学习。在之前学习前端时,网上的服务器接口总是失效,而在笔记本电脑上运行服务器会导致电脑卡顿,同时也非常耗时。将服务端部署到OrangePi AIpro上极大地提高了我的学习效率,同时也避免了频繁编译服务器的麻烦。

