现在因为公司需求,需要新开一个Laravel框架的项目,毫无疑问,我又被借调过去了,最近老是被借调,有点阴郁,不过反观来看,这也是好事,又可以复习和巩固一下自己的知识点,接下来开始讲解Laravel框架
1.安装(我使用的是composer安装)
安装命令1:
composer create-project laravel/laravel:^11.0 example-app(框架所在文件夹:安装时中午不必复制)
安装命令2:
composer global require laravel/installer
laravel new example-app(框架所在文件夹:安装时中午不必复制)
2.环境配置(.env文件)
应用名称
APP_NAME=Laravel
应用运行环境
APP_ENV=local
是否开启Debug模式
APP_DEBUG=true
数据库配置
DB_CONNECTION=mysql
DB_HOST=127.0.0.1
DB_PORT=3306
DB_DATABASE=laravel
DB_USERNAME=root
DB_PASSWORD=root
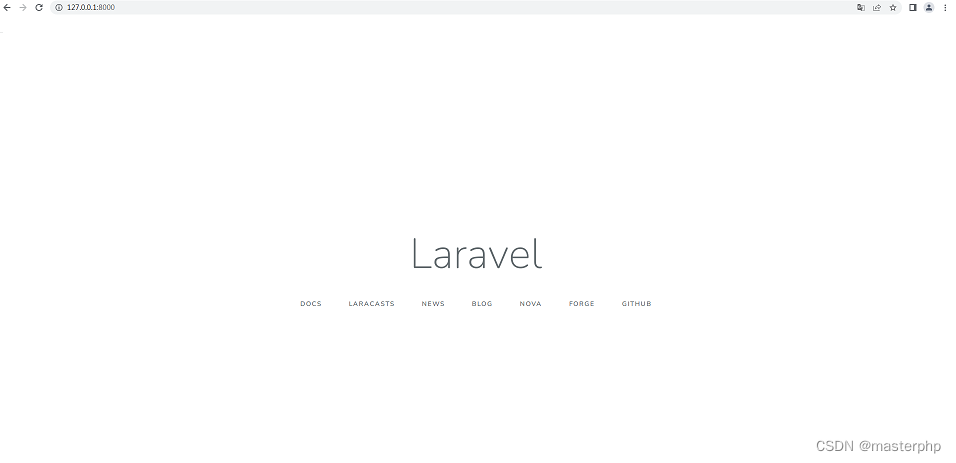
3.框架启动:
cd example-app(框架所在文件夹:安装时中午不必复制)
php artisan serve

4.常用artisan命令:
1.显示您的应用配置、驱动程序和环境:php artisan about
2.加密环境文件(作用在.env文件): php artisan env:encrypt
3.解密环境文件(作用在.env文件):php artisan env:decrypt
4.框架启动:php artisan serve
5.这个命令会生成一个新的应用程序密钥,并将其自动添加到 .env 文件中:php artisan key:generate
6.创建一个新的控制器:php artisan make:controller
7.创建一个新的 Eloquent 模型:php artisan make:model
8.创建一个新的策略类:php artisan make:policy
9.创建一个新的种子文件:php artisan make:seeder
10.运行数据库迁移,创建或修改数据库表以匹配最新的迁移文件:php artisan migrate
11.回滚最后一个数据库迁移操作:php artisan migrate:rollback
12.重置并重新运行所有数据库迁移:php artisan migrate:refresh
13.列出应用程序的所有路由:php artisan route:list
14.清除应用程序缓存:php artisan cache:clear
15.创建配置缓存文件以加速应用程序的启动:php artisan config:cache
16.清除视图缓存:php artisan view:clear
17.清除优化文件:php artisan optimize:clear
18.启动一个与应用程序的交互式解释器:php artisan tinker
19.在本地开发服务器上运行应用程序:php artisan serve
20.生成未定义监听器的事件:php artisan event:generate
21.为通知表生成一个迁移文件:php artisan notification:table
22.为队列迁移生成一个迁移文件:php artisan queue:table
23.为会话迁移生成一个迁移文件:php artisan session:table
24.列出所有路由:php artisan route:list -v
25.创建中间件:php artisan make:middleware 中间件名
5.框架目录:
根目录
--app :应用程序的核心代码
--bootstrap :引导框架的 app.php 文件
--config :所有配置文件
--database :数据库迁移、模型工厂和种子文件
--public :包含 index.php 文件,这是所有请求进入您应用程序的入口点,并配置自动加载
--resources :视图以及样式文件和JS文件
--routes :所有路由定义文件
--storage :日志、编译的 Blade 模板、基于文件的会话、文件缓存以及框架生成的其他文件
--tests :自动化测试
--vendor :Composer 依赖项
App目录 :大部分代码文件
--Broadcasting :所有广播频道类
--Console :所有自定义 Artisan 命令
--Exceptions :所有自定义异常
--Http :包含控制器、中间件和表单请求
--Jobs :包含应用程序的可队列化作业
--Listeners :处理事件的类
--Mail :代表电子邮件的类
--Models :所有的 Eloquent 模型类
--Notifications :应用程序发送的所有“事务性”通知
--Policies :应用程序的授权策略类
--Providers :应用程序的所有服务提供者
--Rules :应用程序的自定义验证规则对象
6.前端模
Blade
语法:
1.通过 {{ }} 渲染 PHP 变量(最常用)
2.通过 {!! !!} 渲染原生 HTML 代码(用于富文本数据渲染)
3.通过以 @ 作为前缀的 Blade 指令执行一些控制结构和继承、引入之类的操作
4.关键字:(关键字开始;关键字end结束)
@if、@else、@elseif
@unless(和 @if 条件相反的条)
@isset、@empty
@switch
@for、@foreach 和 @while
Vue / React
react有函数式编码和类编码,这次讲的是的类编码,后面小编争取出一个函数式编码的文章
解决办法:
1.使用Inertia桥接了Laravel应用程序和Vue或React 前端之间的连接,允许使用Vue或React构建成熟的现代前端框架
引入相关类(版本需要升级到laravel9,php版本需要升级到php8):composer require inertiajs/inertia-php
2.直接引入相关资源(主要的JS文件:这样写其实是:穿着Blade的外衣的 Vue / React)
路由:
route::get('/reactest',[TestController::class,'reactst']);头部:
<!DOCTYPE html>
<html>
<head>
    <meta charset="UTF-8" />
    <title>Hello React!</title>
    <script src="https://cdn.staticfile.org/react/16.4.0/umd/react.development.js"></script>
    <script src="https://cdn.staticfile.org/react-dom/16.4.0/umd/react-dom.development.js"></script>
    <script src="https://cdn.staticfile.org/babel-standalone/6.26.0/babel.min.js"></script>
</head>
页面代码(包含异步请求):
@include('head')
<body>
<div id="example"></div>
<script type="text/babel">
        //请求主方法
    class UserGist extends React.Component {
                //构造函数(和后端的构造函数类似)
        constructor(props) {
                        //super关键字实现调用父类,super代替的是父类的构建函数
            super(props);
                        //控制组件的内部状态变化
            this.state = {username: '', lastGistUrl: ''};
        }

                //在组件挂载后立即调用(插入 DOM 树中)
        componentDidMount() {
            this.serverRequest = $.get(this.props.source, function (result) {
                var lastGist = result[0];
                this.setState({
                    username: lastGist.owner.login,
                    lastGistUrl: lastGist.html_url
                });
            }.bind(this));
        }

                //当组件即将被卸载/销毁时,会调用这个方法(和后端的析构函数类似)
        componentWillUnmount() {
            this.serverRequest.abort();
        }

                //渲染方法
        render() {
            return (
                <div>
                    {this.state.username} 用户最新的 Gist 共享地址:
                    <a href={this.state.lastGistUrl}>{this.state.lastGistUrl}</a>
                </div>
            );
        }
    }

        //请求主体
    ReactDOM.render(
                //调用主方法(赋值请求地址)
        <UserGist source="https://api.github.com/users/octocat/gists" />,
        document.getElementById('example')
    );
</script>
</body>
</html>
7.路由:
use App\Http\Controllers\TestController;

//框架路由测试
Route::get('/test', [TestController::class, 'index']);

//控制器方法
<?php
namespace App\Http\Controllers;
use Illuminate\Routing\Controller as BaseController;

class TestController extends BaseController
{
    public function index(){
        return view('test');
    }
}
?>


//框架路由测试
Route::get('/test', [TestController::class, 'index']);


//依赖注入
Route::get('/tests', function (Request $request) {
    //todo or 模板
});

//指定请求方法
Route::match(['get', 'post'], '/', function () {
    //todo or 模板
});

Route::any('/', function () {
    //todo or 模板
});


Route::get('/testrequest', function (Request $request) {
    //todo or 模板
});

//路由重定向
Route::redirect('/page1', '/page2');

//单参数绑定
Route::get('/page3/{id}', function (string $id) {
    return '标记 '.$id;
});

//多参数绑定
Route::get('/page4/{id}/{ids}', function (string $id,string $ids) {
    return '标记 '.$id.';新标记'.$ids;
});

//可选参数(设置默认值)
Route::get('/page5/{name?}', function (?string $name = null) {
    return $name;
});

//正则表达式(where 添加正则表达式)
Route::get('/page6/{name}', function (string $name) {
    // ...
})->where('name', '[A-Za-z]+');


//路由重命名
Route::get('/page7', function () {
    // ...
})->name('page7realname');

//路由组+中间件
Route::group(['prefix' => 'admin'],function () {
    Route::get('/page8', function () {
        //访问/admin/page8
    });
    Route::get('/page9', function () {
        //访问/admin/page9
    });
});

//中间件(前置中间件,后置中间件,全局中间件)
php artisan make:middleware EnsureTokenIsValid

//使用中间件
 Route::get('/page10', function () {
    //todo or 模板
})->middleware(EnsureTokenIsValid::class);


//排除中间件

Route::group(['prefix' => 'admin'],function () {
    Route::get('/page11', function () {
       //todo or 模板
    })->withoutMiddleware([EnsureTokenIsValid::class]);
});
8.(MVC)php代码:
M (Model)
<?php

namespace App;

use Illuminate\Database\Eloquent\Model;
use Illuminate\Database\Eloquent\Relations\HasOne;

class Users extends Model
{
    //表
    protected $table = 'users';
    //组件
    protected $primaryKey = 'id';
    //主键自增是否开启
    public $incrementing = true;
    //主键 ID 的数据类型
    protected $keyType = 'int';
    //表示模型是否应该被打上时间戳
    public $timestamps = false;
    //数据库链接模型
    protected $connection = 'mysql';
    //定义方法
    public function phone()
    {
        return $this->hasOne(Users_extend::class);
    }
}
C (Controller)
<?php
namespace App\Http\Controllers;
use App\Http\Controllers\Controller;
use Inertia\Inertia;
use Inertia\Response;

class UserController extends Controller
{
    public function show(string $id): Response
    {
        return Inertia::render('Users/Profile', ['id' =>$id]);
    }
}

?>
V (View)
<script setup>
import Layout from '@/Layouts/Authenticated.vue'
import { Head } from '@inertiajs/vue3'
const props = defineProps(['user'])
</script>

<template>
  <Head title="User Profile" />
  <Layout>
    <template #header>
      <h2 class="text-xl font-semibold leading-tight text-gray-800">vue测试</h2>
    </template>
    <div class="py-12">标识: {{$id}}</div>
  </Layout>
</template>
写到这里,相信大家已经了解到了,控制器、视图大家都已经学会了,后面我们开始进阶的用法
数据库(数据库配置在.env文件中):
9.数据库 (原生 + Eloquent)
//访问路由
Route::get('/datacreate', [TestController::class, 'data_create']);
Route::get('/datafind', [TestController::class, 'data_find']);
Route::get('/datafinds', [TestController::class, 'data_finds']);
Route::get('/datafindspage', [TestController::class, 'data_finds_page']);
Route::get('/datafindshasone', [TestController::class, 'data_finds_hasone']);
Route::get('/dataup', [TestController::class, 'data_up']);
use Illuminate\Support\Facades\DB;
//数据库连接
'mysql' => [
'read' => [
'host' => [
'192.168.1.1',
'196.168.1.2',
],
],
'write' => [
'host' => [
'196.168.1.3',
],
],
'sticky' => true,
'database' => env('DB_DATABASE', 'forge'),
'username' => env('DB_USERNAME', 'forge'),
'password' => env('DB_PASSWORD', ''),
'unix_socket' => env('DB_SOCKET', ''),
'charset' => env('DB_CHARSET', 'utf8mb4'),
'collation' => env('DB_COLLATION', 'utf8mb4_unicode_ci'),
'prefix' => '',
'prefix_indexes' => true,
'strict' => true,
'engine' => null,
'options' => extension_loaded('pdo_mysql') ? array_filter([
PDO::MYSQL_ATTR_SSL_CA => env('MYSQL_ATTR_SSL_CA'),
]) : [],
],
//数据库Eloquent组件
use Illuminate\Database\Eloquent\Model;

//创建model
php artisan make:model Users

//model方法
namespace App;
use Illuminate\Database\Eloquent\Model;
use Illuminate\Database\Eloquent\Relations\HasOne;
class Users extends Model
{
    //表
    protected $table = 'users';
    //组件
    protected $primaryKey = 'id';
    //主键自增是否开启
    public $incrementing = true;
    //主键 ID 的数据类型
    protected $keyType = 'int';
    //表示模型是否应该被打上时间戳
    public $timestamps = false;
    //数据库链接模型
    protected $connection = 'mysql';
    //定义方法
    public function phone()
    {
        return $this->hasOne(Users_extend::class);
    }
}

//创建model
php artisan make:model Users_extend

//model方法
namespace App;
use Illuminate\Database\Eloquent\Model;
class Users_extend extends Model
{
    //表
    protected $table = 'user_extend';
    //定义方法
    public function user()
    {
        return $this->belongsTo(Users::class);
    }
}

//方法调用
namespace App\Http\Controllers;
use Illuminate\Routing\Controller as BaseController;
//数据库
use App\Users;

class TestController extends BaseController
{
    //初始化
    public function __construct()
    {
        $this->student = new Users();
    }

    //数据创建
    public function data_create(){
        $this->student->username='数据测试';
        $this->student->sex="女";
        $this->student->age="30";
        $this->student->save();
        $userid = $this->student->id;
        var_dump($userid);die;
    }

    //数据查询
    public function data_find(){
        $result = $this->student->where("id",5)->first();
        var_dump($result);die;
    }

    //数据查询
    public function data_finds(){
        $result = $this->student::all();
        var_dump($result);die;
    }

    //数据分页
    public function data_finds_page(){
        $result = $this->student::paginate(2);
        var_dump($result);die;
    }

    //数据一对一(hasone)
    public function data_finds_hasone(){
        $phone = $this->student::find(1)->phone;
        var_dump($phone);
        die;
    }

    //数据修改
    public function data_up(){
        $result = $this->student->where("id","=","5")->update(['username'=>"数据测试编号5"]);
        var_dump($result);die;
    }
}
10.关联关系(相当于联合查询)
一对一
return $this->hasOne();
return $this->belongsTo();
一对多
return $this->hasMany();
return $this->belongsTo();
多对多
return $this->belongsToMany();
return $this->belongsToMany();
11.文件上传表单
<form id="uploadForm" enctype="multipart/form-data">
<input type="file" name="file" />
<input type="submit" value="上传" />
</form>
//异步方法
<script>
$(document).ready(function (e) {
$('#uploadForm').on('submit', function(e) {
e.preventDefault(); // 阻止表单默认提交行为
var formData = new FormData(this); // 创建FormData对象
$.ajax({
type: 'POST',
url: '/upload', // 这里是你的上传处理路径
data: formData,
contentType: false,
processData: false,
success: function(response) {
console.log(response); // 处理成功的回调
},
error: function() {
console.log('上传失败'); // 处理错误的回调
}
});
});
});
</script>
普通文件上传
use Illuminate\Support\Facades\Route;
Route::post('/upload', function () {
    request()->file('file')->store('files', 'public');
    return '文件上传成功!';
});
oss文件上传
<?php
use App\Http\Controllers\Core\ApiController;
use App\Models\LoginLog;
use Illuminate\Http\Request;
use OSS\OssClient;

//定义方法
class FileController extends ApiController
{
        //上传主方法
    public function uploadFile(Request $request)
    {
                //获取上传文件
        $file = $request->file();
                //上传方法调用
        $ret = $this->_upload($file);
                //参数返回
        echo json_encode($ret);
        exit;
    }

        //上传方法
    protected function _upload($file)
    {
                //获取上传文件名字
        $dir_name = empty($_GET['dir']) ? 'image' : trim($_GET['dir']);
                //获取路径(配置文件中获取)
        $storage_path = config('upload.storage');
        $webpath_path = config('upload.webpath');
                //重名民上传文件
        $image_path =  $dir_name . '/' . date("Y-m") . '/';
                //获取路径(配置文件中获取)
        $app_url = env('APP_URL') . '/';
                //判断上传文件是否存在
        if (!$file) {
            return array('error'=>1,'message'=>"文件上传失败,请检查后重试");
        }
                //获取路径(配置文件中获取)
        $ossConfig = config('oss.' . config('upload.ossflag'));
        if($ossConfig['bucket_addr']) {
            $app_url = $ossConfig['bucket_addr'];
        }

        //文件上传
                $tmpName = $file->getPathName();
                $fileExtension = $file->getClientOriginalExtension();
                $filePath = md5_file($tmpName) . '.' . $fileExtension;
                //判断文件大小
                $file_size = $file->getSize();
                if($file_size > config('upload.maxSize'))
                {
                        return array('error'=>1,'message'=>"文件不可以超过50MB");
                }
                //判断是否符合上传类型
                if (!in_array(strtolower($fileExtension),config('upload.allowExts')))
                {
                        return array('error'=>1,'message'=>"文件类型不支持");
                }
                //上传成功后处理
                if(config('oss.' . 'oss_open') == 1) {
                        //初始化OSS对象
                        $oss = new OssClient($ossConfig['access_key_id'], $ossConfig['access_key_secret'], $ossConfig['endpoint']);
                        //oss上传
                        $res = $oss->uploadFile($ossConfig['bucket'],$webpath_path . $image_path . $filePath,$v->getPathName());
                        if ($res)
                        {
                                $data['oss'] = 1;
                                $data['attach_url'] = $ossConfig['bucket_addr'] . $webpath_path . $image_path . $filePath;
                        } else {
                                $data['attach_url'] = $app_url . $webpath_path . $image_path . $filePath;
                                $data['oss'] = 0;
                        }
                        $data['time'] = time();
                } else {
                        $data['oss'] = 0;
                        $data['attach_url'] = $app_url. $webpath_path . $image_path . $filePath;
                        $data['time'] = time();

                }
                if(!$data['oss'] || config('oss.' . 'is_delete') != 1)
                {
                        $file->move($storage_path . $image_path, $filePath);
                        unset($data);
                }
                return array('error'=>0,'url'=>$data['attach_url']);
    }
}
讲到这里基础的部分就已经完成了,万米高楼平地起,先复习到这里,先赶着做项目去了,后面高级一点的广播、缓存、集合、上下文啥的,后面有机会再出一个学习文章供大家学习
