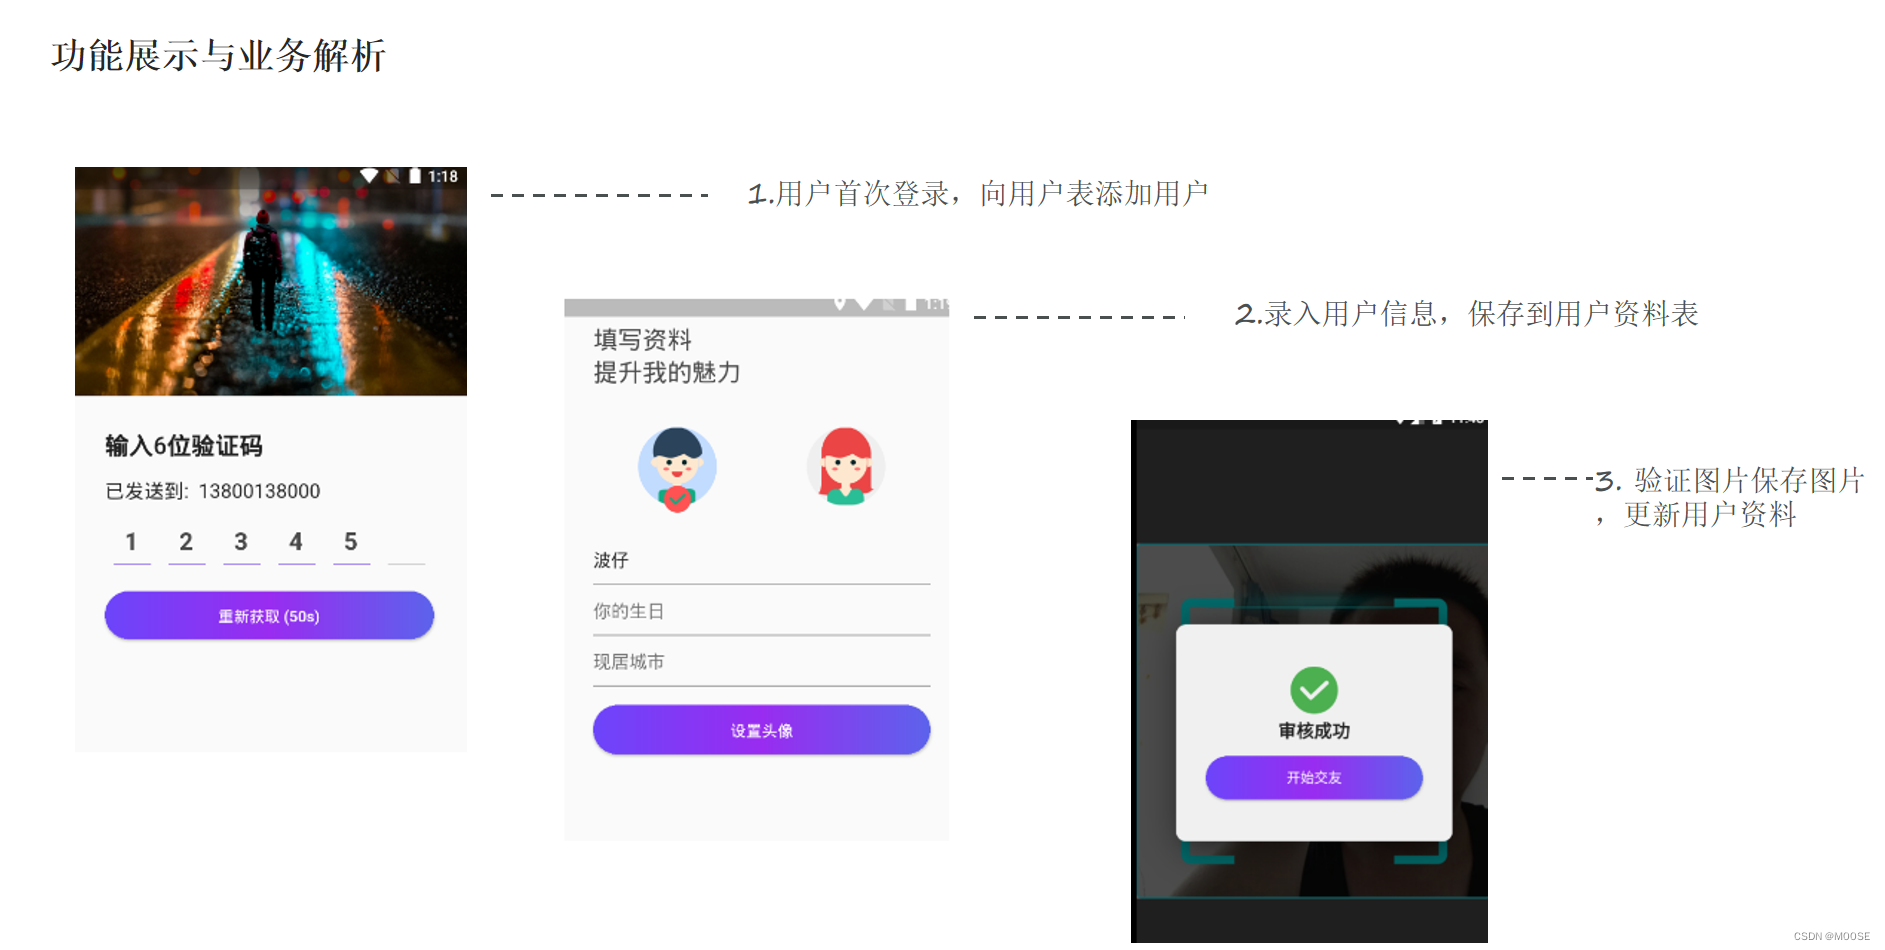
完善用户信息
业务概述

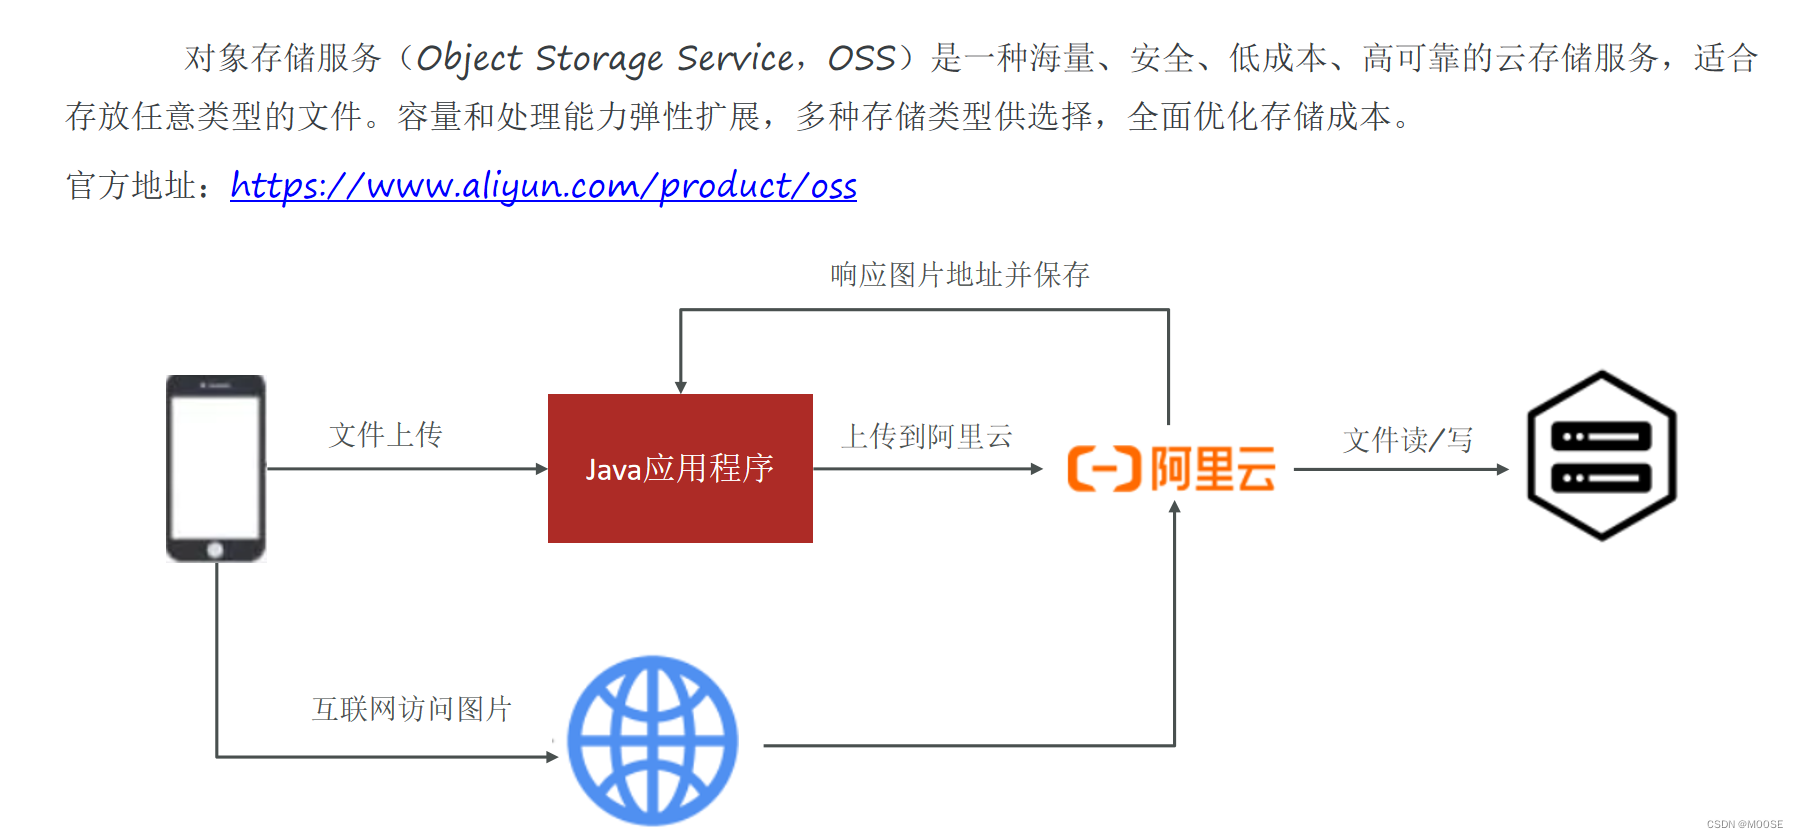
阿里云OSS

@Data
@ConfigurationProperties(prefix = "tanhua.oss")
public class OssProperties {
private String accessKey;
private String secret;
private String bucketName;
private String url; //域名
private String endpoint;
}
public class OssTemplate {
private OssProperties properties;
public OssTemplate(OssProperties properties) {
this.properties = properties;
}
/**
* 文件上传
* 1:文件名称
* 2:输入流
*/
public String upload(String filename, InputStream is) {
//3、拼写图片路径
filename = new SimpleDateFormat("yyyy/MM/dd").format(new Date())
+"/"+ UUID.randomUUID().toString() + filename.substring(filename.lastIndexOf("."));
// yourEndpoint填写Bucket所在地域对应的Endpoint。以华东1(杭州)为例,Endpoint填写为https://oss-cn-hangzhou.aliyuncs.com。
String endpoint = properties.getEndpoint();
// 阿里云主账号AccessKey拥有所有API的访问权限,风险很高。强烈建议您创建并使用RAM账号进行API访问或日常运维,请登录 https://ram.console.aliyun.com 创建RAM账号。
String accessKeyId = properties.getAccessKey();
String accessKeySecret = properties.getSecret();
// 创建OSSClient实例。
OSS ossClient = new OSSClientBuilder().build(endpoint, accessKeyId,accessKeySecret);
// 填写Byte数组。
// 填写Bucket名称和Object完整路径。Object完整路径中不能包含Bucket名称。
ossClient.putObject(properties.getBucketName(), filename, is);
// 关闭OSSClient。
ossClient.shutdown();
String url = properties.getUrl() +"/" + filename;
return url;
}
}
@EnableConfigurationProperties({
SmsProperties.class,
OssProperties.class
})
public class TanhuaAutoConfiguration {
@Bean
public SmsTemplate smsTemplate(SmsProperties properties) {
return new SmsTemplate(properties);
}
@Bean
public OssTemplate ossTemplate(OssProperties properties) {
return new OssTemplate(properties);
}
}
tanhua:
oss:
accessKey: LTAI4GKgob9vZ53k2SZdyAC7
secret: LHLBvXmILRoyw0niRSBuXBZewQ30la
endpoint: oss-cn-beijing.aliyuncs.com
bucketName: tanhua001
url: https://tanhua001.oss-cn-beijing.aliyuncs.com/
@RunWith(SpringRunner.class)
@SpringBootTest(classes = AppServerApplication.class)
public class OssTest {
@Autowired
private OssTemplate template;
@Test
public void testTemplateUpload() throws FileNotFoundException {
String path = "C:\\Users\\lemon\\Desktop\\课程资源\\02-完善用户信息\\03-资料\\2.jpg";
FileInputStream inputStream = new FileInputStream(new File(path));
String imageUrl = template.upload(path, inputStream);
System.out.println(imageUrl);
}
}
百度人脸识别
人脸识别(Face Recognition)基于图像或视频中的人脸检测、分析和比对技术,提供对您已获授权前提下的私有数据的人脸检测与属性分析、人脸对比、人脸搜索、活体检测等能力。灵活应用于金融、泛安防、零售等行业场景,满足身份核验、人脸考勤、闸机通行等业务需求 官方地址:https://ai.baidu.com/tech/face/
@Data
@ConfigurationProperties("tanhua.aip")
public class AipFaceProperties {
private String appId;
private String apiKey;
private String secretKey;
@Bean
public AipFace aipFace() {
AipFace client = new AipFace(appId, apiKey, secretKey);
// 可选:设置网络连接参数
client.setConnectionTimeoutInMillis(2000);
client.setSocketTimeoutInMillis(60000);
return client;
}
}
配置信息
tanhua:
aip:
appId: 24021388
apiKey: ZnMTwoETXnu4OPIGwGAO2H4G
secretKey: D4jXShyinv5q26bUS78xRKgNLnB9IfZh
测试类
@RunWith(SpringRunner.class)
@SpringBootTest(classes = AppServerApplication.class)
public class FaceTest {
@Autowired
private AipFaceTemplate template;
@Test
public void detectFace() {
String image = "https://tanhua001.oss-cn-beijing.aliyuncs.com/2021/04/19/a3824a45-70e3-4655-8106-a1e1be009a5e.jpg";
boolean detect = template.detect(image);
}
}


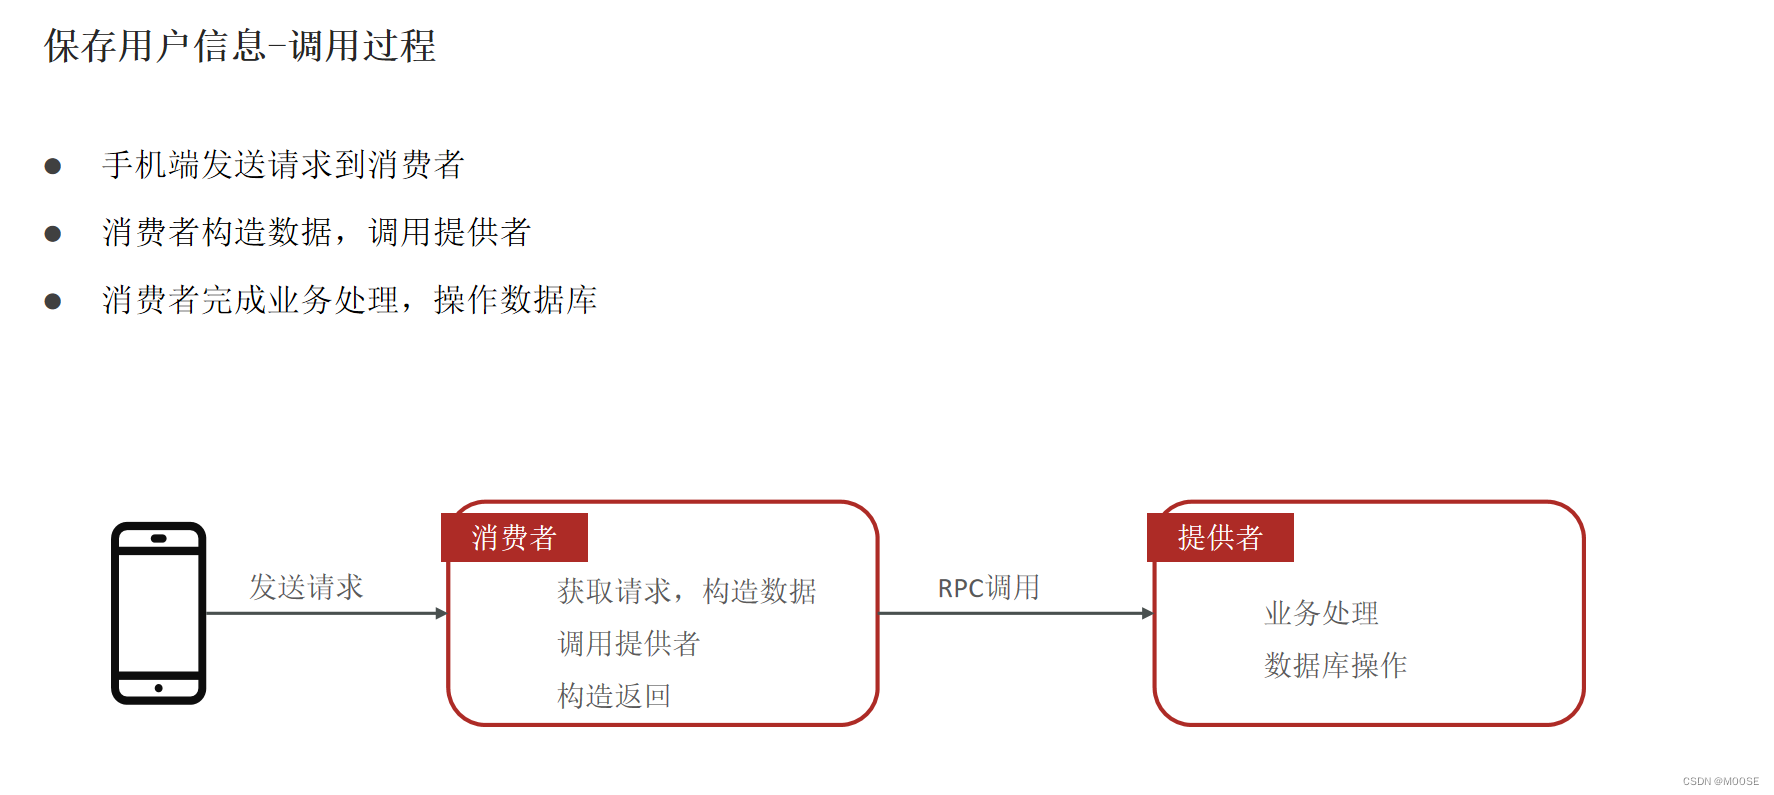
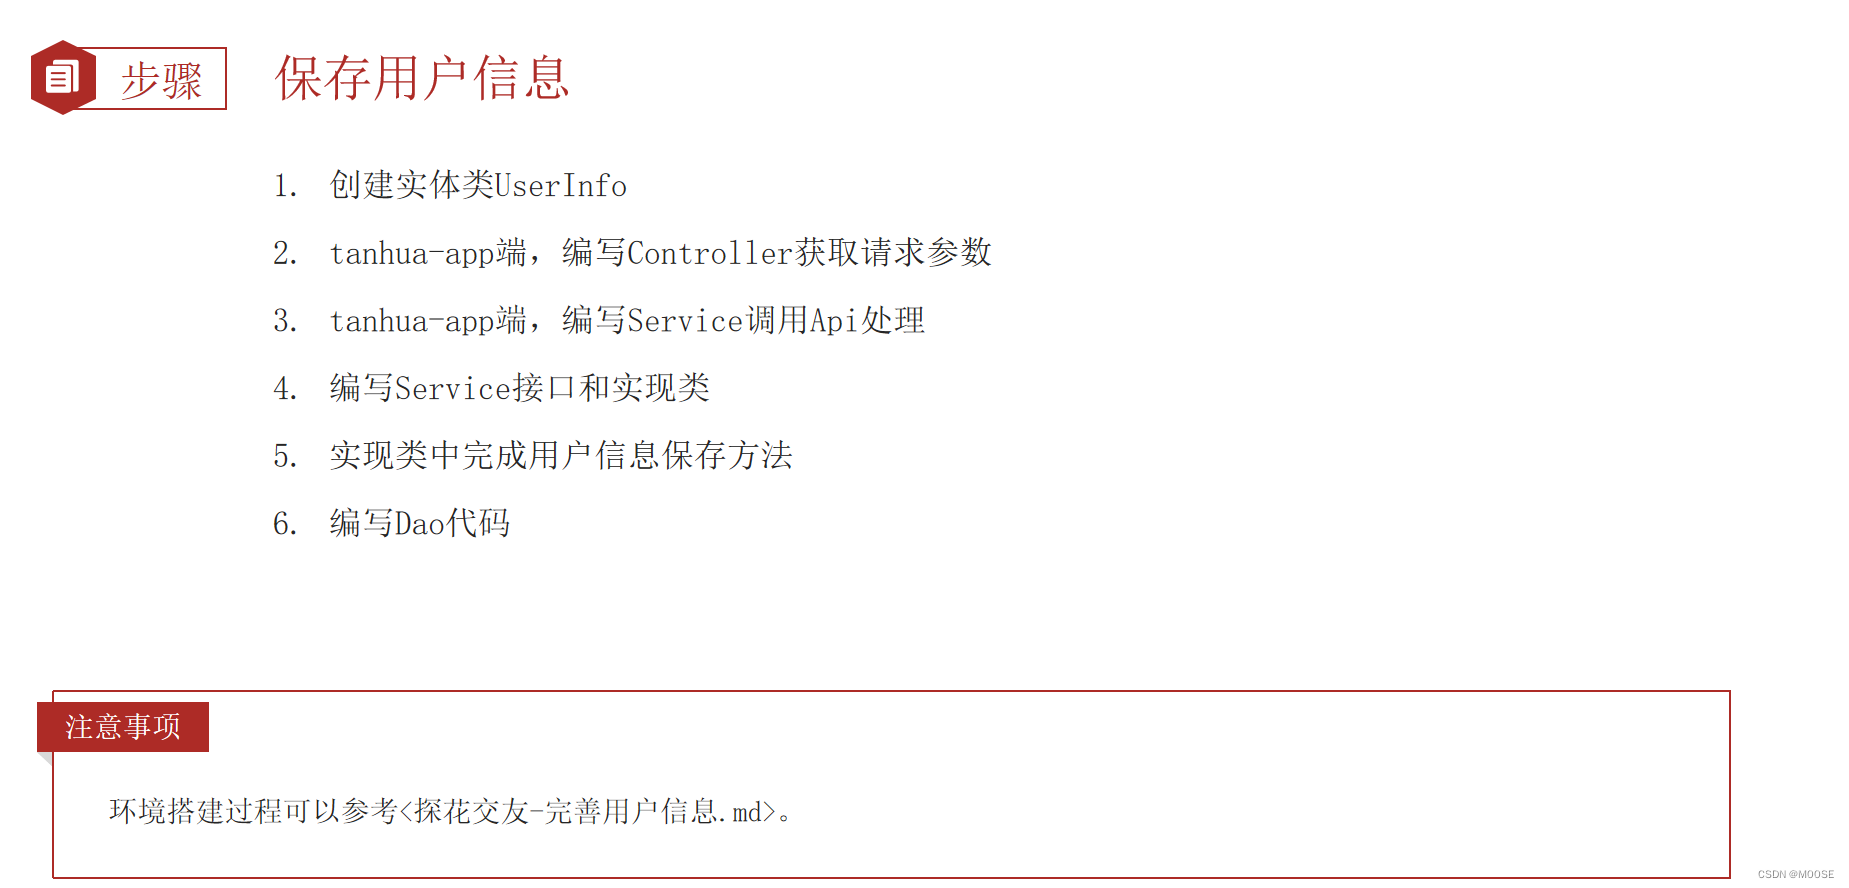
UserInfo实体类:
@Data
@NoArgsConstructor
@AllArgsConstructor
public class UserInfo implements Serializable {
/**
* 由于userinfo表和user表之间是一对一关系
* userInfo的id来源于user表的id
*/
@TableId(type= IdType.INPUT)
private Long id; //用户id
private String nickname; //昵称
private String avatar; //用户头像
private String birthday; //生日
private String gender; //性别
private Integer age; //年龄
private String city; //城市
private String income; //收入
private String education; //学历
private String profession; //行业
private Integer marriage; //婚姻状态
private String tags; //用户标签:多个用逗号分隔
private String coverPic; // 封面图片
private Date created;
private Date updated;
//用户状态,1为正常,2为冻结
@TableField(exist = false)
private String userStatus = "1";
}
UserController:
@RestController
@RequestMapping("/user")
public class UserController {
@Autowired
private UserInfoService userInfoService;
/**
* 保存用户信息
* UserInfo
* 请求头中携带token
*/
@PostMapping("/loginReginfo")
public ResponseEntity loginReginfo(@RequestBody UserInfo userInfo,
@RequestHeader("Authorization") String token) {
//1、解析token
Claims claims = JwtUtils.getClaims(token);
Integer id = (Integer) claims.get("id");
//2、向userinfo中设置用户id
userInfo.setId(Long.valueOf(id));
//3、调用service
userInfoService.save(userInfo);
return ResponseEntity.ok(null);
}
}
UserInfoService:
@Service
public class UserInfoService {
@DubboReference
private UserInfoApi userInfoApi;
public void save(UserInfo userInfo) {
userInfoApi.save(userInfo);
}
}
UserInfoApi:
public interface UserInfoApi {
public void save(UserInfo userInfo);
}
UserInfoApiImpl:
@DubboService
public class UserInfoApiImpl implements UserInfoApi {
@Autowired
private UserInfoMapper userInfoMapper;
@Override
public void save(UserInfo userInfo) {
userInfoMapper.insert(userInfo);
}
}
UserInfoMapper:
public interface UserInfoMapper extends BaseMapper<UserInfo> {
}
上传用户头像-调用过程


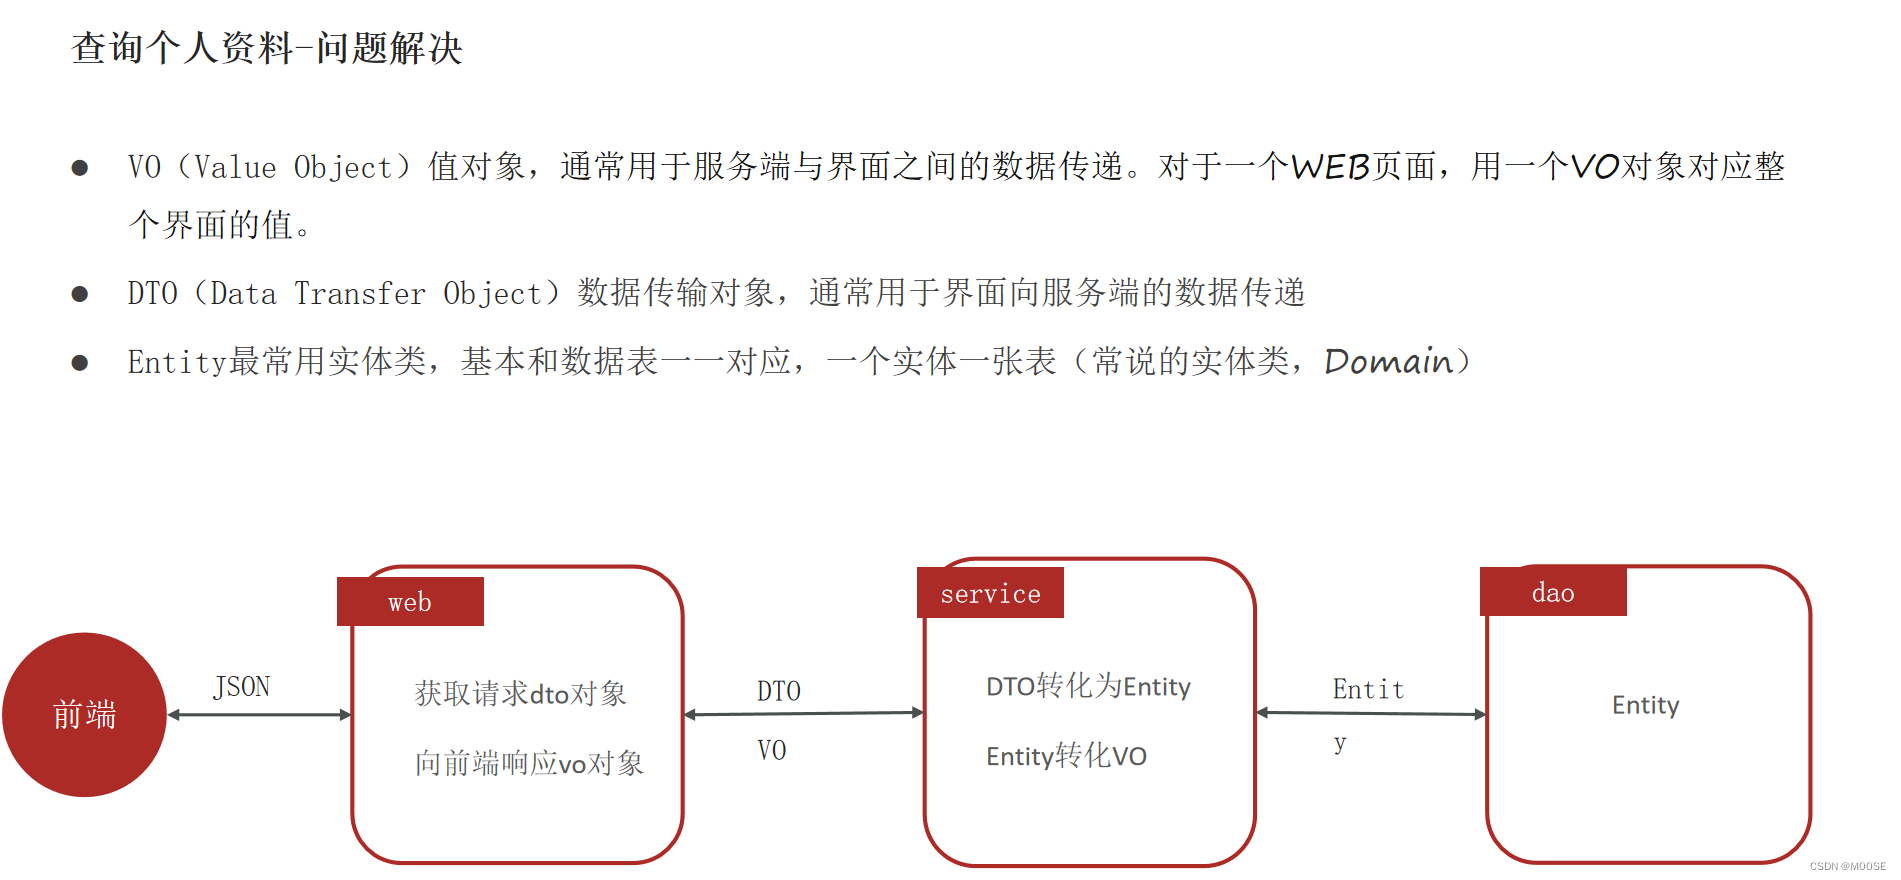


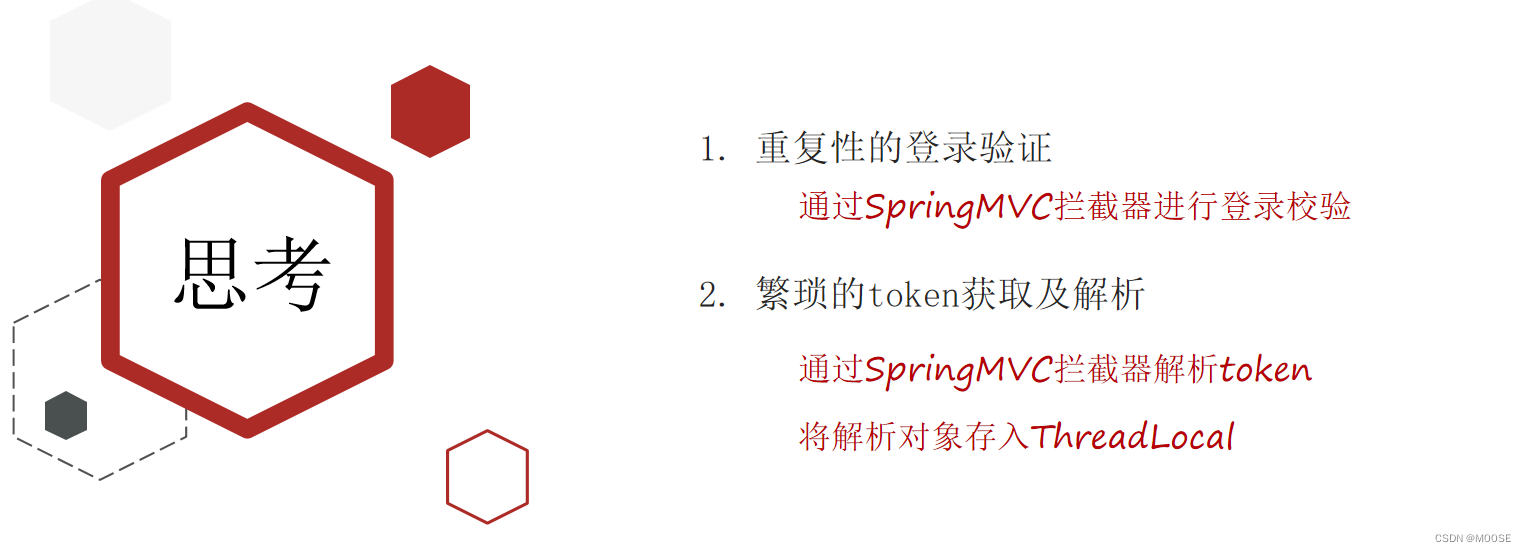
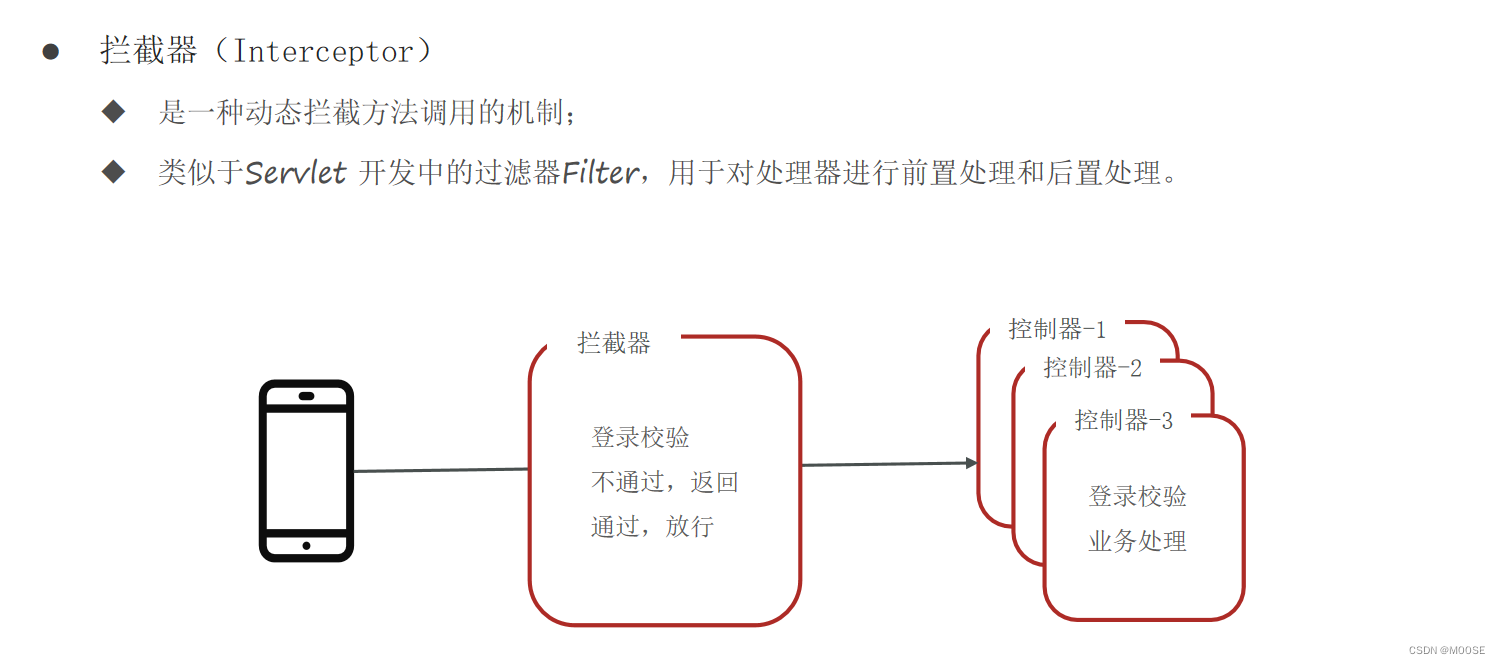
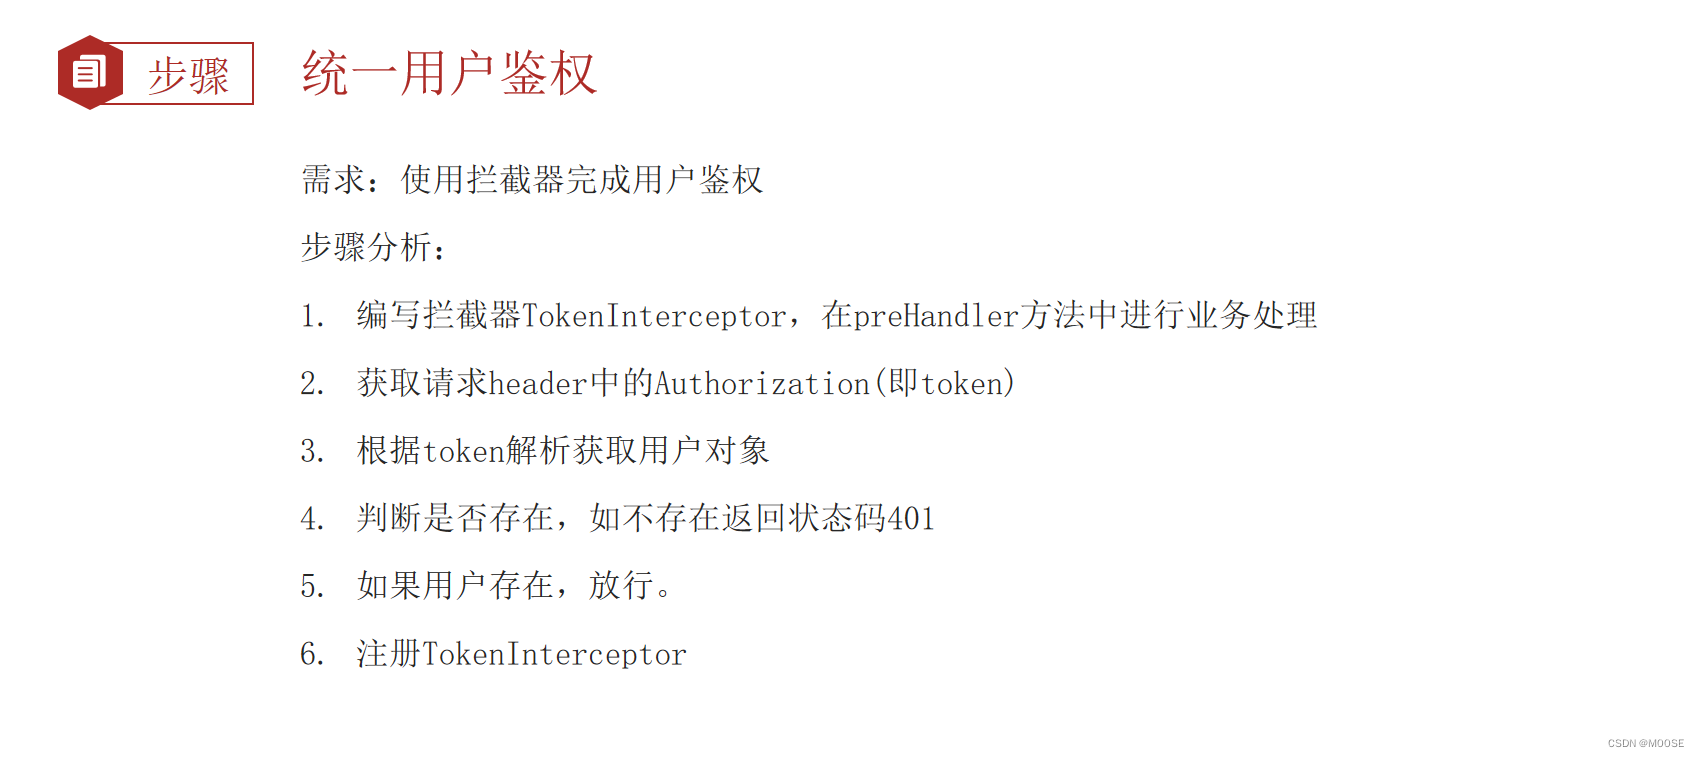
代码优化



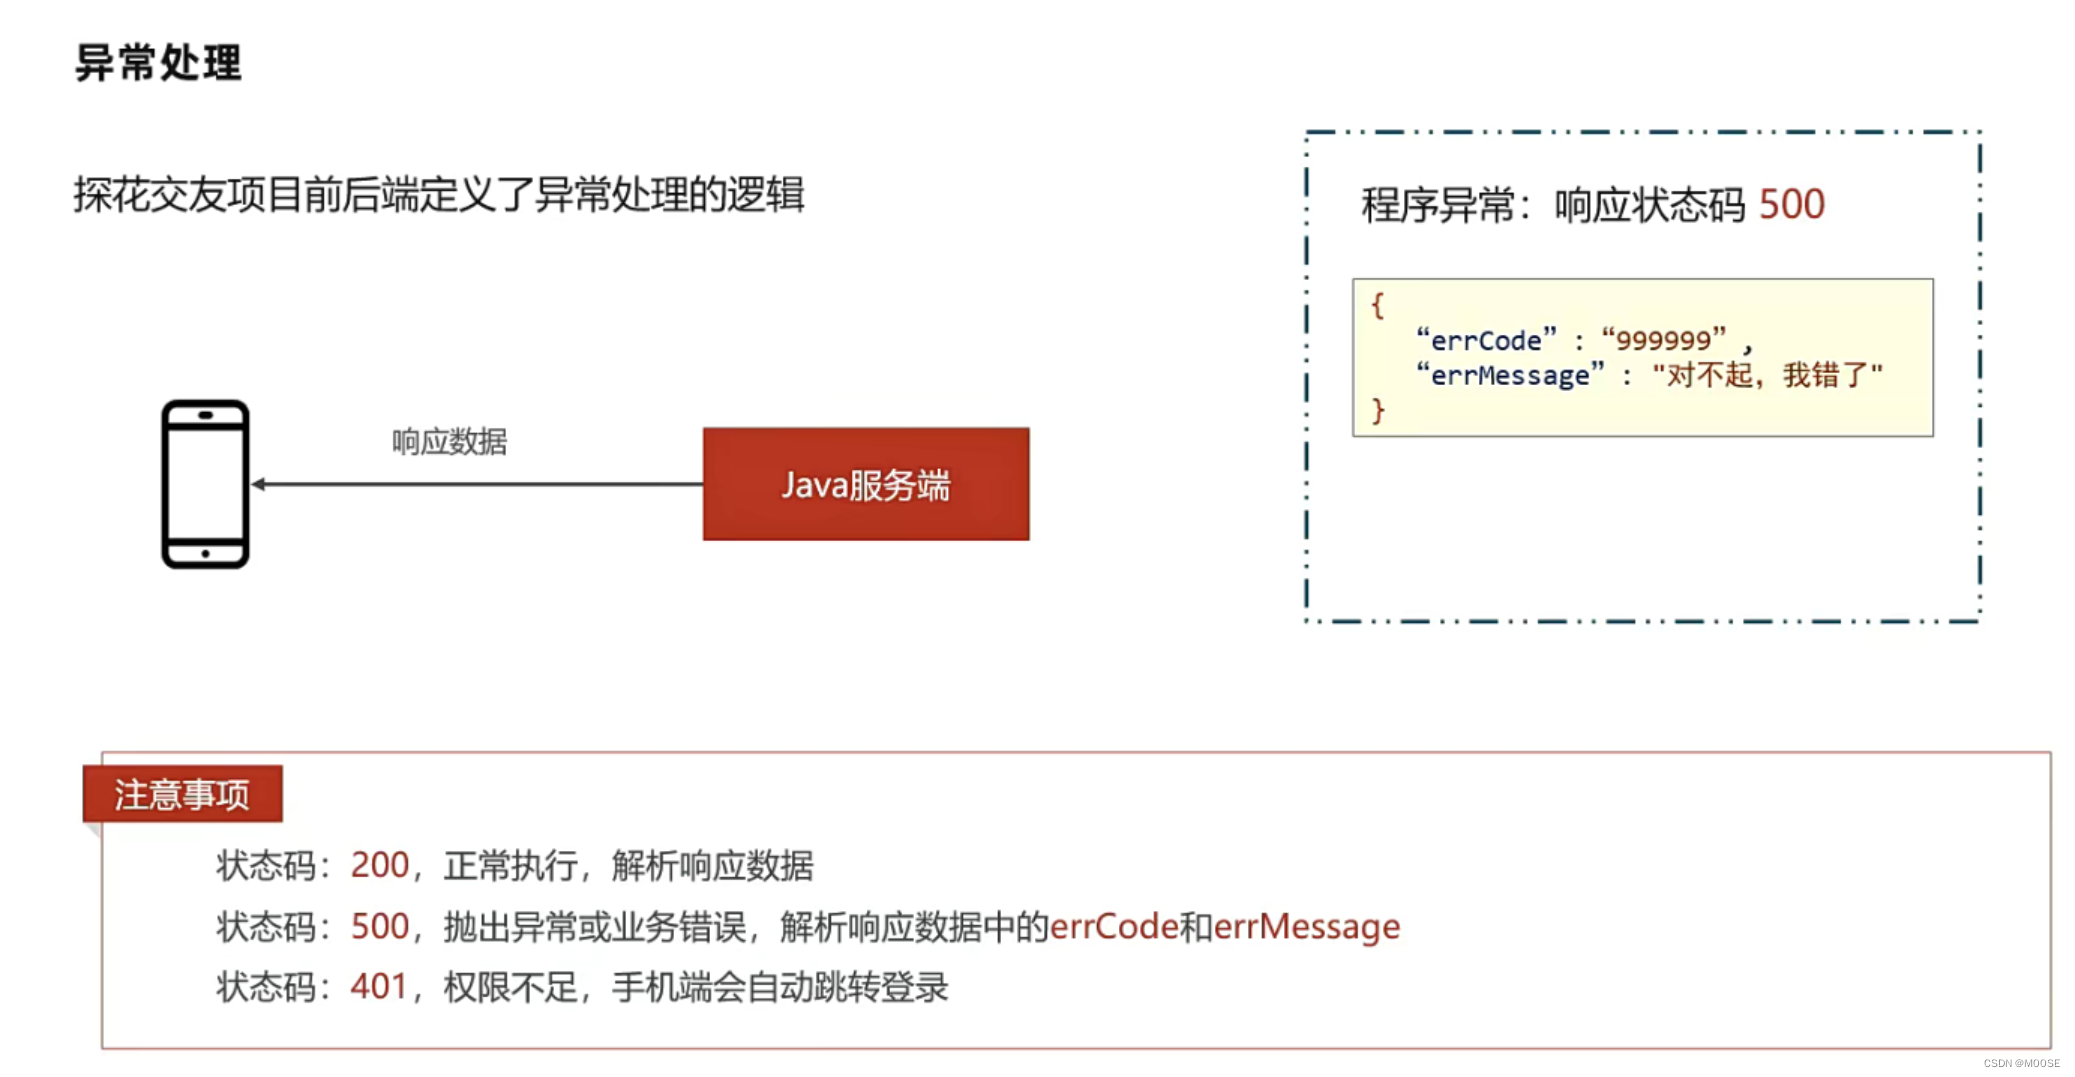
统一异常处理:

/**
 * 自定义统一异常处理
 *  1、通过注解,声明异常处理类
 *  2、编写方法,在方法内部处理异常,构造响应数据
 *  3、方法上编写注解,指定此方法可以处理的异常类型
 */
@ControllerAdvice
public class ExceptionAdvice {

    @ExceptionHandler(BusinessException.class)
    public ResponseEntity handlerException(BusinessException be) {
        be.printStackTrace();
        ErrorResult errorResult = be.getErrorResult();
        return ResponseEntity.status(HttpStatus.INTERNAL_SERVER_ERROR).body(errorResult);
    }

    @ExceptionHandler(Exception.class)
    public ResponseEntity handlerException1(Exception be) {
        be.printStackTrace();
        return ResponseEntity.status(HttpStatus.INTERNAL_SERVER_ERROR).body(ErrorResult.error());
    }
}
这样我们就不用再controller中try 跟catch了





![P1028 [NOIP2001 普及组] 数的计算————C++](https://img-blog.csdnimg.cn/8016e048bbe1460591d3170640774549.png)

