路径规划算法中有两种算法使用最普遍,第一个是Dijkstr算法,第二个是A*算法,两个算法各有千秋,Dijkstra算法可以保证最优解,但是复杂度较高,尤其当点数量较多时,A*算法是一种启发式搜索算法,它不保证最优解,但成本很低,也是很多机器人移动或者游戏中人物自动寻路场景中常用的算法。
下面来说下大概得逻辑,假设有30*30的方格,从1,1点要到25,20点,会先从1,1出发,查询1,1能到达的点,假设1,1能够到达(0,1),(1,0),(1,2),(2,1)这四个点,那么求出四个点中哪个点距离目标点(25,20)的曼哈顿距离最近,得到这个这里距离最近的点之后,再找出这个点能够到达的点,从它能够到达的点中再求出四个点中哪个点距离目标点(25,20)的曼哈顿距离最近。依此类推,直到到达目标点。
ps:曼哈顿距离也就是横向距离加上纵向距离,而不是勾股定理求出的横向距离的平方和纵向距离的平方再开根,因为一般使用A*算法的更多的是街道或者网格状的场景,用曼哈顿距离更加符合实际场景。
下面可以通过threejs来演示,首先在threejs场景中绘制一个30*30的网格,在绘制网格的时候就正好存储每个网格的点,并用x.y为点的名字,再存储每个点能到达点的路线,另外为了演示更真实可以防止一些障碍物,并在绘制场景的时候去掉能连接到障碍物的路线,
    initTable() {
      const cylinderMaterial = new THREE.MeshLambertMaterial({ color: '#d3d3d3' })
      const table = []
      for (let i = 0; i < 30; i++) {
        for (let j = 0; j < 30; j++) {
          const boxGeometry = new THREE.BoxGeometry(9, 9, 9)
          const box1 = new THREE.Mesh(boxGeometry, cylinderMaterial)
          box1.position.set(i * 10, j * 10, 5)
          // this.scene.add(box1)
          box1.updateMatrix()// 更新模型变换矩阵
          const boxMesh = box1.geometry.applyMatrix4(box1.matrix)// 启动并应用变换矩阵
          table.push(boxMesh)

          const params = { name: i + '.' + j, x: (i * 10), y: (j * 10) }
          this.pointList.push(params)
          if (i > 1) {
            this.roadList.push({ begin: i + '.' + j, end: (i - 1) + '.' + j })
          }
          if (j > 1) {
            this.roadList.push({ begin: i + '.' + j, end: i + '.' + (j - 1) })
          }
          this.roadList.push({ begin: i + '.' + j, end: (i + 1) + '.' + j })
          this.roadList.push({ begin: i + '.' + j, end: i + '.' + (j + 1) })
        }
      }
      const bayGeometry = mergeGeometries(table)// 合并模型数组

      const boxList = new THREE.Mesh(bayGeometry, cylinderMaterial)// 生成一整个新的模型
      this.scene.add(boxList)
      for (let i = 0; i < this.roadList.length; i++) {
        for (let j = 0; j < this.obstacle.length; j++) {
          if (this.roadList[i].begin === (this.obstacle[j].x + '.' + this.obstacle[j].y) ||
          this.roadList[i].end === (this.obstacle[j].x + '.' + this.obstacle[j].y)) {
            console.log(this.obstacle[j].x + '.' + this.obstacle[j].y)
            this.roadList.splice(i, 1)
            j--
          }
        }
      }
    },
这样一个网格布局就绘制完成,然后可以开始按照刚才的步骤实现具体的寻路过程,在寻路时每次获取到的点都存放到集合中,并用绘制方格的方法绘制路线方格,与网格用不同的颜色来区分。
buildPath() {
      let begin = (parseInt(this.beginPoint.x) - 1) + '.' + (parseInt(this.beginPoint.y) - 1)
      const end = (parseInt(this.endPoint.x) - 1) + '.' + (parseInt(this.endPoint.y) - 1)
      this.removeOnce()
      this.drawPoint(begin)
      while (begin !== end) {
        const result = this.calcDistance(begin, end)
        this.drawPoint(result.point)
        begin = result.point
      }
    },
    calcDistance(begin, end) {
      const tempRoads = []
      for (let i = 0; i < this.roadList.length; i++) {
        if (this.roadList[i].begin === begin) {
          tempRoads.push(this.roadList[i].end)
        }
      }
      let result = { distance: Infinity, point: '' }
      for (let i = 0; i < tempRoads.length; i++) {
        const beginX = tempRoads[i].split('.')[0]
        const beginY = tempRoads[i].split('.')[1]
        const endX = end.split('.')[0]
        const endY = end.split('.')[1]
        const distance = Math.abs(parseInt(endX - beginX)) + Math.abs(parseInt(endY - beginY))
        if (distance < result.distance) {
          result = { distance: distance, point: tempRoads[i] }
        }
      }
      return result
    },
    drawPoint(point) {
      const pointX = point.split('.')[0]
      const pointY = point.split('.')[1]
      const boxGeometry = new THREE.BoxGeometry(10, 10, 10)
      const material = new THREE.MeshPhongMaterial({
        color: '#00FF00', // 设置颜色
        shininess: 20 // 设置高光大小,范围为0到128,默认值为30
      })
      const pointMesh = new THREE.Mesh(boxGeometry, material, 0)
      pointMesh.position.set(parseInt(pointX) * 10, parseInt(pointY) * 10, 6)
      pointMesh.name = 'path'
      this.scene.add(pointMesh)
    },
我们可以先设置默认的起点和结束点看下效果,设置起始点为(1,1),结束点为(20.16),规划后看下效果: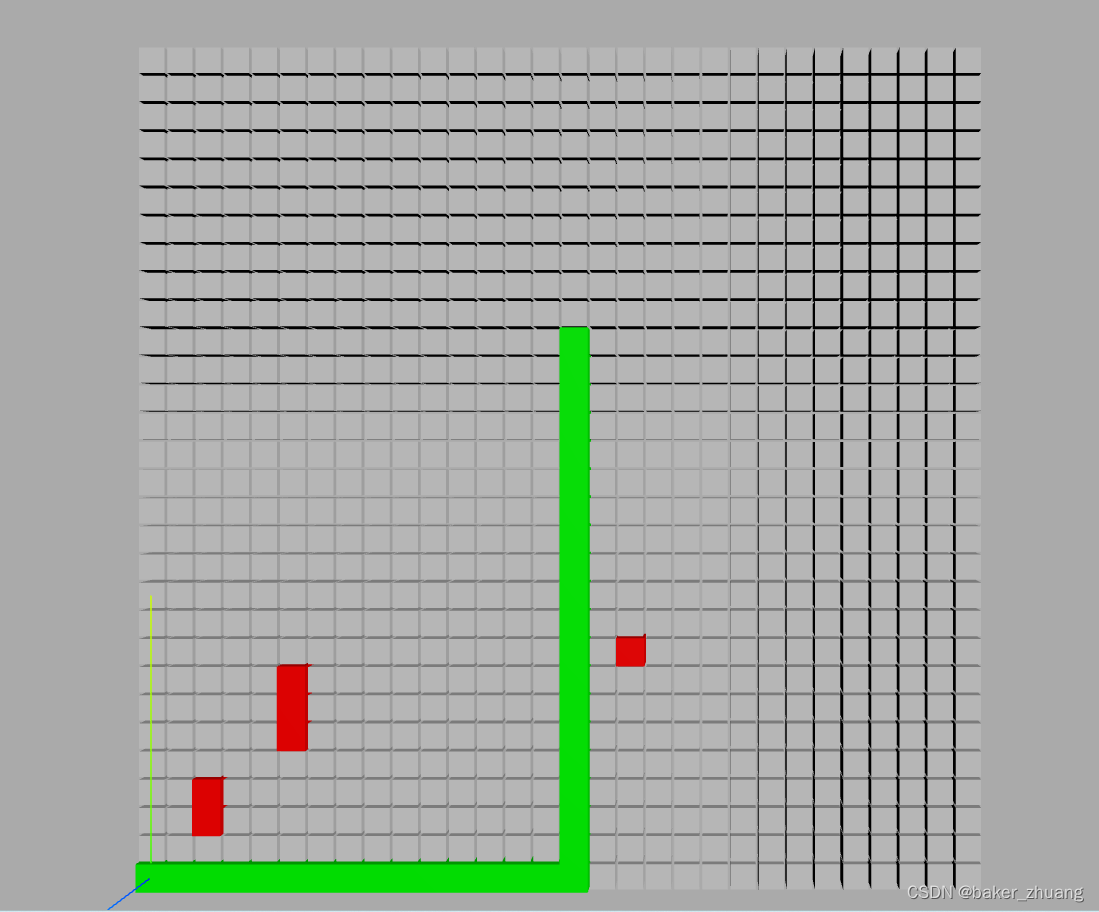
可以同样用上个章节的加入element的输入框来实现动态规划,并在每次规划后清除上一次规划的路线。
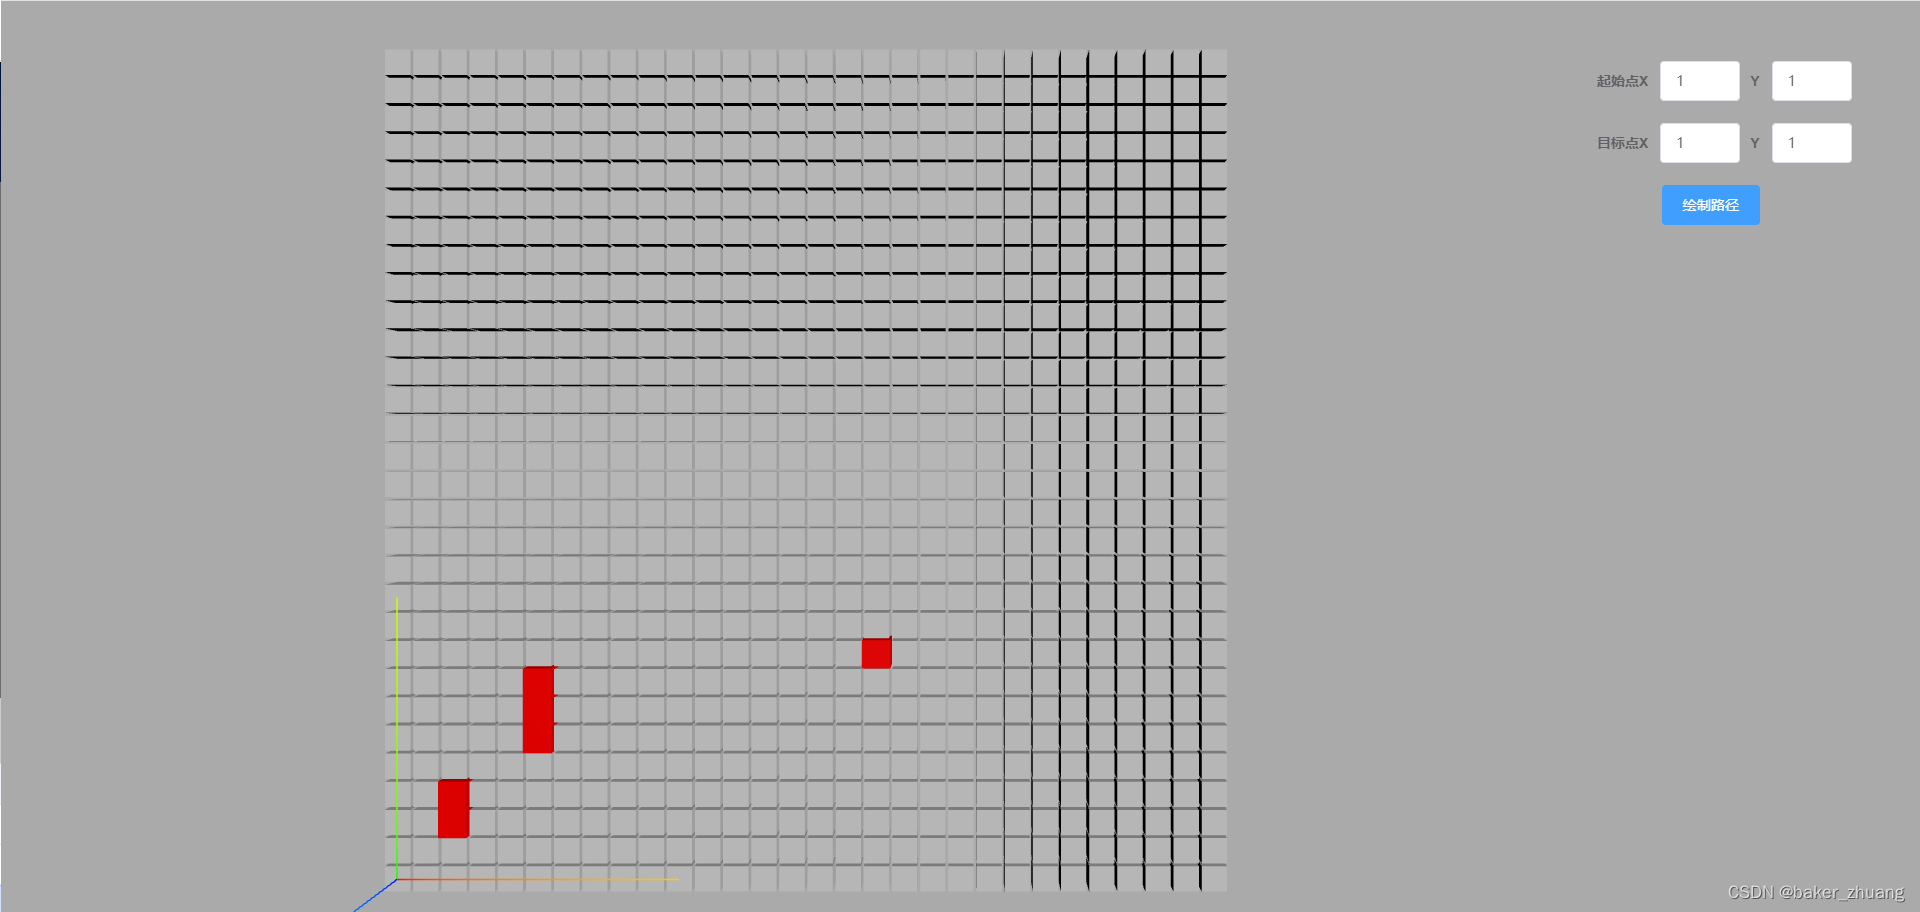
我们可以规划试试,效果如下,
A*初級
还可以把距离比较换成两个点之间的直线距离,效果如下:因为两个数相加的和相等的情况下,两个数越接近,直线距离最短,简单的说,周长相等的情况下,正方形的对角线最短。但是在实际地图中,转弯是需要花费成本的,所以还是使用曼哈顿距离更合适。
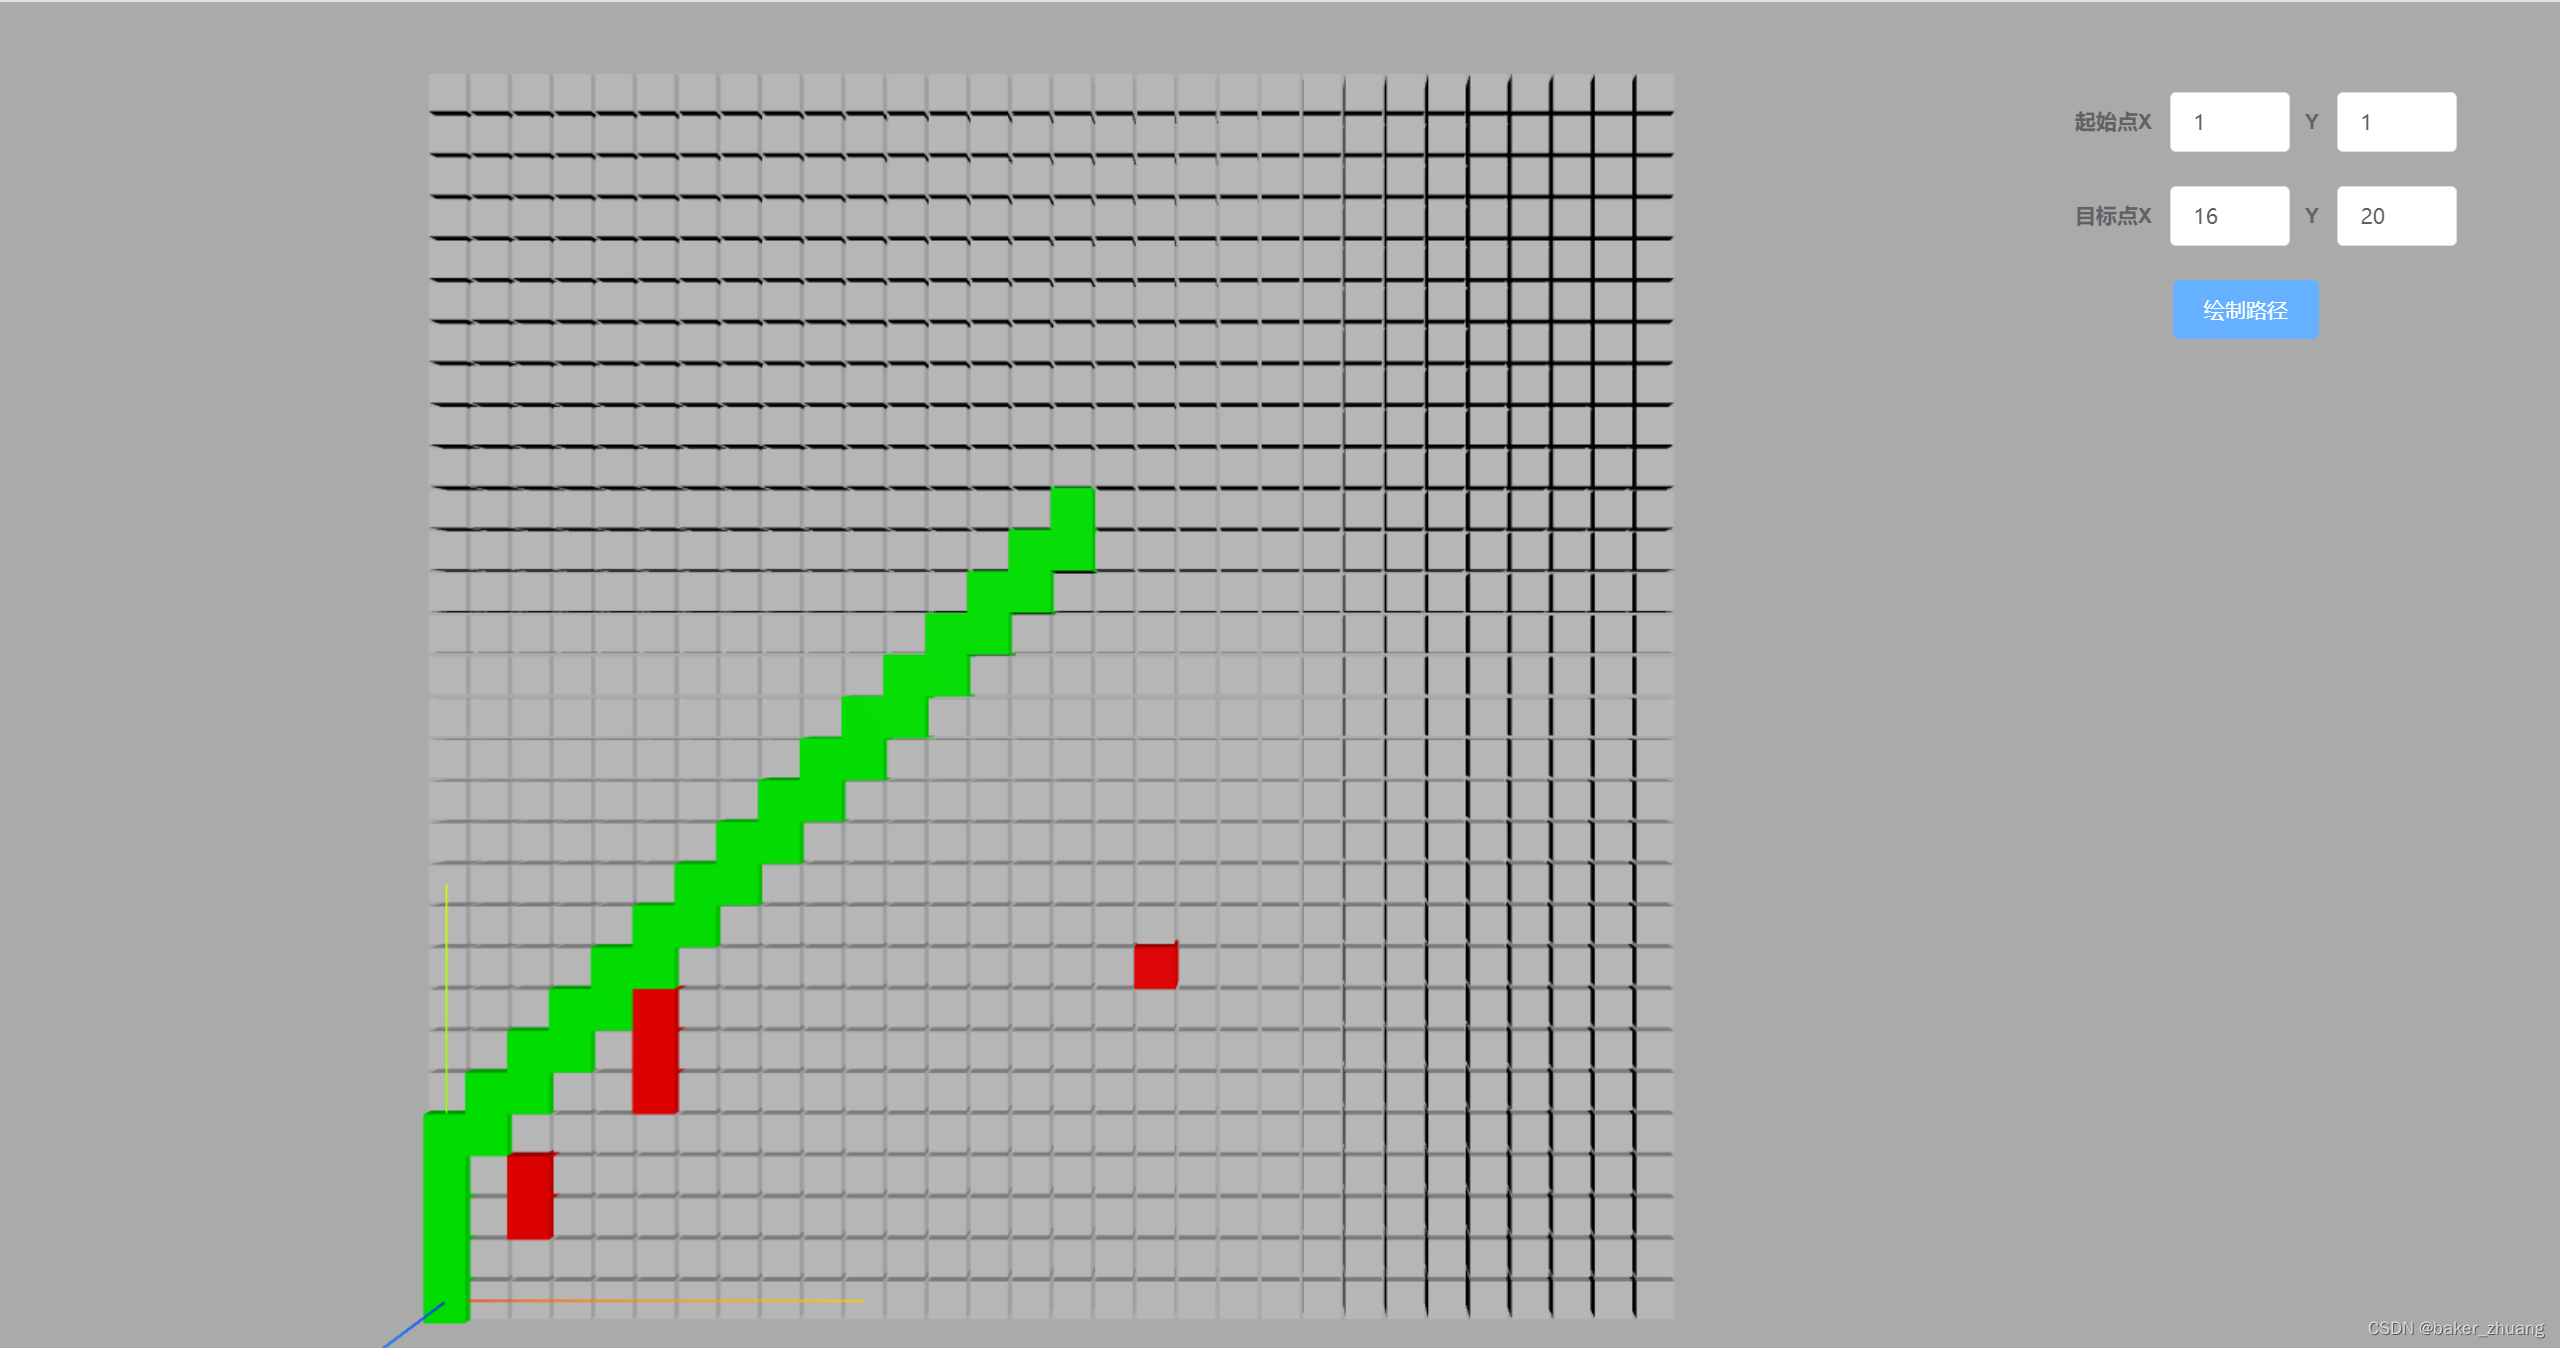 不过此方式不太适合有障碍物的情况,因为在有复杂障碍物时,并不是距离越接近目标点花费成本越低,直到到达目标点,下面的章节再探讨复杂障碍物的处理方式。

