前言:
开发过 Spring Boot 项目的都知道只需要一个简单的入口类,然后入口类中有个 main 方法,main 方法中调用了 SpringApplication.run 方法,再配合 @SpringBootApplication 注解就可以完成一个项目的启动,如下:
@SpringBootApplication
public class DemoApplication {

    public static void main(String[] args) {
        SpringApplication.run(DemoApplication.class, args);
    }

}
那你知道 SpringApplication#run 具体做了什么吗?
启动流程简单debugg:
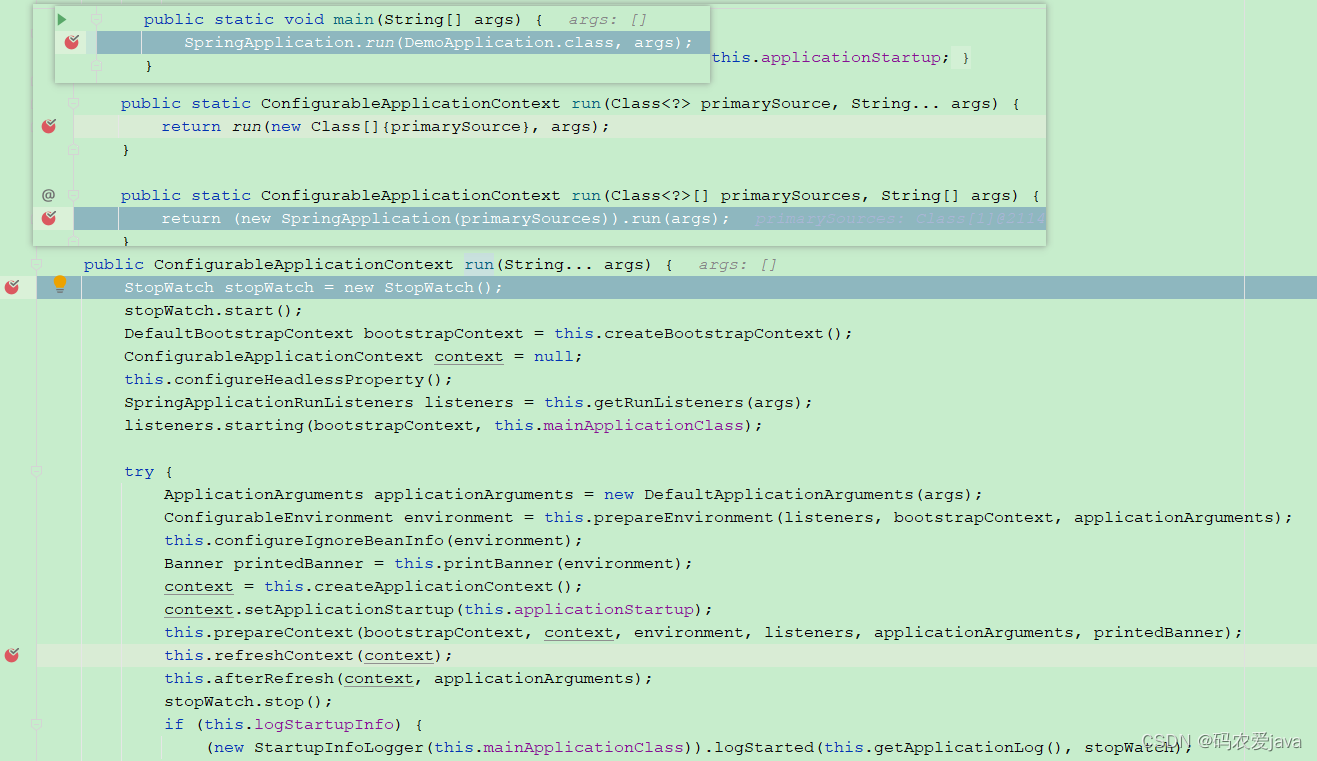
SpringApplication#run 方法源码解析:
SpringApplication#run 方法:
//run 方法的封装
public static ConfigurableApplicationContext run(Class<?> primarySource, String... args) {
	return run(new Class[]{primarySource}, args);
}
//创建 SpringApplication 对象 调用 SpringApplication 的 run 方法
public static ConfigurableApplicationContext run(Class<?>[] primarySources, String[] args) {
	return (new SpringApplication(primarySources)).run(args);
}
面两个方法,一个方法完成了 SpringApplication 创建,一个完成了 run 方法的调用,非常简单,具体的调用细节在下面的方法中。
真正的SpringApplication#run 方法:
//真正的SpringApplication run 方法
public ConfigurableApplicationContext run(String... args) {
	//计时器
	StopWatch stopWatch = new StopWatch();
	stopWatch.start();
	//创建默认的引导上下文 实现了 ConfigurableBootstrapContext 接口
	DefaultBootstrapContext bootstrapContext = this.createBootstrapContext();
	//配置应用程序上下文
	ConfigurableApplicationContext context = null;
	//设置系统属性 java.awt.headless 的值 默认值为true 开启headless模式
	this.configureHeadlessProperty();
	//创建监听器  获取运行时的监听器列表
	SpringApplicationRunListeners listeners = this.getRunListeners(args);
	//启动监听器
	listeners.starting(bootstrapContext, this.mainApplicationClass);

	try {
		//初始化默认应用参数类
		ApplicationArguments applicationArguments = new DefaultApplicationArguments(args);
		//根据监听器 引导上下文 默认参数 准备 spring 环境
		ConfigurableEnvironment environment = this.prepareEnvironment(listeners, bootstrapContext, applicationArguments);
		//设置需要忽略的 bean 信息 BeanInfo是一种描述 Java Bean 属性 事件 方法的元数据信息的机制
		this.configureIgnoreBeanInfo(environment);
		//创建打印类 可以自定义启动时候的打印信息
		Banner printedBanner = this.printBanner(environment);
		//创建应用程序上下文
		context = this.createApplicationContext();
		//应用程序上下文设置 applicationStartup
		context.setApplicationStartup(this.applicationStartup);
		//准备上下文--预处理 上面已经创建了应用程序上下文 但是还是一个空白对象
		this.prepareContext(bootstrapContext, context, environment, listeners, applicationArguments, printedBanner);
		//刷新应用上下文 核心方法 spring 源码中会讲解
		this.refreshContext(context);
		//刷新应用上下文后置处理
		this.afterRefresh(context, applicationArguments);
		//即时结束
		stopWatch.stop();
		//日志
		if (this.logStartupInfo) {
			(new StartupInfoLogger(this.mainApplicationClass)).logStarted(this.getApplicationLog(), stopWatch);
		}
		//广播应用上下文加载完成
		listeners.started(context);
		//调用执行Runner  如果需要 spring boot 项目启动就执行某些操作就可以自定义实现  ApplicationRunner  CommandLineRunner
		this.callRunners(context, applicationArguments);
	} catch (Throwable var10) {
		this.handleRunFailure(context, var10, listeners);
		throw new IllegalStateException(var10);
	}

	try {
		//广播应用上下文运行
		listeners.running(context);
		return context;
	} catch (Throwable var9) {
		this.handleRunFailure(context, var9, (SpringApplicationRunListeners)null);
		throw new IllegalStateException(var9);
	}
}

//准备应用程序上下文
private void prepareContext(DefaultBootstrapContext bootstrapContext, ConfigurableApplicationContext context, ConfigurableEnvironment environment, SpringApplicationRunListeners listeners, ApplicationArguments applicationArguments, Banner printedBanner) {
	//为应用程序上下文设置环境
	context.setEnvironment(environment);
	//应用程序上下文后处理
	this.postProcessApplicationContext(context);
	//初始化应用程序上下文
	this.applyInitializers(context);
	//监听器广播上下文已经准备好
	listeners.contextPrepared(context);
	//引导上下文关闭
	bootstrapContext.close(context);
	if (this.logStartupInfo) {
		this.logStartupInfo(context.getParent() == null);
		this.logStartupProfileInfo(context);
	}
	//获取应用程序上下文的beanFactory 并设置一些属性
	ConfigurableListableBeanFactory beanFactory = context.getBeanFactory();
	beanFactory.registerSingleton("springApplicationArguments", applicationArguments);
	if (printedBanner != null) {
		//设置单例bean
		beanFactory.registerSingleton("springBootBanner", printedBanner);
	}

	if (beanFactory instanceof DefaultListableBeanFactory) {
		//设置bean 定义允许覆盖
		((DefaultListableBeanFactory)beanFactory).setAllowBeanDefinitionOverriding(this.allowBeanDefinitionOverriding);
	}

	if (this.lazyInitialization) {
		//添加延迟加载bean 后置处理器
		context.addBeanFactoryPostProcessor(new LazyInitializationBeanFactoryPostProcessor());
	}

	Set<Object> sources = this.getAllSources();
	Assert.notEmpty(sources, "Sources must not be empty");
	//加载bean对象到 context中
	this.load(context, sources.toArray(new Object[0]));
	//监听器广播上下文已经加载
	listeners.contextLoaded(context);
}
源码关键对象分析:
- DefaultBootstrapContext:是 ConfigurableBootstrapContext 接口的实现,在 Spring Boot 应用程序的引导阶段使用,可以通过注册一些自定义的组件,去影响应用程序的启动行为,也是 Spring Boot 程序启动的一个扩展点。
- ConfigurableApplicationContext:应用程序上下文可配置的接口,开发人员可以对应用程序上下文进行更灵活的配置和可扩展性,以满足不同应用程序的需求,例如设置环境、配置文件位置、添加后置处理器等。它提供了更多的灵活性和可扩展性,以满足不同应用程序的需求。
- SpringApplicationRunListeners:监听器列表,负责在应用程序运行过程中触发相应的事件和回调函数,通过注册监听器,开发人员可以在应用程序启动、停止、失败等不同的阶段执行自定义的逻辑。
- ApplicationArguments:实际用的是实现类 DefaultApplicationArguments,是一个参数解析类,ApplicationArguments 接口提供了对应用程序启动参数的访问和解析功能,DefaultApplicationArguments 对象可以方便地获取和解析应用程序启动时传入的参数信息,也可以自己根据需求去扩展。
- ConfigurableEnvironment:环境配置接口,提供了一种可配置的方式来管理应用程序的配置属性,通过调用 prepareEnvironment(listeners, applicationArguments) 方法,可以根据传入的监听器和应用程序参数来准备环境配置,包括加载配置文件、解析配置等,同样可以根据具体的应用程序需求进行扩展。
- Banner:接受一个 ConfigurableEnvironment 对象,通过 printBanner 方法,打印出自定义的 Banner(程序启动控制台打印的图标,比如打印一个:永无bug),这个功能没有什么大的作用,是一个提升体验感的小功能。
- prepareContext:应用程序上下文启动预处理,包括设置环境变量、注册监听器、处理命令行参数等,保证应用程序上下文可以正常启动。
- refreshContext:刷新应用程序上下文,主要解析配置文件,加载业务 bean等,底层调用的是 Spring 的 refresh 方法。
- afterRefresh:刷新应用程序上下文后的操作,Spring Boot 没有对其进行实现,应用程序开发者有需要可以自定义一些自己逻辑。
- listeners.started(context):通知注册的监听器应用程序已经启动完成。
- this.callRunners(context, applicationArguments):执行应用程序的运行器,比如执行我们自定义的 Runner,例如初始化数据、启动定时任务等,这个还是比较常用的。
- listeners.running(context):通知注册的监听器应用程序已经开始运行。
总结:习惯了 Spring Boot 的自动装配,一个简单的入口类,就可以帮我们跑起来应用程序,但是我们不知道是怎样启动的,具体都做了什么,阅读了源码之后,我们发现框架帮我们做了很多工作,也给我们留了很多可以扩展的入口,也有我们常用的功能在源码里都有体现,比如我们常用的 Runner 功能,可能在开发中没少用,但是有没有想过为什么可以这么用呢?其实这在源码中都有体现,如果你阅读了源码,就会对这些底层实现了然于胸,本文简单分享了 Spring Boot 启动相关源码,希望帮助到有需要的伙伴们。
欢迎提出建议及对错误的地方指出纠正。

