SVN搭建以及自动更新代码
目录
一、windows安装svn并且转成中文
第1步:先下载安装包如下下面是语言包与安装包
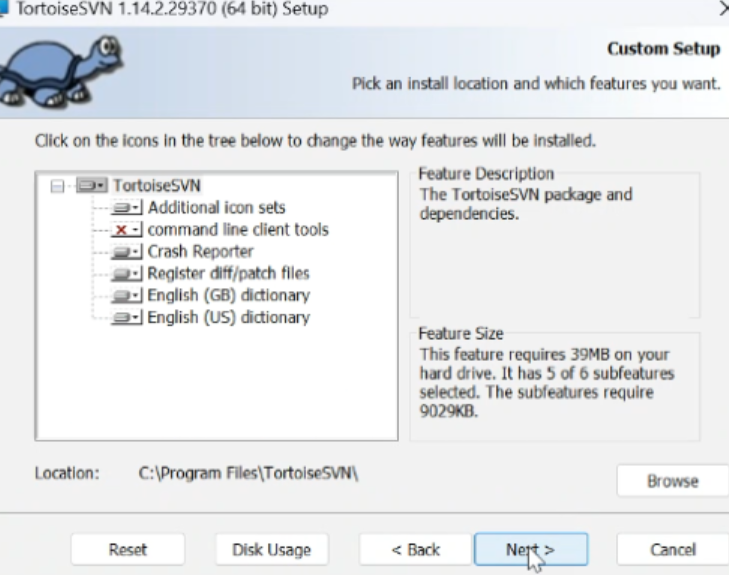
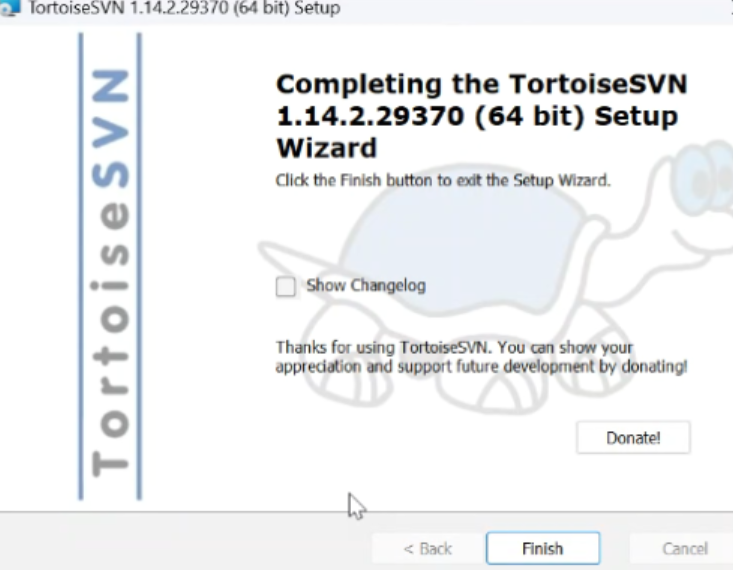
第2步:双击安装包一直点击下一步即可
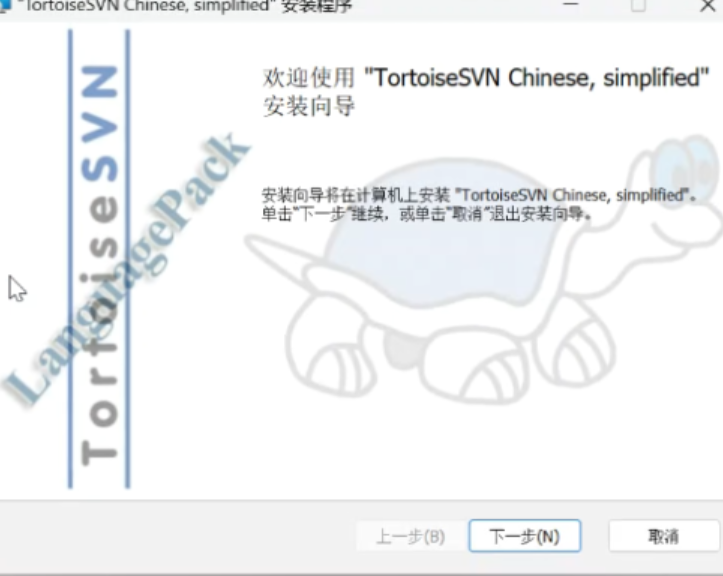
第3步:双击安装中文语言包
第二步:勾选设置语言包
二、linux安装svn
第1步 :检查是否安装SVN并用yum安装
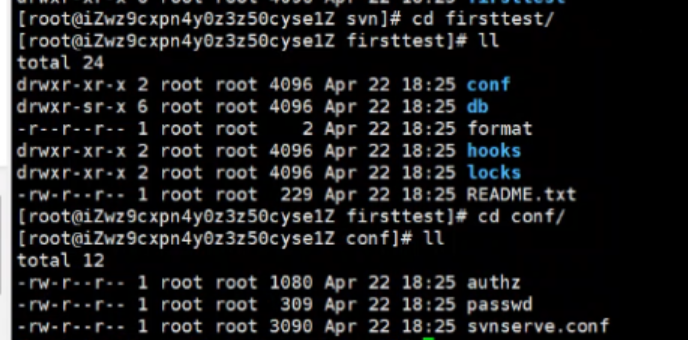
第2步:创建版本库目录和版本库 firsttest为项目名称
第3步:进入版本库修改conf目录配置
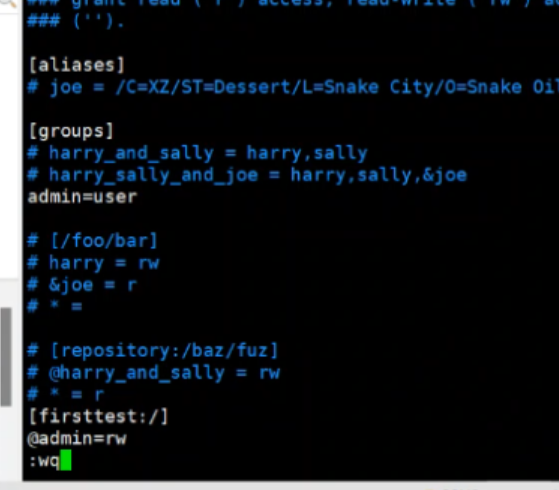
第4步:修改authz文件,添加分组和版本库权限
第5步:修改passwd密码文件
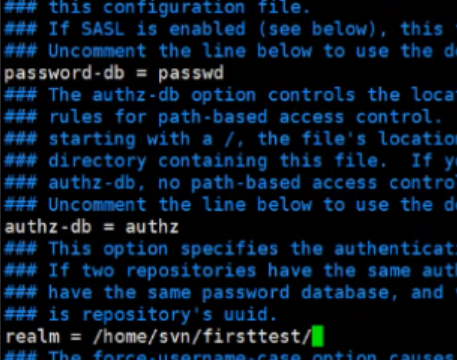
第6步:添加目录权限,修改svnserve.conf
第7步:启动和关闭svn
第8步:windows客户端更新代码
第9步:服务器更新svn代码
三、linux服务器代码自动更新不用 svn update
第1步:创建自动更新脚本
第2步:配置脚本权限
第3步:重启svn测试
一、windows安装svn并且转成中文
第1步:先下载安装包如下下面是语言包与安装包

第2步:双击安装包一直点击下一步即可

第3步:双击安装中文语言包
第二步:勾选设置语言包
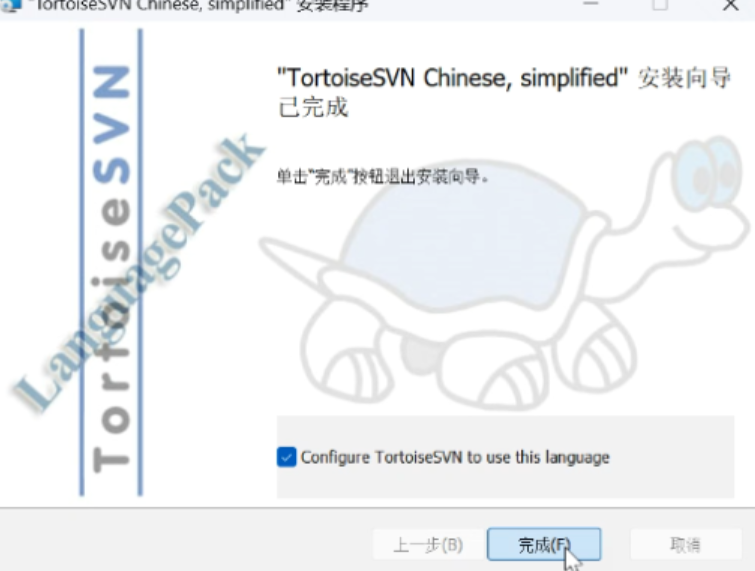
点击下一步安装成功后右键svn已更改为中文
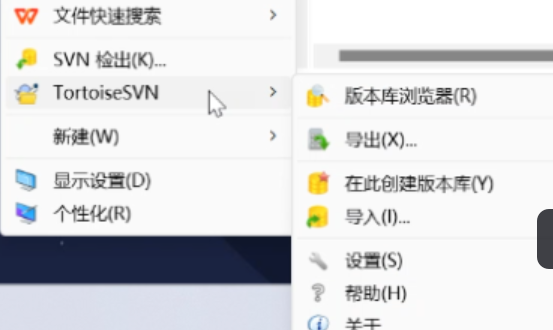
二、linux安装svn
第1步 :检查是否安装SVN并用yum安装
检查是否安装 rpm -qa subversion
卸载旧版本 yum remove subversion
yum -y install subversion

输入svnserve --version 查看是否安装成功,安装成功显示下面版本号

第2步:创建版本库目录和版本库 firsttest为项目名称

mkdir /home/svn/
cd /home/svn/
svnadmin create firsttest 安装好后会产生firsttest目录
第3步:进入版本库修改conf目录配置
第4步:修改authz文件,添加分组和版本库权限
vi authz
以下是文件内容,红色为修改部分
[groups]
# harry_and_sally = harry,sally
# harry_sally_and_joe = harry,sally,&joe
admin=user1,user2 //增加分组
# [repository:/baz/fuz]
# @harry_and_sally = rw
# * = r
[firsttest:/] //目录和项目名称对应 firsttest
@admin=rw 分配权限
第5步:修改passwd密码文件
vi passwd
以下是文件内容,红色为修改部分
### This file is an example password file for svnserve.
### Its format is similar to that of svnserve.conf. As shown in the
### example below it contains one section labelled [users].
### The name and password for each user follow, one account per line.
[users]
# harry = harryssecret
# sally = sallyssecret
user1=888888
user2=888888

第6步:添加目录权限,修改svnserve.conf
[general]
### These options control access to the repository for unauthenticated
### and authenticated users. Valid values are "write", "read",
### and "none". The sample settings below are the defaults.
# anon-access = read 去掉#并修改为 anon-access=none
# auth-access = write 去掉#
### If SASL is enabled (see below), this file will NOT be used.
### Uncomment the line below to use the default password file.
#password-db = passwd 去掉#
### The authz-db option controls the location of the authorization
### rules for path-based access control. Unless you specify a path
### starting with a /, the file's location is relative to the the
### directory containing this file. If you don't specify an
### authz-db, no path-based access control is done.
### Uncomment the line below to use the default authorization file.
#authz-db = authz 去掉#
### This option specifies the authentication realm of the repository.
### If two repositories have the same authentication realm, they should
### have the same password database, and vice versa. The default realm
### is repository's uuid.
realm = /home/svn/firsttest/ svn所在目录
第7步:启动和关闭svn
启动svn
svnserve -d -r /home/svn/
停止
killall svnserve
第8步:windows客户端更新代码
右键点击检出代码
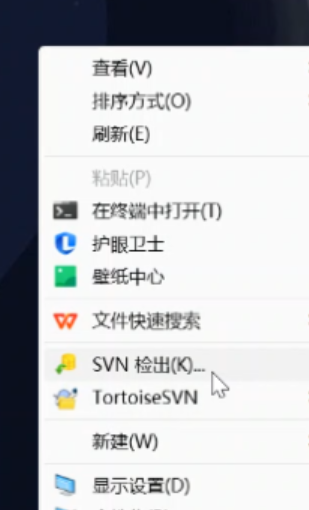
svn://你的服务器id/firsttest
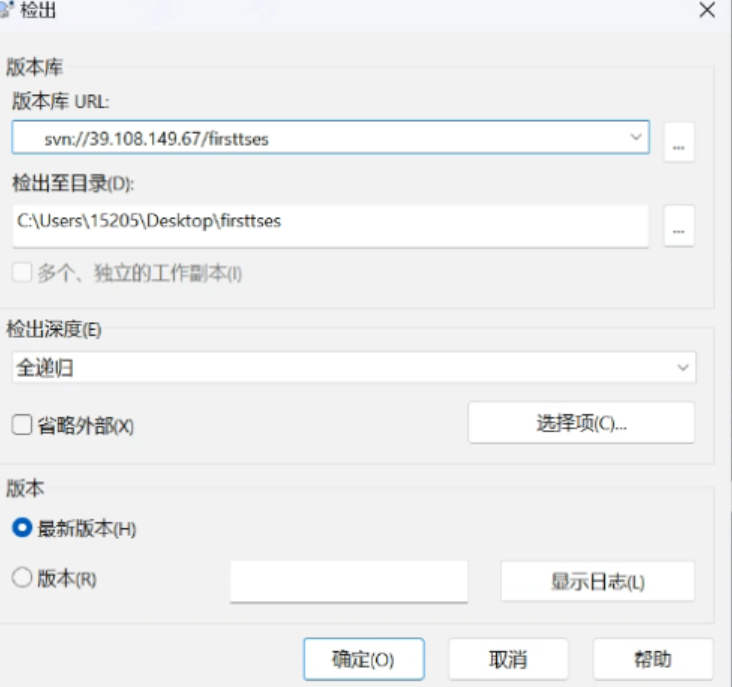
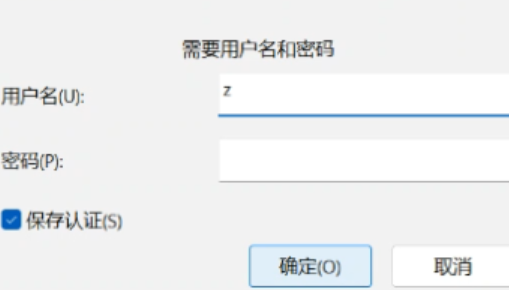
输入第5步设置的账号密码

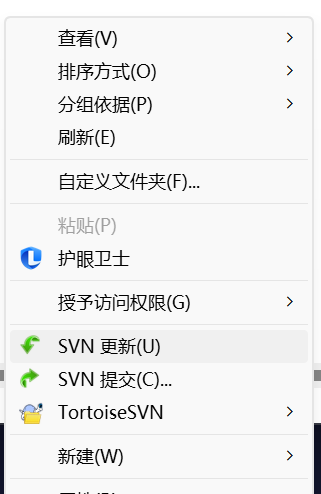
新增文件后右键更新或者上传代码
第9步:服务器更新svn代码
然后回到服务器 你的项目目录/var/www/
进入根目录 cd /
svn co svn://你的服务器id/firsttest /var/www/
输入第5步的账号密码与windows一样账号

windows上传代码后,服务器需要svn update更新代码

三、linux服务器代码自动更新不用 svn update
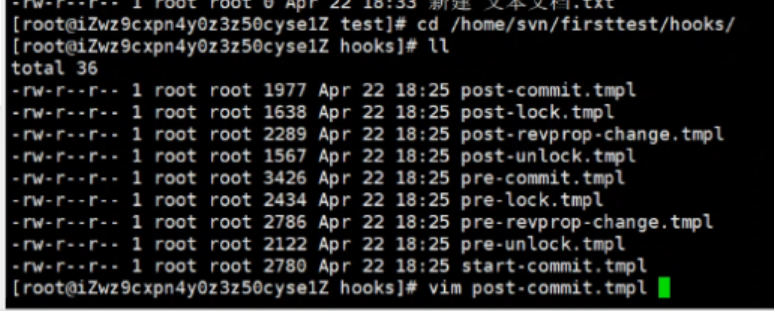
第1步:创建自动更新脚本
cd /home/svn/firsttest/hooks
vi post-commit
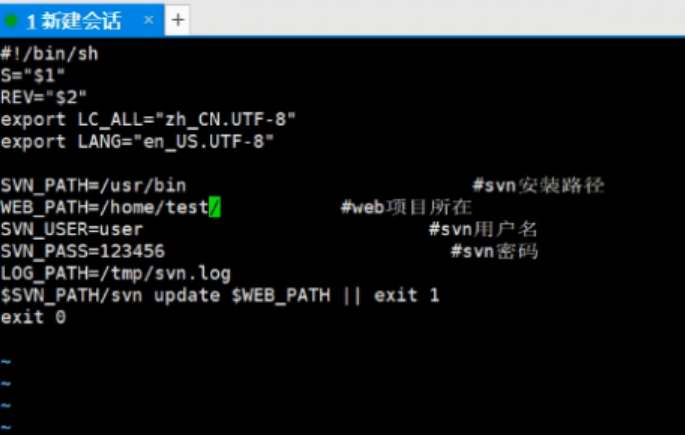
输入下面代码
#!/bin/sh
S="$1"
REV="$2"
export LC_ALL="zh_CN.UTF-8"
export LANG="en_US.UTF-8"
SVN_PATH=/usr/bin #svn安装路径
WEB_PATH=/var/www/ #web项目所在
SVN_USER=user1 #svn用户名
SVN_PASS=888888 #svn密码
LOG_PATH=/tmp/svn.log
$SVN_PATH/svn update $WEB_PATH || exit 1
exit 0
第2步:配置脚本权限
chmond -R 777 post-commit
![]()
第3步:重启svn测试
killall svnserve
svnserve -d -r /home/svn/
windows上传代码测试,linux自动更新代码不用svn update
线上服务器存在风险,代码误传会出问题,一定要小心