目录
简介
设置
准备数据
配置超参数
使用数据增强
实施前馈网络(FFN)
将创建修补程序作为一个层
实施补丁编码层
建立感知器模型
变换器模块
感知器模型
编译、培训和评估模式
政安晨的个人主页:政安晨
欢迎 👍点赞✍评论⭐收藏
收录专栏: TensorFlow与Keras机器学习实战
希望政安晨的博客能够对您有所裨益,如有不足之处,欢迎在评论区提出指正!
本文目标:实施用于图像分类的感知器模型。
简介
本文实现了安德鲁-杰格(Andrew Jaegle)等人的 Perceiver:
图像分类模型,在 CIFAR-100 数据集上进行演示。
Perceiver 模型利用非对称注意力机制,将输入信息迭代提炼成一个紧密的潜在瓶颈,使其能够扩展以处理非常大的输入信息。
换句话说:假设你的输入数据数组(如图像)有 M 个元素(即补丁),其中 M 很庞大。在标准变换器模型中,会对 M 个元素执行自注意操作。这一操作的复杂度为 O(M^2)。然而,感知器模型会创建一个大小为 N 个元素(其中 N << M)的潜在数组,并迭代执行两个操作:
1. 潜数组和数据数组之间的交叉注意变换器 - 此操作的复杂度为 O(M.N)。
2. 潜数组上的自注意变换器 - 此操作的复杂度为 O(N^2)。
本示例需要 Keras 3.0 或更高版本。
设置
import keras
from keras import layers, activations, ops
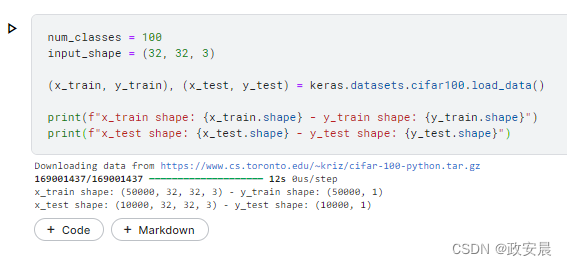
准备数据
num_classes = 100
input_shape = (32, 32, 3)

(x_train, y_train), (x_test, y_test) = keras.datasets.cifar100.load_data()

print(f"x_train shape: {x_train.shape} - y_train shape: {y_train.shape}")
print(f"x_test shape: {x_test.shape} - y_test shape: {y_test.shape}")
演绎展示:
配置超参数
learning_rate = 0.001
weight_decay = 0.0001
batch_size = 64
num_epochs = 2  # You should actually use 50 epochs!
dropout_rate = 0.2
image_size = 64  # We'll resize input images to this size.
patch_size = 2  # Size of the patches to be extract from the input images.
num_patches = (image_size // patch_size) ** 2  # Size of the data array.
latent_dim = 256  # Size of the latent array.
projection_dim = 256  # Embedding size of each element in the data and latent arrays.
num_heads = 8  # Number of Transformer heads.
ffn_units = [
    projection_dim,
    projection_dim,
]  # Size of the Transformer Feedforward network.
num_transformer_blocks = 4
num_iterations = 2  # Repetitions of the cross-attention and Transformer modules.
classifier_units = [
    projection_dim,
    num_classes,
]  # Size of the Feedforward network of the final classifier.

print(f"Image size: {image_size} X {image_size} = {image_size ** 2}")
print(f"Patch size: {patch_size} X {patch_size} = {patch_size ** 2} ")
print(f"Patches per image: {num_patches}")
print(f"Elements per patch (3 channels): {(patch_size ** 2) * 3}")
print(f"Latent array shape: {latent_dim} X {projection_dim}")
print(f"Data array shape: {num_patches} X {projection_dim}")
演绎展示:

请注意,为了将每个像素作为数据数组中的单独输入,请将 patch_size 设置为 1。
使用数据增强
data_augmentation = keras.Sequential(
    [
        layers.Normalization(),
        layers.Resizing(image_size, image_size),
        layers.RandomFlip("horizontal"),
        layers.RandomZoom(height_factor=0.2, width_factor=0.2),
    ],
    name="data_augmentation",
)
# Compute the mean and the variance of the training data for normalization.
data_augmentation.layers[0].adapt(x_train)
实施前馈网络(FFN)
def create_ffn(hidden_units, dropout_rate):
    ffn_layers = []
    for units in hidden_units[:-1]:
        ffn_layers.append(layers.Dense(units, activation=activations.gelu))

    ffn_layers.append(layers.Dense(units=hidden_units[-1]))
    ffn_layers.append(layers.Dropout(dropout_rate))

    ffn = keras.Sequential(ffn_layers)
    return ffn
将创建修补程序作为一个层
class Patches(layers.Layer):
    def __init__(self, patch_size):
        super().__init__()
        self.patch_size = patch_size

    def call(self, images):
        batch_size = ops.shape(images)[0]
        patches = ops.image.extract_patches(
            image=images,
            size=(self.patch_size, self.patch_size),
            strides=(self.patch_size, self.patch_size),
            dilation_rate=1,
            padding="valid",
        )
        patch_dims = patches.shape[-1]
        patches = ops.reshape(patches, [batch_size, -1, patch_dims])
        return patches
实施补丁编码层
PatchEncoder 层会通过投射到大小为 latent_dim 的矢量中对补丁进行线性变换。此外,它还会为投影向量添加可学习的位置嵌入。
请注意,最初的 Perceiver 论文使用的是傅立叶特征位置编码。
class PatchEncoder(layers.Layer):
    def __init__(self, num_patches, projection_dim):
        super().__init__()
        self.num_patches = num_patches
        self.projection = layers.Dense(units=projection_dim)
        self.position_embedding = layers.Embedding(
            input_dim=num_patches, output_dim=projection_dim
        )

    def call(self, patches):
        positions = ops.arange(start=0, stop=self.num_patches, step=1)
        encoded = self.projection(patches) + self.position_embedding(positions)
        return encoded
建立感知器模型
感知器由两个模块组成:一个交叉注意模块和一个自注意标准变换器。
交叉注意模块
交叉注意模块将(latent_dim, projection_dim)潜在数组和(data_dim, projection_dim)数据数组作为输入,以产生(latent_dim, projection_dim)潜在数组作为输出。为了应用交叉关注,查询向量由潜在数组生成,而键向量和值向量则由编码图像生成。
请注意,本例中的数据数组是图像,其中 data_dim 设置为 num_patches。
def create_cross_attention_module(
    latent_dim, data_dim, projection_dim, ffn_units, dropout_rate
):
    inputs = {
        # Recieve the latent array as an input of shape [1, latent_dim, projection_dim].
        "latent_array": layers.Input(
            shape=(latent_dim, projection_dim), name="latent_array"
        ),
        # Recieve the data_array (encoded image) as an input of shape [batch_size, data_dim, projection_dim].
        "data_array": layers.Input(shape=(data_dim, projection_dim), name="data_array"),
    }

    # Apply layer norm to the inputs
    latent_array = layers.LayerNormalization(epsilon=1e-6)(inputs["latent_array"])
    data_array = layers.LayerNormalization(epsilon=1e-6)(inputs["data_array"])

    # Create query tensor: [1, latent_dim, projection_dim].
    query = layers.Dense(units=projection_dim)(latent_array)
    # Create key tensor: [batch_size, data_dim, projection_dim].
    key = layers.Dense(units=projection_dim)(data_array)
    # Create value tensor: [batch_size, data_dim, projection_dim].
    value = layers.Dense(units=projection_dim)(data_array)

    # Generate cross-attention outputs: [batch_size, latent_dim, projection_dim].
    attention_output = layers.Attention(use_scale=True, dropout=0.1)(
        [query, key, value], return_attention_scores=False
    )
    # Skip connection 1.
    attention_output = layers.Add()([attention_output, latent_array])

    # Apply layer norm.
    attention_output = layers.LayerNormalization(epsilon=1e-6)(attention_output)
    # Apply Feedforward network.
    ffn = create_ffn(hidden_units=ffn_units, dropout_rate=dropout_rate)
    outputs = ffn(attention_output)
    # Skip connection 2.
    outputs = layers.Add()([outputs, attention_output])

    # Create the Keras model.
    model = keras.Model(inputs=inputs, outputs=outputs)
    return model
变换器模块
转换器将交叉注意模块输出的潜向量作为输入,对其 latent_dim 元素应用多头自注意,然后通过前馈网络,生成另一个(latent_dim,projection_dim)潜数组。
def create_transformer_module(
    latent_dim,
    projection_dim,
    num_heads,
    num_transformer_blocks,
    ffn_units,
    dropout_rate,
):
    # input_shape: [1, latent_dim, projection_dim]
    inputs = layers.Input(shape=(latent_dim, projection_dim))

    x0 = inputs
    # Create multiple layers of the Transformer block.
    for _ in range(num_transformer_blocks):
        # Apply layer normalization 1.
        x1 = layers.LayerNormalization(epsilon=1e-6)(x0)
        # Create a multi-head self-attention layer.
        attention_output = layers.MultiHeadAttention(
            num_heads=num_heads, key_dim=projection_dim, dropout=0.1
        )(x1, x1)
        # Skip connection 1.
        x2 = layers.Add()([attention_output, x0])
        # Apply layer normalization 2.
        x3 = layers.LayerNormalization(epsilon=1e-6)(x2)
        # Apply Feedforward network.
        ffn = create_ffn(hidden_units=ffn_units, dropout_rate=dropout_rate)
        x3 = ffn(x3)
        # Skip connection 2.
        x0 = layers.Add()([x3, x2])

    # Create the Keras model.
    model = keras.Model(inputs=inputs, outputs=x0)
    return model
感知器模型
感知器模型重复交叉注意模块和变换器模块的迭代次数--通过共享权重和跳转连接--使潜在阵列能够根据需要从输入图像中迭代提取信息。
class Perceiver(keras.Model):
    def __init__(
        self,
        patch_size,
        data_dim,
        latent_dim,
        projection_dim,
        num_heads,
        num_transformer_blocks,
        ffn_units,
        dropout_rate,
        num_iterations,
        classifier_units,
    ):
        super().__init__()

        self.latent_dim = latent_dim
        self.data_dim = data_dim
        self.patch_size = patch_size
        self.projection_dim = projection_dim
        self.num_heads = num_heads
        self.num_transformer_blocks = num_transformer_blocks
        self.ffn_units = ffn_units
        self.dropout_rate = dropout_rate
        self.num_iterations = num_iterations
        self.classifier_units = classifier_units

    def build(self, input_shape):
        # Create latent array.
        self.latent_array = self.add_weight(
            shape=(self.latent_dim, self.projection_dim),
            initializer="random_normal",
            trainable=True,
        )

        # Create patching module.war
        self.patch_encoder = PatchEncoder(self.data_dim, self.projection_dim)

        # Create cross-attenion module.
        self.cross_attention = create_cross_attention_module(
            self.latent_dim,
            self.data_dim,
            self.projection_dim,
            self.ffn_units,
            self.dropout_rate,
        )

        # Create Transformer module.
        self.transformer = create_transformer_module(
            self.latent_dim,
            self.projection_dim,
            self.num_heads,
            self.num_transformer_blocks,
            self.ffn_units,
            self.dropout_rate,
        )

        # Create global average pooling layer.
        self.global_average_pooling = layers.GlobalAveragePooling1D()

        # Create a classification head.
        self.classification_head = create_ffn(
            hidden_units=self.classifier_units, dropout_rate=self.dropout_rate
        )

        super().build(input_shape)

    def call(self, inputs):
        # Augment data.
        augmented = data_augmentation(inputs)
        # Create patches.
        patches = self.patcher(augmented)
        # Encode patches.
        encoded_patches = self.patch_encoder(patches)
        # Prepare cross-attention inputs.
        cross_attention_inputs = {
            "latent_array": ops.expand_dims(self.latent_array, 0),
            "data_array": encoded_patches,
        }
        # Apply the cross-attention and the Transformer modules iteratively.
        for _ in range(self.num_iterations):
            # Apply cross-attention from the latent array to the data array.
            latent_array = self.cross_attention(cross_attention_inputs)
            # Apply self-attention Transformer to the latent array.
            latent_array = self.transformer(latent_array)
            # Set the latent array of the next iteration.
            cross_attention_inputs["latent_array"] = latent_array

        # Apply global average pooling to generate a [batch_size, projection_dim] repesentation tensor.
        representation = self.global_average_pooling(latent_array)
        # Generate logits.
        logits = self.classification_head(representation)
        return logits
编译、培训和评估模式
def run_experiment(model):
    # Create ADAM instead of LAMB optimizer with weight decay. (LAMB isn't supported yet)
    optimizer = keras.optimizers.Adam(learning_rate=learning_rate)

    # Compile the model.
    model.compile(
        optimizer=optimizer,
        loss=keras.losses.SparseCategoricalCrossentropy(from_logits=True),
        metrics=[
            keras.metrics.SparseCategoricalAccuracy(name="acc"),
            keras.metrics.SparseTopKCategoricalAccuracy(5, name="top5-acc"),
        ],
    )

    # Create a learning rate scheduler callback.
    reduce_lr = keras.callbacks.ReduceLROnPlateau(
        monitor="val_loss", factor=0.2, patience=3
    )

    # Create an early stopping callback.
    early_stopping = keras.callbacks.EarlyStopping(
        monitor="val_loss", patience=15, restore_best_weights=True
    )

    # Fit the model.
    history = model.fit(
        x=x_train,
        y=y_train,
        batch_size=batch_size,
        epochs=num_epochs,
        validation_split=0.1,
        callbacks=[early_stopping, reduce_lr],
    )

    _, accuracy, top_5_accuracy = model.evaluate(x_test, y_test)
    print(f"Test accuracy: {round(accuracy * 100, 2)}%")
    print(f"Test top 5 accuracy: {round(top_5_accuracy * 100, 2)}%")

    # Return history to plot learning curves.
    return history
请注意,在 V100 GPU 上以当前设置训练感知器模型大约需要 200 秒。
perceiver_classifier = Perceiver(
    patch_size,
    num_patches,
    latent_dim,
    projection_dim,
    num_heads,
    num_transformer_blocks,
    ffn_units,
    dropout_rate,
    num_iterations,
    classifier_units,
)


history = run_experiment(perceiver_classifier)
演绎展示:
Test accuracy: 0.91%
Test top 5 accuracy: 5.2%
经过 40 次历时后,Perceiver 模型在测试数据上达到了约 53% 的准确率和 81% 的前五名准确率。
正如 Perceiver 论文的消融部分所述,通过增加潜在阵列大小、增加潜在阵列和数据阵列元素的(投影)维度、增加变换器模块中的块数以及增加交叉注意和潜在变换器模块的迭代次数,可以获得更好的结果。您还可以尝试增加输入图像的大小,并使用不同的补丁尺寸。
Perceiver 可以从增大模型尺寸中获益。
不过,更大的模型需要更大的加速器来适应和有效训练。这就是 Perceiver 论文中使用 32 个 TPU 内核进行实验的原因。

