系列文章目录
- 如何在前端项目中使用opencv.js | opencv.js入门
- 如何使用tensorflow.js实现面部特征点检测
- tensorflow.js 如何从 public 路径加载人脸特征点检测模型
- tensorflow.js 如何使用opencv.js通过面部特征点估算脸部姿态并绘制示意图
- tensorflow.js 使用 opencv.js 将人脸特征点网格绘制与姿态估计线绘制结合起来,以获得更高的帧数
- 结合 tensorflow.js 、opencv.js 与 Ant Design 创建美观且高性能的人脸动捕组件并发布到InsCode
项目地址(github):https://github.com/couchette/simple-react-face-fandmark-detection
项目地址(gitcode):https://gitcode.com/qq_41456316/simple-react-face-fandmark-detection
文章目录
- 系列文章目录
- 前言
- 一、OpenCV.js是什么?
- 二、使用步骤
- 1.获取OpenCV.js
- 2. 将OpenCV.js复制到public目录下
- 3. 在HTML中导入脚本
- 4. 测试是否导入成功
- 总结
前言
随着 Web 技术的发展,前端开发领域不断涌现出新的技术和工具,其中之一就是 OpenCV.js。OpenCV.js 是 OpenCV(开放源代码计算机视觉库)的 JavaScript 版本,它可以在 Web 浏览器中运行,使得利用计算机视觉技术实现图像处理、分析和识别成为可能。
一、OpenCV.js是什么?
OpenCV.js 是 OpenCV 的 JavaScript 版本,提供了对 OpenCV 库的 JavaScript 绑定。它允许开发者在前端项目中直接使用 OpenCV 库的功能,而无需依赖于后端服务器。这为在 Web 环境下进行图像处理和计算机视觉任务提供了便利。
二、使用步骤
1.获取OpenCV.js
从如下网址下载OpenCV.js,如果你需要指定的OpenCV.js版本可以修改对应的版本号。
https://docs.opencv.org/4.5.0/opencv.js
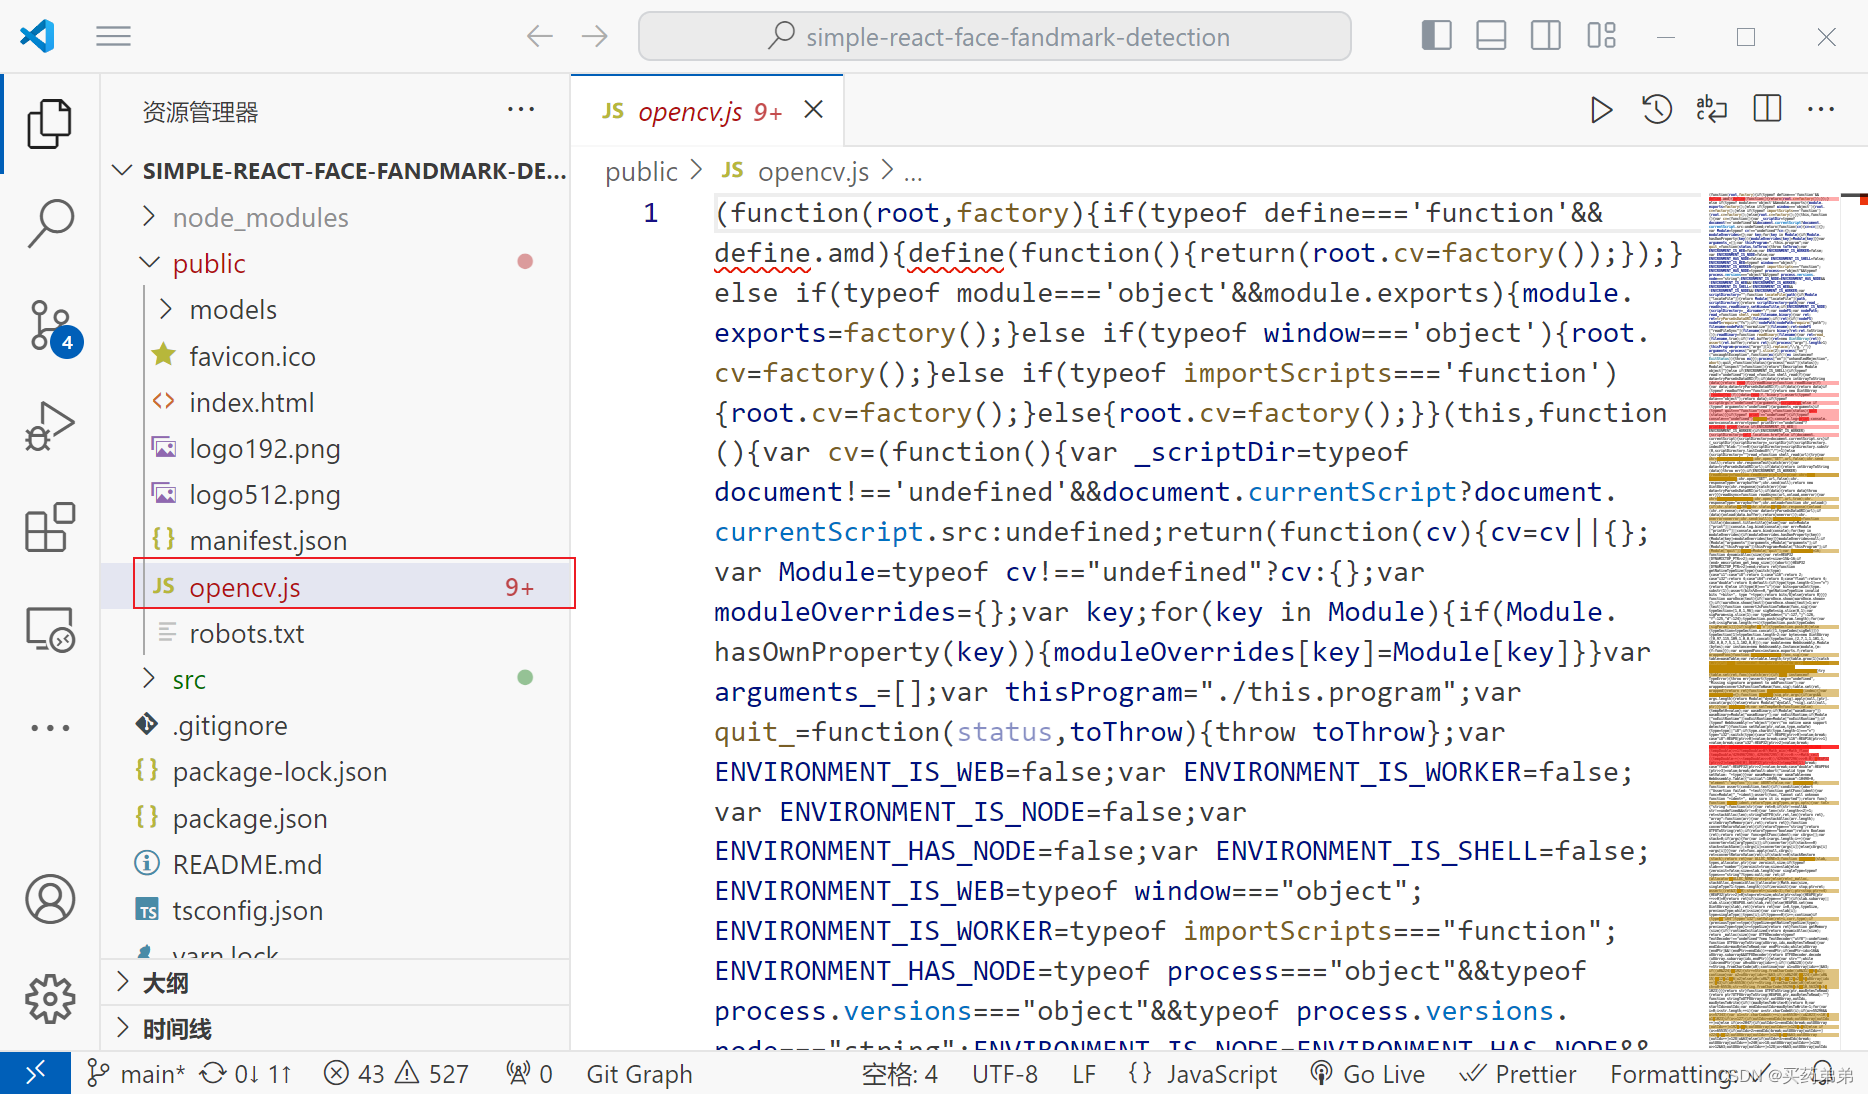
2. 将OpenCV.js复制到public目录下
在public路径下添加opencv.js,如下图所示
3. 在HTML中导入脚本
在HTML中添加脚本导入代码,修改HTML内容如下所示:
<!DOCTYPE html>
<html lang="en">
  <head>
    <meta charset="utf-8" />
    <link rel="icon" href="%PUBLIC_URL%/favicon.ico" />
    <meta name="viewport" content="width=device-width, initial-scale=1" />
    <meta name="theme-color" content="#000000" />
    <meta
      name="description"
      content="Web site created using create-react-app"
    />
    <link rel="apple-touch-icon" href="%PUBLIC_URL%/logo192.png" />
    <!--
      manifest.json provides metadata used when your web app is installed on a
      user's mobile device or desktop. See https://developers.google.com/web/fundamentals/web-app-manifest/
    -->
    <link rel="manifest" href="%PUBLIC_URL%/manifest.json" />
    <!--
      Notice the use of %PUBLIC_URL% in the tags above.
      It will be replaced with the URL of the `public` folder during the build.
      Only files inside the `public` folder can be referenced from the HTML.

      Unlike "/favicon.ico" or "favicon.ico", "%PUBLIC_URL%/favicon.ico" will
      work correctly both with client-side routing and a non-root public URL.
      Learn how to configure a non-root public URL by running `npm run build`.
    -->
    <title>React App</title>
    <script>
      var cv = null;
      function onOpenCvReady() {
        cv = window.cv;
        console.log("opencv load succeed.");
      }
    </script>
    <script
      async
      src="./opencv.js"
      onload="onOpenCvReady();"
      type="text/javascript"
    ></script>
  </head>
  <body>
    <noscript>You need to enable JavaScript to run this app.</noscript>
    <div id="root"></div>
    <!--
      This HTML file is a template.
      If you open it directly in the browser, you will see an empty page.

      You can add webfonts, meta tags, or analytics to this file.
      The build step will place the bundled scripts into the <body> tag.

      To begin the development, run `npm start` or `yarn start`.
      To create a production bundle, use `npm run build` or `yarn build`.
    -->
  </body>
</html>
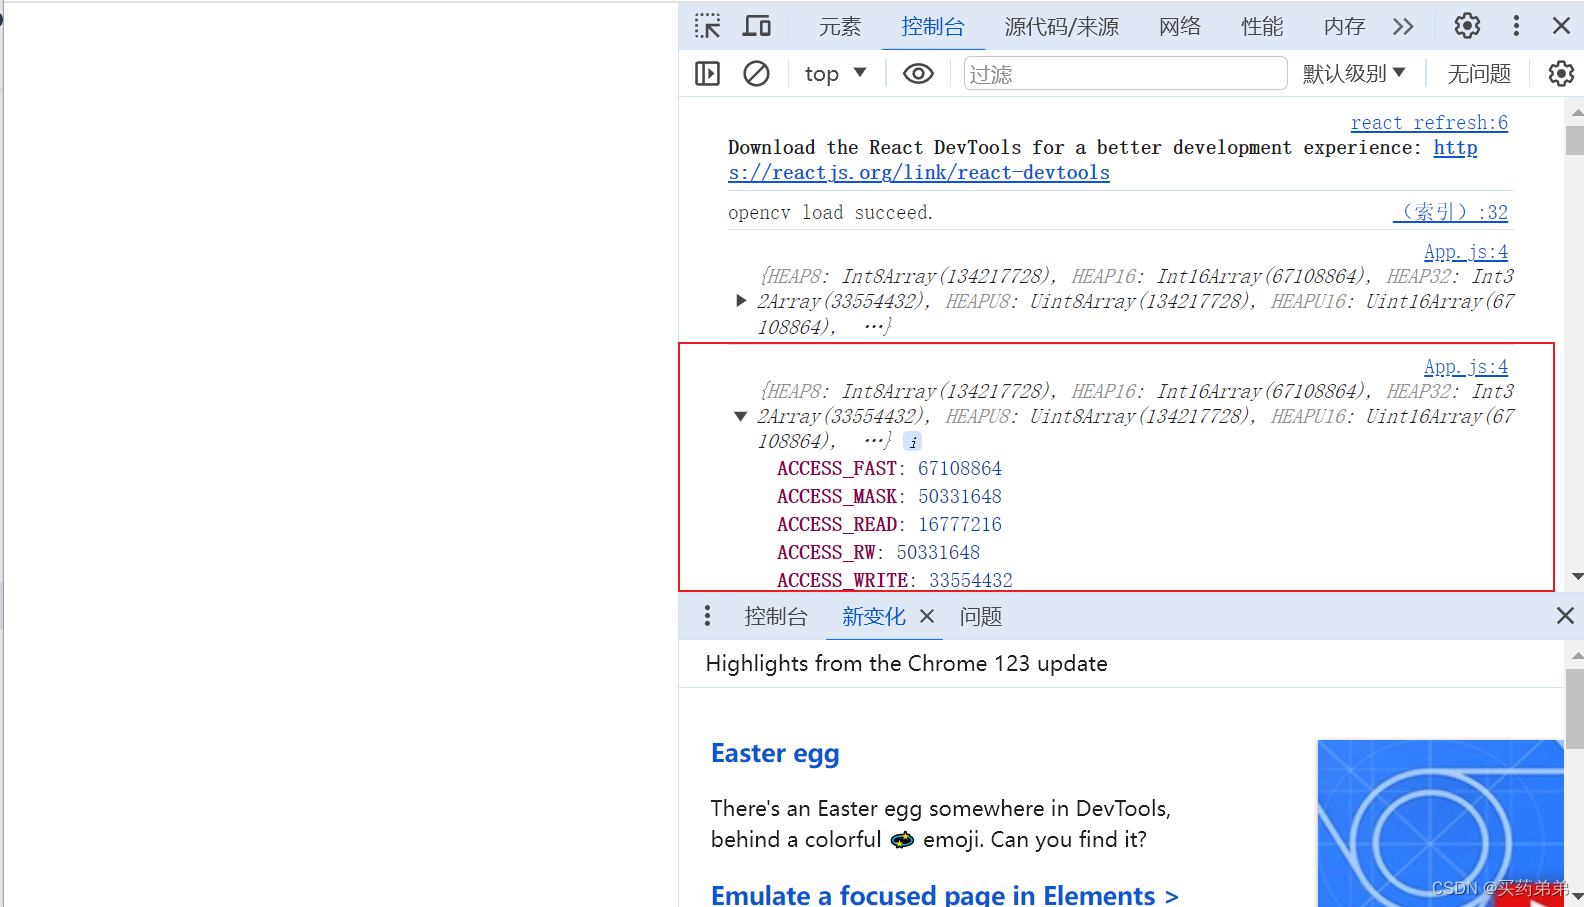
4. 测试是否导入成功
修改App.js如下
import React, { useEffect } from "react";
function App() {
  useEffect(() => {
    console.log(window.cv);
  }, []);
  return <div />;
}
export default App;
npm i 安装项目依赖
npm start 运行项目,查看终端结果如下
总结
通过使用 OpenCV.js,你可以在前端项目中轻松地利用计算机视觉技术。本文介绍了如何获取 OpenCV.js 并将其集成到项目中,并给出了简单的示例代码。希望本文能够帮助你入门 OpenCV.js,并在前端开发中发挥其强大的功能。
