📝个人主页:哈__
期待您的关注

本文介绍SpringBoot整合Redis并且进行接口的限流,文章主要介绍的是一种思想,具体代码还要结合实际。
一、Windows安装Redis
Redis的解压包我放在了百度网盘上,有需要的可以下载。
Redis-x64-3.0.504 解压码:uhwj
二、启动Redis
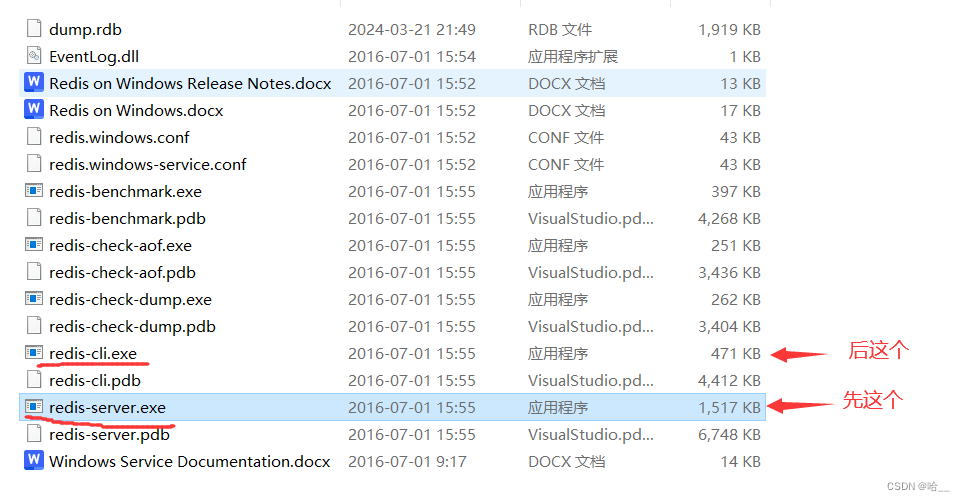
我们在本地解压下载的Redis压缩包,打开解压后的目录,首先启动redis-server.exe,之后在启动redis-cli.exe。
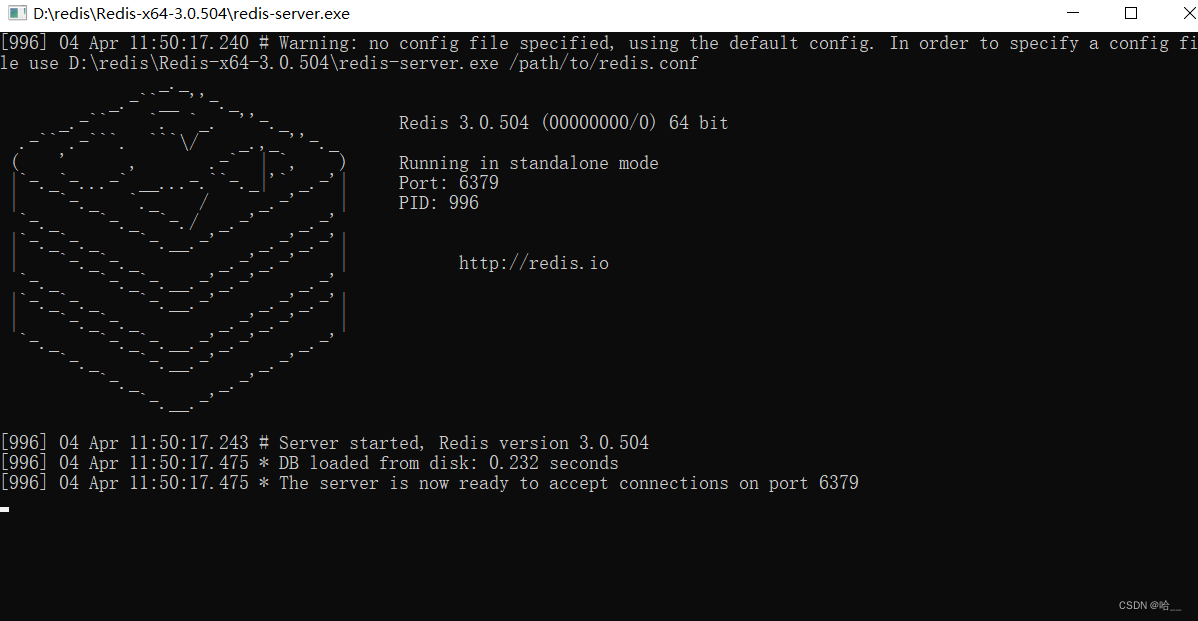
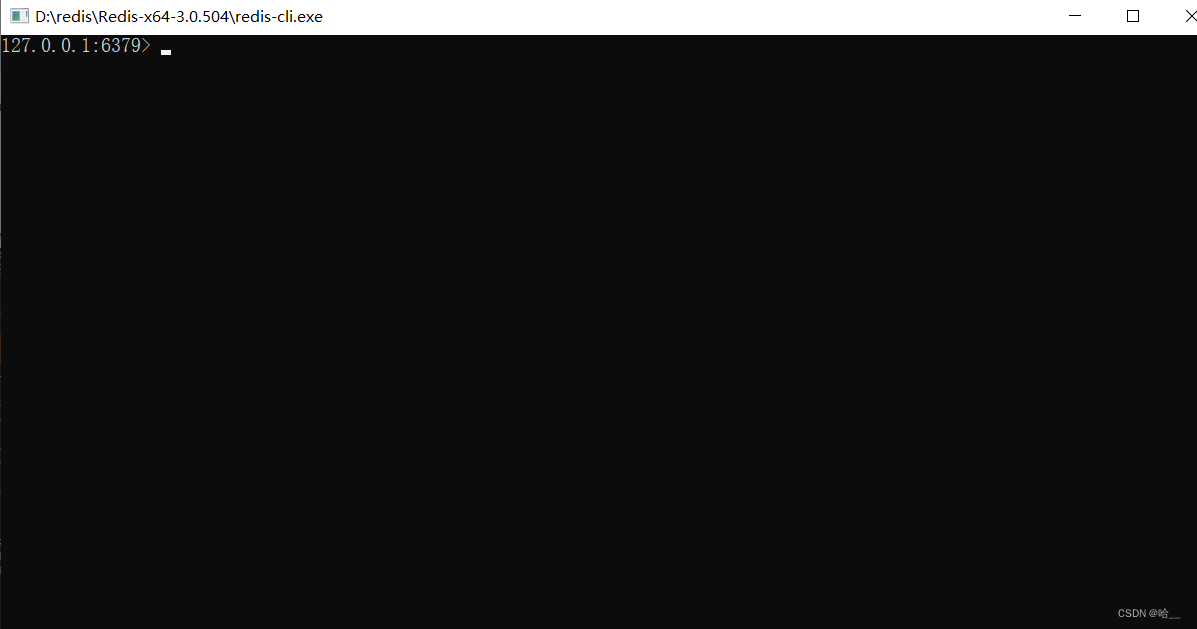
启动成功截图如下。
三、SpringBoot整合Redis
1.引入依赖
         <dependency>
            <groupId>org.springframework.boot</groupId>
            <artifactId>spring-boot-starter</artifactId>
        </dependency>
        <dependency>
            <groupId>org.springframework.boot</groupId>
            <artifactId>spring-boot-starter-web</artifactId>
        </dependency>
        <dependency>
            <groupId>org.springframework.boot</groupId>
            <artifactId>spring-boot-starter-data-redis</artifactId>
        </dependency>
        <dependency>
            <groupId>org.springframework.boot</groupId>
            <artifactId>spring-boot-starter-test</artifactId>
            <scope>test</scope>
        </dependency>
2.添加配置文件application.yml
我们并没有设置密码所以不用配置。
spring:
  redis:
    host: 127.0.0.1
    port: 6379
3.创建RedisController
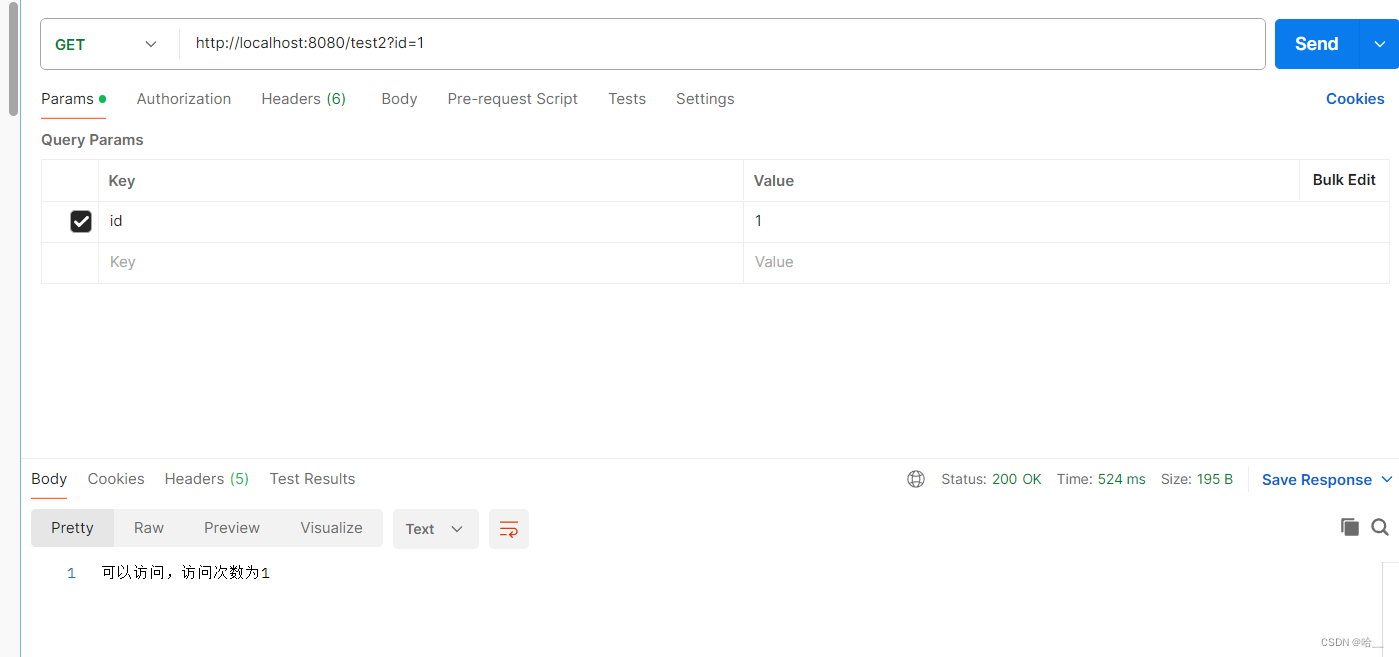
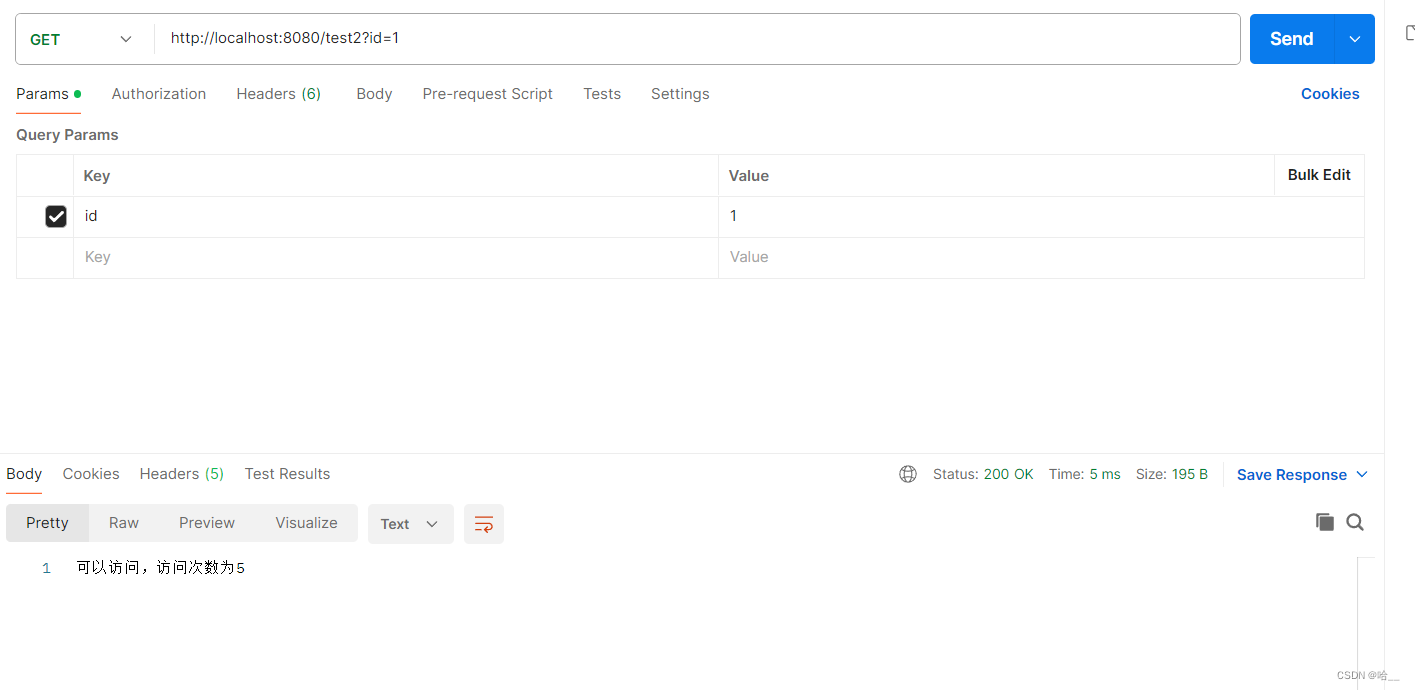
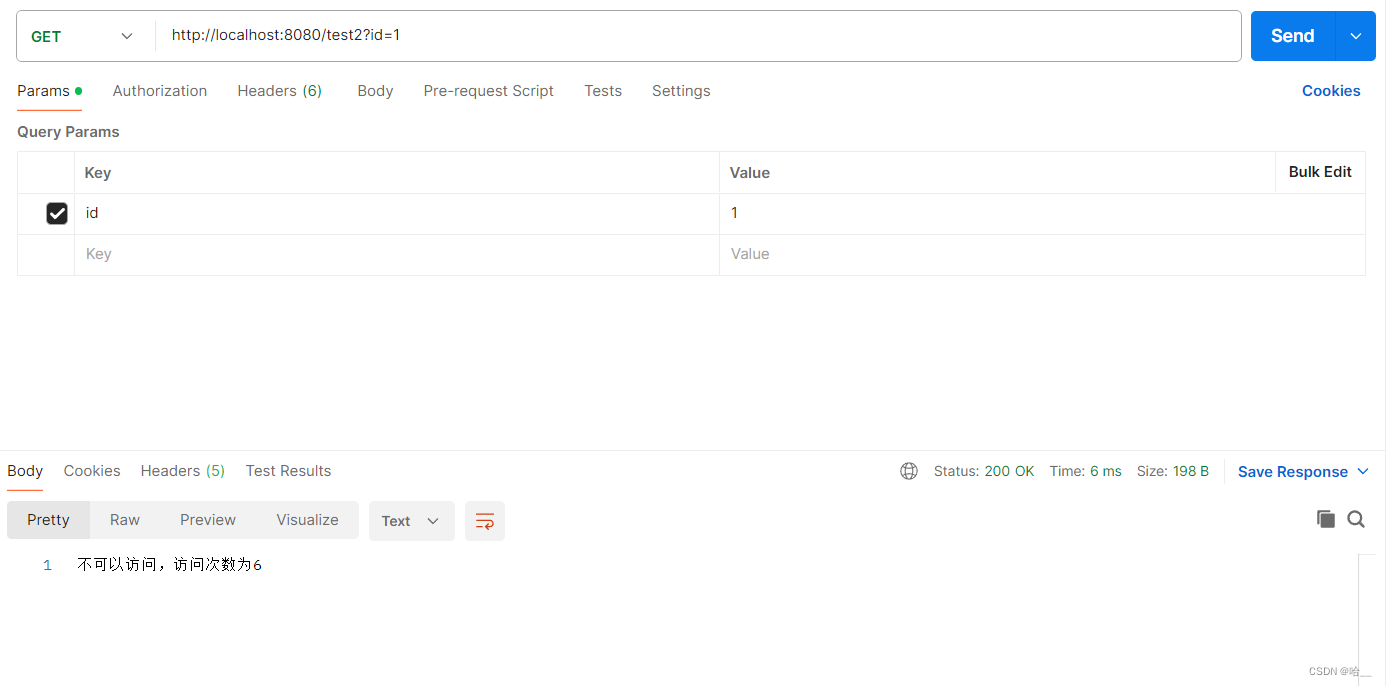
我们现在是介绍思想,所以传入了一个用户的id来判断是哪一个用户访问的接口。我们对redis中保存的key为用户id的键值对进行一个自增操作,然后返回这个自增后的值,这个值代表的就是我们在十秒钟内访问接口的次数。每次访问我们都重新设置这个键值对的有效时间,如果值大于5说明我们访问的次数已经达到了系统对个人十秒钟内访问次数的限制了,就不可以执行我们的业务逻辑。
@Resource
private RedisTemplate<String, String> redisTemplate;

@GetMapping("/test2")
    public String test2(String id){
        Long increment = redisTemplate.opsForValue().increment(id);
        redisTemplate.expire(id,10,TimeUnit.SECONDS);
        if(increment > 5){
            return "不可以访问,访问次数为"+increment;
        }
        return "可以访问,访问次数为"+increment;
    }
之后启动我们的SpringBoot项目。我这里使用的是PostMan进行的接口测试。
进行第一次访问。
第二次。

第五次 。
第六次。第六次可以看到接口的返回值为不可以访问,说明我们的访问次数已经上限了,这时候就要等十秒后再次访问了。
四、Redis限流的几种方法
1.基于Redis的数据结构zset(滑动窗口)
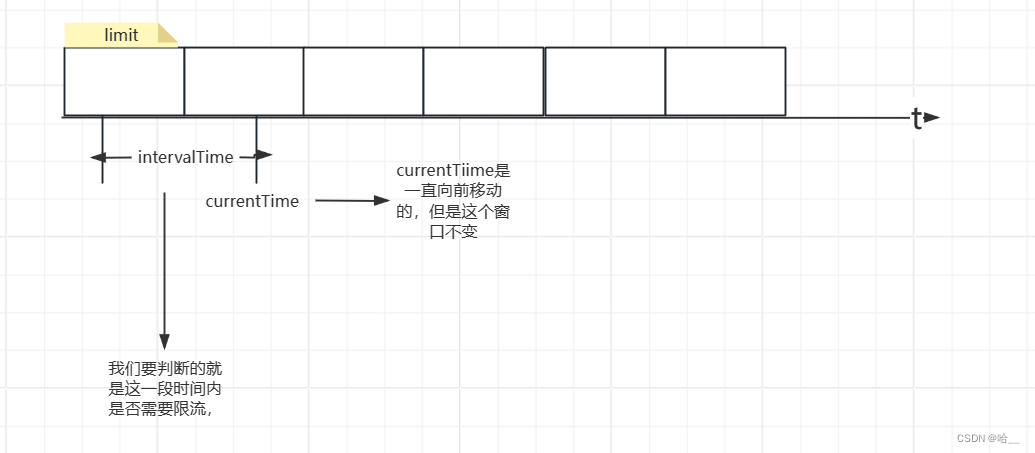
思想比较容易接收,我们定一个这样一个key为limit的列表,每当我们发送一次请求的时候,我们向这个列表当中添加当前的时间戳(前提是没有被限流),当然,在我们进行数据的添加之前需要进行是否需要进行限流。我们设定intervalTime为限流的时间间隔,我们从limit列表中获取我们访问接口的时间currentTIme-intervalTime,这样我们判断一下(currentTIme-intervalTime,currentTime)范围内的时间戳个数,也就是我们请求的次数,这样就能判断是否超过限制了。这里我用一张图来表示。
既然叫做滑动窗口,那这个窗口的大小就是我们进行限流的时间间隔,这个窗口在我们的时间轴上进行移动。
代码如下:
@GetMapping("/test3")
    public String test3(){
        int intervalTime = 10;
        Long currentTime = new Date().getTime();
        if(Boolean.TRUE.equals(redisTemplate.hasKey("limit"))) {
            Integer count = Objects.requireNonNull(redisTemplate.opsForZSet().rangeByScore("limit", currentTime - intervalTime, currentTime)).size();
            if (count != null && count > 5) {
                return "每分钟最多只能访问5次";
            }
        }
        redisTemplate.opsForZSet().add("limit", UUID.randomUUID().toString(),currentTime);
        return "访问成功";
    }
2.基于Redis的令牌桶算法
这个就好理解了,一个筐子里十个苹果大家都去拿,拿到了就可以吃,拿不到就等着别人放。在Redis里我们在一个列表里放令牌,用户访问接口去尝试拿这个令牌,拿到了就能访问接口,拿不到就进行限流,当然除了拿令牌之外还放令牌,我们通过定时任务向列表内放令牌。
 @GetMapping("/test3")
    public String test3(){
        Object result = redisTemplate.opsForList().leftPop("limit_list");
        if(result == null){
            return "当前令牌桶中无令牌,无法访问";
        }
        return "访问成功";
    }
    @Scheduled(fixedDelay = 100,initialDelay = 0)
    public void setLimitListTask(){
        redisTemplate.opsForList().rightPush("limit_list",UUID.randomUUID().toString());
    }
定时任务到底如何使用,大家可以自行搜索一下。还有一些其他的方式本文就不在介绍了。


