1:开启docker 远程访问
- 使用 vim 编辑docker服务配置文件
vim /lib/systemd/system/docker.service
[Service]
Type=notify
# the default is not to use systemd for cgroups because the delegate issues still
# exists and systemd currently does not support the cgroup feature set required
# for containers run by docker
ExecStart=/usr/bin/dockerd -H fd:// --containerd=/run/containerd/containerd.sock
ExecReload=/bin/kill -s HUP $MAINPID
TimeoutStartSec=0
RestartSec=2
Restart=always
修改 ExecStart 添加 -H tcp://0.0.0.0:2375
[Service]
Type=notify
# the default is not to use systemd for cgroups because the delegate issues still
# exists and systemd currently does not support the cgroup feature set required
# for containers run by docker
ExecStart=/usr/bin/dockerd -H fd:// --containerd=/run/containerd/containerd.sock -H tcp://0.0.0.0:2375
ExecReload=/bin/kill -s HUP $MAINPID
TimeoutStartSec=0
RestartSec=2
Restart=always
重新加载docker配置并重启服务
systemctl daemon-reload && systemctl restart docker
然后直接在命令行客户端输入如下命令进行测试,IP地址改为自己的
curl http://192.168.56.20:2375/version
出现如下信息则代表修改Docker服务设置远程访问成功。
{
  "Platform": {
    "Name": "Docker Engine - Community"
  },
  "Components": [
    {
      "Name": "Engine",
      "Version": "26.0.0",
      "Details": {
        "ApiVersion": "1.45",
        "Arch": "amd64",
        "BuildTime": "2024-03-20T15:17:48.000000000+00:00",
        "Experimental": "false",
        "GitCommit": "8b79278",
        "GoVersion": "go1.21.8",
        "KernelVersion": "5.15.0-101-generic",
        "MinAPIVersion": "1.24",
        "Os": "linux"
      }
    },
    {
      "Name": "containerd",
      "Version": "1.6.28",
      "Details": {
        "GitCommit": "ae07eda36dd25f8a1b98dfbf587313b99c0190bb"
      }
    },
    {
      "Name": "runc",
      "Version": "1.1.12",
      "Details": {
        "GitCommit": "v1.1.12-0-g51d5e94"
      }
    },
    {
      "Name": "docker-init",
      "Version": "0.19.0",
      "Details": {
        "GitCommit": "de40ad0"
      }
    }
  ],
  "Version": "26.0.0",
  "ApiVersion": "1.45",
  "MinAPIVersion": "1.24",
  "GitCommit": "8b79278",
  "GoVersion": "go1.21.8",
  "Os": "linux",
  "Arch": "amd64",
  "KernelVersion": "5.15.0-101-generic",
  "BuildTime": "2024-03-20T15:17:48.000000000+00:00"
}
特别注意的点: 完全开放Docker对外访问权限有可能会遭到别人攻击,这是很不安全的,只要别人知道你的服务器地址就能够随意连接你的Docker服务,而不需要任何认证,因此,完全开放只推荐自己在内网使用,不推荐在云服务器上直接完全开放。
在使用 docker info 命令时,会报警告
[DEPRECATION NOTICE]: API is accessible on http://0.0.0.0:2375 without encryption.
         Access to the remote API is equivalent to root access on the host. Refer
         to the 'Docker daemon attack surface' section in the documentation for
         more information: https://docs.docker.com/go/attack-surface/
In future versions this will be a hard failure preventing the daemon from starting! Learn more at: https://docs.docker.com/go/api-security/
在未来的版本中,这将是一个阻止守护进程启动的硬故障,
那就暂时先不管。
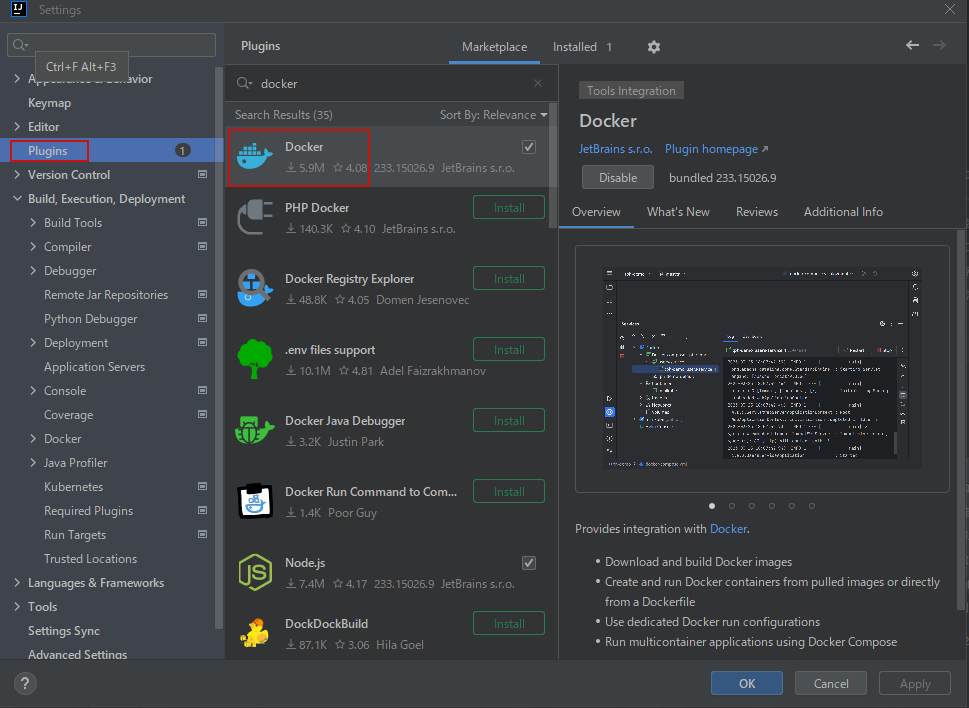
2:在idea安装docker插件在idea安装docker插件
idea在2023.3.3版本已经内置了docker,其他版本自行下载即可
3:在项目下创建Dockerfile文件(与pom.xml同目录)
这里最好放在pom.xml同级目录下,指定文件方便,如果单独放一个文件夹,指定路径的jar会报找不到,需要将打包的jar手动丢进去。
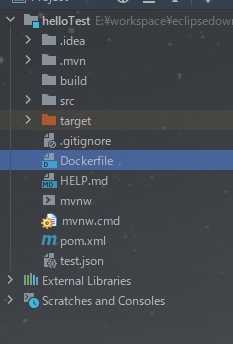
Dockerfile文件内容
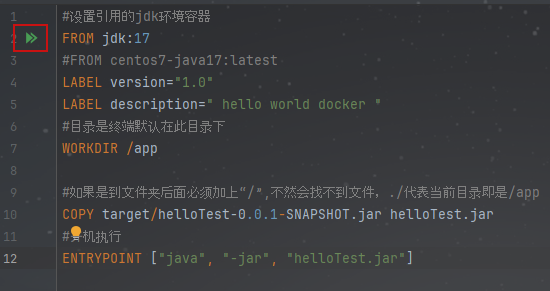
#设置引用的jdk环境容器
FROM jdk:17
#FROM centos7-java17:latest
LABEL version="1.0"
LABEL description=" hello world docker "
#目录是终端默认在此目录下
WORKDIR /app

#如果是到文件夹后面必须加上“/”,不然会找不到文件,./代表当前目录即是/app
COPY target/helloTest-0.0.1-SNAPSHOT.jar helloTest.jar
#开机执行
ENTRYPOINT ["java", "-jar", "helloTest.jar"]
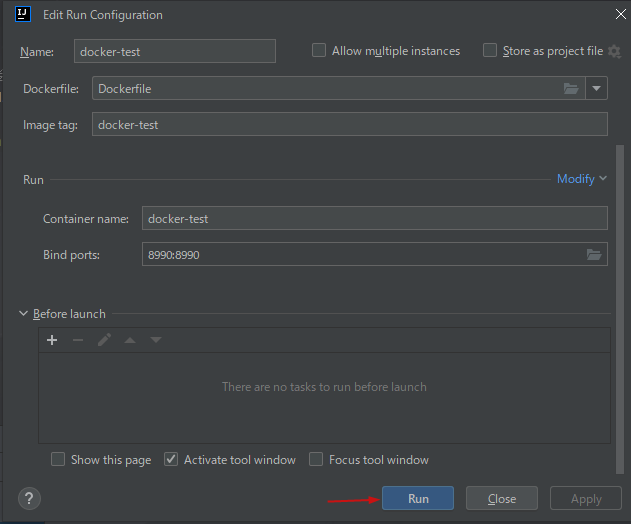
6:Dockerfile文件FROM位置的绿色双箭头,去配置链接docker服务
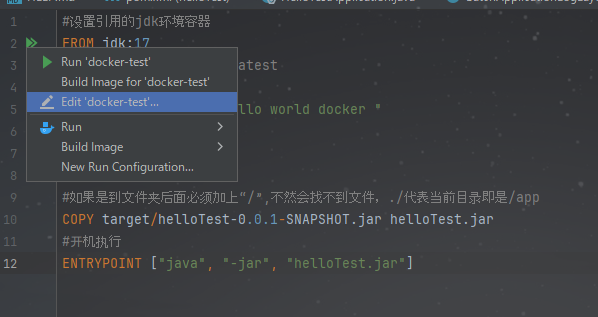
Dockerfile : 指定 Dockerfile文件地址
Image tag : 设置上传到docker的镜像名称
Container name: 设置容器名称
Bind ports: 配置的端口绑定。例如,如果您已经在Docker主机端口5432上运行PostgreSQL,则可以将主机上的端口5433映射到容器内的5432,如前面的屏幕截图所示。这将使PostgreSQL在容器内运行,通过主机上的端口5433可访问。
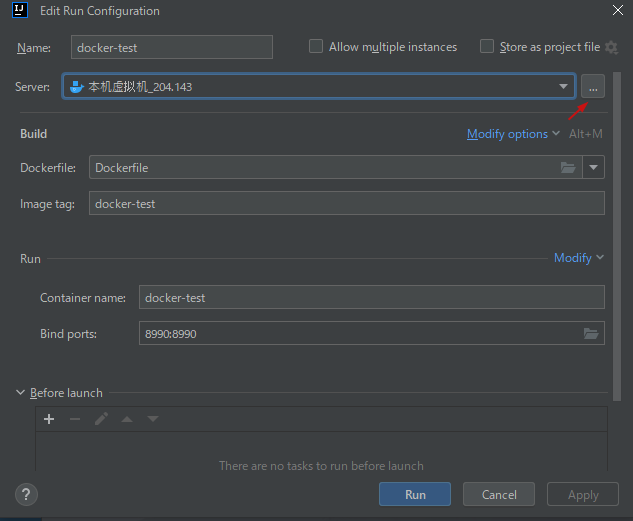
点击 + 号,创建一个新连接
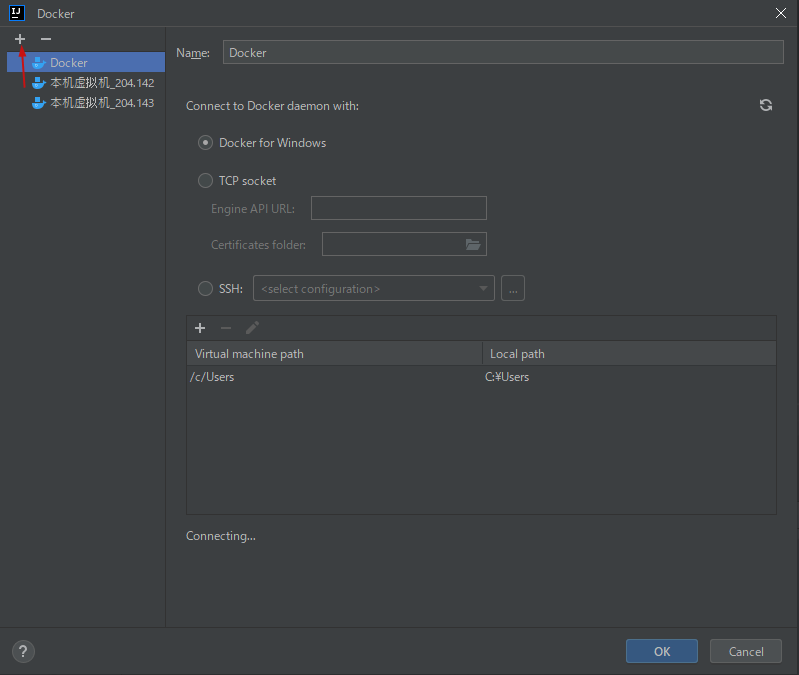
选择 TCP socket 连接,
输入 服务器的IP地址 + 2375 端口号
tcp://192.168.204.143:2375
输入后,idea 会立即连接,如果成功,会显示
Connection successful
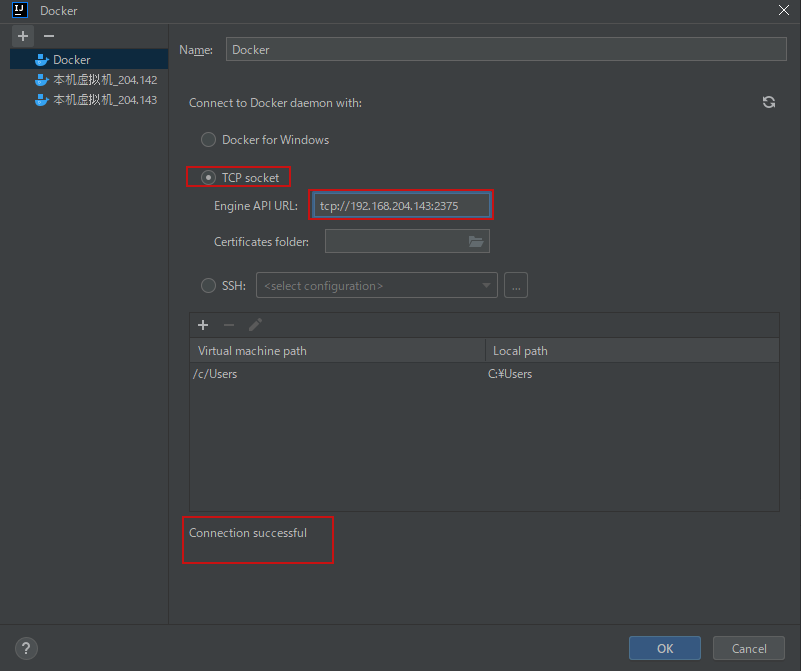
点击OK保存后,点击RUN 运行。
这里显示的 Step ,是在dockerfile中写的命令,命令有几个,Step 就有几个。
正常 Step 步骤执行完后,打包就OK 了。
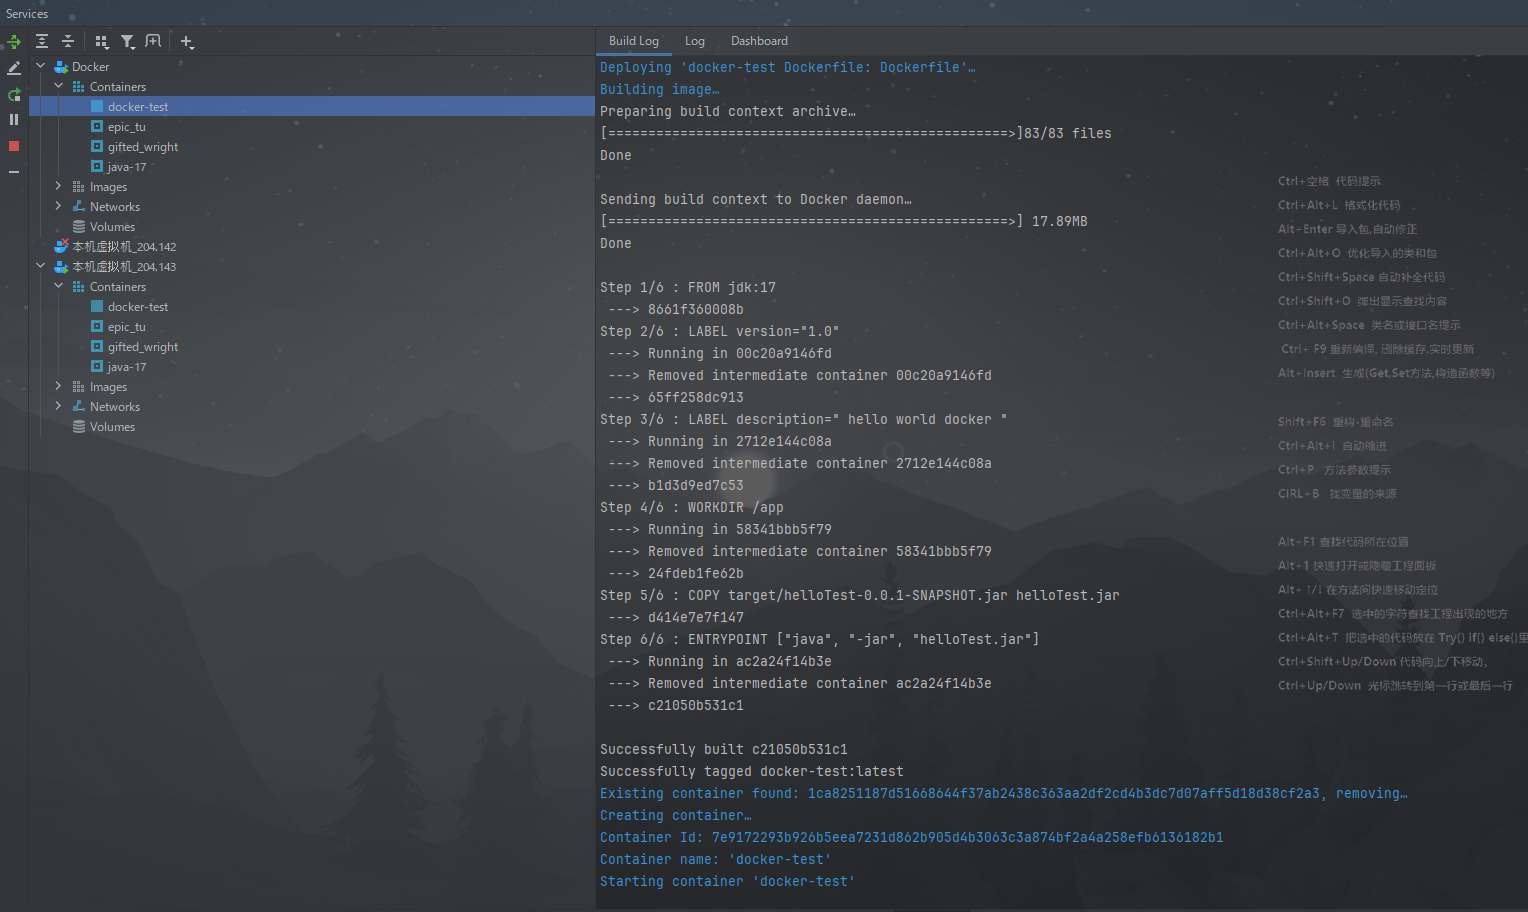
随后会立即启动
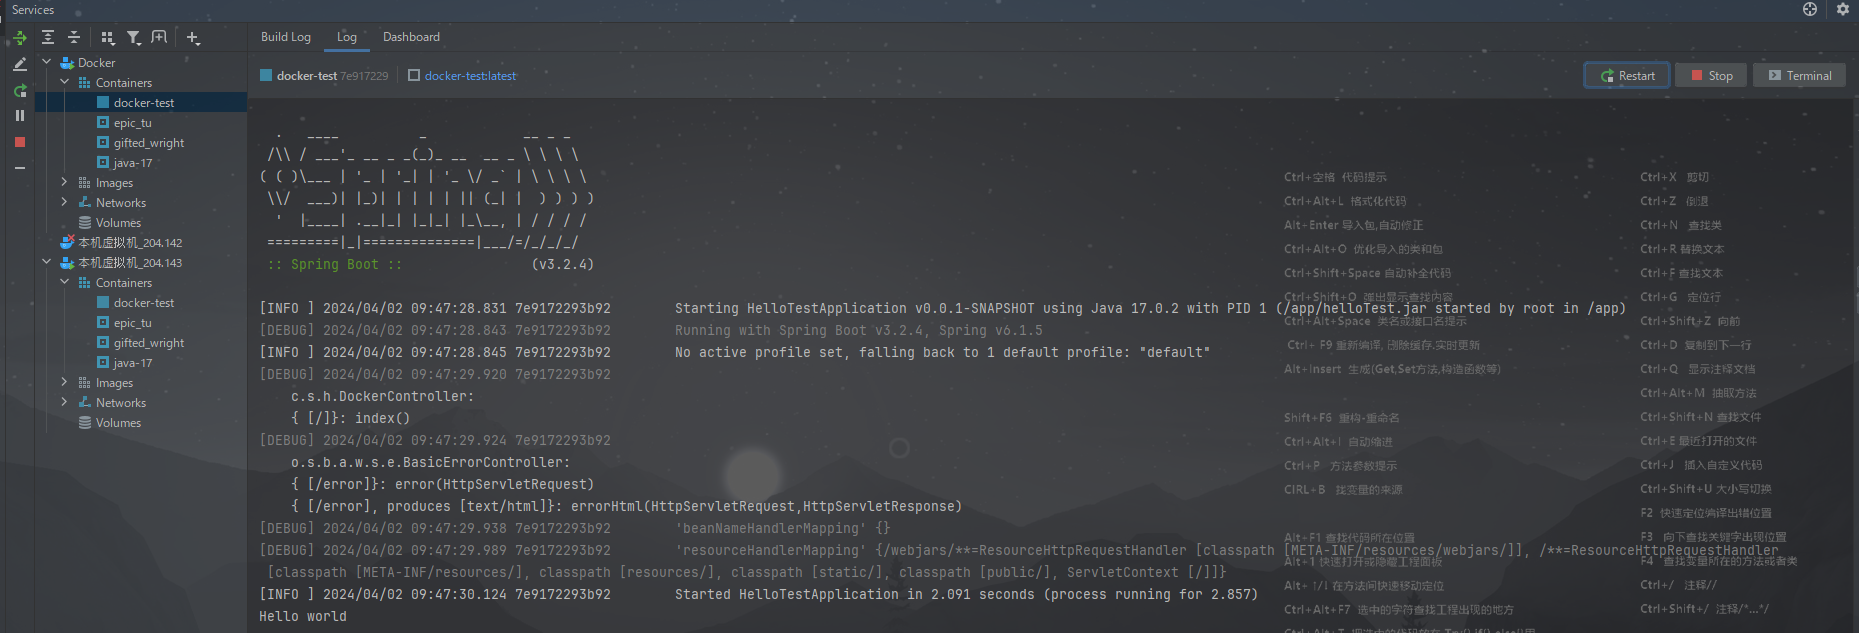
显示 hello world 表示启动成功
从浏览器访问测试
http://192.168.204.143:8990/
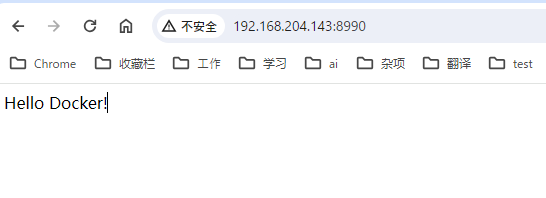
再看控制台
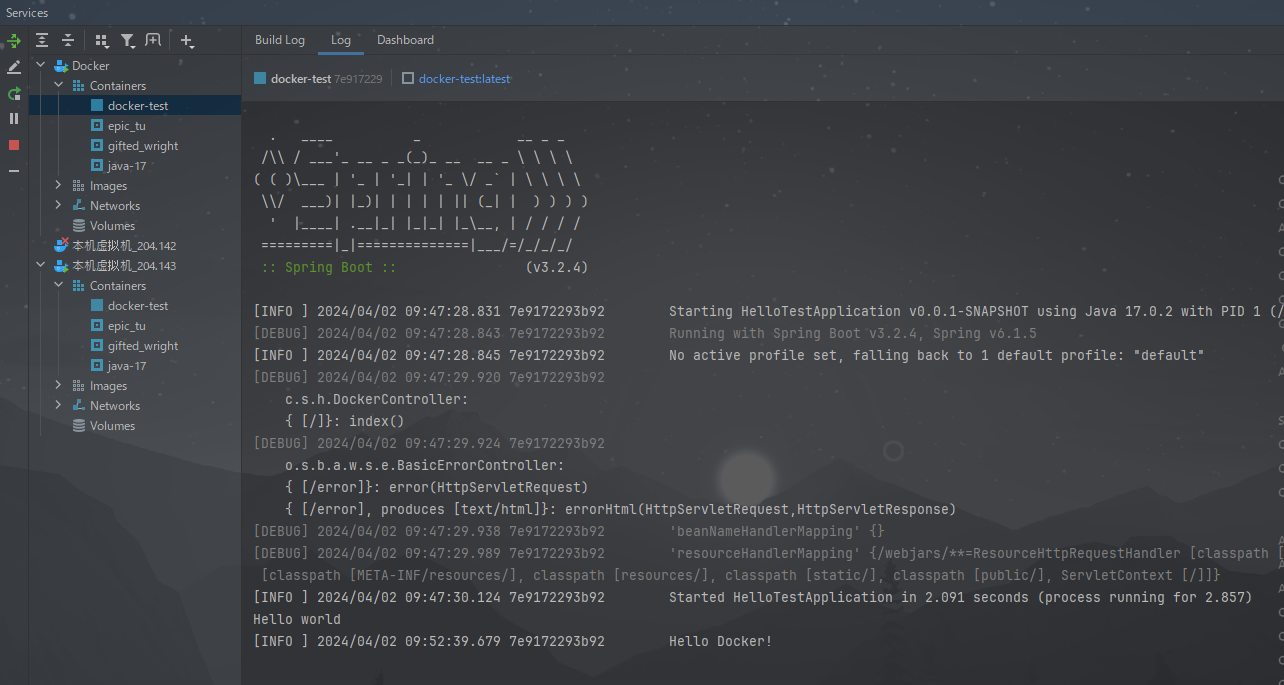
执行controller 方法成功。
-----end-----
后记:
我在pom.xml上加了 docker的插件,但是并不好用,实际上还是要单独提交。
<!-- docker插件-->
            <plugin>
                <groupId>com.spotify</groupId>
                <artifactId>docker-maven-plugin</artifactId>
                <version>${docker.version}</version>

                <configuration>
                    <!-- 远程Docker的地址 -->
                    <dockerHost>http://192.168.204.142:2375</dockerHost>
                    <!-- 镜像名称、前缀、项目名 -->
                    <imageName>${docker.image.prefix}</imageName>
                    <!-- Dockerfile的位置 -->
                    <dockerDirectory>${project.basedir}/build</dockerDirectory>
                    <resources>
                        <resource>
                            <targetPath>/</targetPath>
                            <!-- 表示的target文件夹 -->
                            <directory>${project.build.directory}</directory>
                            <!-- 表示打出来的JAR包-->
                            <include>${project.build.finalName}.jar</include>
                        </resource>
                    </resources>
                </configuration>
            </plugin>
只是打了jar,。
测试项目地址
https://github.com/yanzhao77/helloTest
参考资料:
1,win10 版本的docker
idea使用docker生成镜像(打包镜像,导入镜像,导出镜像)
2,
Docker安全开放远程访问连接权限
3,
Docker镜像和容器的基本命令操作
4,
IDEA 打包docker镜像(以打包Jdk8为例)






![练习 13 Web [极客大挑战 2019]Secret File](https://img-blog.csdnimg.cn/direct/fb3ba218624c4aadafa31f1e08323319.png)

