一、源代码编译安装Nginx
1.下载最新nginx源码
以nginx-1.25.3.tar.gz为例:
可以使用命令(联网):curl -O http://nginx.org/download/nginx-1.25.3.tar.gz或在官网下载.tar.gz
2.解压缩
tar -zxvf nginx-1.25.3.tar.gz
cd nginx-1.25.3/
3.安装依赖模块
yum install pcre
yum install pcre-devel
4.配置源代码
./configure
或 ./configure --without-http_gzip_module
5.编译
make
6.安装
make install
7.启动nginx
①切到nginx的sbin目录下输入:
启动:./nginx
加载:./nginx -s reload
或②/usr/local/nginx/sbin/nginx -c /usr/local/nginx/conf/nginx.conf
ps:关闭nginx:./nginx -s stop
或③执行启动脚本(./op_nginx.sh start)
#!/bin/sh
# ./op_nginx.sh start 启动 stop 停止 restart 重启 status 状态 monitor 监控(未启动->自动重启)

APP_HOME=/usr/local/nginx
LOG_PATH=$APP_HOME/logs/$AppName.log
AppName2=nginx
AppName=/usr/local/nginx/sbin/nginx
opUser=root
RE_LOG_HOME=/home/data/monitorlog/crontab
RE_LOG_FILE=$RE_LOG_HOME/$(date +%F)/$(date +%F)_restart.txt
STATE_HOME=/home/data/monitorlog/component-status
STATE_FILE=$STATE_HOME/$AppName2

#variable
##nginx安装路径
nginx_path=/usr/local/nginx
##nginx脚本启动路径
nginxd=$nginx_path/sbin/nginx
##nginx服务启动后存放PID的文件
nginx_pid_file=$nginx_path/logs/nginx.pid

if [ `whoami` != "$opUser" ];then
    echo -e " only $opUser can run me"
    exit 1
fi

if [ "$1" = "" ];
then
    echo -e "\033[0;31m 未输入操作名 \033[0m  \033[0;34m {start|stop|restart|status|monitor} \033[0m"
    exit 1
fi

if [ "$AppName" = "" ];
then
    echo -e "\033[0;31m 未输入应用名 \033[0m"
    exit 1
fi

if [ ! -d "$RE_LOG_HOME/$(date +%F)/" ];
then
    mkdir $RE_LOG_HOME/$(date +%F)
fi

#调用shell的函数库
if [ -f /etc/init.d/functions ];then
  . /etc/init.d/functions
else
  echo "not find file:/etc/init.d/functions"
  eixt 1
fi

#对nginx PID脚本文件进行判断
if [ -f $nginx_pid_file ];then
  pid=`cat $nginx_pid_file`
  nginx_process_num=`ps -ef  | grep $pid | grep -v "grep" | wc -l`
fi

#函数部分
##Nginx的启动函数
start () {
##如果nginx启动则报错
if [ -f $nginx_pid_file ] && [ $nginx_process_num -ne 0 ];then
  echo "Nginx服务已经启动"
else
##如果pid文件存在,但是没有进程,说明上一次非法关闭了nginx,造成pid文件没有自动删除,所以启动nginx之前先删除旧的pid文件
  if [ -f $nginx_pid_file ] && [ $nginx_process_num -eq 0 ];then
    rm -f $nginx_pid_file
    action "nginx start" $nginxd
  fi
  action "nginx start" $nginxd
fi
}

##Nginx关闭函数
stop () {
##如果Nginx服务没有启动,则提示服务没有启动
if [ -f $nginx_pid_file ] && [ $nginx_process_num -eq 0 ];then
  echo "Nginx服务没有启动"
  exit 2
else
  action "nginx stop" killall -s QUIT nginx
  rm -f $nginx_pid_file
fi
}

##Nginx重启函数
restart () {
stop
sleep 1
start
if [ $? -eq 0 ];then
  action "nginx 重启完成"
fi
}

##重新读取配置文件,不会更改pid
reload () {
if [ -f $nginx_pid_file ] && [ $nginx_process_num -ne 0 ];then
  action "nginx reload" killall -s HUP nginx
else
  echo "Nginx没有启动"
fi
}

##查看Nginx启动状态
status () {
tmp=`mktemp nginx.XXXX`
curl -s -I 127.0.0.1 1> $tmp
#curl -I 127.0.0.1 > $tmp &>/dev/null
sed -i "s/\r//" $tmp
val=`grep "HTTP" $tmp | cut -d ' ' -f3`
if [ "$val" == "OK" ];then
  echo "Nginx start"
else
  echo "Nginx stop"
fi
rm -f $tmp
}

function monitor()
{
    PID=`ps -ef |grep java|grep $AppName2|grep -v grep|wc -l`
    if [ $PID != 0 ];then
        echo "$AppName2 is running..."
        echo $(date +%Y-%m-%d%n%H:%M:%S)_running > $STATE_FILE
    else
	start
        echo "$AppName2 is not running,and restarting..."
        # 重启保存到日志
        echo $(date +%Y-%m-%d%n%H:%M:%S)_notrunning > $STATE_FILE
        echo $(date +%Y-%m-%d%n%H:%M:%S) >> $RE_LOG_HOME/$(date +%F)/$(date +%F)_restart.txt
        echo "$AppName is not running,and restarting..." >> $RE_LOG_HOME/$(date +%F)/$(date +%F)_restart.txt
    fi
}

case $1 in
    start)
    start;;
    stop)
    stop;;
    restart)
    restart;;
    status)
    status;;
    monitor)
    monitor;;
    *)
esac
8.浏览器访问
ps:防火墙开放端口
如下表示成功。

二、Docker安装Nginx(确保已安装Docker)
1.nginx.conf
#user  nobody;
worker_processes  4;

error_log   /usr/local/nginx/logs/error.log;

#pid        logs/nginx.pid;

events {
    worker_connections  1024;
}

http {
    include       mime.types;
    default_type  application/octet-stream;

    #log_format  main  '$remote_addr - $remote_user [$time_local] "$request" '
    #                  '$status $body_bytes_sent "$http_referer" '
    #                  '"$http_user_agent" "$http_x_forwarded_for"';

    #access_log  logs/access.log  main;

    client_max_body_size 200m;
    client_header_buffer_size 10k;
    large_client_header_buffers 20 10k;

    access_log /usr/local/nginx/logs/access.log ;

    sendfile        on;
    #tcp_nopush      on;

    keepalive_timeout  65;
    keepalive_requests 100000;
    #gzip  on;

    upstream server_list {
        server IP地址1:端口;
	    server P地址2:端口;
   }

    server {
        listen       8080;
        server_name  域名或ip地址;

        charset utf-8;

        access_log  /usr/local/nginx/logs/host.access.log;

        #对 / 所有做负载均衡+反向代理
        location / {
           # root   html;
           # index  index.html index.htm;
	        proxy_pass http://server_list;

            proxy_redirect off;
            proxy_http_version 1.1;
            proxy_set_header Upgrade $http_upgrade;
            proxy_set_header Connection "upgrade";
            proxy_set_header X-Real-IP $remote_addr;
            proxy_set_header Host $host;
            proxy_set_header X-Forwarded-For $proxy_add_x_forwarded_for;
            proxy_read_timeout 300;
            proxy_send_timeout 300;
            proxy_connect_timeout 300;
        }

        error_page   500 502 503 504  /50x.html;
        location = /50x.html {
            root   html;
        }
    }
}
2.nginx镜像上传到服务器
2.1访问 dockerhub 查找所需的镜像版本并下载(docker pull nginx)
2.2上传镜像
ps:确保nginx安装目录中有如下内容:

3.nginx安装脚本
在服务器上安装和启动(install_nginx.sh)
#!/bin/bash

##########################
# nginx-docker 安装脚本 #
##########################

WORK_PATH=/home/data/install_pkg
PKG_PATH=$WORK_PATH/nginx

#检查安装目录
if [ ! -d $PKG_PATH ];
then
    echo -e "${PKG_PATH} 缺失,结束进程"
    exit 1
fi

#docker 导入tar包
docker load < $PKG_PATH/nginx-1.25.3.tar

#新建nginx目录 注册配置文件
mkdir -p /home/data/nginx
cd /home/data/nginx
cp -rf $PKG_PATH/nginx.conf ./

#docker启动nginx
docker run -d --restart always \
    -p 9001:80 \
    --name nginx \
    -v /home/data/nginx/nginx.conf:/etc/nginx/nginx.conf \
    -v /home/data/nginx/conf.d:/etc/nginx/conf.d \
    -v /home/data/nginx/html:nginx:/usr/share/nginx/html \
    nginx:1.25.3

echo nginx installed.
docker ps | grep nginx-v:挂载配置文件、html 目录到宿主机;冒号前为宿主机文件路径,冒号后为挂载到容器中的路径
三、nginx配置注意事项
1.配置nginx.service(即配置systemctl启动服务)
使用源码安装nginx的,可以添加该配置并放到/usr/lib/systemd/system
[Unit]
Description=nginx service
After=network.target

[Service]
Type=forking
#PIDFile=/var/run/nginx.pid #nginx.conf设置pid位置
ExecStart=/usr/local/nginx/sbin/nginx  #启动命令
ExecReload=/usr/local/nginx/sbin/nginx -s reload  #重启命令
ExecStop=/usr/local/nginx/sbin/nginx -s quit      #停止命令
PrivateTmp=true

[Install]
WantedBy=multi-user.target
2.导入3万条数据会报如下错误,因为nginx请求体默认是1m
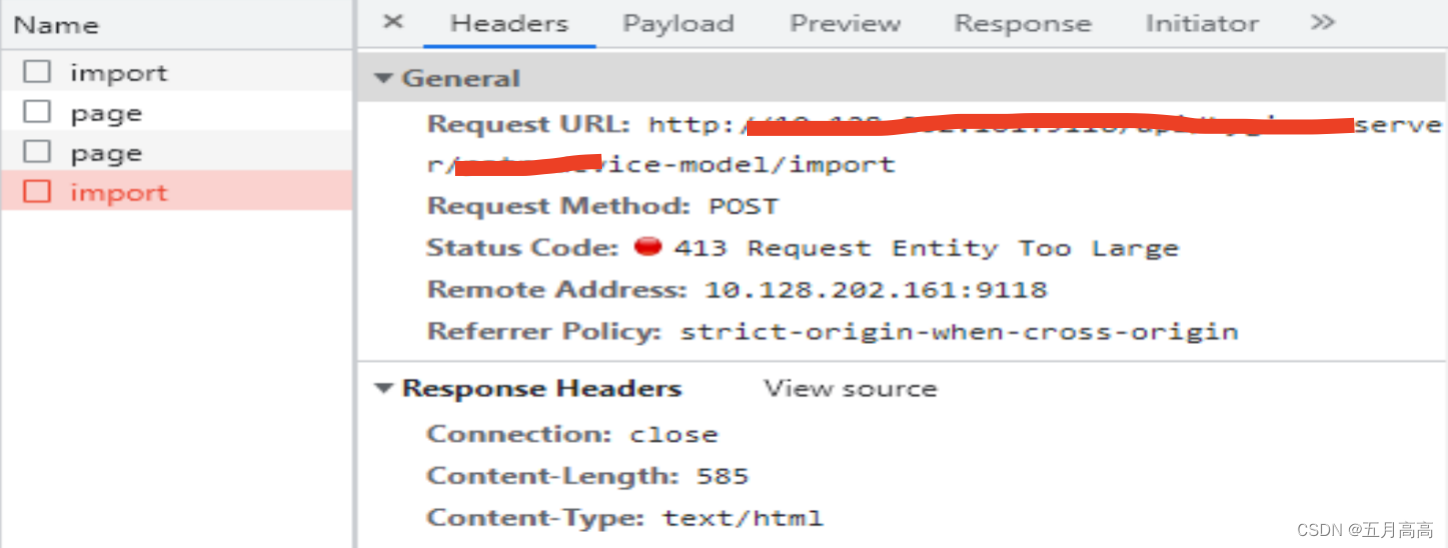
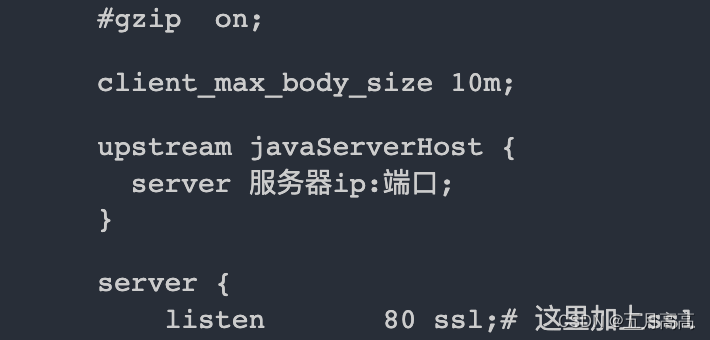
可在nginx.conf中加上client_max_body_size 10m;