文章目录
- 数据集介绍
- 下载数据集
- 将数据集转换为yolo
- 绘制几张图片看看数据样子
- 思考类别是否转换
- 下载yolov5
- 修改数据集样式以符合yolov5
- 创建 dataset.yaml
- 训练参数
- 开始训练
- 训练分析
- 推理
- 模型转换onnx
- 重训一个yolov5s
- 后记
数据集介绍
https://github.com/hukenovs/hagrid
HaGRID(HAnd Gesture Recognition Image Dataset)的大型图像数据集,用于手势识别系统。这个数据集非常适合用于图像分类或图像检测任务,并且可以帮助构建用于视频会议服务、家庭自动化系统、汽车行业等领域的手势识别系统。
HaGRID数据集的规模达到了723GB,包含554,800张FullHD RGB图像,被分为18类手势。此外,一些图像中还包含no_gesture类,用于表示图像中存在第二只空闲手的情况。这个额外的类别包含了120,105个样本。数据集根据主题用户ID进行了划分,分为训练集(74%)、验证集(10%)和测试集(16%),其中训练集包含410,800张图像,验证集包含54,000张图像,测试集包含90,000张图像。
数据集中包含了37,583位独特的人物以及至少这么多个独特的场景。被试者的年龄跨度从18岁到65岁不等。数据集主要在室内收集,光照条件有较大的变化,包括人工光和自然光。此外,数据集还包括了在极端条件下拍摄的图像,例如面对窗户或背对窗户。被试者需要在距离相机0.5到4米的范围内展示手势。
下载数据集
创建数据集环境:
git clone https://github.com/hukenovs/hagrid.git
# or mirror link:
cd hagrid
# Create virtual env by conda or venv
conda create -n gestures python=3.11 -y
conda activate gestures
# Install requirements
pip install -r requirements.txt
下载小的数据集解压:
wget https://n-ws-620xz-pd11.s3pd11.sbercloud.ru/b-ws-620xz-pd11-jux/hagrid/hagrid_dataset_new_554800/hagrid_dataset_512.zip

unzip hagrid_dataset_512.zip
下载数据集的标注:
wget https://n-ws-620xz-pd11.s3pd11.sbercloud.ru/b-ws-620xz-pd11-jux/hagrid/hagrid_dataset_new_554800/annotations.zip

unzip annotations.zip
整体目录结构:
# tree -L 2
.
├── annotations
│   ├── test
│   ├── train
│   └── val
├── annotations.zip
├── hagrid
│   ├── configs
│   ├── constants.py
│   ├── converters
│   ├── custom_utils
│   ├── dataset
│   ├── ddp_run.sh
│   ├── demo_ff.py
│   ├── demo.py
│   ├── download.py
│   ├── images
│   ├── license
│   ├── models
│   ├── pyproject.toml
│   ├── README.md
│   ├── requirements.txt
│   └── run.py
├── hagrid_dataset_512
│   ├── call
│   ├── dislike
│   ├── fist
│   ├── four
│   ├── like
│   ├── mute
│   ├── ok
│   ├── one
│   ├── palm
│   ├── peace
│   ├── peace_inverted
│   ├── rock
│   ├── stop
│   ├── stop_inverted
│   ├── three
│   ├── three2
│   ├── two_up
│   └── two_up_inverted
├── hagrid_dataset_512.tar
└── hagrid_dataset_512.zip
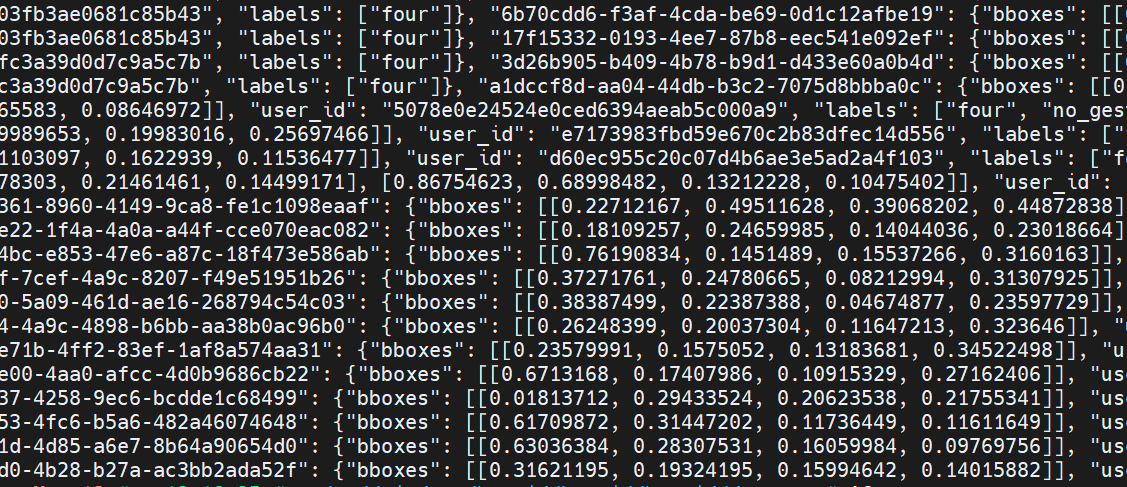
标注 含义:
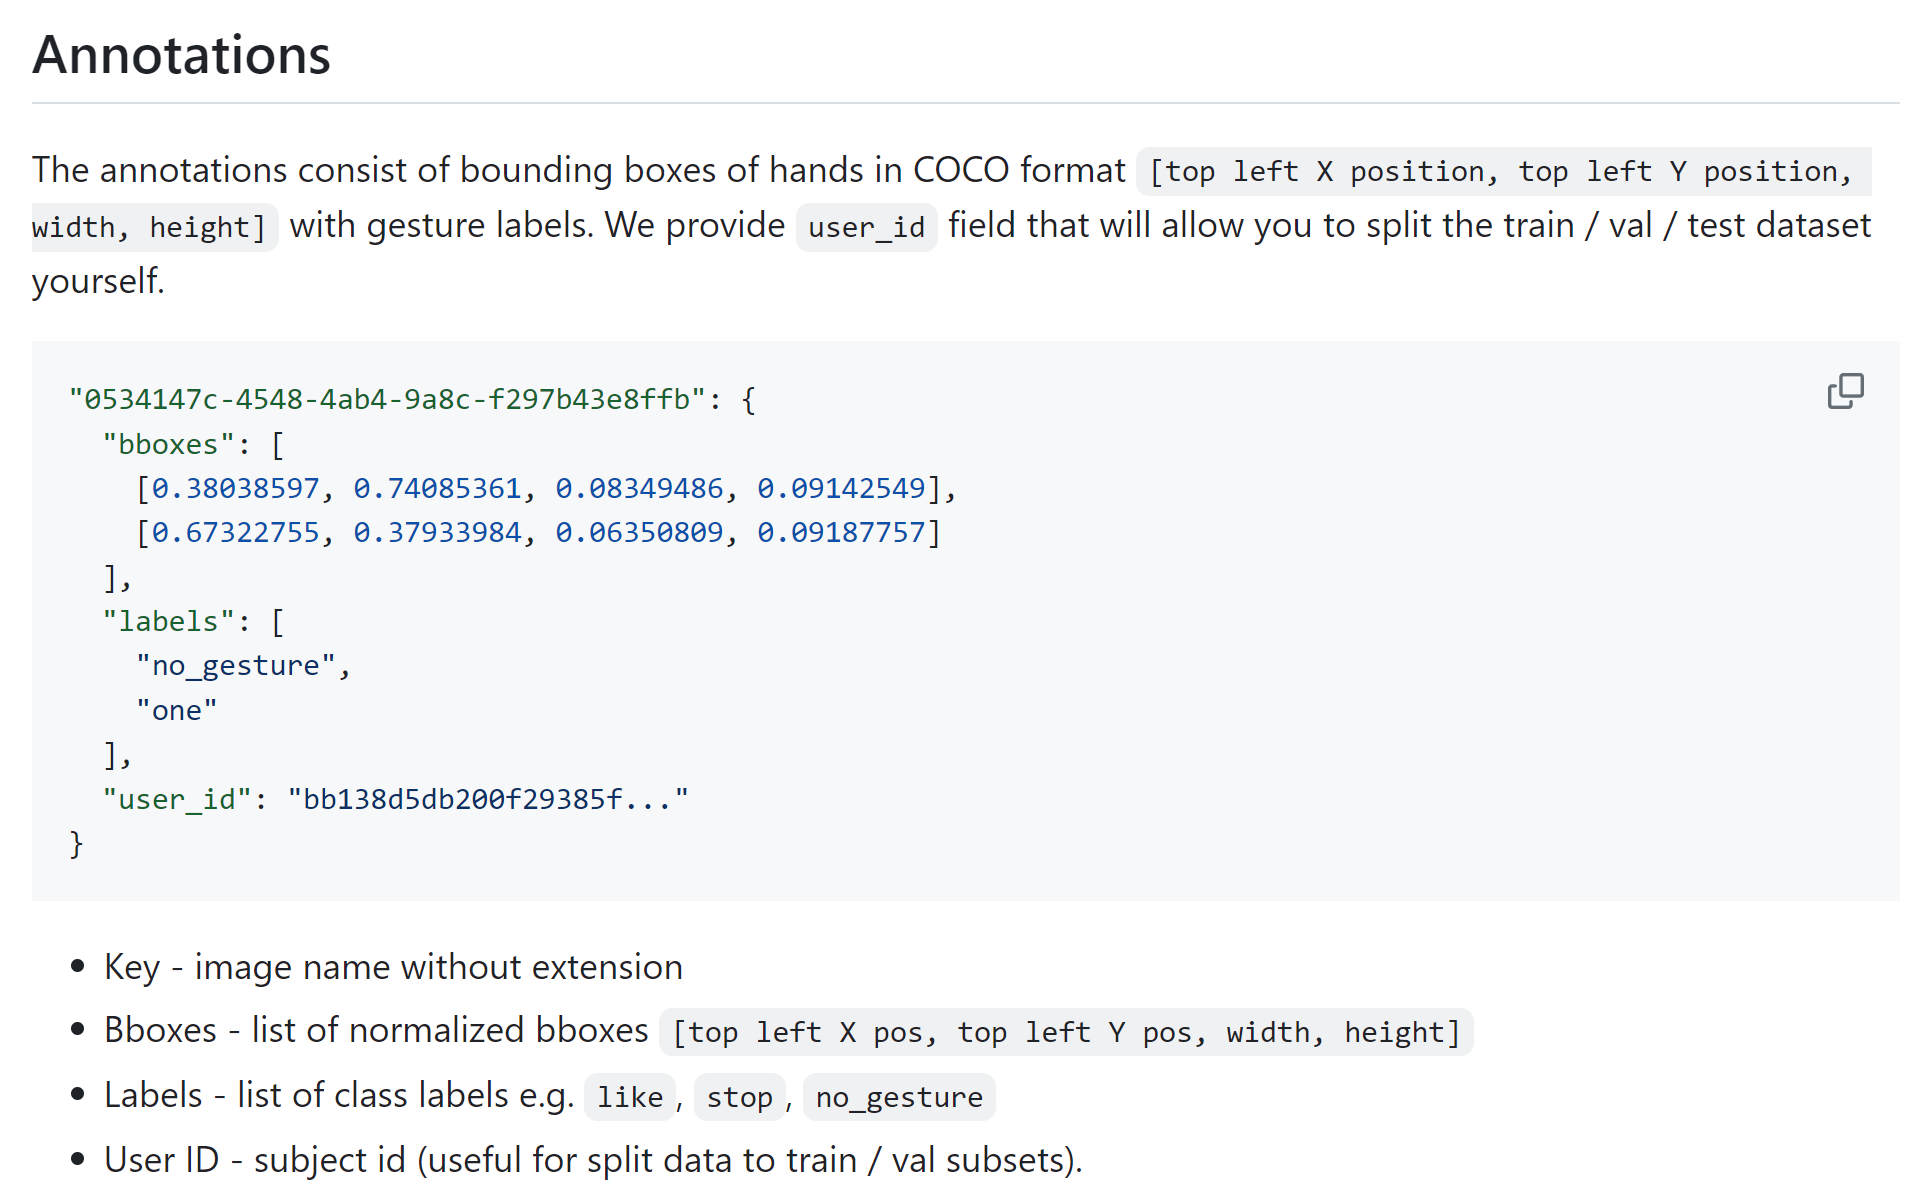
标注给的框都是0到1,所以我们下载的原尺寸图片和缩小的图片尺寸的图片都是可以使用的:
将数据集转换为yolo
转换方式:
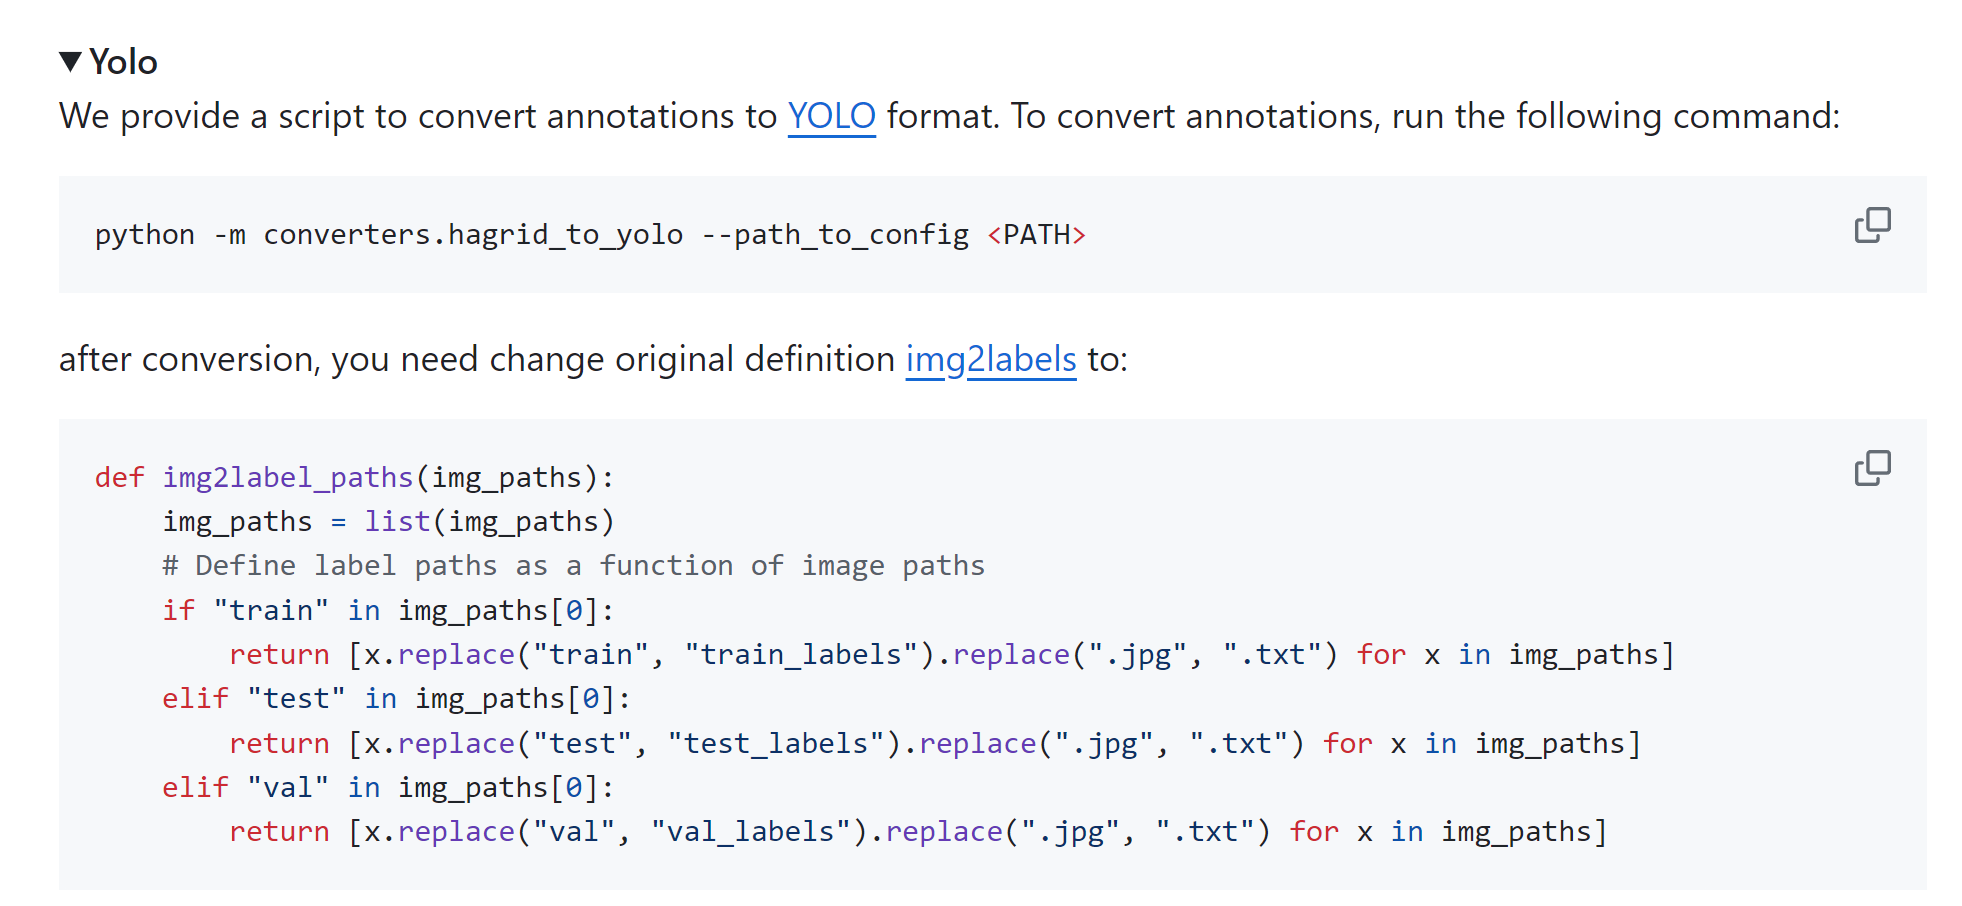
转换参数:
vim converters/hagrid_to_yolo.py

修改配置文件:
vim converters/converter_config.yaml
改为:
dataset:
  dataset_annotations: '/ssd/xiedong/hagrid/annotations/'
  dataset_folder: '/ssd/xiedong/hagrid/hagrid_dataset_512/'
  phases: [train, test, val] #names of annotation directories
  targets:
    - call
    - dislike
    - fist
    - four
    - like
    - mute
    - ok
    - one
    - palm
    - peace
    - rock
    - stop
    - stop_inverted
    - three
    - two_up
    - two_up_inverted
    - three2
    - peace_inverted
    - no_gesture
开始转换标记:
python -m converters.hagrid_to_yolo --cfg ‘/ssd/xiedong/hagrid/hagrid/converters/converter_config.yaml’
转换完成后,结果默认在hagrid_yolo_format/目录中。
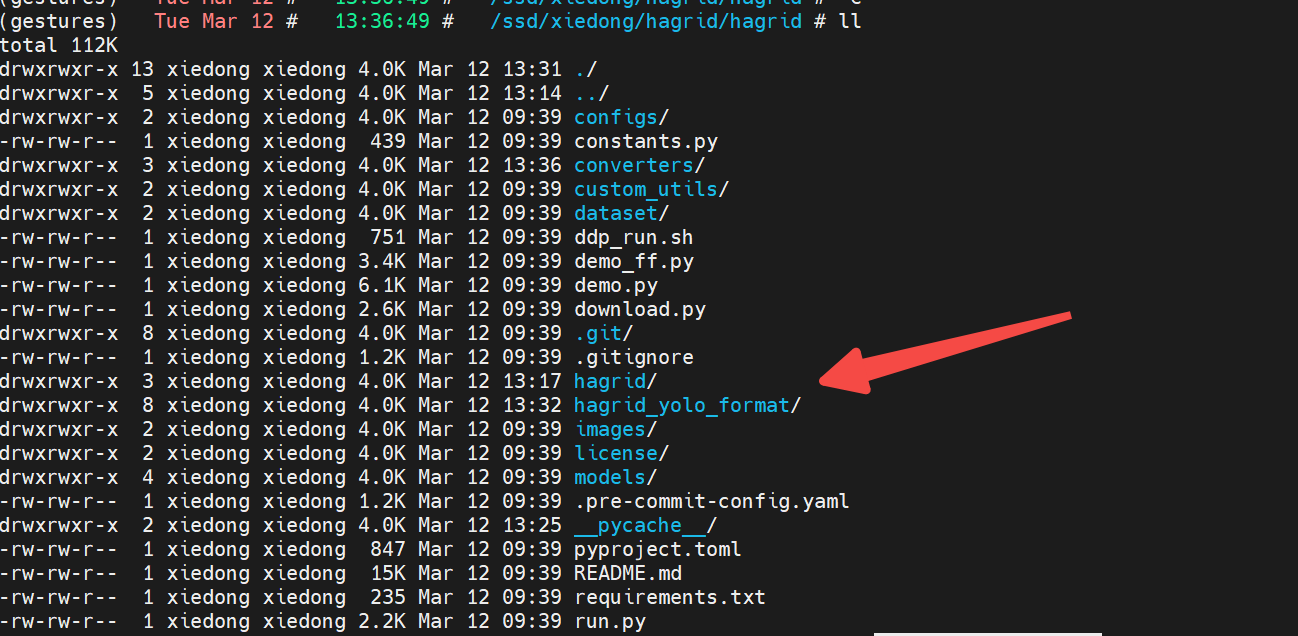
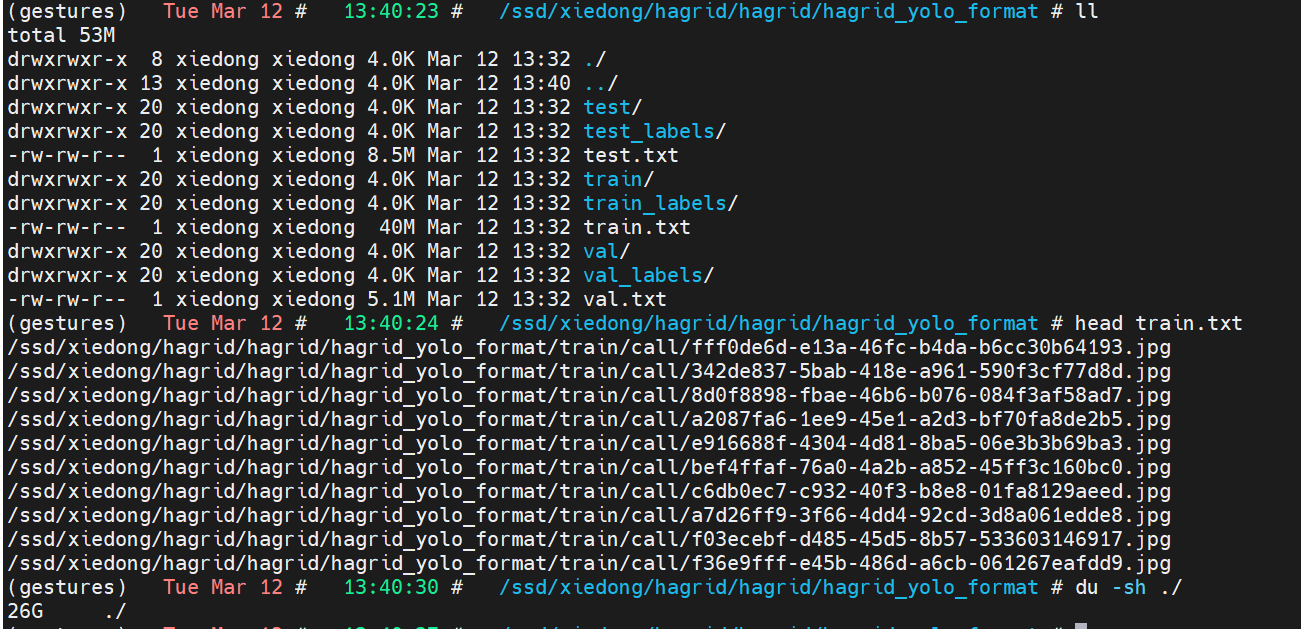
转换完成后,这个目录中是一个标准的YOLO数据集的样子。
train.txt是图片绝对路径。
train/中是图片数据。
train_labels/是图片对应的yolo标记。
绘制几张图片看看数据样子
画图代码:
import os
import cv2

txt = "/ssd/xiedong/hagrid/hagrid/hagrid_yolo_format/train.txt"
# 取前5行
lines_five = []
with open(txt, 'r') as f:
    for i in range(5):
        lines_five.append(f.readline().strip())
print(lines_five)
# 取对应标记画框和类别号,保存到新路径
dstpath = "/ssd/xiedong/hagrid/hagrid/output_five"
os.makedirs(dstpath, exist_ok=True)
for imgname in lines_five:
    # /ssd/xiedong/hagrid/hagrid/hagrid_yolo_format/train/call/fff0de6d-e13a-46fc-b4da-b6cc30b64193.jpg
    labelfilename = imgname.replace(".jpg", ".txt").replace("train/", "train_labels/")
    with open(labelfilename, 'r') as f:
        lb_lines = f.read().splitlines()
    # 0 0.5 0.5 0.5 0.5
    # 画框 写类别
    img = cv2.imread(imgname)
    for lb in lb_lines:
        lb = lb.split()
        x, y, w, h = map(float, lb[1:])
        x1, y1, x2, y2 = int((x - w / 2) * img.shape[1]), int((y - h / 2) * img.shape[0]), int(
            (x + w / 2) * img.shape[1]), int((y + h / 2) * img.shape[0])
        cv2.rectangle(img, (x1, y1), (x2, y2), (0, 255, 0), 2)
        cv2.putText(img, lb[0], (x1, y1), cv2.FONT_HERSHEY_SIMPLEX, 1, (0, 255, 0), 2)
    # 保存
    cv2.imwrite(os.path.join(dstpath, os.path.basename(imgname)), img)
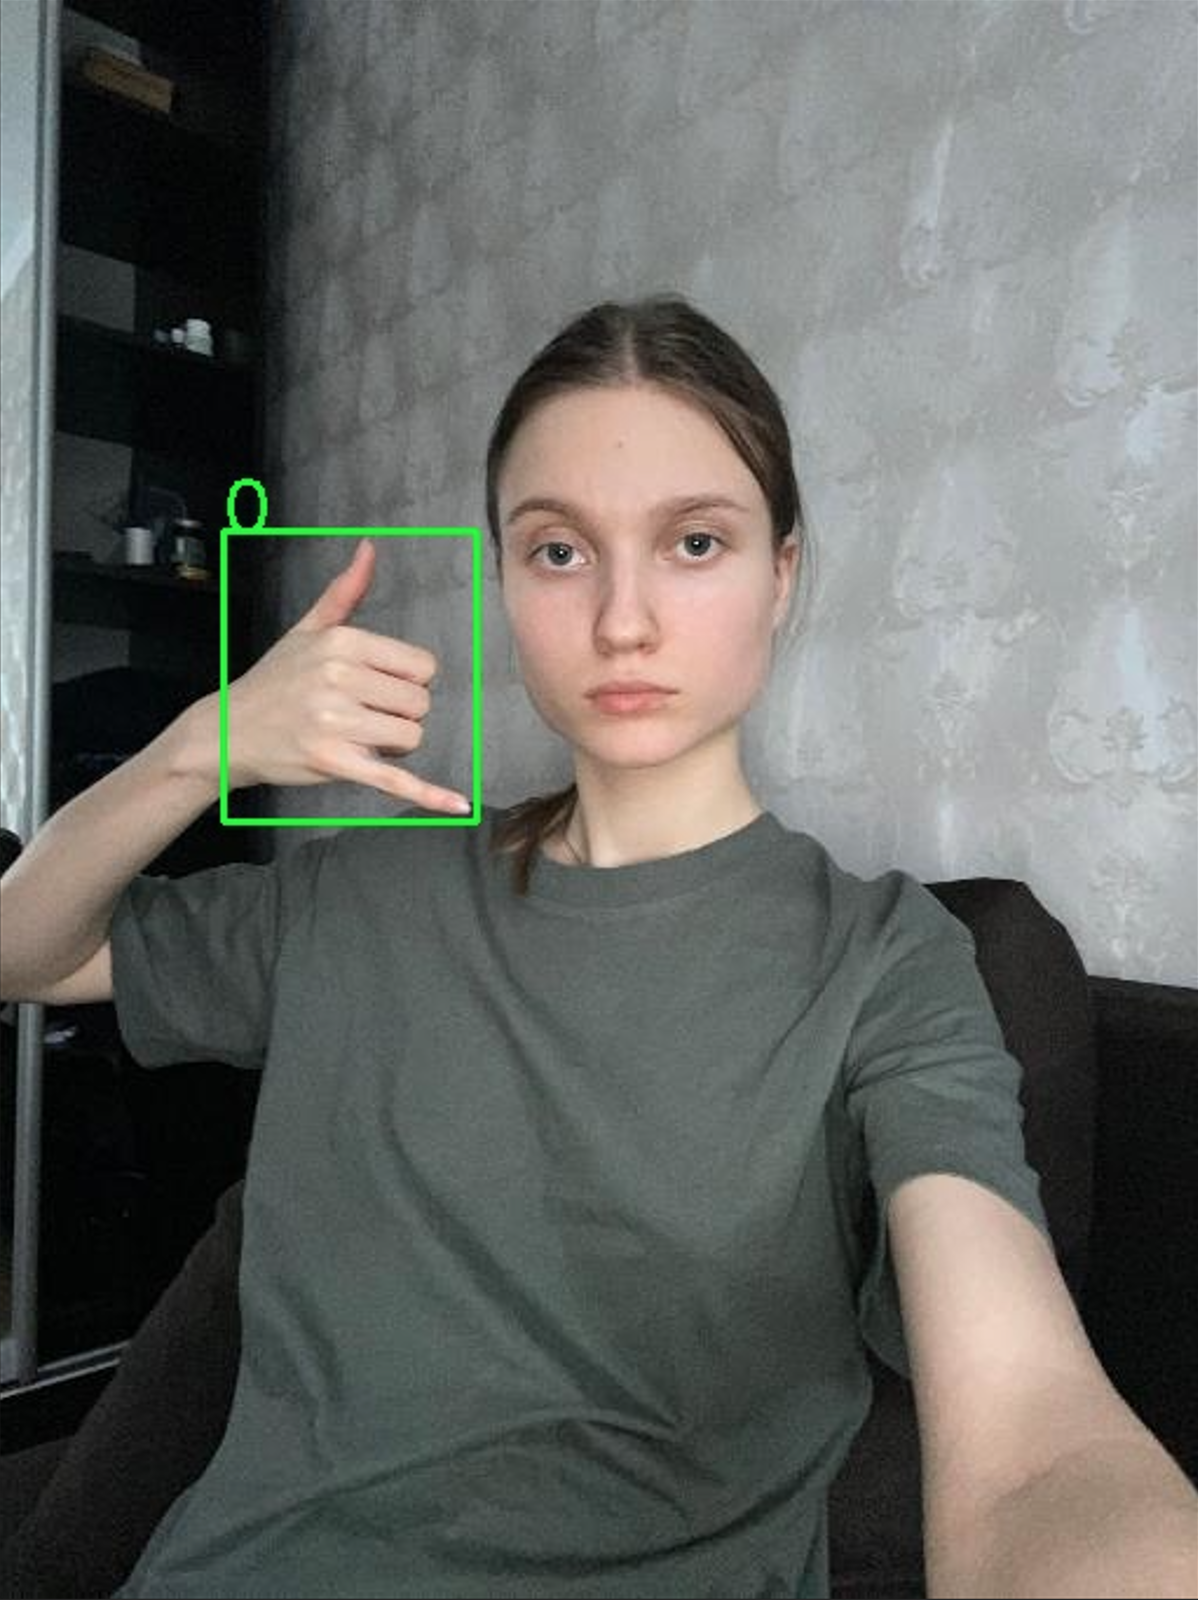
画图的结果在/ssd/xiedong/hagrid/hagrid/output_five/中,其中一张:

思考类别是否转换
目前有19个类别=18个有用类别+1个no_gesture类别负样本。
即使我们最终想要的只有5个类别:one、peace、frist、palm、ok。 我们还是选择用19个类别,这样模型可以看到更多的手势差异,便于模型学习辨认,而我们只是提高了一点分类ce softmax的计算量。我们需求的5个类别可以从19个类别中拿,从功能上也没缺什么。
targets:
- call
- dislike
- fist
- four
- like
- mute
- ok
- one
- palm
- peace
- rock
- stop
- stop_inverted
- three
- two_up
- two_up_inverted
- three2
- peace_inverted
- no_gesture
下载yolov5
下载yolov5
git clone https://github.com/ultralytics/yolov5.git
cd yolov5/
创建环境:
conda create -n py310_yolov5 python=3.10 -y
conda activate py310_yolov5
装一个可以用的torch:
# CUDA 11.8
conda install pytorch==2.1.2 torchvision==0.16.2 torchaudio==2.1.2 pytorch-cuda=11.8 -c pytorch -c nvidia
取消这2个:

然后安装一些别的包:
pip install -r requirements.txt # install
随后更多内容参考官网这里的训练指导:
https://docs.ultralytics.com/zh/yolov5/tutorials/train_custom_data/#before-you-start
修改数据集样式以符合yolov5
这样移动:
cd /ssd/xiedong/hagrid/hagrid/hagrid_yolo_format
mkdir images
mv test/ train/ val/ images/
mkdir labels
mv test_labels/ train_labels/ val_labels/ labels/

mv  labels/test_labels labels/test
mv  labels/train_labels labels/train
mv  labels/val_labels labels/val
此时的文件目录:
# tree -L 2
.
├── images
│   ├── test
│   ├── train
│   └── val
├── labels
│   ├── test
│   ├── train
│   └── val
├── test.txt
├── train.txt
└── val.txt

8 directories, 3 files
为了增加一个路径 images:
这个命令中的-i选项表示直接在文件中进行替换操作,s|old|new|g表示将每一行中的old替换为new,最后的g表示全局替换(即一行中可能出现多次替换):
sed -i 's|/ssd/xiedong/hagrid/hagrid/hagrid_yolo_format/|/ssd/xiedong/hagrid/hagrid/hagrid_yolo_format/images/|g' train.txt
sed -i 's|/ssd/xiedong/hagrid/hagrid/hagrid_yolo_format/|/ssd/xiedong/hagrid/hagrid/hagrid_yolo_format/images/|g' test.txt
sed -i 's|/ssd/xiedong/hagrid/hagrid/hagrid_yolo_format/|/ssd/xiedong/hagrid/hagrid/hagrid_yolo_format/images/|g' val.txt
创建 dataset.yaml
创建文件:
cd yolov5/data
cp coco.yaml hagrid.yaml
将hagrid.yaml修改为这样:
path: /ssd/xiedong/hagrid/hagrid/hagrid_yolo_format
train: train.txt
val: val.txt
test: test.txt

# Classes
names:
  0: call
  1: dislike
  2: fist
  3: four
  4: like
  5: mute
  6: ok
  7: one
  8: palm
  9: peace
  10: rock
  11: stop
  12: stop_inverted
  13: three
  14: two_up
  15: two_up_inverted
  16: three2
  17: peace_inverted
  18: no_gesture
训练参数
使用python train.py --help查看训练参数:
# python train.py --help
警告 ⚠️ Ultralytics 设置已重置为默认值。这可能是由于您的设置存在问题或最近 Ultralytics 包更新导致的。
使用 'yolo settings' 命令或查看 '/home/xiedong/.config/Ultralytics/settings.yaml' 文件来查看设置。
使用 'yolo settings key=value' 命令来更新设置,例如 'yolo settings runs_dir=path/to/dir'。更多帮助请参考 https://docs.ultralytics.com/quickstart/#ultralytics-settings。
用法: train.py [-h] [--weights WEIGHTS] [--cfg CFG] [--data DATA] [--hyp HYP] [--epochs EPOCHS] [--batch-size BATCH_SIZE] [--imgsz IMGSZ] [--rect] [--resume [RESUME]]
                [--nosave] [--noval] [--noautoanchor] [--noplots] [--evolve [EVOLVE]] [--evolve_population EVOLVE_POPULATION] [--resume_evolve RESUME_EVOLVE]
                [--bucket BUCKET] [--cache [CACHE]] [--image-weights] [--device DEVICE] [--multi-scale] [--single-cls] [--optimizer {SGD,Adam,AdamW}] [--sync-bn]
                [--workers WORKERS] [--project PROJECT] [--name NAME] [--exist-ok] [--quad] [--cos-lr] [--label-smoothing LABEL_SMOOTHING] [--patience PATIENCE]
                [--freeze FREEZE [FREEZE ...]] [--save-period SAVE_PERIOD] [--seed SEED] [--local_rank LOCAL_RANK] [--entity ENTITY] [--upload_dataset [UPLOAD_DATASET]]
                [--bbox_interval BBOX_INTERVAL] [--artifact_alias ARTIFACT_ALIAS] [--ndjson-console] [--ndjson-file]

选项:
  -h, --help            显示帮助信息并退出
  --weights WEIGHTS     初始权重路径
  --cfg CFG             模型配置文件路径
  --data DATA           数据集配置文件路径
  --hyp HYP             超参数路径
  --epochs EPOCHS       总训练轮数
  --batch-size BATCH_SIZE
                        所有 GPU 的总批量大小,-1 表示自动批处理
  --imgsz IMGSZ, --img IMGSZ, --img-size IMGSZ
                        训练、验证图像大小(像素)
  --rect                矩形训练
  --resume [RESUME]     恢复最近的训练
  --nosave              仅保存最终检查点
  --noval               仅验证最终轮次
  --noautoanchor        禁用 AutoAnchor
  --noplots             不保存绘图文件
  --evolve [EVOLVE]     为 x 代演进超参数
  --evolve_population EVOLVE_POPULATION
                        加载种群的位置
  --resume_evolve RESUME_EVOLVE
                        从上一代演进恢复
  --bucket BUCKET       gsutil 存储桶
  --cache [CACHE]       图像缓存 ram/disk
  --image-weights       在训练时使用加权图像选择
  --device DEVICE       cuda 设备,例如 0 或 0,1,2,3 或 cpu
  --multi-scale         图像大小变化范围为 +/- 50%
  --single-cls          将多类数据作为单类训练
  --optimizer {SGD,Adam,AdamW}
                        优化器
  --sync-bn             使用 SyncBatchNorm,仅在 DDP 模式下可用
  --workers WORKERS     最大数据加载器工作进程数(每个 DDP 模式中的 RANK)
  --project PROJECT     保存到项目/名称
  --name NAME           保存到项目/名称
  --exist-ok            存在的项目/名称正常,不增加
  --quad                四通道数据加载器
  --cos-lr              余弦学习率调度器
  --label-smoothing LABEL_SMOOTHING
                        标签平滑 epsilon
  --patience PATIENCE   EarlyStopping 耐心(未改善的轮次)
  --freeze FREEZE [FREEZE ...]
                        冻结层:backbone=10, first3=0 1 2
  --save-period SAVE_PERIOD
                        每 x 轮保存检查点(如果 < 1 则禁用)
  --seed SEED           全局训练种子
  --local_rank LOCAL_RANK
                        自动 DDP 多 GPU 参数,不要修改
  --entity ENTITY       实体
  --upload_dataset [UPLOAD_DATASET]
                        上传数据,"val" 选项
  --bbox_interval BBOX_INTERVAL
                        设置边界框图像记录间隔
  --artifact_alias ARTIFACT_ALIAS
                        要使用的数据集 artifact 版本
  --ndjson-console      将 ndjson 记录到控制台
  --ndjson-file         将 ndjson 记录到文件
开始训练
多卡训练:
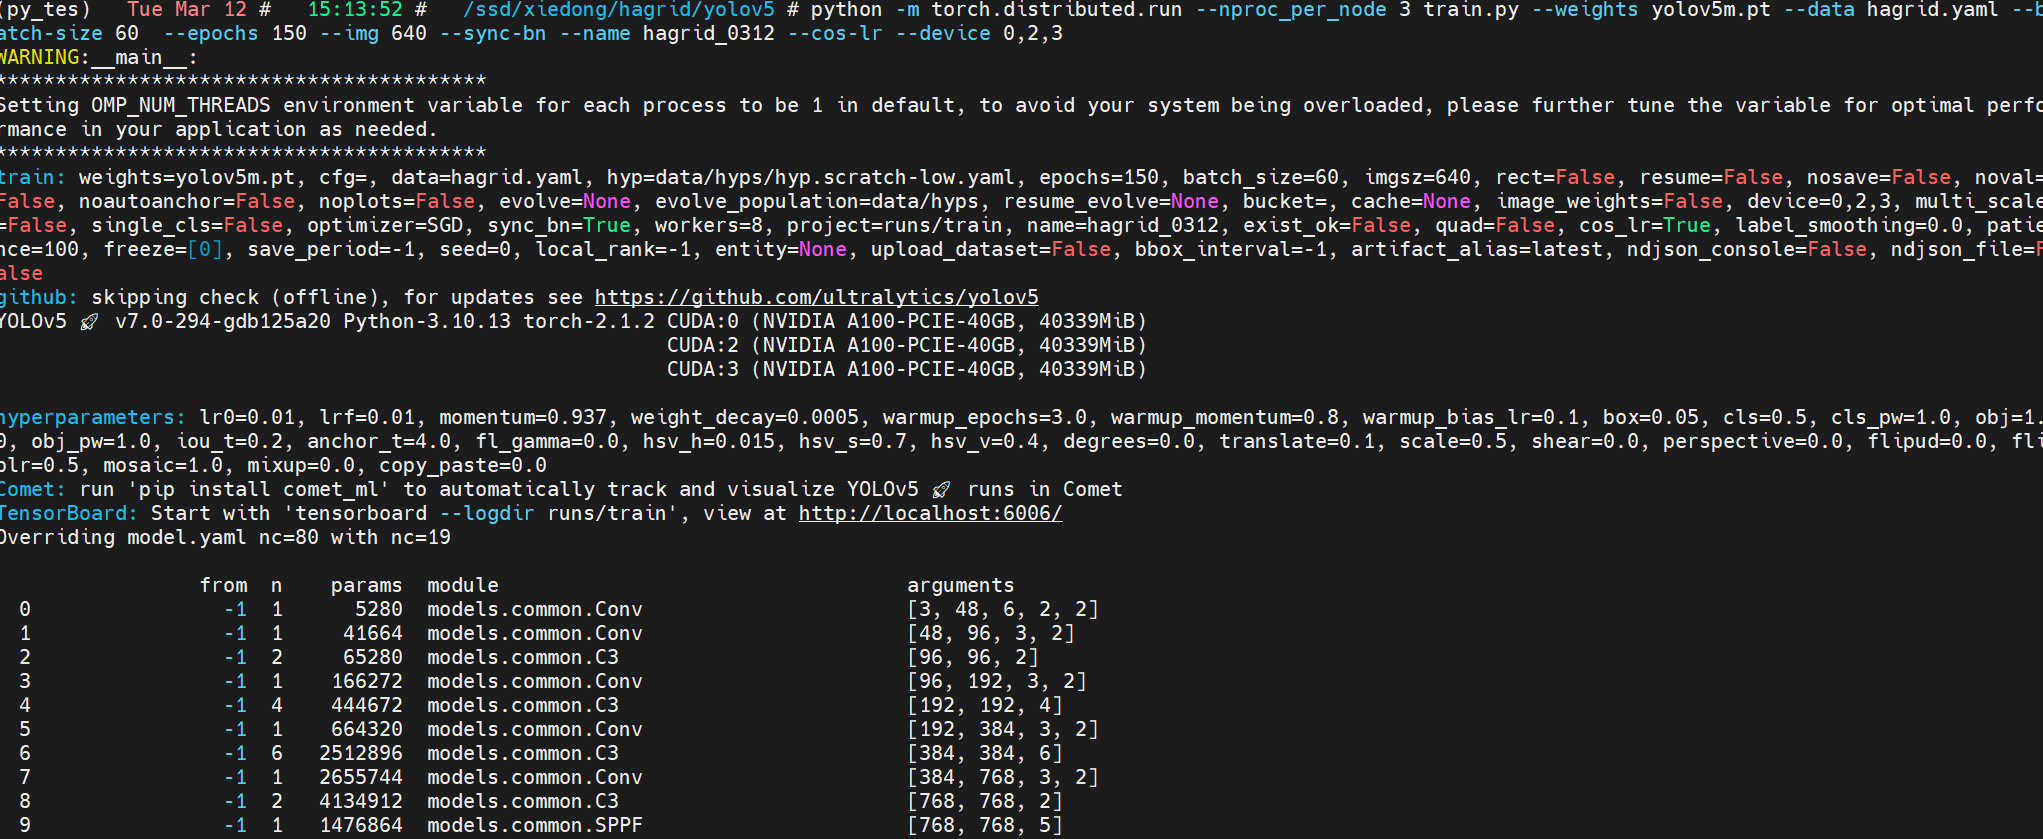
python -m torch.distributed.run --nproc_per_node 3 train.py --weights yolov5m.pt --data hagrid.yaml --batch-size 90 --epochs 150 --img 640 --sync-bn --name hagrid_0312 --cos-lr --device 0,2,3
正常启动训练:

训练分析
第一轮完成后就是非常收敛的表现。数据量太大,收敛得太好,看来不用训练150轮。

调整到训练20轮结束:
python -m torch.distributed.run --nproc_per_node 3 train.py --weights /ssd/xiedong/hagrid/yolov5/runs/train/hagrid_03129/weights/last.pt --data hagrid.yaml --batch-size 102 --epochs 20 --img 640 --sync-bn --name hagrid_0312_epoch10x --cos-lr --device 0,2,3 --noval
推理
推理:
python detect.py --weights /ssd/xiedong/hagrid/yolov5/runs/train/hagrid_03129/weights/last.pt --source /ssd/xiedong/hagrid/yolov5/demov.mp4
模型转换onnx
先装环境:
pip install onnx onnx-simplifier onnxruntime-gpu # gpu版本
pip install onnx onnx-simplifier onnxruntime # cpu版本
导出:
python export.py --weights /ssd/xiedong/hagrid/yolov5/runs/train/hagrid_03129/weights/last.pt --include onnx
成功:

推理:
python detect.py --weights /ssd/xiedong/hagrid/yolov5/runs/train/hagrid_03129/weights/last.onnx --source /ssd/xiedong/hagrid/yolov5/demov.mp4
重训一个yolov5s
训练40轮:
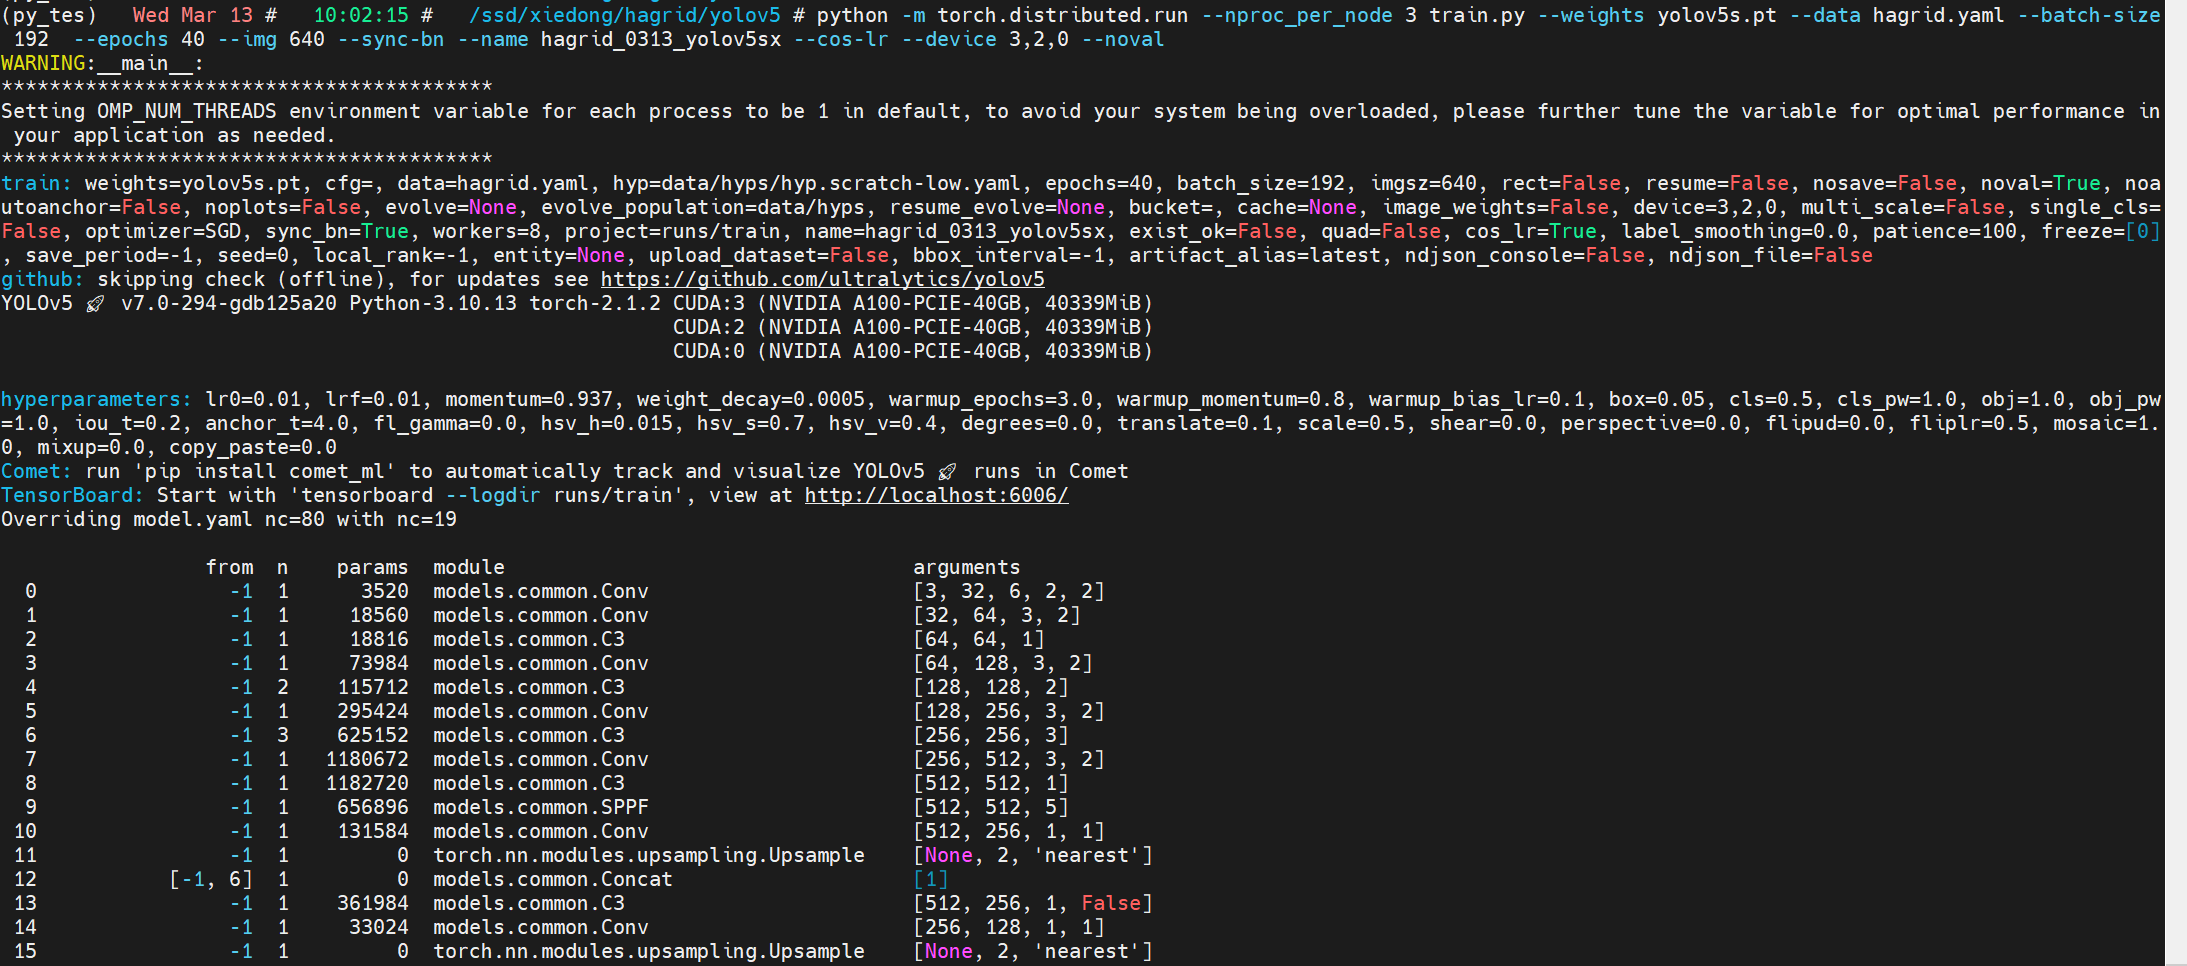
python -m torch.distributed.run --nproc_per_node 3 train.py --weights yolov5s.pt --data hagrid.yaml --batch-size 192 --epochs 40 --img 640 --sync-bn --name hagrid_0313_yolov5sx --cos-lr --device 3,2,0 --noval

后记
需要训练、数据、代码、指导,请私信。
