一.简易axios封装-获取省份列表
1. 需求:基于 Promise 和 XHR 封装 myAxios 函数,获取省份列表展示到页面
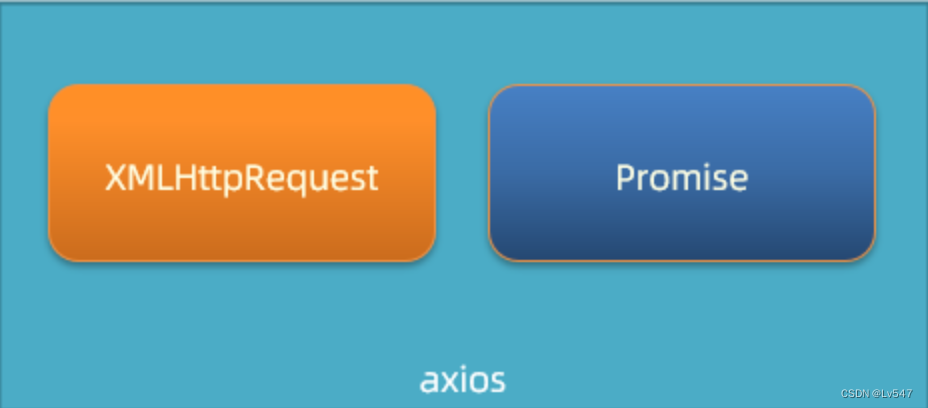
2. 核心语法:
function myAxios(config) {
  return new Promise((resolve, reject) => {
    // XHR 请求
    // 调用成功/失败的处理程序
  })
}

myAxios({
  url: '目标资源地址'
}).then(result => {

}).catch(error => {

})
3. 步骤:
- 定义 myAxios 函数,接收配置对象,返回 Promise 对象
- 发起 XHR 请求,默认请求方法为 GET
- 调用成功/失败的处理程序
- 使用 myAxios 函数,获取省份列表展示
4. 核心代码如下:
/**
 * 目标:封装_简易axios函数_获取省份列表
 *  1. 定义myAxios函数,接收配置对象,返回Promise对象
 *  2. 发起XHR请求,默认请求方法为GET
 *  3. 调用成功/失败的处理程序
 *  4. 使用myAxios函数,获取省份列表展示
*/
// 1. 定义myAxios函数,接收配置对象,返回Promise对象
function myAxios(config) {
  return new Promise((resolve, reject) => {
    // 2. 发起XHR请求,默认请求方法为GET
    const xhr = new XMLHttpRequest()
    xhr.open(config.method || 'GET', config.url)
    xhr.addEventListener('loadend', () => {
      // 3. 调用成功/失败的处理程序
      if (xhr.status >= 200 && xhr.status < 300) {
        resolve(JSON.parse(xhr.response))
      } else {
        reject(new Error(xhr.response))
      }
    })
    xhr.send()
  })
}

// 4. 使用myAxios函数,获取省份列表展示
myAxios({
  url: 'http://hmajax.itheima.net/api/province'
}).then(result => {
  console.log(result)
  document.querySelector('.my-p').innerHTML = result.list.join('<br>')
}).catch(error => {
  console.log(error)
  document.querySelector('.my-p').innerHTML = error.message
})
二.简易axios封装-获取地区列表
1. 需求:
在上个封装的建议 axios 函数基础上,修改代码支持传递查询参数功能
2. 修改步骤:
- myAxios 函数调用后,判断 params 选项
- 基于 URLSearchParams 转换查询参数字符串
- 使用自己封装的 myAxios 函数显示地区列表
3. 核心代码:
function myAxios(config) {
  return new Promise((resolve, reject) => {
    const xhr = new XMLHttpRequest()
    // 1. 判断有params选项,携带查询参数
    if (config.params) {
      // 2. 使用URLSearchParams转换,并携带到url上
      const paramsObj = new URLSearchParams(config.params)
      const queryString = paramsObj.toString()
      // 把查询参数字符串,拼接在url?后面
      config.url += `?${queryString}`
    }

    xhr.open(config.method || 'GET', config.url)
    xhr.addEventListener('loadend', () => {
      if (xhr.status >= 200 && xhr.status < 300) {
        resolve(JSON.parse(xhr.response))
      } else {
        reject(new Error(xhr.response))
      }
    })
    xhr.send()
  })
}

// 3. 使用myAxios函数,获取地区列表
myAxios({
  url: 'http://hmajax.itheima.net/api/area',
  params: {
    pname: '辽宁省',
    cname: '大连市'
  }
}).then(result => {
  console.log(result)
  document.querySelector('.my-p').innerHTML = result.list.join('<br>')
})
三.封装_简易axios-注册用户
1. 需求:
修改 myAxios 函数支持传递请求体数据,完成注册用户功能
2. 修改步骤:
- myAxios 函数调用后,判断 data 选项
- 转换数据类型,在 send 方法中发送
- 使用自己封装的 myAxios 函数完成注册用户功能
3. 核心代码:
function myAxios(config) {
  return new Promise((resolve, reject) => {
    const xhr = new XMLHttpRequest()

    if (config.params) {
      const paramsObj = new URLSearchParams(config.params)
      const queryString = paramsObj.toString()
      config.url += `?${queryString}`
    }
    xhr.open(config.method || 'GET', config.url)

    xhr.addEventListener('loadend', () => {
      if (xhr.status >= 200 && xhr.status < 300) {
        resolve(JSON.parse(xhr.response))
      } else {
        reject(new Error(xhr.response))
      }
    })
    // 1. 判断有data选项,携带请求体
    if (config.data) {
      // 2. 转换数据类型,在send中发送
      const jsonStr = JSON.stringify(config.data)
      xhr.setRequestHeader('Content-Type', 'application/json')
      xhr.send(jsonStr)
    } else {
      // 如果没有请求体数据,正常的发起请求
      xhr.send()
    }
  })
}

document.querySelector('.reg-btn').addEventListener('click', () => {
  // 3. 使用myAxios函数,完成注册用户
  myAxios({
    url: 'http://hmajax.itheima.net/api/register',
    method: 'POST',
    data: {
      username: 'itheima999',
      password: '666666'
    }
  }).then(result => {
    console.log(result)
  }).catch(error => {
    console.dir(error)
  })
})
小结
1. 自己封装的 myAxios 如何设置默认请求方法 GET?
config.method 判断有值就用,无值用‘GET’方法
2. 外面传入查询参数对象,myAxios 函数内如何转查询参数字符串?
使用 URLSearchParams 对象转换
3. 外面传入 data 选项,myAxios 函数内如何携带请求体参数?
判断外面传入了这个属性,自己转成 JSON 字符串并设置请求头并在 send 方法中携带

![BUUCTF---[MRCTF2020]你传你呢1](https://img-blog.csdnimg.cn/direct/58d14ccf39814c3e809351c35fb2c942.png)

