vue3中新增了组合式API,本文讲解组合式API setup 的使用
关于setup 的出现和 vue3 js setup 的使用,笔者已经在2022年的文章中说明,这里不再赘述,需要的朋友可以阅读:《vue3 setup 使用教程》
官网文档:https://cn.vuejs.org/
目录
1、新建vue3 ts 项目
2、响应式变量
3、v-model 双向数据绑定
4、计算属性 computed
4.1、基本使用
4.2、可写的计算属性
5、侦听器 watch
5.1、基本使用
5.2、深层侦听
5.3、即时回调
5.4、一次性侦听
5.5、watchEffect()
6、模板引用 ref
7、类与样式绑定
7.1、绑定对象
7.2、绑定数组
7.3、三元表达式
7.4、绑定内联样式
8、生命周期钩子
9、父子组件通信
9.1、基本使用
9.2、搭配 TypeScript 使用
9.3、事件校验
10、依赖注入
1、新建vue3 ts 项目
在电脑上的空白文件目录下打开 cmd 窗口,执行下面命令
npm create vue@latest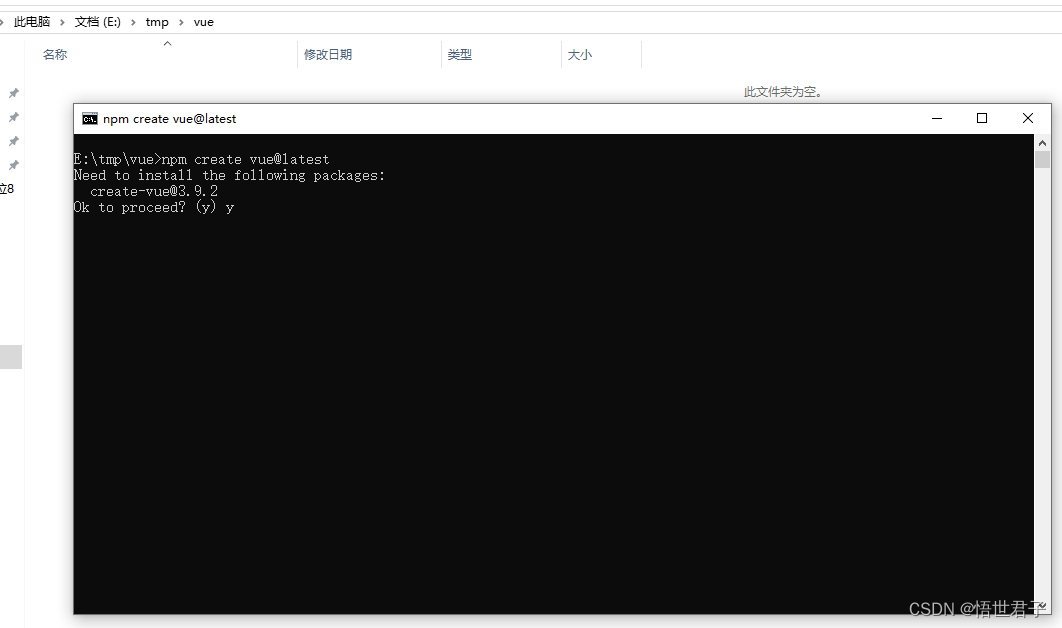
输入y 按回车
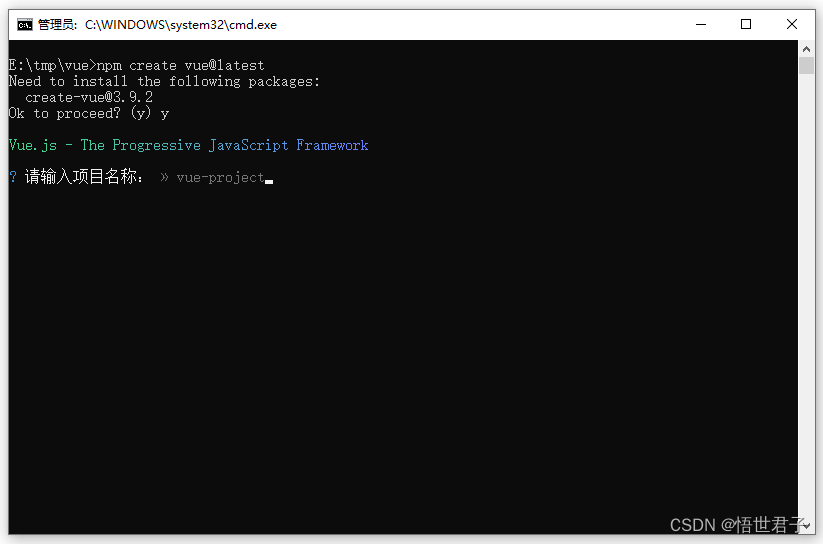
输入项目名 vue3-ts-project
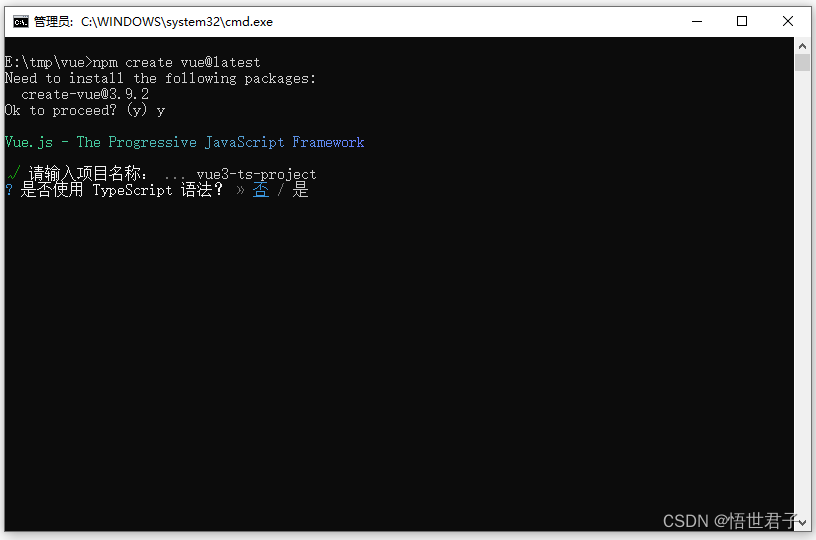
是否使用 ts 语法,选择 是
是否启用 JSX 支持,这个不影响学习,是或否都行,笔者选择 是
是否引入vue router,选择 是
是否使用 Pinia 用于状态管理,选择 是
是否引入 Vitest 用于单元测试,选择 是
是否要引入一款端到端测试工具,选择 不需要
是否引入 ESLint 用于代码质量检测,选择 是
是否引入 Prettier 用于代码格式化,选择 否

创建完成
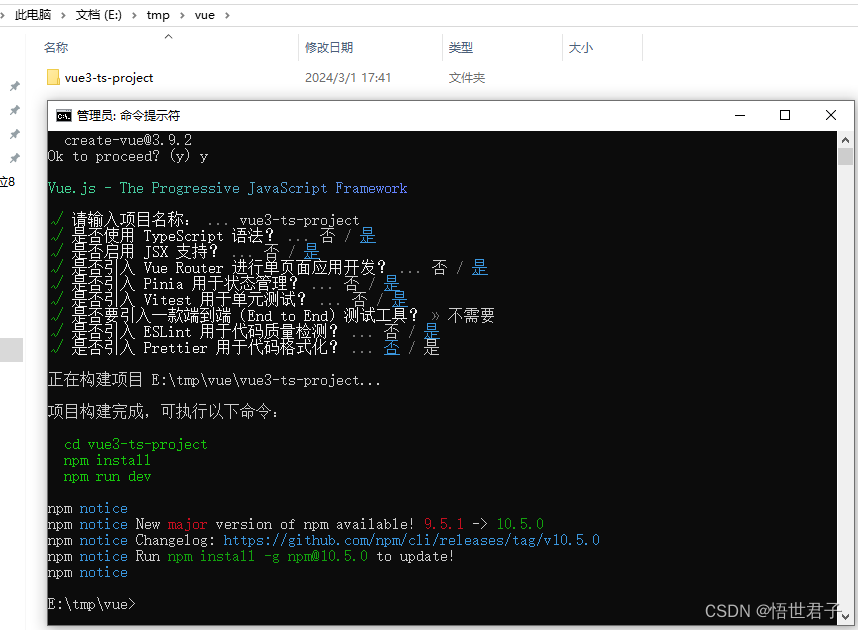
进入项目目录,安装依赖
cd vue3-ts-project 安装依赖
npm install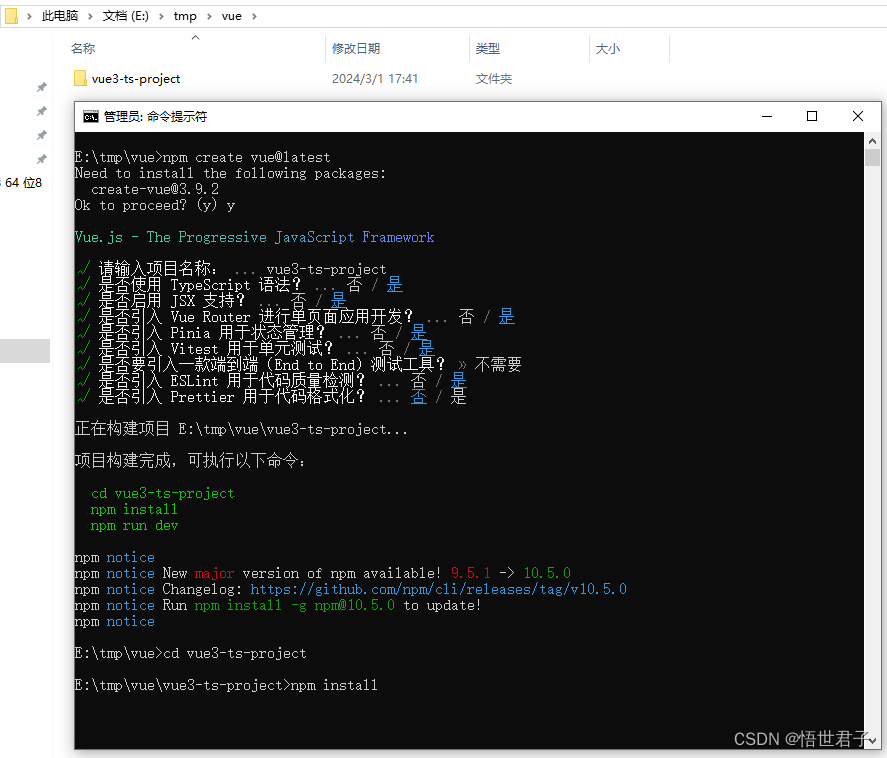
依赖安装完成

依赖安装完成后,使用 VS Code 打开项目
执行下面命令运行项目
npm run dev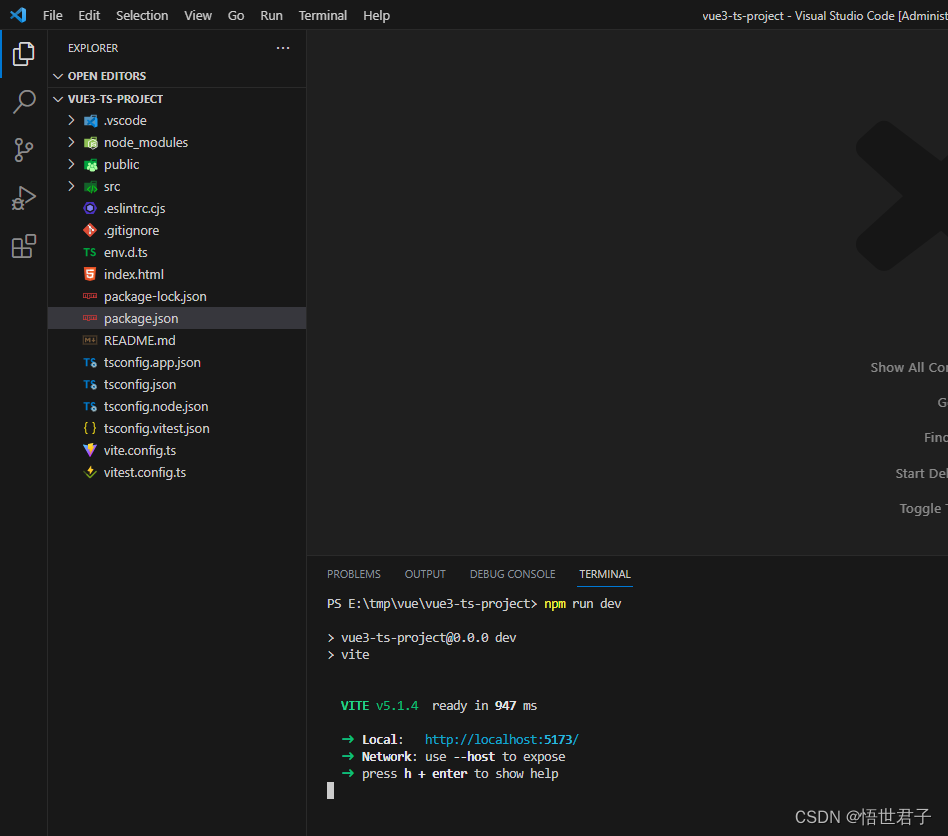
浏览器访问:http://localhost:5173/

出现这个页面说明项目创建成功
2、响应式变量
先将 main.css 中的样式替换为下面代码
@import './base.css';

#app {
  margin: 0 auto;
  padding: 2rem;
  font-weight: normal;
}
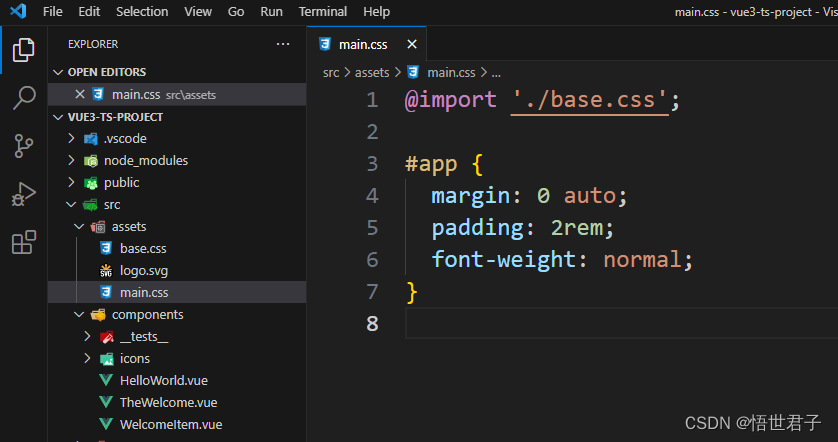
再App.vue 原来的内容全部删除,替换为下面代码
<template>
 <div>
  <p>{{name}}</p>
  <button @click="change">修改</button>
 </div>
</template>

<script setup lang="ts">
let name = '年少相逢意气豪,千金买醉度良宵'
function change() {
    name = '调筝人去秋风冷,一院梧桐影自摇'
}
</script>

<style scoped>
</style>
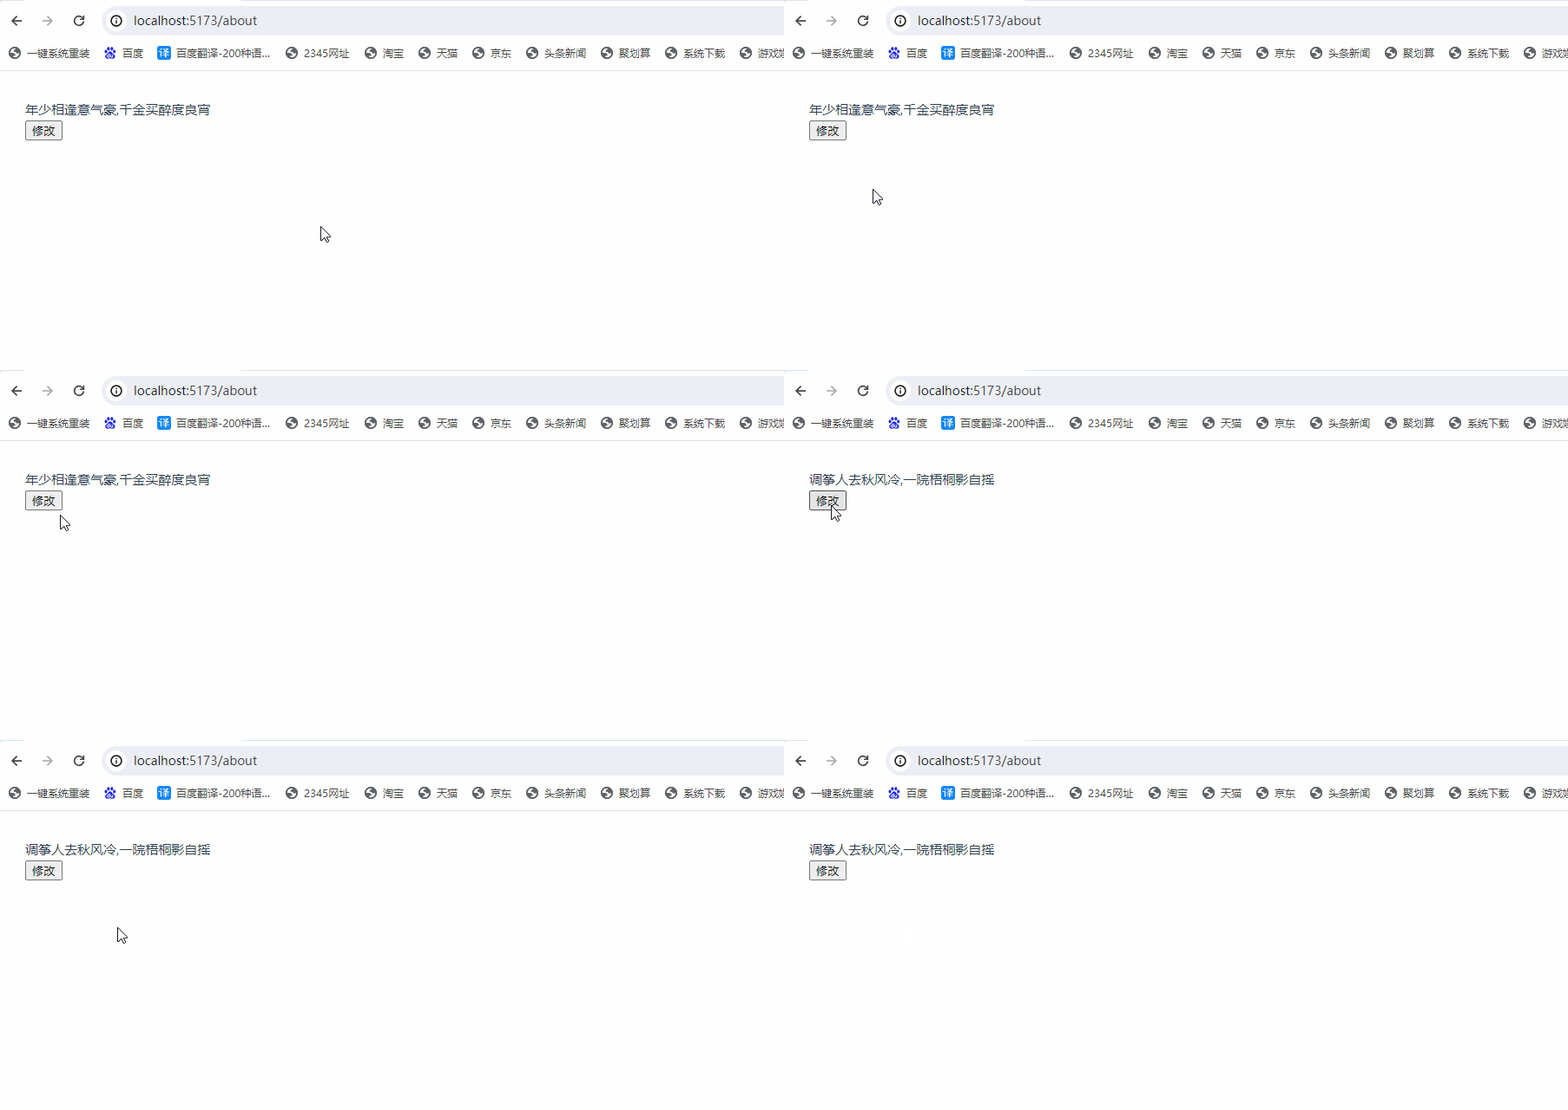
运行效果

发现点击按钮,变量不能修改,这是因为默认的 name 不再像vue2 一样默认就是响应式变量,需要使用 ref 或 reactive 函数转换一下,看下面代码
使用 ref
<template>
 <div>
  <p>{{name}}</p>
  <button @click="change">修改</button>
 </div>
</template>

<script setup lang="ts">
import { ref , reactive } from 'vue'
let name = ref('年少相逢意气豪,千金买醉度良宵')
function change() {
    name.value = '调筝人去秋风冷,一院梧桐影自摇'
}
</script>

<style scoped>
</style>
运行效果
使用 reactive
<template>
 <div>
  <p>{{nameObj.name}}</p>
  <button @click="change">修改</button>
 </div>
</template>

<script setup lang="ts">
import { ref , reactive } from 'vue'
let nameObj = reactive({name:'一客若蜀士,相逢意气豪'})
function change() {
    nameObj.name = '偶谈唐夹寨,遂及楚成皋'
}
</script>

<style scoped>
</style>
运行效果

注意 ref 和 reactive 的区别
ref 一般处理基本类型;reactive 处理复杂的数据类型
3、v-model 双向数据绑定
<template>
 <div>
  <p>{{name}}</p>
  <input type="text" v-model="name" />
 </div>
</template>

<script setup lang="ts">
import { ref , reactive } from 'vue'
let name = ref('顿洗风尘恶,都忘箠辔劳')

</script>

<style scoped>
</style>
运行效果

4、计算属性 computed
使用 computed 可实现计算
4.1、基本使用
<template>
 <div>
  <p>{{numberOfOnlineUsers}}</p>
  <button @click="add">添加在线人数</button>
 </div>
</template>

<script setup lang="ts">
import { ref , reactive, computed } from 'vue'
let name = ref('顿洗风尘恶,都忘箠辔劳')
let users = ref([])
const numberOfOnlineUsers = computed(()=>{
    return users.value.length > 0 ? '当前在线人数'+ users.value.length : '无人在线'
})
const add = ()=>{
    let date = new Date()
    users.value.push(date.getTime())
}
</script>

<style scoped>
</style>
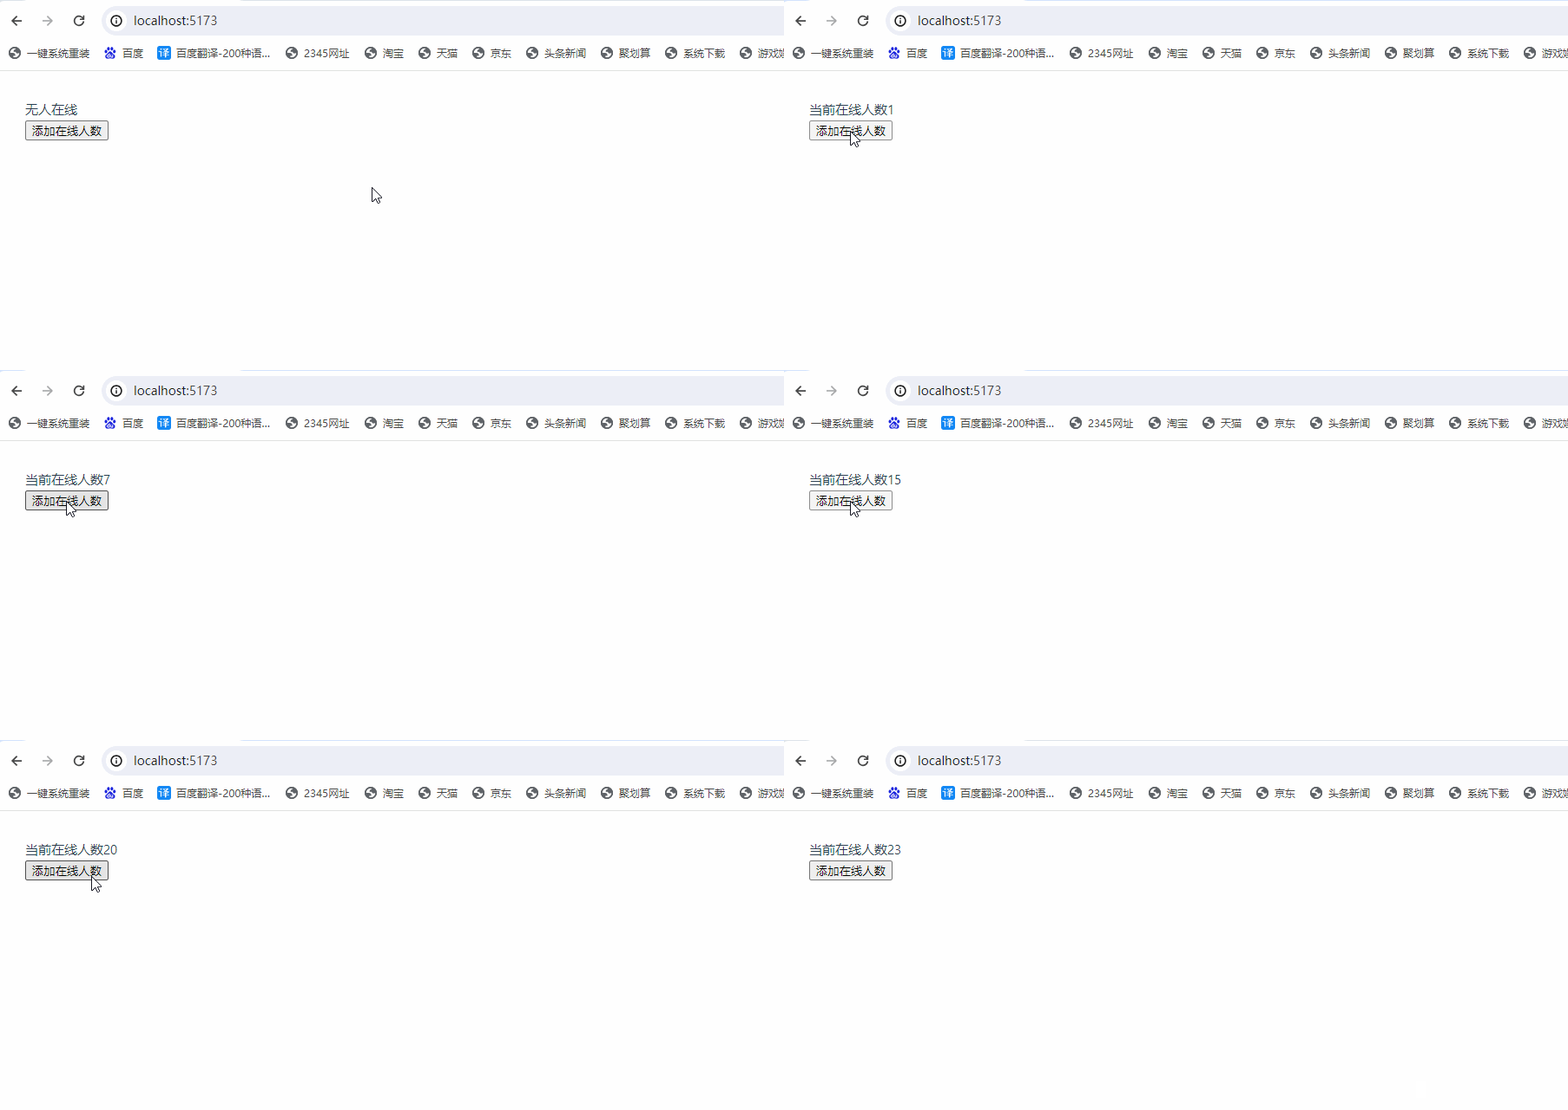
运行效果
4.2、可写的计算属性
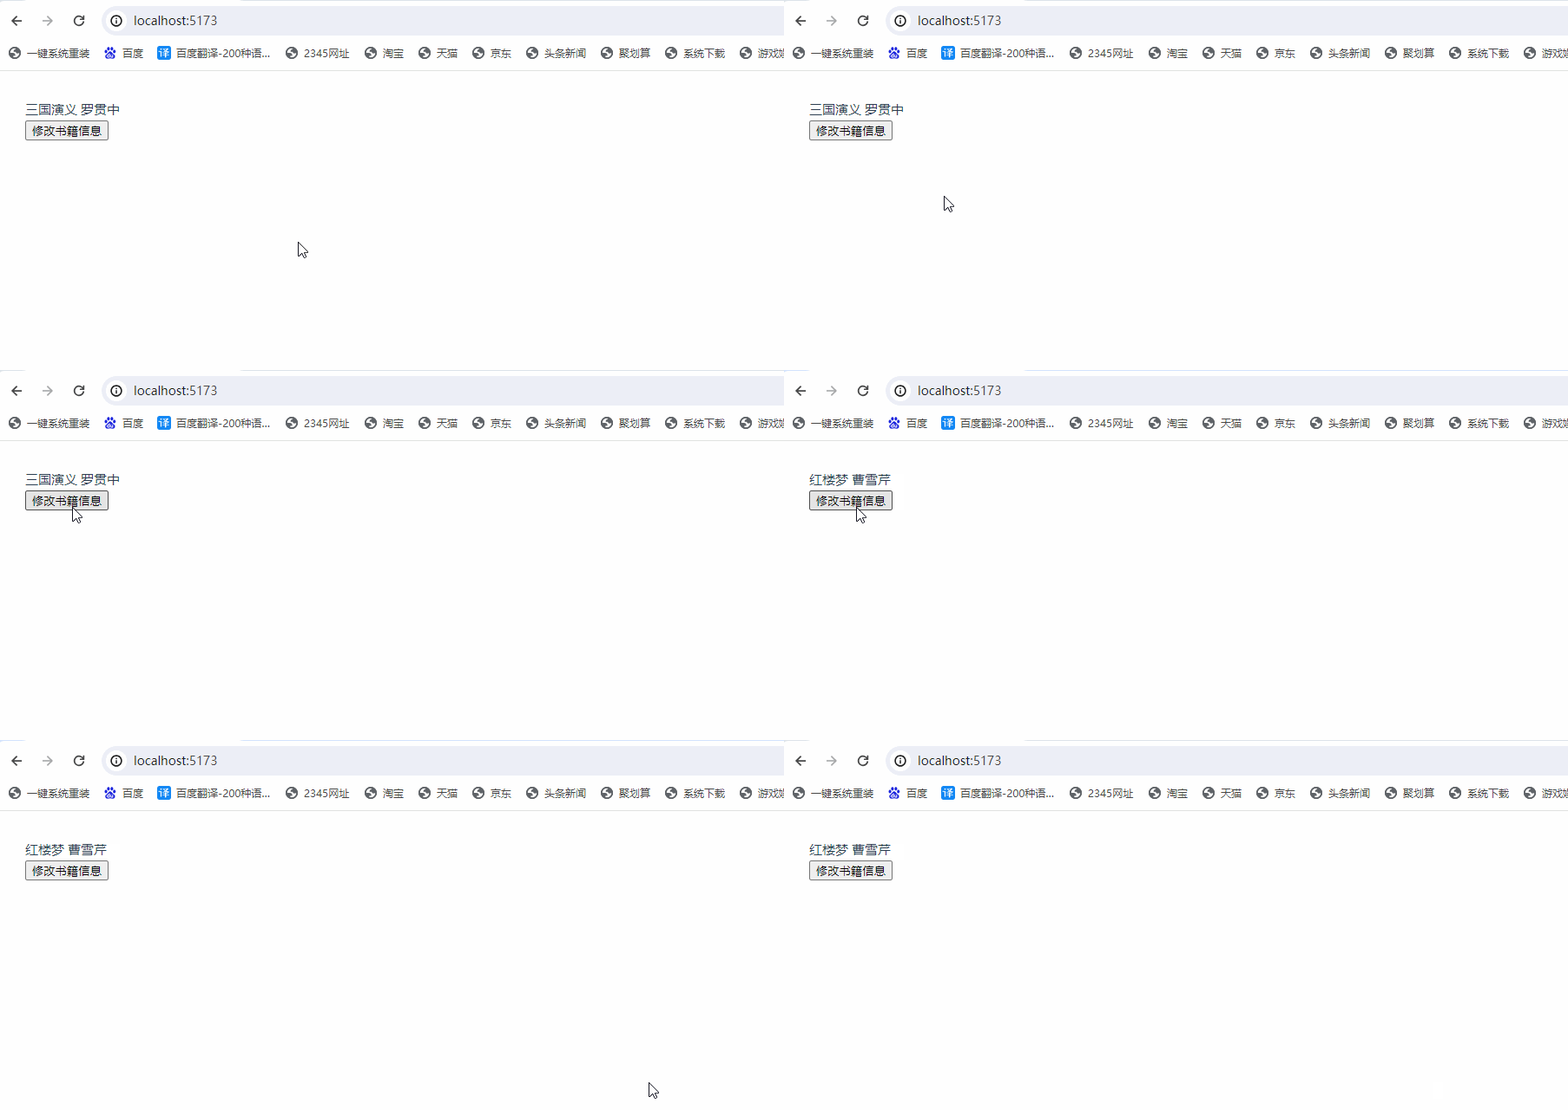
计算属性默认是只读的,可以通过同时提供 getter 和 setter 来创建
<template>
 <div>
  <p>{{bookInfo}}</p>
  <button @click="add">修改书籍信息</button>
 </div>
</template>

<script setup lang="ts">
import { ref , reactive, computed } from 'vue'
const bookName = ref('三国演义')
const authorName = ref('罗贯中')

const bookInfo = computed({
  // getter
  get() {
    return bookName.value + ' ' + authorName.value
  },
  // setter
  set(newValue) {
    let tmp = newValue.split(' ')
    bookName.value = tmp[0]
    authorName.value = tmp[1]
  }
})
const add = ()=>{
    bookInfo.value = '红楼梦 曹雪芹'
}
</script>

<style scoped>
</style>
运行效果
5、侦听器 watch
5.1、基本使用
<template>
 <div>
  <input type="text" v-model="name">
 </div>
</template>

<script setup lang="ts">
import { ref , reactive, watch } from 'vue'
let name = ref('三国演义')
watch(name, (newValue, oldValue)=>{
    console.log(oldValue);
    console.log(newValue);
})

</script>

<style scoped>
</style>
运行效果

5.2、深层侦听
深层侦听器需要添加 deep: true 属性。默认直接给 watch() 传入一个响应式对象,会隐式地创建一个深层侦听器——该回调函数在所有嵌套的变更时都会被触发,相比之下,一个返回响应式对象的函数,只有在返回不同的对象时,才会触发回调
看下面代码
<template>
 <div>
    <p>{{book.name}}</p>
    <button @click="change">修改</button>
 </div>
</template>

<script setup lang="ts">
import { ref , reactive, watch } from 'vue'
let book = reactive({name:'西游记', author: '施耐庵'})
watch(()=>book, (newValue)=>{
    console.log(newValue);
}
)

const change = ()=> {
    book.name = '道德经'
}
</script>

<style scoped>
</style>
运行效果
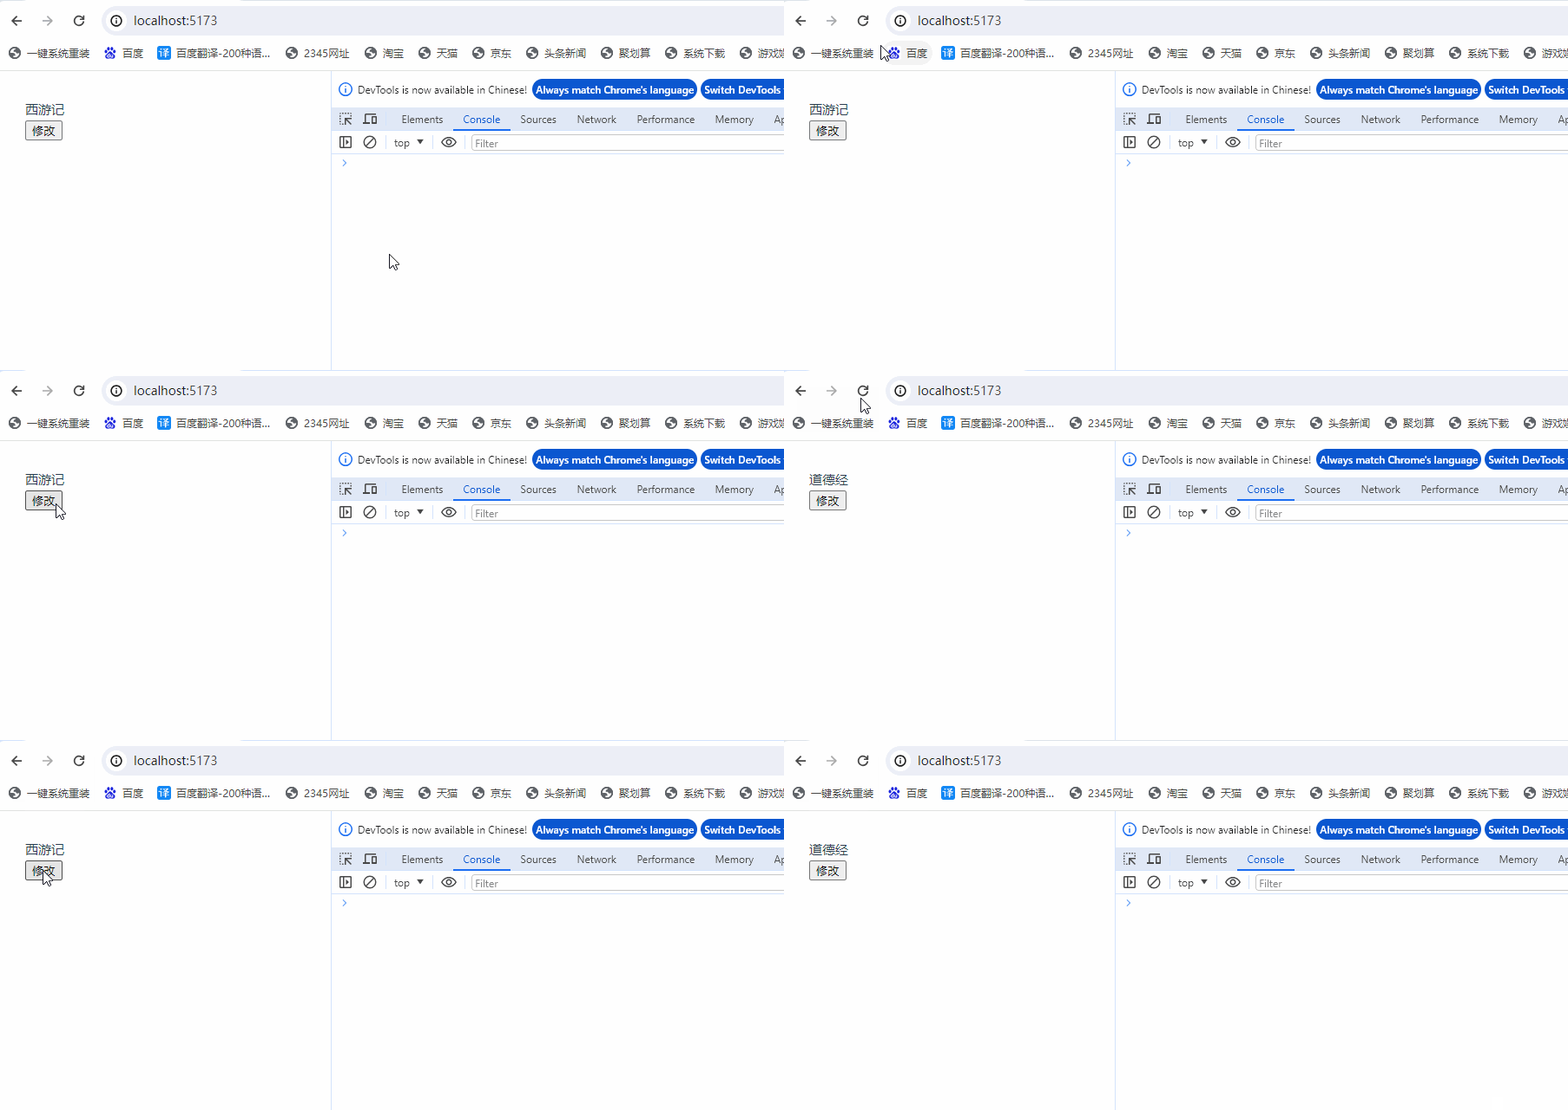
可以看到没有触发侦听
添加 深层侦听 后看下面代码
<template>
 <div>
    <p>{{book.name}}</p>
    <button @click="change">修改</button>
 </div>
</template>

<script setup lang="ts">
import { ref , reactive, watch } from 'vue'
let book = reactive({name:'西游记', author: '施耐庵'})
watch(()=>book, (newValue)=>{
    console.log(newValue);
},
{ deep: true }
)

const change = ()=> {
    book.name = '道德经'
}
</script>

<style scoped>
</style>
运行效果
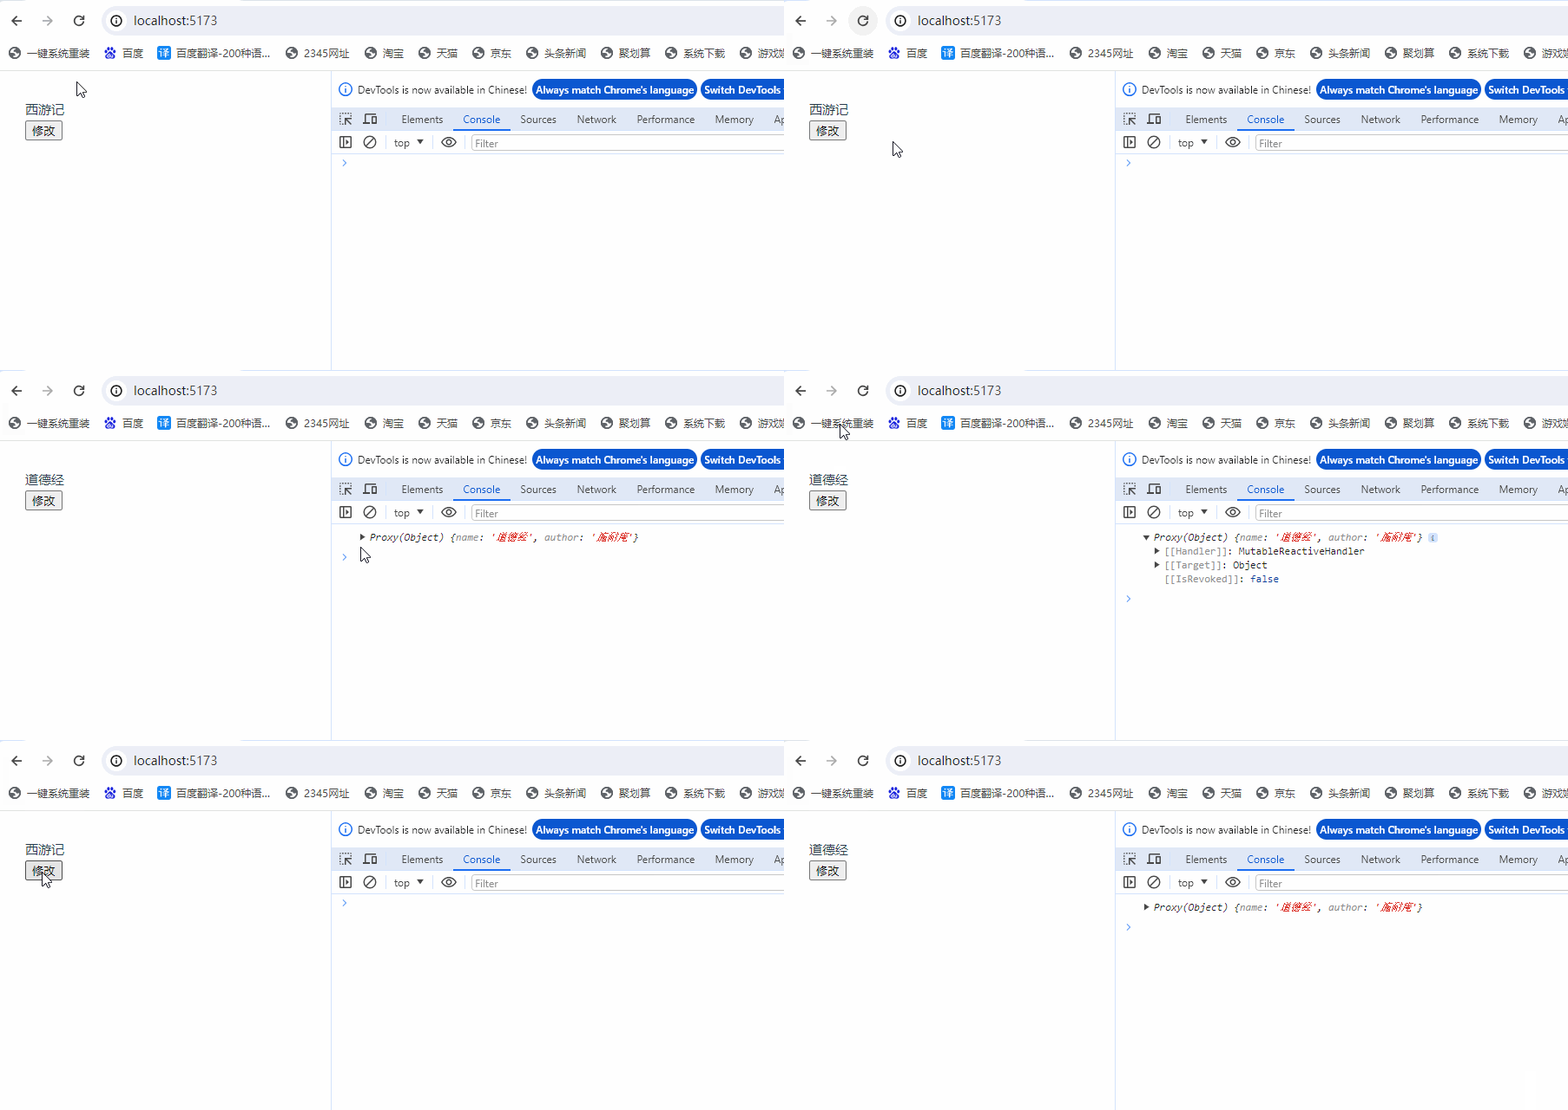
5.3、即时回调
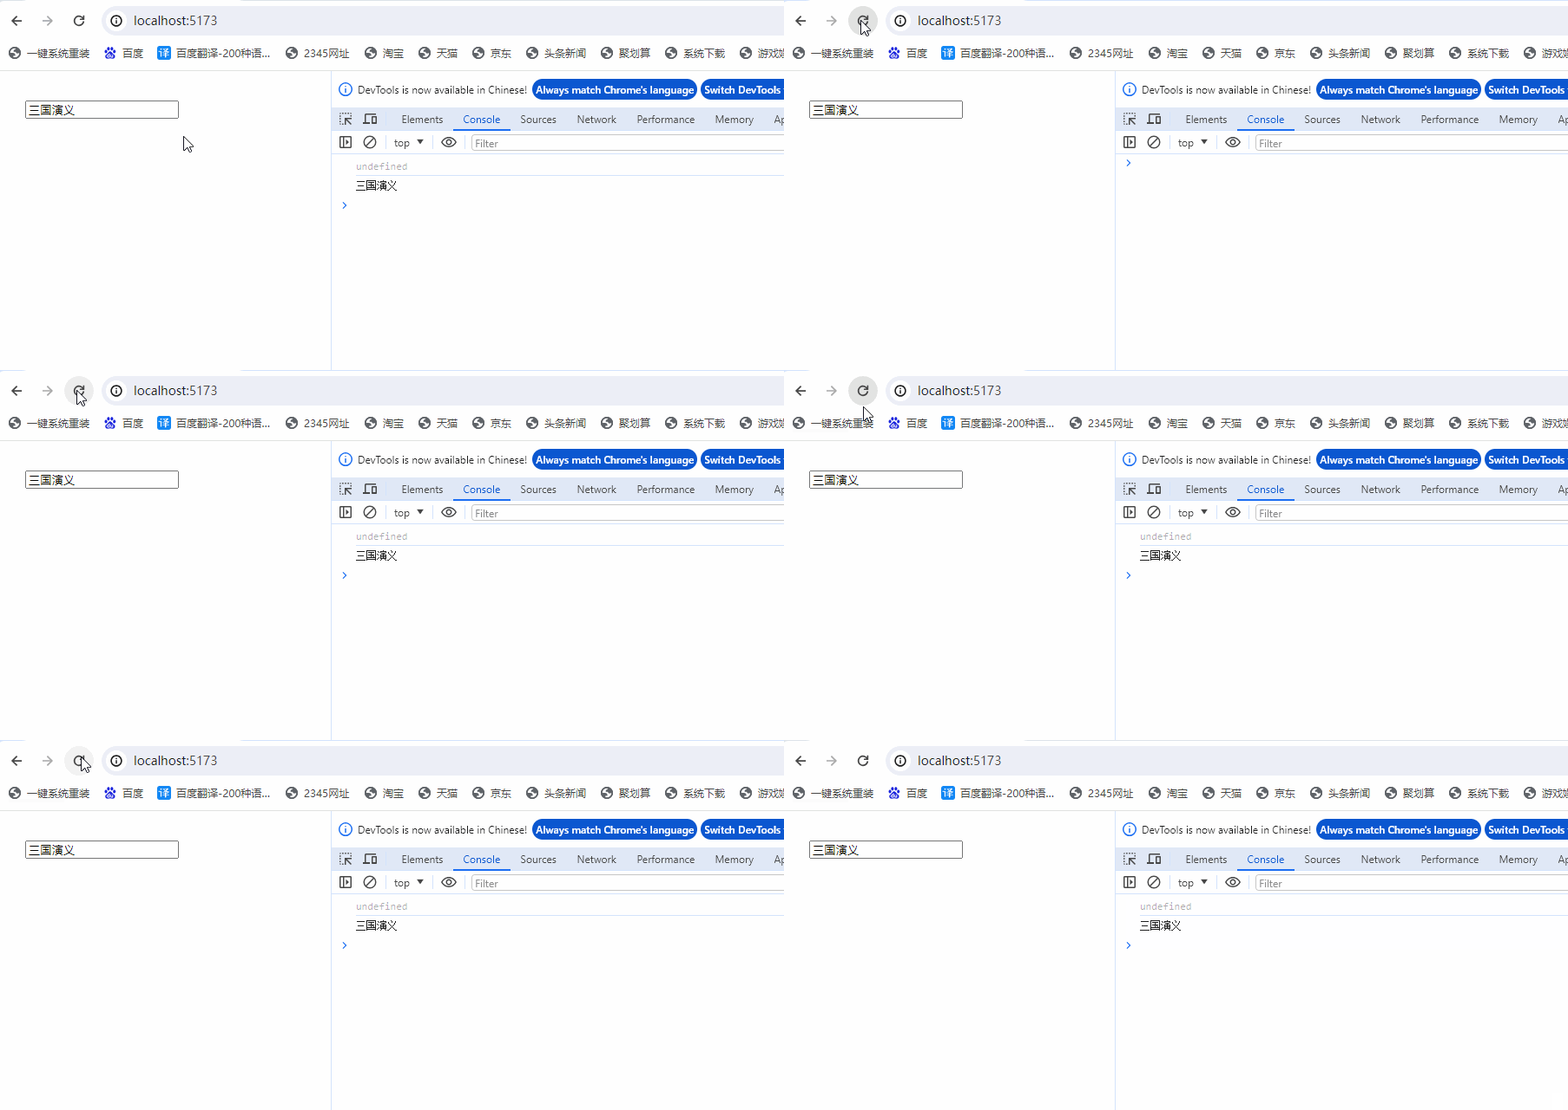
watch 默认是懒执行的,只有当数据源变化时,才会执行回调 。如果想在创建侦听器时,立即执行一遍回调,可以通过传入 immediate: true 选项来强制侦听器的回调立即执行
<template>
 <div>
  <input type="text" v-model="name">
 </div>
</template>

<script setup lang="ts">
import { ref , reactive, watch } from 'vue'
let name = ref('三国演义')
watch(name, (newValue, oldValue)=>{
    console.log(oldValue);
    console.log(newValue);
},
{ immediate: true }
)

</script>

<style scoped>
</style>
运行效果
5.4、一次性侦听
默认侦听器是每当被侦听源发生变化时,侦听器的回调就会执行。如果想让回调只在源变化时触发一次,可以使用 once: true 选项
<template>
 <div>
  <input type="text" v-model="name">
 </div>
</template>

<script setup lang="ts">
import { ref , reactive, watch } from 'vue'
let name = ref('三国演义')
watch(name, (newValue, oldValue)=>{
    console.log(oldValue);
    console.log(newValue);
},
{ once: true }
)

</script>

<style scoped>
</style>
运行效果
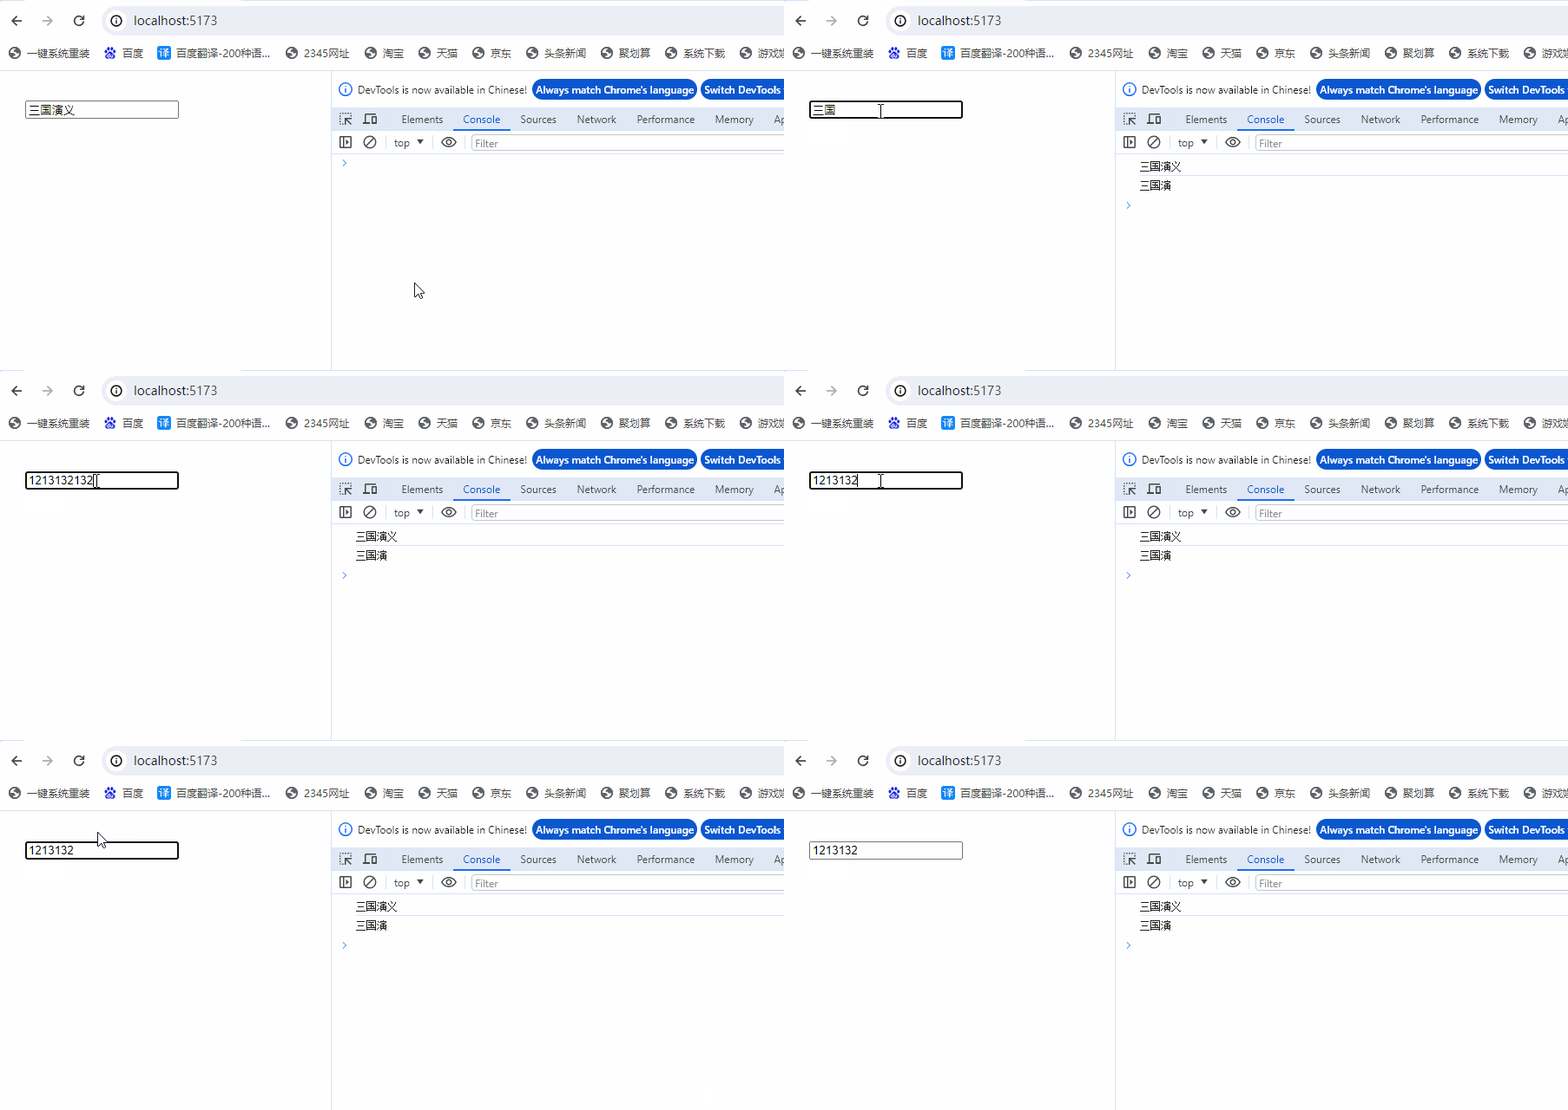
5.5、watchEffect()
当侦听器的回调使用与源完全相同的响应式状态时,可以使用 watchEffect 简化代码
先看 watch 的代码
<template>
 <div>
  <input type="text" v-model="name">
 </div>
</template>

<script setup lang="ts">
import { ref , reactive, watch, watchEffect } from 'vue'
let name = ref('三国演义')
watch(name, ()=>{
    httpGetRequest(name.value)
},
{ immediate: true }
)
//模拟发送请求
function httpGetRequest(username:string) {
    console.log('发送请求:' + username);
}
</script>

<style scoped>
</style>
运行效果
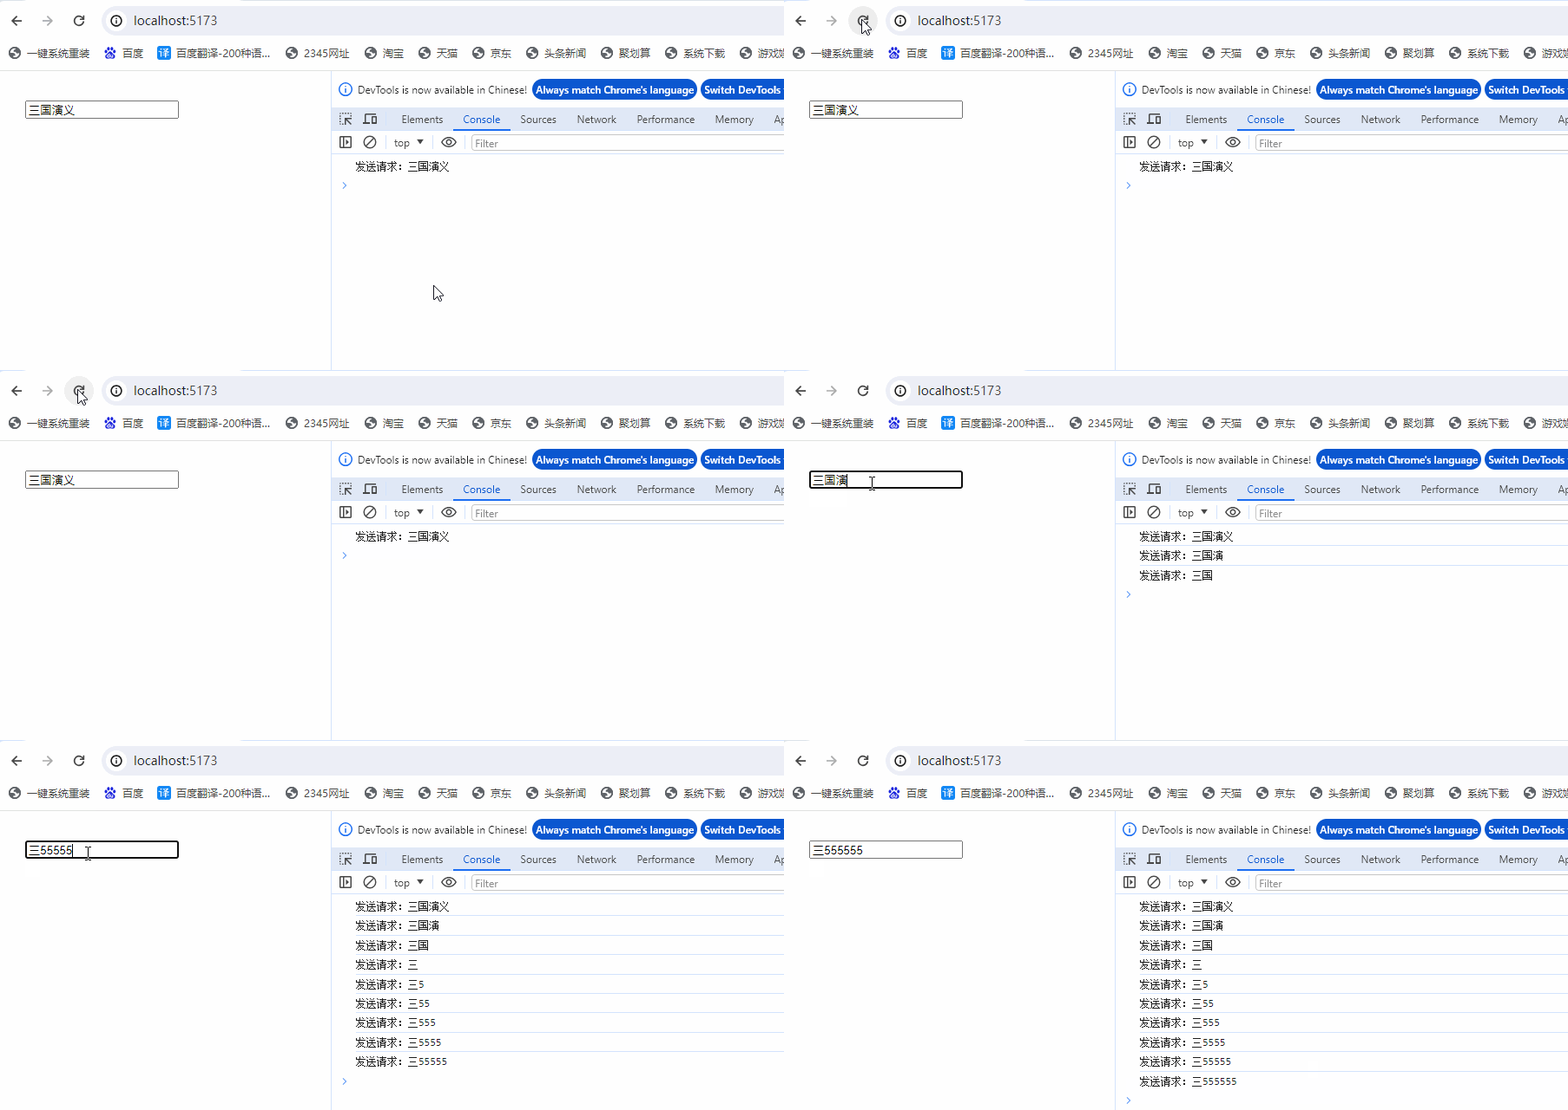
使用 watchEffect 简化上面 watch 代码
<template>
 <div>
  <input type="text" v-model="name">
 </div>
</template>

<script setup lang="ts">
import { ref , reactive, watch, watchEffect } from 'vue'
let name = ref('水浒传')
// watch(name, ()=>{
//     httpGetRequest(name.value)
// },
// { immediate: true }
// )
watchEffect(()=>{
    httpGetRequest(name.value)
})
//模拟发送请求
function httpGetRequest(username:string) {
    console.log('发送请求:' + username);
}
</script>

<style scoped>
</style>
运行效果
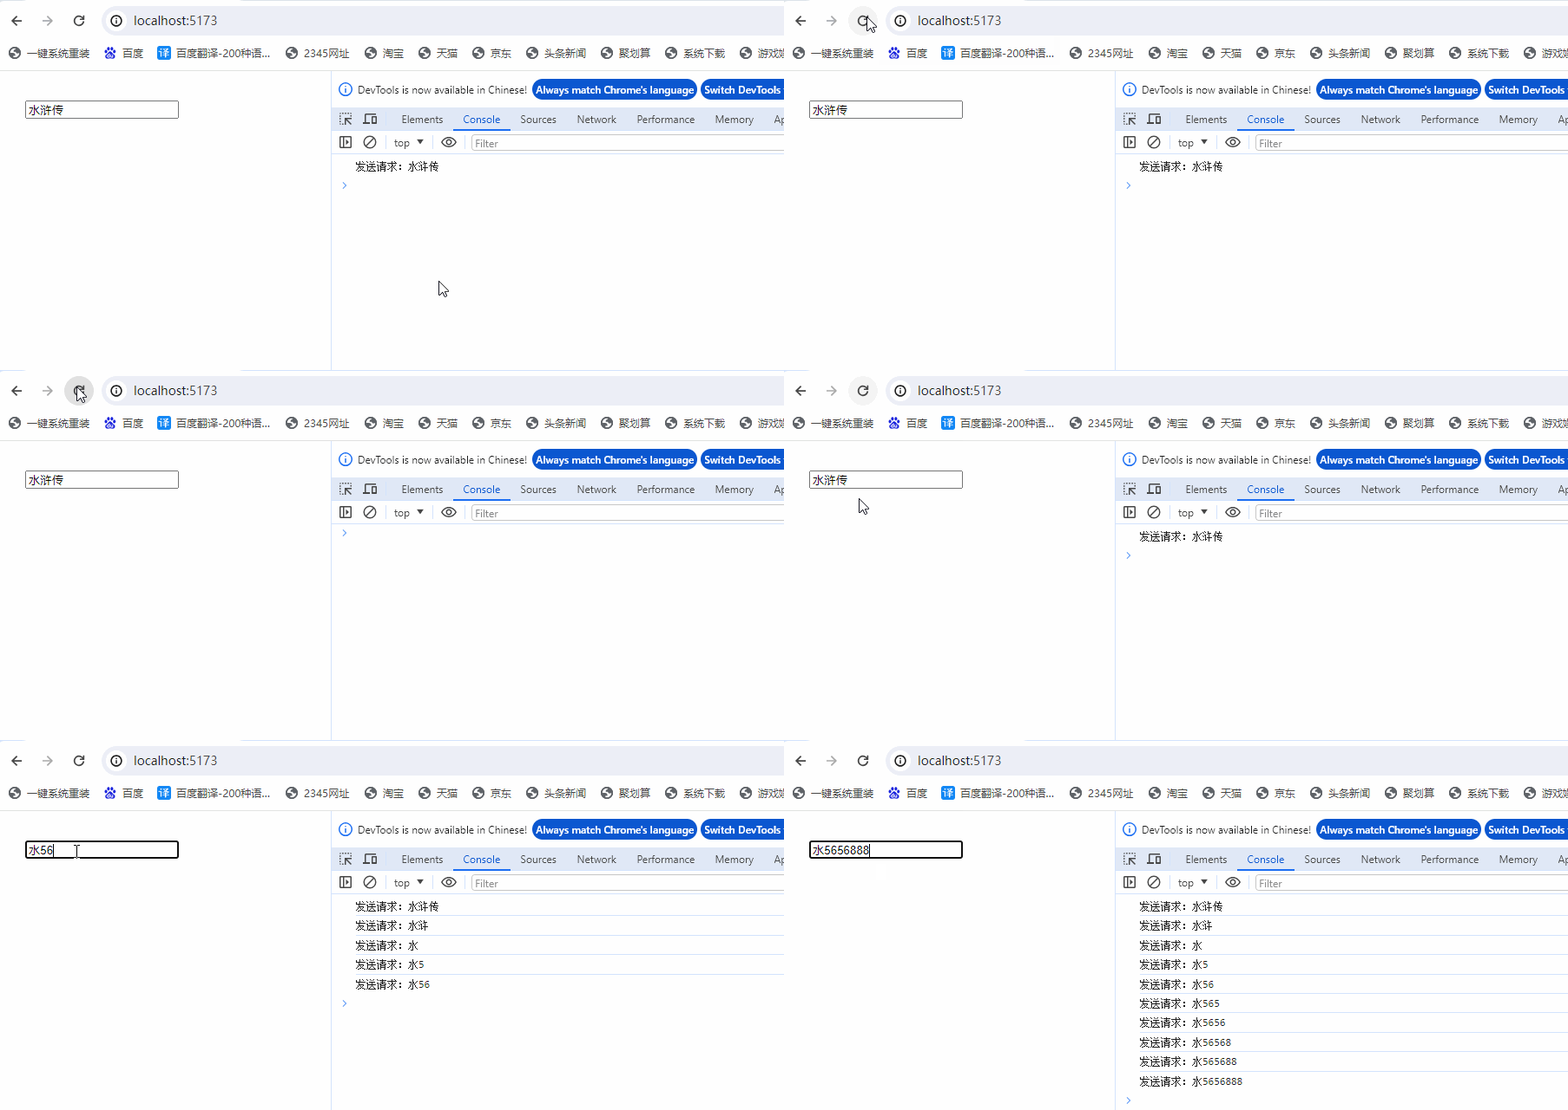
6、模板引用 ref
ref 是一个特殊的 attribute,它允许我们在一个特定的 DOM 元素或子组件实例被挂载后,获得对它的直接引用
<template>
 <div>
    <input ref="inputRef" type="text">
    <button @click="get">获取</button>
 </div>
</template>

<script setup lang="ts">
import { ref , reactive, watch } from 'vue'
const inputRef = ref(null)

const get = ()=> {
    console.log(inputRef.value);
    inputRef.value.focus()
}
</script>

<style scoped>
</style>
运行效果
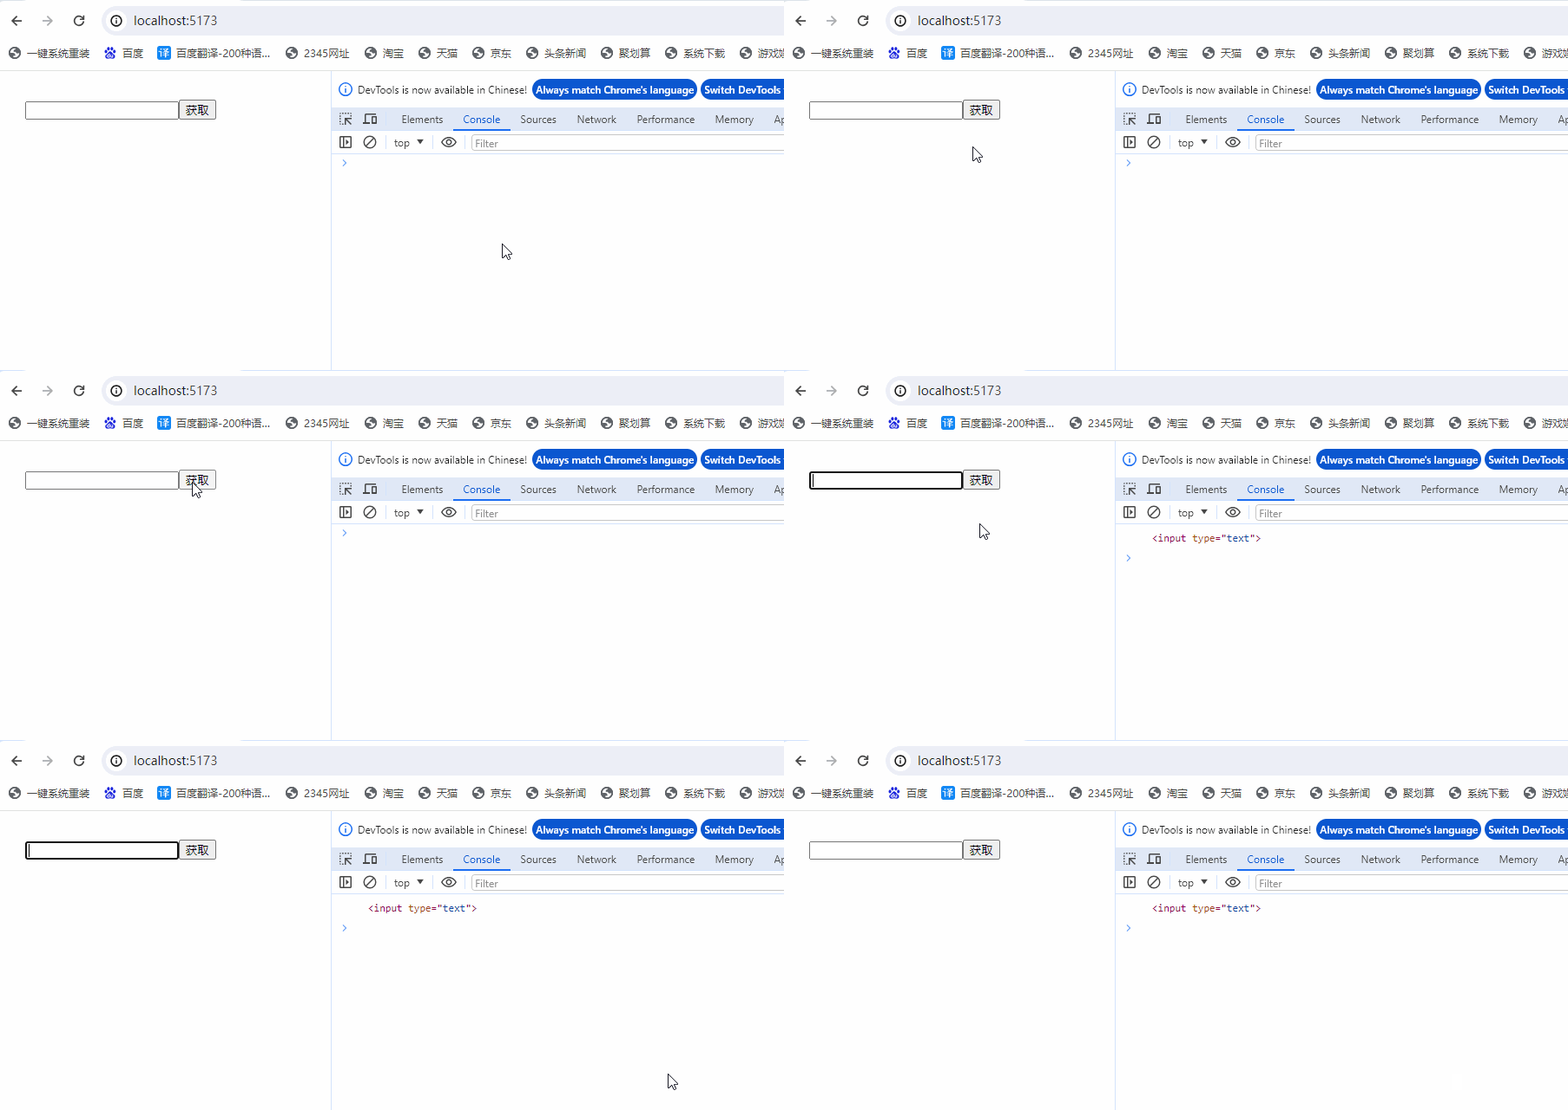
7、类与样式绑定
7.1、绑定对象
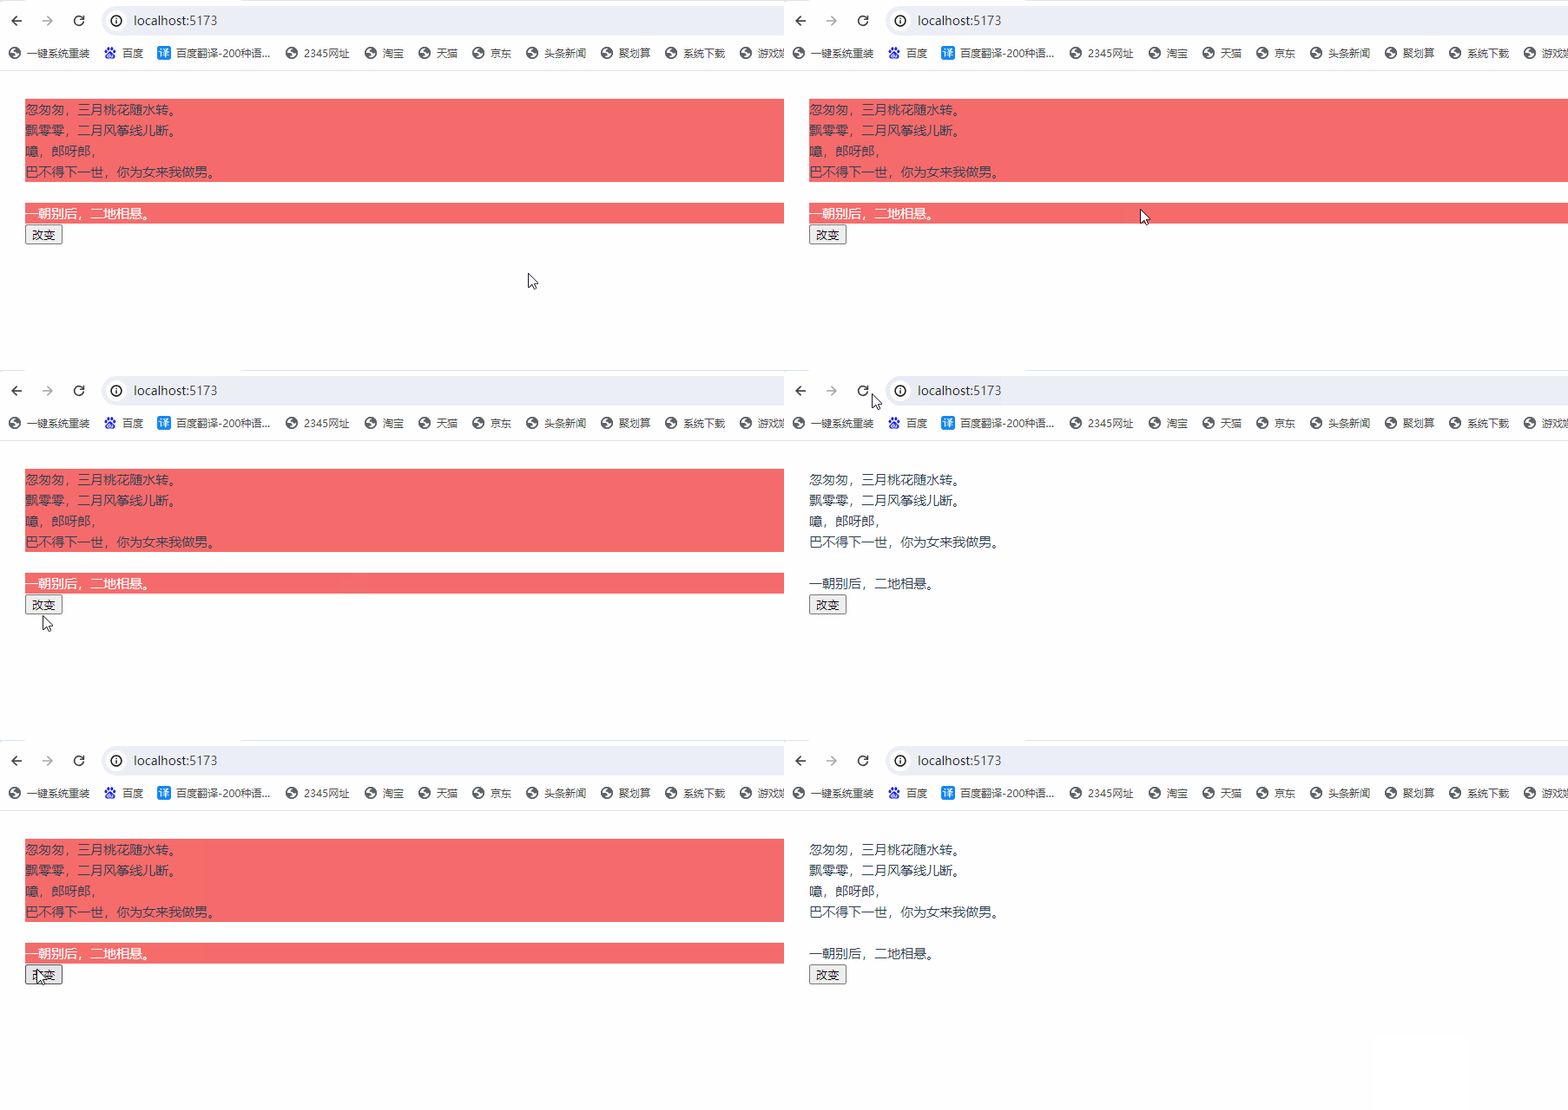
<template>
 <div>
    <div :class="{ active: isActive }">
        <p>忽匆匆,三月桃花随水转。</p>
        <p>飘零零,二月风筝线儿断。</p>
        <p>噫,郎呀郎,</p>
        <p>巴不得下一世,你为女来我做男。</p>
    </div>
    <br>
    <div :class="classObject">
        一朝别后,二地相悬。
    </div>
    <button @click="change">改变</button>
 </div>
</template>

<script setup lang="ts">
import { ref, reactive } from 'vue'
let isActive = ref(true)
const classObject = reactive({
  active: true,
  'text-primary': true
})
const change = ()=> {
    isActive.value = false
    classObject.active = false
    classObject['text-primary'] = false
}
</script>

<style scoped>
.active {
    background: #f56c6c;
}
.text-primary {
    color: #ffff;
}
</style>
运行效果
7.2、绑定数组
<template>
 <div>
    <div :class="[activeClass, primaryClass]">
        万语千言说不完,百无聊赖,十依栏杆。
    </div>
 </div>
</template>

<script setup lang="ts">
import { ref, reactive } from 'vue'
const activeClass = ref('active')
const primaryClass = ref('text-primary')
</script>

<style scoped>
.active {
    background: #f56c6c;
}
.text-primary {
    color: #ffff;
}
</style>
运行效果

7.3、三元表达式
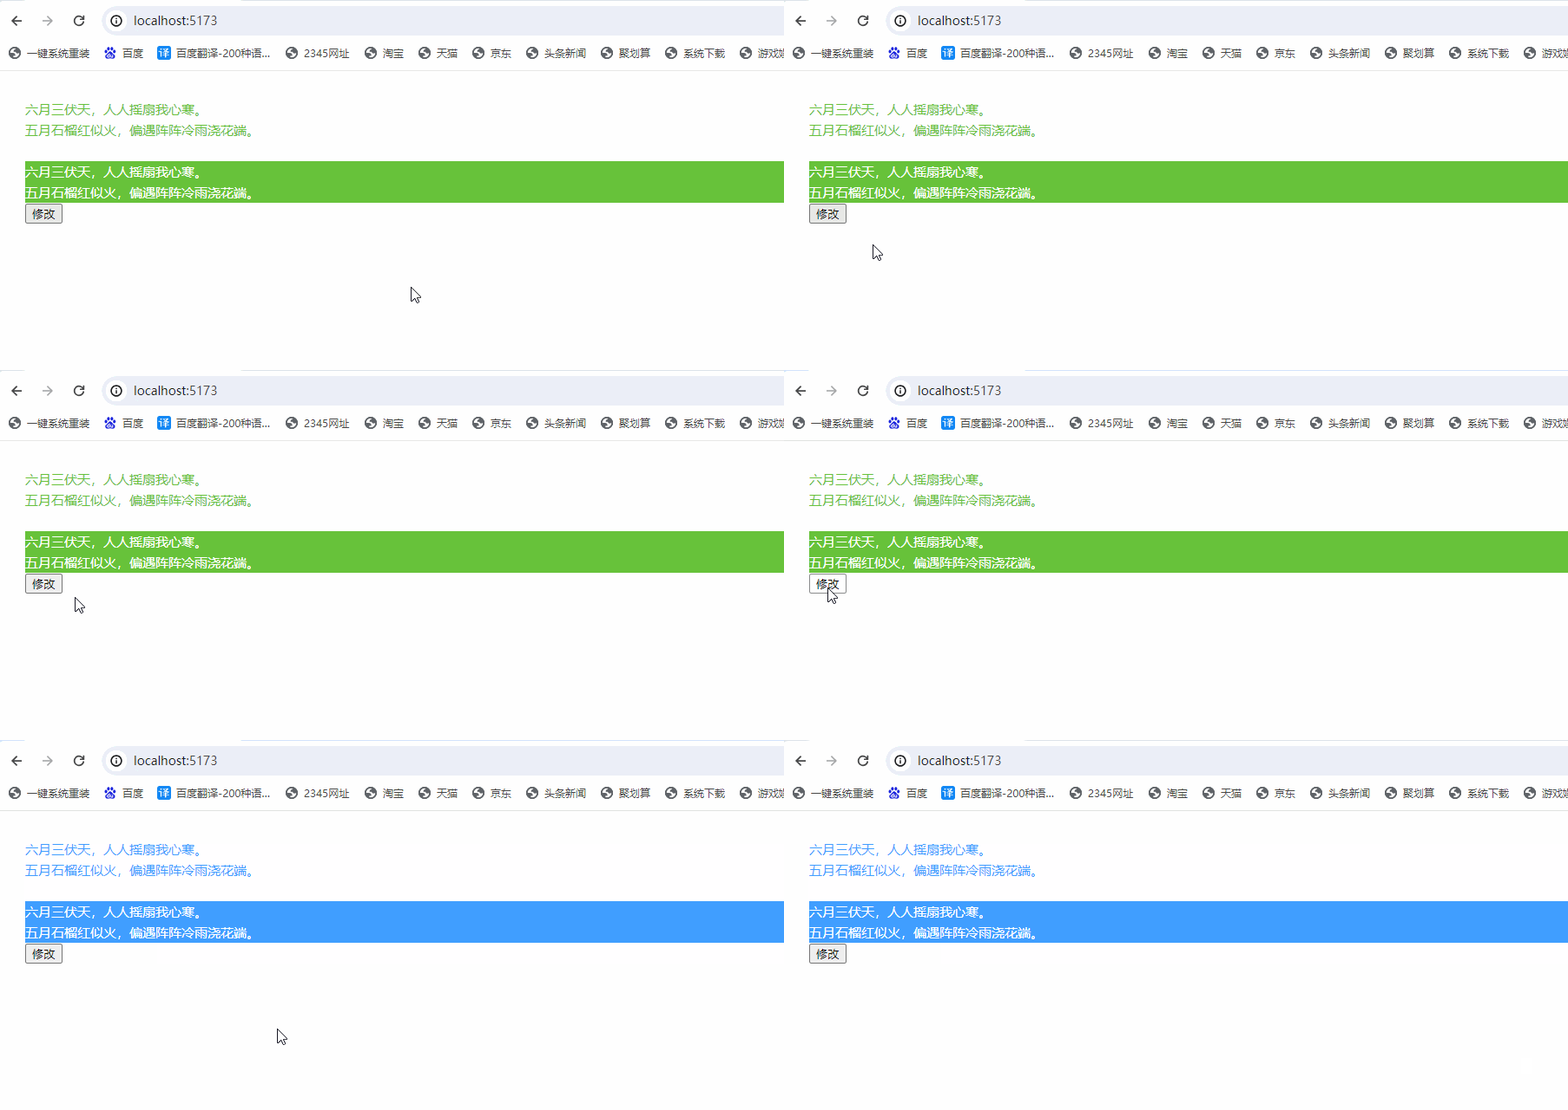
<template>
 <div>
    <!-- 三目表达式单独使用 -->
    <div :class="[isActive ? activeClass : primaryClass]">
        <p>六月三伏天,人人摇扇我心寒。</p>
        <p>五月石榴红似火,偏遇阵阵冷雨浇花端。</p>
    </div>

    <br>

    <!-- 三目表达式和其他样式一起使用 -->
    <div :class="[isActive ? successBackgroundClass : primaryBackgroundClass, textClass]">
        <p>六月三伏天,人人摇扇我心寒。</p>
        <p>五月石榴红似火,偏遇阵阵冷雨浇花端。</p>
    </div>
    <button @click="change">修改</button>
 </div>
</template>

<script setup lang="ts">
import { ref, reactive } from 'vue'
let isActive = ref(true)
const activeClass = ref('active')
const primaryClass = ref('text-primary')

const textClass = ref('text-class')
const successBackgroundClass = ref('success-background')
const primaryBackgroundClass = ref('primary-background')
const change = ()=> {
    isActive.value = false
}
</script>

<style scoped>
.active {
    color: #67c23a;
}
.text-primary {
    color: #409eff;
}
.text-class {
    color: #ffff;
}
.success-background {
    background: #67c23a;
}
.primary-background {
    background: #409eff;
}
</style>
运行效果
7.4、绑定内联样式
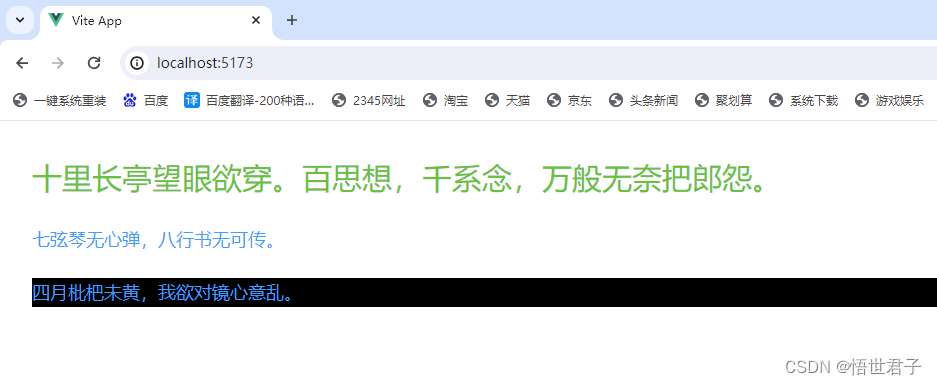
<template>
 <div>
    <!-- 绑定对象 -->
    <div :style="{ color: activeColor, fontSize: fontSize + 'px' }">
        十里长亭望眼欲穿。百思想,千系念,万般无奈把郎怨。
    </div>
    <br>
    <div :style="styleObject">
        七弦琴无心弹,八行书无可传。
    </div>
    <br>
    <!-- 绑定数组 -->
    <div :style="[styleObject, backStyles]">
        四月枇杷未黄,我欲对镜心意乱。
    </div>
 </div>
</template>

<script setup lang="ts">
import { ref, reactive } from 'vue'
const activeColor = ref('#67c23a')
const fontSize = ref(30)
const styleObject = reactive({
  color: '#409eff',
  fontSize: '18px'
})
const backStyles = reactive({
    background: 'black'
})
</script>

<style scoped>
</style>
运行效果
8、生命周期钩子
官网 实例生命周期的图表

在setup 中引入生命周期函数使用
<template>
 <div>
    <p>{{name}}</p>
    <button @click="change">修改</button>
 </div>
</template>

<script setup lang="ts">
import { ref, onMounted,onUpdated  } from 'vue'
let name = ref('阅尽天涯离别苦,不道归来,零落花如许。')
const change = ()=> {
    name.value = '花底相看无一语,绿窗春与天俱莫。'
}

onMounted(() => {
    console.log('挂载完成')
})

onUpdated(()=>{
    console.log('更新完成');
})
</script>

<style scoped>
</style>
运行效果

更多生命周期函数可以看官网文档:https://cn.vuejs.org/api/composition-api-lifecycle.html
9、父子组件通信
9.1、基本使用
在 components 目录下定义子组件 Book.vue
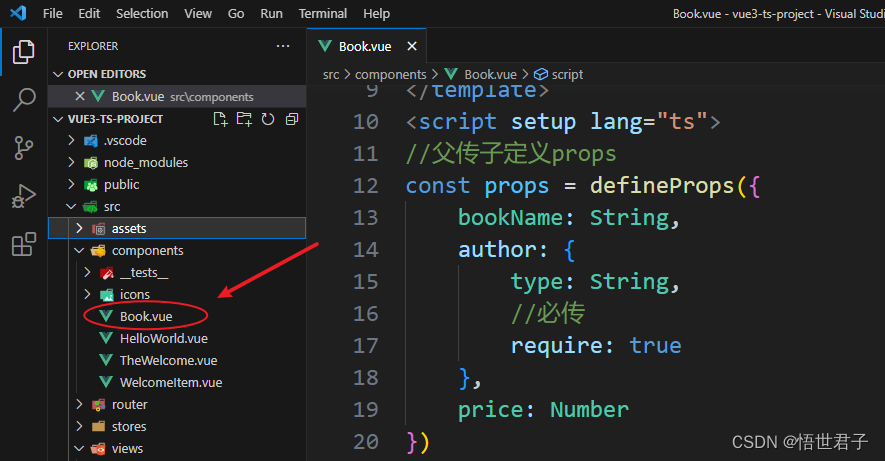
代码如下
<template>
    <div>
        <p>书名:{{bookName}}</p>
        <p>作者:{{author}}</p>
        <p>价格:{{price}}</p>
    </div>
    <button @click="buy">下单</button>
    <button @click="cart">加入购物车</button>
</template>
<script setup lang="ts">
//父传子定义props
const props = defineProps({
    bookName: String,
    author: {
        type: String,
        //必传
        required: true
    },
    price: Number
})
//定义子传父事件
const emit = defineEmits(['buyEmit', 'cartEmit'])
const buy = ()=> {
    emit('buyEmit', props.bookName)
}
const cart = ()=> {
    emit('cartEmit')
}
</script>
在 App.vue 中引入 Book.vue
<template>
 <div>
    <Book :bookName="name" :author="author" :price="price" @buyEmit="buy" @cartEmit="cart" />
 </div>
</template>

<script setup lang="ts">
import { ref } from 'vue'
import Book from '@/components/Book.vue'
let name = ref('稼轩长短句')
let author = ref('辛弃疾')
let price = ref(50)

const buy = (bookName)=> {
    alert(bookName)
}
const cart = ()=> {
    alert('点击购物车')
}
</script>

<style scoped>
</style>
运行效果

9.2、搭配 TypeScript 使用
<template>
    <div>
        <p>书名:{{bookName}}</p>
        <p>作者:{{author}}</p>
        <p>价格:{{price}}</p>
    </div>
    <button @click="buy">下单</button>
    <button @click="cart">加入购物车</button>
</template>
<script setup lang="ts">
//父传子定义props
const props = defineProps({
    bookName: String,
    author: {
        type: String,
        //必传
        required: true
    },
    price: Number
})
//定义子传父事件
const emit = defineEmits<{
    (e: 'buyEmit', bookName:String):void
    (e: 'cartEmit'):void
}>()
const buy = ()=> {
    emit('buyEmit', props.bookName)
}
const cart = ()=> {
    emit('cartEmit')
}
</script>
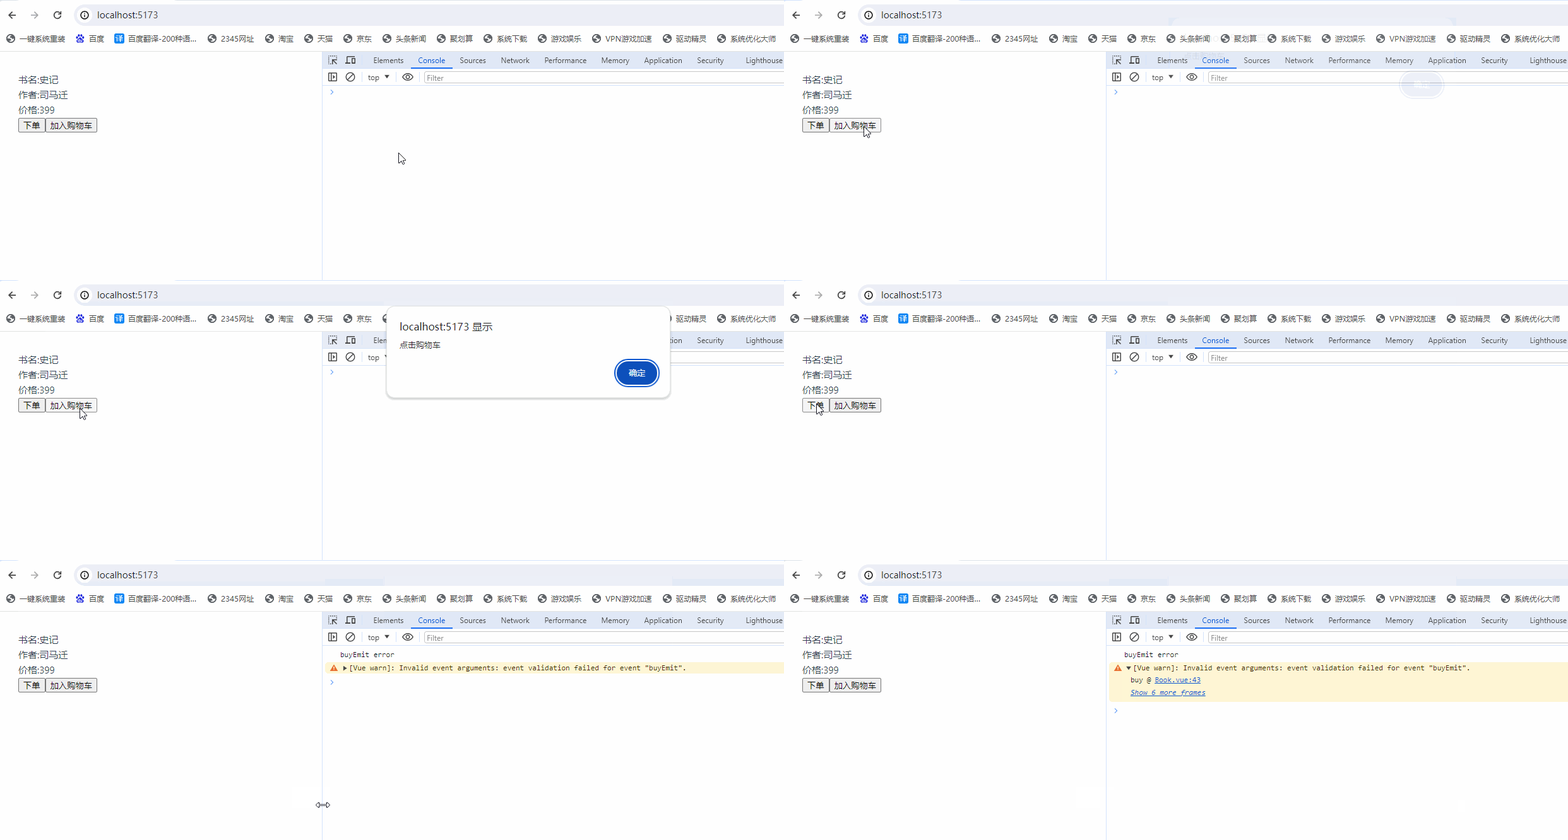
9.3、事件校验
<template>
    <div>
        <p>书名:{{bookName}}</p>
        <p>作者:{{author}}</p>
        <p>价格:{{price}}</p>
    </div>
    <button @click="buy">下单</button>
    <button @click="cart">加入购物车</button>
</template>
<script setup lang="ts">
//父传子定义props
const props = defineProps({
    bookName: String,
    author: {
        type: String,
        //必传
        required: true
    },
    price: Number
})
//定义子传父事件
const emit = defineEmits({
    //校验 buyEmit 事件
    buyEmit:(bookName:String) => {
        if(bookName.length > 1) {
            console.log('buyEmit error');

            return false
        } else {
            return true
        }
    },
    //没有校验
    cartEmit: null
})


const buy = ()=> {
    emit('buyEmit', props.bookName)
}
const cart = ()=> {
    emit('cartEmit')
}
</script>
运行效果
10、依赖注入
在 App.vue 中提供使用 provide
<template>
 <div>
    <Book :bookName="name" :author="author" :price="price" />
 </div>
</template>

<script setup lang="ts">
import { ref, provide } from 'vue'
import Book from '@/components/Book.vue'
let name = ref('史记')
let author = ref('司马迁')
let price = ref(399)

provide(/* 注入名 */ 'bookShop', /* 值 */ '开心图书商店')
</script>

<style scoped>
</style>
在子组件 Book.vue 中注入使用 inject
<template>
    <div>
        <h1>{{bookShop}}</h1>
        <p>书名:{{bookName}}</p>
        <p>作者:{{author}}</p>
        <p>价格:{{price}}</p>
    </div>

</template>
<script setup lang="ts">
import { inject } from 'vue'
const bookShop = inject('bookShop')
//父传子定义props
const props = defineProps({
    bookName: String,
    author: {
        type: String,
        //必传
        required: true
    },
    price: Number
})
</script>
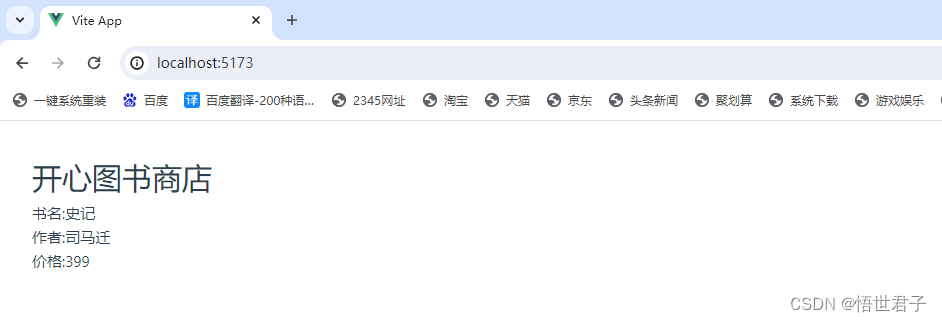
运行效果
依赖注入更详细讲解请阅读笔者文章《vue 依赖注入使用教程》
至此完
