1 创建脚手架
(1)CLI就是 command line interface 的缩写。Vue CLI官网:Vue CLI
(2)安装过程:
(PS:
提前安装过node.js了,没有安装的可以打开这个:Download | Node.js
已经安装的可以检查node.js和npm版本及安装情况:
检查nodejs : node -v
检查npm : npm -v (这两个指令均出现版本号为安装成功)
)

 ①配置npm淘宝镜像:npm config set registryhttps://registry.npm.taobao.org
(这一步可以让vue的安装更加快速,可有可无,但是建议还是安装一下)
 ②第一步(仅第一次执行),全局安装@vue/cli : npm install -g @vue/cli
 ③第二步,切换到你要创建项目的目录,然后使用命令创建项目 : vue create xxxx (xxxx为项目名,最好不要取vue、jQuery这种名字)
 ④第三步,启动项目 : npm run serve
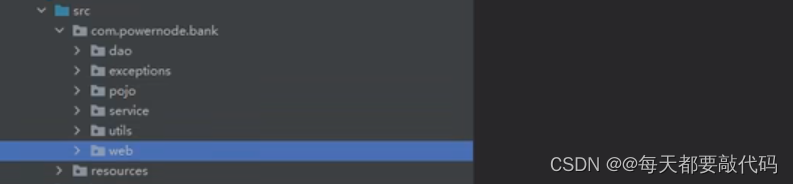
2 分析脚手架结构
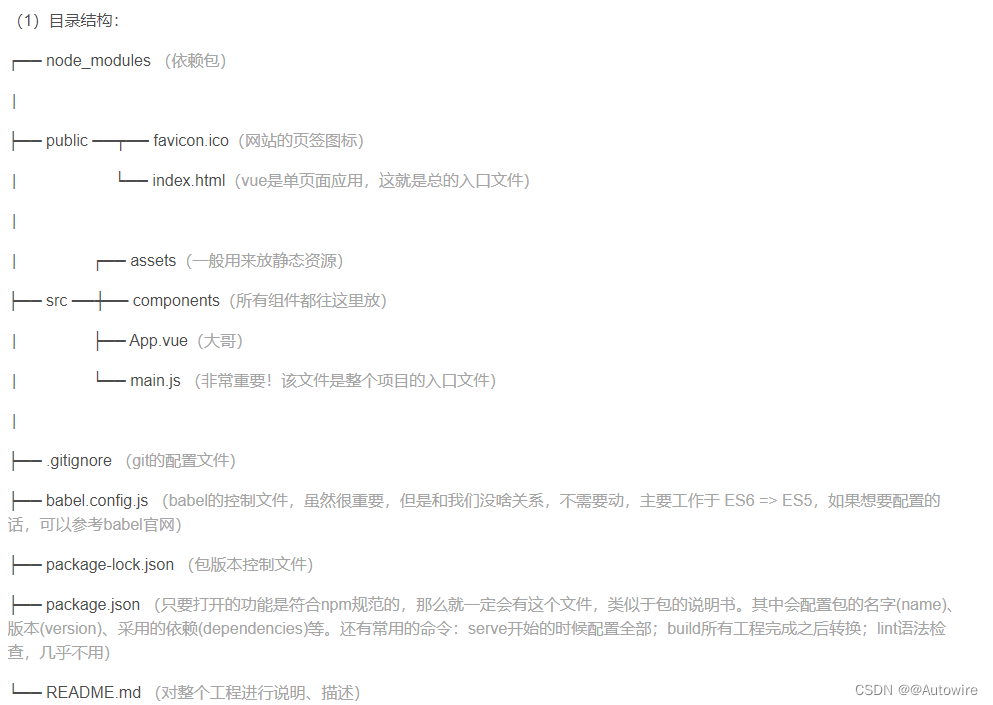
2)整个流程:
1、执行npm run serve,随后来到src中,找到main.js,这个页面中引入了Vue、App.vue、关闭了提示等。
// 该文件是整个项目的入口文件
// 引入Vue
import Vue from 'vue'
// 引入App组件-是所有组件的父组件
import App from './App.vue'
// 关闭Vue的生产提示
Vue.config.productionTip = false
// 创建Vue实例对象 --- vm
new Vue({
    // 将App组件放入容器中
    render: h => h(App),
}).$mount('#app')
2、继续找到App.vue页面,看到这个页面中引入了school和student,于是就到components文件夹中找到这两个并执行,执行最终汇总到了App.vue页面。
3、再回到main.js页面,把App组件放入容器中。
4、再找到index.html(容器),把东西放到这个里面。
3 render函数
main.js
import App from './App'
new Vue({
    el: '#single',
    template: `
      <app></app>
    `,
    components: {
        App
    }
})
替换
import Vue from 'vue'
import App from './App.vue'
Vue.config.productionTip = false
new Vue({
    // 将App组件放入容器中
    render: h => h(App),
}).$mount('#app')
——>
// 引入Vue
import Vue from 'vue'
import App from './App.vue'
Vue.config.productionTip = false
new Vue({
    el: '#app',
    template: `
      <app></app>
    `,
    components: {
        App
    }
})
此时页面有问题:
此时,在main.js中引入的vue是残缺版的。缺少了模板解析器:
这才是最完整的vue如下
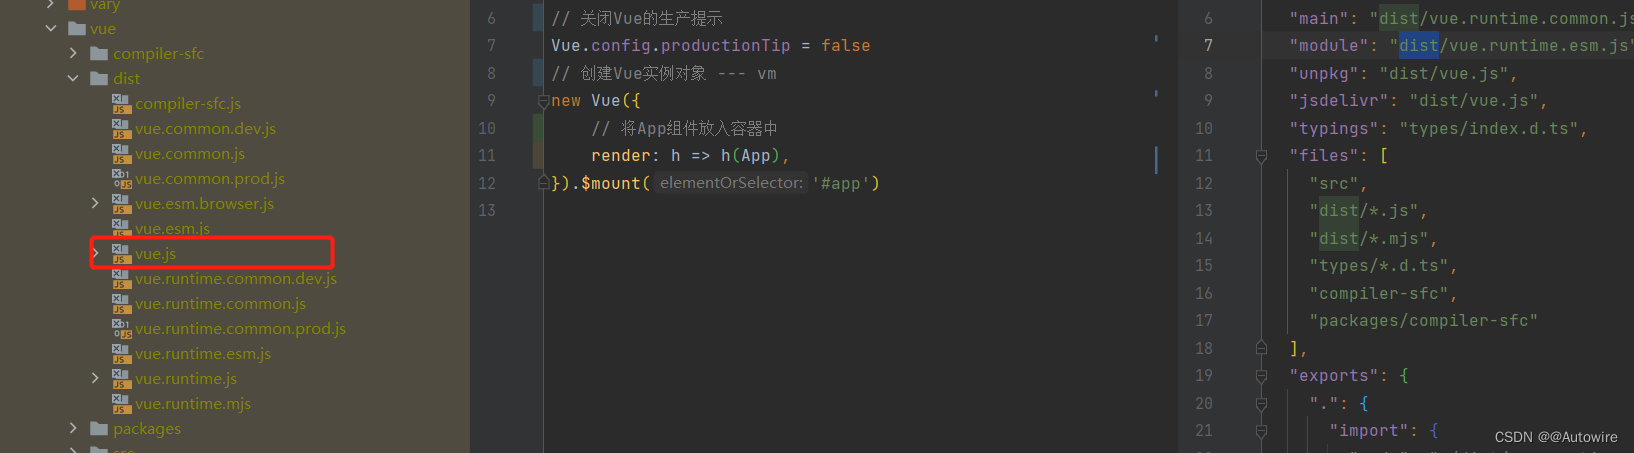
解决方案一 我们可以引入完整的vue:
import Vue from 'vue/dist/vue'
解决方案二 :render
import Vue from 'vue'

Vue.config.productionTip = false
new Vue({
    el: '#app',
    render(createElement) {
        return createElement('h1', '你好啊')
    }
=======================箭头函数替换============================
	render: h => h(App)
})
最终得到:
import Vue from 'vue'
import App from './App.vue'
Vue.config.productionTip = false
new Vue({
    // 将App组件放入容器中
    render: h => h(App),
}).$mount('#app')
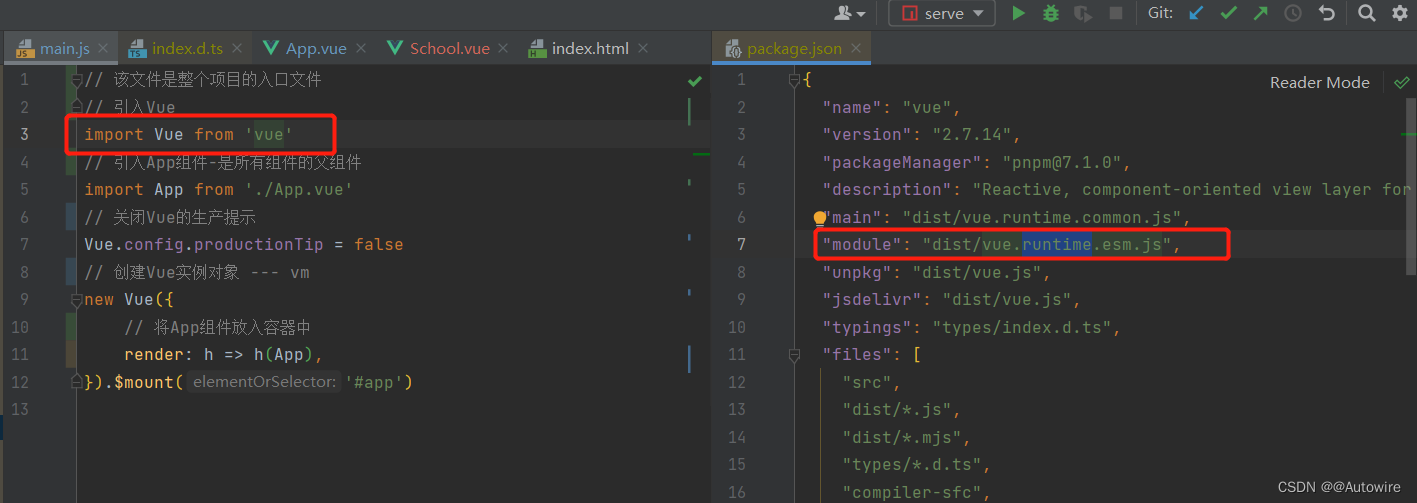
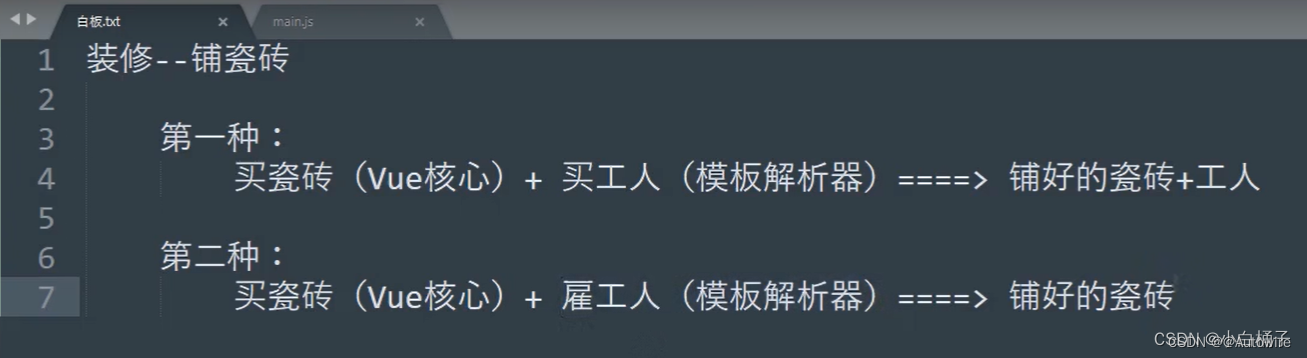
为什么不直接引入vue.js,反而要vue文件夹那么多东西?
vue中包含了两种东西,核心(比如说生命周期、处理事件等)和模板解析器。如果没有其它的文件,只把vue放到一个页面中,可能会出现问题。因为vue中有三分之一都是模板解析器,之后webpack打包完成后,会生成一个非常大的文件,这个时候vue的模板解析器就不适合出现在这里,没有作用。(vue文件中,带有runtime的都表示运行时的vue,带有common的就是走commonJS)
简而言之,没有了模板解析器的vue体积很小,打包之后能够更加轻量,代价就是写的时候要用那行render去写。
关于不同版本的Vue:
1、 vue.js 与 vue.runtime.xxx.js 的区别:
1)vue.js 是完整版的Vue,包含:核心功能+模板解析器。
2)vue.runtime.xxx.js 是运行版的Vue,只包含核心功能,没有模板解析器。
2、因为 vue.runtime.xxx.js 没有模板解析器,所以不能使用template配置项,需要使用render函数接收到的createrElement函数去指定具体内容。
4 修改默认配置
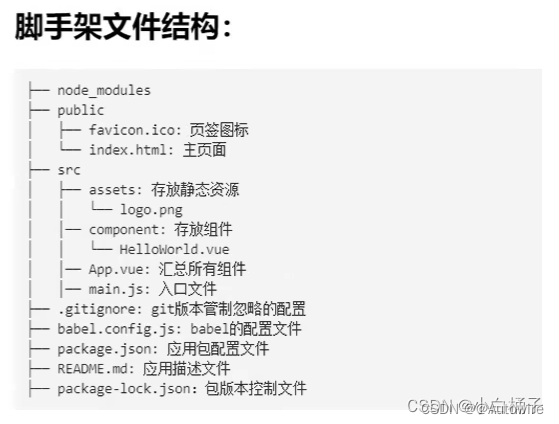
五个默认不能改的:public文件夹、favicon.ico、index.html、src文件夹、main.js
如果还是要修改的话,打开Vue CLI官网——配置参考——左侧栏都是能改的

vue.config.js: https://cli.vuejs.org/zh/config/#vue-config-js 配置参考
项目开发中需要关闭语法检查(具体的根据公司要求定),在 module.exports 里面添加 lintOnSave:false

const { defineConfig } = require('@vue/cli-service')
module.exports = defineConfig({
  transpileDependencies: true,
  lintOnSave: false
})
5 ref属性
<template>
  <div>
<!--    <h1 v-text="msg" id="title"></h1>-->
    <h1 v-text="msg" ref="title"></h1>
    <button ref="btn" @click="showDOM">点我输出上方的DOM元素</button>
    <School/>
  </div>
</template>

<script>
// 引入组件
import School from "./components/School"

export default {
  name: 'App',
  data() {
    return {
      msg: 'Hello zhaoshuai-lc'
    }
  },
  methods: {
    showDOM() {
      // console.log(document.getElementById('title')) 原生操作
      console.log(this.$refs)
    }
  },
  components: {School}
}
</script>

<style>
</style>

<template>
  <div>
<!--    <h1 v-text="msg" id="title"></h1>-->
    <h1 v-text="msg" ref="title"></h1>
    <button ref="btn" @click="showDOM">点我输出上方的DOM元素</button>
    <School ref="sch"/>
  </div>
</template>

<script>
// 引入组件
import School from "./components/School"

export default {
  name: 'App',
  data() {
    return {
      msg: 'Hello zhaoshuai-lc'
    }
  },
  methods: {
    showDOM() {
      // console.log(document.getElementById('title')) 原生操作
      console.log(this.$refs.sch)
    }
  },
  components: {School}
}
</script>

<style>
</style>
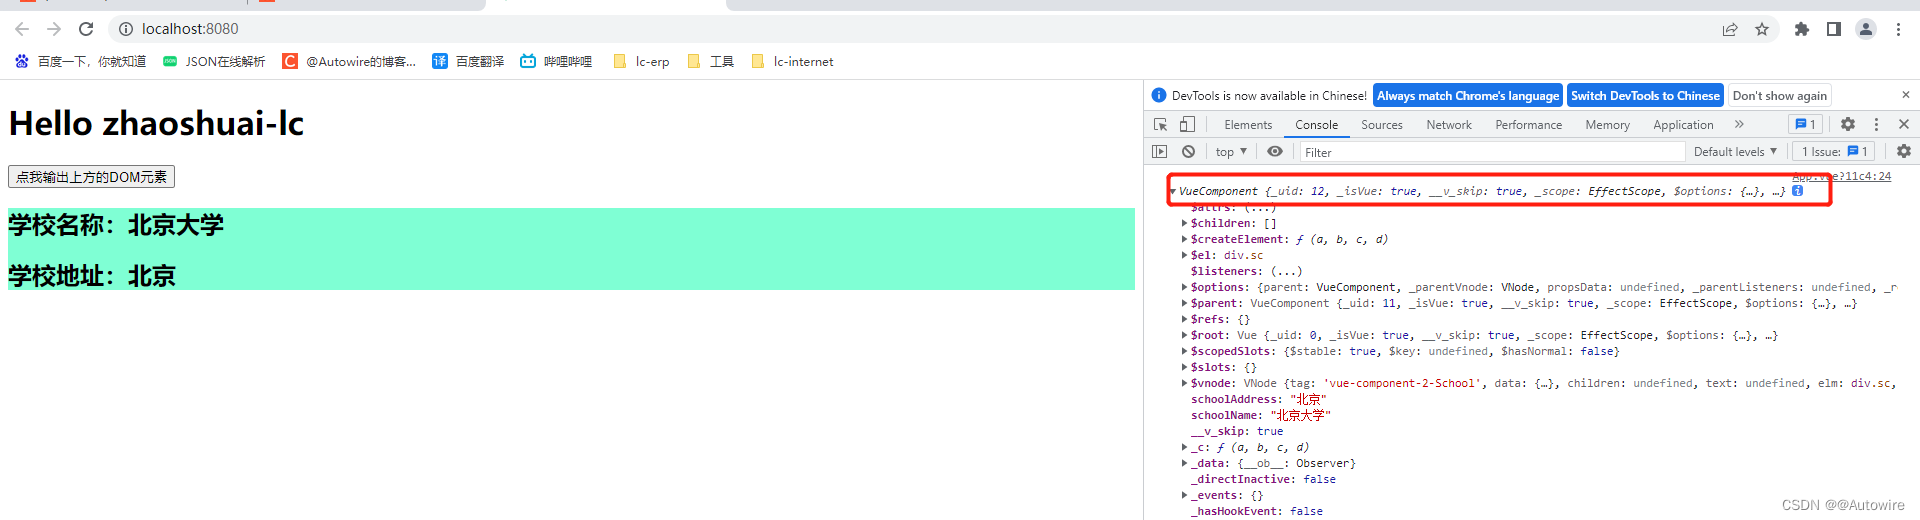
对于传统的HTML而言,id和ref确实没有什么差别,但是对于组件来说就不一样了。
给组件加id,打印出获取的结果为组件所对应的完整DOM结构。
给组件加ref,打印出获取的结果就是VueComponent实例。
ref属性:
1.被用来给元素(html标签)或子组件注册引用信息(id的代替者)
2.应用在html标签上获取的是真实的DOM元素,应用在组件标签上是组件实例对象(vc)
3.使用方式:
打标识:<h1 ref="xxx">  ... </h1>
获取: this.$refs.xxx
6 props配置
<template>
  <div>
    <!--    :age="" ""作为表达式-->
    <!--    <Student name="zhaoshuai-lc" gender="male" :age="27"/>-->
    <!--    <Student name="zhaoshuai-ld" gender="male" :age="27"/>-->

    <Student name="zhaoshuai-lc" gender="male"/>
    <Student name="zhaoshuai-ld" gender="male" :age="27"/>
  </div>
</template>

<script>
// 引入组件
import Student from "./components/Student"

export default {
  name: 'App',
  data() {
    return {}
  },
  methods: {},
  components: {Student}
}
</script>

<style>
</style>
<template>
  <div class="sc">
    <h1>{{ msg }}</h1>
    <h2>学生名称:{{ name }}</h2>
    <h2>学生性别:{{ gender }}</h2>
    <h2>学生年龄:{{ age + 1 }}</h2>
  </div>
</template>

<script>
export default {
  name: `Student`,
  data() {
    return {
      msg: 'i am a student'
    }
  },
  // 接受数据
  // props: ['name', 'gender', 'age'],
  // 接收的同时对数据进行类型限制
  // props: {
  //   name: String,
  //   gender: String,
  //   age: Number
  // },
  // 接收的同时对数据进行类型限制 + 默认值的指定 + 必要性的限制
  props: {
    name: {
      type: String,
      required: true
    },
    gender: {
      type: String,
      default: 'male'
    },
    age: {
      type: Number,
      default: 99
    }
  },
  methods: {}
}
</script>

<style>
.sc {
  background-color: aquamarine;
}
</style>
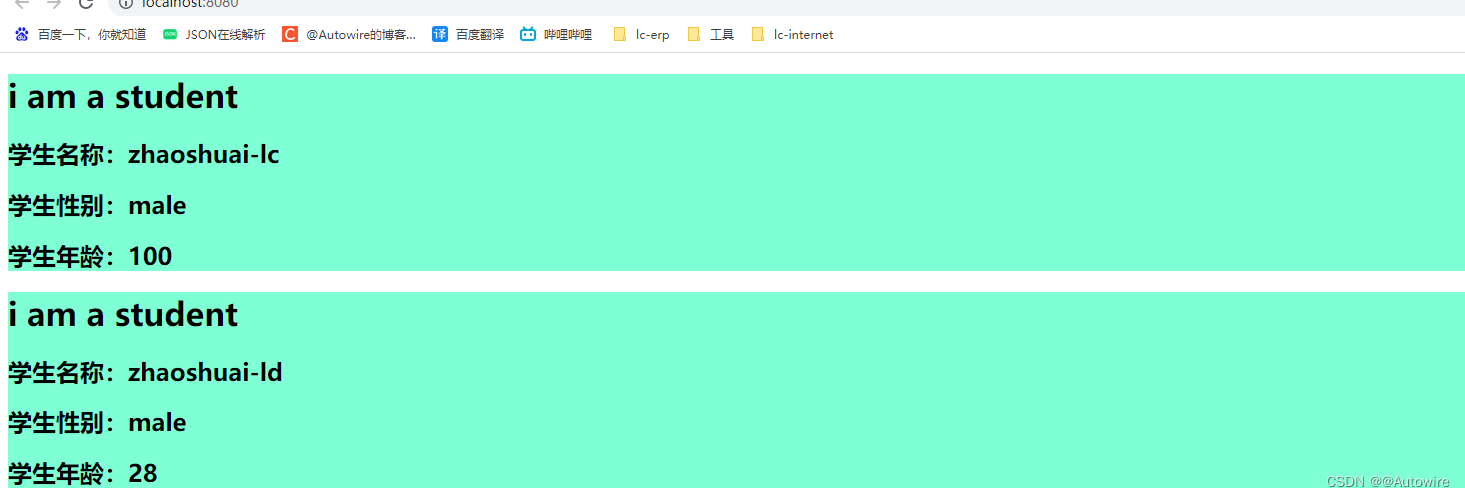
配置项propos 功能:让组件接收外部传过来的数据
(1)传递数据:
    <!--    :age="" ""作为表达式-->
    <!--    <Student name="zhaoshuai-lc" gender="male" :age="27"/>-->
    <!--    <Student name="zhaoshuai-ld" gender="male" :age="27"/>-->

    <Student name="zhaoshuai-lc" gender="male"/>
    <Student name="zhaoshuai-ld" gender="male" :age="27"/>
(2)接收数据:
第一种方式(只接收):
props:['name']
第二种方式(限制类型):
props:{
	name:Number
 }
第三种方式(限制类型、限制必要性、指定默认值):
props:{
	name:{
	type:String, // 类型
	 required:true, // 必要性
	 default:'老王' // 默认值
	 }
  }
备注:props是只读的,Vue底层会监测你对props的修改,如果进行了修改,就会发出警告,若业务需求确实需要修改,那么请复制props的内容到data中一份,然后去修改data中的数据。
<template>
  <div class="sc">
    <h1>{{ msg }}</h1>
    <h2>学生名称:{{ name }}</h2>
    <h2>学生性别:{{ gender }}</h2>
    <h2>学生年龄:{{ ageBK }}</h2>
    <button @click="updateAge">点击我尝试修改年龄</button>
  </div>
</template>

<script>
export default {
  name: `Student`,
  data() {
    return {
      msg: 'i am a student',
      ageBK: this.age
    }
  },
  props: {
    name: {
      type: String,
      required: true
    },
    gender: {
      type: String,
      default: 'male'
    },
    age: {
      type: Number,
      default: 99
    }
  },
  methods: {
    updateAge() {
      this.ageBK++
    }
  }
}
</script>

<style>
.sc {
  background-color: aquamarine;
}
</style>

7 mixin混入
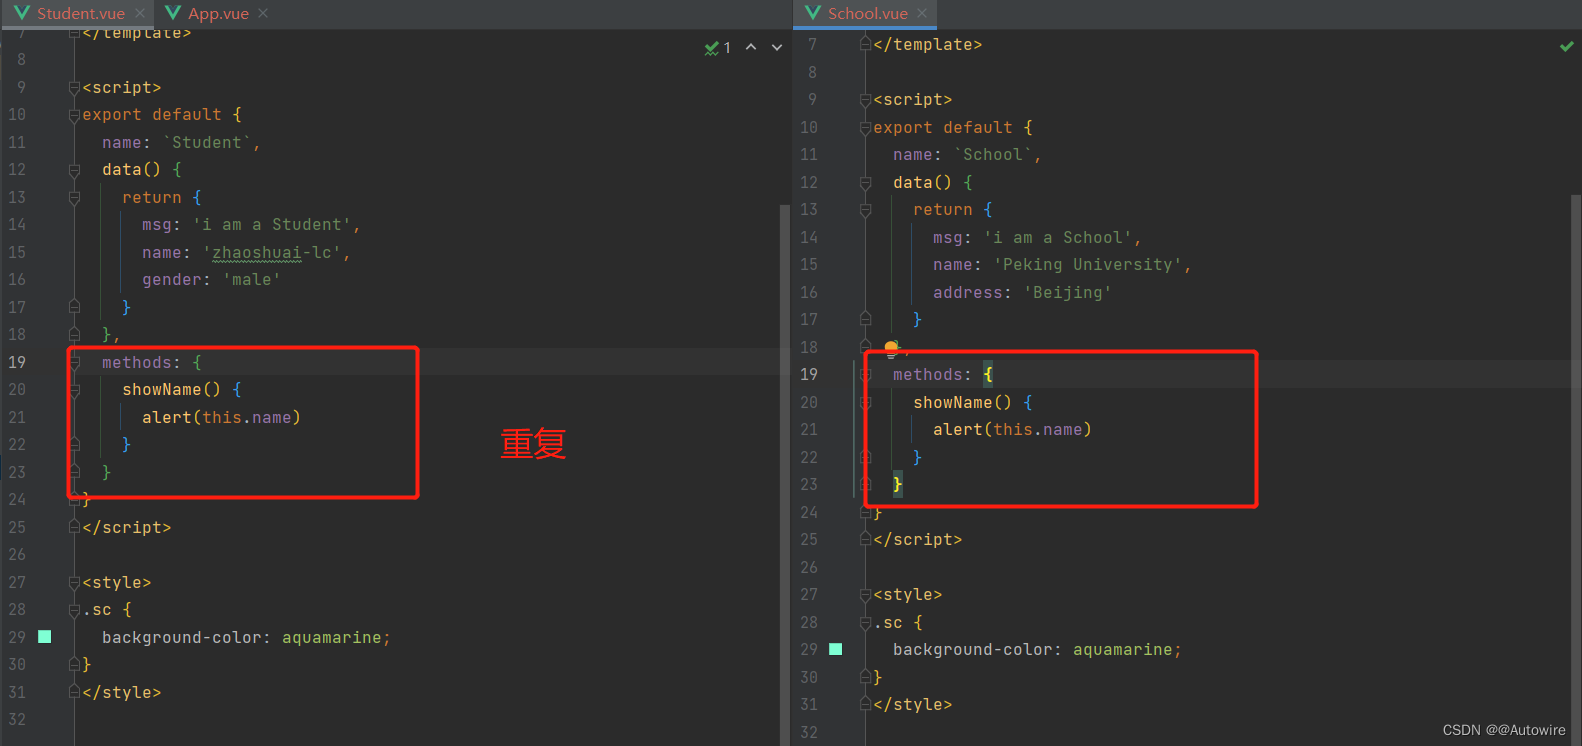
export const mixin = {
    methods: {
        showName() {
            alert(this.name)
        }
    },
    mounted() {
        console.log('hello mounted() ...')
    }
}
export const data = {
    data() {
        return {
            x: 100
        }
    }
}
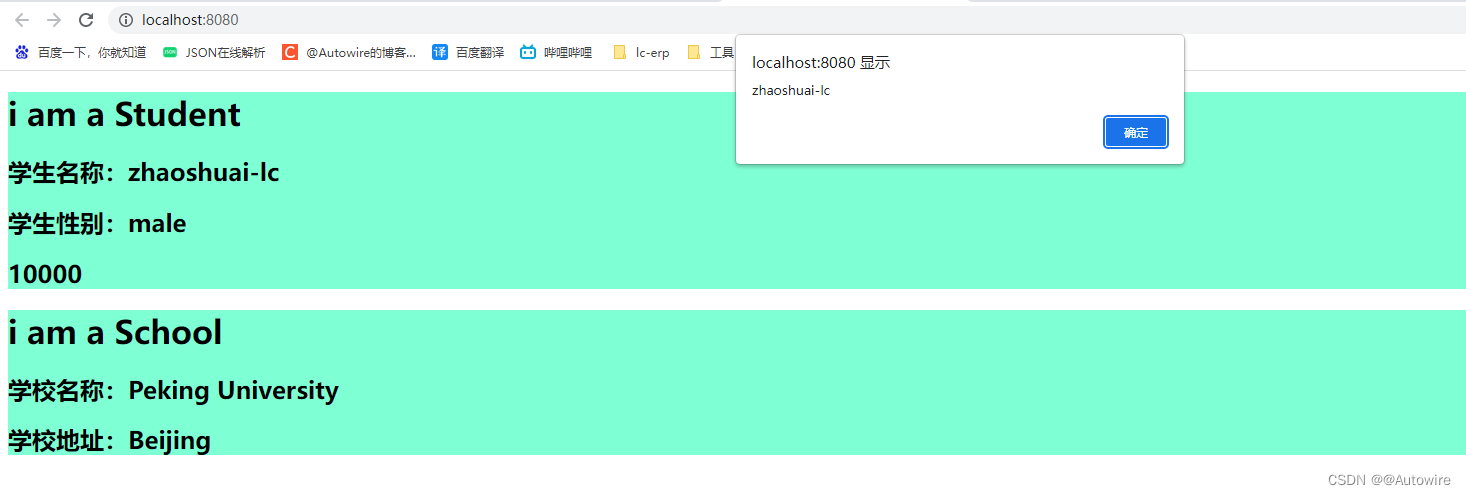
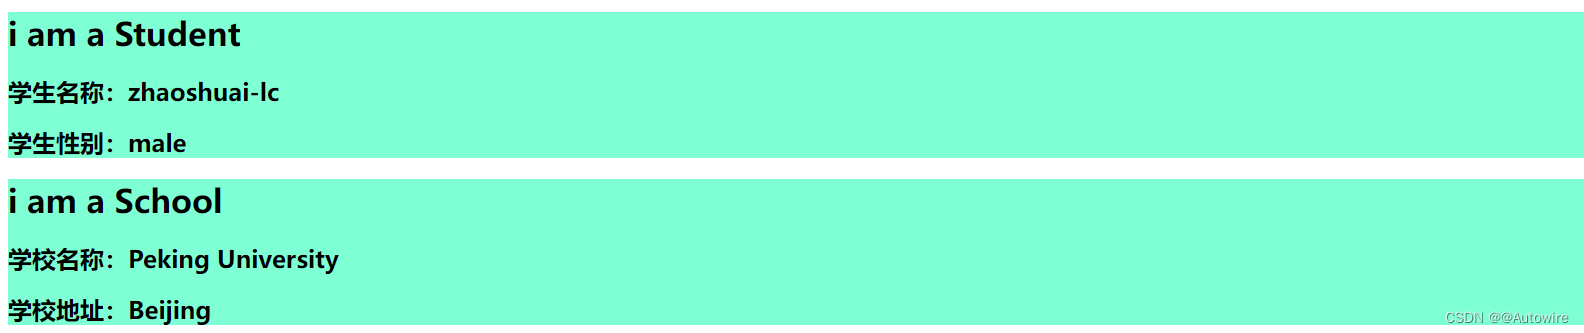
<template>
  <div class="sc">
    <h1>{{ msg }}</h1>
    <h2 @click="showName">学生名称:{{ name }}</h2>
    <h2>学生性别:{{ gender }}</h2>
    <h2>{{ x }}</h2>
  </div>
</template>

<script>
// 引入一个混合
import {mixin, data} from "@/mixin";

export default {
  name: `Student`,
  data() {
    return {
      msg: 'i am a Student',
      name: 'zhaoshuai-lc',
      gender: 'male',
      x: 10000 // 混合中也存在该值 - 以自己的为主
    }
  },
  mounted() {
    console.log('hello mounted() ...')
  },
  mixins: [mixin, data]
}
</script>

<style>
.sc {
  background-color: aquamarine;
}
</style>
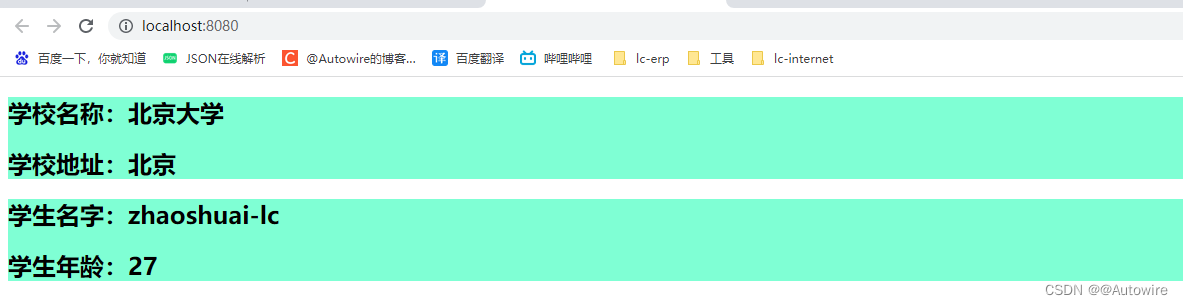
<template>
  <div class="sc">
    <h1>{{ msg }}</h1>
    <h2 @click="showName">学校名称:{{ name }}</h2>
    <h2>学校地址:{{ address }}</h2>
  </div>
</template>

<script>
import {mixin, data} from "@/mixin";

export default {
  name: `School`,
  data() {
    return {
      msg: 'i am a School',
      name: 'Peking University',
      address: 'Beijing'
    }
  },
  mounted() {
    console.log('hello mounted() ...')
  },
  mixins: [mixin, data]

}
</script>

<style>
.sc {
  background-color: aquamarine;
}
</style>
<template>
  <div>
    <Student/>
    <School/>
  </div>
</template>

<script>
// 引入组件
import Student from "./components/Student"
import School from "./components/School";

export default {
  name: 'App',
  data() {
    return {}
  },
  methods: {},
  components: {Student, School}
}
</script>

<style>
</style>
以上是局部引入,全局引入如下:
main.js
import Vue from 'vue'
import App from './App.vue'
import {mixin, data} from './mixin'
Vue.config.productionTip = false
Vue.mixin(mixin)
Vue.mixin(data)
new Vue({
    // 将App组件放入容器中
    render: h => h(App),
}).$mount('#app')
mixin中的data数据会与页面中的data数据进行整合,如若有冲突的话,则以页面为准。
mixin和页面中的生命周期钩子不以任何为主,都要。
mixin(混入)
功能:可以把多个组件共用的配置提取成一个混入对象
使用方式:
第一步定义混合,例如:
 {
     data(){ ... }
     methods:{ ... }
              ...
 }
第二步使用混入,例如:
1)全局混入:Vue.mixin(xxx)
2)局部混入:mixins:['xxx']
8 插件
// const obj = {
//     install() {
//         console.log('@@@@install')
//     }
// }
// export default obj


export default {
    install(Vue) {
        console.log('@@@@install', Vue)
    }
}
import Vue from 'vue'
import App from './App.vue'
// 引入插件
import plugins from "@/plugins"

Vue.config.productionTip = false
// 应用插件
Vue.use(plugins)
new Vue({
    // 将App组件放入容器中
    render: h => h(App),
}).$mount('#app')

plugins.js
// const obj = {
//     install() {
//         console.log('@@@@install')
//     }
// }
// export default obj


export default {
    install(Vue) {
        Vue.filter('mySlice', function (value) {
            return value.slice(0, 4)
        })
        // 定义全局指令
        Vue.directive('fbind', {
            bind(element, binding) {
                element.value = binding.value
            },
            inserted(element, binding) {
                element.focus()
            },
            update(element, binding) {
                element.value = binding.value
            }
        })
        // 定义混入
        Vue.mixin({
            data() {
                return {
                    x: 100,
                    y: 200
                }
            }
        })
        // 给Vue原型上添加一个方法 vm vc 都可以用
        Vue.prototype.hello = () => alert('你好啊!!!')
    }
}
main.js
import Vue from 'vue'
import App from './App.vue'
// 引入插件
import plugins from "@/plugins"

Vue.config.productionTip = false
// 应用插件
Vue.use(plugins)
new Vue({
    // 将App组件放入容器中
    render: h => h(App),
}).$mount('#app')
School.vue
<template>
  <div class="sc">
    <h1>{{ msg }}</h1>
    <h2>学校名称:{{ name | mySlice }}</h2>
    <h2>学校地址:{{ address }}</h2>
    <button @click="test">点我测试一下hello方法</button>
  </div>
</template>

<script>

export default {
  name: `School`,
  data() {
    return {
      msg: 'i am a School',
      name: 'Peking University',
      address: 'Beijing'
    }
  },
  methods: {
    test() {
      this.hello()
    }
  }
}
</script>

<style>
.sc {
  background-color: aquamarine;
}
</style>
Student.vue
<template>
  <div class="sc">
    <h1>{{ msg }}</h1>
    <h2>学生名称:{{ name }}</h2>
    <h2>学生性别:{{ gender }}</h2>
    <input type="text" v-fbind:value="name">
  </div>
</template>

<script>
export default {
  name: `Student`,
  data() {
    return {
      msg: 'i am a Student',
      name: 'zhaoshuai-lc',
      gender: 'male',
    }
  }

}
</script>

<style>
.sc {
  background-color: aquamarine;
}
</style>
插件:
功能:用于增强Vue
本质:包含install方法的一个对象,install的第一个参数是Vue,第二个以后的参数是插件使用者传递的数据。
定义插件:
 对象.install = fuction (Vue, options){
 // 1.添加全局过滤器
 Vue.filter( ... )
 // 2.添加全局指令
Vue.directive( ... )
}
9 scoped样式
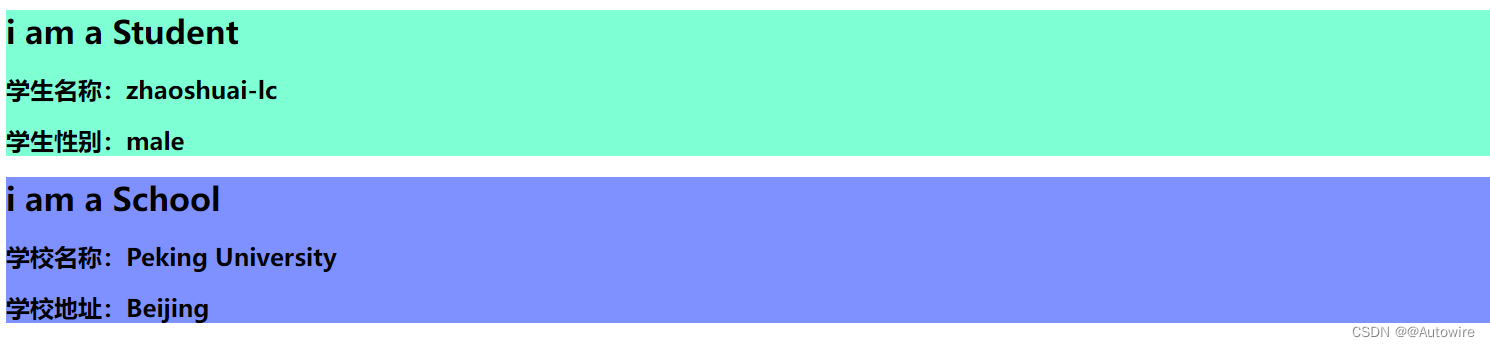
问题:样式冲突
<template>
  <div class="sc">
    <h1>{{ msg }}</h1>
    <h2>学校名称:{{ name }}</h2>
    <h2>学校地址:{{ address }}</h2>
  </div>
</template>

<script>

export default {
  name: `School`,
  data() {
    return {
      msg: 'i am a School',
      name: 'Peking University',
      address: 'Beijing'
    }
  },
  methods: {
  }
}
</script>

<style>
.sc {
  background-color: #7f90ff;
}
</style>
<template>
  <div class="sc">
    <h1>{{ msg }}</h1>
    <h2>学生名称:{{ name }}</h2>
    <h2>学生性别:{{ gender }}</h2>
  </div>
</template>

<script>
export default {
  name: `Student`,
  data() {
    return {
      msg: 'i am a Student',
      name: 'zhaoshuai-lc',
      gender: 'male',
    }
  }

}
</script>

<style>
.sc {
  background-color: aquamarine;
}
</style>
<template>
  <div>
    <Student/>
    <School/>
  </div>
</template>

<script>
// 引入组件
import School from "./components/School"
import Student from "./components/Student"

export default {
  name: 'App',
  data() {
    return {}
  },
  methods: {},
  components: {Student, School}
}
</script>

<style>
</style>
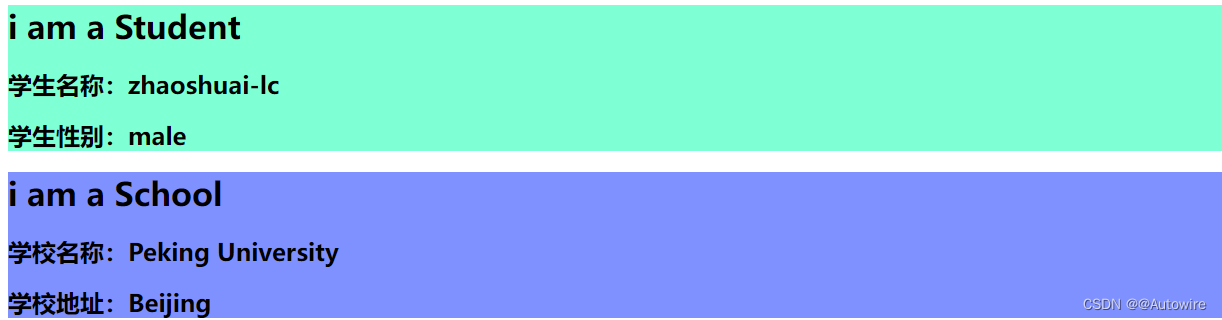
解决方案: scoped
School.vue
<style scoped>
.sc {
  background-color: aquamarine;
}
</style>
Student.vue
<style scoped>
.sc {
  background-color: aquamarine;
}
</style>
又出现如下问题:
<h2 class="title">学校名称:{{ name }}</h2>

<h2 class="title">学生名称:{{ name }}</h2>

App.vue
<style>
.title{
  color: red
}
</style>
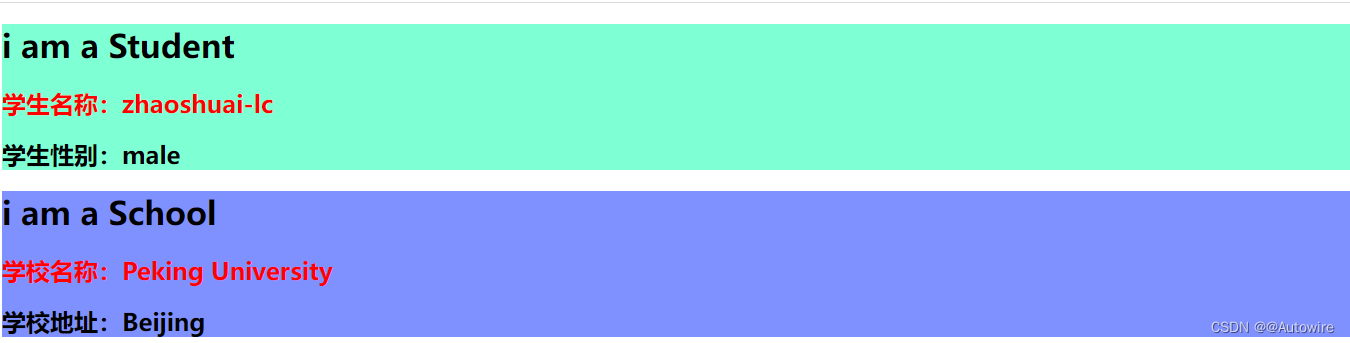
但是在App.vue:
<style scoped>
.title{
  color: red
}
</style>
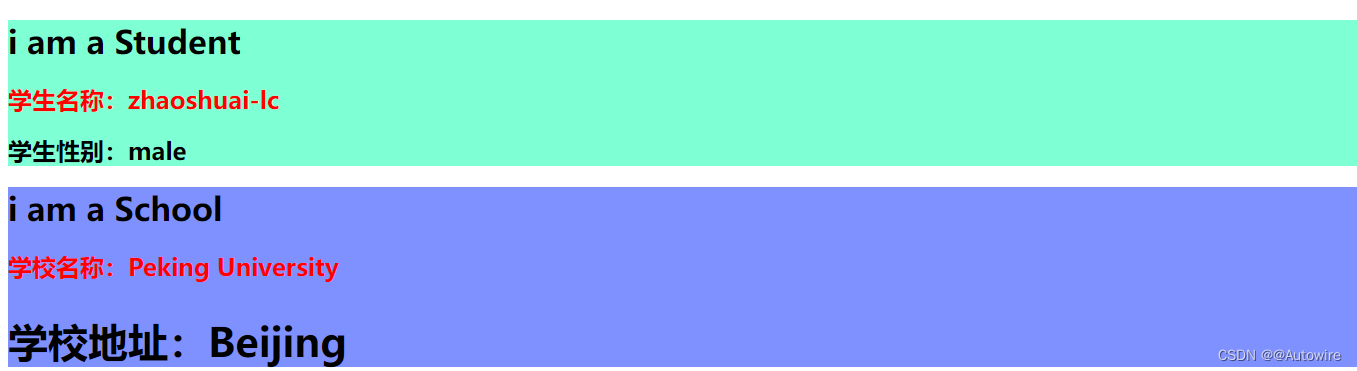
又如:
<template>
  <div class="sc">
    <h1>{{ msg }}</h1>
    <h2 class="title">学校名称:{{ name }}</h2>
    <h2 class="atlc">学校地址:{{ address }}</h2>
  </div>
</template>

<script>

export default {
  name: `School`,
  data() {
    return {
      msg: 'i am a School',
      name: 'Peking University',
      address: 'Beijing'
    }
  },
  methods: {}
}
</script>

<style lang="less" scoped>
.sc {
  background-color: #7f90ff;

  .atlc {
    font-size: 40px;
  }
}
</style>
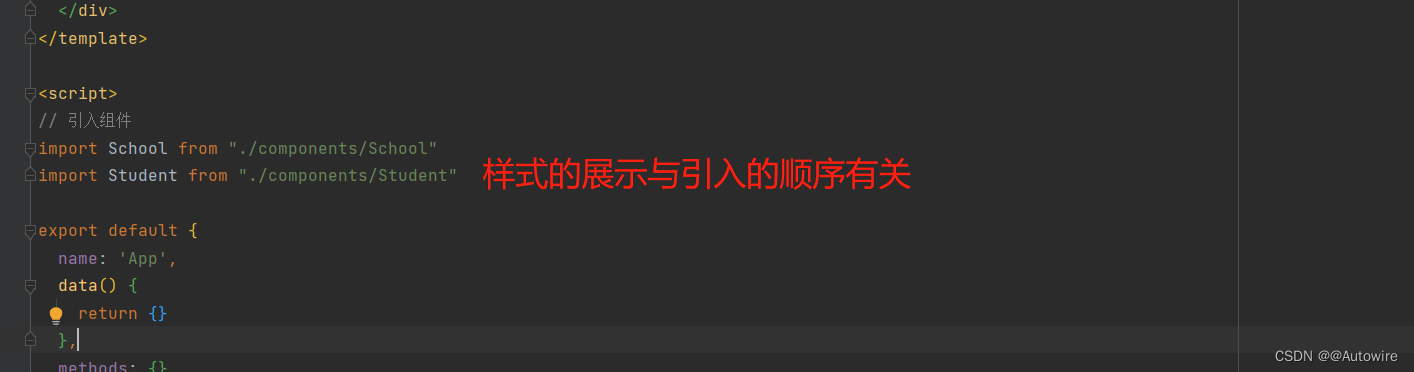
1)各个组件虽然样式是在自己的页面上写的,可是最后编译起来都会汇总到一起。
2)脚手架在解析Vue文件的时候,顺序是:最先扫描import引入、然后再读取配置项、最后才解析模板。
3)scoped原理:
其实就是在外层的div中,加了一个特殊的标签(随机生成值),通过标签+属性选择器,完成控制指定的div。
4)App组件不适合用。
5)安装less指令:npm i less-loader
查看less版本指令:npm view less-loader versions (less-loader可替换成别的,查看别的版本)
安装指定版本的less:npm i less-loader@7
scoped样式
作用:让样式在局部生效,放置冲突。
写法:<style scoped>