需求说明
1.父组件传参给子组件
1.1子组件中定义属性unitList
1.2 父组件中将data中的unitList传递给子组件
2.子组件向父组件传参
2.1子组件设置用户名文本框以及切换操作属性
2.2 子组件对应操作(文本输入以及按钮切换)添加自定义事件
2.3 父组件接收子组件自定义事件
3.完整代码
4.父子组件传参父组件数据同步但页面显示不同步问题处理
1.elementUI中textarea本设置换行显示
需求说明
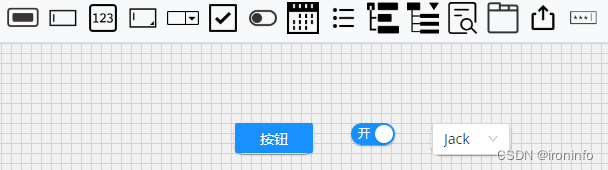
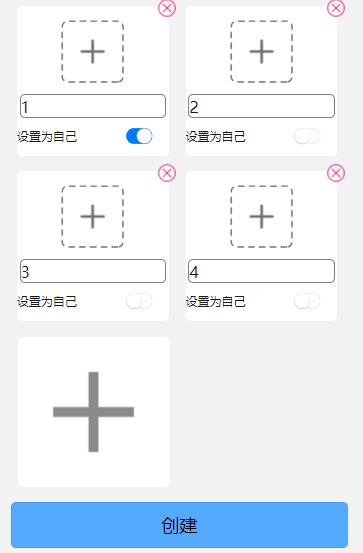
上一篇uniapp实战:父子组件传参之子组件数量动态变化介绍了如何动态添加子组件,这一篇讲一下如何实现父子组件传参.最终实现效果是可以从各个子组件中输入自定义昵称以及设置是否为自己,点击创建按钮时可获取各个组件的内容.
1.父组件传参给子组件
首先先看父组件传参给子组件,分别设置各子组件昵称为1、2、3、4。
1.1子组件中定义属性unitList
props:{
		     unitList: {
		     					type: Array,
								default: [{
										"userName":"",
										"userImg":"",
										"setMe":true,
										"unitId":0
										}],
		     					required: false
		     				}
		   }
1.2 父组件中将data中的unitList传递给子组件
父组件标签:
<setFriend class="addUnit"
				v-for="(unitItem,index) in unitList" :unitList="unitList" ></setFriend>
父组件data数据:
data() {
			return {
				unitList:[
					{
						"userName":"1",
						"userImg":"",
						"setMe":true,
						"unitId":0
					},
					{
						"userName":"2",
						"userImg":"",
						"setMe":true,
						"unitId":0
					},
					{
						"userName":"3",
						"userImg":"",
						"setMe":true,
						"unitId":0
					},
					{
						"userName":"4",
						"userImg":"",
						"setMe":true,
						"unitId":0
					}
					]
			}
		}
2.子组件向父组件传参
这里使用的办法是子组件中使用$emit添加自定义事件,父组件中使用@自定义事件名来接收子组件属性变化。涉及到的操作是输入框中输入内容,父组件中的用户昵称需要动态变化,设置是否为自己按钮切换也需要实现父组件中对应内容动态变化。
2.1子组件设置用户名文本框以及切换操作属性
props:{
			setMe: {
								type: Boolean,
								default: false,
								required: false
					},
			userName:{
				type: String,
				default: "xaiohon",
				required: false
			}
		   }
2.2 子组件对应操作(文本输入以及按钮切换)添加自定义事件
<input class="name"  placeholder="请输入昵称" @input="changeUserName()" v-model="subUserName"/>
				<view class="set-me">
					<text>设置为自己</text>
					<switch :checked="setMe" @change="switchChange" />
				</view>
事件执行内容:
methods:{
			switchChange(){
				var unitInfo={
					"userName":this.subUserName,
					"unitId":this.unitId,
					"setMe":!this.setMe
				}
				this.$emit("setMeChange",unitInfo)
			},
			changeUserName(){
				var unitInfo={
					"userName":this.subUserName,
					"unitId":this.unitId,
					"setMe":this.setMe
				}
				this.$emit("userNameChange",unitInfo)
			}

		}
2.3 父组件接收子组件自定义事件
父组件标签:
<setFriend class="addUnit"
				@userNameChange="getSubUserName"
				@setMeChange="getSubSetMe"></setFriend>
				<view class="addUnitClass" @click="addUnit">
父组件接收子组件自定义事件内容:
getSubUserName(e){
				console.log("singleFrind_getSubUserName_e:",e)
			},
			getSubSetMe(e){
				console.log("singleFrind_getSubSetMe_e:",e)
			},
这样就能将对应的子组件中的内容获取到了,剩下的就是添加到集合中,这里不在赘述.
3.完整代码
子组件:
<template>
	<view>
		<view class="unit">
			<image class="close_img" src="../../static/close_button.png" @click="closeUnit()"></image>
			<view class="uni_item">
				<image class="upload_img" src="../../static/upload_img.png"></image>
				<!-- <input class="name"  placeholder="请输入昵称" @input="changeUserName()" v-model="subUserName"/> -->
				<input class="name"  placeholder="请输入昵称" @input="changeUserName()" v-model="subUserName"/>
				<view class="set-me">
					<text>设置为自己</text>
					<switch :checked="setMe" @change="switchChange" />
				</view>
			</view>
		</view>
	</view>
</template>

<script>
	export default {
		name:"setFriend",
		data() {
			return {
				subUserName:this.userName+"--"+this.unitId,
				subUnitId:this.unitId
			};
		},
		props:{
		     unitList: {
		     					type: Array,
								default: [{
										"userName":"",
										"userImg":"",
										"setMe":true,
										"unitId":0
										}],
								// default:[],
		     					required: false
		     				},
			setMe: {
								type: Boolean,
								default: false,
								required: false
					},
			userName:{
				type: String,
				default: "xaiohon",
				required: false
			},
			unitId:{
				type: Number,
				default: 0,
				required: false
			}
		   },
		methods:{
			closeUnit(){
				console.log("closeUnit:this.unitList:",this.unitList)
				this.$emit("closeUnitChange",this.subUnitId)
			},
			switchChange(){
				var unitInfo={
					"userName":this.subUserName,
					"unitId":this.unitId,
					"setMe":!this.setMe
				}
				this.$emit("setMeChange",unitInfo)
			},
			changeUserName(){
				var unitInfo={
					"userName":this.subUserName,
					"unitId":this.unitId,
					"setMe":this.setMe
				}
				this.$emit("userNameChange",unitInfo)
			}

		}
	}
</script>

<style lang="scss">
	uni-page-body,page {
				height:100%;
				background-color: rgb(242, 242,242);
			}
	.unit{
		width: 90%;
		height: 150px;
		background-color: white;
		margin-top: 9px;
		margin-left: 5px;
		border-radius: 5px;
		position: relative;
		left: 1px;
		.close_img{
			width: 20px;
			height: 20px;
			position: absolute;
			left:140px;
			top:-8px;
		}
		.uni_item{
			width: 100%;
			height: 100%;
			display: flex;
			justify-content: center;
			align-items: center;
			flex-direction: column;
			.upload_img{
				width:65px;
				height: 65px;
				margin-bottom: 10px;
			}
			.name{
				border: 1px gray solid;
				border-radius: 5px;
				width: 95%;
				margin-bottom: 10px;
			}
			.set-me{
				width: 100%;
				height: 10%;
				display: flex;
				justify-content: space-between;
				align-items: center;
				text{
					font-size: 12px;
				}
				switch{
					transform:scale(0.5)
				}
			}
		}

	}

</style>
父组件:
<template>
	<view class="out">
		<view class="content">
			<view class="setting">
				<setFriend class="addUnit"
				v-for="(unitItem,index) in unitList" :unitList="unitList" :key="index"
				:setMe="index == 0 ? true:false"
				@userNameChange="getSubUserName"
				@setMeChange="getSubSetMe"
				@closeUnitChange="getUnitList"
				:unitId="index"
				:userName="unitItem.userName"></setFriend>
				<view class="addUnitClass" @click="addUnit">
					<image class="add_unit_img" src="../../static/add_unit.png"></image>
				</view>
			</view>
			<button @click="test">创建</button>
		</view>
	</view>
</template>

<script>
	export default {
		data() {
			return {
				unitList:[
					{
						"userName":"1",
						"userImg":"",
						"setMe":true,
						"unitId":0
					},
					{
						"userName":"2",
						"userImg":"",
						"setMe":true,
						"unitId":0
					},
					{
						"userName":"3",
						"userImg":"",
						"setMe":true,
						"unitId":0
					},
					{
						"userName":"4",
						"userImg":"",
						"setMe":true,
						"unitId":0
					}
					]
			}
		},
		methods: {
			test(){
				this.unitList.splice(0, 1);
				console.log(this.unitList)
			},
			addUnit(){
				this.unitList.push({
					"userName":"4",
					"userImg":"",
					"setMe":true,
					"unitId":this.unitList.length
				})
				console.log("addUnit this.unitList:",this.unitList)
			},
			getSubUserName(e){
				console.log("singleFrind_getSubUserName_e:",e)
			},
			getSubSetMe(e){
				console.log("singleFrind_getSubSetMe_e:",e)
			},
			getUnitList(e){
				console.log("getUnitList e:",e)
				console.log("singleFrind_unitList_old:",this.unitList)
				if(this.unitList.length != 0){
					this.unitList.splice(e, 1);
				}
				console.log("singleFrind_unitList:",this.unitList)
			}
		}
	}
</script>

<style lang="scss">
	uni-page-body,page {
				height:100%;
				background-color: rgb(242, 242,242);
			}
	.out{
		display: flex;
		justify-content: center;
		align-items: center;
		width: 90%;
		margin: auto;
		.content{
			width: 100%;
			// height: 400px;
			display: flex;
			justify-content: center;
			align-items: center;
			flex-direction: column;
			.setting{
				width: 100%;
				display: flex;
				justify-content: flex-start;
				align-items: center;
				flex-direction: row;
				flex-wrap:wrap;
				.addUnit{
					width: 50%;
					height: 150px;
					margin-bottom: 15px;
				}
				.addUnitClass{
					position: relative;
					top: 10px;
					margin-left: 7px;
					width: 45%;
					height: 150px;
					margin-bottom: 15px;
					background-color: white;
					display: flex;
					justify-content: center;
					align-items: center;
					border-radius: 5px;
					.add_unit_img{
						width: 80%;
						height: 80%;
					}
				}


			}
			button{
				position: relative;
				top: 10px;
				width: 100%;
				background-color: #55aaff;
			}
		}
	}


</style>
4.父子组件传参父组件数据同步但页面显示不同步问题处理
补充记录一下这个问题,对于存在多个子组件非父组件,如果点击任意子组件右上角关闭按钮,出现的场景是子组件数量会减少,但是减少的是总是最后一个组件.但是打印父组件中的子组件集合发现数据是正确的,但是页面显示不正确.处理的办法就是在子组件for循环调用处使用v-if设置是否显示强制刷新dom.
<view class="setting" v-if="showUnitList">
				<setFriend  class="addUnit"
				v-for="(unitItem,index) in unitList"  :key="index"
				@closeUnitChange="getUnitList"
				:unitId="index"
				:userName="unitItem.userName"></setFriend>
				<view class="addUnitClass" @click="addUnit">
					<image class="add_unit_img" src="../../static/add_unit.png"></image>
				</view>
			</view>
子组件中右上角关闭方法:
export default {
		name:"setFriend",
		data() {
			return {
				subUnitId:this.unitId
			};
		},
		props:{
			unitId:{
				type: Number,
				default: 0,
				required: false
			}
		methods:{
			closeUnit(){
				this.$emit("closeUnitChange",this.subUnitId)
			}

		}
	}
父组件关闭事件
getUnitList(e){
			if(this.unitList.length != 0){
				this.unitList.splice(e, 1);
				this.showUnitList = false
				this.$nextTick(() => {
					this.showUnitList = true
				})
			}
			console.log("singleFrind_unitList:",this.unitList)
		}