组件使用
父子组件传参 父传子 模板上直接使用 js里面使用 ts组件里面泛型接收 ts泛型里面设置默认值 子传父 方式一,采用defineEmits 方式二,采用ts的泛型 方式三,采用ref获取子组件内部暴露的数据和方法
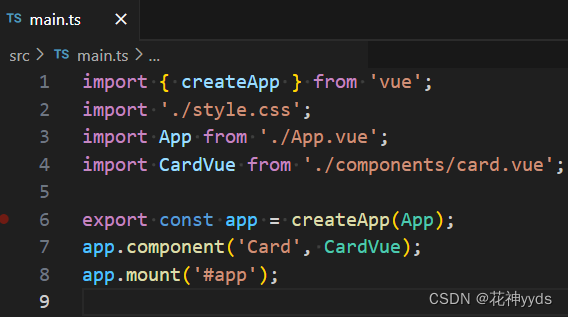
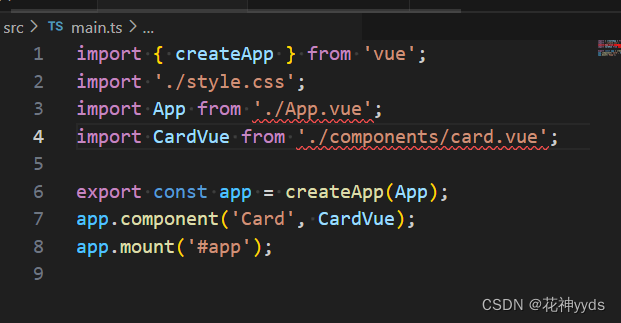
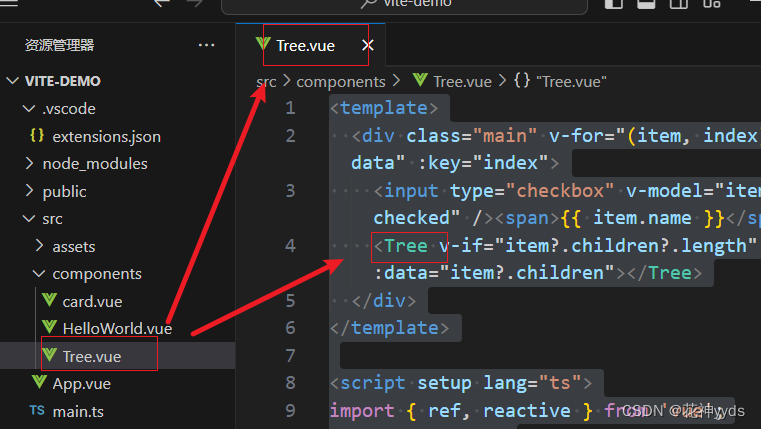
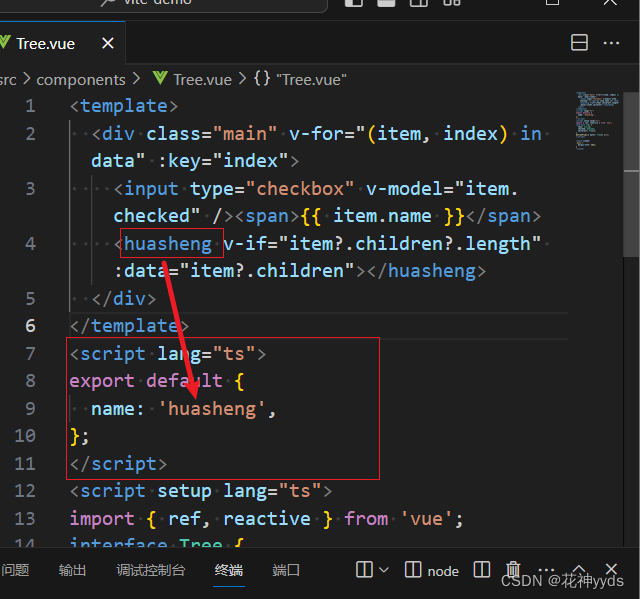
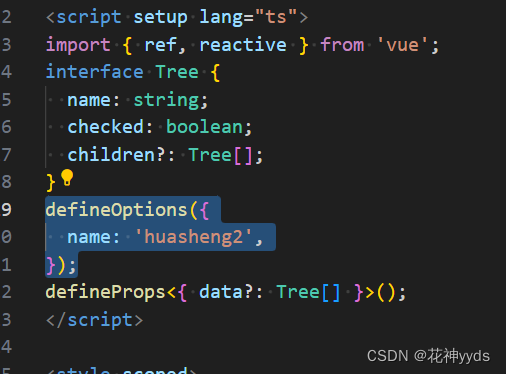
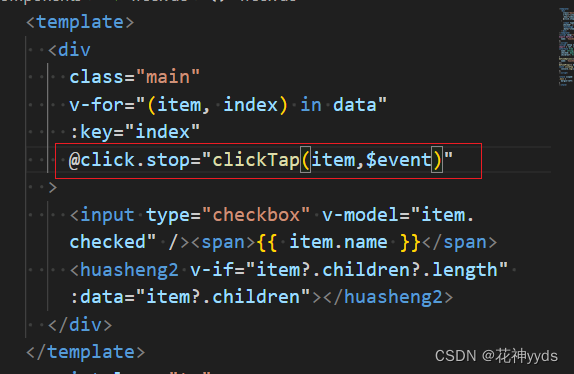
全局组件 发现有报错,找不到模块“./App.vue”或其相应的类型声明 批量导入组件 可选链 递归组件 步骤一,建立子组件Tree.vue 步骤二,建立父组件展示最终页面 如何设置递归组件名name 防止点击冒泡和传递event对象 动态组件
Teleport 传送组件 keep-alive缓存组件 include enclude max,缓存最多数 keep-alive生命周期onActivated和onDeactivated 异步组件
父组件通过v-bind绑定一个数据,然后子组件通过defineProps接受传过来的值 < template>
< div class = "main" >
< div class = "vt-test" > 子组件< / div>
< div> { { title } } < / div>
< / div>
< / template>
< script setup lang= "ts" >
defineProps ( {
title: {
type: String,
default : '默认值' ,
} ,
} ) ;
< / script>
const props = defineProps ( {
title: {
type: String,
default : '默认值' ,
} ,
} ) ;
console . log ( '父组件传过来的值' , props. title) ;
const prop = defineProps < {
title: string ;
} > ( ) ;
console . log ( '父组件传过来的值' , prop. title) ;
const prop = withDefaults (
defineProps < {
title: string ;
arr: number [ ] ;
} > ( ) ,
{
arr : ( ) => [ 1 , 2 , 3 ] ,
}
) ;
console . log ( '父组件传过来的值' , prop. title) ;
< template>
< div class = "main" >
< div class = "vt-test" > 子组件< / div>
< button @ click = "send" > 点击给父组件传值< / button>
< / div>
< / template>
< script setup lang= "ts" >
const emit = defineEmits ( [ 'on-click' , 'on-getname' ] ) ;
const send = ( ) => {
emit ( 'on-click' , '花神' ) ;
emit ( 'on-getname' , '花神' ) ;
} ;
< / script>
< template>
< div class = "vt-parents" > 父组件< / div>
< hr / >
< Helloworld : title= "name" @ on - click= "getclick" @ on - getname= 'getName' > < / Helloworld>
< / template>
< script setup lang= "ts" >
import Helloworld from './components/HelloWorld.vue' ;
const name = '花神' ;
const getName = ( value) => {
console . log ( value, '子组件传的值' ) ;
} ;
< / script>
const emit = defineEmits ( [ 'on-click' , 'on-getname' ] ) ;
const send = ( ) => {
emit ( 'on-click' , '花神' ) ;
emit ( 'on-getname' , '花神2' ) ;
} ;
const getname = ( ) => {
emit ( 'on-getname' , '花神2' ) ;
} ;
< script setup lang= "ts" >
const emit = defineEmits < {
( e: 'on-click' , value: string ) : void ;
( e: 'on-getname' , value: string ) : void ;
} > ( ) ;
const send = ( ) => {
emit ( 'on-click' , '花神' ) ;
} ;
const getname = ( ) => {
emit ( 'on-getname' , '花神2' ) ;
} ;
< / script>
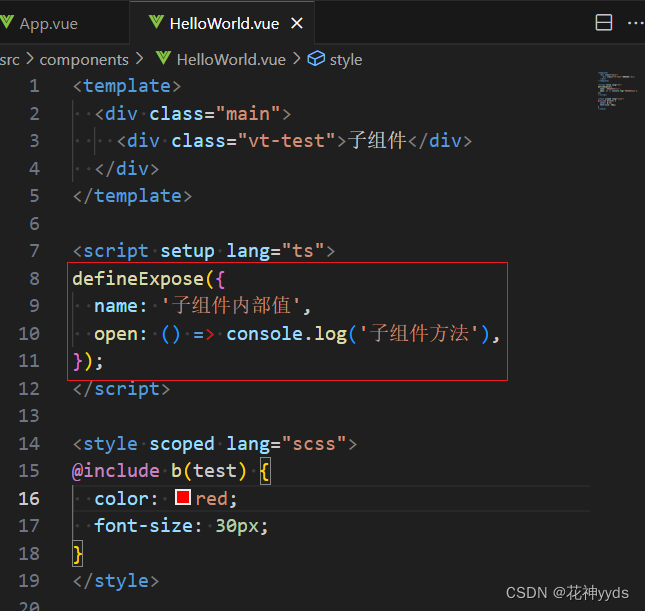
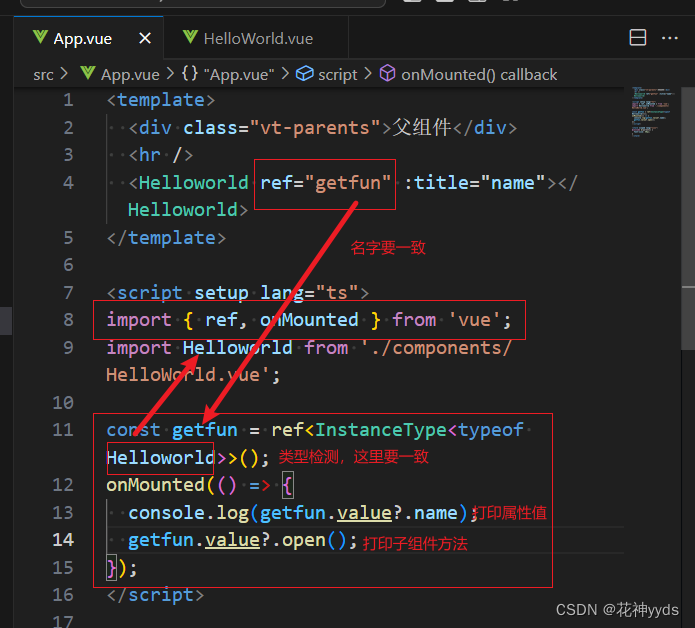
defineExpose 类型检测<InstanceType>不写也行
页面上直接使用即可
解决思路:在项目根目录 env.d.ts 文件中,加入以下内容:
declare module "*.vue" {
import type { DefineComponent } from "vue"
const vueComponent: DefineComponent< { } , { } , any >
export default vueComponent
}
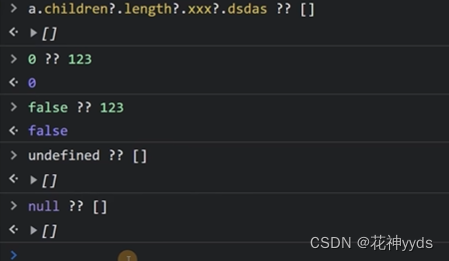
想一次性全部导入模块的所有变量就可以使用 * as 代表全部 Object.entries() ,将一个对象中可枚举属性的键名和键值按照二维数组的方式返回 单问号,没有值返回undefined 双问号,只判断undefined和null,0和false不处理 简单来说就是在组件中内使用组件本身 一般用来实现树形菜单,多级菜单 注意的是:要防止无限递归,造成调用栈溢出 < template>
< div class = "main" v- for = "(item, index) in data" : key= "index" >
< input type= "checkbox" v- model= "item.checked" / > < span> { { item. name } } < / span>
< Tree v- if = "item?.children?.length" : data= "item?.children" > < / Tree>
< / div>
< / template>
< script setup lang= "ts" >
import { ref, reactive } from 'vue' ;
interface Tree {
name: string ;
checked: boolean ;
children? : Tree[ ] ;
}
defineProps < { data? : Tree[ ] } > ( ) ;
< / script>
< style scoped>
. main {
margin- left: 30px;
}
< / style>
< template>
< div class = "main" > < / div>
< TreeVal : data= "data" > < / TreeVal>
< / template>
< script setup lang= "ts" >
import { ref, reactive } from 'vue' ;
import TreeVal from './components/Tree.vue' ;
interface Tree {
name: string ;
checked: boolean ;
children? : Tree[ ] ;
}
const data = reactive < Tree[ ] > ( [
{
name: '1' ,
checked: false ,
children: [
{
name: '1-1' ,
checked: false ,
children: [
{
name: '1-1-1' ,
checked: false ,
children: [ ] ,
} ,
] ,
} ,
] ,
} ,
{
name: '2' ,
checked: false ,
children: [ ] ,
} ,
] ) ;
< / script>
< style scoped> < / style>
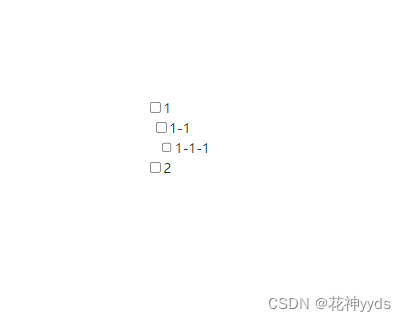
最终展示页面 方式一:可以采用文件名本身 方式二:可以页面内再建script里自定义组件名 方式三:通过插件
让多个组件使用同一个挂载点,并动态切换 在挂载点使用component标签,然后使用v-bind :is=”组件“ < template>
< div v- for = "(item, index) in com" : key= "index" >
< div> { { item. name } } < / div>
< component : is = "item.com" > < / component>
< / div>
< / template>
< script lang= "ts" >
import A from './components/A.vue' ;
import B from './components/B.vue' ;
import C from './components/C.vue' ;
export default {
components: {
A ,
B ,
C ,
} ,
} ;
< / script>
< script setup lang= "ts" >
import { ref, reactive } from 'vue' ;
const com = reactive ( [
{ name: 'A组件' , com: "A" } ,
{ name: 'B组件' , com: "B" } ,
{ name: 'C组件' , com: "C" } ,
] ) ;
< / script>
< template>
< div v- for = "(item, index) in com" : key= "index" >
< div> { { item. name } } < / div>
< component : is = "item.com" > < / component>
< / div>
< / template>
< script setup lang= "ts" >
import { ref, reactive } from 'vue' ;
import A from './components/A.vue' ;
import B from './components/B.vue' ;
import C from './components/C.vue' ;
const com = reactive ( [
{ name: 'A组件' , com: A } ,
{ name: 'B组件' , com: B } ,
{ name: 'C组件' , com: C } ,
] ) ;
< / script>
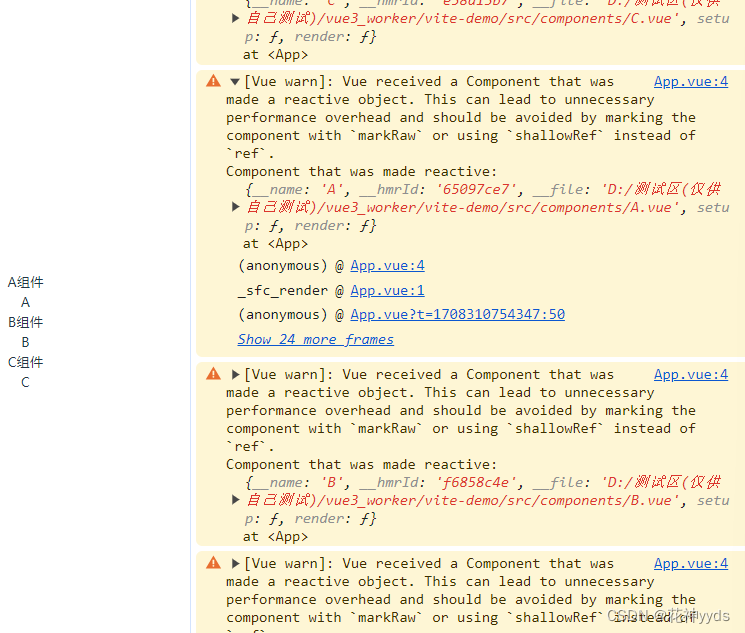
虽然展示,但有报错 使用markRaw,到时候会多一个skip属性,reactive碰到这个属性,会跳过proxy代理 < script setup lang= "ts" >
import { ref, reactive, markRaw } from 'vue' ;
import A from './components/A.vue' ;
import B from './components/B.vue' ;
import C from './components/C.vue' ;
const com = reactive ( [
{ name: 'A组件' , com: markRaw ( A ) } ,
{ name: 'B组件' , com: markRaw ( B ) } ,
{ name: 'C组件' , com: markRaw ( C ) } ,
] ) ;
< / script>
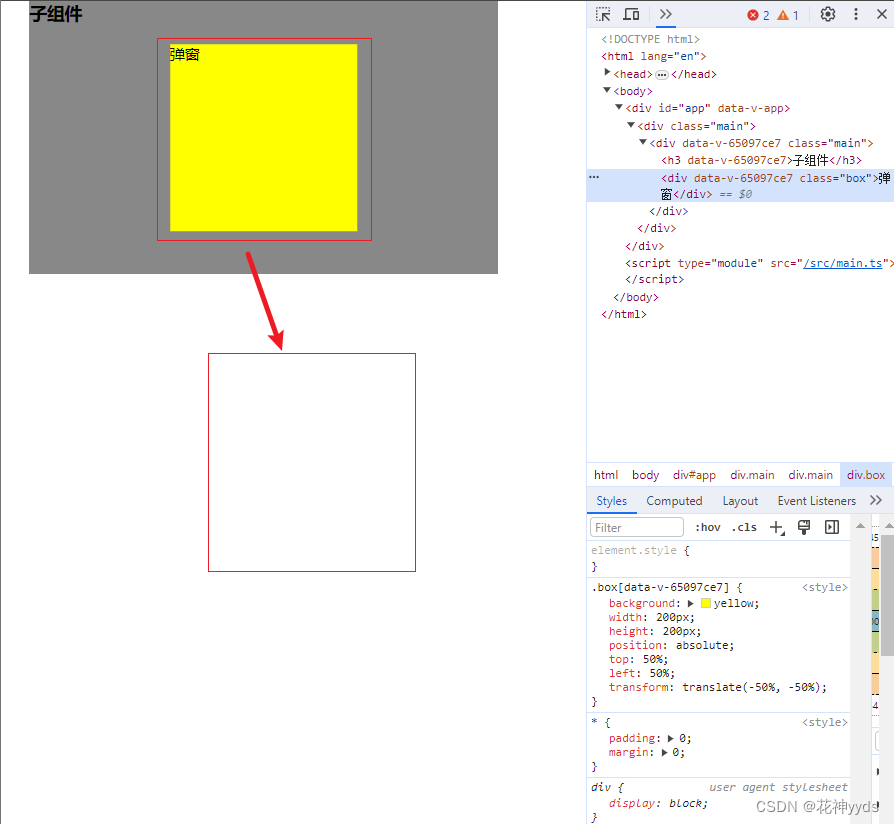
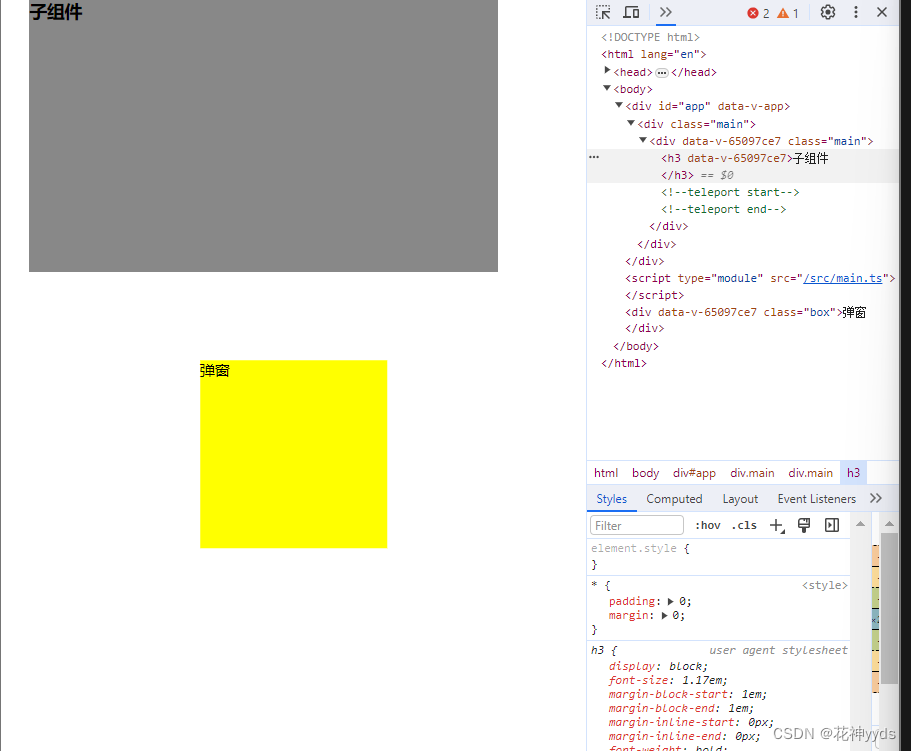
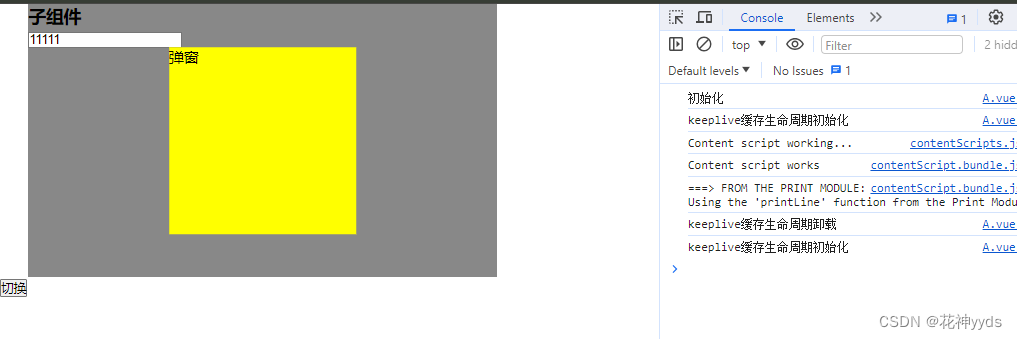
Teleport是一种能够将我们的模板渲染至指定Dom节点,不受父级style,v-show等属性影响 但data,prop数据依旧能够共用的技术 主要为了解决,使Teleport节点挂载在其他指定的节点下,完全不受父级style样式的影响 例如:想要将子组件的这个弹窗挂载到外层 使用Teleport ,to挂载到想要展示的层级 < template>
< div class = "main" >
< h3> 子组件< / h3>
< ! -- disabled设置为true ,则to不生效,否则生效 -- >
< Teleport to= "body" : disabled= "true " >
< div class = "box" > 弹窗< / div>
< / Teleport>
< / div>
< / template>
< script setup lang= "ts" >
import { ref, reactive } from 'vue' ;
< / script>
< style scoped lang= "less" >
. main {
position: relative;
width: 500px;
height: 30vh;
margin- left: 30px;
background: #888 ;
}
. box {
background: yellow;
width: 200px;
height: 200px;
position: absolute;
top: 50 % ;
left: 50 % ;
transform: translate ( - 50 % , - 50 % ) ;
}
< / style>
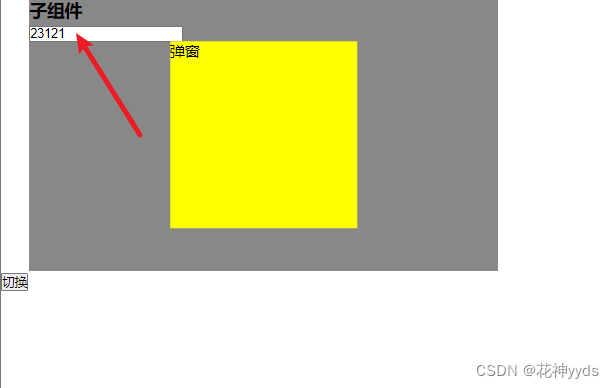
注意,keep-alive里面只能有一个子节点,不能放多个,多个的话需要if条件判断只显示一个 有时候不希望组件被重新渲染影响使用体验,或者处于性能考验,避免多次重复渲染 目的,想要切换组件的时候,将我之前输入的值保留 缓存name匹配上的 在vue3中,组件内部的组件name需要重新写,setup的语法糖不支持 子组件 < template>
< div class = "main" >
< h3> 子组件< / h3>
< Teleport to= "body" : disabled= "true" >
< div class = "box" > 弹窗< / div>
< / Teleport>
< input type= "text" / >
< / div>
< / template>
< script setup lang= "ts" >
import { ref, reactive } from 'vue' ;
< / script>
< script lang= "ts" >
export default {
name: 'Avue' ,
} ;
< / script>
< template>
< div class = "main" >
< ! -- include,只缓存名字匹配的,例如,这次只缓存Avue,Bvue不缓存-- >
< keep- alive : include= "['Avue']" >
< Avue v- if = "istrue" > < / Avue>
< Bvue v- else > < / Bvue>
< / keep- alive>
< button @ click = "change" > 切换< / button>
< / div>
< / template>
< script setup lang= "ts" >
import { ref, reactive } from 'vue' ;
import Avue from './components/A.vue' ;
import Bvue from './components/B.vue' ;
let istrue = ref ( 'true' ) ;
const change = ( ) => {
istrue. value = ! istrue. value;
} ;
< / script>
< style scoped> < / style>
超出max,会剔除旧的,不活跃的,保留新组件进行缓存 < template>
< div class = "main" >
< h3> 子组件< / h3>
< Teleport to= "body" : disabled= "true" >
< div class = "box" > 弹窗< / div>
< / Teleport>
< input type= "text" / >
< / div>
< / template>
< script setup lang= "ts" >
import {
ref,
reactive,
onMounted,
onUnmounted,
onActivated,
onDeactivated,
} from 'vue' ;
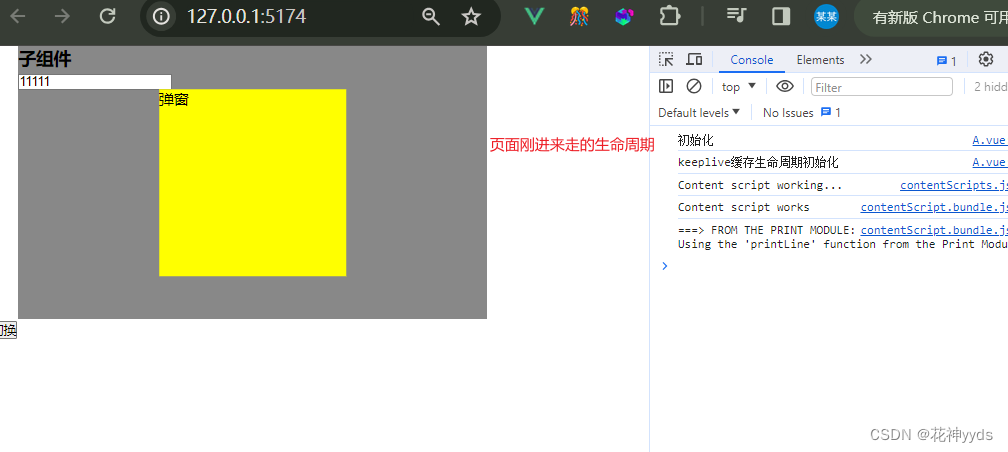
onMounted ( ( ) => {
console . log ( '初始化' ) ;
} ) ;
onActivated ( ( ) => {
console . log ( 'keeplive缓存生命周期初始化' ) ;
} ) ;
onDeactivated ( ( ) => {
console . log ( 'keeplive缓存生命周期卸载' ) ;
} ) ;
onUnmounted ( ( ) => {
console . log ( '卸载' ) ;
} ) ;
< / script>
< script lang= "ts" >
export default {
name: 'Avue' ,
} ;
< / script>
切换后 切回来 defineAsyncComponent加载异步组件 大型应用中,需要将应用分割成小一些的代码块,并且减少主包的体积 < template>
< div class = "main" >
< Suspense>
< template #default >
< Syncvue> < / Syncvue>
< / template>
< template #fallback>
< ! -- 放置骨架屏等 -- >
< / template>
< / Suspense>
< / div>
< / template>
< script setup lang= "ts" >
import { ref, reactive, defineAsyncComponent} from 'vue' ;
const Syncvue = defineAsyncComponent ( ( ) = 》{ import ( '@/components/sync.vue' ) } )
< / script>
< style scoped> < / style>
它帮助我们处理异步组件,但它的作用远不止于此 我们可以将异步组件的加载状态和占位内容进行统一管理。当异步组件加载完成时,会自动替换占位内容,从而实现平滑的过渡效果 Suspense 允许我们协调整个应用程序的加载状态,而不是一个页面上到处都是 loading Suspense,把异步组件放入 default 槽,把回退加载状态放入 fallback 槽。 Suspense 机制还提供了错误处理的能力。当异步组件加载出错时,可以显示自定义的错误信息,以便及时通知用户 < template>
< Suspense>
< template v- slot: default >
< div> Loading... < / div>
< / template>
< template v- slot: error>
< div> Failed to load component. < / div>
< / template>
< Syncvue / >
< / Suspense>
< / template>
< script>
import { defineAsyncComponent } from 'vue' ;
const Syncvue = defineAsyncComponent ( ( ) = 》{ import ( '@/components/sync.vue' ) } )
export default {
components: {
Syncvue ,
} ,
} ;
< / script>




![[CISCN2019 华北赛区 Day2 Web1]Hack World 1 题目分析与详解](https://img-blog.csdnimg.cn/direct/2cbd5b93d0114c1b94ab42ced97d86bd.png)
