用Chatgpt一段时间了,最近在想有没有离线可以装在本机的chatgpt,这样哪天openai把咱们渠道堵得死死的之后,咱们还有东西可用。网上一搜还真有,比如这个ChatGLM3,我用的就是ChatGLM3-6B。
官网有详细的部署教程,但实际操作的时候还是有点问题。
下面是我的部署过程:
我的环境:
windows 11 + 12400 + 32G内存 + 1660s显卡(6G显存)
1.下载代码
# 先克隆代码
git clone https://github.com/THUDM/ChatGLM3
cd ChatGLM3
2.安装Conda
conda用来隔离环境,比如电脑上装了python3.11,这里需要使用python3.10,就可以用conda来隔离。
conda下载地址:Conda Documentation — conda 24.1.2 documentation
安装完之后,在命令行中输入conda,如果找不到命令,可以在开始菜单中找下面这个:

进入conda命令行之后,执行下面的命令,意思是创建chatglm3-demo的隔离环境,使用python3.10
conda create -n chatglm3-demo python=3.10
conda activate chatglm3-demo
3.安装python的依赖包
在conda命令行中切换到ChatGLM3目录
切换目录如下所示:

执行下面的代码:
cd ChatGLM3
# 先安装ChatGLM3的依赖,可能时间比较长。
# 可以指定清华的源:pip install -i https://pypi.tuna.tsinghua.edu.cn/simple -r requirements.txt
pip install -r requirements.txt
# 再切换到composite_demo下面安装依赖,因为我们最终要跑的web页面在这个下面
cd composite_demo
pip install -r requirements.txt
4.安装pytorch
官方教程里面没有提这个,我按照官方教程弄完之后,发现走的是cpu,而不是gpu,因为看任务管理器显卡没反应,而且对话半天出不来结果。
这个pytorch默认调用的cpu,可以用下面这个命令查看:
# 可以看到显示的是cpu
$ python -c "import torch; print(torch.__version__)"
2.2.0+cpu

# 可以看到cuda不可用,就是nvidia的cuda不可用,就是显卡不可用
$ python -c "import torch; print(torch.cuda.is_available())"
False
PyTorch可以到 pytorch官网查看对应的版本

可以在红框里面选择操作系统、语言等,有个要注意就是CUDA的版本,可以用下面的命令获取:
nvidia-smi比如我这边的版本就是12.4,所以选择pytorch中的CUDA 12.1
最终得到的绿框的内容,复制到本机执行就可以了。这个包很大,有2.5G。它会自动卸载原来的cpu版本的包,再安装GPU版本的包。
pip3 install torch torchvision torchaudio --index-url https://download.pytorch.org/whl/cu121安装完之后,再查看下:
# 可以看到已经变成cu121
$ python -c "import torch; print(torch.__version__)"
2.2.0+cu121

# 可以看到cuda变成True,表示可用
$ python -c "import torch; print(torch.cuda.is_available())"
True
5.修改源码
官方描述默认要13GB显存,如果GPU显存有限,改成它下面这样。

实测,改成官方这样之后报错:RuntimeError: Library cublasLt is not initialized

由于我之前调试过stable-diffusion-webui,当时是设置的一半显存,于是我就在想这个改成一半是不是也可以?
要改的就是下面这两行代码:

class HFClient(Client):
    def __init__(self, model_path: str, tokenizer_path: str, pt_checkpoint: str = None):
        self.model_path = model_path
        self.tokenizer = AutoTokenizer.from_pretrained(tokenizer_path, trust_remote_code=True)

        if pt_checkpoint is not None and os.path.exists(pt_checkpoint):
            config = AutoConfig.from_pretrained(
                model_path,
                trust_remote_code=True,
                pre_seq_len=PRE_SEQ_LEN
            )
            # self.model = AutoModel.from_pretrained(
            #     model_path,
            #     trust_remote_code=True,
            #     config=config,
            #     device_map="auto").eval()
            self.model = AutoModel.from_pretrained(
                model_path,
                trust_remote_code=True,
                config=config).half().cuda().eval()
            # add .quantize(4).cuda() before .eval() and remove device_map="auto" to use int4 model
            prefix_state_dict = torch.load(os.path.join(pt_checkpoint, "pytorch_model.bin"))
            new_prefix_state_dict = {}
            for k, v in prefix_state_dict.items():
                if k.startswith("transformer.prefix_encoder."):
                    new_prefix_state_dict[k[len("transformer.prefix_encoder."):]] = v
            print("Loaded from pt checkpoints", new_prefix_state_dict.keys())
            self.model.transformer.prefix_encoder.load_state_dict(new_prefix_state_dict)
        else:
            self.model = AutoModel.from_pretrained(MODEL_PATH, trust_remote_code=True).half().cuda().eval()
            # add .quantize(4).cuda() before .eval() and remove device_map="auto" to use int4 model
然后再尝试运行,果然好了。(PS:第一次启动的时候会下载module,一共7个,每个1G多,比较慢)

运行代码切换到ChatGLM3\composite_demo,执行下面的命令:
streamlit run main.py
最终效果: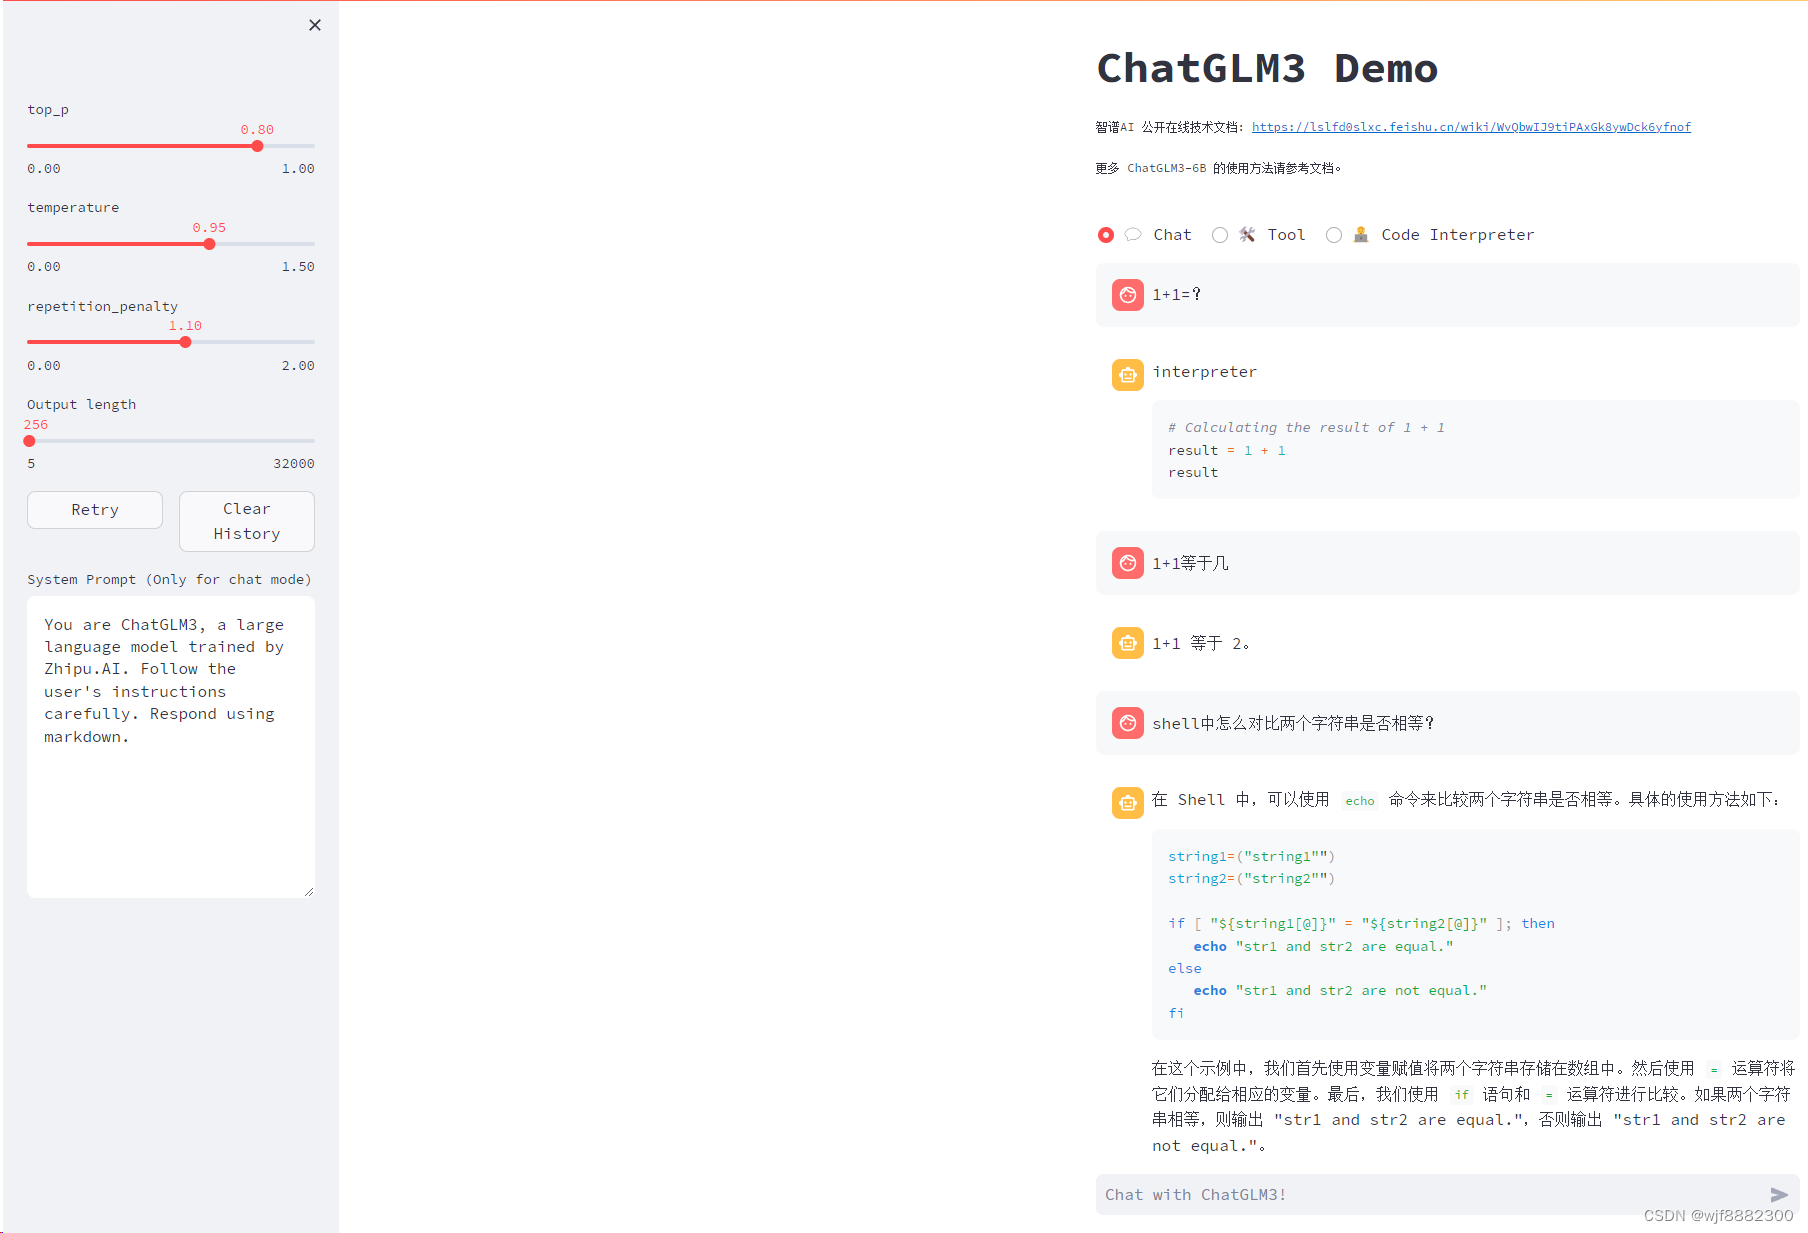





![洛谷 P1075 [NOIP2012 普及组] 质因数分解](https://img-blog.csdnimg.cn/direct/ccf98a2ac1b84976baec6912b93bdddc.png)


