日常开发中,最绕不开的一个控件就是EditText,随之避免不了的则是对其软键盘事件的监听,随着需求的不同对用户输入的软键盘要求也不同,有的场景需要用户输入完毕后,有一个确认按钮,有的场景需要的是回车,有的场景需要用户输入后进入下一项或者搜索,所幸的是,大部分需求场景通过修改原生设置就可满足,只要极少情况下才需要去写自定义键盘。而关于EditText唤起的软键盘中回车的功能可以通过imeOptions的设定来进行相应的设置。
其使用方式仅通过在xml中声明即可:
<EditText
            ...
            android:imeOptions="actionSend"/>
常用属性
如果不特殊声明,右下角按键则为回车键。其常用属性及相应功能设置如下:
| 属性 | 右下角按键显示及常见应用场景 |
|---|---|
| actionGo | 右下角按键显示“开始” |
| actionSearch | 右下角显示放大镜,对应搜索功能场景 |
| actionSend | 右下角按键内容为"发送",一般用于即时聊天页面 |
| actionNext | 右下角按键内容为“下一步”或者“下一项”,会跳到下一个EditText |
| actionDone | 右下角按键内容为“完成” |
| actionNone | 无任何提示 |
| flagNoExtractUi | 使软键盘不全屏显示,只占用一部分屏幕,右下角按键为默认回车键在指定imeOptions后,还要添加android:inputType="text"属性。 |
也可以通过代码去设置对应属性,如下:
editText.setInputType(EditorInfo.TYPE_CLASS_TEXT);
editText.setImeOptions(EditorInfo.IME_ACTION_...);
其属性与代码中设置的常量关系为:
| 属性 | 对应常量 |
|---|---|
| actionGo | EditorInfo.IME_ACTION_GO |
| actionSearch | EditorInfo.IME_ACTION_SEARCH |
| actionSend | EditorInfo.IME_ACTION_SEND |
| actionNext | EditorInfo.IME_ACTION_NEXT |
| actionDone | EditorInfo.IME_ACTION_DONE |
| actionNone | EditorInfo.IME_ACTION_NONE |
| actionUnspecified(未指定) | EditorInfo.IME_ACTION_UNSPECIFIED |
监听
对应的EditText可以设置相应的监听,editText.setOnEditorActionListener,在监听的onEditorAction()中通过返回的actionId参数来判断触发的对应事件。例如以下示例:
xml中简单设置一个EditText:
<?xml version="1.0" encoding="utf-8"?>
<RelativeLayout xmlns:android="http://schemas.android.com/apk/res/android"
    xmlns:tools="http://schemas.android.com/tools"
    android:layout_width="match_parent"
    android:layout_height="match_parent"
    tools:context=".MainActivity">
    <EditText
        android:id="@+id/edt_view"
        android:layout_width="wrap_content"
        android:layout_height="wrap_content"
        android:layout_centerInParent="true"
        android:imeOptions="actionGo"
        android:inputType="text"/>
</RelativeLayout>
对应在Activity中对其进行事件监听:
@Override
protected void onCreate(Bundle savedInstanceState) {
    super.onCreate(savedInstanceState);
    setContentView(R.layout.activity_main);
    EditText mEdtView = findViewById(R.id.edt_view);
    mEdtView.setOnEditorActionListener(new TextView.OnEditorActionListener() {
        @Override
        public boolean onEditorAction(TextView v, int actionId, KeyEvent event) {
            switch (actionId){
                case EditorInfo.IME_ACTION_DONE:
                    Toast.makeText(MainActivity.this, "IME_ACTION_DONE", Toast.LENGTH_SHORT).show();
                    break;
                case EditorInfo.IME_ACTION_GO:
                    Toast.makeText(MainActivity.this, "IME_ACTION_GO", Toast.LENGTH_SHORT).show();
                    break;
                case EditorInfo.IME_ACTION_NEXT:
                    Toast.makeText(MainActivity.this, "IME_ACTION_NEXT", Toast.LENGTH_SHORT).show();
                    break;
                case EditorInfo.IME_ACTION_NONE:
                    Toast.makeText(MainActivity.this, "IME_ACTION_NONE", Toast.LENGTH_SHORT).show();
                    break;
                case EditorInfo.IME_ACTION_PREVIOUS:
                    Toast.makeText(MainActivity.this, "IME_ACTION_PREVIOUS", Toast.LENGTH_SHORT).show();
                    break;
                case EditorInfo.IME_ACTION_SEARCH:
                    Toast.makeText(MainActivity.this, "IME_ACTION_SEARCH", Toast.LENGTH_SHORT).show();
                    break;
                case EditorInfo.IME_ACTION_SEND:
                    Toast.makeText(MainActivity.this, "IME_ACTION_SEND", Toast.LENGTH_SHORT).show();
                    break;
                case EditorInfo.IME_ACTION_UNSPECIFIED:
                    Toast.makeText(MainActivity.this, "IME_ACTION_UNSPECIFIED", Toast.LENGTH_SHORT).show();
                    break;
                default:
                    break;
            }
            return true;
        }
    });
}
其对应效果为:
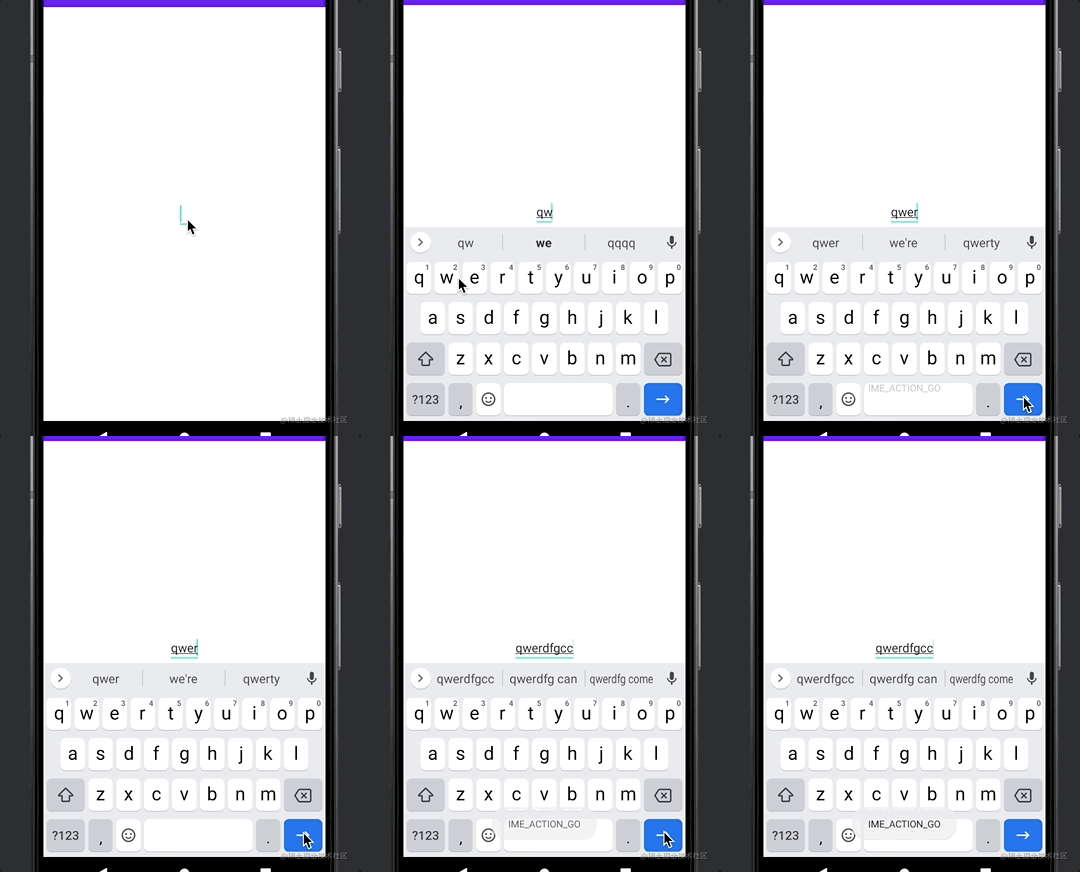
对应吐司也验证了我们代码的运行,我们再在xml中删除对应属性,用代码的形式声明试试。
xml中:
<?xml version="1.0" encoding="utf-8"?>
<RelativeLayout xmlns:android="http://schemas.android.com/apk/res/android"
    xmlns:tools="http://schemas.android.com/tools"
    android:layout_width="match_parent"
    android:layout_height="match_parent"
    tools:context=".MainActivity">
    <EditText
        android:id="@+id/edt_view"
        android:layout_width="wrap_content"
        android:layout_height="wrap_content"
        android:layout_centerInParent="true"
        android:inputType="text"/>
</RelativeLayout>
可见,其余无变动,对应activity的修改则是在设置监听前设置对应属性:
...
mEdtView.setImeOptions(EditorInfo.IME_ACTION_SEND);
...
其效果为:
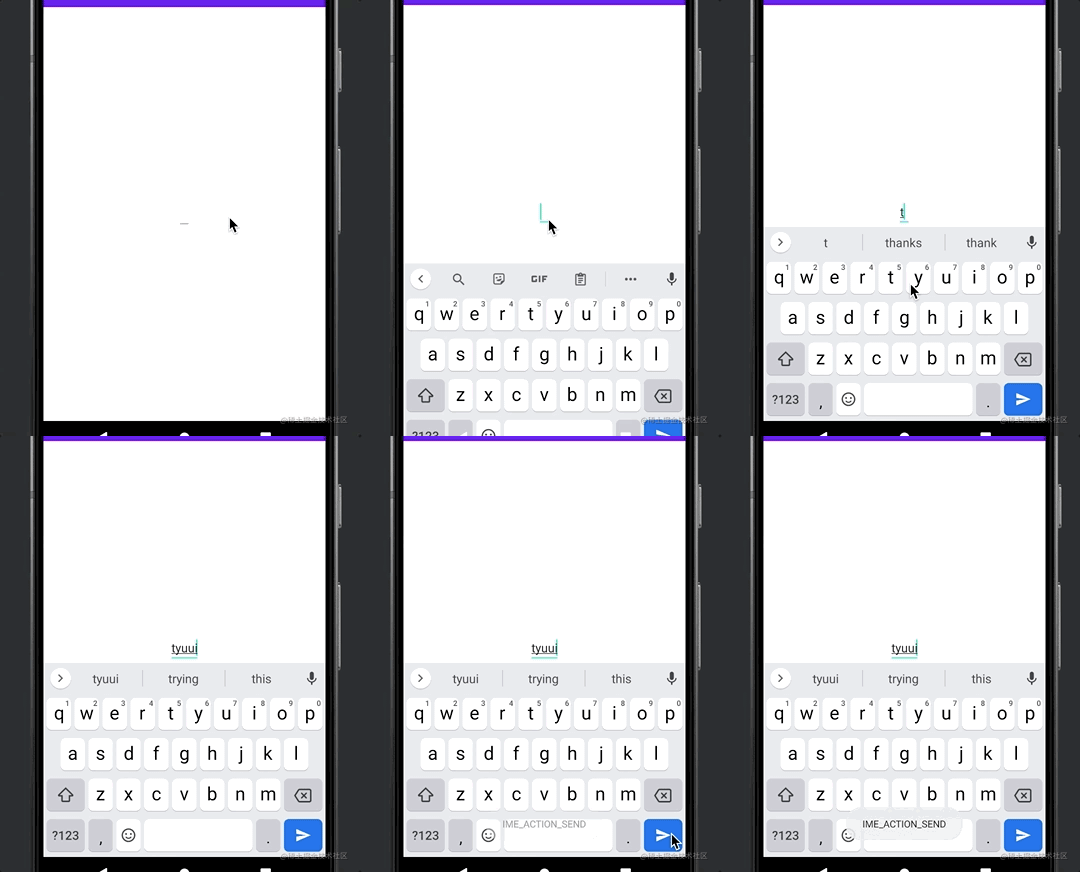
可见,代码中设置效果则一样,也许你会疑问,为什么点击右下角按键后还不能收起软键盘,系统中是没有这样主动行为的,需要我们自己来调用以下方法即可:
InputMethodManager imm = (InputMethodManager) context.getSystemService(Context.INPUT_METHOD_SERVICE);
imm.hideSoftInputFromWindow(context.getWindow().getDecorView().getWindowToken(), 0);
重复响应问题
这里需要注意的是,onEditorAction中,如果返回的是false,则onEditorAction中的代码可能会调用两次,原因不难理解,系统会首先判断用户实现的方法onEditorActionListener.onEditorAction(this, actionCode, null)的返回值,一旦返回true,会立即return,因此系统的处理被直接跳过。
设置无效问题
当设置了android:maxLines=“1” 属性时,有可能出现设置无效问题,这里要改为android:singleLine="true"此属性即可。当然,有可能个别的机型还有其他适配问题,比如三星等等,有遇见的朋友可以留言互相交流。
