开发环境:ubuntu18.04 64bit
mqtt客户端测试工具:mqtt.fx 1.7.1
1.安装
# 引入库
sudo apt-add-repository ppa:mosquitto-dev/mosquitto-ppa
sudo apt-get update
# 安装
sudo apt-get install mosquitto
#安装客户端
sudo apt-get install mosquitto-clients
2.测试
2.1启动mosquitto
# 查看mosquitto是否启动
ps -aux | grep mosquitto
mosquit+  44224  0.0  0.1  48032  6208 ?        S    20:01   0:00 /usr/sbin/mosquitto -c /etc/mosquitto/mosquitto.conf

# 启动或停止mosquitto
sudo service mosquitto start
sudo service mosquitto stop

# 或指定配置文件启动
sudo mosquitto -d -c /etc/mosquitto/mosquitto.conf
2.2mqtt.fx配置
打开mqtt.fx,新建一个配置,填定服务器ip和mqtt服务默认端口,点connect看能不能连接上。

2.3 订阅或发布消息
# 订阅消息
mosquitto_sub -h ip -t "test"
-h:服务器的ip地址,也就是mosquitto程序所在系统的ip地址
-t:topic

# 发布消息
mosquitto_pub -h ip -t "test" -m "my name is xxx"
-h:服务器的ip地址,也就是mosquitto程序所在系统的ip地址
-t:topic
-m:消息的内容
在mqtt.fx上发布消息

在ubuntu上的订阅就收到了这条消息

在mqtt.fx上订阅消息,在ubuntu上发布消息

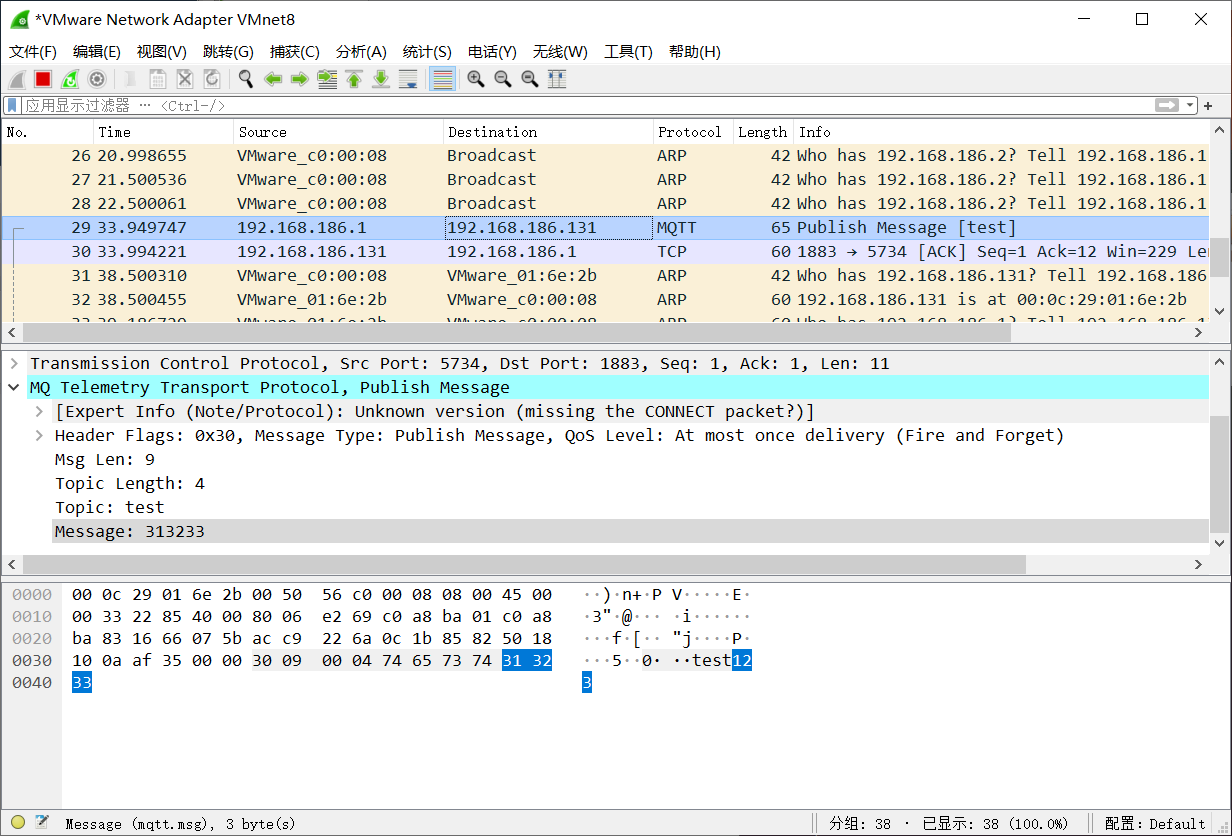
2.4 抓包
通过抓包可看到,此时mqtt传输的还是明文。
3.生成证书
生成证书可以参数这篇博文:https://www.codenong.com/cs107110960/
但我根据这篇博文生成的证书双向验证一直失败,没找到什么原因,后来我看了另一篇博文:https://primalcortex.wordpress.com/2016/11/08/mqtt-mosquitto-broker-client-authentication-and-client-certificates/
用文中提供的一个脚本generate-CA.sh生成证书就没有问题了:
https://github.com/owntracks/tools/blob/master/TLS/generate-CA.sh
生成ca证书和server证书:
sy@ubuntu:~/key$ ./generate-CA.sh
Generating a RSA private key
......++++
...++++
writing new private key to './ca.key'
-----
Created CA certificate in ./ca.crt
subject=
    commonName                = An MQTT broker
    organizationName          = OwnTracks.org
    organizationalUnitName    = generate-CA
    emailAddress              = nobody@example.net
Warning: the CA key is not encrypted; store it safely!
--- Creating server key and signing request
Generating RSA private key, 4096 bit long modulus (2 primes)
......++++
..................................................................................++++
e is 65537 (0x010001)
--- Creating and signing server certificate
Signature ok
subject=CN = ubuntu, O = OwnTracks.org, OU = generate-CA, emailAddress = nobody@example.net
Getting CA Private Key
sy@ubuntu:~/key$ ls
ca.crt  ca.key  ca.srl  generate-CA.sh  ubuntu.crt  ubuntu.csr  ubuntu.key
生成客户端证书:
sy@ubuntu:~/key$ ./generate-CA.sh client client
--- Creating client key and signing request
Generating RSA private key, 4096 bit long modulus (2 primes)
...........................................................++++
.......................................................................................++++
e is 65537 (0x010001)
--- Creating and signing client certificate
Signature ok
subject=CN = client
Getting CA Private Key
sy@ubuntu:~/key$ ls
ca.crt  ca.srl      client.csr  generate-CA.sh  ubuntu.csr
ca.key  client.crt  client.key  ubuntu.crt      ubuntu.key
4.单向验证
4.1修改mosquitto的配置文件
在配置文件中配置openssl证书路径,修改后别忘了重启mosquitto
sudo vim /etc/mosquitto/mosquitto.conf
# 在配置文件中添加下面三行
cafile /home/sy/key/ca.crt
certfile /home/sy/key/ubuntu.crt
keyfile /home/sy/key/ubuntu.key
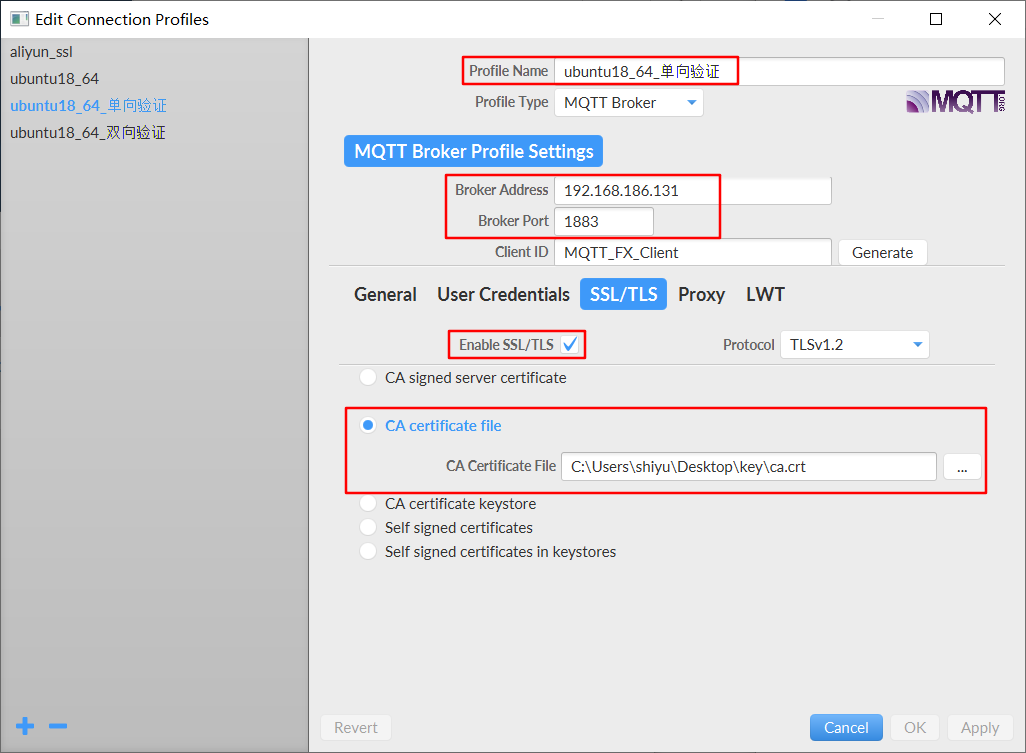
4.2mqtt.fx配置
填写配置名称,填写服务器地址和默认端口,选择开启ssl,配置CA证书。
4.3 订阅或发布消息
# 订阅消息
mosquitto_sub -h ip -t test --cafile ./ca.crt

#发布消息
mosquitto_pub -h ip -t test -m "my name is xxx" --cafile ./ca.crt
mqtt.fx的操作和之前一样。
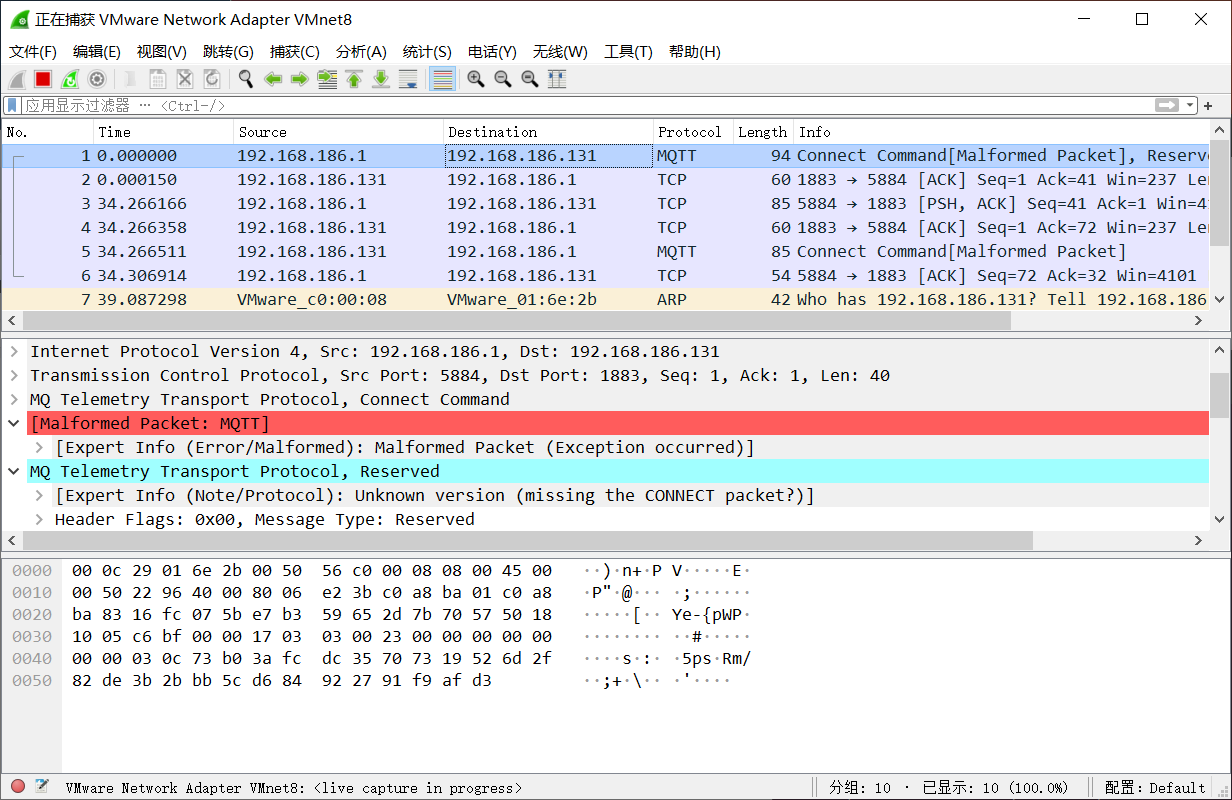
4.4 抓包
通过抓包可以发现,此时已经看到不明文的消息了。
5.双向验证
5.1修改配置文件
sudo vim /etc/mosquitto/mosquitto.conf
# 在配置文件中添加下面一行,表示需要客户端提供证书
require_certificate true
5.2mqtt.fx配置
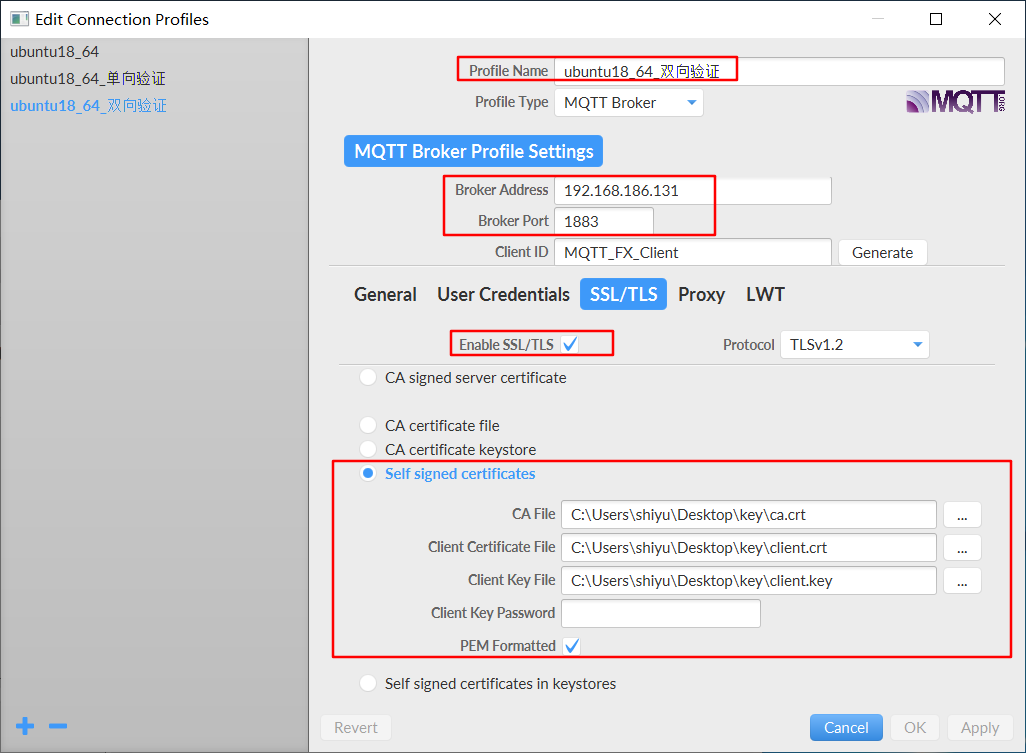
填写配置名称,填定服务器地址和默认端口,选择开启ssl,配置CA证书和客户端证书。
5.3订阅和发布消息
# 订阅消息
mosquitto_sub -h ip -t test --cafile ./ca.crt --cert ./client.crt --key ./client.key

#发布消息
mosquitto_pub -h ip -t test -m "my name is xxx" --cafile ./ca.crt --cert ./client.crt --key ./client.key
mqtt.fx的操作和之前一样。


