css新手教程
课程:14、盒子模型及边框使用_哔哩哔哩_bilibili
一.什么是CSS
1.什么是CSS
Cascading Style Sheet 层叠样式表。
CSS:表现(美化网页)
字体,颜色,边距,高度,宽度,背景图片,网页定位,网页浮动。
2.CSS发展史
- CSS 1.0:1994年 10月提出;
- CSS 2.0:DIV(块)+CSS,HTML与CSS结构分离的思想,网页变得简单,SEO;
- CSS 2.1:浮动,定位;
- CSS 3.0:圆角、阴影、动画…浏览器兼容性。
3.快速入门
<!DOCTYPE html>
<html lang="en">
<head>
    <meta charset="UTF-8">
    <title>CSS3快速入门</title>
    <!-- 规范:<style>可以编写CSS的代码,每一个声明最好以“;”结尾
            语法:
                选择器{
                    声明1;
                    声明2;
                    声明3;
                }
    -->
    <style>
        h1{
            color: blue;
        }
    </style>
</head>
<body>
<h1>CSS3测试</h1>
</body>
</html>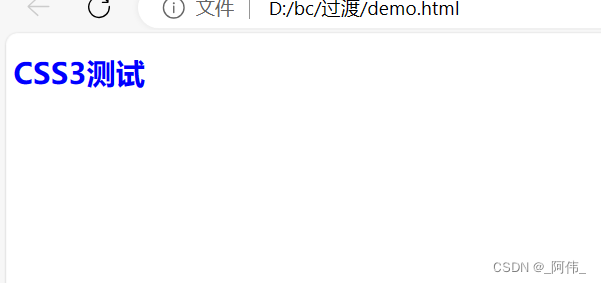
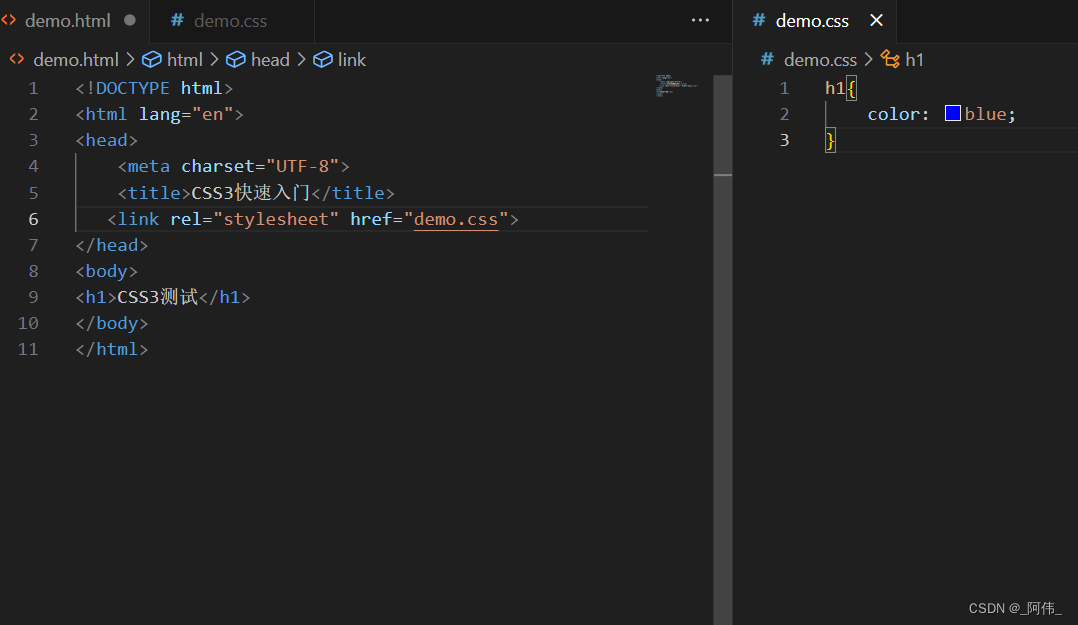
- 建议使用这种规范(单独写一个css文件,用link标签引入css文件效果) 。
CSS的优势:
- 内容和表现分离;
- 网页结构表现统一,可以实现复用;
- 样式十分的丰富;
- 建议使用独立于html的css文件;
- 利用SEO,容易被搜索引擎收录!
4.CSS的3种常用导入方式
<!DOCTYPE html>
<html lang="en">
<head>
    <meta charset="UTF-8">
    <title>CSS3快速入门</title>

    <!--外部样式-->
    <link rel="stylesheet" href="css/style.css">

    <style>
       /*内部样式*/
        h1{
            color: blue;
        }
    </style>

</head>
<body>

<!--优先级:就近原则-->

<!--行内样式:在标签元素中,编写一个style属性,编写样式即可-->
<h1 style="color: aquamarine">CSS3测试</h1>

</body>
</html>
拓展:外部样式两种方法
1.链接式——HTML
    <!--外部样式-->
    <link rel="stylesheet" href="css/style.css">
导入式—— @import是CSS2.1特有的!
    <!--导入式-->
    <style>
        @import url("css/style.css");
    </style>
二.CSS选择器
1.基本选择器
(1).标签选择器。格式:标签名{}
<!DOCTYPE html>
<html lang="en">
<head>
    <meta charset="UTF-8">
    <title>标签</title>

    <style>
        h1{
            color: orange;
            background: beige;
            border-radius: 10px;
        }
        h3{
            color: aquamarine;
            background: chocolate;
            border-radius: 10px;
        }
        p{
            font-size: 80px;
        }
    </style>

</head>

<body>

<h1>标签选择器</h1>
<p>Android</p>
<h3>前端-CSS3</h3>

</body>

</html>
(2).类选择器class——选择所有class一致的标签,跨标签。格式:.类名{}
<!DOCTYPE html>
<html lang="en">
<head>
    <meta charset="UTF-8">
    <title>类选择器</title>

    <style>
        /*
        类选择器的格式: .class的名称{}
        好处:可以多个标签归类,是同一个class,可以复用!
         */
        .test01{
            color: darkorange;
        }
        .test02{
            color: cadetblue;
        }
        .test03{
            color: cornflowerblue;
        }
    </style>

</head>

<body>

<h1 class="test01">类选择器:Test01</h1>
<h1 class="test02">类选择器:Test02</h1>
<h1 class="test03">类选择器:Test03</h1>
<p class="test03">类选择器:Test04</p>

</body>

</html>
(3).id选择器——全局唯一。格式:#id名{}
<!DOCTYPE html>
<html lang="en">
<head>
    <meta charset="UTF-8">
    <title>Title</title>

    <style>
        /*
        id选择器: id必须保证全局唯一
        #id名称{}
        不遵循就近原则,优先级是固定的
        id选择器 > class类选择器 > 标签选择器
         */
        #git02{
            color: darkorange;
        }
        #git03{
            color: cadetblue;
        }
        #git01{
            color: cornflowerblue;
        }
        h1{
            color: darkseagreen;
        }
    </style>

</head>

<body>
<h1 id="git01" class="git02">id选择器:git01</h1>
<h1 id="git02" class="git02">id选择器:git02</h1>
<h1 class="git03">id选择器:git03</h1>
<h1 id="git03" class="git01">id选择器:git01</h1>
<h1>id选择器:git03</h1>
</body>

</html>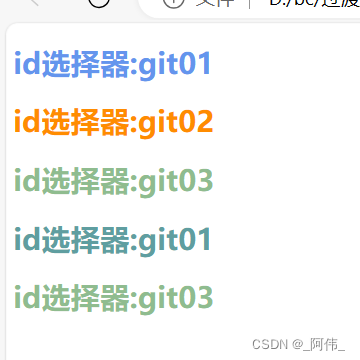
- 优先级:id > class > 标签。
2.层次选择器
1.后代选择器:在某个元素的后面。
<!DOCTYPE html>
<html lang="en">
<head>
    <meta charset="UTF-8">
    <title>Title</title>

    <style>
        /*
        后代选择器
         */
        body p{
            background: deeppink;
        }

    </style>

</head>
<body>

    <p>p1</p>
    <p>p2</p>
    <p>p3</p>

    <ul>
        <li>
            <p>p4</p>
        </li>
        <li>
            <p>p5</p>
        </li>
        <li>
            <p>p6</p>
        </li>
    </ul>

</body>
</html>
2.子选择器:一代。
<!DOCTYPE html>
<html lang="en">
<head>
    <meta charset="UTF-8">
    <title>Title</title>

    <style>
       /*
        子选择器
         */
         body>p{
            background: olive;
        }

    </style>

</head>
<body>

    <p>p1</p>
    <p>p2</p>
    <p>p3</p>

    <ul>
        <li>
            <p>p4</p>
        </li>
        <li>
            <p>p5</p>
        </li>
        <li>
            <p>p6</p>
        </li>
    </ul>

</body>
</html> 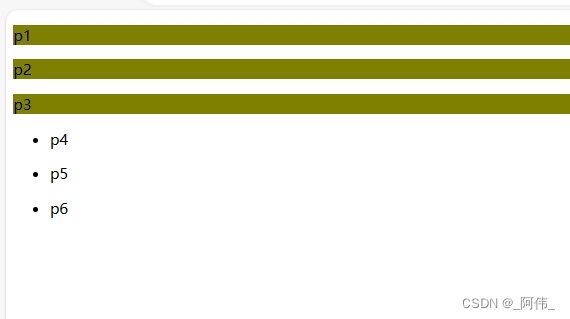
3.相邻的兄弟选择器:同辈。
<!DOCTYPE html>
<html lang="en">
<head>
    <meta charset="UTF-8">
    <title>Title</title>

    <style>
       /*
        相邻兄弟选择器:只选择一个,相邻向下
         */
         .active+p{
            background: blueviolet;
        }

    </style>

</head>
<body>

    <p class="active">p1</p>
    <p>p2</p>
    <p>p3</p>

    <ul>
        <li>
            <p class="active">p4</p>
        </li>
        <li>
            <p>p5</p>
        </li>
        <li>
            <p>p6</p>
        </li>
    </ul>

</body>
</html>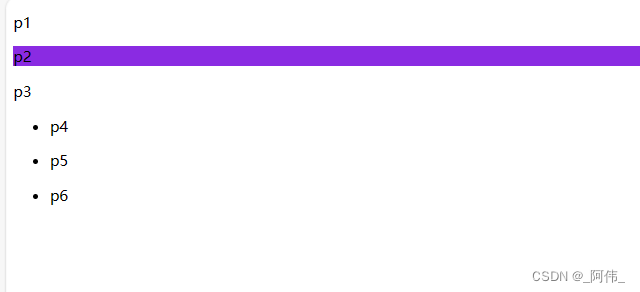
4.通用兄弟选择器,当前选中元素的向下的所有兄弟元素
<!DOCTYPE html>
<html lang="en">
<head>
    <meta charset="UTF-8">
    <title>Title</title>

    <style>
       /*
        通用兄弟选择器,当前选中元素的向下的所有兄弟元素
         */
         .active2~p{
            background: dodgerblue;
        }

    </style>

</head>
<body>

    <p class="active2">p1</p>
    <p>p2</p>
    <p>p3</p>

    <ul>
        <li>
            <p class="active2">p4</p>
        </li>
        <li>
            <p>p5</p>
        </li>
        <li>
            <p>p6</p>
        </li>
    </ul>

</body>
</html>
3.结构伪类选择器
<!DOCTYPE html>
<html lang="en">
<head>
    <meta charset="UTF-8">
    <title>伪类选择器</title>
    <style>

        ul li:first-child{
            /*
            ul的第一个子元素
            */
            background: mediumaquamarine;
        }

        ul li:last-child{
            /*
            ul的最后一个子元素
            */
            background: lightpink;
        }

        /*
        选中p1:定位到<body>
         */
        p:nth-child(2){
            background: greenyellow;
        }

        p:nth-of-type(2){
            /*
            选中父元素下的第二个p元素
            */
            background: lightseagreen;
        }

        a:hover{
            color: royalblue;
        }

    </style>

</head>
<body>

<a href="">9521</a>
<p>p1</p>
<p>p2</p>
<p>p3</p>
<h3>h3</h3>
<ul>
    <li>1li01</li>
    <li>1li02</li>
    <li>1li03</li>
    <li>1li04</li>
</ul>

<a href="https://www.taobao.com/">淘宝</a>

</body>
</html>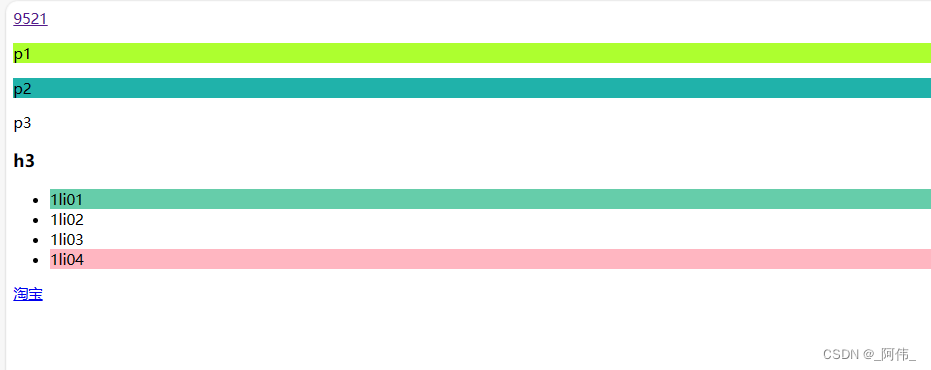
4.属性选择器(常用)
- id + class 结合
<!DOCTYPE html>
<html lang="en">
<head>
    <meta charset="UTF-8">
    <title>属性选择器</title>
    <style>
        .demo a{
            float: left;
            display: block;
            height: 50px;
            width: 50px;
            border-radius: 10px;
            background: aquamarine;
            text-align: center;
            color: gray;
            text-decoration: none;
            margin-right: 5px;
            line-height:50px;
            font: bold 20px/50px Arial;
        }
        /*
        属性名,属性名 = 属性值(正则)
              = 表示绝对等于
             *= 表示包含
             ^= 表示以...开头
             $= 表示以...结尾
             存在id属性的元素
                a[]{}
         */
        a[id]{
            background: deeppink;
        }
        a[id=first]{
            /*
            id=first的元素
            */
            background: greenyellow;
        }
        a[class*="links"]{
            /*
            class 中有links的元素
            */
            background: green;
        }
        a[href^=http]{
            /*
            选中href中以http开头的元素
            */
            background: yellow;
        }
        a[href$=pdf]{
            /*
            选中href中以http开头的元素
            */
            background: red;
        }
    </style>
</head>
<body>
<p class="demo">
    <a href="https://www.taobao.com/" class="links item first" id="first">淘宝</a>
    <a href="" class="links item active" target="_blank " title="test">链接</a>
    <a href="img/hello.html" class="links item">网页</a>
    <a href="img/str1.png" class="links item">png</a>
    <a href="img/str2.jpg" class="links item">jpg</a>
    <a href="abc" class="links item">链2</a>
    <a href="/fy.pdf" class="links item">pdf</a>
    <a href="/quit.pdf" class="links item">pdf2</a>
    <a href="dump.doc" class="links item">doc</a>
    <a href="kiko.doc" class="links item last">doc2</a>
</p>
</body>
</html>
三.美化网页
1.span标签
重点要突出的字,使用span标签套起来
<!DOCTYPE html>
<html lang="en">
<head>
    <meta charset="UTF-8">
    <title>美化网页</title>
    <style>
        #title{
            font-size: 25px;
        }
    </style>
</head>
<body>
编程语言:<span id="title">Java</span>
</body>
</html>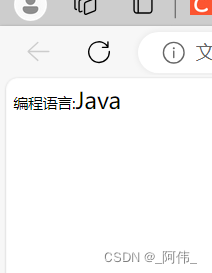
2.字体样式
<!DOCTYPE html>
<html lang="en">
<head>
    <meta charset="UTF-8">
    <title>Title</title>

    <style>
        /*
        font-family:字体
        font-size:字体大小 也可以填px,但不能超过900,相当于bloder
        font-weight:字体粗细
        color:字体颜色

        常用写法如下:
        font:oblique bloder 12px "楷体"
        */
        body{
            font-family: "Arial Black";
            color: dodgerblue;
        }
        h1{
            font-size: 25px;
        }
        .p1{
            font-weight: 600;
            color: chocolate;
        }
    </style>
</head>

<body>

<h1>标题</h1>
<p>正文6699</p>
<p class="p1">正文4444444</p>
<p>Study English and Computer</p>

</body>
</html>
3.文本样式
<!DOCTYPE html>
<html lang="en">
<head>
    <meta charset="UTF-8">
    <title>Title</title>

    <style>
        /*

        一.颜色–>color:agb / rgba()

        二.文本对齐方式–>text-align:center;

           图片、文字水平对齐。
         img,span{
                vertical-align: middle;
            }

        三.首行缩进–>text-indent:2em;

        四.行高–>line-height:300px;

        五.下划线–>text-decoration;

        1.下划线:text-decoration:underline

        2.中划线:text-decoration:line-through

        3.上划线:text-decoration:overline

        4.超链接去下划线:text-decoration:none

        */
        h1{
            color: rgba(0,255,255,0.9);
            text-align: center;
        }
        .p1{
            text-indent:2em;
        }
        .p3{
            line-height:300px;
            background: mediumaquamarine;
            height: 300px;
        }
        /*下划线*/
        .l1{
            text-decoration: underline;
        }
        /*中划线*/
        .l2{
            text-decoration: line-through;
        }
        /*上划线*/
        .l3{
            text-decoration: overline;
        }
        /*超链接去下划线*/
        a{
            text-decoration: none;
        }
    </style>

</head>

<body>

<a href="">4399-7k7k</a>
<p class="l1">123123123</p>
<p class="l2">123123123</p>
<p class="l3">123123123</p>

<h1>概述</h1>
<p class="p1">
    看到有人说fcu是混凝土立方体抗压强度设计值,特来纠正一下。混凝土立方体抗压强度没有设计值,fcu是实测的混凝土立方体抗压强度,它是一个代表值。立方体抗压强度和轴心抗压强度是一组测试(3个试块为一组)的结果(一般是取其平均值。详见GBT 50081-2019 第5.0.5条);而立方体抗压标准强度是试验结果经概率统计后得到的(一般是95%的保证率)。对于同一种配比的混凝土,立方体抗压强度大于立方体抗压标准强度。即使是在土木工程这一学科中,不同的方向fcu的意义也不相同。我见到的用到fcu(或类似的如fcm等)等一般是在论文中给出材性试验数据时,一般计算用到的并不是fcu而是fcu,k以及其他的量。在混凝土规范(这里指GB 50010)里是没有fcu的,只有fcu,k
</p>
<p>
    在1963年,我把核子的基本构成命名为“夸克”(quark),我先有的是声音,而没有拼法,所以当时也可以写成“郭克”(kwork)。不久之后,在我偶尔翻阅詹姆斯·乔伊斯所著的《芬尼根守灵夜》时,我在“向麦克老大三呼夸克”这句中看到夸克这个词。由于“夸克”(字面上意为海鸥的叫声)很明显是要跟“麦克”及其他这样的词押韵,所以我要找个借口让它读起来像“郭克”。但是书中代表的是酒馆老板伊厄威克的梦,词源多是同时有好几种。书中的词很多时候是酒馆点酒用的词。所以我认为或许“向麦克老大三呼夸克”源头可能是“敬麦克老大三个夸脱”,那么我要它读“郭克”也不是完全没根据。再怎么样,字句里的三跟自然中夸克的性质完全不谋而合。
</p>
<p class="p3">
    茨威格则用“埃斯”(Ace)来称呼他所理论化的粒子,但是在夸克模型被广泛接纳时,盖尔曼的用词就变得很有名。很多中国物理学家则称夸克为“层子”,在台湾地区亦曾翻译“亏子”,但并不普遍使用。
</p>

</body>
</html>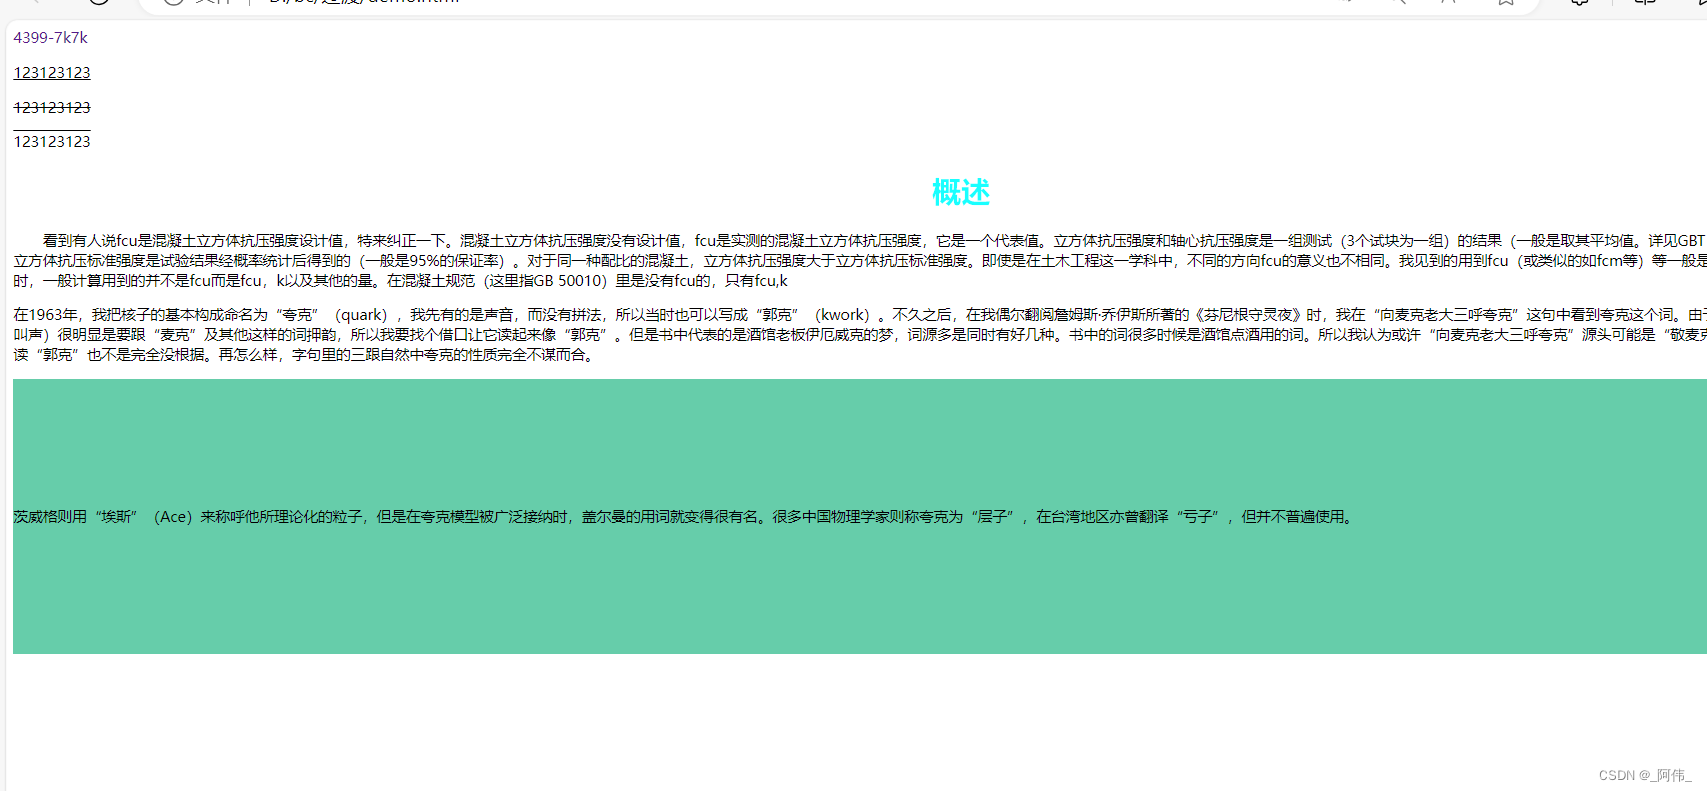
4.文本阴影和超链接伪类
<!DOCTYPE html>
<html lang="en">
<head>
    <meta charset="UTF-8">
    <title>Title</title>

    <style>
        /*超链接有默认的颜色*/
        a{
            text-decoration: hotpink;
            color: #000000;
        }

        /*鼠标悬浮的状态*/
        a:hover{
            color: dodgerblue;
        }

        /*鼠标按住未释放的状态*/
        a:active{

            color:green
        }
        /*点击之后的状态*/
        a:visited{
            color:mediumpurple;
        }

        /*
            text-shadow:5px 5px 5px 颜色
            第一个参数:表示水平偏移
            第二个参数:表示垂直偏移
            第三个参数:表示模糊半径
            第四个参数:表示颜色
        */
        #price{
            text-shadow: #eaff29 5px 5px 5px;
        }

        /*固定阴影*/
        a:link{
            background: bisque;
        }
    </style>
</head>

<body>
<a href="#">
    <img src="tp\1.png" width="400" height="200" alt="">
</a>
<p>
    <a href="#">Java博客</a>
</p>
<p id="price">
    <a href="#">哇哈哈</a>
</p>
</body>

</html>
5.列表ul、li
<!DOCTYPE html>
<html lang="en">
<head>
    <meta charset="UTF-8">
    <title>Title</title>

    <link href="demo.css" rel="stylesheet" type="text/css">
    <style>
    </style>
</head>

<body>
    <!--<div> 元素 (或 HTML 文档分区元素) 是一个通用型的流内容容器,
        在不使用CSS的情况下,其对内容或布局没有任何影响。-->
<div id="nav">
    <h2 class="title">全部商品分类</h2>
    <ul>
        <li>
            <a href="#">图书</a>
            <a href="#">影视</a>
            <a href="#">家电</a>
        </li>
        <li>
            <a href="#">配件</a>
            <a href="#">手机</a>
            <a href="#">数码</a>
        </li>
        <li>
            <a href="#">电脑</a>
            <a href="#">办公</a>
        </li>
        <li>
            <a href="#">家居</a>
            <a href="#">家装</a>
            <a href="#">厨具</a>
        </li>
        <li>
            <a href="#">服饰鞋帽</a>
            <a href="#">个性化妆</a>
        </li>
        <li>
            <a href="#">礼品箱包</a>
            <a href="#">钟表</a>
            <a href="#">珠宝</a>
        </li>
        <li>
            <a href="#">食品饮料</a>
            <a href="#">保健食品</a>
        </li>
        <li>
            <a href="#">彩票</a>
            <a href="#">旅行</a>
            <a href="#">充值</a>
            <a href="#">票务</a>
        </li>
    </ul>
</div>
</body>
</html> 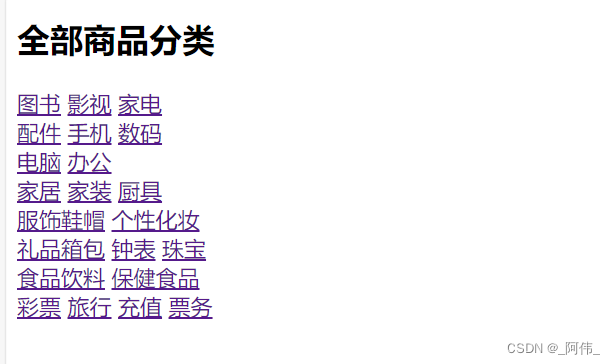
#nav{
    width: 300px;
    background: beige;
}

.title{
    font-size: 18px;
    font-weight: bold;
    text-indent: 2em;/*缩进*/
    line-height: 35px;
    background: gold;
}

/*  ul li
list-style:
    1.none 去掉实心圆
    2.circle 空心圆
    3.square 正方形
*/

ul li{
    height: 30px;
    list-style: none;
    text-indent: 1em;
}

a{
    text-decoration: none;
    font-size: 14px;
    color: darkorange;
}

a:hover{
    color: dodgerblue;
    text-decoration: underline;
}
6.背景
<!DOCTYPE html>
<html lang="en">
<head>
    <meta charset="UTF-8">
    <title>背景</title>

    <style>
        div{
            width: 500px;
            height: 200px;
            border: 1px solid mediumaquamarine;
            background-image: url("tp/1.png")
            /* 默认是全部平铺的 */
        }
        /*水平平铺*/
        .div1{
            background-repeat: repeat-x;
        }
        /*垂直平铺*/
        .div2{
            background-repeat: repeat-y;
        }
        /*不平铺*/
        .div3{
            background-repeat: no-repeat;
        }
    </style>

</head>
<body>
<div class="div1"></div>
<div class="div2"></div>
<div class="div3"></div>
</body>
</html>
下面的图片效果有问题

7.渐变
- 渐变背景网址:https://www.grabient.com
<!DOCTYPE html>
<html lang="en">
<head>
    <meta charset="UTF-8">
    <title>背景</title>

    <style>
             body{
            background-color: #08AEEA;
            background-image: linear-gradient(0deg, #08AEEA 0%, #2AF598 100%);
        }

        div{
            width: 500px;
            height: 200px;
            border: 1px solid mediumaquamarine;
            background-image: url("tp/1.png")
            /* 默认是全部平铺的 */
        }
        /*水平平铺*/
        .div1{
            background-repeat: repeat-x;
        }
        /*垂直平铺*/
        .div2{
            background-repeat: repeat-y;
        }
        /*不平铺*/
        .div3{
            background-repeat: no-repeat;
        }
    </style>

</head>
<body>
<div class="div1"></div>
<div class="div2"></div>
<div class="div3"></div>
</body>
</html>
四.盒子模型
1.什么是盒子模型
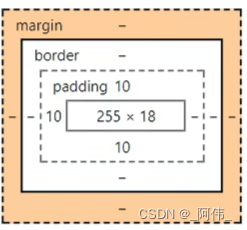
- margin:外边距;
- padding:内边框;
- border:边框
2.边框
<!DOCTYPE html>
<html lang="en">
<head>
<meta charset="UTF-8">
<title>盒子</title>
<style>
/*body总有一个默认的外边距为0*/
h1,ul,li,a,body{
margin: 0;
padding: 0;
text-decoration: none;
}
/*border:粗细 样式 颜色*/
#box{
width: 300px;
border: 1px solid peru;
}
h2{
font-size: 16px;
background-color: antiquewhite;
line-height: 30px;
margin: 0;
color: hotpink;
}
form{
background: khaki;
}
div:nth-of-type(1) input{
border: 3px solid seagreen;
}
div:nth-of-type(2) input{
border: 3px dashed gray;
}
div:nth-of-type(3) input{
border: 2px solid royalblue;
}
</style>
</head>
<body>
<div id="box">
<h2>会员登陆</h2>
<form action="#">
<div>
<span>用户名:</span>
<input type="text">
</div>
<div>
<span>密 码:</span>
<input type="text">
</div>
<div>
<span>邮 箱:</span>
<input type="text">
</div>
</form>
</div>
</body>
</html>
3.外边距
/* 分别表示上、右、下、左;从上开始顺时针 */
margin:0 0 0 0

/* 例1: 居中 auto表示左右自动 */
margin:0 auto

/* 例2:表示上、右、下、左都为4px */
margin:4px

/* 例3: 表示上为10px,左右为20px,下为30px */
margin:10px 20px 30px
<!DOCTYPE html>
<html lang="en">
<head>
<meta charset="UTF-8">
<title>外边距</title>
<style>
#box{
width: 300px;
border: 1px solid peru;
margin: 0 auto;
}
h2{
font-size: 16px;
background-color: antiquewhite;
line-height: 30px;
margin: 0;
color: hotpink;
}
form{
background: khaki;
}
input{
border: 1px solid tomato;
}
div:nth-of-type(1){
padding: 10px; /* 内边距10px */
}
</style>
</head>
<body>
<div id="box">
<h2>会员登陆</h2>
<form action="#">
<div>
<span>用户名:</span>
<input type="text">
</div>
<div>
<span>密 码:</span>
<input type="text">
</div>
<div>
<span>邮 箱:</span>
<input type="text">
</div>
</form>
</div>
</body>
</html>
4.圆角边框
<!DOCTYPE html>
<html lang="en">
<head>
    <meta charset="UTF-8">
    <title>边框</title>
    <style>
        div{
            width: 100px;
            height: 100px;
            border: 10px solid mediumpurple;
            /* 一个border-radius只管一个圆的1/4 */
            border-radius: 50px 20px 20px 30px;
            /* 左上 右上 右下 左下 ,顺时针方向 */
        }

        img{
            margin: 50px;
            border-radius: 25px; /*圆角矩形25px*/
            width: 64px;
            height: 64px;
        }
    </style>
</head>
<body>
<div></div>
<img src="tp\1.png" alt="#">
</body>
</html> 
5.盒子阴影
<!DOCTYPE html>
<html lang="en">
<head>
    <meta charset="UTF-8">
    <title>边框</title>
    <style>


        img{
            margin: 100px;
            border-radius: 25px; /*圆角矩形25px*/
            box-shadow: 10px 10px 10px yellow;
            width: 64px;
            height: 64px;

        }
    </style>
</head>
<body>
<div><img src="tp\1.png" alt="#"></div>

</body>
</html> 
五.浮动
1.标准文档流
(1)块级元素:独占一行
h1~h6 、p、div、 列表…
(2)行内元素:不独占一行
span、a、img、strong注: 行内元素可以包含在块级元素中,反之则不可以
2.dispaly
<!DOCTYPE html>
<html lang="en">
<head>
    <meta charset="UTF-8">
    <title>dispaly</title>
    <style>
        /*
        block: 块元素
        inline: 行内元素
        inline-block: 块元素,但是可以内联
        none: 隐藏
        */
        div{
            width: 100px;
            height: 100px;
            border: 1px solid darkorange;
            /* display: inline-block; */
        }
        span{
            width: 100px;
            height: 100px;
            border: 1px solid darkorange;
            /* display: inline-block; */
        }
    </style>
</head>
<body>
<div>div块元素</div>
<span>span行内元素</span>
</body>
</html>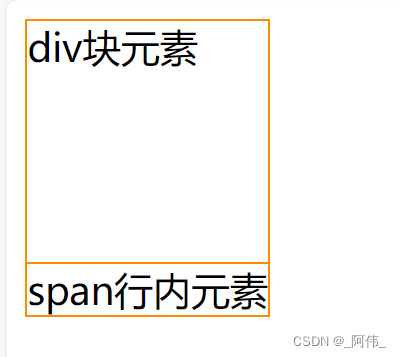
<!DOCTYPE html>
<html lang="en">
<head>
    <meta charset="UTF-8">
    <title>dispaly</title>
    <style>
        /*
        block: 块元素
        inline: 行内元素
        inline-block: 块元素,但是可以内联
        none: 隐藏
        */
        div{
            width: 100px;
            height: 100px;
            border: 1px solid darkorange;
            display: inline-block;
        }
        span{
            width: 100px;
            height: 100px;
            border: 1px solid darkorange;
            display: inline-block;
        }
    </style>
</head>
<body>
<div>div块元素</div>
<span>span行内元素</span>
</body>
</html>
3.float:left/right
<!DOCTYPE html>
<html lang="en">
<head>
    <meta charset="UTF-8">
    <title>浮动</title>
    <link href="css/style.css" rel="stylesheet" type="text/css">
</head>
<body>
<div id="father">
    <div class="layer01"><img src="tp\1.png" alt=""></div>
    <div class="layer02"><img src="tp\屏幕截图 2024-02-01 171130.png" alt=""></div>
    <div class="layer03"><img src="tp\屏幕截图 2024-02-01 173553.png" alt=""></div>
    <div class="layer04">
        浮动的盒子可以向左浮动,也可以向右浮动,知道他的外边缘碰到包含框或另一个浮动盒子为止。
    </div>
</div>
</body>
</html>
div{
margin: 10px;
padding: 5px;
}
#father{
border: 1px #000 solid;
}
.layer01{
border: 1px #F00 dashed;
display: inline-block;
float: left;
}
.layer02{
border: 1px #00F dashed;
display: inline-block;
float: right;
}
.layer03{
border: 1px #060 dashed;
display: inline-block;
}
/*
clear:
right:右侧不允许有浮动元素;
left:左侧不允许有浮动元素;
both:两侧不允许有浮动元素;
none
*/
.layer04{
border: 1px #666 dashed;
font-size: 12px;
line-height: 23px;
display: inline-block;
clear: both;
}
可以看出右边的图片超出了父级边框,所有下面我们会解决这个问题
4.父级边框塌陷的问题
18、overflow及父级边框塌陷问题_哔哩哔哩_bilibili
- 方案一:增加父级元素的高度;
#father{
    border:1px #000 solid;
    height:800px;
}
- 方案二:增加一个空的div标签,清除浮动。
<div class = "clear"></div>.clear{ clear:both; margin:0; padding:0; }
- 方案三:在父级元素中增加一个overflow属性。
    overflow:hidden; /* 隐藏超出部分 */
    overflow:scroll; /* 滚动 */

- 方案四:父类添加一个伪类:after。
#father:after{
    content:'';
    display:block;
    clear:both;
}
小结:
- 浮动元素增加空div——> 简单、代码尽量避免空div;
- 设置父元素的高度——-> 简单,但是元素假设有了固定的高度,可能就会超出范围;
- overflow——> 简单,下拉的一些场景避免使用;
- 父类添加一个伪类:after(推荐)——> 写法稍微复杂,但是没有副作用,推荐使;
display与float对比:
- display:方向不可以控制;
- float:浮动起来的话会脱离标准文档流,所以要解决父级边框塌陷的问题。。
六.定位
1.相对定位
- 相对定位:positon:relstive;
- 相对于原来的位置,进行指定的偏移,相对定位的话,它仍然在标准文档流中!原来的位置会被保留
top:-20px; /* 向上偏移20px */
left:20px; /* 向右偏移20px */
bottom:10px; /* 向下偏移10px */
right:20px; /* 向左偏移20px */
<!DOCTYPE html>
<html lang="en">
<head>
<meta charset="UTF-8">
<title>练习</title>
<style>
#box{
height: 300px;
width: 300px;
border: 2px red solid;
padding: 10px;
}
a{
height: 100px;
width: 100px;
background-color: #ee73b7;
color: white;
text-align: center;
text-decoration: none;
line-height: 100px; /* 设置行距100px */
display: block; /* 设置方块 */
}
a:hover{
background: #4158D0;
}
.a2,.a4{
position: relative;
left: 200px;
top: -100px;
}
.a5{
position: relative;
left: 100px;
top: -300px;
}
</style>
</head>
<body>
<div id="box">
<div class="a1"><a href="#">连接1</a></div>
<div class="a2"><a href="#">连接2</a></div>
<div class="a3"><a href="#">连接3</a></div>
<div class="a4"><a href="#">连接4</a></div>
<div class="a5"><a href="#">连接5</a></div>
</div>
</body>
</html>
2.绝对定位
- 定位:基于xxx定位,上下左右;
- 没有父级元素定位的前提下,相对于浏览器定位;
- 假设父级元素存在定位,我们通常会相对于父级元素进行偏移;
- 在父级元素范围内移动。
总结:相对一父级或浏览器的位置,进行指定的偏移,绝对定位的话,它不在标准文档流中,原来的位置不会被保留。
3.固定定位
<!DOCTYPE html>
<html lang="en">
<head>
    <meta charset="UTF-8">
    <title>绝对定位</title>
    <style>
        body{
            height: 1000px;
        }
        div:nth-of-type(1){
            width: 100px;
            height: 60px;
            background-color: #4a77d4;
            position: absolute; /* absolute 绝对定位 */
            right: 0;
            bottom: 0;
        }
        div:nth-of-type(2){
            width: 40px;
            height: 40px;
            background-color: #fcb346;
            position: fixed; /* fixed 固定定位 */
            right: 0;
            bottom: 0;
        }
    </style>
</head>
<body>
<div>div1</div>
<div>div2</div>
</body>
</html>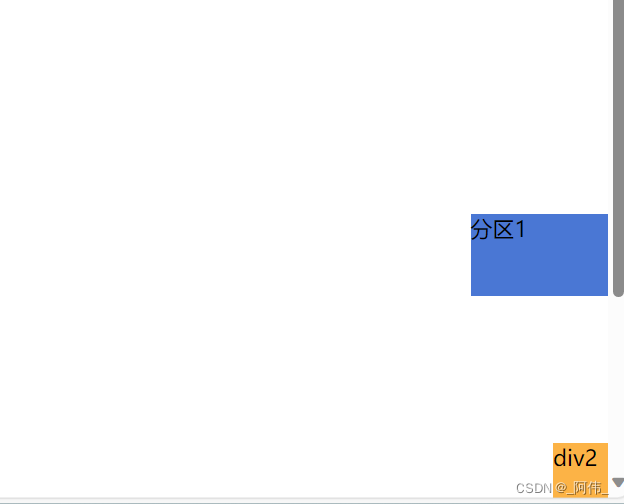
4.z-index及透明度
- 图层-z-index:默认是0,最高无限~999。
<!DOCTYPE html>
<html lang="en">
<head>
    <meta charset="UTF-8">
    <title>透明度</title>
    <link rel="stylesheet" href="demo.css" type="text/css">
    <style>
    </style>
</head>
<body>
<div id="content">
    <ul>
        <li><img src="tp\1.png" alt=""></li>
        <li class="tipText">Java后端学习</li>
        <li class="tipBg"></li>
        <li>时间:1202-06-15</li>
        <li>地点:水星基地核心仓</li>
    </ul>
</div>
</body>
</html>
#content{ width: 450px; padding: 0px; margin: 0px; overflow: hidden; font-size: 12px; line-height: 25px; border: 1px solid #1079f6; } ul,li{ padding: 0px; margin: 0px; list-style: none; } /* 父级元素相对定位 */ #content ul{ position: relative; } .tipText,.tipBg{ position: absolute; width: 380px; height: 25px; top:216px } .tipText{ color: #ffffff; z-index: 999; } .tipBg{ background: #33f13d; opacity: 0.5; /* 背景透明度 */ filter: alpha(opacity=50); }
七.网页动画
CSS3 动画 | 菜鸟教程 (runoob.com)
<!doctype html>
<html>
<head>
    <meta charset="utf-8">
    <title>HTML5 Canvas模拟飞机航班线路动画DEMO演示</title>
    <style>
        *{margin:0;padding:0;}
        canvas {
            background:#111;
            background-size:cover;
            display:block;
        }
        body{overflow: hidden;}
    </style>
</head>
<body>
<div></div>
<script>
    window.requestAnimFrame=function(){return window.requestAnimationFrame||window.webkitRequestAnimationFrame||window.mozRequestAnimationFrame||function(a){window.setTimeout(a,1E3/60)} }();
    $ = {};
    $.util = {
        rand: function( min, max ) {
            return Math.random() * ( max - min ) + min;
        },
        randInt: function( min, max ) {
            return Math.floor( Math.random() * ( max - min + 1 ) ) + min;
        },
        norm: function( val, min, max ) {
            return ( val - min ) / ( max - min );
        },
        lerp: function( norm, min, max ) {
            return ( max - min ) * norm + min;
        },
        map: function( val, sMin, sMax, dMin, dMax ) {
            return $.util.lerp( $.util.norm( val, sMin, sMax), dMin, dMax );
        },
        clamp: function( val, min, max ) {
            return Math.min( Math.max( val, Math.min( min, max ) ), Math.max( min, max ) );
        },
        distance: function( p1, p2 ) {
            var dx = p1.x - p2.x,
                dy = p1.y - p2.y;
            return Math.sqrt( dx * dx + dy * dy );
        },
        angle: function( p1, p2 ) {
            return Math.atan2( p1.y - p2.y, p1.x - p2.x );
        },
        inRange: function( val, min, max ) {
            return val >= Math.min( min, max ) && val <= Math.max( min, max );
        },
        pointInRect: function( x, y, rect ) {
            return $.util.inRange( x, rect.x, rect.x + rect.width ) &&
                $.util.inRange( y, rect.y, rect.y + rect.height );
        },
        pointInArc: function( p, a ) {
            return distance( p, a ) <= a.radius;
        },
        setProps: function( obj, props ) {
            for( var k in props ) {
                obj[ k ] = props[ k ];
            }
        },
        multicurve: function( points, ctx ) {
            var p0, p1, midx, midy;
            ctx.moveTo(points[0].x, points[0].y);
            for(var i = 1; i < points.length - 2; i += 1) {
                p0 = points[i];
                p1 = points[i + 1];
                midx = (p0.x + p1.x) / 2;
                midy = (p0.y + p1.y) / 2;
                ctx.quadraticCurveTo(p0.x, p0.y, midx, midy);
            }
            p0 = points[points.length - 2];
            p1 = points[points.length - 1];
            ctx.quadraticCurveTo(p0.x, p0.y, p1.x, p1.y);
        }
    };
    $.init = function() {
        // setup
        $.c = document.createElement( 'canvas' );
        $.ctx = $.c.getContext( '2d' );
        document.body.appendChild( $.c );
        // collections
        $.ports = [];
        $.planes = [];
        // events
        window.addEventListener( 'resize', $.reset, false );
        window.addEventListener( 'click', $.reset, false );
        $.reset();
        $.step();
    };
    $.reset = function() {
        // dimensions
        $.cw = $.c.width = window.innerWidth;
        $.ch = $.c.height = window.innerHeight;
        $.dimAvg = ( $.cw + $.ch ) / 2;
        // type / font
        $.ctx.textAlign = 'center';
        $.ctx.textBaseline = 'middle';
        $.ctx.font = '16px monospace';
        // options / settings
        $.opt = {};
        $.opt.portCount = 6;
        $.opt.planeCount = 80;
        $.opt.portSpacingDist = $.dimAvg / $.opt.portCount;
        $.opt.holdingDist = 5;
        $.opt.approachDist = 80;
        $.opt.planeDist = 20;
        $.opt.pathSpacing = 15;
        $.opt.pathCount = 40;
        $.opt.avoidRadius = 30;
        $.opt.avoidMult = 0.025;
        // collections
        $.ports.length = 0;
        $.planes.length = 0;
        // delta
        $.lt = Date.now();
        $.dt = 1;
        $.et = 0;
        $.tick = 0;
        // setup ports
        for( var i = 0; i < $.opt.portCount; i++ ) {
            $.ports.push( new $.Port() );
        }
        // setup planes
        for( var i = 0; i < $.opt.planeCount; i++ ) {
            $.planes.push( new $.Plane() );
        }
    };
    $.Port = function() {
        this.x = $.util.rand( $.cw * 0.1, $.cw * 0.9 );
        this.y = $.util.rand( $.ch * 0.1, $.ch * 0.9 );
        while( !this.validSpacing() ) {
            this.x = $.util.rand( $.cw * 0.1, $.cw * 0.9 );
            this.y = $.util.rand( $.ch * 0.1, $.ch * 0.9 );
        }
    };
    $.Port.prototype.validSpacing = function() {
        var spaced = true,
            i = $.ports.length;
        while( i-- ) {
            var otherPort = $.ports[ i ];
            if( $.util.distance( otherPort, this ) < $.opt.portSpacingDist ) {
                spaced = false;
                break;
            }
        }
        return spaced;
    };
    $.Port.prototype.update = function( i ) {
        var j = $.planes.length;
        this.approachingCount = 0;
        while( j-- ) {
            var plane = $.planes[ j ];
            if( plane.destIndex == i && plane.approaching ) {
                this.approachingCount++;
            }
        }
    };
    $.Port.prototype.render = function( i ) {
        $.ctx.beginPath();
        $.ctx.arc( this.x, this.y, 3 + ( this.approachingCount + 5 ), 0, Math.PI * 2 );
        $.ctx.fillStyle = 'hsla(120, 90%, 80%, ' + ( 0.35 + Math.sin( $.et / 20 ) * 0.2 ) + ')';
        $.ctx.fill();
        $.ctx.fillStyle = '#fff';
        $.ctx.fillText( this.approachingCount, this.x, this.y - 30 );
    };
    $.Plane = function( opt ) {
        this.originIndex = $.util.randInt( 0, $.ports.length - 1 );
        this.origin = $.ports[ this.originIndex ];
        this.path = [];
        this.x = this.origin.x;
        this.y = this.origin.y;
        this.vx = $.util.rand( -0.35, 0.35 );
        this.vy = $.util.rand( -0.35, 0.35 );
        this.vmax = 1;
        this.accel = 0.01;
        this.decel = 0.96;
        this.angle = 0;
        this.approaching = false;
        this.holding = false;
        this.setDest();
    };
    $.Plane.prototype.setDest = function() {
        if( this.destIndex != undefined ) {
            this.originIndex = this.destIndex;
            this.origin = $.ports[ this.originIndex ];
        }
        this.destIndex = $.util.randInt( 0, $.ports.length - 1 );
        while( this.destIndex == this.originIndex ) {
            this.destIndex = $.util.randInt( 0, $.ports.length - 1 );
        }
        this.dest = $.ports[ this.destIndex ];
        this.approaching = false;
        this.holding = false;
    }
    $.Plane.prototype.update = function( i ) {
        this.ox = this.x;
        this.oy = this.y;
        if( $.tick % $.opt.pathSpacing == 0 ) {
            this.path.push( { x: this.x, y: this.y } );
        }
        if( this.path.length > $.opt.pathCount ) {
            this.path.shift();
        }
        this.angle = $.util.angle( this.dest, this );
        this.speed = ( Math.abs( this.vx ) + Math.abs( this.vy ) ) / 2;
        if( !$.util.pointInRect( this.x, this.y, { x: 0, y: 0, width: $.cw, height: $.ch } ) ) {
            this.vx *= this.decel;
            this.vy *= this.decel;
        }
        if( this.speed > 0.1 ) {
            if( $.util.distance( this.dest, this ) < $.opt.approachDist ) {
                this.vx *= this.decel;
                this.vy *= this.decel;
                this.approaching = true;
            }
        }
        if( $.util.distance( this.dest, this ) < $.opt.holdingDist ) {
            this.holding = true;
            this.setDest();
        }
        this.vx += Math.cos( this.angle ) * this.accel;
        this.vy += Math.sin( this.angle ) * this.accel;
        if( this.speed > this.vmax ) {
            this.vx *= this.decel;
            this.vy *= this.decel;
        }
        this.x += this.vx * $.dt;
        this.y += this.vy * $.dt;
    };
    $.Plane.prototype.render = function( i ) {
        if( this.approaching ) {
            $.ctx.strokeStyle = 'hsla(0, 80%, 50%, 1)';
        } else {
            $.ctx.strokeStyle = 'hsla(180, 80%, 50%, 1)';
        }
        $.ctx.beginPath();
        $.ctx.moveTo( this.x, this.y );
        var angle = $.util.angle( { x: this.ox, y: this.oy }, this );
        $.ctx.lineWidth = 2;
        $.ctx.lineTo(
            this.x - Math.cos( angle ) * ( 3 + this.speed * 2 ),
            this.y - Math.sin( angle ) * ( 3 + this.speed * 2 )
        );
        $.ctx.stroke();
        var pathLength = this.path.length;
        if( pathLength > 1) {
            $.ctx.strokeStyle = 'hsla(0, 0%, 100%, 0.15)';
            $.ctx.lineWidth = 1;
            $.ctx.beginPath();
            if( pathLength >= $.opt.pathCount ) {
                var angle = $.util.angle( this.path[ 1 ], this.path[ 0 ] ),
                    dx = this.path[ 0 ].x - this.path[ 1 ].x,
                    dy = this.path[ 0 ].y - this.path[ 1 ].y,
                    dist = Math.sqrt( dx * dx + dy * dy ),
                    x = this.path[ 0 ].x + Math.cos( angle ) * ( dist * ( ( $.tick % $.opt.pathSpacing ) / $.opt.pathSpacing ) ),
                    y = this.path[ 0 ].y + Math.sin( angle ) * ( dist * ( ( $.tick % $.opt.pathSpacing ) / $.opt.pathSpacing ) );
            } else {
                var x = this.path[ 0 ].x,
                    y = this.path[ 0 ].y
            }
            $.ctx.moveTo( x, y );
            for( var i = 1; i < pathLength; i++ ) {
                var point = this.path[ i ];
                $.ctx.lineTo( point.x, point.y );
            }
            $.ctx.lineTo( this.x, this.y );
            $.ctx.stroke();
        }
    };
    $.step = function() {
        requestAnimFrame( $.step );
        // clear
        $.ctx.globalCompositeOperation = 'destination-out';
        $.ctx.fillStyle = 'hsla(0, 0%, 0%, 1)';
        $.ctx.fillRect( 0, 0, $.cw, $.ch );
        $.ctx.globalCompositeOperation = 'lighter';
        // collections
        var i;
        i = $.ports.length; while( i-- ) { $.ports[ i ].update( i ) }
        i = $.planes.length; while( i-- ) { $.planes[ i ].update( i ) }
        i = $.ports.length; while( i-- ) { $.ports[ i ].render( i ) }
        i = $.planes.length; while( i-- ) { $.planes[ i ].render( i ) }
        // delta
        var now = Date.now();
        $.dt = $.util.clamp( ( now - $.lt ) / ( 1000 / 60 ), 0.001, 10 );
        $.lt = now;
        $.et += $.dt;
        $.tick++;
    };
    $.init();
</script>
</body>
</html>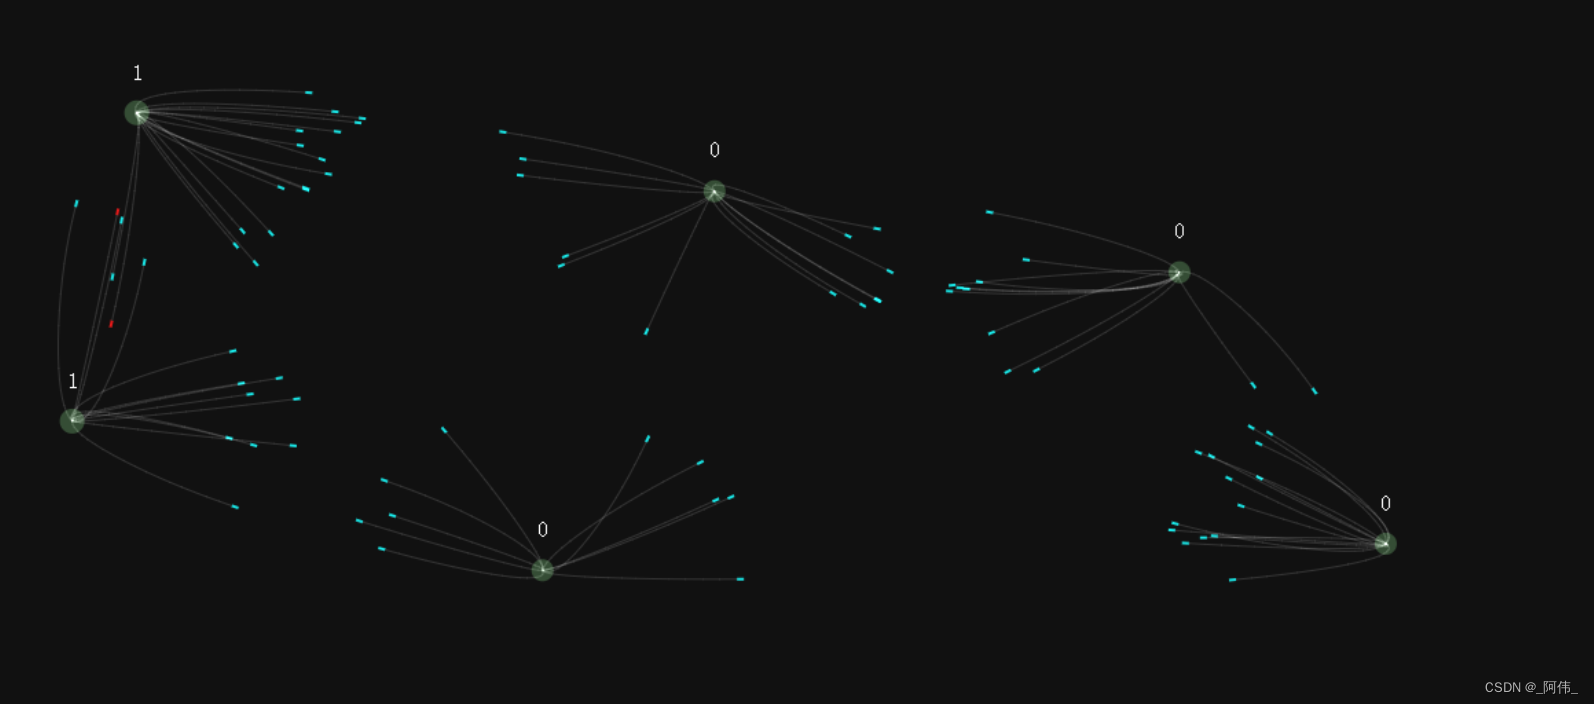








![【蓝桥杯冲冲冲】[NOIP2003 普及组] 数字游戏](https://img-blog.csdnimg.cn/img_convert/5fbf457faea6bf146289b47af5e9ef11.png)
